
Terrys87 86 4Runner with a 2nd Chance
 04-29-2013, 01:36 AM
#1081
Registered User
i so need to get one of those flexible long boards even Kris mentioned it as well
body work lookin good
oh terry you dont want to see my 79 i used a LOT of fiberglass an bondo on her over the rust in areas i couldnt remove it but at the time replacing steel was not an option
 04-29-2013, 03:58 AM
#1082
Super Moderator
Staff
Thread Starter
iTrader: (1)
Join Date: Aug 2008
Location: Anderson Missouri
Posts: 11,788
Likes: 0
Received 25 Likes
on
22 Posts
Hello Cyberhorn..I have found several ways that work for me, but I do know when I tagged and bagged everything it turned into a nightmare quick when reassembling. I learned the hardway too.lol.
There is a shop locally that sells some longboards like you are mentioning. I want some as well and eventually will get one, I just havent needed on right off just yet and dont want to part with the funds that they want for those. The brand he sells isn Durablock. A really nice kit. I have a rust free truck bed that has a long gounge in it that when I do go and fix it, I will need one of those.
I have fiberglassed some rust in the past. You got your 79 straightend out and all that matters. I have done fiberglass as well and it is a great fix. It will never rust again.
Last edited by Terrys87; 04-29-2013 at 04:20 AM.
04-29-2013, 04:18 AM
#1083
Super Moderator
Staff
Thread Starter
iTrader: (1)
Join Date: Aug 2008
Location: Anderson Missouri
Posts: 11,788
Likes: 0
Received 25 Likes
on
22 Posts
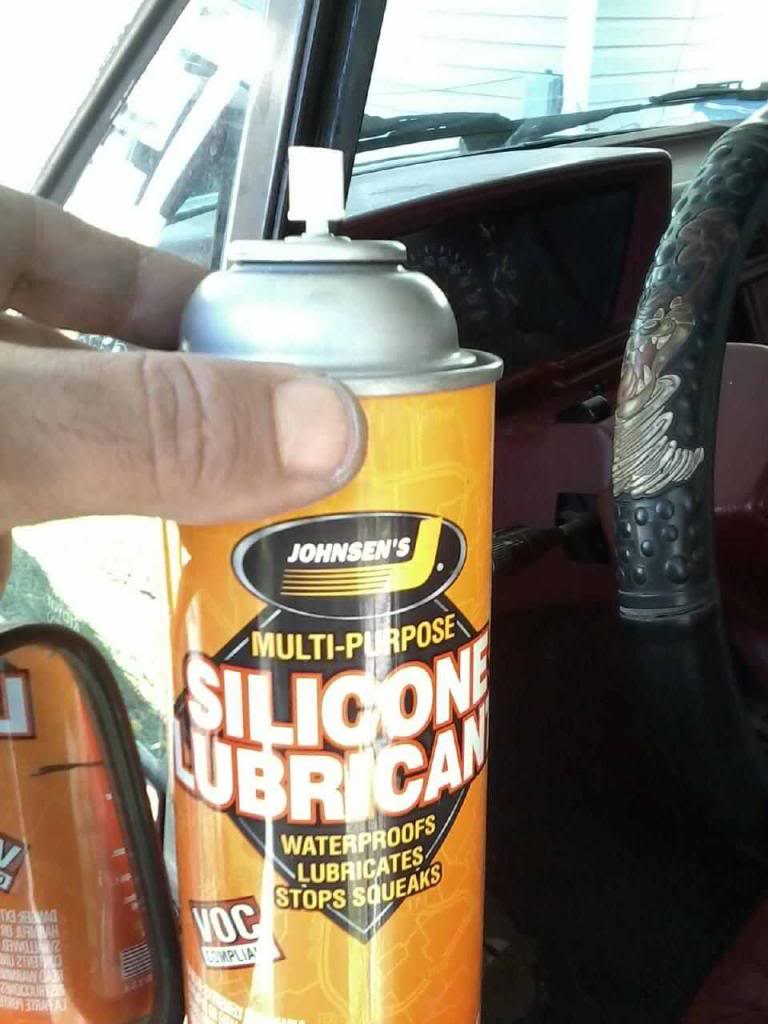
I have posted this on my 88s thread, but wanted to post here as well for some that may have missed. I spent some time on Mistys truck just checking it out and her window was getting hard to roll up again. I sprayed the tracks down with silicone and smooth and easy to work again.
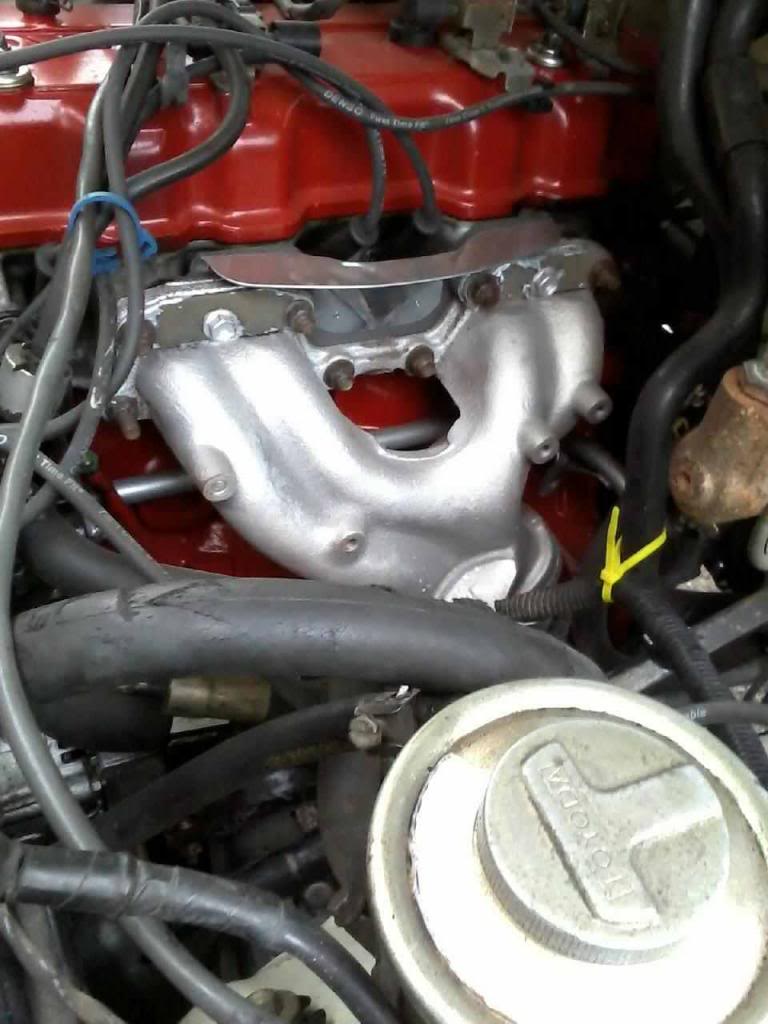
I painted her exhaust manifold with the high temp exhaust/engine paint, (cant rember name). Directions says to paint and heat in oven or something like that. I didnt have an oven or what they suggested, so I just would start the motor a few times and let it cool down. It is still holding up. That was nice to see. I still need to get the plug wires looking better though.

I painted her exhaust manifold with the high temp exhaust/engine paint, (cant rember name). Directions says to paint and heat in oven or something like that. I didnt have an oven or what they suggested, so I just would start the motor a few times and let it cool down. It is still holding up. That was nice to see. I still need to get the plug wires looking better though.
 04-29-2013, 05:42 AM
#1084
Registered User
Wow Misty's motor looks nice!
That's right I remember I was subbed to all your threads a while back before I accidentally pressed the Unsubscribe button to all threads. Lost a bunch of them.
That's right I remember I was subbed to all your threads a while back before I accidentally pressed the Unsubscribe button to all threads. Lost a bunch of them.
Last edited by Redeth005; 04-29-2013 at 05:44 AM.
04-29-2013, 09:05 AM
#1085
Registered User
misty's motor looks great even after all its running lookin good!
well with my having to do all the metal replacement to my rear 1/4'ers im likely gona get one thank you for the name (long board)
ehhhhh... the fiberglass tried to stop the rust on my 79 i was out there getting things out of her an great huge bits have popped off due to the pressure the rust can put shes not gona last too much longer already has flinstone brakes option shes gona be a permanent farm truck then likely be parted out she did well though in her life its why i only want toyotas anymore
 05-01-2013, 09:01 AM
#1087
Super Moderator
Staff
Thread Starter
iTrader: (1)
Join Date: Aug 2008
Location: Anderson Missouri
Posts: 11,788
Likes: 0
Received 25 Likes
on
22 Posts
Thanks Redeth005...I put alot of work into it and so far it is still looking good. I just hope I can keep it that way. I have pushed the wrong button at times and what a mess it makes on the computer when you do that.
Hello Cyberhorn... I have parted 3 trucks do to rust. They were so far gone, there just wasnt any saving them. One was a runner and it was nearly ready to break into two pieces. That rust can be some nasty stuff.
Thanks dakotawho...If you pull the motor, it really doesnt take to long to get one cleaned up. I have my trucks engine bay looking just as good, but I need to spend sometime getting it cleaned back up. I have alot of dust from doing bodywork on it and sweating all over it. I hope I can get it to shine back to the way I had it. I spend just as much time cleaning under the hood as I do the top part, but it is nice when someone sees how well it looks under there.
05-01-2013, 09:20 AM
#1088
Super Moderator
Staff
Thread Starter
iTrader: (1)
Join Date: Aug 2008
Location: Anderson Missouri
Posts: 11,788
Likes: 0
Received 25 Likes
on
22 Posts
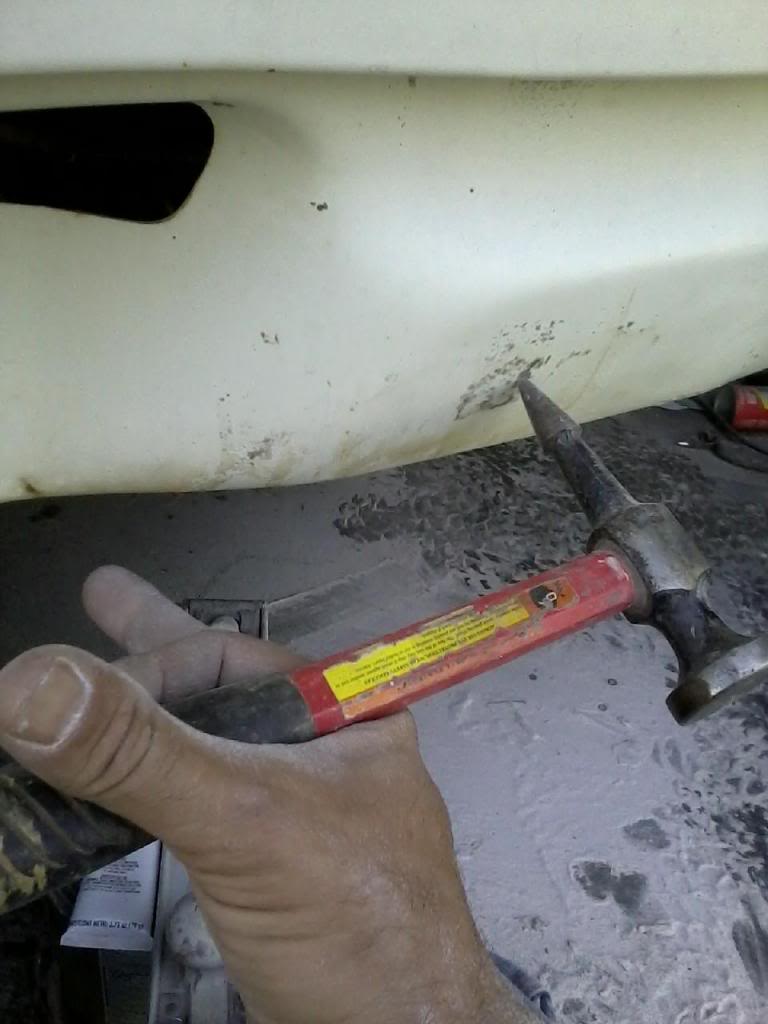
What I am trying to show here is that I have a high spot form something denting it from the inside to the outside. I have the pecking hammer balanced in my hand. With just enough force from my finger, about what is needed to pull the trigger on a pistol or rifle, I am able to tap the high spot back down. It doesnt take brute force. With about 15 light taps in a one square inch area, brought the high spot down.
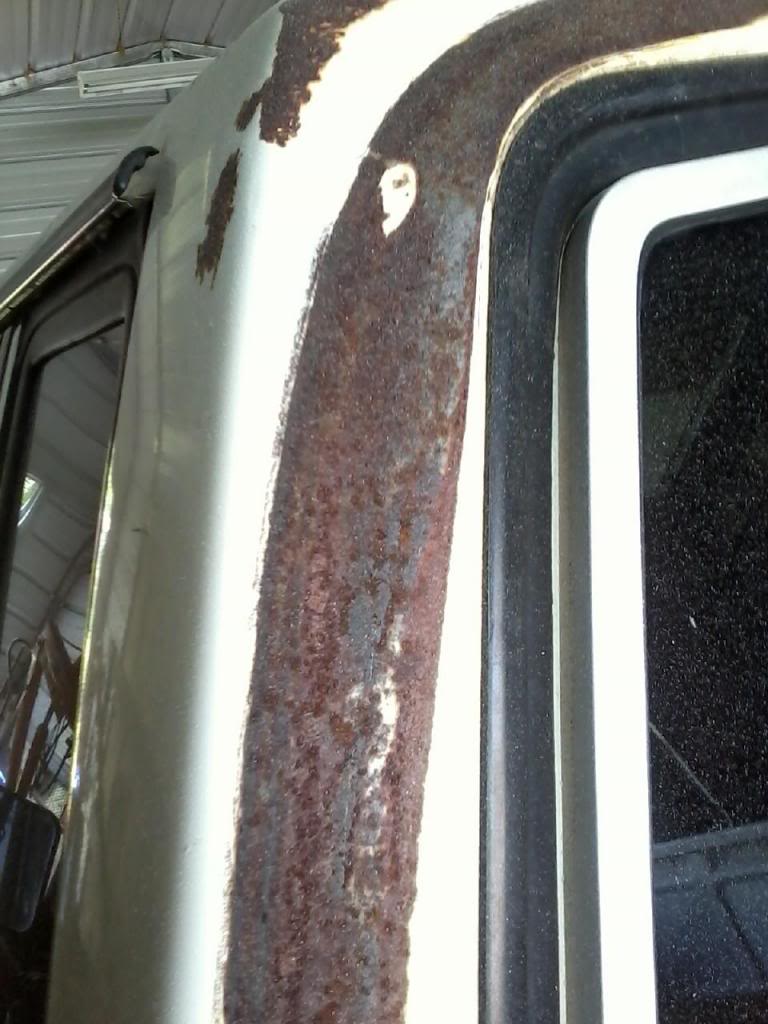
Backside showing where hole is. I will use rust killer on it and remove the rest of the rust along the bedside as well.
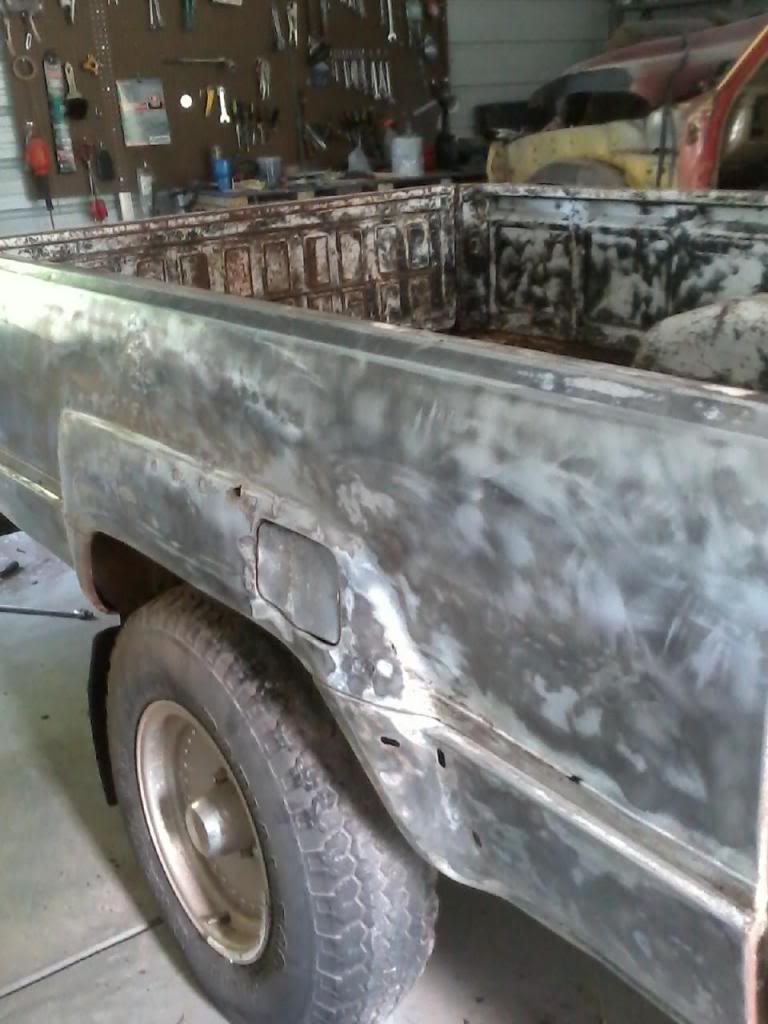
Here is a rust hole on the drivers rear fender. It started as a blister, but a quick bump with the sander showed the hole. I will take some rust killer and use a little fiberglass patch from the back side to fix it and then coat it with some body filler on the outside.

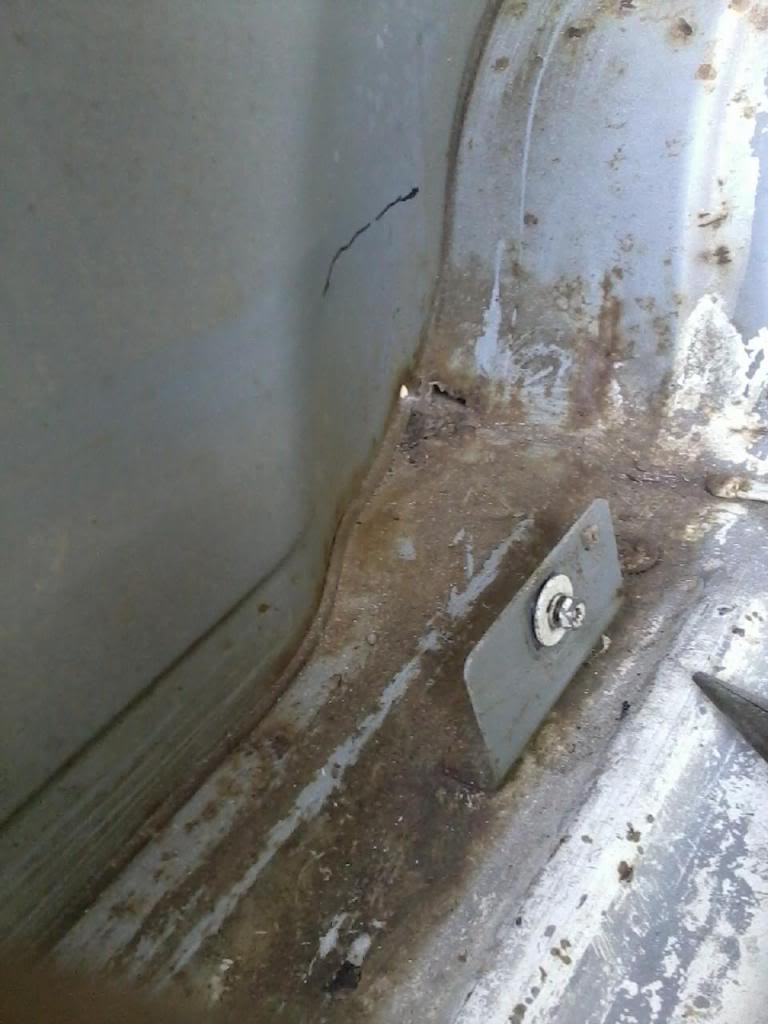
To prevent this from happening and what has ruined alot of these truck beds is the inner panel of the truck bed. Where I am pointing, remove the bolts that hold the panel off. There are several large cracks that debri can get into from around the panel and it just collets mud and debri and starts eating the panel up. Most of these bolts will break on you. I am going to come up with a quick release to remove these panels eventually.
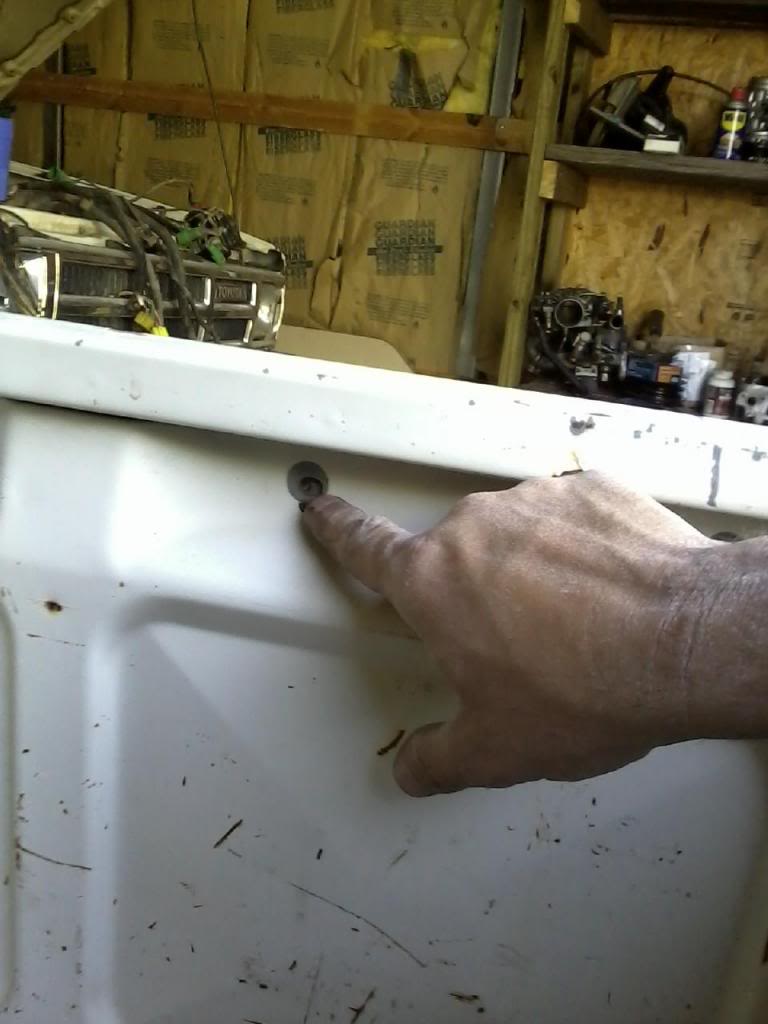
With the panel removed, on drivers side, I was able to get all of these bolts out. Where the black line is, is where I have seen mud stacked that deep or more. This sis why you see so many of these beds rusted along the body line.
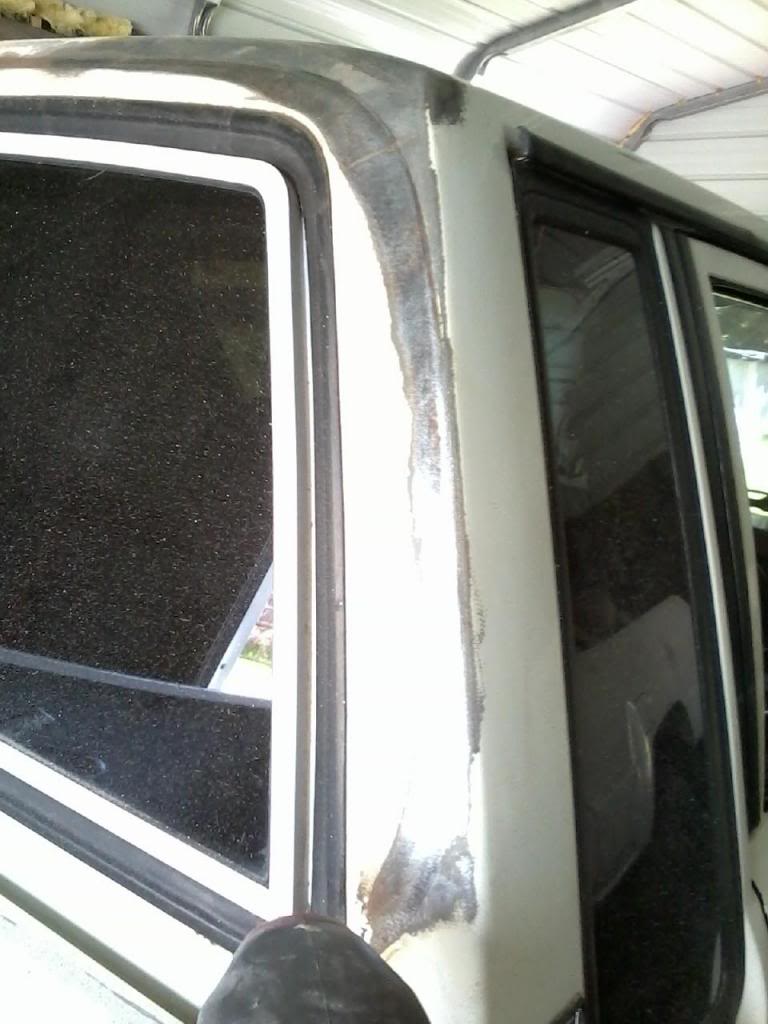
Not all rust is bad. Here is the drivers side where a camper sat and rubbed the paint.
Here I used 40 grit sandpaper on the passenger side and got all of the rust off.

Backside showing where hole is. I will use rust killer on it and remove the rest of the rust along the bedside as well.

Here is a rust hole on the drivers rear fender. It started as a blister, but a quick bump with the sander showed the hole. I will take some rust killer and use a little fiberglass patch from the back side to fix it and then coat it with some body filler on the outside.

To prevent this from happening and what has ruined alot of these truck beds is the inner panel of the truck bed. Where I am pointing, remove the bolts that hold the panel off. There are several large cracks that debri can get into from around the panel and it just collets mud and debri and starts eating the panel up. Most of these bolts will break on you. I am going to come up with a quick release to remove these panels eventually.

With the panel removed, on drivers side, I was able to get all of these bolts out. Where the black line is, is where I have seen mud stacked that deep or more. This sis why you see so many of these beds rusted along the body line.
Not all rust is bad. Here is the drivers side where a camper sat and rubbed the paint.

Here I used 40 grit sandpaper on the passenger side and got all of the rust off.
 05-01-2013, 09:23 AM
#1090
Super Moderator
Staff
Thread Starter
iTrader: (1)
Join Date: Aug 2008
Location: Anderson Missouri
Posts: 11,788
Likes: 0
Received 25 Likes
on
22 Posts
Here is one I have done in the past. It looks bad but cleaned up nice. Except for the rust along the body line. Just had to knock the ugly off of it.
Copied
Here it is at the preious owner getting bought.
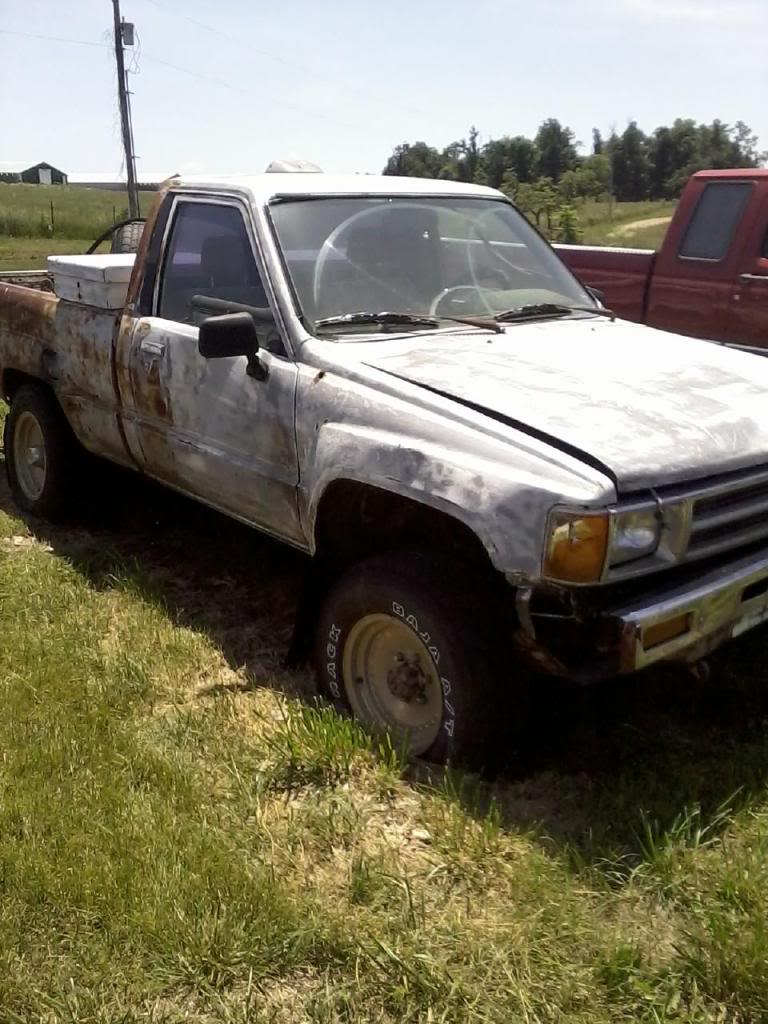
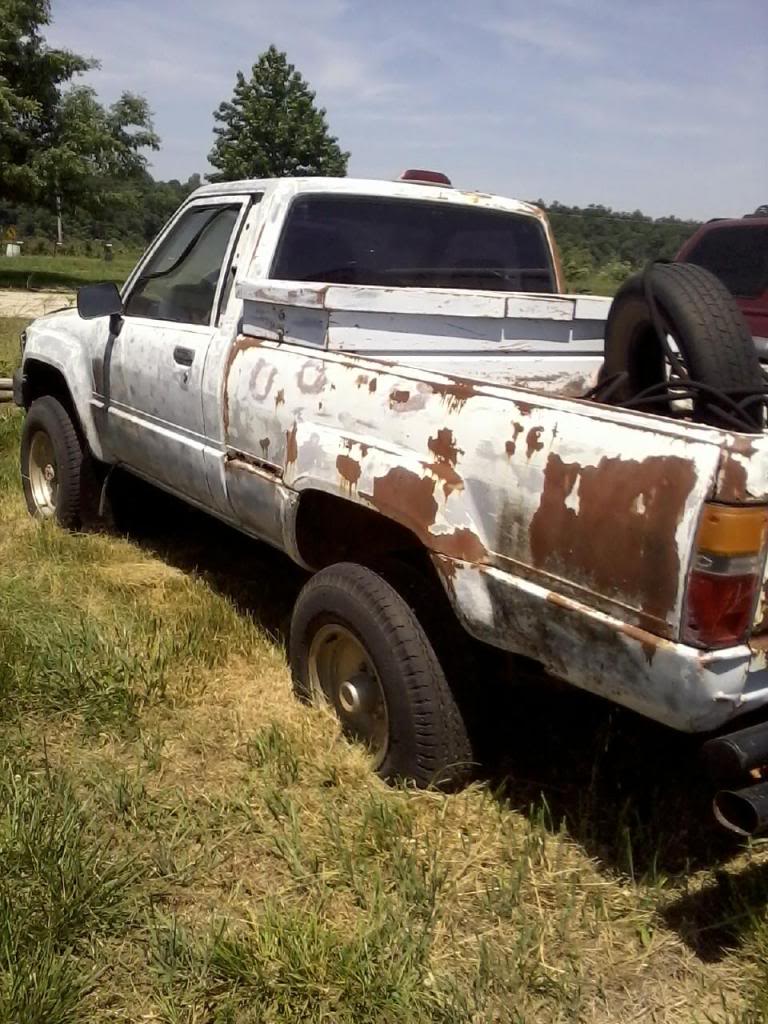
One hour after getting it home.

Except for the rust holes, it did turn out well.
Copied
Here it is at the preious owner getting bought.
One hour after getting it home.
Except for the rust holes, it did turn out well.
05-01-2013, 09:26 AM
#1091
Super Moderator
Staff
Thread Starter
iTrader: (1)
Join Date: Aug 2008
Location: Anderson Missouri
Posts: 11,788
Likes: 0
Received 25 Likes
on
22 Posts
Hello Mark...Got a beautiful day and am getting alot done. Waiting for the body filler to dry. Tomorrow we will be getting snow flurries, so I will be running around town chasing down some truck parts. Things are going well so far. Might even get to shoot some primer today. Wahoo!!
05-01-2013, 11:38 AM
#1092
Registered User
yep it dropped to 27 here last night had to start a fire today house was cold outside right now its 45 cold front a comin your way terry
i didnt see the panels on my 79 they change the bed style inside?
i didnt see the panels on my 79 they change the bed style inside?
05-01-2013, 03:07 PM
#1093
Terry, i hate coming to your thread, every time I come here I get a little jealous seeing how far you've gotten and I keep getting set back. You are the Man, I can't wait till i start the body work on mine. Lucky you you've got employees... How much does he cost...
By the way, I'm thinking of giving that hot cold thing a try on some of the small dents on the truck. Paint doesn't really matter to me as it will be painted anyhow. My only concern seeing that you have talked to other about this technique is how much warp effect happens around the area if you heat it as high as you say. I personally plan on using a heat gun and dry ice.
That's the way to go bare metal .
05-02-2013, 05:03 AM
#1094
Registered User
Here is one I have done in the past. It looks bad but cleaned up nice. Except for the rust along the body line. Just had to knock the ugly off of it.
Copied
Here it is at the preious owner getting bought.


One hour after getting it home.

Except for the rust holes, it did turn out well.

Copied
Here it is at the preious owner getting bought.
One hour after getting it home.
Except for the rust holes, it did turn out well.
Takes alot of the elements to get that look.
I also think that's cool that your son digs in on the build.
 05-03-2013, 04:53 AM
#1095
Super Moderator
Staff
Thread Starter
iTrader: (1)
Join Date: Aug 2008
Location: Anderson Missouri
Posts: 11,788
Likes: 0
Received 25 Likes
on
22 Posts
Hello Cyberhorn.. Great talking to you. We got about 3 inches of snow in MAY!!! What is that? Not doing anything today. I dont think the first gens had any panels in the bed. I think all of the dents from the insides of the first gens, Toyota tried to come up with a solution.
LOL junk4u... My employee as a great wage for me, FREE, it is his yearly cost that adds up. I checked out them adoption agencies but decided I needed someone around when I get more old-ER and more senile-ER that I had better keep him around.
Bodywork is a challenge and takes patience, but when done and you cant find where the damage was there is some personal satisfaction in it. People like seeing an older car that looks new and alot of times I hear " I remeber when..."
On healthy paint, it is best to leave it on and when it comes time to paint, you can spray sealer over the old paint. Some of the old timers dont believe in sealer, but it is well worth the extra time and cost in the long run. Teh factory paint was applied in ideal conditions with heaters and dryers. A repaint is never as tough as the factory paint. When I get to the sealer stage I will add more info about it. If possible really consider using sealer inbetween the primer and the paint. It cost around $50 more but is well worth it.
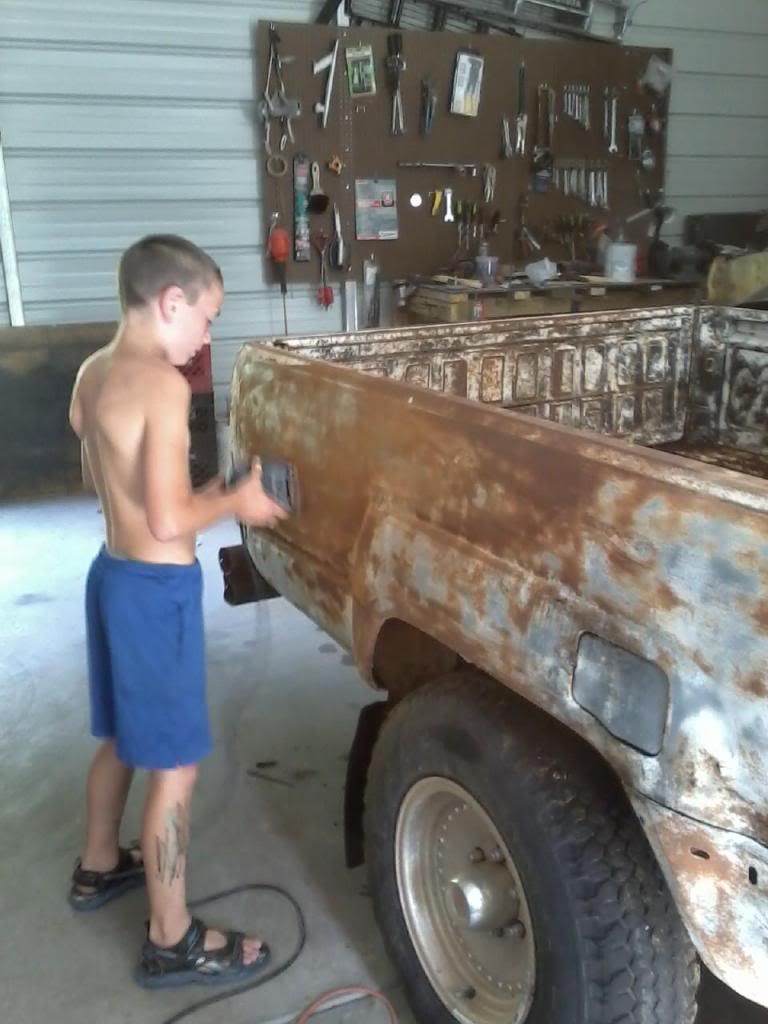
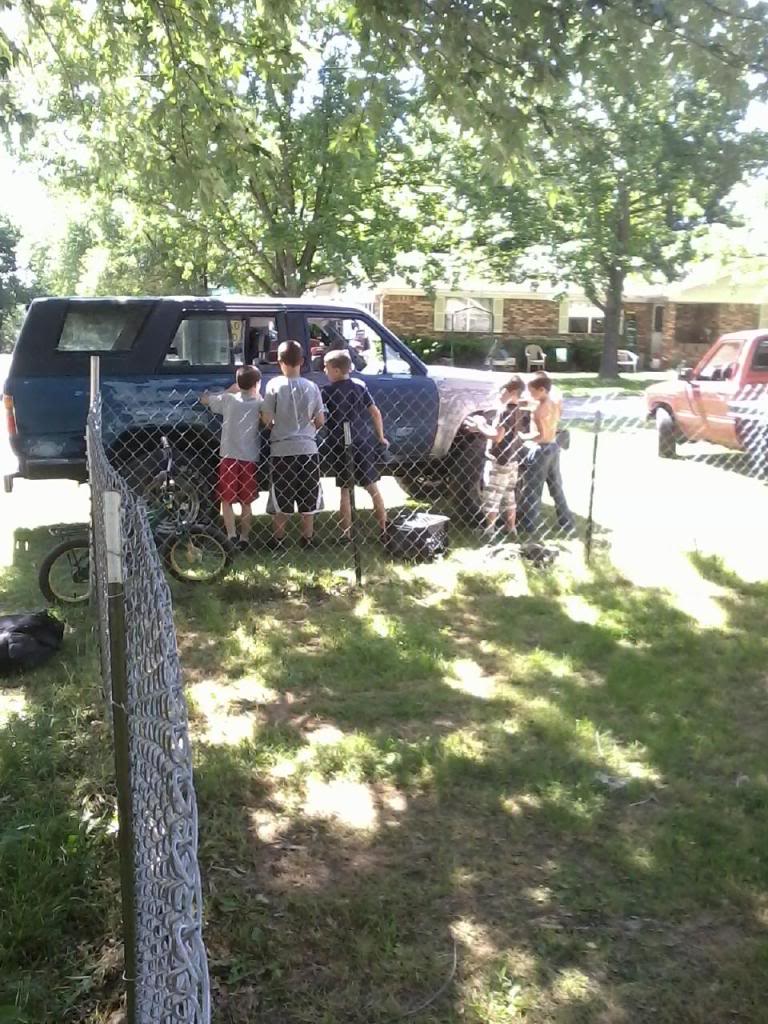
Thanks ksti... We dont have much of a problem with patina around here. It comes easily,lol, Having the kids out there is alot of fun. They like running the electric and air tools. I have high hopes of letting them get a fixer upper when they ar 14 and make them put alot of their own hard work into that they will have a greater appreciation of what they got. They like to run the primer gun and I have gotten alot of help form the neighbor kids as well. They like to run the tools as well.
This all started with just one kid wanting to help. Then the others wanted to jump in. I had a total of 5 neighbor kids plus my two at one time. I am sure some of the parents appreciated the filler dust they had on them when they went home.hehehe
LOL junk4u... My employee as a great wage for me, FREE, it is his yearly cost that adds up. I checked out them adoption agencies but decided I needed someone around when I get more old-ER and more senile-ER that I had better keep him around.
Bodywork is a challenge and takes patience, but when done and you cant find where the damage was there is some personal satisfaction in it. People like seeing an older car that looks new and alot of times I hear " I remeber when..."
On healthy paint, it is best to leave it on and when it comes time to paint, you can spray sealer over the old paint. Some of the old timers dont believe in sealer, but it is well worth the extra time and cost in the long run. Teh factory paint was applied in ideal conditions with heaters and dryers. A repaint is never as tough as the factory paint. When I get to the sealer stage I will add more info about it. If possible really consider using sealer inbetween the primer and the paint. It cost around $50 more but is well worth it.
Thanks ksti... We dont have much of a problem with patina around here. It comes easily,lol, Having the kids out there is alot of fun. They like running the electric and air tools. I have high hopes of letting them get a fixer upper when they ar 14 and make them put alot of their own hard work into that they will have a greater appreciation of what they got. They like to run the primer gun and I have gotten alot of help form the neighbor kids as well. They like to run the tools as well.
This all started with just one kid wanting to help. Then the others wanted to jump in. I had a total of 5 neighbor kids plus my two at one time. I am sure some of the parents appreciated the filler dust they had on them when they went home.hehehe
05-03-2013, 04:55 AM
#1096
Super Moderator
Staff
Thread Starter
iTrader: (1)
Join Date: Aug 2008
Location: Anderson Missouri
Posts: 11,788
Likes: 0
Received 25 Likes
on
22 Posts
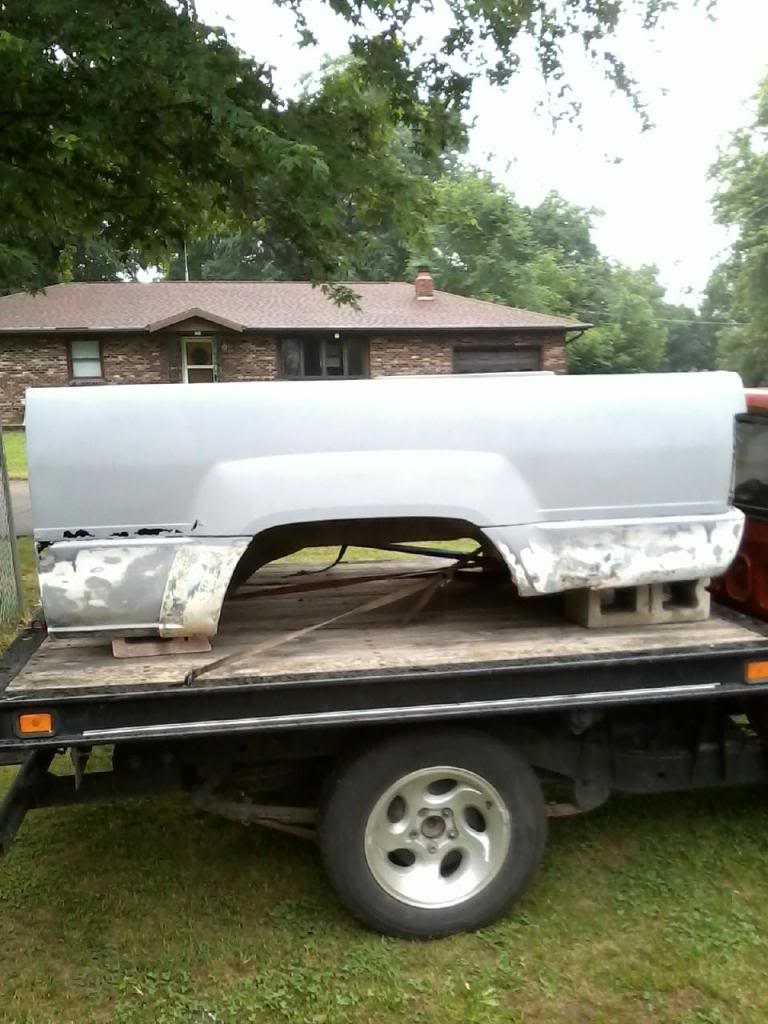
I was looking at another thread and found this runner. I always like getting ideas from other builds.

Mine just recently. I need a better picture but for comparision for now.
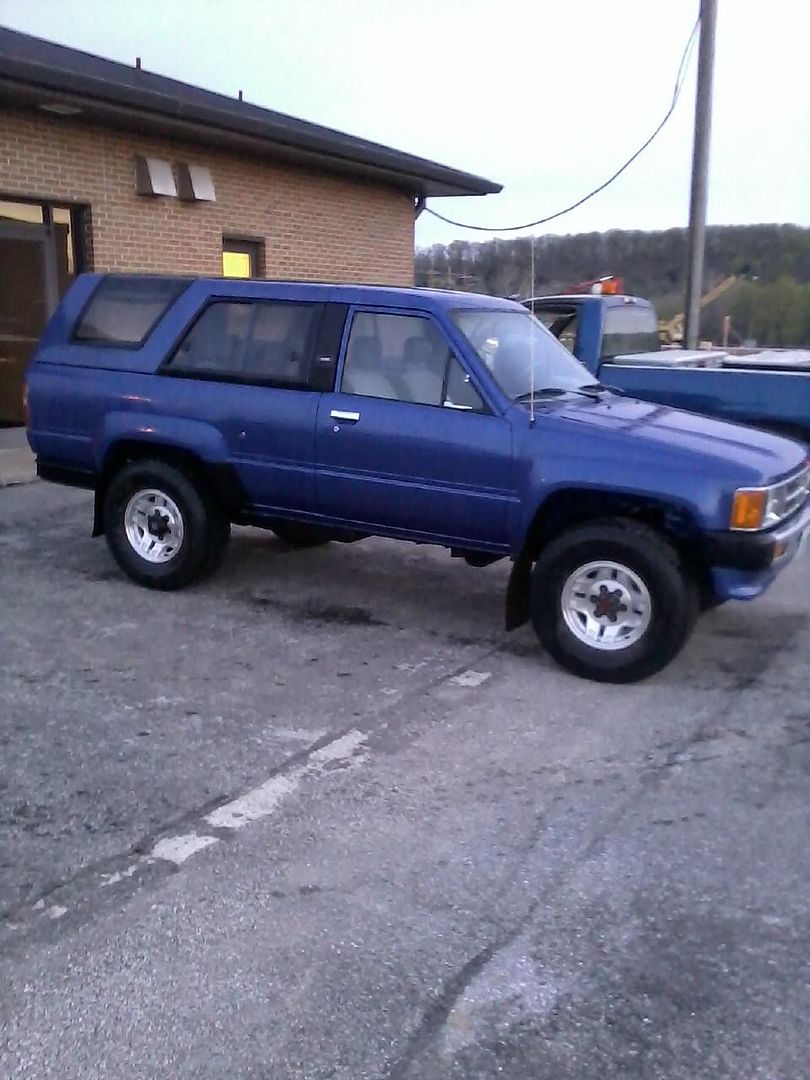
Mine just recently. I need a better picture but for comparision for now.

Last edited by Terrys87; 05-31-2013 at 02:15 PM.
05-03-2013, 05:50 AM
#1097
Registered User
That's some great work Terry!
That's pretty cool that those kids have the ambition to help.
Reminds me when i was young, I was happy just handing my dad wrenches LOL!
05-03-2013, 10:28 AM
#1098
Registered User
yup ll ya need is the mirrors
those rims look new too cool terry
i told ya the farmers around here couple nights ago woke up to their walking water lines all covered in ice when the temp crashed at 28 an it was comin your way snow in may... who'da thought
those rims look new too cool terry
i told ya the farmers around here couple nights ago woke up to their walking water lines all covered in ice when the temp crashed at 28 an it was comin your way snow in may... who'da thought
05-03-2013, 11:10 AM
#1099
It's just personal taste, but I have never seen any after-market wheels that look as tasteful as stock alloy wheels, no matter the brand. So my vote goes to stock SR5 rims.
Nice to see Terry's helpers!


