
Terrys87 86 4Runner with a 2nd Chance
 02-12-2013, 12:33 AM
#961
Super Moderator
Staff
Thread Starter
iTrader: (1)
Join Date: Aug 2008
Location: Anderson Missouri
Posts: 11,788
Likes: 0
Received 25 Likes
on
22 Posts
Hello Mark..I too am wondering what they will look like. I am going to be getting these cleaned up. I was talking to Jason and we both just recently learned about Enkei providing wheels for Toyota. I am starting to like some of those as well.
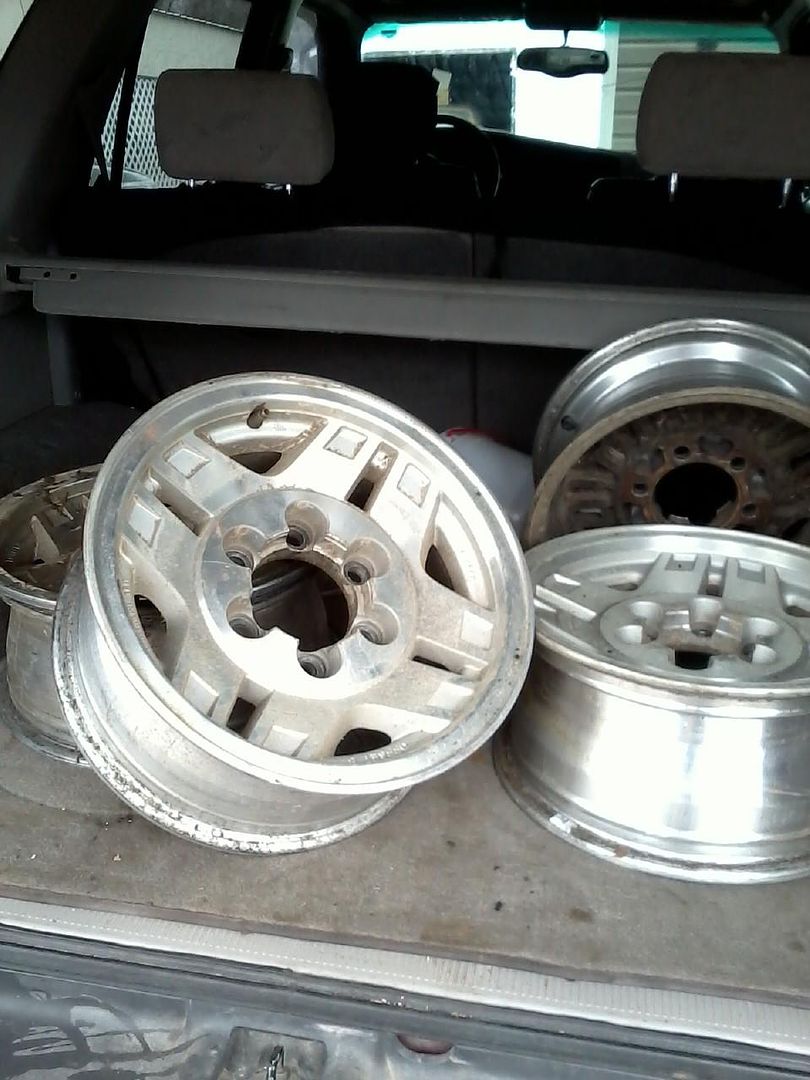
Hello Cyberhorn..That rust bucket only had 3 of those rims on it. I did eventually get to talk to the orginal owner of the rust bucket and he is going to keep it for a shop truck to get parts for it. If it wasnt for the rust, you could tell it was actually took good care of it. They were 15 inch rims. One of the few aftermarket wheels that I thought looked good on it. As far as the chrome, to bad I couldnt have been a teenager in the 50s.lol
Hello kornhuskerwizard...I have always put the SR5 cluster in. When the idiot light comes on it usually means it is too late. I have thought of the pillar cluster before as I want to know what is going on under the hood at all times. These SR5 guages are going on 25 plus years so I sometimes wonder how acurate they are but still they are better then the lights. I will be getting my mudflap on soon.
It wont take much to get my mudflap back on, luckily it did very little damage. As far as the rust bucket, it is reallyyy bad. It is one that I would part out. I do not like parting a truck out and it has to be bad for me to part one but it is one that really shouldnt be on the road. The frame is weak as well. I have parted 2 trucks and 1 runner and it was because of rust. But when I part one I keep everything that is good. I doubt very many that get parted gets stripped as well as I do it and even parts I thought I would never need have come in so handy. If a part is unusable I use it to experiment with or take two and make one when I can. I have learned alot from doing things like that.
 02-12-2013, 12:45 AM
#962
Super Moderator
Staff
Thread Starter
iTrader: (1)
Join Date: Aug 2008
Location: Anderson Missouri
Posts: 11,788
Likes: 0
Received 25 Likes
on
22 Posts
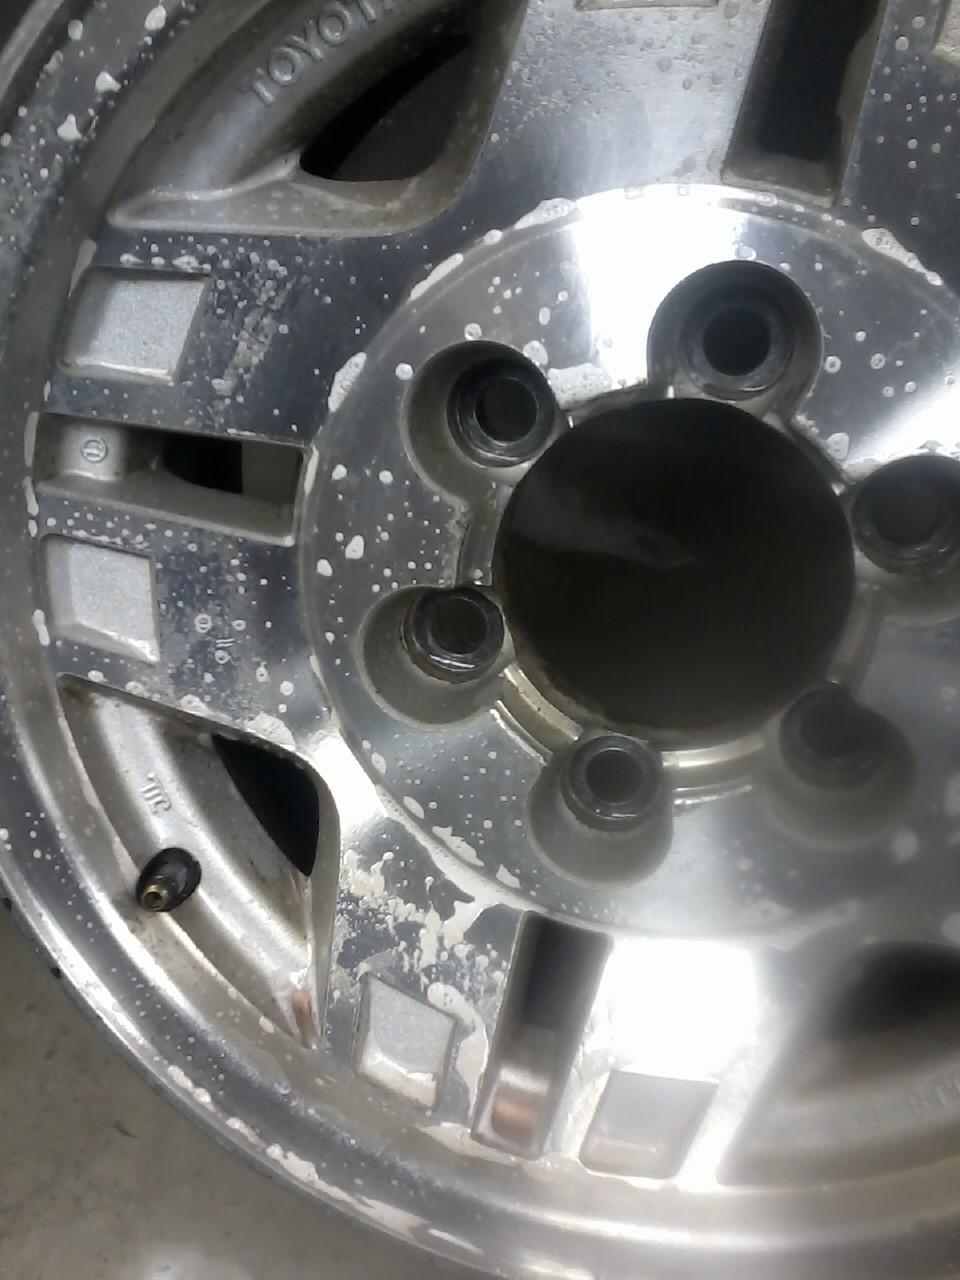
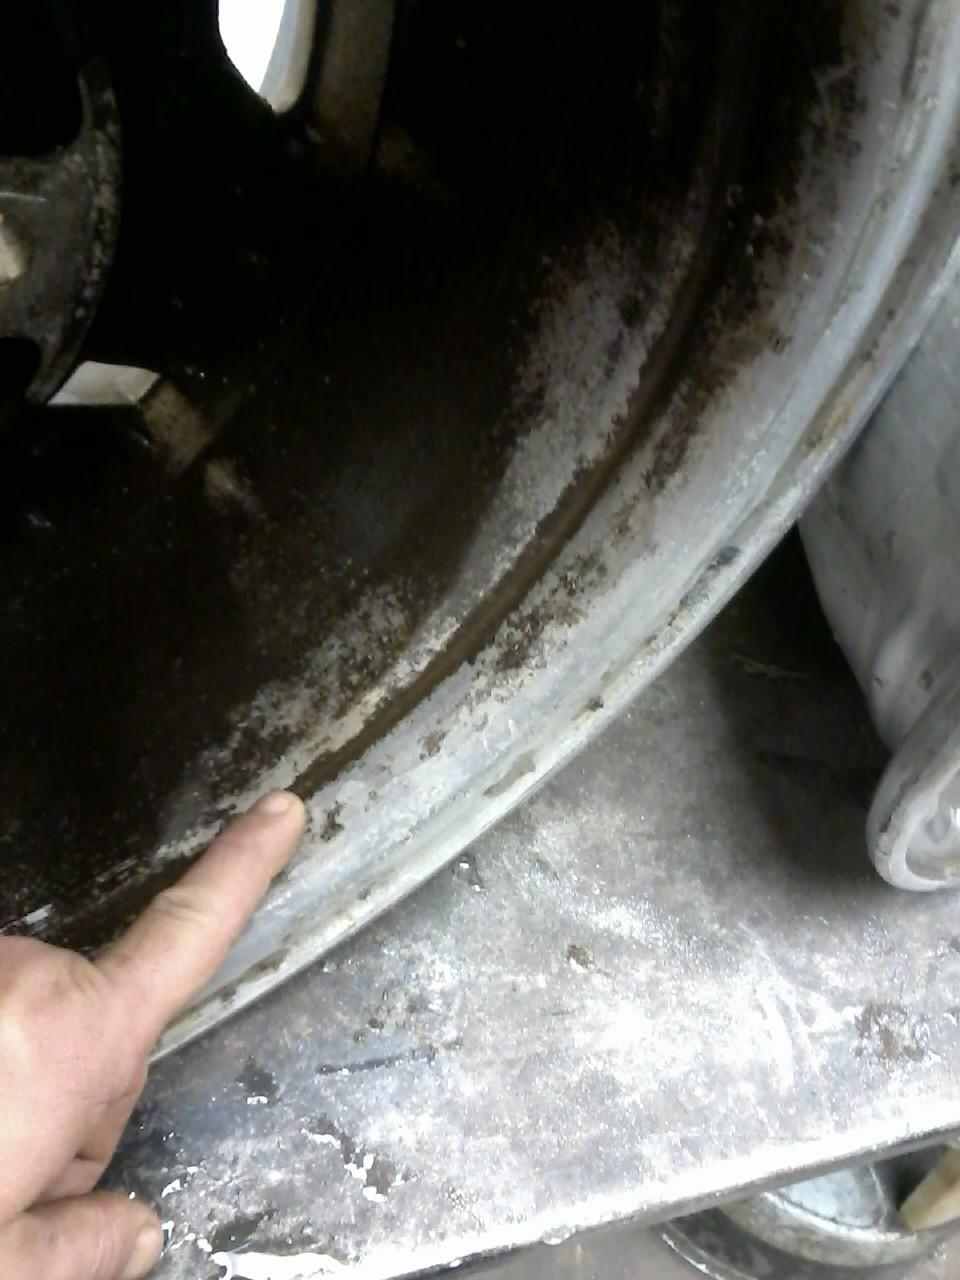
The wheel is dirtier then what it looks like and I have gotten it alot cleaner then what is showing in the picture. It came from the junkyard and it has some clear coat peeling. I am going to do some research and see if I cant scuff it up with some 400 grit and shoot some regular clear coat on it that you would when painting a car. Besides just looks, I wanted to get the rim edges cleaned so as not to have to worry about slow leaks and tire shops usually wont spend to much time getting the edge cleaned off.
Also I wanted to make sure I got all of the extra weight off that I could so it wouldnt affect balancing of tires. On the back side there was actually alot of grime and dirt build up on it and I got alot of that cleaned off as well. One tire out of balance will drive me up the wall. I also want as few weights as possible when I have tires mounted.
It has been warmer til today and it got me to wanting to start getting things done again and try and get back on my plan of one thing a day accomplished. During a build, I dont think some dont realize cleaning and prepping parts takes just as much time as saving to purchase parts and getting them installed. With spring around the corner, I am hoping to get alot of the things done that I can so when I get to start putting them on I wont have to stop to do the cleaning on them.
Alot cleaner then it is showing now. Will start searching on re clearing them.
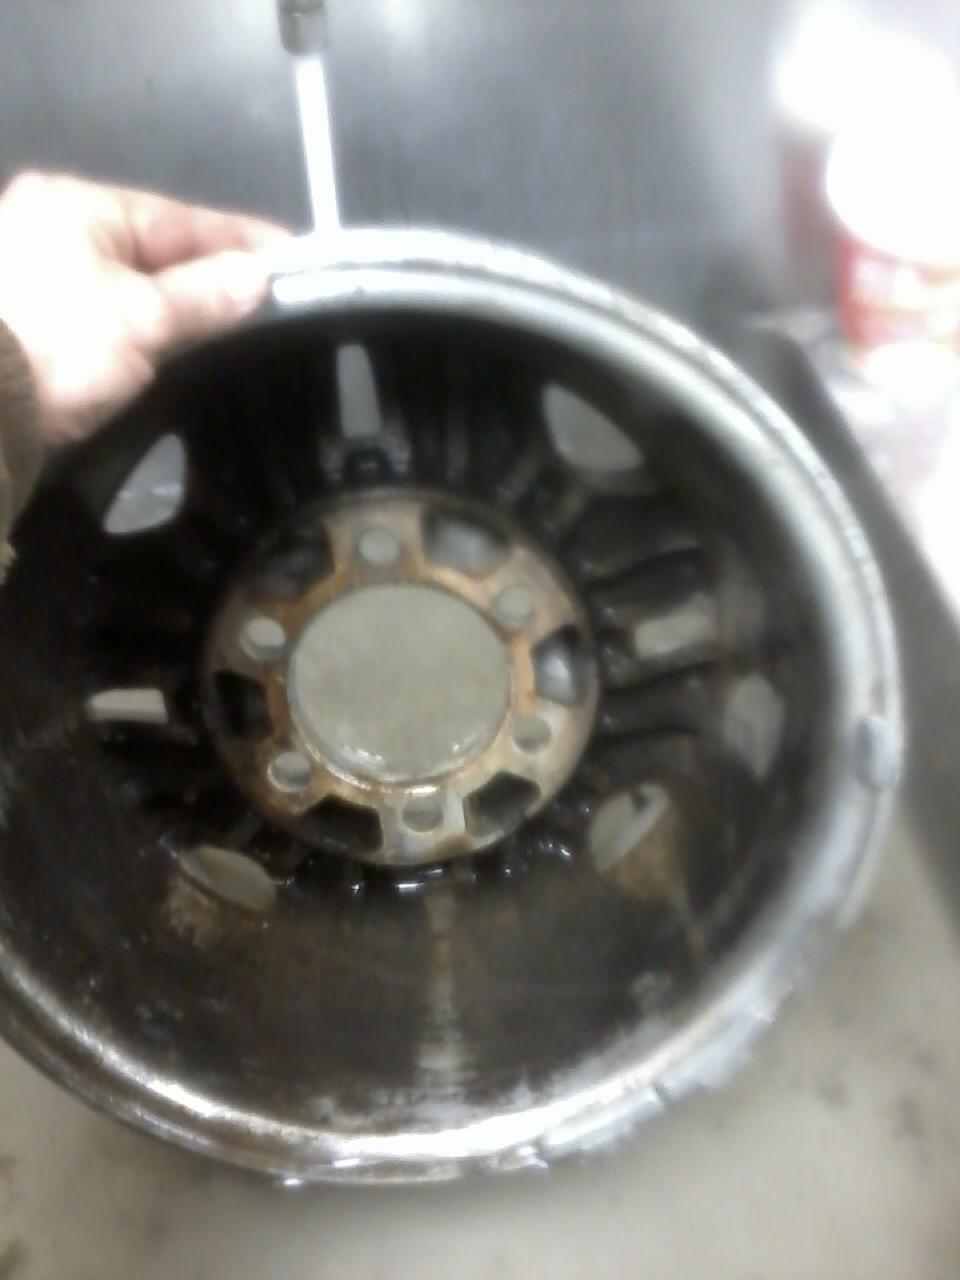
The backsides are now alot cleaner and got alot of excess weight off just by cleaning. Hoping it helps for a smoother ride. No matter how good I get this runner to look, I want to enjoy driving so I am hoping this helps big time.
Also I wanted to make sure I got all of the extra weight off that I could so it wouldnt affect balancing of tires. On the back side there was actually alot of grime and dirt build up on it and I got alot of that cleaned off as well. One tire out of balance will drive me up the wall. I also want as few weights as possible when I have tires mounted.
It has been warmer til today and it got me to wanting to start getting things done again and try and get back on my plan of one thing a day accomplished. During a build, I dont think some dont realize cleaning and prepping parts takes just as much time as saving to purchase parts and getting them installed. With spring around the corner, I am hoping to get alot of the things done that I can so when I get to start putting them on I wont have to stop to do the cleaning on them.
Alot cleaner then it is showing now. Will start searching on re clearing them.
The backsides are now alot cleaner and got alot of excess weight off just by cleaning. Hoping it helps for a smoother ride. No matter how good I get this runner to look, I want to enjoy driving so I am hoping this helps big time.
02-12-2013, 03:32 AM
#965
Registered User
If its anything like the aluminum brightener i put on my truck wheels and fuel tanks at work it really cleans the grime off but will also take the shine away and just be a really clean but dull look.
02-12-2013, 10:10 AM
#966
I say try that newer rustoleum HD clear, I think it even said "for wheels" too, but was meant for rattle canning a decent clear on without 10 coats being needed!(saw it at Home Depon't, Lol.) U could just Jasco them and start with frwsh shine and new ckear all together, ..... maybe? Hahaha
Last edited by ChefYota4x4; 02-12-2013 at 10:11 AM.
02-12-2013, 11:31 AM
#967
Registered User
if you go that way might as well do a bit of cleaning an buffing detailing the rims with color in the spokes strip them clean of oils an ect an shoot um possibly in a good warm area so the clear flashes right
they might have an additive to mix in for better adhesion?
edit perhaps this stuff?
sharkhide
Last edited by Cyberhorn The Dragon; 02-12-2013 at 11:37 AM.
02-12-2013, 01:44 PM
#968
Registered User
iTrader: (4)
Join Date: May 2010
Location: People's Republic of California
Posts: 720
Likes: 0
Received 15 Likes
on
12 Posts
My opinion on the wheels. The rustoleum wheel paint is holding up great on my truck wheels. I removed the clear coat because it was cracking and peeling with paint stripper, roughed it up with sand paper, sprayed etching paint, then wheel paint, then the wheel clear coat.
Since you want to keep the polished aluminum. I THINK you will need to remove the peeling clear coat, follow up with clear adhesion promoter to the bare aluminum, and then the wheel clear coat. But if it isn't peeling badly, maybe just clean it, adhesion promoter, then clear coat.
I did find this video, and they briefly mention using the adhesion promoter on chrome surfaced wheels before painting.
02-12-2013, 11:08 PM
#969

presumably those are anodized AL, you don't want to strip this off. make sure your solvents and cleaning materials are neutral PH.
A two part clear coat should hold up very well. Better if you can bake it in, eg some foil lined foam box with a regular bulb or two.
Scuffing may show thru the clear, test in a spot that is already questionable eg under wheel weights. It'll also remove the Al-oxide(anodizing).
That nasty white stuff, eg smut, showing in the picture of the rear side. assuming thats not your cleaner. Is where the anodizing has been worn off and the raw Al has reacted with the air. I don't recall offhand what the reactant is but it's not Al-oxide.
You can DIY anodize, it's kind of simple but there is some art to it. I imagine you got lots of stuff to practice on.
Anyways, just spray it and bake it for a harder finish.
02-14-2013, 01:46 AM
#970
Super Moderator
Staff
Thread Starter
iTrader: (1)
Join Date: Aug 2008
Location: Anderson Missouri
Posts: 11,788
Likes: 0
Received 25 Likes
on
22 Posts
Thanks kornhuskerwizard.. I might try that on the back side of the rims and give them a protective covering.
Thanks Mark.. I will need to look up "Jasco", I havent heard of that before.
Thanks Cyeberhorn.. I have seen that episode and might still have it on my DVR. I am a big Chip Foose fan.
Hello Grego..I did 4 trips with active navy and 2 others with the Missouri guard. Thanks for the video and will be looking into it.
Hello CO 94 PU.. I will look into that anodizing. I think I have access to an oven big enough to bake it on. That would add strength to the clear.
02-14-2013, 01:56 AM
#971
Super Moderator
Staff
Thread Starter
iTrader: (1)
Join Date: Aug 2008
Location: Anderson Missouri
Posts: 11,788
Likes: 0
Received 25 Likes
on
22 Posts
I got two more wheels done and still have one more to go. Getting them clean has been a work out. There is alot of build up and junk on the back side of the wheels and think this should help for a smoother ride. My 10inch wide rims I spent alot of time getting them clean and they balanced nice and no vibrations.
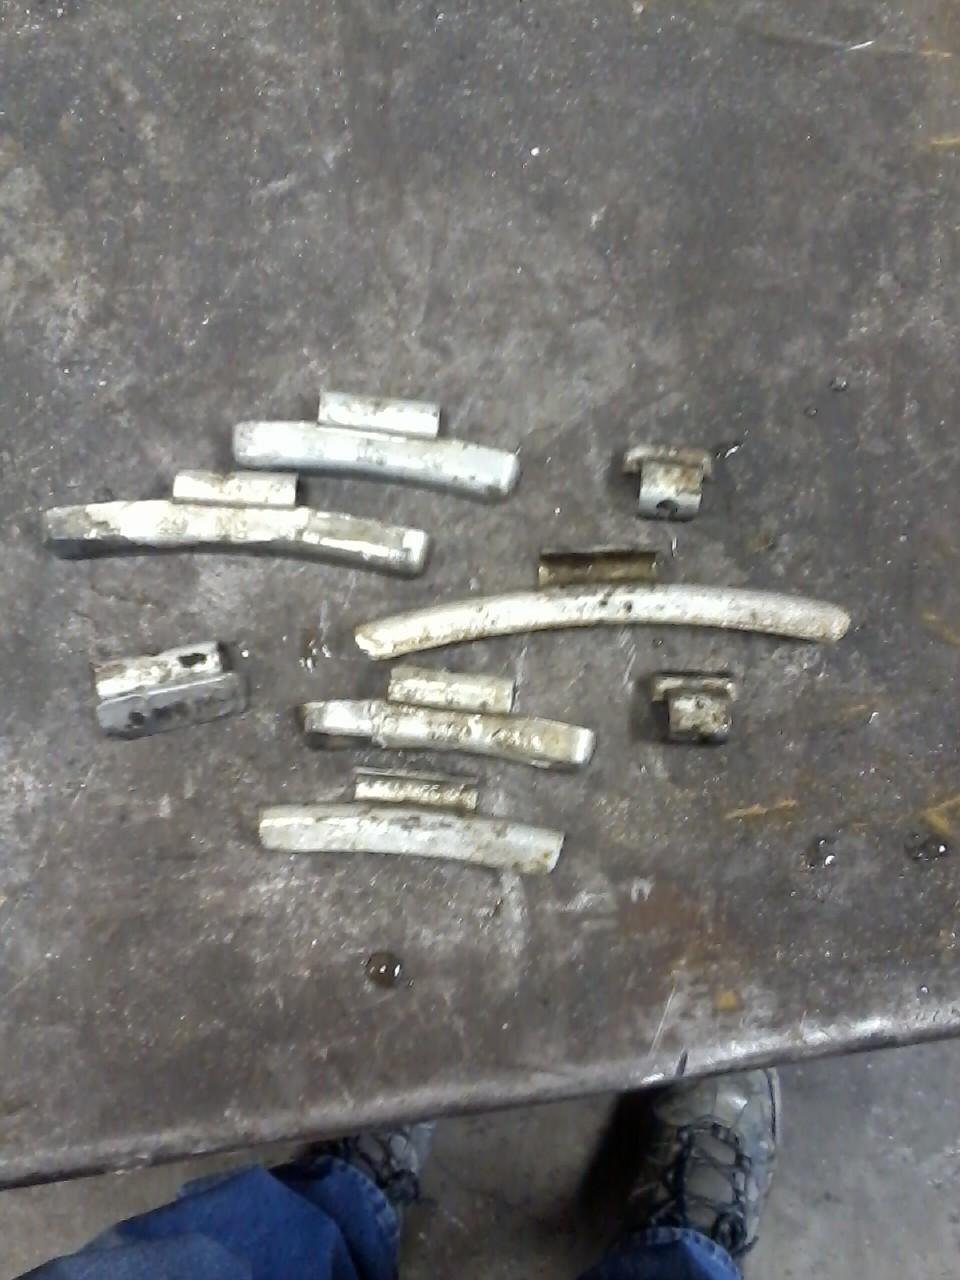
I also work where the tires seals to the wheel so hope that will keep me from having any slow leaks along with new valve stems. Just the 3 wheels I have done so far, I have removed alot of wheel weights. I really think alot of this is caused from build up on the back sides and poor tires. All of the weights in one hand is actually quite heavy.
Also there are some differences in SR5 rims. These rims came off of 2 different 2nd gen runners. One has a groove in it on the backside. Other then that I cant tell any differece between the rims. Just thought I would mention it.
Weights off of 3 rims. Heavyyy!!
Groove I am talking about. Some have it, some dont. Other wise I havent seen any difference.
02-14-2013, 11:45 AM
#972
Super Moderator
Staff
Thread Starter
iTrader: (1)
Join Date: Aug 2008
Location: Anderson Missouri
Posts: 11,788
Likes: 0
Received 25 Likes
on
22 Posts
I went to fix my leaking brake cylinder and that went well. One area that I just cant figure out without screwing it up is replacing rear brake shoes. My brake adjuster is frozen so will have to get my dad over to help me on that. Some reason I just cant get the hang of rear brakes. I need to replace the shoes anyways since they are soaked. I am going to get the rest of my tow hitch assembly from a guy parting out a runner so should be able to get one from him I hope.

02-14-2013, 12:10 PM
#973
Registered User
this is of course after cleaning the heck outa the backing plate terry my auto shop teacher once told me a pattern to rear brakes
hard cables connections first (ebrake levers)
mount the pads to the backer a tiny dab of grease on the rub spots where the pad rubs on the backer plate quarter turn washers on pins an springs are next some cars use a spring from pad to pad as a pivot that goes in before any others
adjusters leave loose an make sure they are very well greased an move freely
springs often front pad to back first the rear to front mounts second
a small set 2-3 brake tools are very handy the lever tool helps get the springs on easy an the quarter turn wrench helps save your fingers the adjuster spoon helps out with the star wheel to get the pads seated to the drum before putting the wheel on
dont mean to sound like you dont know anything terry just saying how i learned
02-14-2013, 12:36 PM
#974
Super Moderator
Staff
Thread Starter
iTrader: (1)
Join Date: Aug 2008
Location: Anderson Missouri
Posts: 11,788
Likes: 0
Received 25 Likes
on
22 Posts
Thanks Cyberhorn... No problem that is one area I have had great difficulty. I am going to try this when I get my brake parts unfrozen.
Copied from Thooks thread.
Hey all....
I had to change the shoes on the '92 4rnr yesterday and discovered, for myself, there was actually an easier way to do it than how the FSM describes.
http://personal.utulsa.edu/~nathan-b...tem/11-4wd.pdf
Personally, I despise fiddling with the barrel adjuster through the backing plate. If you've figured a convenient way to do it, more power to ya. But, I'd rather lick bearing grease.
Anyway, here's a little bit of a write up describing how I came to do the procedure bypassing the barrel adjuster/backing plate mess AND.....most importantly.....bypassing multiple, frustrating attempts at reattaching the return spring upon reassembly even with the proper tools.
(A): How I disassembled!
1) First thing, of course, jack the rear end up and support on heavy duty stands. Remove the wheels after having loosened the lugs while still on the ground.
2) Remove both drums using two bolts to back the drum off the assembly. If it's sticky/frozen up to the shoes, continue tapping with a hammer or rubber mallet around the outer edge of the drum as you continually back the drum off with the bolts.
3) Once the drums are off, pick a side to start with leaving the other side as reference for assembly. On your chosen side, start by loosening the adjuster to get the tension off of the springs.
4) Remove both hold down springs w/cups. I use a pair of channel locks to grab the outer cup and push in while turning the pin with needle nose pliers. Do it however you want, but this works well for me and, I find, is easier than using the stupid tool. After this, both shoes will be loose enough to begin removing the return spring and anchor spring......this, effectively, making the stupid, special return spring and hold down spring removal tools useless/moot.
5) Note the barrel adjuster will now be dangling from the rearward shoe. Simply pull the two pieces apart leaving the remaining piece attached. It's easier to get it off once you've removed the adjuster lever.
6) To remove the adjuster lever, pull the spring off the shoe and lever. Then, remove the small, very easy to lose e-ring retaining the lever with a small flat head. Careful! Cup it with your hand as that doo-dad may fly off leaving you feeling dumb. (Yes, I found it)
7) Remove the remaining adjuster piece and set it aside with it's mate reassembled.
8) Remove the c-washer for the parking brake lever by anchoring one jaw of your channel locks against the c-washer and the other jaw on the pivot pin. Squeeze. The washer will spread apart fairly easily and move off the pin. However, you may have to reanchor the channel locks against the end of the shoe to get the washer to come all the way off. You'll see. Once off, remove the PB lever.
9) Remove the parking brake cable from the lever.
10) Now, take the time to clean the backing plate and drums, grease the contact points on the backing plate, the pistons on the wheel cylinder, and the contact points on the block at the bottom end of the of the backing plate where the two bottom ends of the shoes contact.
Assembly:
1) Provided you've inspected the wheel cylinder, drum, and new shoes (see FSM) and everything's good to go, assemble the rearward brake shoe with the parking brake lever, followed the by the pivotal end of the barrel adjuster, and then the adjuster lever and adjuster lever spring. Install on the backing plate with hold down spring.
*For the parking brake cable, you can attach it to the adjuster lever before installing the shoe or after. It's easier beforehand, but make sure once the shoe's installed you've routed the cable back through the little retaining tongues on the block where the bottom end of the shoe seats. I had forgotten that and had to pull the drum off once again. <<<ding, ding>>>
2) Install the return spring, the anchor spring, and the adjusting end of the barrel adjuster to the installed rearward shoe.
3) Take the forward shoe and attach it to the anchor spring while the spring is behind the tongue on the block thereby connecting the two shoes. Then, seat the bottom end of the forward shoe to the block. Make sure that spring is behind the tongue on the block!!
4) Connect the return spring to the forward shoe
5) The fun part: Take a long, stout flathead screwdriver and poke it through the hole that the return spring is attached to and anchor the end of the driver to the backing plate in the little trough that follows inside the outer circumference of the backing plate. Pry the shoe outward while sliding it against the driver towards the backing plate. Line the shoe up with the wheel cylinder piston and barrel adjuster. While letting the tension off the driver, allow the shoe to fall in place.
6) Install the remaining hold down spring. Take a breath and a sip of beer.
7) Make sure the adjuster lever is properly contacting the starwheel on the barrel adjuster and that the lever adjustment feature functions.
8) Adjust the barrel adjuster outward about 1/2" or less (depends on shoe and drum thickness) so that the drum will just slide on over the shoes. You may have to persuade it a little with some rotating and/or a rubber mallet. Be gentle and try not the let the drum go on caddywompus.
9) Dismantle and assemble the other side in the same fashion
10) Once all that's done, tug on the parking brake lever from in the cab until the lever travel in quite short. You will have to start the vehicle and press the brake pedal to check for brake travel a couple/maybe several times until it all feels good.
11) If it's all good, yer done. Finish yer beer....
Video
02-16-2013, 06:50 AM
#975
Super Moderator
Staff
Thread Starter
iTrader: (1)
Join Date: Aug 2008
Location: Anderson Missouri
Posts: 11,788
Likes: 0
Received 25 Likes
on
22 Posts
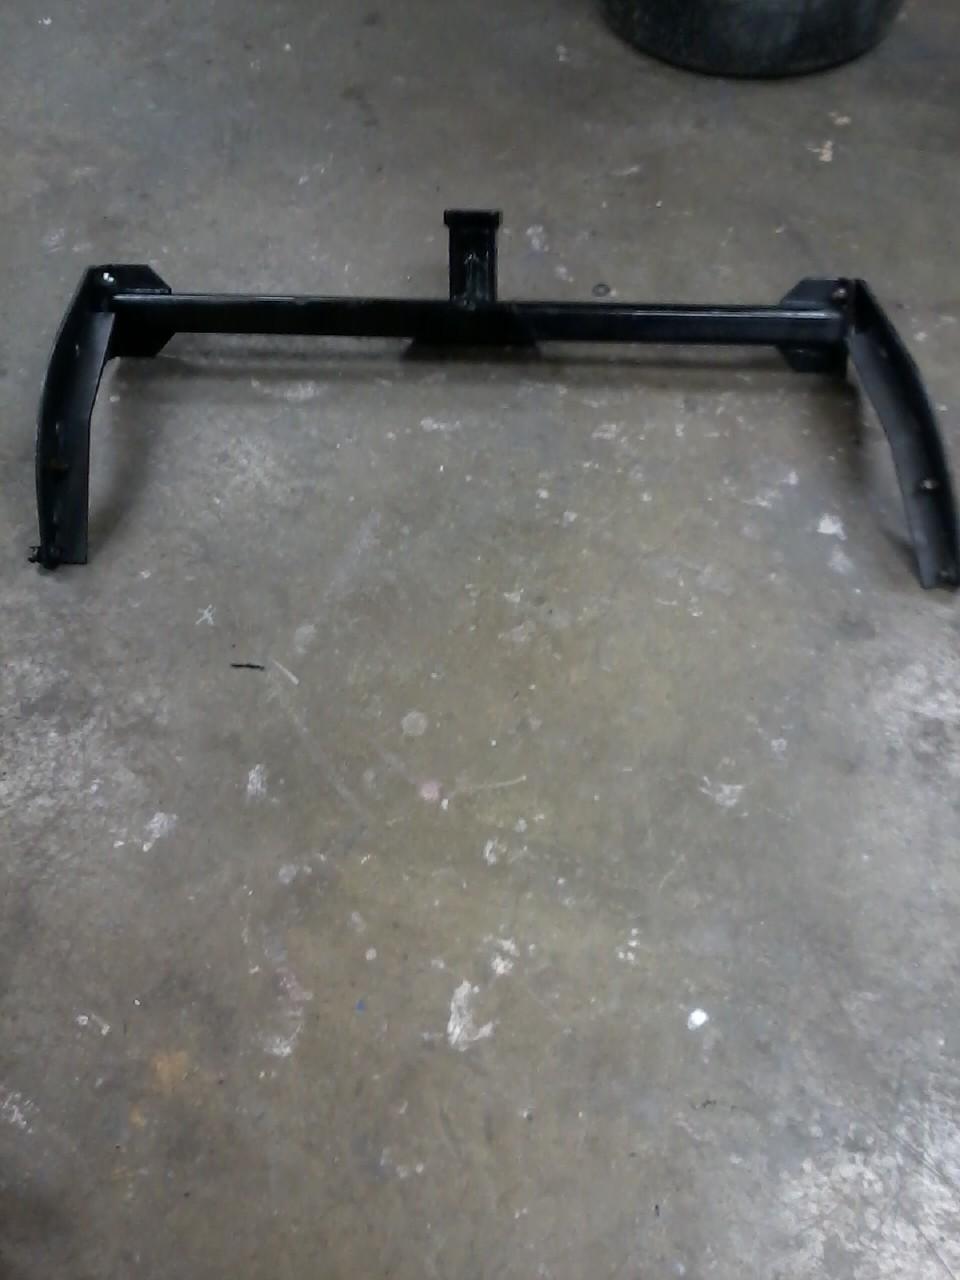
I havent been messing witht the rims lately but should get back on them. I went a got a reciever hitch awhile back and the guy didnt take the mounts off of the frame so I went back and got it. Stopped at the hardware store to get 4 bolts to reassemble it.
The reciever hitch doesnt have a place for safety chains so will get something added to it later for it. I will be glad the day I get a welder. I do alot of towing of different trailers and having a hitch that you can drop or raise to level the trailer makes a big difference. Regardless of the amount of weight you tow, you need more weight in front of the axle or you will get the wig wag going on at higher speeds. I like to tow my trailers level or or the front of the trailer with a slight tilt downward to it.
Now I just need to get a reciever hitch and a wiring harness and get it put on. Getting it put on should happen soon. I ran out of paint and still need to paint the sides and bottom of it.
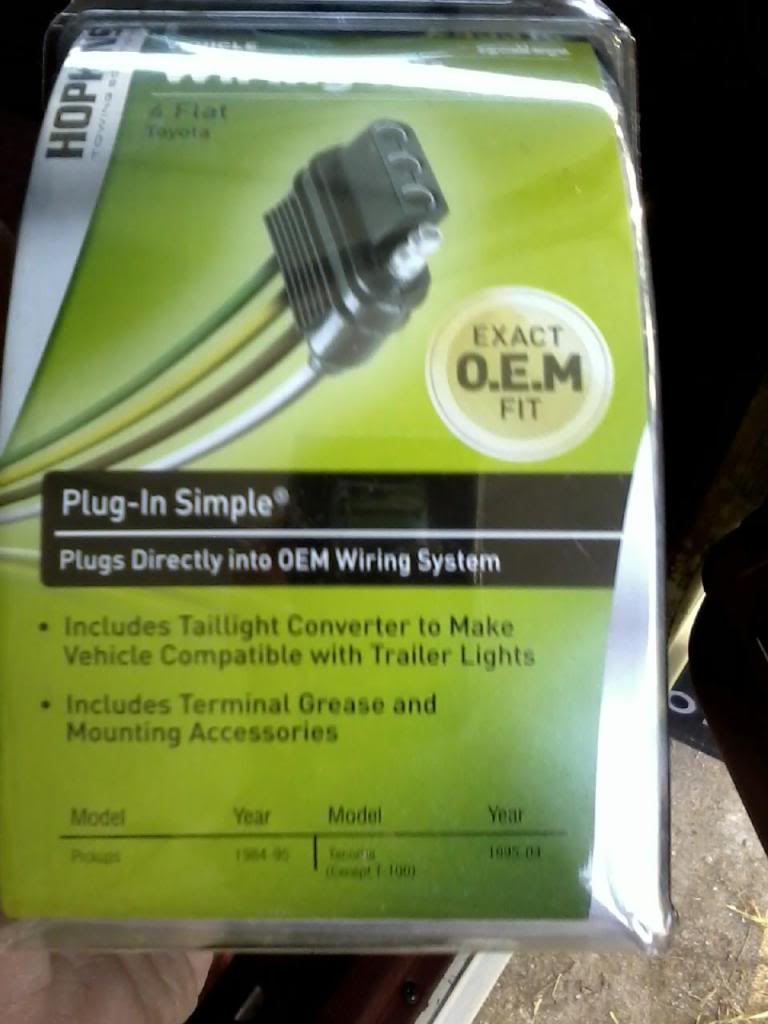
When installing trailer lights, get the plug an play. That splicing wires is just a headache and eventually causes problems. I have installed several of these on Toyota trucks. Mostly posting this up so I can order one.
Tail light conversion kit,Its PN# 43315.
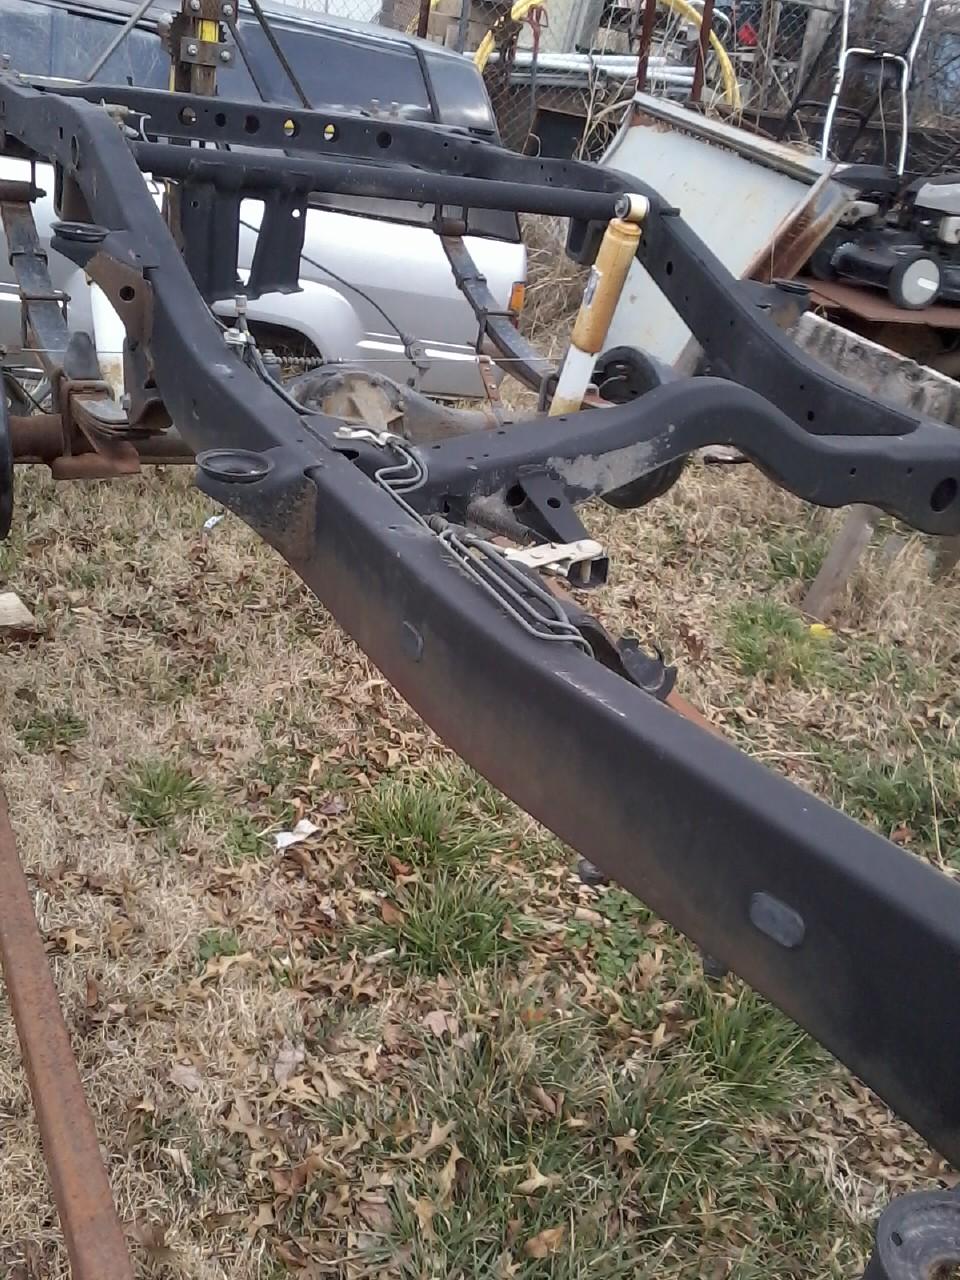
When I was out part shopping, I know a guy doing a Solid Axle Swap. This is a California truck. Look at how sweet the frame is.
The reciever hitch doesnt have a place for safety chains so will get something added to it later for it. I will be glad the day I get a welder. I do alot of towing of different trailers and having a hitch that you can drop or raise to level the trailer makes a big difference. Regardless of the amount of weight you tow, you need more weight in front of the axle or you will get the wig wag going on at higher speeds. I like to tow my trailers level or or the front of the trailer with a slight tilt downward to it.
Now I just need to get a reciever hitch and a wiring harness and get it put on. Getting it put on should happen soon. I ran out of paint and still need to paint the sides and bottom of it.
When installing trailer lights, get the plug an play. That splicing wires is just a headache and eventually causes problems. I have installed several of these on Toyota trucks. Mostly posting this up so I can order one.
Tail light conversion kit,Its PN# 43315.
When I was out part shopping, I know a guy doing a Solid Axle Swap. This is a California truck. Look at how sweet the frame is.
02-16-2013, 11:23 AM
#976
Hi Terry, nice score on the receiver hitch... I'm glad you posted the part # for the plug and play trailer wiring harness, I still need to get one for my 4runner! I look forward to seeing how your wheels turn out, I have a spare set of aluminum wheels for my 83' that are peeling and oxidized that need freshened up, I'm sure that I'll be refering back to your thread on painting prep tech!
02-16-2013, 12:14 PM
#978
Registered User
iTrader: (4)
Join Date: May 2010
Location: People's Republic of California
Posts: 720
Likes: 0
Received 15 Likes
on
12 Posts
Nice...did 4 years active Army, then 8 in the army guard, went to OCS, and then 2 in the army reserve.
Those drums were kind of a pain...I can't even remember how I did mine.
 Just read some posts and then kept playing around with it to adjust it correctly!
  I'm just glad they last so long that I hope I won't be mess'n with those for a long long time again.
02-16-2013, 01:55 PM
I'm just glad they last so long that I hope I won't be mess'n with those for a long long time again.
02-16-2013, 01:55 PM
#979
Super Moderator
Staff
Thread Starter
iTrader: (1)
Join Date: Aug 2008
Location: Anderson Missouri
Posts: 11,788
Likes: 0
Received 25 Likes
on
22 Posts
Hello Ed... The wheel thing went south on me in a bad way. Dont soak them in hot water. It bleached them, at first I thougt it was from Purple Power, but further testing showed it was just hot water. Not sure what kind of mess I have myself in on this one. Worse case scenario, the bone yard does have one more but I am going to see if I can save it or come up with something as good or better then new. I will post a picture of it in the next day or so. I kid you not, just hot water.
That harness runs about $20 and doesnt take long to install. I have put them on 3 different trucks. Sooo much better then splicing. Has a little box that you need to mount up under the body some where and acts like it needs to be charged for a second when you first start using it but it is a quick install. I hit all of the electrical connections with electric grease when installing it.
Hello Mark.. I will be up all nite and have my phone handy so just give me a holler.
Hello Grego.. I dont miss the politics of the military, but do enjoy alot of the people I have met and some of the things I got to see while in. The brakes are anoter thing that is been a problem. My brake adjuster was frozen and I got freed up last nite, now I just need to get it back together. My dad was just here and I asked for his help as soon as it warms up. My shop cant get warm when temps get to low and him and me neither one likes the cold. This week 50 is the very high and it wont last long that day. That might be when I will try and get my reciever hitch one.
02-16-2013, 05:03 PM
#980
Hello Ed... The wheel thing went south on me in a bad way. Dont soak them in hot water. It bleached them, at first I thougt it was from Purple Power, but further testing showed it was just hot water. Not sure what kind of mess I have myself in on this one. Worse case scenario, the bone yard does have one more but I am going to see if I can save it or come up with something as good or better then new. I will post a picture of it in the next day or so. I kid you not, just hot water.
...
My dad was just here and I asked for his help as soon as it warms up. My shop cant get warm when temps get to low and him and me neither one likes the cold. This week 50 is the very high and it wont last long that day. That might be when I will try and get my reciever hitch one.
...
My dad was just here and I asked for his help as soon as it warms up. My shop cant get warm when temps get to low and him and me neither one likes the cold. This week 50 is the very high and it wont last long that day. That might be when I will try and get my reciever hitch one.
Here is a link for home anodizing with a battery charger. I don't know how good it is but it was the first one that poped up on google with a search for "anodizing aluminium with a battery charger", since I know that it has been done with a charger for a power source.
I don't recall what color you have for paint. You might want to dye them to match. Or just try a desmut and re anodize it.

So sorry I should have warned you about the hot water and to be carefull with the cleaning product choice. Especially since baking soda and hot water are a pretty much goto household cleaner.


