
Terrys87 86 4Runner with a 2nd Chance
 09-24-2012, 10:38 AM
#701
Super Moderator
Staff
Thread Starter
iTrader: (1)
Join Date: Aug 2008
Location: Anderson Missouri
Posts: 11,788
Likes: 0
Received 25 Likes
on
22 Posts
I did cover up some of the overspray and the pieces are just on there for picture purposes. Probably not bolts and screw holding it all on, but to give an idea of what it will look like. I need a valance and the bumper is bent but it will work for now, but it will get replaced. I still need to buff it all out.
I am going to try and paint the 88 pick up cab on Thursday if all goes as planned. Just depends on how much I can get done in the next few days. So spent alot of time on it today. Nothing picture worthy as I had to remove all of the old primer on it. My brother did help on it quite a bit today. Will only get the cab painted and I will try and work on the bed this weekend.
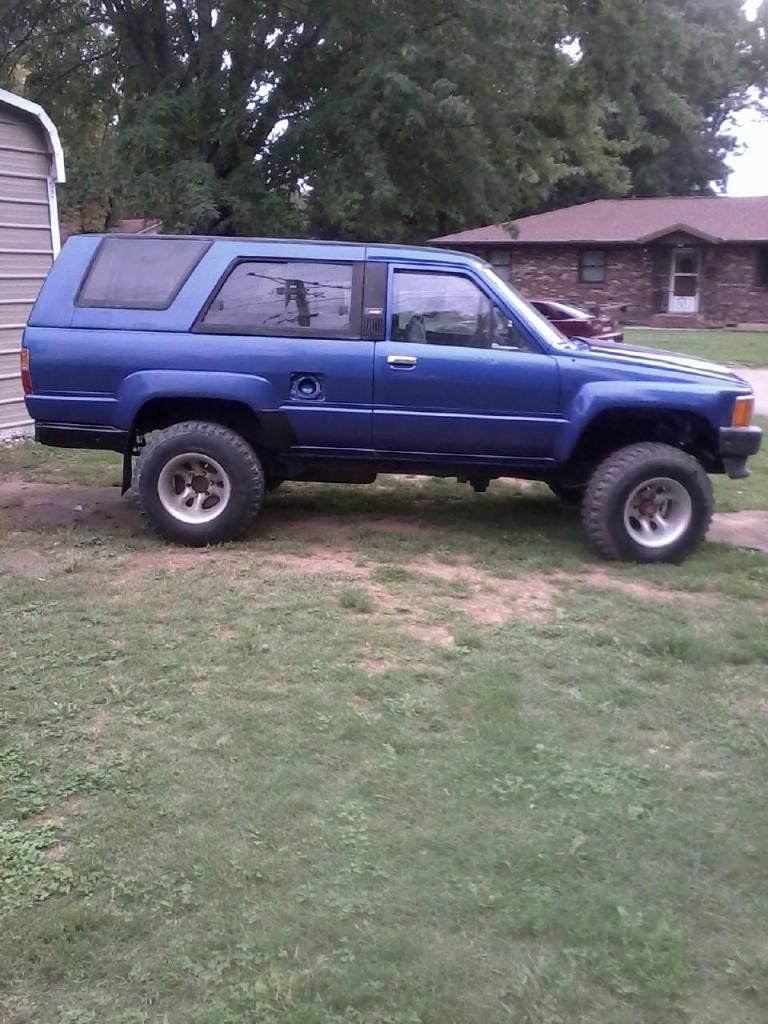
Front view. Hood is not adjusted at all. Still need to set the body gaps. Alot of the trim parts are dustyyyy. Will need some serious detailing.
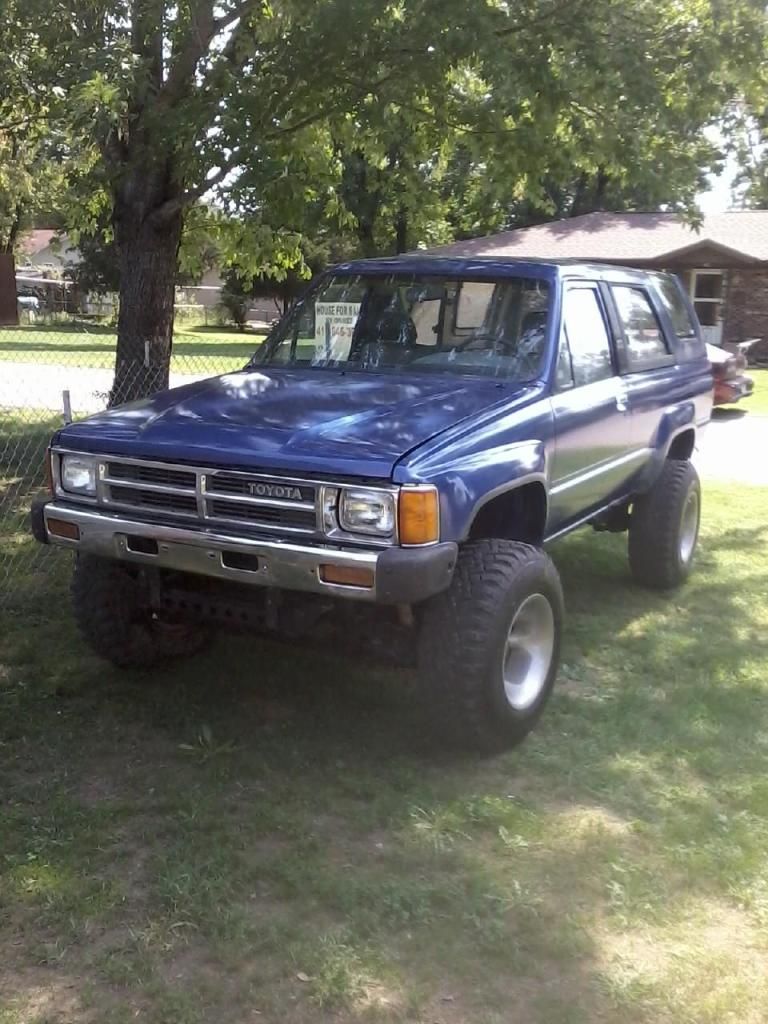
I covered up alot of the over spray and think I will leave the rock guards black just to offset the top.
I am going to try and paint the 88 pick up cab on Thursday if all goes as planned. Just depends on how much I can get done in the next few days. So spent alot of time on it today. Nothing picture worthy as I had to remove all of the old primer on it. My brother did help on it quite a bit today. Will only get the cab painted and I will try and work on the bed this weekend.
Front view. Hood is not adjusted at all. Still need to set the body gaps. Alot of the trim parts are dustyyyy. Will need some serious detailing.
I covered up alot of the over spray and think I will leave the rock guards black just to offset the top.
 09-24-2012, 10:53 AM
#702
Registered User
Ummmmm yota candy lol. Looks even better with a little trim back on it. Hurry up and get Steve's truck done so I can start working out a trade with this one since misty just won't budge on hers lol. Jk buddy keep up the great work.
09-24-2012, 11:01 AM
#703
Oh man, .... yeah, NOW I have a much better idea of the color... I LIKE IT, LOTS, Terry! I still trip out though...... how light and angle and all that have so much effect.. IN the first pic it looks more like the original blueberry... The second more like that "High Red-Blue" I mentioned before..... But the first pics last page look different yet AGAIN! hahaha.... Man, ... it really looks good. So, what's her name gonna be, eh????  My 83 is gone, so "Blue Betty" is free for the taking
 hehehe.
Take care, Terry.... Later....
My 83 is gone, so "Blue Betty" is free for the taking hehehe. Take care, Terry.... Later....
09-26-2012, 12:42 AM
#709
Super Moderator
Staff
Thread Starter
iTrader: (1)
Join Date: Aug 2008
Location: Anderson Missouri
Posts: 11,788
Likes: 0
Received 25 Likes
on
22 Posts
Hello Jason..I got a little plan of just doing a section at a time and when I get to an area that I get to put a piece back on, I will take that as a small accomplishment, Soon I get to put the right rear tail light on for the LAST time.Wahoo!!
Hello Mark...Still working on a name for it. Think I will drive it for a while and see what kind of personalities it comes up with. Something like coming back from the grave, but not deathly, Phoenix is an example. The metallic does do different colors on it. Couldnt afford pearl and not sure how that would of looked. Had a friend that had some pearl in his paint and that car was never the same color. Kind of radiated colors off of it.
Thanks Ed..Base coat/ clear coat isnt bad really. I go for a 50% overlap and go with several coats just to keep from getting runs in the base coat. On the clear coat, I do about the same. It will run easier but you can sand the runs with 2000 grit sandpaper and polish it out. It is the prep work that takes the effort. My equipment is cheapy stuff but works. Find an old panel and practice on it and you might be surprised at how well it turns out. Painting is the least work but gets noticed the biggest. To me bodywork is the toughest as getting it perfect just takes alot practice.
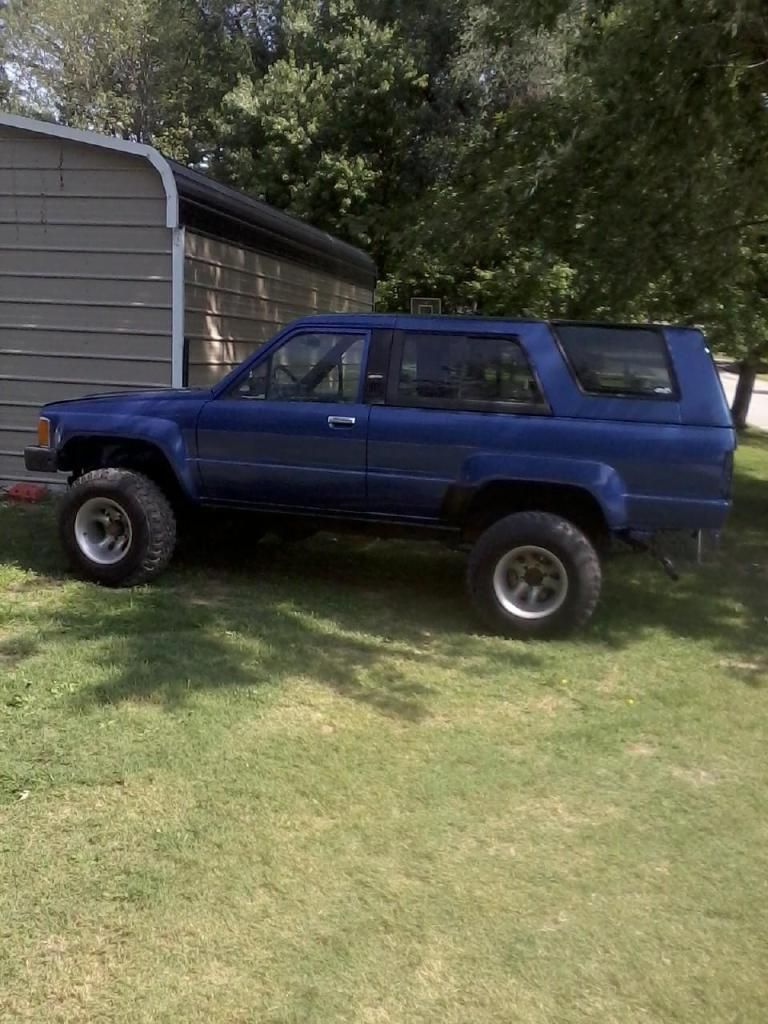
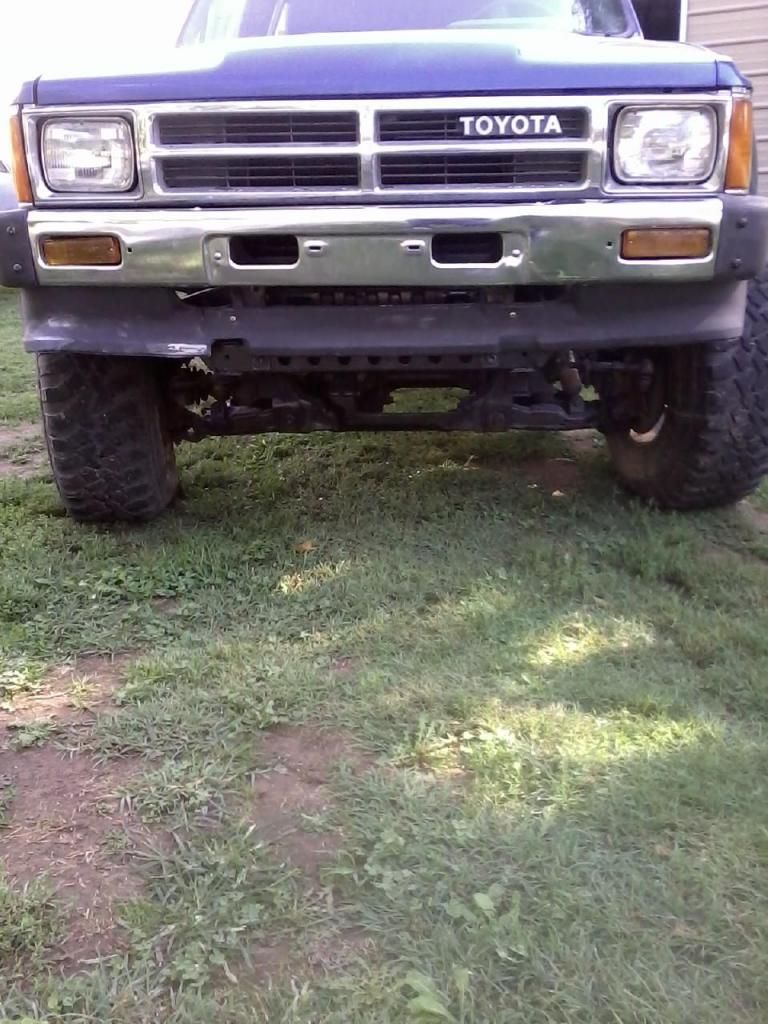
Hello Cyberhorn..I am hoping to get the rims looking alot better. Still dont have them where I want them to be just yet. The bumper is bent, just isnt as easily noticeable in the picture. Should of seen it before I worked on it. It will just be on until I can get a good bumper. I did alot on a vise with it as I am doing with the valance that I will show in my next post.
Hello Brandon..I got plenty to keep us busy wheter it is painting or wrenching. Got a motor that needs broke down and it is on the list to get done when the weather is to cold to do body work.
If you want that first gen cab or know of somebody who does, have them to come and get it. If not, let me know and when you get down this way I will get the core support,dash,head liner, steering column out of it. The center floor and body mounts are rusted out and found more rust that it just isnt fixable. It would work good for a crawler, but not for any restoration. Let me know a day or two before you come down this way and I will have the parts for you.
Hello Bill.. Glad to see you back and hope things heal up well for you. I got a long ways to go on it yet. I will write up a short and long term list soon. Also been working on the 88 pickup, just nothing picture worthy at this time but soon should be. The bumper lift brackets look familiar to you? Thanks again.
Thanks junk4u..I tried to take a few pics of the paint as it isnt as good as it is in the pictures. Has some bugs, paint runs, and orange peel on it. Today I worked on a part of it and am really happy at well it is cleaning up and smoothing out. It has been a work out and will be slow, but from what I got accomplished today is what I was hoping for when I first painted it.
Hello Mark...Still working on a name for it. Think I will drive it for a while and see what kind of personalities it comes up with. Something like coming back from the grave, but not deathly, Phoenix is an example. The metallic does do different colors on it. Couldnt afford pearl and not sure how that would of looked. Had a friend that had some pearl in his paint and that car was never the same color. Kind of radiated colors off of it.
Thanks Ed..Base coat/ clear coat isnt bad really. I go for a 50% overlap and go with several coats just to keep from getting runs in the base coat. On the clear coat, I do about the same. It will run easier but you can sand the runs with 2000 grit sandpaper and polish it out. It is the prep work that takes the effort. My equipment is cheapy stuff but works. Find an old panel and practice on it and you might be surprised at how well it turns out. Painting is the least work but gets noticed the biggest. To me bodywork is the toughest as getting it perfect just takes alot practice.
Hello Cyberhorn..I am hoping to get the rims looking alot better. Still dont have them where I want them to be just yet. The bumper is bent, just isnt as easily noticeable in the picture. Should of seen it before I worked on it. It will just be on until I can get a good bumper. I did alot on a vise with it as I am doing with the valance that I will show in my next post.
Hello Brandon..I got plenty to keep us busy wheter it is painting or wrenching. Got a motor that needs broke down and it is on the list to get done when the weather is to cold to do body work.
If you want that first gen cab or know of somebody who does, have them to come and get it. If not, let me know and when you get down this way I will get the core support,dash,head liner, steering column out of it. The center floor and body mounts are rusted out and found more rust that it just isnt fixable. It would work good for a crawler, but not for any restoration. Let me know a day or two before you come down this way and I will have the parts for you.
Hello Bill.. Glad to see you back and hope things heal up well for you. I got a long ways to go on it yet. I will write up a short and long term list soon. Also been working on the 88 pickup, just nothing picture worthy at this time but soon should be. The bumper lift brackets look familiar to you? Thanks again.
Thanks junk4u..I tried to take a few pics of the paint as it isnt as good as it is in the pictures. Has some bugs, paint runs, and orange peel on it. Today I worked on a part of it and am really happy at well it is cleaning up and smoothing out. It has been a work out and will be slow, but from what I got accomplished today is what I was hoping for when I first painted it.
09-26-2012, 01:06 AM
#710
Super Moderator
Staff
Thread Starter
iTrader: (1)
Join Date: Aug 2008
Location: Anderson Missouri
Posts: 11,788
Likes: 0
Received 25 Likes
on
22 Posts
Today I got a little time to work on the passenger side tail panel. It is the worse on the paint runs, orange peel and bugs. I used 2000 grit wet paper and it is cleaning up well. Got 2 runs out of it, the orange peel is smoothing out really well and where I had 3 bugs to land, I can only find a small speck of where he used to be and I really have to look for it. Most probably couldnt find it. I will try to get some pics of the finished and unfinished part of the paint.
I am starting to get the "feel" for wetsanding the clear coat back and think it will speed up faster the more that I work on it. Also this panel is the worse part of it. All of the rest are in better condition. When I get a section done and get to add the tail light or piece that belongs in that area, it is one step closer to being done.
Thing will slow down for a little bit as I have a distant family member in the hospital and others are in to visit. I am also having to get back into shape as I have a Physical Fitness Test to take and at this time should have no problems failing it with flying colors for the guards.lol. When I was younger passing it was easy, not so much now. I have to work at it. I do not care for exercising but it has to be done.
But I am determined to get a little bit of time on it each day. Plan on calling the insurance tomorrow and maybe Friday getting it inspected and tagged. Will go with generic tags but eventually want to get personal tags possibly "86 4RNR" or something along those lines.
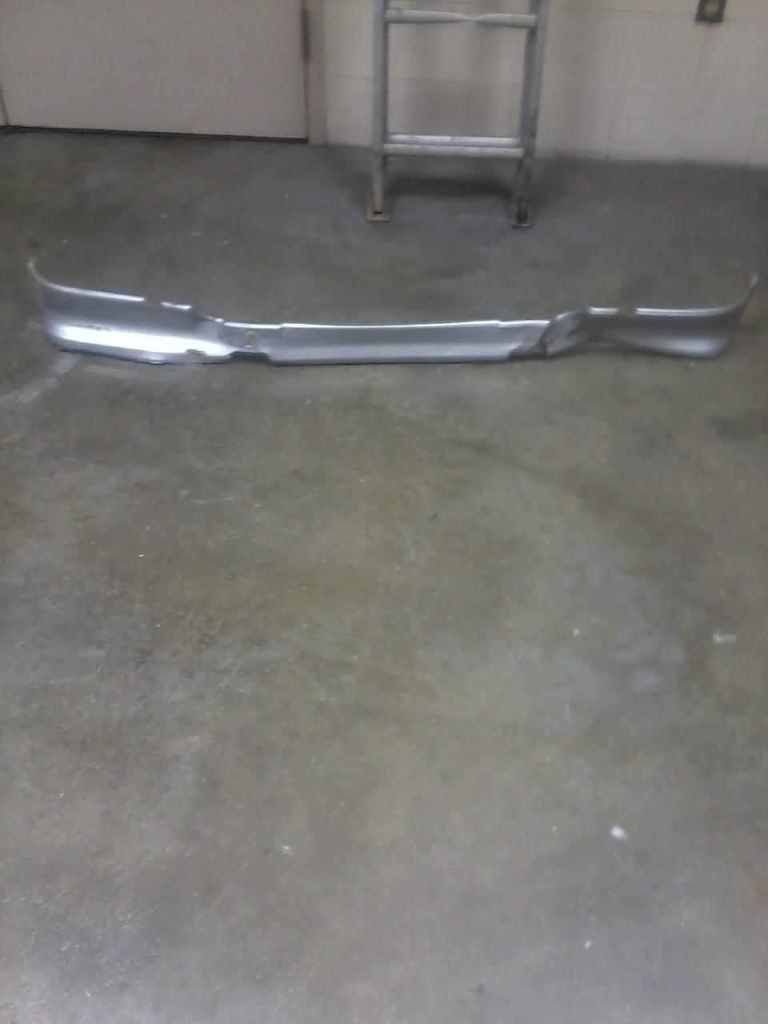
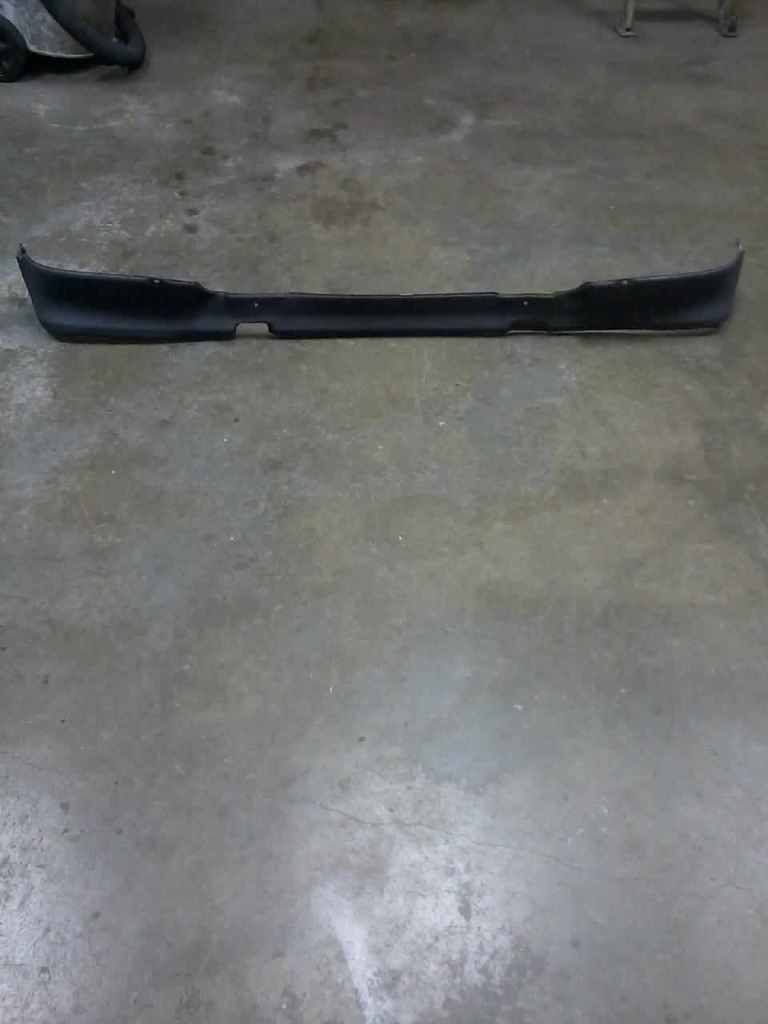
I will buy a replacement valance at a later time but I have a bent one that I will clean up and paint that will work for the time being. It will get replaced though, it actually straightened out real well.
Bent up
High tech straightening device. I have saved a few valances in the past this way just by going along the edges and clamping the vice to get things straight again. Using the jack handle helped to get it flat again.
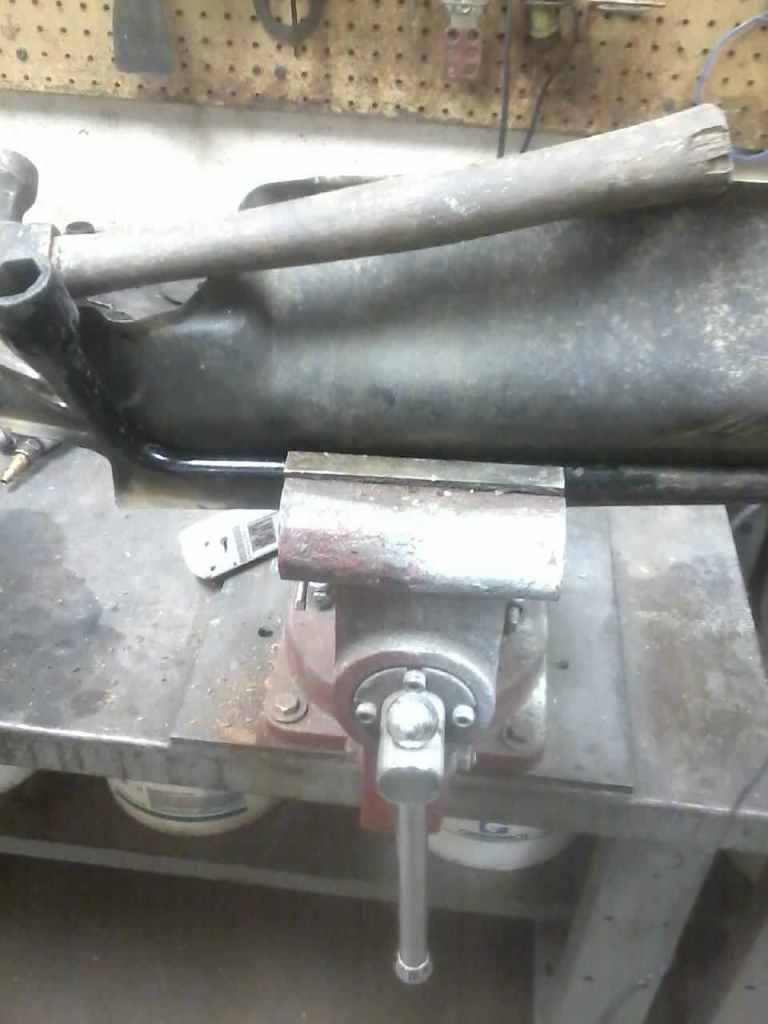
Will mount on the truck and do a little more work to it. It will look alright til I can get a new one. Has a little twist to it, but should straighten out when mounted.
I am starting to get the "feel" for wetsanding the clear coat back and think it will speed up faster the more that I work on it. Also this panel is the worse part of it. All of the rest are in better condition. When I get a section done and get to add the tail light or piece that belongs in that area, it is one step closer to being done.
Thing will slow down for a little bit as I have a distant family member in the hospital and others are in to visit. I am also having to get back into shape as I have a Physical Fitness Test to take and at this time should have no problems failing it with flying colors for the guards.lol. When I was younger passing it was easy, not so much now. I have to work at it. I do not care for exercising but it has to be done.
But I am determined to get a little bit of time on it each day. Plan on calling the insurance tomorrow and maybe Friday getting it inspected and tagged. Will go with generic tags but eventually want to get personal tags possibly "86 4RNR" or something along those lines.
I will buy a replacement valance at a later time but I have a bent one that I will clean up and paint that will work for the time being. It will get replaced though, it actually straightened out real well.
Bent up
High tech straightening device. I have saved a few valances in the past this way just by going along the edges and clamping the vice to get things straight again. Using the jack handle helped to get it flat again.
Will mount on the truck and do a little more work to it. It will look alright til I can get a new one. Has a little twist to it, but should straighten out when mounted.
09-26-2012, 09:42 PM
#712
Great work, buddy!
MAN, you think of all kinds of 'hey, I can use THAT!' type things like I do! hahaa.... I used those water bottles to paint the hubs, ya know? And it got me how so many people were like "WOW, great idea!" hahaha.... I think of that kinda crap all the time, like something to hold up the hose at an angle so it will spray over something onto a wide area, etc.... (Used a hard rake with a solar light planting post/spike, stood the rake up and slid the hose into the rake teeth, then turned it a couple times over an hour to cover the whole area... LOTS of plants I have can't get wet DIRECTLY... so I have to shoot over them, ya know?
  )
)
Terry...... Your tailgate seal and a couple other goodies are on the way! Jason picked them up, today
ANDDDDDDDDDD, .... I found a 94 that was formerly 'window up' in back, the other day.... today it was down, someone had removed the panel and lowered the window and then pulled the latches manually and opened it! I LEARNED HOW it works now! hahaha... Anyway, I got BOTH CABLES... 2$ EACH! And they're PRISTINE!
Then I went and got both rear panel rock guards for Jason... /..... Also got him some 'badges' for the Badge Pillars .........
AND, from reading your removalinstructions on the side windows...(sliders)... I removed a pair of PERFECT/RUST FREE/TOTALLY FLAWLESS '''L-TRIM''' ..... Was gonna ask you what I can ask for them without being a jerk? hahaha. I've seen a couple guys on here, whom I wont mention, selling really clean ones like this for 50-80$ for the pair..... BUT, then, there's guys like this..........>>>>
http://www.ebay.com/itm/1984-1989-To...sories&vxp=mtr
WHAT THE HECK-FIRE??????? hahaha.. (and HIS ARE FLAWED, unlike mine! ) I could get a PERFECTLY decent shell for that much, man! HOWEVER..... those ship... a shell does not(not for under 200$ I would guess! lol. NEVER should have sold my 86's Shell, the one I wrecked when it was off?)
MAN, you think of all kinds of 'hey, I can use THAT!' type things like I do! hahaa.... I used those water bottles to paint the hubs, ya know? And it got me how so many people were like "WOW, great idea!" hahaha.... I think of that kinda crap all the time, like something to hold up the hose at an angle so it will spray over something onto a wide area, etc.... (Used a hard rake with a solar light planting post/spike, stood the rake up and slid the hose into the rake teeth, then turned it a couple times over an hour to cover the whole area...
LOTS of plants I have can't get wet DIRECTLY... so I have to shoot over them, ya know? )Terry...... Your tailgate seal and a couple other goodies are on the way! Jason picked them up, today
ANDDDDDDDDDD, .... I found a 94 that was formerly 'window up' in back, the other day.... today it was down, someone had removed the panel and lowered the window and then pulled the latches manually and opened it! I LEARNED HOW it works now! hahaha... Anyway, I got BOTH CABLES... 2$ EACH! And they're PRISTINE!
Then I went and got both rear panel rock guards for Jason... /..... Also got him some 'badges' for the Badge Pillars
......... AND, from reading your removalinstructions on the side windows...(sliders)... I removed a pair of PERFECT/RUST FREE/TOTALLY FLAWLESS '''L-TRIM'''
..... Was gonna ask you what I can ask for them without being a jerk? hahaha. I've seen a couple guys on here, whom I wont mention, selling really clean ones like this for 50-80$ for the pair..... BUT, then, there's guys like this..........>>>> http://www.ebay.com/itm/1984-1989-To...sories&vxp=mtr
WHAT THE HECK-FIRE??????? hahaha.. (and HIS ARE FLAWED, unlike mine!
) I could get a PERFECTLY decent shell for that much, man! HOWEVER..... those ship... a shell does not(not for under 200$ I would guess! lol. NEVER should have sold my 86's Shell, the one I wrecked when it was off?)
09-27-2012, 08:35 AM
#713
Super Moderator
Staff
Thread Starter
iTrader: (1)
Join Date: Aug 2008
Location: Anderson Missouri
Posts: 11,788
Likes: 0
Received 25 Likes
on
22 Posts
Hello Cyberhorn.. Thanks for the valance, I couldnt find the rear bumper and didnt want to wake you or would of gotten it too.lol
Hello Mark..Thanks for the seal. appreciate it. $2 for cable is cheap. I would grab all that I could find. I have practiced taking things abpart in the boneyard when I need to do something on mine that I need to and do it without destroying it.
I seen that goof butt selling them for $160 along time ago. There is another guy out of Barnsdall NC, I think, who is way over priced.
I can get a whole dash apart in about 20 minutes in a boneyard. Start at the speedo bezel, then the lower part, glove box, passenger speaker,glove box, ash tray then the main support. Stereos can slow you down. Learned that in the a boneyard.
09-27-2012, 08:42 AM
#714
Super Moderator
Staff
Thread Starter
iTrader: (1)
Join Date: Aug 2008
Location: Anderson Missouri
Posts: 11,788
Likes: 0
Received 25 Likes
on
22 Posts
Getting alot of small things done. Will update later. Just came in to let some things dry or set up.
I got to go to the boneyard and get the support for the sides of the bumper caps. Coming along better then I thought. Will use this one instead of eplacing it.
Got these on. The white paint looks better on screen then in person. Will work on it later.
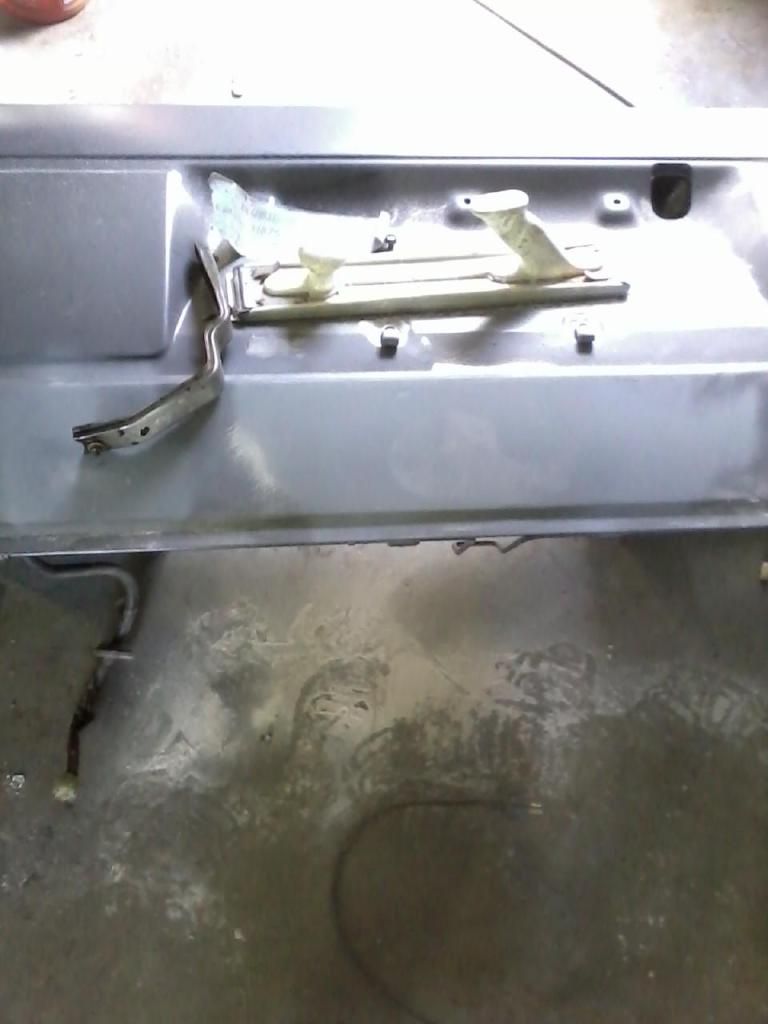
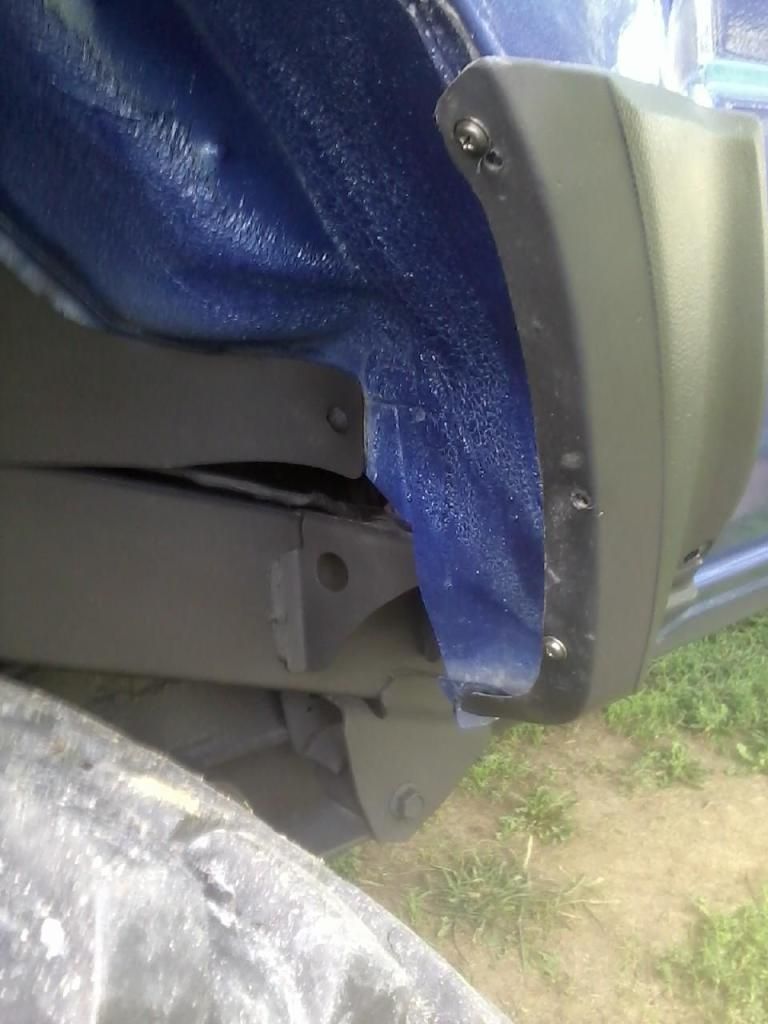
Bumper cap bracket that I need and getting the tail gate done.
Covered overspray on fram.
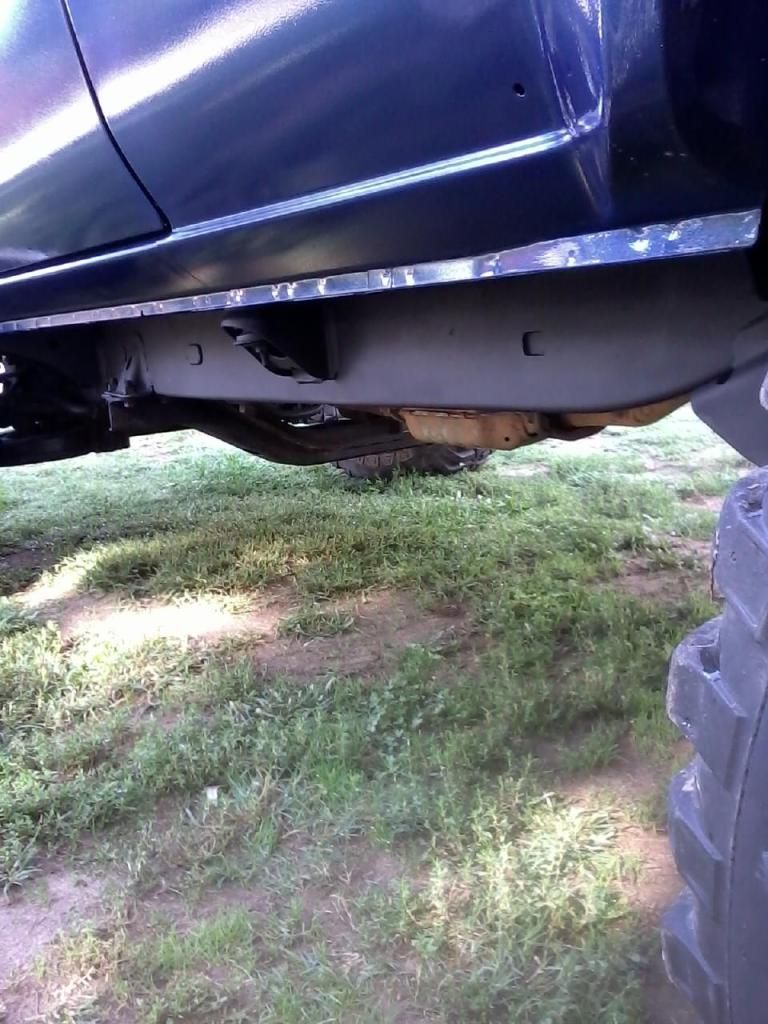
Got under rear fenders.
Tail lights in. Still need some more screws for them, but they ae done. Bad reflection on top. Got alot of the wetsanding done on rear.
I got to go to the boneyard and get the support for the sides of the bumper caps. Coming along better then I thought. Will use this one instead of eplacing it.
Got these on. The white paint looks better on screen then in person. Will work on it later.
Bumper cap bracket that I need and getting the tail gate done.
Covered overspray on fram.
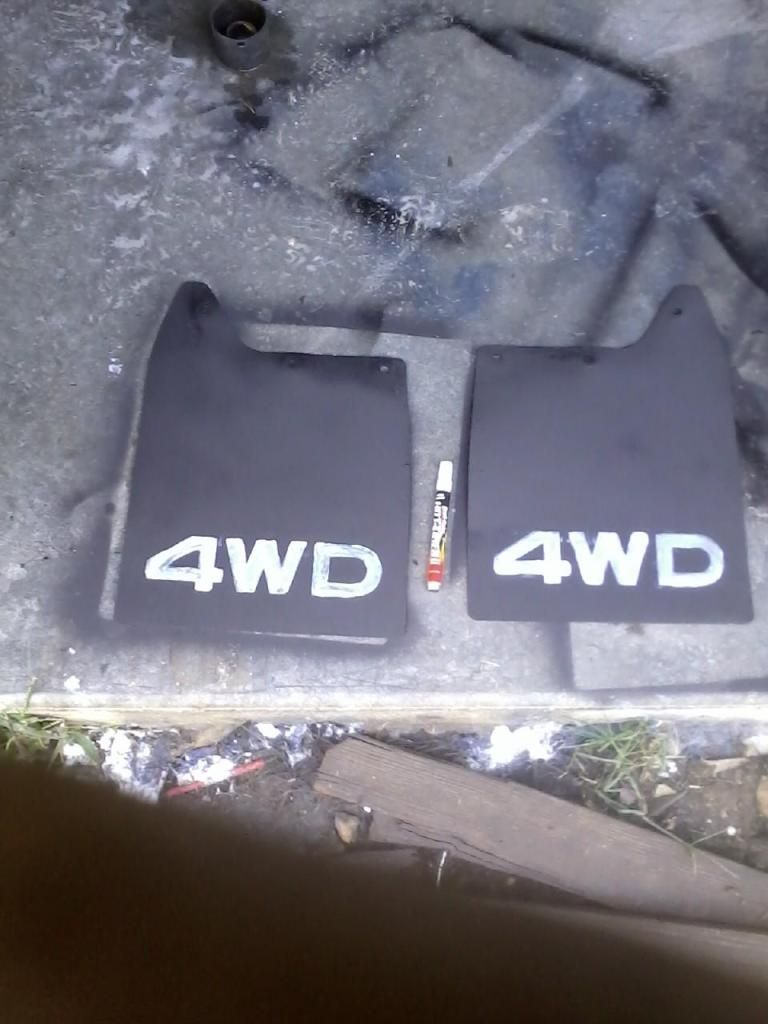
Got under rear fenders.
Tail lights in. Still need some more screws for them, but they ae done. Bad reflection on top. Got alot of the wetsanding done on rear.
Last edited by Terrys87; 09-18-2014 at 04:03 AM.
09-27-2012, 01:05 PM
#717
Registered User
Terry I hate to say this but yeah I want it!!!!!!!!!!! me and a bud was thinking about extending the cab of mine.....so...that would make it super easy.....
09-27-2012, 03:22 PM
#718
Super Moderator
Staff
Thread Starter
iTrader: (1)
Join Date: Aug 2008
Location: Anderson Missouri
Posts: 11,788
Likes: 0
Received 25 Likes
on
22 Posts
Hello Brandon...I will leave it intact for you. The back half is solid. There is no hurry so when ever works for you.
09-27-2012, 03:37 PM
#719
Super Moderator
Staff
Thread Starter
iTrader: (1)
Join Date: Aug 2008
Location: Anderson Missouri
Posts: 11,788
Likes: 0
Received 25 Likes
on
22 Posts
If all goes well, I will get go get insurance on it and catching my agent can be a problem as he likes to take off early on Fridays, which wouldnt be a problem, but I need proof of insurance. May be the home office can fax me proof.
Then I need to go to the hardware store and find some screws to hold the light covers on. Of the 50,000 nuts and bolts I have, I can never find lense screws and it isnt like I havent looked.
Then head to the inspection station and it will pass, still need to put on the wipers, but will show him that they work and I have a set. He will pass me, at the worse, I put them on there as I still need to wet sand the front doors, hood, and cowl.
Then go get my tags, Wahoo!! It has brakes, but they are spongy, so I wont be driving it just yet. I got the valance looking really well, I will still replace it but it only has a couple of flaws in it and it will work til I can by a new one. They arent to much on ebay.
If all goes well I will paint the tailgate and valalnce tomorrow. Wish I would of gotten the tailgate rightthe first time. Grr... My only worry is I am hoping the paint matches the rest of the rear end. I still have the exact same materials that I painted the rest of the truck with so should be alright.
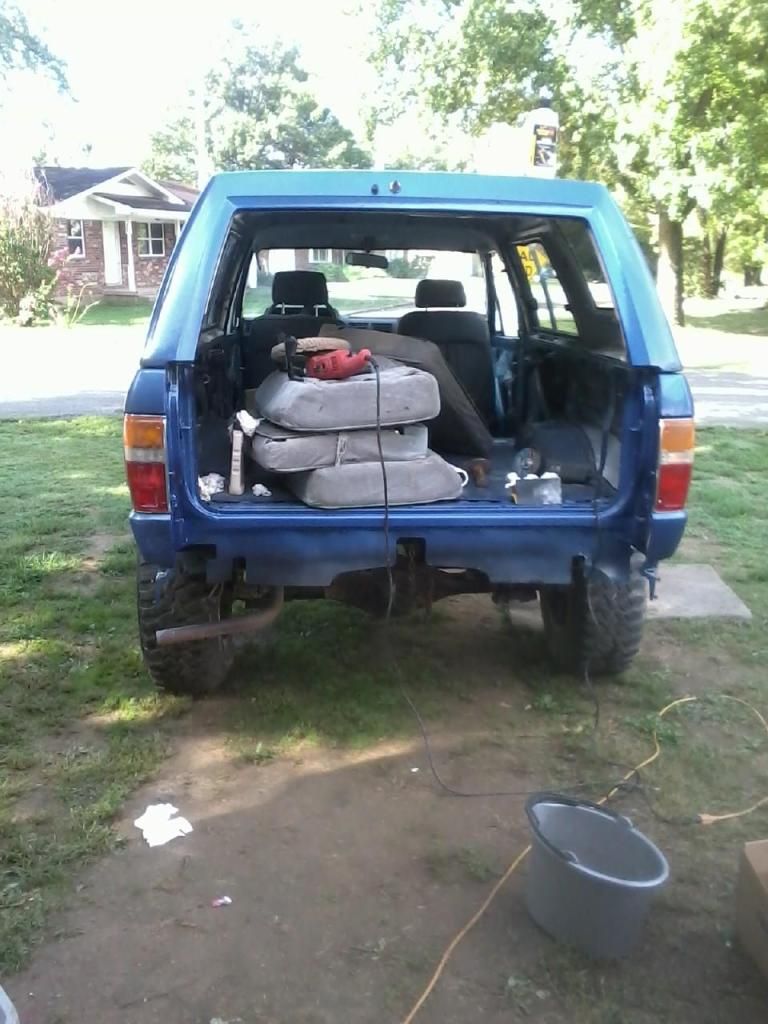
Doesnt look like it, but I started at 5 am this morning and it is 6:30 pm. Got from behind the doors wetsanded and buffed, overspray taken care of, tail lights in,front blinker working, tailgate is ready for paint, most of the front end trim tightended up for driving, the side skirts on, rock guards on, rear mud flaps on, spent alot of time getting the valance in better shape. Sure there is somethings I missed but it is more then it looks. Mostly small things. I was wanting to blacken in the "L" trims and didnt get it done. Planning on getting up early in the morning and working on them while waiting for everything to open.
Then I need to go to the hardware store and find some screws to hold the light covers on. Of the 50,000 nuts and bolts I have, I can never find lense screws and it isnt like I havent looked.
Then head to the inspection station and it will pass, still need to put on the wipers, but will show him that they work and I have a set. He will pass me, at the worse, I put them on there as I still need to wet sand the front doors, hood, and cowl.
Then go get my tags, Wahoo!! It has brakes, but they are spongy, so I wont be driving it just yet. I got the valance looking really well, I will still replace it but it only has a couple of flaws in it and it will work til I can by a new one. They arent to much on ebay.
If all goes well I will paint the tailgate and valalnce tomorrow. Wish I would of gotten the tailgate rightthe first time. Grr... My only worry is I am hoping the paint matches the rest of the rear end. I still have the exact same materials that I painted the rest of the truck with so should be alright.
Doesnt look like it, but I started at 5 am this morning and it is 6:30 pm. Got from behind the doors wetsanded and buffed, overspray taken care of, tail lights in,front blinker working, tailgate is ready for paint, most of the front end trim tightended up for driving, the side skirts on, rock guards on, rear mud flaps on, spent alot of time getting the valance in better shape. Sure there is somethings I missed but it is more then it looks. Mostly small things. I was wanting to blacken in the "L" trims and didnt get it done. Planning on getting up early in the morning and working on them while waiting for everything to open.
Last edited by Terrys87; 09-27-2012 at 03:39 PM.
09-27-2012, 03:57 PM
#720
Registered User
Terry, the 4Runner looks phenomenal. Seriously, one of greatest transformations I've ever seen, anyone else would have used that rig for parts. Be proud, man.


