
Terrys87 86 4Runner with a 2nd Chance

 09-12-2012, 12:07 PM
#622
Super Moderator
Staff
Thread Starter
iTrader: (1)
Join Date: Aug 2008
Location: Anderson Missouri
Posts: 11,788
Likes: 0
Received 25 Likes
on
22 Posts
Found 2 more small things and just have to finish the hood,tailgate, and the edges. Then I will start the wetsanding. Got all of the trim off except the door handles and the top. Top wont take long to prep.
Mark... Here is where one of the clips that could be causing you problems. Same ones that are under the hood.
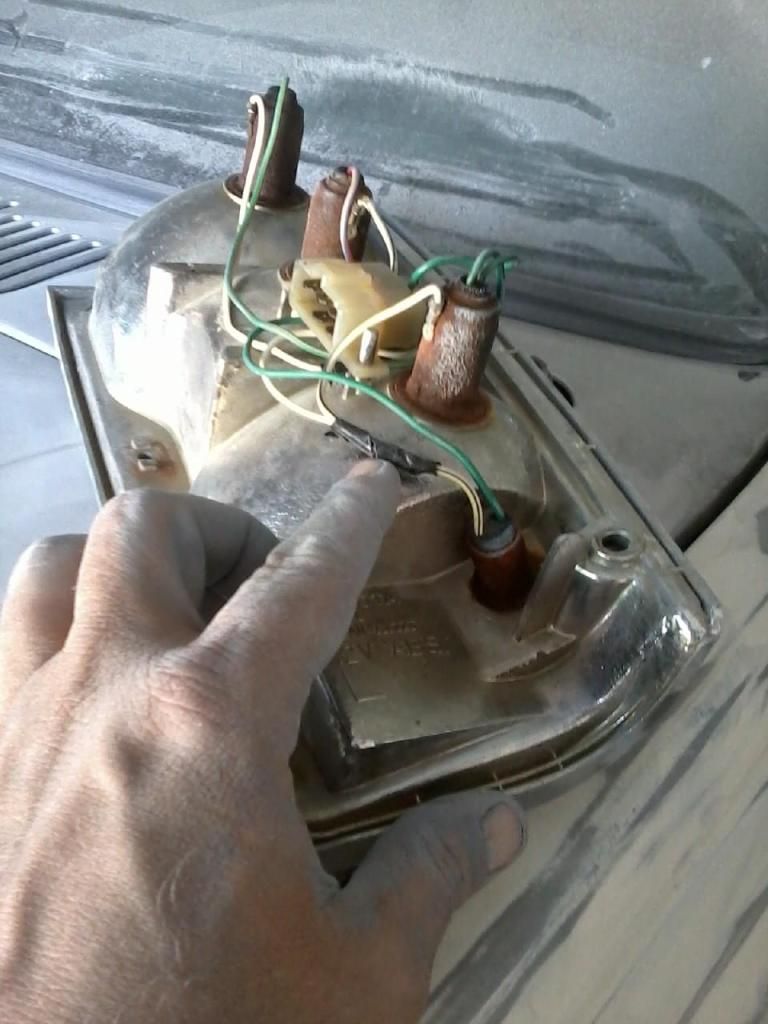
Here I can watch how fast the rotor moves. It is quick. Thanks Mr. Mouse, it is the last wire repair I have left. Will get to it eventually.
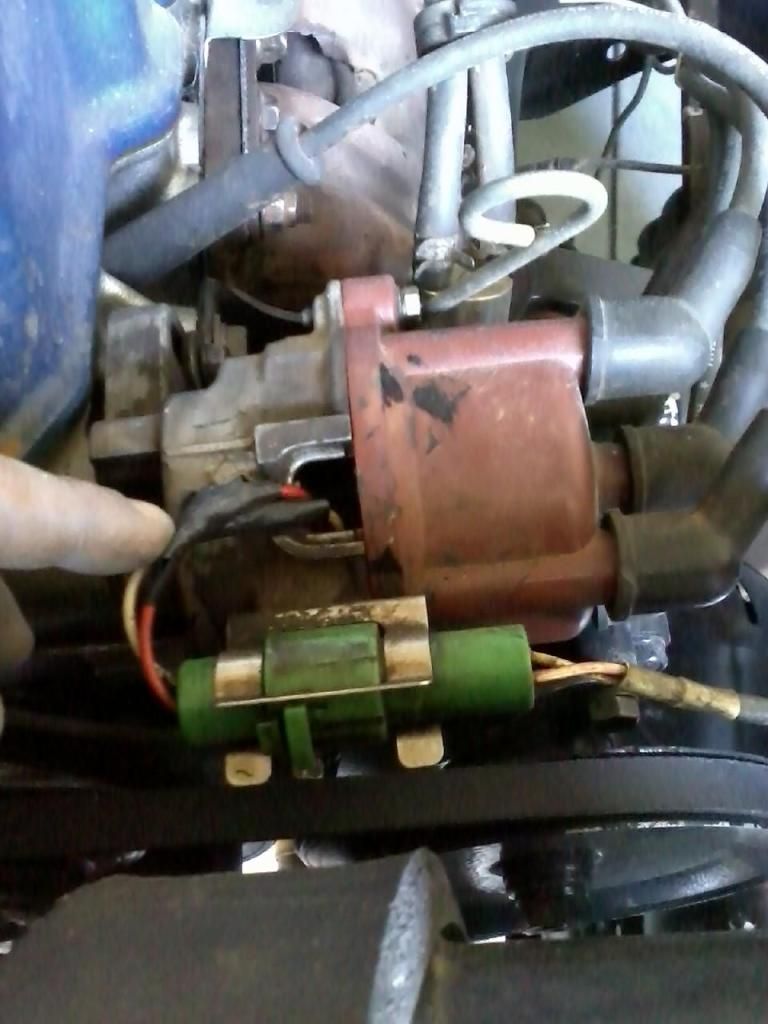
Mark... Here is where one of the clips that could be causing you problems. Same ones that are under the hood.
Here I can watch how fast the rotor moves. It is quick. Thanks Mr. Mouse, it is the last wire repair I have left. Will get to it eventually.
09-12-2012, 12:51 PM
#623
Ah hahhhhhhh, .... that COULD be the issue... i will look into it! Weird thing is, Terry.... When I pull the cover and tinker with the bulb...it'll come on. Plus, it doesn't seem to blow them out unusually fast.... I replaced one and then realized it was fine, lol. Should say "I bought some, did it in the parking lot... then realized when touching the original one it was fine. Just had to remove it and turn it back in... Came on and worked for weeks before needing a slap on the cover again! lol.
09-12-2012, 01:11 PM
#624
Registered User
chef, that could well be cheap bulbs not making good contact on the sockets pins check the bulbs make sure they have a nice raised button for the filaments some cheap bulbs have a tiny little contact point or one is higher than the other

09-12-2012, 01:26 PM
#625
Yep, both good ideas... And while I have NOTHING against upgrading wiring, etc.... I just have other projects right now... And I wanna get STARTED ON THEM!  hahahaa... BUT, honestly, that reverse thing.... and then a front marker bulb... and one brake light bulb... That's all I've had to replace in 12 years. OH, yeah, a headlight went out, lol.... After 10 years.
I put in those silverstars and I gotta say... NO, they're not those neato roundeyes light kits.... but seriously, they really do put out more light than the stock ones... DEFINITELY.
Looking at the 2nd Gen Map light next to the pics posted by bbordeau ........ I wonder if a simple 'self taping screw' mod might take those suckers in.. Hmm.... Maybe I will wait for dragon to do it? hahahaa. Jk... Only thing I don't understand really well is the rearview mirror.... How it goes in.
  I mean, it slops around in there.... I just pulled it out... nothing dramatic.. And it seemed tight until I pulled it out. HOW IS THAT HELD IN THERE? I know, silly question I should know, right? But, meh.... I'll trade info for humiliation any day! lol.
hahahaa... BUT, honestly, that reverse thing.... and then a front marker bulb... and one brake light bulb... That's all I've had to replace in 12 years. OH, yeah, a headlight went out, lol.... After 10 years. I put in those silverstars and I gotta say... NO, they're not those neato roundeyes light kits.... but seriously, they really do put out more light than the stock ones... DEFINITELY.
Looking at the 2nd Gen Map light next to the pics posted by bbordeau ........ I wonder if a simple 'self taping screw' mod might take those suckers in.. Hmm.... Maybe I will wait for dragon to do it?
hahahaa. Jk... Only thing I don't understand really well is the rearview mirror.... How it goes in. I mean, it slops around in there.... I just pulled it out... nothing dramatic.. And it seemed tight until I pulled it out. HOW IS THAT HELD IN THERE? I know, silly question I should know, right? But, meh.... I'll trade info for humiliation any day! lol.
09-12-2012, 01:34 PM
#627
Yeah, I can't find it... I have like 4500 Sub's.... gotta clean that up! lol. At least 100 on top are occasionally or OFTEN active... I just have a hard time letting go I guess  hahaha. No, jk... seriously need to clean up. I can't seem to get answers much anymore..... So not sure posting it on my thread will enlighten us as to who did that. I know people with NO map lights that have added them.. BUT, into 3rd Gen PU's........ Not 1st Gen 4Runners.
  Just can't remember who did it for the life of me, CHD!
hahaha. No, jk... seriously need to clean up. I can't seem to get answers much anymore..... So not sure posting it on my thread will enlighten us as to who did that. I know people with NO map lights that have added them.. BUT, into 3rd Gen PU's........ Not 1st Gen 4Runners. Just can't remember who did it for the life of me, CHD!
09-12-2012, 03:39 PM
#628
Registered User
Streetlancer put maplights in his 2nd gen pickup. I would bet the wiring is all the same. I thought all the wires were there for the dealer in case the original purchaser wanted to upgrade. Here's his great write up:
https://www.yotatech.com/forums/f199...thread-206158/
https://www.yotatech.com/forums/f199...thread-206158/
09-15-2012, 04:22 AM
#629
Super Moderator
Staff
Thread Starter
iTrader: (1)
Join Date: Aug 2008
Location: Anderson Missouri
Posts: 11,788
Likes: 0
Received 25 Likes
on
22 Posts
Hello Cyberhorn..I will look into it as I think the 2nd gens are a better light.
Hello Mark...I will look into Nervos post and see what I can come up with as well. I have been trying to save threads that intrest me as I have a tough time finding them when I want to try an upgrade. Been trying to add some of the links to my 88Runner when I come across them.
Thanks Nervo.. I will be looking into it when things slow down here a little.
09-15-2012, 04:38 AM
#630
Super Moderator
Staff
Thread Starter
iTrader: (1)
Join Date: Aug 2008
Location: Anderson Missouri
Posts: 11,788
Likes: 0
Received 25 Likes
on
22 Posts
Everybody around here has been wanting to go fishing and have one friend that has been wanting me to go with him for quite sometime and everything just never worked out. We finally went Thursday, and now we are getting alot of rain and I want to do some finer sanding and get things ready for paint.
If all goes as planned I will pick up the paint on Wednesday and hope to paint on Thursday if it isnt raining. It looks like rain off and on til Tuesday. I dont want to paint if it is humid. I am really hoping all goes as planned.
Did get back from fishing and have spent the past 2 days trying to get all of the dust out of the nooks and crannies of the shop and getting things that I dont want over spray on. I figure it is going to take the next few days to get the runner prepped and the shop ready as well. Some neighbors were having a moving sale and had a nice shop vac they were selling and the wifey picked it up for me along with some ratchet straps. Justin, my oldest just wouldnt wait to put it to use and helped for a few hours helping me to get the shop cleaned as well.
I have been cleaning and fixing some parts for the 85 occasionally and putting them in the back of the truck when I get them done, so when I do get to it, it will make it that much more quicker to put back together. It will have to sit outside for a few days. Now we are getting all of this rain and the windshield leaks bad on it, so I am having to move those items to where they will stay dry and try to get the windshield from leaking.
Hoping things dry out here the next few days and I can get the runner completely ready for Thursday. I am ready to get it done and put back togther. Still need to diasassemble the tailgate and finish the hood. It is just the final sanding and masking. Did find 3 more small spots I want to take care of and other then that I have tried to go over it well. One spot is giving me some trouble but think I about got it.
Getting there. Final prime, sand and masking. Hoping for Thursday.
Last edited by Terrys87; 09-15-2012 at 04:41 AM.
09-15-2012, 07:26 AM
#631
Registered User
Is it going to be bluebery? Here's a restoration site (besides the Toyota Reference site) that shows ALL the colors available by year. For mine there are three pages of variations for '89:
http://www.tcpglobal.com/autocolorlibrary/default.aspx
If you zoom in on the page that's all writing it has the PPG color codes for bumper and interior paint codes.
I wish I'd get on the stick. The weather here is perfect for paint. No rain and no humidity. There's been huge household projects taking my time and $$.
09-15-2012, 01:28 PM
#632
Super Moderator
Staff
Thread Starter
iTrader: (1)
Join Date: Aug 2008
Location: Anderson Missouri
Posts: 11,788
Likes: 0
Received 25 Likes
on
22 Posts
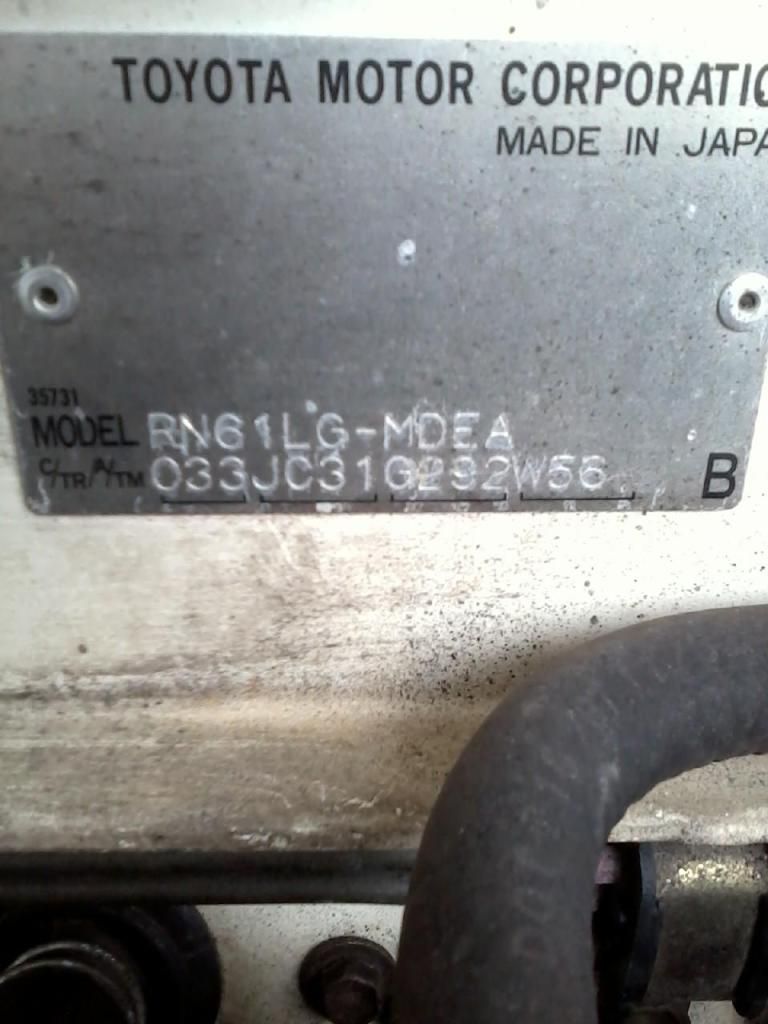
Thanks Nervo.. If I understand right. It is easiest to find the paint code on the firewall under the hood. I am sure there is a way to decipher out of the VIN. It is the C/TR code which mine is 033. I did paint my 88 Runner with the Toyota Super White which is 040. I do know for sure the last code is for the trannys in these truck which mine is the W56. I know yours is white as well. Glad to see you coming along.
Looking forward to seeing your rocker panels. That is one thing I want to learn to do is patch panels and whole quarter panels. I still am aquiring just the basics of tools but little by little I hope to get the tools needed to weld and cut.
I got to get busy as well, as I just have a feeling winter is going to come in quick this year. Just seems like it is cooler at night then normal. I still have to paint the pick up. Painting is actually the easy part, it is everything else that takes patience. I do have to have my nephew to set up my paint gun, but once he does that, I am on my own. Would be nice to have another set of eyes at times.
Here is the Trim Code ( I am sure??)
Here is what I am going for. I wont be doing the bottom black but it shows what the top will look like being blue instead of black.
09-15-2012, 02:40 PM
#634
I concur, Jason.... I can't wait to see his final result.
You've saved so much doing things the way you do...... Plus therein keeping them OEM for the most part.. You MUST be stoked when you don't have to bust through that budget you've probably got on them to do things that, well, just cost a lil more/have to come new, like paint !!!!! VERY impressed with all you've done and how you've done it... I mean that, I REALLY am excited to see this thing get her skin! lol. Is it the same blue as my 83? >>>
You've saved so much doing things the way you do...... Plus therein keeping them OEM for the most part.. You MUST be stoked when you don't have to bust through that budget you've probably got on them to do things that, well, just cost a lil more/have to come new, like paint
!!!!! VERY impressed with all you've done and how you've done it... I mean that, I REALLY am excited to see this thing get her skin! lol. Is it the same blue as my 83? >>>
09-16-2012, 11:54 AM
#637
Super Moderator
Staff
Thread Starter
iTrader: (1)
Join Date: Aug 2008
Location: Anderson Missouri
Posts: 11,788
Likes: 0
Received 25 Likes
on
22 Posts
Hello Jason... I am ready to get iti in one color. I think that will make it look like it is a runner again. For as straight as it is and as well it seems to run around here, I am chomping at the bits to get it going.
Hello Mark... I think it is the same color as your truck. I might be a slight shade off, but I want it close as I really dont want to get into a full color change. I notice jams and engine compartments. Hoping to have it look like it was a well cared for runner when finished. But really appreciate the compliment. This thing was in bad shape.
Most probably would of junked it, but I really dont have much wrapped up into it. I did orginally buy it for parts for the 88, and slowly accumilated parts for it as I came across them. I have had this project in the works for about 2 years or so. Mostly had just a good frame and body. Everything else has been worked on somewhere.
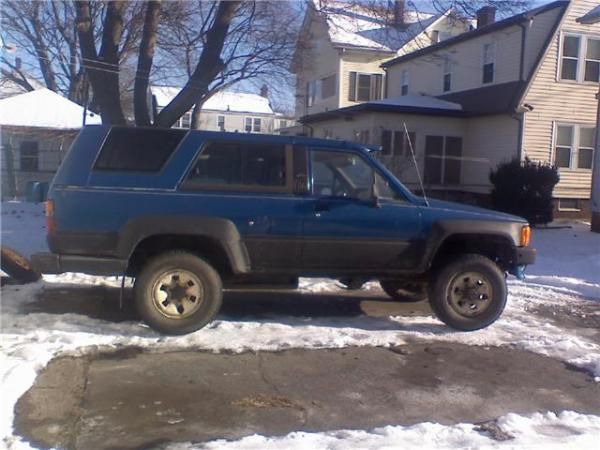
Thanks Cyberhorn... I am going to go blue with it. I want something that looks like it could of been factory, but sets it off a little bit different. I was going to paint the top blue all along and just happened to stumble into the blue pic above.
Hello junk4u...This one did come with the black top. I had thought of leaving it black, but think it will help be a little cooler in the summer. I think I will like the blue better, but if not it will be easy to switch it back to black. Seems like most them were trimmed out in black trimming where as I went with chrome.
Hello Mark... I think it is the same color as your truck. I might be a slight shade off, but I want it close as I really dont want to get into a full color change. I notice jams and engine compartments. Hoping to have it look like it was a well cared for runner when finished. But really appreciate the compliment. This thing was in bad shape.
Most probably would of junked it, but I really dont have much wrapped up into it. I did orginally buy it for parts for the 88, and slowly accumilated parts for it as I came across them. I have had this project in the works for about 2 years or so. Mostly had just a good frame and body. Everything else has been worked on somewhere.
Thanks Cyberhorn... I am going to go blue with it. I want something that looks like it could of been factory, but sets it off a little bit different. I was going to paint the top blue all along and just happened to stumble into the blue pic above.
Hello junk4u...This one did come with the black top. I had thought of leaving it black, but think it will help be a little cooler in the summer. I think I will like the blue better, but if not it will be easy to switch it back to black. Seems like most them were trimmed out in black trimming where as I went with chrome.
09-16-2012, 12:10 PM
#638
Super Moderator
Staff
Thread Starter
iTrader: (1)
Join Date: Aug 2008
Location: Anderson Missouri
Posts: 11,788
Likes: 0
Received 25 Likes
on
22 Posts
The weather is looking better as Wednesday or Thursday gets closer. Nothing really that looks different from before, but I would like to see what it would look like in black. Black shows imperfection and white hides it., it will be blue, just like to see how straight it really is. I have gone over it with a fine toothed comb and cant anything. Feeling really good about it.
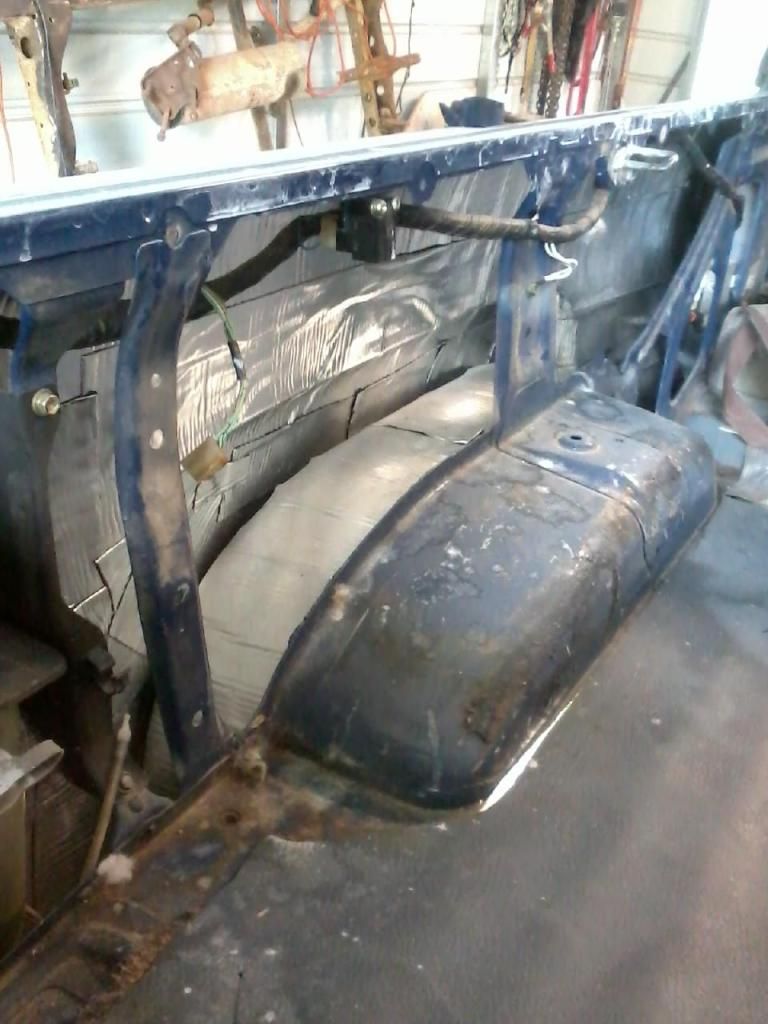
I was asked recently about how the Peel and Seal has held up in the 88 Runner and it is doing great, no pics as couldnt get a good view. Cant find anywhere that is peeling off or smells. Really like the results with it. I did the same thing with this truck. Here is a picture of it and it is about 4 months old. Got it stripped for paint, and it is still holding up well. I still need to insulate the doors and up to the firewall and front floor but have a patch that I need to do to fix a hole.
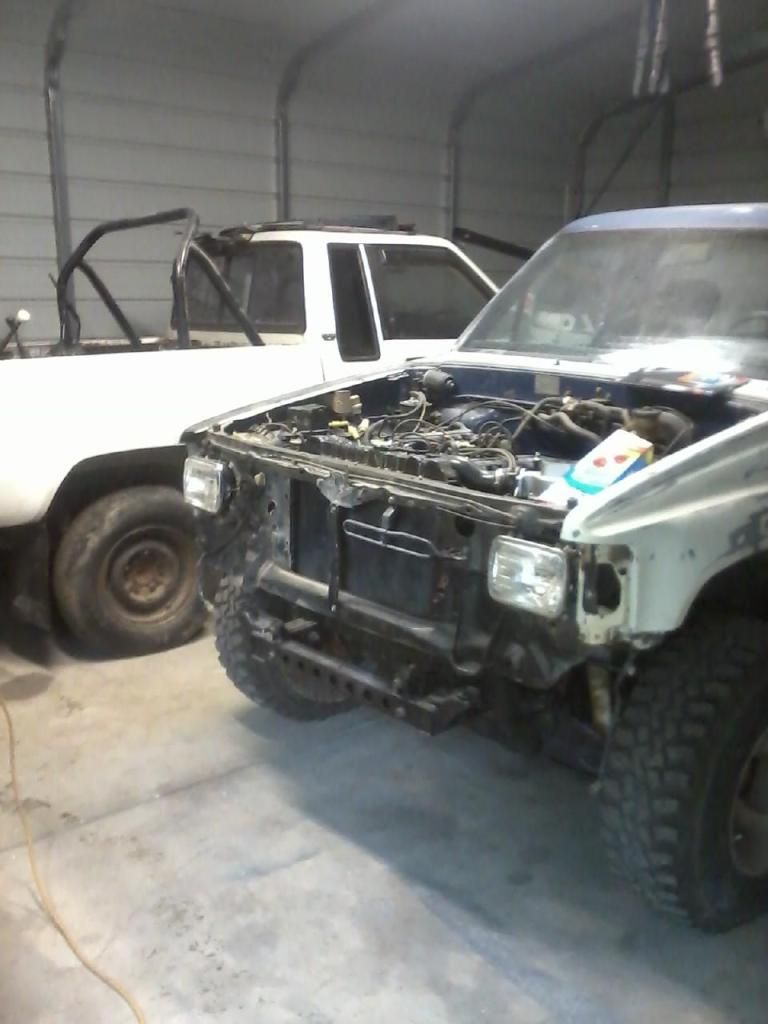
In the back ground you can see a frame that I am going to do a complete build from scratch. It is probably 2 years off and am gradually gettting parts for it as well. I want to do complete assembly on about everything I can do. Cab will be stripped and completely assembled. Kiddos have been runnign a wire brush on a drill cleaning it up.
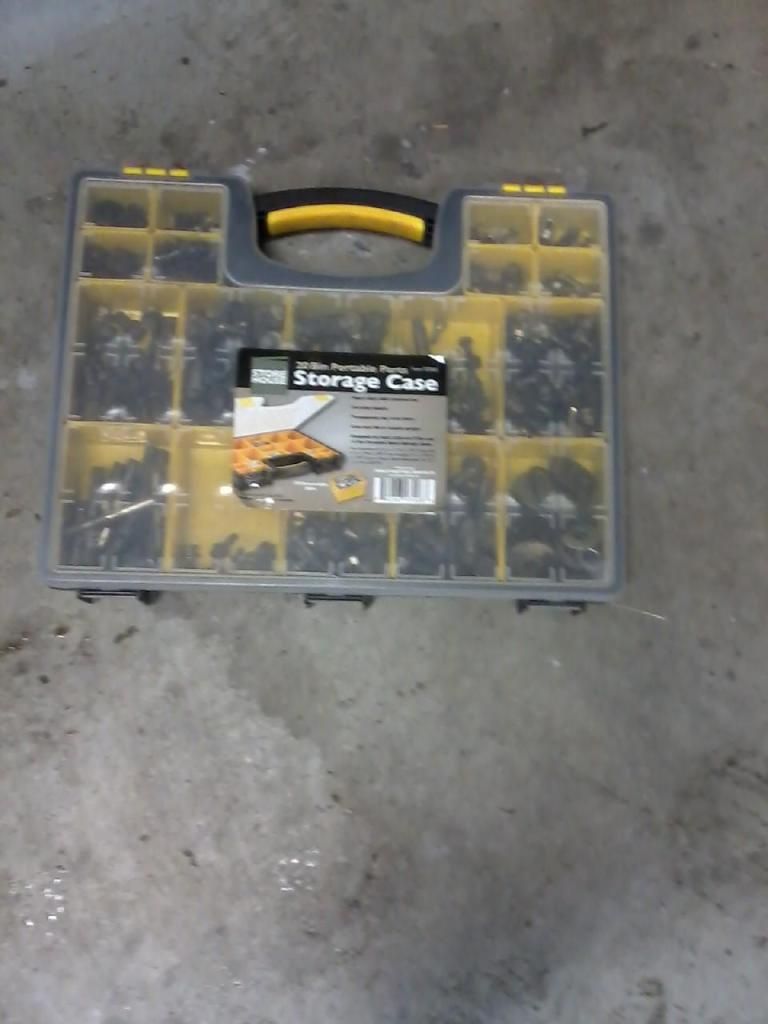
Was at HF and came across this storage bin for nuts and bolts. Works so much better then my little jar set up and makes assembling these so much easier. Will be getting another one for the other nuts and bolts that I have. Any time I am in the bone yard, I grab as many nuts and bolts I can get my hands on. Salvages are used to seeing me walk out with jars of them. It makes life a lot easier with these builds.
I was asked recently about how the Peel and Seal has held up in the 88 Runner and it is doing great, no pics as couldnt get a good view. Cant find anywhere that is peeling off or smells. Really like the results with it. I did the same thing with this truck. Here is a picture of it and it is about 4 months old. Got it stripped for paint, and it is still holding up well. I still need to insulate the doors and up to the firewall and front floor but have a patch that I need to do to fix a hole.
In the back ground you can see a frame that I am going to do a complete build from scratch. It is probably 2 years off and am gradually gettting parts for it as well. I want to do complete assembly on about everything I can do. Cab will be stripped and completely assembled. Kiddos have been runnign a wire brush on a drill cleaning it up.
Was at HF and came across this storage bin for nuts and bolts. Works so much better then my little jar set up and makes assembling these so much easier. Will be getting another one for the other nuts and bolts that I have. Any time I am in the bone yard, I grab as many nuts and bolts I can get my hands on. Salvages are used to seeing me walk out with jars of them. It makes life a lot easier with these builds.
09-16-2012, 12:13 PM
#639
That's EXACTLY the type case I was trying to tell someone to grab on my build a bit back... I have 2, one that's a BIT LARGER, .... like 18x22"... Another that's deep recessed but around 12x16".... SO HANDY! I have all my spare clips and wiring loom organizers and OEM YOTA Hose clamps, etc., etc.
THAT REMINDS ME.... I need to go tell Richard/Redeth something, lol... L8r t8r, ...keep up the FANTASTICAL work!
THAT REMINDS ME.... I need to go tell Richard/Redeth something, lol... L8r t8r, ...keep up the FANTASTICAL work!
09-16-2012, 05:34 PM
#640
Registered User
after much hunting i found enough bolts to put things back together on mine (fender ect) i sure could use oh half of the bolts an ect you've got in that kit terry i am envious! makes grabby hands GIVE IT!
is that more of the peel an seal in the picture above it terry? lots of layers
is that more of the peel an seal in the picture above it terry? lots of layers


