
Terrys87 86 4Runner with a 2nd Chance
 09-07-2012, 11:22 AM
#601
I heard some tings! lol.....
Actually, I've heard the OEM last many years longer.... I think mine worked up to 2006.... Then it wanted to come up past and the whole mast would fall over and hang there, lol.... So I'd have to get it JUSTTTTTTTT right, put it back in, put it down about half inch with tape on it, etc... BUT, it lasted 20 years... Not bad.
BUT, I remember reading some 'online antenna' store that the guys pride themselves in their Mast Replacements for OEM Antennas that have broken. I know they sell masts at Pep-Boys..... and they have them for certain brands, etc. But not usually going back that far. ........ We'll see, lol.
Actually, I've heard the OEM last many years longer.... I think mine worked up to 2006.... Then it wanted to come up past and the whole mast would fall over and hang there, lol.... So I'd have to get it JUSTTTTTTTT right, put it back in, put it down about half inch with tape on it, etc... BUT, it lasted 20 years... Not bad.
BUT, I remember reading some 'online antenna' store that the guys pride themselves in their Mast Replacements for OEM Antennas that have broken. I know they sell masts at Pep-Boys..... and they have them for certain brands, etc. But not usually going back that far.
........ We'll see, lol.
 09-07-2012, 04:39 PM
#602
Super Moderator
Staff
Thread Starter
iTrader: (1)
Join Date: Aug 2008
Location: Anderson Missouri
Posts: 11,788
Likes: 0
Received 25 Likes
on
22 Posts
HEY, Terry.... GREAT work, as usual!
BTW, I wanted to mention before forgetting; While fishing around in this gutted 4runner, I realized it had a "Underhood Light"........ It was a high temp resistant thingy with a screw cap lid with EXTRA WIRE on the actual light....which had a hook right off it... GENIUS, seriously.. it was back by the Charcoal can and you could flip the toggle and then pull off the light and cover and have all this extra wire ..... then hang it over the engine wherever you're working! The lens was badly cracked, but I LOVED this idea... Been wanting a NICE AND BRIGHT engine work/check oil light for the night time, especially when camping/setting up stuff off the battery, etc., ya know? Where you think they have those? Have you seen one?
BTW, I wanted to mention before forgetting; While fishing around in this gutted 4runner, I realized it had a "Underhood Light"........ It was a high temp resistant thingy with a screw cap lid with EXTRA WIRE on the actual light....which had a hook right off it... GENIUS, seriously.. it was back by the Charcoal can and you could flip the toggle and then pull off the light and cover and have all this extra wire ..... then hang it over the engine wherever you're working! The lens was badly cracked, but I LOVED this idea... Been wanting a NICE AND BRIGHT engine work/check oil light for the night time, especially when camping/setting up stuff off the battery, etc., ya know? Where you think they have those? Have you seen one?
Nice progress Terry on all your builds, really wish I could find time to get to mine. I will be doing some rereading on your builds when I finally get around to mine.
Chef I had one of those lights that was factory on my 96 Silverado, and believe me it came in handy many times. If I remember correctly it had appr. 5 feet of line.
Chef I had one of those lights that was factory on my 96 Silverado, and believe me it came in handy many times. If I remember correctly it had appr. 5 feet of line.
outsane: i replaced the lady of the houses 90's runner with one from ebay it wasnt hugely expensive an works perfectly want hard to do either came with instructions about a 20-30 min job as ya have to take the inner fender liner aside to get into the antenna motor to let the old shaft free tne feed the new one in from above
Here is a link to what I found for the motorized antenna. I tried to get the picture of it but couldnt figure that part out. Normally I have typed in the part number on different search engines and usually get a distributor. On this search I could not get one thing to come up. Maybe I am doing something wrong. Seems like when ebay changed their search, I really struggle to find things I know that are there.
Link>>> http://www.utoyot8.com/FullImage.asp...nfo=(8308-++++)
8308-8404
09-07-2012, 04:50 PM
#603
Super Moderator
Staff
Thread Starter
iTrader: (1)
Join Date: Aug 2008
Location: Anderson Missouri
Posts: 11,788
Likes: 0
Received 25 Likes
on
22 Posts
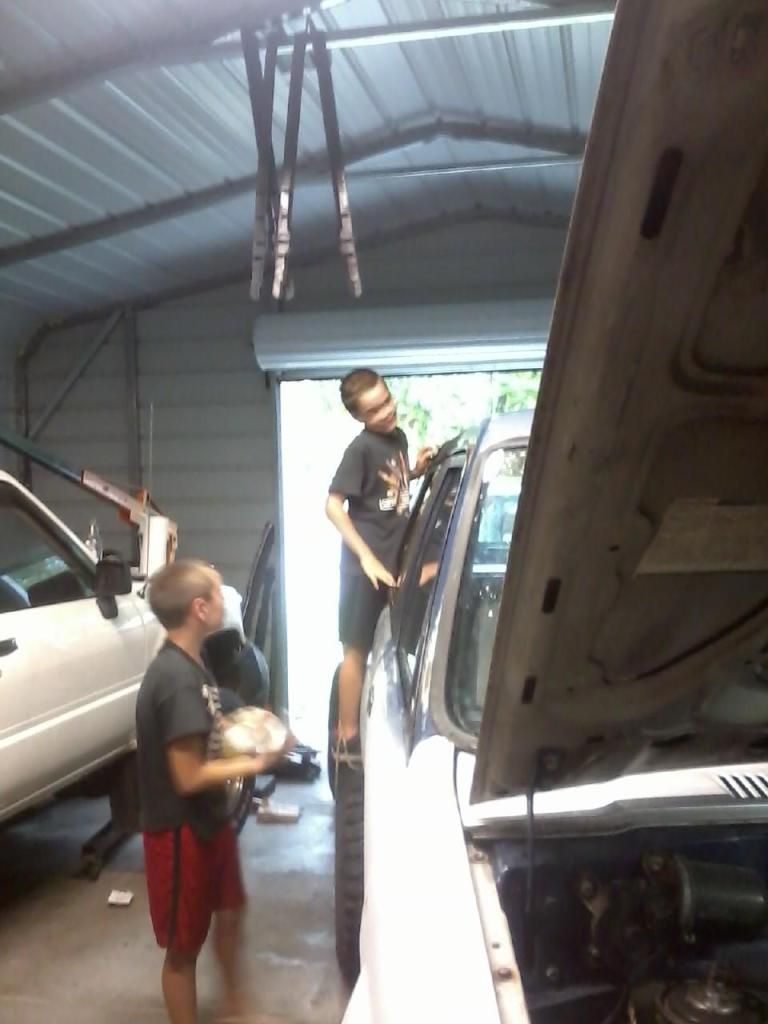
I got the runner home and even the boys are startng to get excited to see this on the road. I had a tail light and a blinker not working. Just had to clean the tail light connector to get the bulb to working. On the blinker, I am not gettting a good connection on the ground wire. You cant tell in the picture, but using a test light and a light from the 85, it would work. Probably will have to replace the blinker assembly.
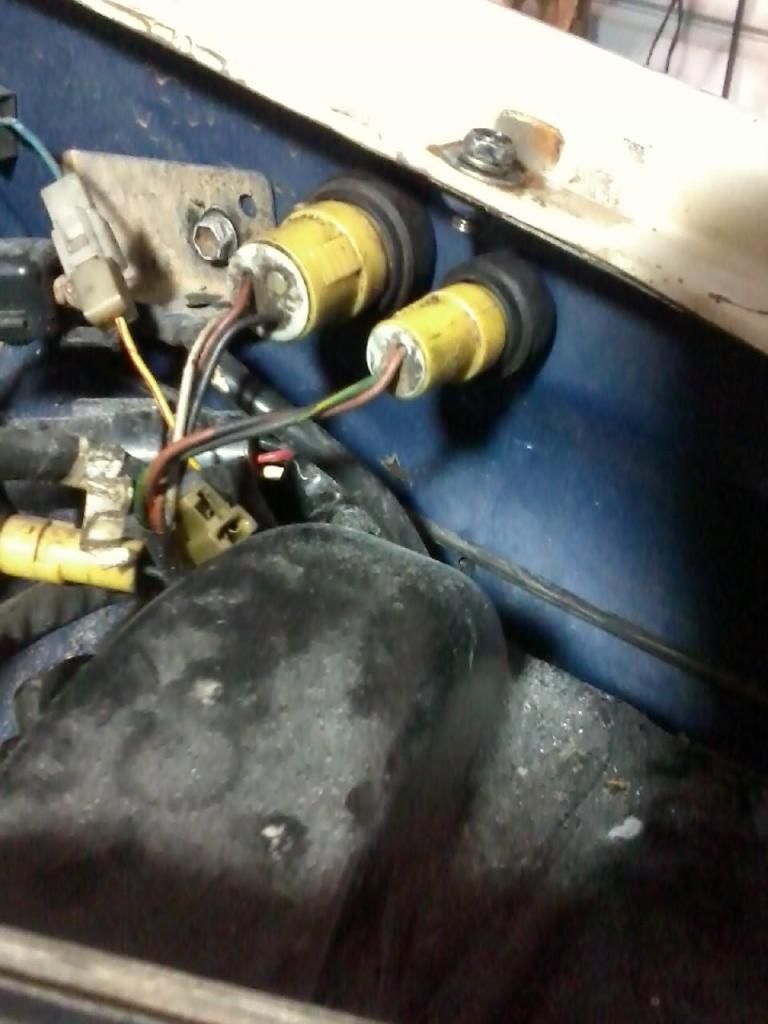
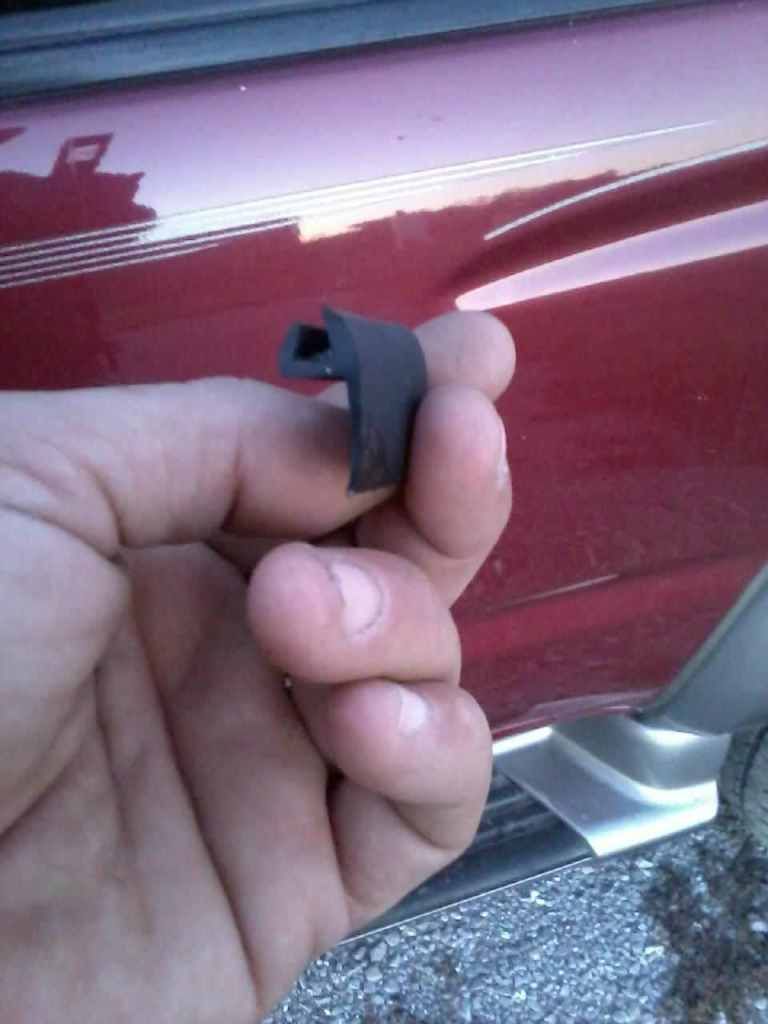
Also a while back I found some rubber caps that hold the two plugs on the drivers side. This is only for the 85 and 86 trucks. Thought I would post so other might find some out there some where. I didnt know about them until farily recently.
Brats glad to see it home.
Rubber caps I am talking about.
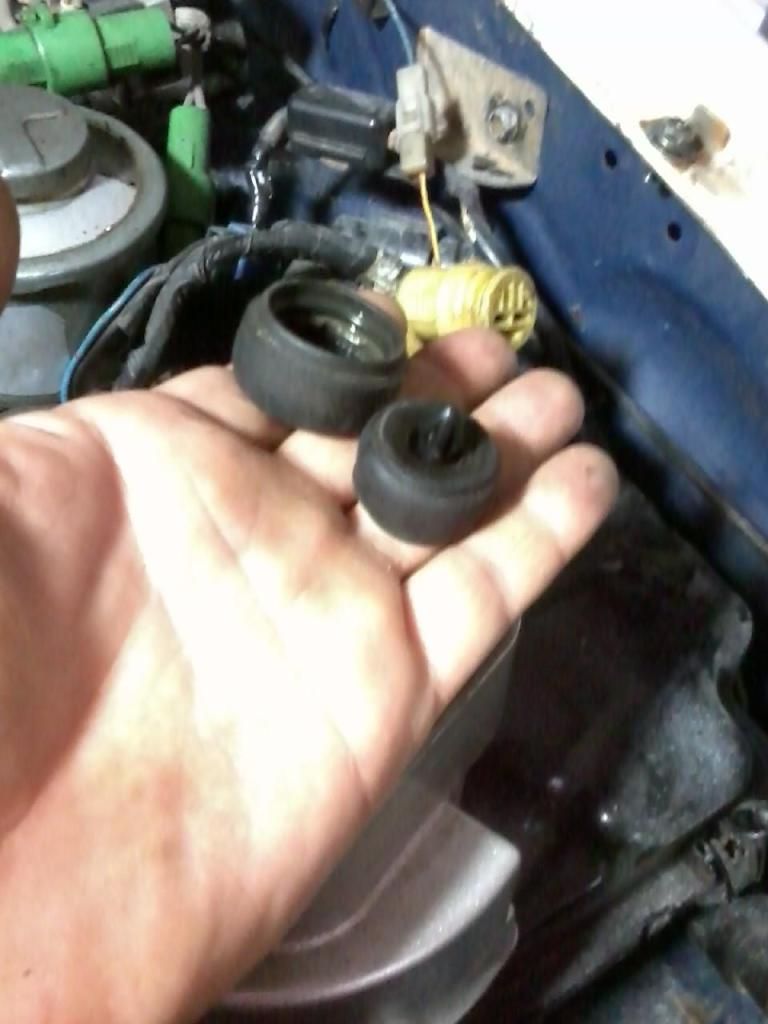
Where they go and which plugs.
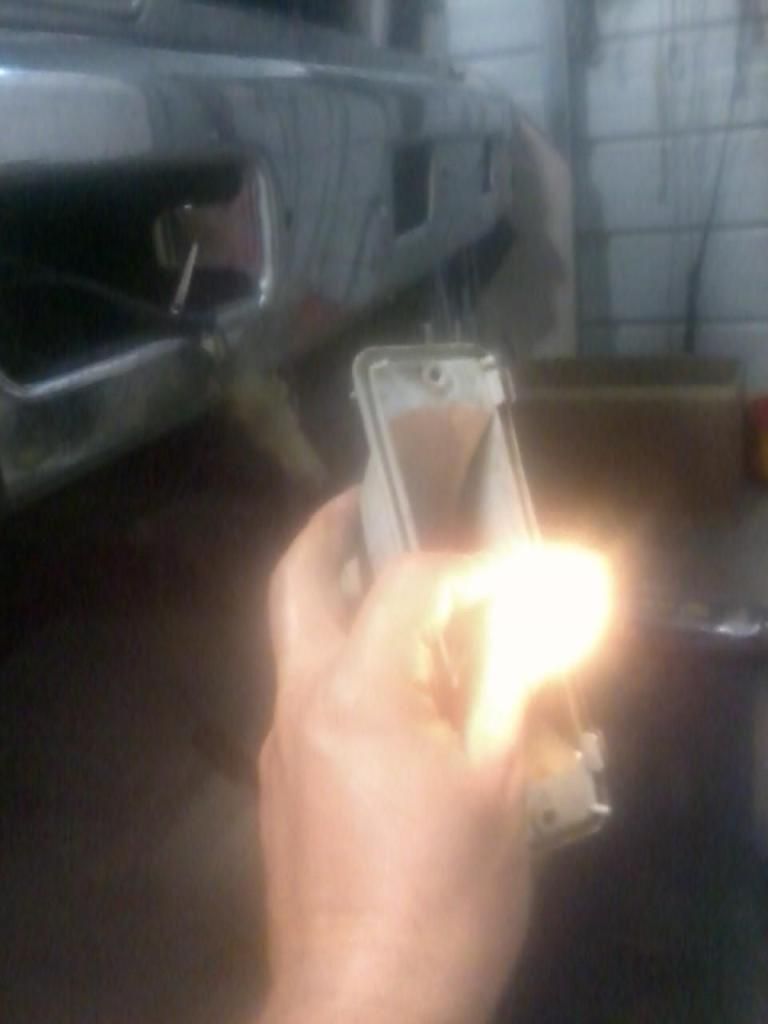
Dont know if you can see the corrosion, but I slid the green wire up as far as it would go and tried cleaning the case that holds the bulb. The case is actually the ground wire. Soaking it in PB Blaster. Will replace the blinker assembly at a later time.

Here is the test light. You can barely see that I have the alligator clip on the bumper. I tried several times to catch it when the blink was so bright. I also used a meter to do resistance checks on the bulb holder. Get a reading on the back side but not on the bulb holder.
Also a while back I found some rubber caps that hold the two plugs on the drivers side. This is only for the 85 and 86 trucks. Thought I would post so other might find some out there some where. I didnt know about them until farily recently.
Brats glad to see it home.
Rubber caps I am talking about.
Where they go and which plugs.
Dont know if you can see the corrosion, but I slid the green wire up as far as it would go and tried cleaning the case that holds the bulb. The case is actually the ground wire. Soaking it in PB Blaster. Will replace the blinker assembly at a later time.
Here is the test light. You can barely see that I have the alligator clip on the bumper. I tried several times to catch it when the blink was so bright. I also used a meter to do resistance checks on the bulb holder. Get a reading on the back side but not on the bulb holder.
Last edited by Terrys87; 09-07-2012 at 04:53 PM.
09-07-2012, 08:49 PM
#604
Registered User
terry: it was very easy definitely plug an play
this is nearly the same ad on ebay its been several years ago i got it for her runner when we got it it was bent an didnt retract fully it had stripped several teeth off the tooth wheel
power antenna mast replacement
video on how to do the fix
he goes on about how "they" prefer to use manufacturer OEM equipment but you know what the one i got works perfectly an its not oem he also has what i had to do which was pull the motor to get the plastic zip line out mine it was teeth down in the reel
generic antenna replacement with
09-07-2012, 08:52 PM
#605
Registered User
another video better one at least
https://www.youtube.com/watch?v=oQMBmJ7OJCM
https://www.youtube.com/watch?v=oQMBmJ7OJCM
09-10-2012, 04:12 AM
#608
Super Moderator
Staff
Thread Starter
iTrader: (1)
Join Date: Aug 2008
Location: Anderson Missouri
Posts: 11,788
Likes: 0
Received 25 Likes
on
22 Posts
Thanks Cyberhorn...I am hoping the electric antenna I got ahold of works. Havent checked it out and know the teeth are the most common failure on these. I am hoping to get to it this week.
Thanks Jason... I had to do my weekend drill this week and then turn around and go to work. It always kicks my butt for a day or two, but I am hoping to get back into the swing of things soon.
Thanks Space-Junk...I am hoping to pick the paint up either later this week or next week and think it will make a big difference on it looking like it finally coming together. I will be starting on the bodywork again tomorrow. Just need to finish the drivers fender and get all of the old primer off. That is the easy part. Getting it final sanded,masked and the shop ready for paint is the work out.
Last edited by Terrys87; 09-10-2012 at 04:21 AM.
09-10-2012, 04:20 AM
#609
Super Moderator
Staff
Thread Starter
iTrader: (1)
Join Date: Aug 2008
Location: Anderson Missouri
Posts: 11,788
Likes: 0
Received 25 Likes
on
22 Posts
I got a piece of trim from the guy that installed my windshied to show what was used on it. He said it was some kind of urethane glue or material he used under it to hold the gasket and windshield in. I could tell I had leaks developing and hope this solves that. He orginally was going to charge me $70, but wound up being $80 as he didnt include the gasket.
A guy is selling parts locally and supposed to have an excellent bumper with caps and want to see what else he has. Hoping to meet up with him this week. I have 4 bumpers and all of them are bent. But not by me. I keep them around for the clips and nuts and bolts.
Trim for the windshield.
A guy is selling parts locally and supposed to have an excellent bumper with caps and want to see what else he has. Hoping to meet up with him this week. I have 4 bumpers and all of them are bent. But not by me. I keep them around for the clips and nuts and bolts.
Trim for the windshield.
09-11-2012, 08:57 AM
#611
09-11-2012, 09:25 AM
#612
Super Moderator
Staff
Thread Starter
iTrader: (1)
Join Date: Aug 2008
Location: Anderson Missouri
Posts: 11,788
Likes: 0
Received 25 Likes
on
22 Posts
I got busy this weekend and got wore down and got caught up on my rest so am feeling great. Been wanting to get back after things. Hoping Friday to get it to the inspection station. I will have it ready today if all goes well.
I found out why it was being so difficult to run. I knew the only thing I did was disconnect the plug wires and drain water out of the radiator when replacing the core support. Having air in the system can cause some idling issues and I still need to burp the system.
So I double checked my plug wires. Has #2 and #3 switched. Swapped them and it ran like I knew it would. Doh!!! The battery was run down. Left the key in the accesory postion which is easy to do as the keyswitch will let the key out and not be fully off and the clock will run the battery down after 2 or 3 days. One or two days you can get away with it if you have a good battery and drive it often enough. Have helped people in the past solve this problem on the main page as they didnt realize their key wasnt all the way off.
I am waiting for body filler to dry so did the SR5 guage swap. If using an aftermarket sending unit and it has an extra tab, it is a ground, do NOT connect to it. I think it is an Arnly Beckley (or something like that) that puts a ground tab on theirs. Here is the correct way of hooking the wire. Toyota sending unit is what I am using. There is alot of info on a SR5 swap, but thought I would add a little.
Thought I would post a pic of body filler that I made to much of. When finished applying it, scrape the excess and leave it on your spreader till it hardens up. Makes cleanup so much easier.
It may look like a lot of filler, but it will be paper thin when done. A dent is bigger then what you actually see. Most of it get sanded off. Biggest one was a golf ball sized dent (in the back of fender) and I was bale to peck it out with a body hammer to nearly level. Others are just door dings.
Wanted to get my SR5 guage in and out of the way of things. I will correct the mileage when I get the truck painted and start detailing it. I use Turtle Wax headlight restore to clean up the lense on the guage cluster. That when I will do the mileage, but wanted to make a note for myself when I get to it.
Everything works. Need to add a little fuel to it though.

Ran a wire from the back to the front to double check the ground. It is working, just cant see glow in this picture. It worked so am experimenting with a broken blinker assembly.
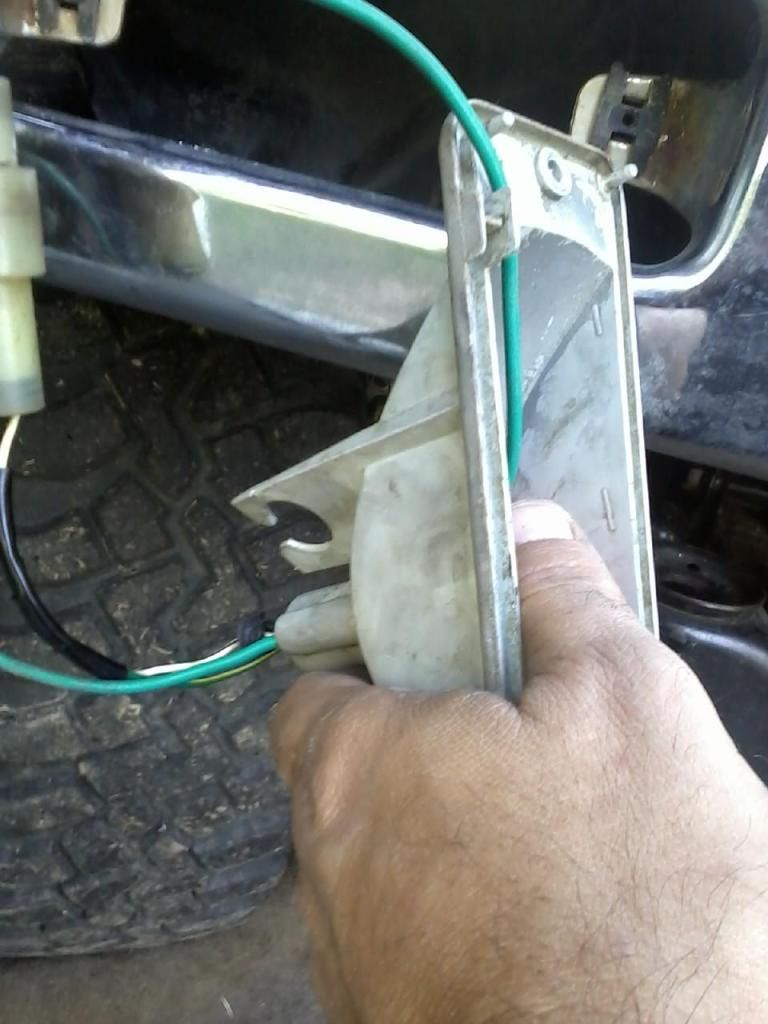
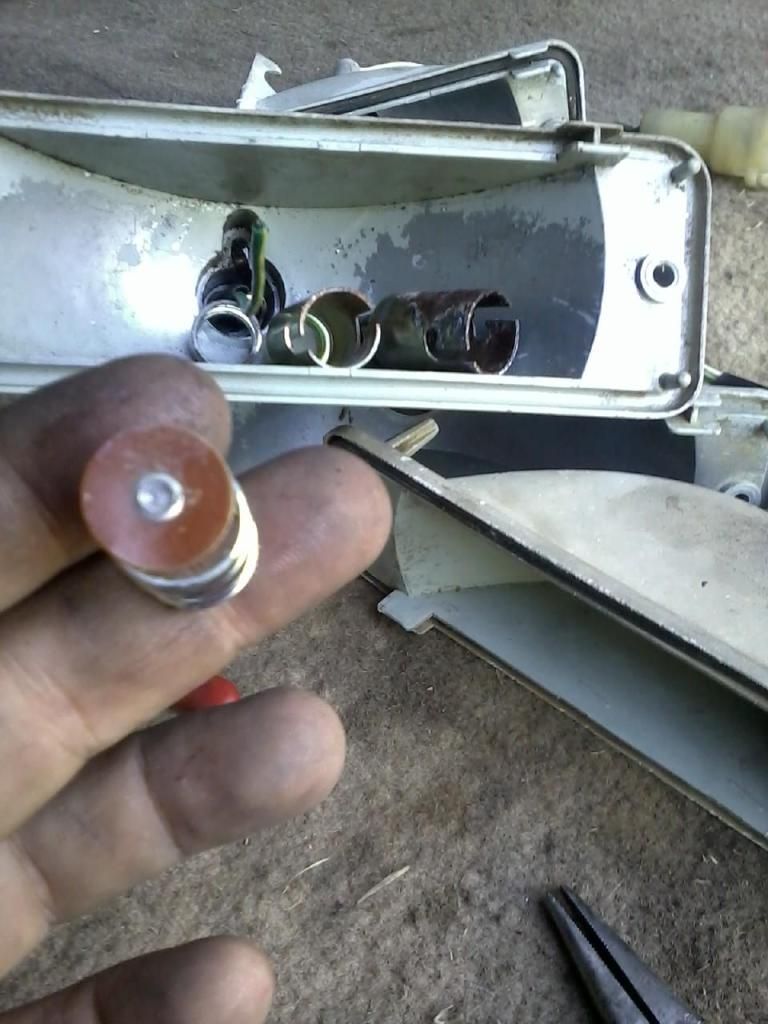
The bulb holder just slides out. I will splice the green wire and should be good as new. The rusty one is where the ground wasnt making any connections.
I found out why it was being so difficult to run. I knew the only thing I did was disconnect the plug wires and drain water out of the radiator when replacing the core support. Having air in the system can cause some idling issues and I still need to burp the system.
So I double checked my plug wires. Has #2 and #3 switched. Swapped them and it ran like I knew it would. Doh!!! The battery was run down. Left the key in the accesory postion which is easy to do as the keyswitch will let the key out and not be fully off and the clock will run the battery down after 2 or 3 days. One or two days you can get away with it if you have a good battery and drive it often enough. Have helped people in the past solve this problem on the main page as they didnt realize their key wasnt all the way off.
I am waiting for body filler to dry so did the SR5 guage swap. If using an aftermarket sending unit and it has an extra tab, it is a ground, do NOT connect to it. I think it is an Arnly Beckley (or something like that) that puts a ground tab on theirs. Here is the correct way of hooking the wire. Toyota sending unit is what I am using. There is alot of info on a SR5 swap, but thought I would add a little.
Thought I would post a pic of body filler that I made to much of. When finished applying it, scrape the excess and leave it on your spreader till it hardens up. Makes cleanup so much easier.
It may look like a lot of filler, but it will be paper thin when done. A dent is bigger then what you actually see. Most of it get sanded off. Biggest one was a golf ball sized dent (in the back of fender) and I was bale to peck it out with a body hammer to nearly level. Others are just door dings.
Wanted to get my SR5 guage in and out of the way of things. I will correct the mileage when I get the truck painted and start detailing it. I use Turtle Wax headlight restore to clean up the lense on the guage cluster. That when I will do the mileage, but wanted to make a note for myself when I get to it.
Everything works. Need to add a little fuel to it though.
Ran a wire from the back to the front to double check the ground. It is working, just cant see glow in this picture. It worked so am experimenting with a broken blinker assembly.
The bulb holder just slides out. I will splice the green wire and should be good as new. The rusty one is where the ground wasnt making any connections.
Last edited by Terrys87; 09-11-2012 at 09:36 AM.
09-11-2012, 09:56 AM
#613
Registered User
terry i sometimes wipe a tiny bit of anti seize on my sockets to help with rust &ground issues the silvery grey stuff is conductive (good for sparkplugs as well) also helps keep the bulb from sticking as well
also the center electrode in those sockets is usually soldiered if you need to replace it (it doesnt look it needs it but just FYI)
also chomping at the bit for the SR5 gauges i bought from AZKEP69 who was fast selling all his extras
also the center electrode in those sockets is usually soldiered if you need to replace it (it doesnt look it needs it but just FYI)
also chomping at the bit for the SR5 gauges i bought from AZKEP69 who was fast selling all his extras
Last edited by Cyberhorn The Dragon; 09-11-2012 at 10:00 AM.
09-11-2012, 10:51 AM
#614
Hey there, Terry ,
,
As usual, ..... learned something just reading a post of yours, lol. Not sure I have enough room up there for all the stuff's you're throwing out there EVERY DAY! hahaha.... But anyway....
Battery; Yeah.... I left the garage the other night and left the dome lights, map lights, KEY ON and volume down.... but radio on.... (and I have a 600W Amp, remember).....AT LEAST 14 hours it was before I went out there and saw it, lol..... VROOM, first turn. 6 Years old, that battery is.... Duralast Gold.... Not a huge fan of duralast products on some things... but for 90$ I think I paid...... As many times as I've left it on? .... WOW!
Dash lights; Did you go with White LED's? Or clean the Green off? Curious.
Reverse light; Nice work on your tail/signal lights in the rear. I've had a problem for a while.... My Reverse light on the passenger side doesn't always work.... BUT, 90% of the time, unless it's burnt, I'll tap on the plastic-glass and VOILA, .....it works. Curious what you think it might be... Corrosion is VERY possible, even on mine, as the lens before this was cracked for 10 years before I put in new.... AND a screw missing... SO, .. do I take it apart like this last pic?
thanks, Terry, .... love your work!
, As usual, ..... learned something just reading a post of yours, lol. Not sure I have enough room up there for all the stuff's you're throwing out there EVERY DAY!
hahaha.... But anyway....Battery; Yeah.... I left the garage the other night and left the dome lights, map lights, KEY ON and volume down.... but radio on.... (and I have a 600W Amp, remember).....AT LEAST 14 hours it was before I went out there and saw it, lol..... VROOM, first turn. 6 Years old, that battery is.... Duralast Gold.... Not a huge fan of duralast products on some things... but for 90$ I think I paid...... As many times as I've left it on? .... WOW!
Dash lights; Did you go with White LED's? Or clean the Green off? Curious.
Reverse light; Nice work on your tail/signal lights in the rear. I've had a problem for a while.... My Reverse light on the passenger side doesn't always work.... BUT, 90% of the time, unless it's burnt, I'll tap on the plastic-glass and VOILA, .....it works. Curious what you think it might be... Corrosion is VERY possible, even on mine, as the lens before this was cracked for 10 years before I put in new.... AND a screw missing... SO, .. do I take it apart like this last pic?
thanks, Terry, .... love your work!
09-11-2012, 11:44 AM
#615
Super Moderator
Staff
Thread Starter
iTrader: (1)
Join Date: Aug 2008
Location: Anderson Missouri
Posts: 11,788
Likes: 0
Received 25 Likes
on
22 Posts
Hello Cyberhorn...I have started doing all my plugs and connectors that way. Makes them so much easier to take apart and I am hoping it stops corrosion.
The SR5 Guge isnt a hard upgrade at all, the worse part is changing he mileag is pulling off th needle. I do it and the next time I have to do it I keep having to go back and relearn the secrets to getting the needle off. Seems if I remember right the last time the non SR5 guage, the odometer will interchange which saves rotating the numbers.
Hello Mark.. I jsut left what wasin there. Seems more orange then white or green. I am still debating on what color to go with on that one.
I have a tail light that if I pus hard to the side that will stop workig. Mine had corrosion in it and got it cleaned up that it will work, but since I know there is the possibility of it actin up again, I am going to see what I can do with it tonite. I will get back with you on that one.
I got my tailgate cabls in and was planning on looking at the adjutments and it gotto hot so I came in. Will try lookin at it tomorrow. Do you think one of your cables is frozen? A cabe I had on the drivers side is frozen. I did find out that a 2nd gen runner is the exact same cables.
09-11-2012, 11:58 AM
#616
Super Moderator
Staff
Thread Starter
iTrader: (1)
Join Date: Aug 2008
Location: Anderson Missouri
Posts: 11,788
Likes: 0
Received 25 Likes
on
22 Posts
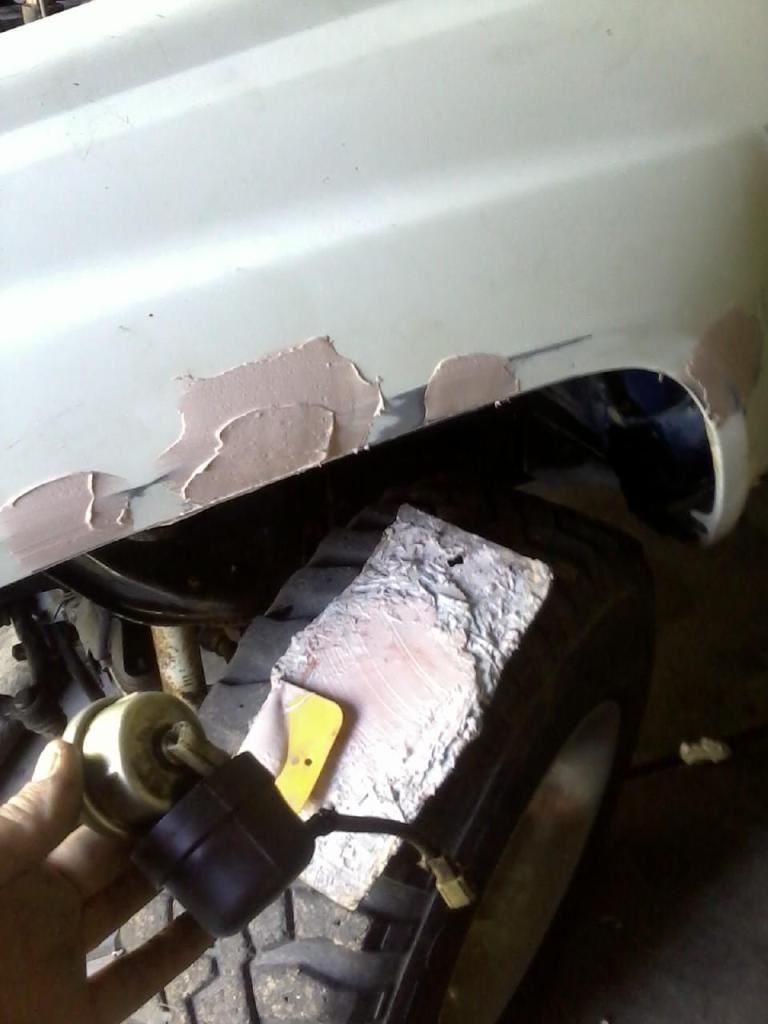
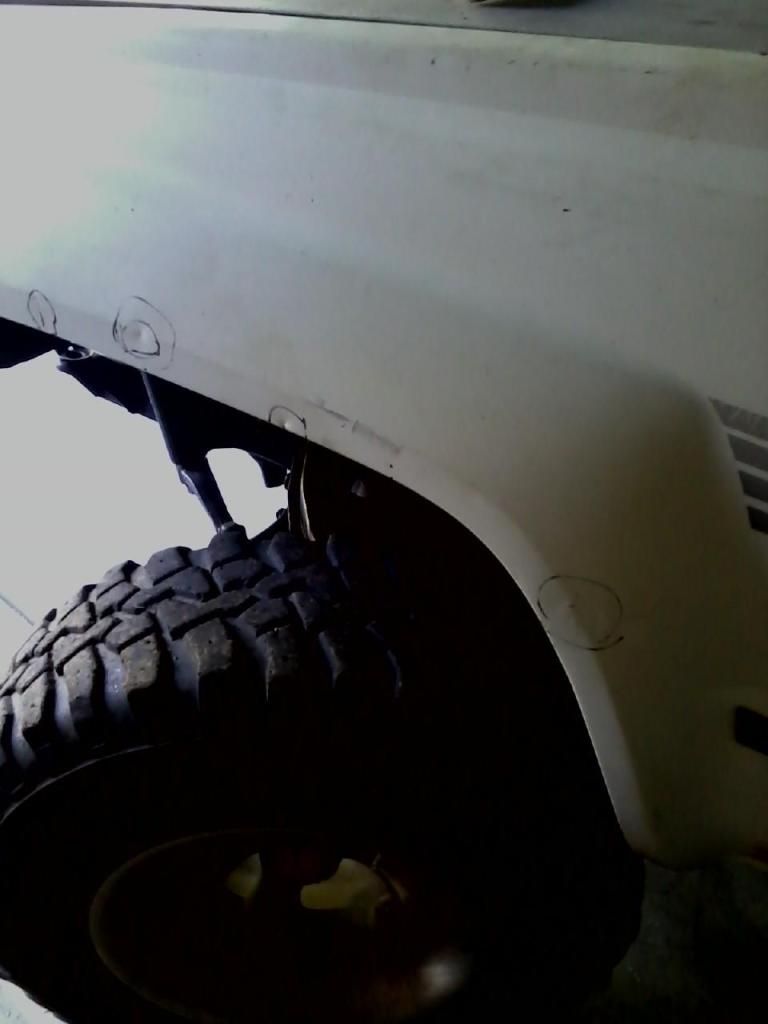
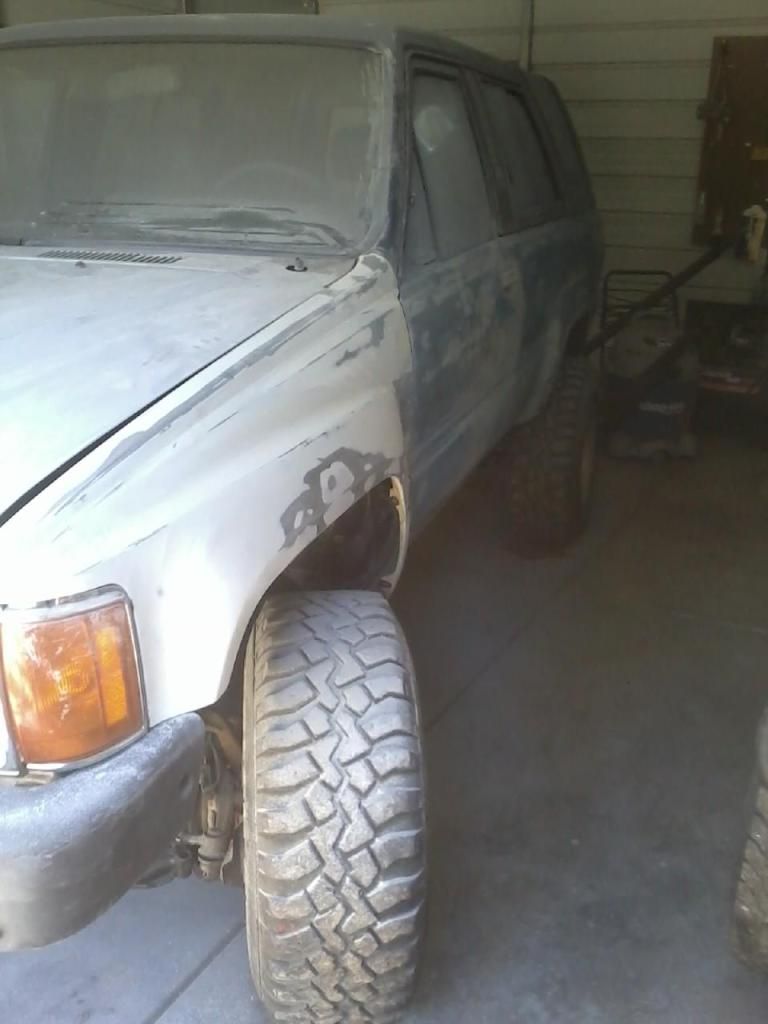
I was all excited to get his registerd Friay, but when I started doing the bodywork, I started sanding the old primer off as it is contaminated from sitting out side. This truck isnt coming out until it is painted. I still need to finish the hood, backside and passenger side. Then I get to prime and wet sand. It is going to get stripped again and I am hoping to pick up the paint Friday or next Wednesday. I am ready to get this truck in one color.
From what I could find on the body, that I did today, I have one small spot on the rear of the front fender and a small spot on the rear fender well. Not much at all. Primer might would fill it but I will work on it. I am going to pull the hood and take it to the carwash and get cleaned before I start getting it ready,
Getting the rubber strip off of the new to me fender is some tough glue. How I do it. If it was already painted,I wouldnt do it this way.
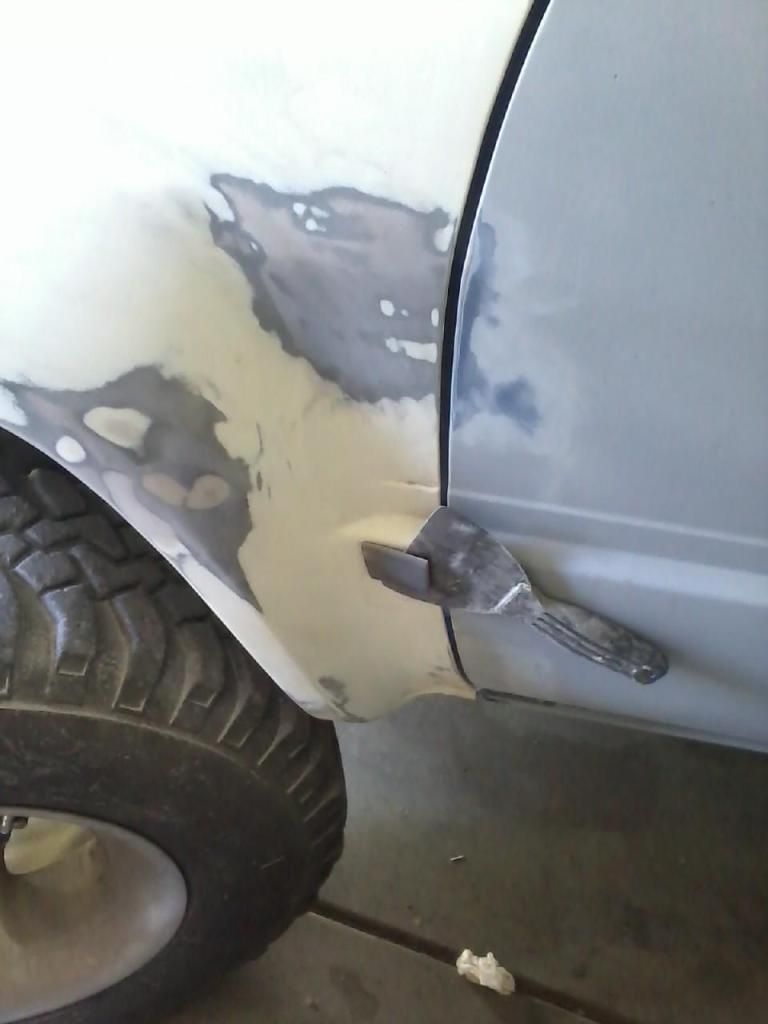
Drives side I am happy with. Still got to remove handles and get the cracks and crannies. Then comes the final sanding. Getting there.
From what I could find on the body, that I did today, I have one small spot on the rear of the front fender and a small spot on the rear fender well. Not much at all. Primer might would fill it but I will work on it. I am going to pull the hood and take it to the carwash and get cleaned before I start getting it ready,
Getting the rubber strip off of the new to me fender is some tough glue. How I do it. If it was already painted,I wouldnt do it this way.
Drives side I am happy with. Still got to remove handles and get the cracks and crannies. Then comes the final sanding. Getting there.
09-11-2012, 11:51 PM
#618
Super Moderator
Staff
Thread Starter
iTrader: (1)
Join Date: Aug 2008
Location: Anderson Missouri
Posts: 11,788
Likes: 0
Received 25 Likes
on
22 Posts
Hello Mark..I had a cable was frozen and the other one was broken but still worked. Not sure how that happened. A 2nd gen cable is an exact match to the first gen runners. I have to get the body lines correct. Sometimes that goes easy and other times I have hours spent on it. My tailgate on the passenger side is off a little and will probably need to work with the latches to get it alighned right.
On your reverse light, there are those little crimps that are the same as the ones in your injector harness. Those are nothing but trouble. Dont think they are hooked to the reverse lights, but it is possible, I would suggest removing those just for good measure.
I am going to use some of that dielectric grease that Cyberhorn is talking about on all of my bulb connectors and wiring connectors.
On post 612 on the 6th picture the little cut out is where the ground wire connects to the bulb socket. I know it is quite similar to the tail light. Your ground is probably corroded. May need to get in there with a pipe cleaner and some rust remover and see if you can get a better connection. I will need to cut the green wire to replace that bulb socket and to get a good connection to it. I am hoping to get a good solder connection on it.
09-12-2012, 12:05 AM
#619
Thanks, Terry!
Hmmmm, I'm still kinda confused on the tailgate thingy... I'll have to look at mine closer and figure it out/along with using the info/bypass trick you provided I just can't understand why the cable would keep the LATCH at the end that grabs on to the hoop would stop the tailgate from 'LATCHING' on that hoop... Does the cable have to come all the way back to allow that mechanism to LATCH onto that hook and LOCK? stupid cable!
  hahaha. Yeah, I need to figure out why the light does that on occasion.... I DID have a leak as I said into that light lens.. SO, it's likely all that condensation wound up getting SOME of itself into the socket..
I used dielectric on ALMOST everything in the motor when assembling, AFTER some cleaning(yeah, I know, me and the cleaning, right? hahaha). I'm going to tackle the TPS connector you sent me, most likely, tomorrow. OH, and I got a fuel pump plug connector... THIS WAY, when I'm done concluding whatever by swapping in the Dizzy.... I'll remove the factory stuff provided by the stuff I got... after trying it out, and then send it back with that connector if you want... I can't see why it wouldn't work just the same, ya know? Might even fit in that lil chrome connector retainer on the side of the dizzy
Anyway, I'm exhausted... time to hit he CHAIR! ...no, the comfy one! lol.
Hmmmm, I'm still kinda confused on the tailgate thingy... I'll have to look at mine closer and figure it out/along with using the info/bypass trick you provided
I just can't understand why the cable would keep the LATCH at the end that grabs on to the hoop would stop the tailgate from 'LATCHING' on that hoop... Does the cable have to come all the way back to allow that mechanism to LATCH onto that hook and LOCK? stupid cable! hahaha. Yeah, I need to figure out why the light does that on occasion.... I DID have a leak as I said into that light lens.. SO, it's likely all that condensation wound up getting SOME of itself into the socket.. I used dielectric on ALMOST everything in the motor when assembling, AFTER some cleaning(yeah, I know, me and the cleaning, right? hahaha). I'm going to tackle the TPS connector you sent me, most likely, tomorrow. OH, and I got a fuel pump plug connector... THIS WAY, when I'm done concluding whatever by swapping in the Dizzy.... I'll remove the factory stuff provided by the stuff I got... after trying it out, and then send it back with that connector if you want... I can't see why it wouldn't work just the same, ya know? Might even fit in that lil chrome connector retainer on the side of the dizzy
Anyway, I'm exhausted... time to hit he CHAIR! ...no, the comfy one! lol.
09-12-2012, 12:30 AM
#620
Super Moderator
Staff
Thread Starter
iTrader: (1)
Join Date: Aug 2008
Location: Anderson Missouri
Posts: 11,788
Likes: 0
Received 25 Likes
on
22 Posts
That cable has to pull quite a bit to releas the latch. Wondering if it is stuck in the open postion or semi open position. Hopefully the TPS connector or the dizzy helps solve your idling problem.
I will post a pic of my dizzy in the next day or two. That mouse chewed up my dizzy wire and I still need to get a wire that goes from the dizzy to the plug. He even got the rubber boot that seals the wire to the dizzy. I can watch the rotor spin. I really have to watch adding water with the motor running. It can get inside easily. I think it is the last of the damages he did I still need to repair. I just put a piece of electrical tape to protect it for now. But it works for now, but I will get it fixed right. You might get a kick out of it.lol
I will post a pic of my dizzy in the next day or two. That mouse chewed up my dizzy wire and I still need to get a wire that goes from the dizzy to the plug. He even got the rubber boot that seals the wire to the dizzy. I can watch the rotor spin. I really have to watch adding water with the motor running. It can get inside easily. I think it is the last of the damages he did I still need to repair. I just put a piece of electrical tape to protect it for now. But it works for now, but I will get it fixed right. You might get a kick out of it.lol


