
RBx 1988 4Runner Build-Up Thread

 06-29-2011, 09:09 AM
#562
Registered User
Thread Starter
Thanks Outsane, i could waste soooo much time playing with those..
Today i picked up a new water Temperature sending unit(runs to the gauge). Mine always reads 1/2 way....hot, cod not matter....hopefully it is the unit and not the gauge, i never did ground out the pigtail to see if the gauge goes 'Hot', then i would know it was the sending unit, but it was cheap, and probably an original part.
Annnnndddd, my fan controller is having an issue with the ground from the chip board, and i hope to have a solution tonight, we have been exchanging emails over the last few days.
I have a trip to the beach planned, and hope to take the rig, if i can get a few loose ends finished:
Install H2O temperature sending unit
Test fuel gauge(it works, but off the lines a bit)
Install new WHITE shifter seat)
4WD shifter fab dog-leg to clear 5spd shifter
Install shifter boots and console
Put dash back together*
Fan controller solution till i can get the DCC fixed (install old Hayden)
Take out for a victory shakedown
*Bonus if i have enough time, modify the dash for new clinometer, install
06-30-2011, 03:37 AM
#564
Registered User
Thread Starter
^^ Thanks
buttoned her up last night
My bro was over and helped, he re-worked my center console, and replaced the foam.

I've added an 86' Speedo bezel because i like the way it looks, and it gave me room to add two more buttons on the left of the steering wheel.
I'll get some pics up tonight, i need a personal assistant.
buttoned her up last night
My bro was over and helped, he re-worked my center console, and replaced the foam.
I've added an 86' Speedo bezel because i like the way it looks, and it gave me room to add two more buttons on the left of the steering wheel.
I'll get some pics up tonight, i need a personal assistant.
Last edited by RBX; 02-05-2015 at 10:01 AM.
06-30-2011, 05:04 AM
#567
Super Moderator
Staff
iTrader: (1)
Join Date: Aug 2008
Location: Anderson Missouri
Posts: 11,788
Likes: 0
Received 25 Likes
on
22 Posts
Just got caught up on your thread. Great job on the tranny swap. There is a big difference between the auto and manual.
I have been using your get something done once a day, there is always something to do, no matter how small it will start to show.
Thats what a nice red interior is supposed to look like? Great job, have been getting some great ideas from you. Enjoying watching your build.
I have been using your get something done once a day, there is always something to do, no matter how small it will start to show.
Thats what a nice red interior is supposed to look like? Great job, have been getting some great ideas from you. Enjoying watching your build.
07-01-2011, 06:56 AM
#569
Registered User
Thread Starter
some pics:
crossmember and gear driven t-case adapter
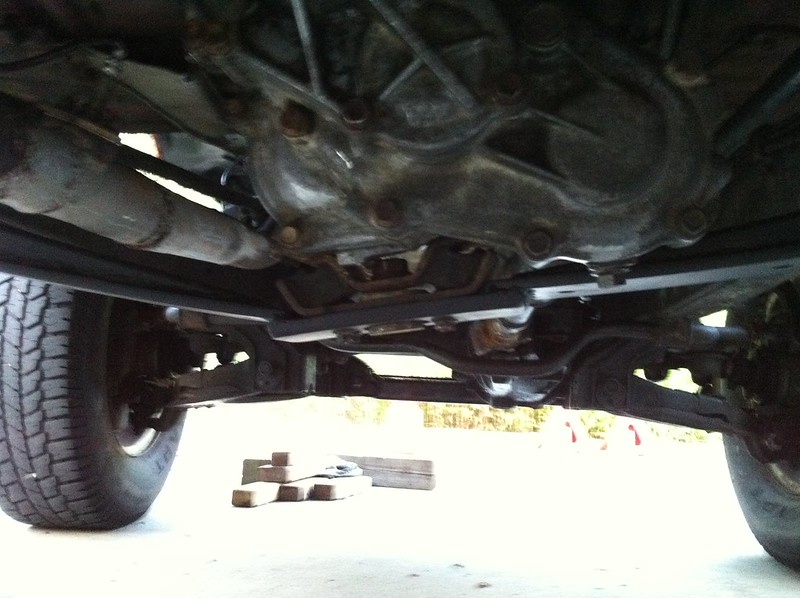
Better photoshopped(to lighten the shadows for clarity) shot of the cross-member clearance:
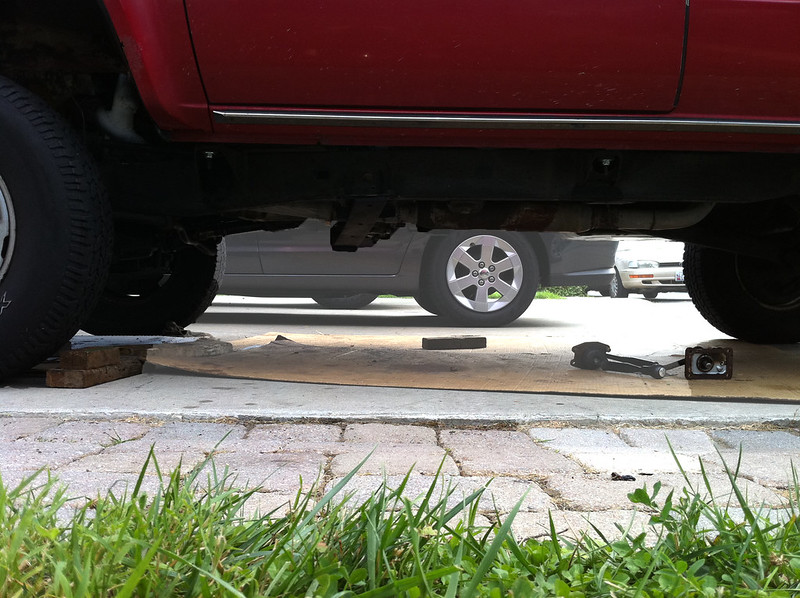
Bumper fitment, yes it's rusty, it'll get ground/blasted and black POR-15'd.

this image made it look like it is bowed, i haven't installed the outrigger braces for the quarter panel protection, but i was still able to jack the whole truck up with very little flex (from the bumper)about 6" from the rear wheel.
Also activated my 400w Inverter, control from dash switch, and fit a few necessary switches in the dash...pics to follow.
crossmember and gear driven t-case adapter
Better photoshopped(to lighten the shadows for clarity) shot of the cross-member clearance:
Bumper fitment, yes it's rusty, it'll get ground/blasted and black POR-15'd.
this image made it look like it is bowed, i haven't installed the outrigger braces for the quarter panel protection, but i was still able to jack the whole truck up with very little flex (from the bumper)about 6" from the rear wheel.
Also activated my 400w Inverter, control from dash switch, and fit a few necessary switches in the dash...pics to follow.
Last edited by RBX; 02-06-2015 at 05:10 AM.
07-01-2011, 09:23 AM
#573
Registered User
Thread Starter
thanks
07-01-2011, 11:37 AM
#575
Registered User

Join Date: Jun 2011
Posts: 2
Likes: 0
Received 0 Likes
on
0 Posts
Interior sound deadening

Inverter Installed(solenoid for switch is the two ten mm bolts next to the speaker)

Either i am launching a satellite or this will keep the Beer cold!code name: 4Cooler


Redoing the shifter trim cover...first try at upholstery using Sunbrella

yes that is adhesive seeping thru the fabric, acetone should clean it up

this stuff will highlight some interior pieces...Perforated Aluminium

More soon
Inverter Installed(solenoid for switch is the two ten mm bolts next to the speaker)
Either i am launching a satellite or this will keep the Beer cold!code name: 4Cooler
Redoing the shifter trim cover...first try at upholstery using Sunbrella
yes that is adhesive seeping thru the fabric, acetone should clean it up
this stuff will highlight some interior pieces...Perforated Aluminium
More soon
07-01-2011, 07:28 PM
#576
Registered User
Thread Starter
I used butyl roof seem joiner and duct wrap, both found at home depot. I used 4 rolls of the duct wrap @ $15(I think) a roll. And two role of the butyl @ $7 approximately.
Pretty cheap considering dynomat prices.
I can say it actually helps keeping the interior cool when the a/c is on, and I'm running the soft top in July! And it keeps it quieter.
Pretty cheap considering dynomat prices.
I can say it actually helps keeping the interior cool when the a/c is on, and I'm running the soft top in July! And it keeps it quieter.
 07-02-2011, 10:39 AM
#579
Registered User
Thread Starter
Thanks Mark
I ran two cheapo 6' extension chords off the inverter one to the passenger side kick panel and the other in the rear passenger side storage cubby. I'll load up some pics.
Oh and I hid te solenoid in the panel next to the inverter.
I ran two cheapo 6' extension chords off the inverter one to the passenger side kick panel and the other in the rear passenger side storage cubby. I'll load up some pics.
Oh and I hid te solenoid in the panel next to the inverter.
07-02-2011, 12:46 PM
#580
Registered User
Thread Starter
Added switches and changed some around

Inverter access one front passenger

One rear

Spare mount need to trim the excess

Inverter access one front passenger
One rear
Spare mount need to trim the excess
Last edited by RBX; 02-06-2015 at 05:57 AM.


