RAD4Runner's 1986 4Runner dlx Build-up
 01-05-2013, 12:59 AM
#141
Dude, I will be totally down for that mod... I'm running the Silverstar Premium lights right now... and I gotta say, they're plenty bright... BUT, I'm sure they would be brighter as per what you're recommending... You're welcome to come up here and do your write up/tech stuff/tutorial/supply list/tools list, etc., all in my garage!  hahaha.
WOW, so sorry you went through that, RAD, ...that's scary!
STAY WELL, ya hear? lol.
hahaha. WOW, so sorry you went through that, RAD, ...that's scary!
STAY WELL, ya hear? lol.
 01-05-2013, 04:24 PM
#142
Registered User
iTrader: (4)
Join Date: May 2010
Location: People's Republic of California
Posts: 720
Likes: 0
Received 15 Likes
on
12 Posts
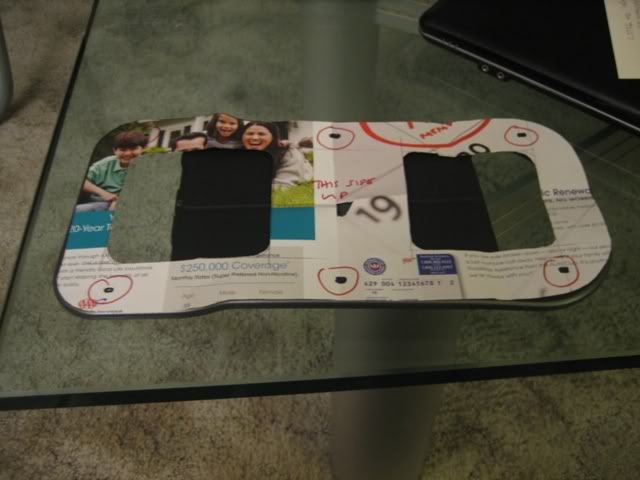
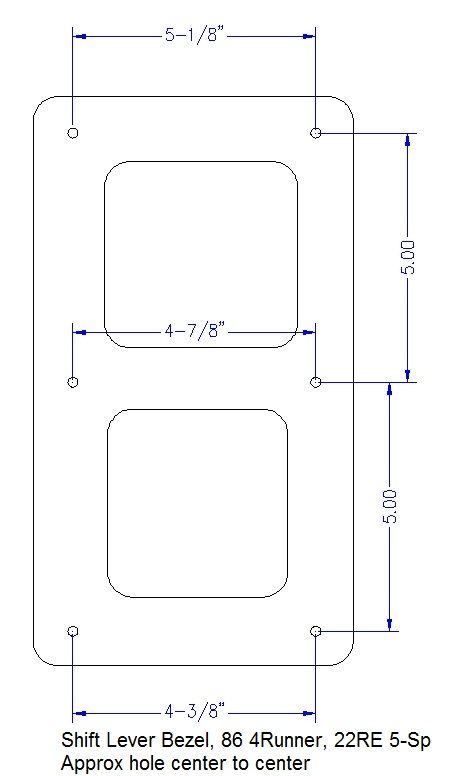
Those must be engineer estimates using a digital micrometer!! hahaha....From bottom to top using your drawing and a good ol' 20 year old craftsman tape measure I'm getting around 4 1/2", 4 3/4", and a little short of 5 1/4".
But I'm with you on the 5" spacing length wise between holes.
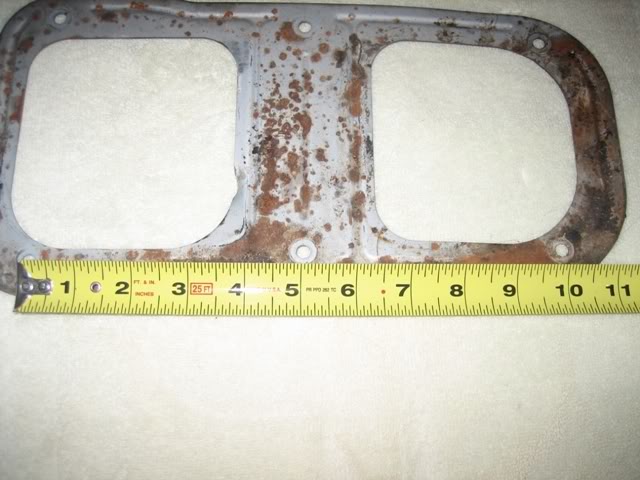
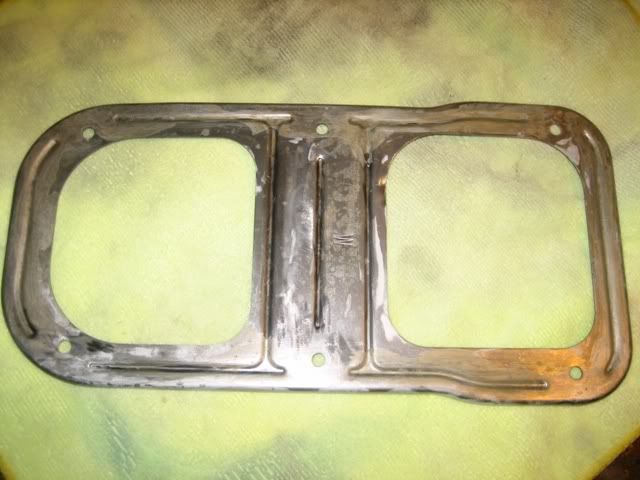
Gave you 10 minutes of my time with a wire wheel brush and a coating of rust remover jelly...should be good to go in the morning.
But I'm with you on the 5" spacing length wise between holes.
Gave you 10 minutes of my time with a wire wheel brush and a coating of rust remover jelly...should be good to go in the morning.
 hahaa.
01-06-2013, 11:59 AM
hahaa.
01-06-2013, 11:59 AM
#144
Registered User
iTrader: (4)
Join Date: May 2010
Location: People's Republic of California
Posts: 720
Likes: 0
Received 15 Likes
on
12 Posts
Yup, did the trick....with it raining off and on here, I made a reason to go outside and do something rather than watching TV and spending $$$$. For example, I just got back from the gun store....purchased a bushmaster bfc15, M16 style for ol' times sake before everything is banned around here. 
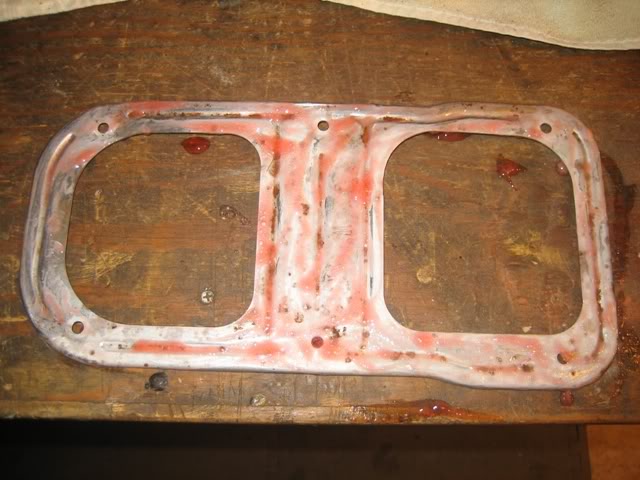
Rust all gone....

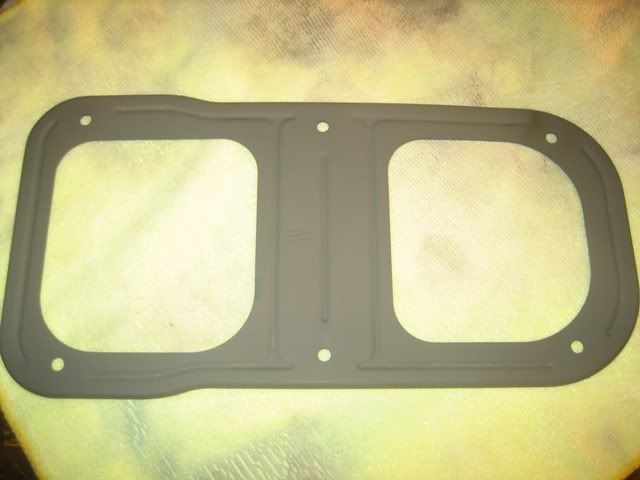
Self-Etching primer......

Left over wheel paint.....
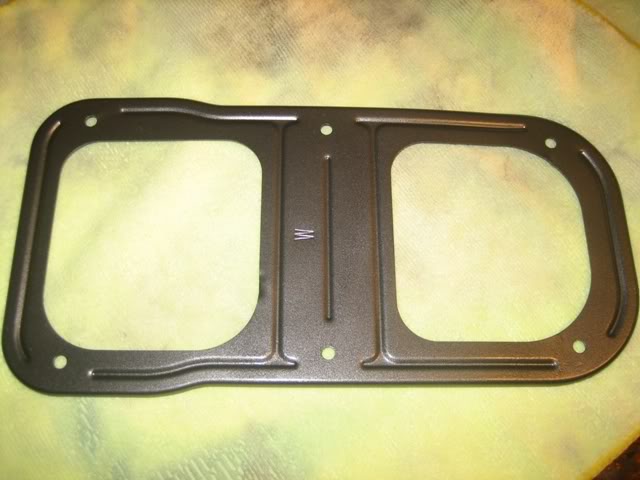
Ready for shipping!
Rust all gone....
Self-Etching primer......
Left over wheel paint.....
Ready for shipping!
01-06-2013, 04:56 PM
#145
Registered User
Thread Starter
Yup, did the trick....with it raining off and on here, I made a reason to go outside and do something rather than watching TV and spending $$$$. For example, I just got back from the gun store....purchased a bushmaster bfc15, M16 style for ol' times sake before everything is banned around here.
Rust all gone....
Self-Etching primer......
Left over wheel paint.....

Ready for shipping!
Rust all gone....
Self-Etching primer......
Left over wheel paint.....
Ready for shipping!
01-07-2013, 12:34 AM
#146
Super Moderator
Staff
iTrader: (1)
Join Date: Aug 2008
Location: Anderson Missouri
Posts: 11,788
Likes: 0
Received 25 Likes
on
22 Posts
Sorry to hear you had to spend time in the hospital and hope things are better for you now. Looks like Grego got you cleaned up shifter plate real well. Dont know if the different trannys used different plates. I will be putting in a G52 tranny in my pickup build later on so I am curious if these are all the same or if there are some differences.
01-07-2013, 09:43 AM
#148
Registered User
Thread Starter
01-07-2013, 10:28 AM
#149
Registered User
iTrader: (4)
Join Date: May 2010
Location: People's Republic of California
Posts: 720
Likes: 0
Received 15 Likes
on
12 Posts
Yeah, left over paint stuff. If you don't coat it with something it will just rust again. Well, it will probably rust again eventually, but not for a while I hope.
01-07-2013, 10:38 AM
#150
Registered User
iTrader: (2)
Join Date: Dec 2009
Location: Pleasanton, CA - SF Bay Area
Posts: 2,159
Likes: 0
Received 7 Likes
on
5 Posts
Yep, Grego-Claus!
I could surely use it. I'm not sure about similarity with 85 & 86 shifters so, but screw spacing should be a good check. Mind comparing with pic above?
If good, please mail to me. I'll refund shipping.
Tnx, Mark. Pretty good now. Found myself having breakfast in a hospital bed on New Year's day - LOL! Spent the eve there because I had vertigo that doc blamed on some virus that affects the inner ear. Past 2 days left me light-headed but all's well now. Drove Ruby Tuesday to work today. This weekend, I'll be working on headlight system upgrade harness. Review of our schematics shows that the headlight has similar flaw as the cranking system. My measurements show we drop around 10% of battery voltage on wire resistance. That's a significant loss of power to bulbs and hence brightness- That's why our headlights are so dim .
I initially planned to actually modify stock wiring and up-size the wires, but decided otherwise. A Plug-and-play harness would mean:
- Less diving in the spaghetti soup,
- Easy to restore to stock; not that I'd want to, but just as a back up in case something in harness goes bad.
- Easy for others to try harness if it works with their system (86-88 4Runners, or other trucks with similar switched-ground dimmer-combo schematic)
- Easy to share build details with you guys so you can make your own easily =D
01-07-2013, 12:42 PM
#151
Registered User
Thread Starter
Can't wait to see this! I just upgraded to Hella H4 housings to replace my OEM sealed beam crap - much better! I also just got a 120A GM alternator from Mark in the mail yesterday, so this is definitely on my long term mod list. I've only found some on Amazon and reviews are mixed....and 4Crawlers seem to be out of stock. Would love to try myself and wire up an extra fuse box too.
I also got a 90-amp Alt recently. Typically, to go with an alternator upgrade people up-size wire that goes from alternator to battery. In my case, in order to help keep wiring clean and still not overload alternator-to-battery wire I will:
- Keep headlight and other light addition inside left fender, closer to alternator, so a short, thick wire from alternator will power all lights. No more need to up-size wire going to battery, because additional capacity will be used on left side. This would also help isolate (future) audio circuit from power fluctuation from current demands of the lights.
- Install future audio upgrades inside right fender, closer to battery, and powered directly from battery. Audio is more sensitive to alternator voltage ripple so connecting directly to battery and farther from alternator would help keep cleaner power.
Last edited by RAD4Runner; 01-07-2013 at 12:44 PM.
01-08-2013, 08:31 AM
#152
Registered User
RAD - cannot wait to see your headlight harness, your write ups are great
01-08-2013, 04:26 PM
#153
Registered User
Thread Starter
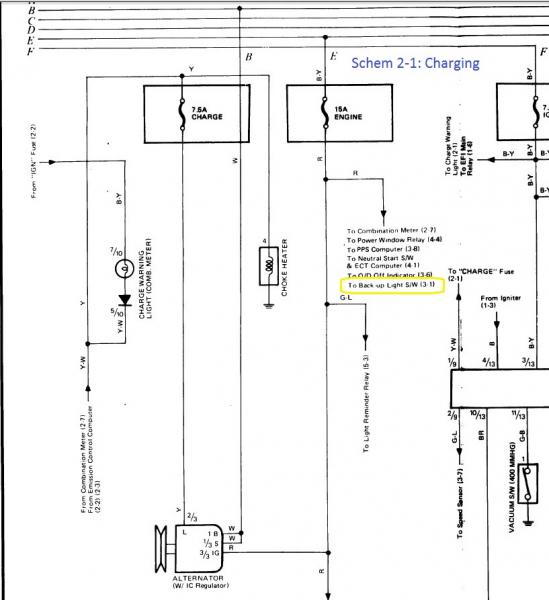
Backup Light Switch Wire Management
Engine fuse sends power to backup light circuit (yellow rectangle below), and more critical circuits like ECT and Alternator
86-88 4Runner schematic page 2 column 1:
86-88 4Runner schematic page 3 column 1:
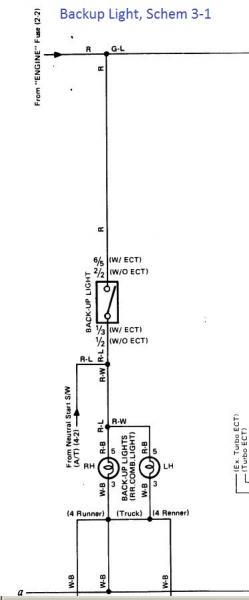
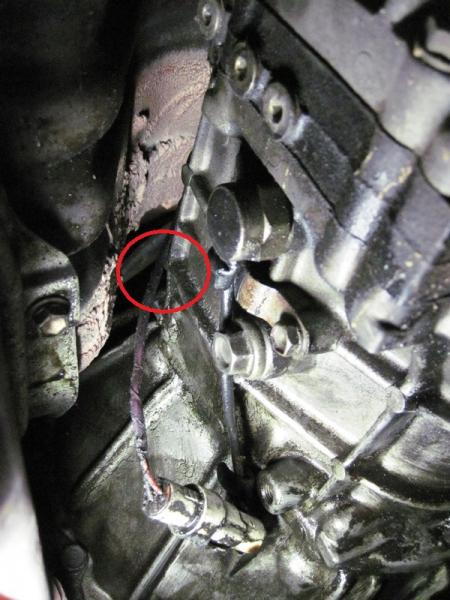
This wire, carrying +12V, rubs against transmission body (Encircled in red below), from vibration, especially from unsecured connector that is heavier than the wire.
On Youtube
[/YOUTUBE]
Eventually insulation could wear out, short to ground, and blow Engine Fuse (15A). Engine fuse supplies critical parts like the ECT, the excitation field for alternator and most of the dash indicators.
To fix this, I:
This is a good example of why switched ground, where possible, is better than switched positive. If the circuit were switched ground (i.e., where this wire provides ground to a relay) and this wire shorts to ground, reverse light will merely come on. No harm done - Heck, I see a lot of Jaguars, Audis and Mercedes on the freeway like that
86-88 4Runner schematic page 2 column 1:
86-88 4Runner schematic page 3 column 1:
This wire, carrying +12V, rubs against transmission body (Encircled in red below), from vibration, especially from unsecured connector that is heavier than the wire.
On Youtube
Eventually insulation could wear out, short to ground, and blow Engine Fuse (15A). Engine fuse supplies critical parts like the ECT, the excitation field for alternator and most of the dash indicators.
To fix this, I:
- Shielded wire with a flexible wiring conduit, and
- Secured connector with stock bracket on transmission body so it does not move.
This is a good example of why switched ground, where possible, is better than switched positive. If the circuit were switched ground (i.e., where this wire provides ground to a relay) and this wire shorts to ground, reverse light will merely come on. No harm done - Heck, I see a lot of Jaguars, Audis and Mercedes on the freeway like that
Last edited by RAD4Runner; 04-18-2014 at 04:28 AM.
01-08-2013, 05:11 PM
#154
Registered User
Thanks for the msg. I have been reading your threads, I really need to do the click-only start mod that you have figured out, and also my EFI fuse in the kick panel is melted away and the PO must have somehow bypassed the fuse in the wiring. I'll be trying to sort that out soon, so your tips and pictures have been pretty helpful.
01-08-2013, 07:12 PM
#155
Registered User
Thread Starter
Thanks for the msg. I have been reading your threads, I really need to do the click-only start mod that you have figured out, and also my EFI fuse in the kick panel is melted away and the PO must have somehow bypassed the fuse in the wiring. I'll be trying to sort that out soon, so your tips and pictures have been pretty helpful.
01-10-2013, 04:56 AM
#156
Registered User
Thanks RAD, I have the FSM, which has schematics, are you referring to those? You had a picture back a few pages where you pulled one of the fuse terminals and tapped into it for your deck light or something. Anyway, how do you pull those little terminals out from the fuse block? Is there a piece of plastic you have to push out of the way or do you just pull the metal terminal right out?
01-10-2013, 09:09 AM
#157
Registered User
Thread Starter
Thanks RAD, I have the FSM, which has schematics, are you referring to those? You had a picture back a few pages where you pulled one of the fuse terminals and tapped into it for your deck light or something. Anyway, how do you pull those little terminals out from the fuse block? Is there a piece of plastic you have to push out of the way or do you just pull the metal terminal right out?
Good! So you have the schematics. Re: terminals. You gotta look really close from the front. There is a notch on the plastic housing. You insert a really fine straight-slot jeweler's screw driver and push a tiny metal tab out of the way. Then, gently push back on fuse contact/terminal, OR gently pull wire from the back.
01-10-2013, 03:00 PM
#159
Registered User
Thread Starter
Hey guys, mind checking out how connector for backup switch is secured on your rigs? Mine vibrates and makes wire (carrying 12V) hit tranny (post above). Wanna secure it, too.
Also got all parts I need for H4 conversion and headlight harness upgrade. Trying to find time to do it. BTW the Autopal DOT housings I got through Ebay came with bulbs already, and seem to be well-built. I think many people have used that. Can't wait to see better.
01-10-2013, 07:01 PM
#160