
RAD4Runner's 1986 4Runner dlx Build-up
 12-16-2012, 08:02 PM
#121
Registered User
Thread Starter
LOL! Thanks, guys!
Mark, I'm with you on the wood. Passenger side panels of project panel is acoustically better acoustically than the thin plastic of panel in rear deck where 6x9's used to mount. I was considering polycarbonate (aka: Lexan) but it would be too expensive, to heavy and I think wood still has better acoustic quality to weight ratio.
I relocated my 6x9's to passenger side for better efficiency; Speakers should be closer to driver & passengers, not to cargo in rear deck. Space to right of roll-bars is reserved for future sub-woofer. BTW, the 6x9's are not stock and are rated for too much power than my HU puts out so someday I'll replace them with appropriate power rating, but that will come after the sub.
Yep, she's pretty quiet, except for the sound of the 22RE . Also, I still need to do the door and tailgate. This Christmas break will give me time to do that
Mark, I'm with you on the wood. Passenger side panels of project panel is acoustically better acoustically than the thin plastic of panel in rear deck where 6x9's used to mount. I was considering polycarbonate (aka: Lexan) but it would be too expensive, to heavy and I think wood still has better acoustic quality to weight ratio.
I relocated my 6x9's to passenger side for better efficiency; Speakers should be closer to driver & passengers, not to cargo in rear deck. Space to right of roll-bars is reserved for future sub-woofer. BTW, the 6x9's are not stock and are rated for too much power than my HU puts out so someday I'll replace them with appropriate power rating, but that will come after the sub.
Yep, she's pretty quiet, except for the sound of the 22RE
. Also, I still need to do the door and tailgate. This Christmas break will give me time to do thatHoly WOWWWWWWWWWWWWWWWWWEEEEEEEEE! You really went full on SPACE SHUTTLE INSULATION on this thing! ABSOLUTELY INCREDIBLE planning and execution, Rad! Seriously... GREAT work! That thing has to be the softest, most quiet 4Runner in CA! lol.... Maybe PERIOD! hahaha.
Nice on the speaker install... Really nice. I've been keeping my eyes open for a spare panel as to maybe modify it or build my own like the rear ones I did... AND THEN install the speakers... Meh, some day... for now, mine are mint... I just can't cut em. But they DO turn up, ya know?
Now I have 2 pairs of PERFECTLY mint rear OEM Panels I got at the yards..... Access doors, corners, edges, ... not a single chip in em, etc. I'm sure I'll have no problem getting rid of them. I think if people shot them with that Truck Bed stuff or maybe even that "Spray on Rubber" stuff... it would SERIOUSLY strengthen them up... Not to the point that they'll support 6x9s on their own without future drama pending, lol... BUT, strong enough that they're quieter and less likely to screw up. I think RBX also wrapped his in Sunbrella Fabric... GREAT idea. I'm good with the wood, lol.. BUT, it's a great idea for "OEM OR NOTHING" ideals, ya know?
Take care, bud... and hopefully see ya soon!
 12-17-2012, 01:38 AM
#122
"Except for the 22RE" ??? What's this all about that I keep hearing...... Richard and Grego will tell ya... Mine must be a pretty quiet one at idle... Cuz people keep yelling at me, "Dang you... why is that so quiet!?!?!?!" hahaha. But sure, it's a lil sewing machine... And under any load, it sure can get a lil noisy... Especially with a Header, believe it or not.
OHHHH, so you ARE going to so something similar to me in the very rear? COOL! I LOVE IT! Richard will tell ya.. The speaker sounds good in there... And it's VERY SOLID... He was pulling on it(I think he was).... Dude, seriously... those Screws and Expansion Nuts are INSANELY solid... and they pull the panels off the metal an 1/8" or so... So EXTRA vibration defense... AND I put 3/8" Weather Stripping from Frost King around all the mounting surfaces. Once I do the carpet... and you see how it's all done... I think you'll be impressed with how solid and sound proof and weather proof it is... OBVIOUSLY not as sound proof as yours! hahaha... BUT, it's enough to create a GREAT speaker hole for my 6x9's.... Mine are very powerful Pioneers... Compared to many that I hear. I only have 4x50W on my deck... But 600W RMS to the 10" Competition JL Audio Sub.... Which Richard has also heard and can tell ya... sounds very clean! (You'll hear it too, I think )
OHHHH, so you ARE going to so something similar to me in the very rear? COOL! I LOVE IT! Richard will tell ya.. The speaker sounds good in there... And it's VERY SOLID... He was pulling on it(I think he was).... Dude, seriously... those Screws and Expansion Nuts are INSANELY solid... and they pull the panels off the metal an 1/8" or so... So EXTRA vibration defense... AND I put 3/8" Weather Stripping from Frost King around all the mounting surfaces. Once I do the carpet... and you see how it's all done... I think you'll be impressed with how solid and sound proof and weather proof it is... OBVIOUSLY not as sound proof as yours! hahaha... BUT, it's enough to create a GREAT speaker hole for my 6x9's.... Mine are very powerful Pioneers... Compared to many that I hear. I only have 4x50W on my deck... But 600W RMS to the 10" Competition JL Audio Sub.... Which Richard has also heard and can tell ya... sounds very clean! (You'll hear it too, I think
)
12-17-2012, 04:35 PM
#123
Registered User
Thread Starter
"Except for the 22RE" ??? What's this all about that I keep hearing...... Mine are very powerful Pioneers... Compared to many that I hear. I only have 4x50W on my deck... But 600W RMS to the 10" Competition JL Audio Sub.... Which Richard has also heard and can tell ya... sounds very clean! (You'll hear it too, I think )
)Can;t wait to hear your system, Mark.
12-17-2012, 04:54 PM
#124
Registered User
Join Date: Sep 2011
Posts: 57
Likes: 0
Received 0 Likes
on
0 Posts
stumbled apon this.im having a prob with my dash lights working.the break lights work and so do the headlights and runners.no blown fuses and i yanked the dimmer knob and jumped a wire on the conector from the + to the other +.negetive is good.and still nothing.is there something im missing?my normal ce and break indicators come on when i turn the ignition..im stumped!!
12-17-2012, 05:18 PM
#125
Registered User
Thread Starter
Fender-Mounted Turn Signal Using Trail Gear Amber LED Lights
I always use my turn signal to turn or change lanes, and I want driver in my blind spot to see and anticipate my move in case I do not see him, so he can alert me or react accordingly. On the first-gen 4Runner, driver to my left or right do not see the rear turn signal nor the front one because front one faces front. So a fender -mounted turn signal makes good sense.

Heck, even the beat-up Yota they tried to kill on Top Gear had it, so I'm surprised that U.S. model cars are not required to have fender mounted turn signal.
Let's fix that!
Stewsrunner's post reminded me to start research on this.
I decided to use the Trailgear Amber LED Lights because:

Sorry guys - I think my web order prompted them to update the price on website (LOL!)
It came in the mail quickly thanks to Off-Road Warehouse, San Diego and Trail Gear for excellent customer service and quick shipping.

As-Built Location:
Right below the antenna, similar to location on pick up they tried to kill on Top Gear. Upon installation I realized it angled a little too high, so IF you're going to do this, I recommend to place it below imaginary line level with bottom of door handle.

Prep work:
I want minimal crevices to catch dirt and retain moisture/salt crystals so I shaved off the rim in back.


Mounting Hardware:
M4 screw is ideal, but I already have stainless steel 8-32's. I'll just use those.
Mounting
Opening for wires.

Mounting Holes:

I would apply a thin (approx 1/16") layer of RTV, let it harden a little, then apply more to fill up the mounting holes and opening for wires

Installed:

Ran Wires along existing loom under fender:

... To front right corner behind and below marker light...

Tapped off (stripped, wire-wrapped-soldered, insulated) green wire with yellow stripe (pos for right turn signal). Please check schematic for left side, white with black stripe (ground). Also tapped off positive for marker light (green wire) and ran other (insulated) end to fuse box for future use.

Done:

In Action:
Heck, even the beat-up Yota they tried to kill on Top Gear had it, so I'm surprised that U.S. model cars are not required to have fender mounted turn signal.
Let's fix that!
Stewsrunner's post reminded me to start research on this.
I decided to use the Trailgear Amber LED Lights because:
- I like the robust and simple mounting. Standard screws, minimal cutting into body panel. (Snap-in fixtures use flimsy hidden clips and require larger cuts in body panel so I do not trust that.)
- Waterproof construction of polycarbonate!
- LED so no need to replace bulb
Sorry guys - I think my web order prompted them to update the price on website (LOL!)
It came in the mail quickly thanks to Off-Road Warehouse, San Diego and Trail Gear for excellent customer service and quick shipping.
As-Built Location:
Right below the antenna, similar to location on pick up they tried to kill on Top Gear. Upon installation I realized it angled a little too high, so IF you're going to do this, I recommend to place it below imaginary line level with bottom of door handle.
Prep work:
I want minimal crevices to catch dirt and retain moisture/salt crystals so I shaved off the rim in back.
Mounting Hardware:
M4 screw is ideal, but I already have stainless steel 8-32's. I'll just use those.
Mounting
Opening for wires.
Mounting Holes:
I would apply a thin (approx 1/16") layer of RTV, let it harden a little, then apply more to fill up the mounting holes and opening for wires
Installed:
Ran Wires along existing loom under fender:
... To front right corner behind and below marker light...
Tapped off (stripped, wire-wrapped-soldered, insulated) green wire with yellow stripe (pos for right turn signal). Please check schematic for left side, white with black stripe (ground). Also tapped off positive for marker light (green wire) and ran other (insulated) end to fuse box for future use.
Done:
In Action:
Last edited by RAD4Runner; 01-15-2018 at 01:06 PM.
The following users liked this post:
SomedayJ (03-01-2020)
12-17-2012, 05:38 PM
#126
Registered User
Thread Starter
stumbled apon this.im having a prob with my dash lights working.the break lights work and so do the headlights and runners.no blown fuses and i yanked the dimmer knob and jumped a wire on the conector from the + to the other +.negetive is good.and still nothing.is there something im missing?my normal ce and break indicators come on when i turn the ignition..im stumped!!
Sounds simple to troubleshoot, and would be glad to help, but it's best if you could find schematic for your truck and post high resolution scan (1280pixels x 1024 pixels for us with poor eyesight- LOL!). (Mine's a 1986 4Runner. Not sure if schematic is same as yours.? Then I and other members can help analyze. Also suggest you search for most recent "dash light" thread and post there. More people who have first-hand experience with that problem will see it. Please update me on where you posted so I can follow.
12-17-2012, 05:38 PM
#127
Registered User
iTrader: (1)
Join Date: Oct 2011
Location: Tahoe, California
Posts: 987
Likes: 0
Received 0 Likes
on
0 Posts
Nice job man! I think I may have to get off my butt and try this out, the solid lights that is. Those blinkers are very sweet however, looks very simple to set up.

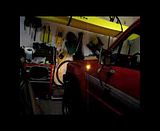
 hahaha.... I have a rubber ducky warning system in my garage!
  12-17-2012, 11:19 PM
#129
Registered User
Thread Starter
LOL!! Thing used to go up and down with garage door but cord wore out. Too much trouble so now I just hung it stationary. Would hurt a thing anyway - LOL!
12-18-2012, 10:31 AM
#130
Registered User
Thread Starter
Fog Light Install And Model Question
12-22-2012, 12:32 AM
#131
Registered User
Thread Starter
Looking For Shift Lever Door Bezel
Looking for shift lever door bezel (metal piece only) for the 86 4Runner, 22RE, 5-Speed. If you know of a junkyard in Los Angeles or Orange County that has one on the yard, please advise.

Approx distances between mounting hole centers if you have one for sale here:

TIA!
Approx distances between mounting hole centers if you have one for sale here:
TIA!
12-23-2012, 01:29 PM
#132
Registered User
Had fun yesterday. Thank you very much for teaching me how to read the schematics and thanks for explaining the mechanics of these window buttons. I now see things more clearly. Oh and thank you for last nights dinner. was good.
Just read your thread. Very nice man. Hey was just wondering if you could upload the picture from yesterday.
Just read your thread. Very nice man. Hey was just wondering if you could upload the picture from yesterday.
12-23-2012, 03:00 PM
#133
Registered User
Thread Starter
Had fun yesterday. Thank you very much for teaching me how to read the schematics and thanks for explaining the mechanics of these window buttons. I now see things more clearly. Oh and thank you for last nights dinner. was good.
Just read your thread. Very nice man. Hey was just wondering if you could upload the picture from yesterday.
Just read your thread. Very nice man. Hey was just wondering if you could upload the picture from yesterday.
Pics posted in post your pics thread here.
Also PM'ng you the rest...
12-25-2012, 08:52 AM
#134
Super Moderator
Staff
iTrader: (1)
Join Date: Aug 2008
Location: Anderson Missouri
Posts: 11,788
Likes: 0
Received 25 Likes
on
22 Posts
It is cold here. Hoping in the next couple of weeks to go to the boneyard and will keep an eye for a shifter plate. They arent to much if they have one. It may be a while as we are in the 20s.
Looks like you guys had a great time. Some good pics as well. Having some one like you to explain to Richard on schematics and such was surely worth several hours of studying books and trial and error. Sure you moved him light years ahead of time in electrical learning. Great job.
Looks like you guys had a great time. Some good pics as well. Having some one like you to explain to Richard on schematics and such was surely worth several hours of studying books and trial and error. Sure you moved him light years ahead of time in electrical learning. Great job.
12-25-2012, 09:26 AM
#135
Registered User
Thread Starter
It is cold here. Hoping in the next couple of weeks to go to the boneyard and will keep an eye for a shifter plate. They arent to much if they have one. It may be a while as we are in the 20s.
Looks like you guys had a great time. Some good pics as well. Having some one like you to explain to Richard on schematics and such was surely worth several hours of studying books and trial and error. Sure you moved him light years ahead of time in electrical learning. Great job.
Looks like you guys had a great time. Some good pics as well. Having some one like you to explain to Richard on schematics and such was surely worth several hours of studying books and trial and error. Sure you moved him light years ahead of time in electrical learning. Great job.
Thank you so much, Terry. Always glad to help Yota brothers. Merry Christmas & Happy New Year!
12-26-2012, 08:25 PM
#136
Registered User
Thread Starter
Ruby Tuesday's Christmas Presents
Thank you very much, grego92, for the Christmas present!

Also got her a woodland camo floor mat, 'cause driver's side one already had holes worn through by heels.

Now she could almost pass for a proper Southern truck =D
Also got her a woodland camo floor mat, 'cause driver's side one already had holes worn through by heels.
Now she could almost pass for a proper Southern truck =D
12-26-2012, 08:41 PM
#137
Registered User
iTrader: (4)
Join Date: May 2010
Location: People's Republic of California
Posts: 720
Likes: 0
Received 15 Likes
on
12 Posts
Looks good Ray! I wish I had known you needed the other side also, one day I'll come across one I'm sure. Merry Christmas, and nice meeting you, and I'm sure we'll meet again.
01-04-2013, 08:09 PM
#138
Registered User
iTrader: (4)
Join Date: May 2010
Location: People's Republic of California
Posts: 720
Likes: 0
Received 15 Likes
on
12 Posts
Ray, found this bezel off an 85' 4runner....the rubber boot was not with it. Yours if you need it! otherwise going in the trash....it didn't cost me anything, magically appeared from under my tool bag when I got home 

01-04-2013, 10:51 PM
#140
Registered User
Thread Starter
Starting On Headlight Circuit Upgrade Harness
Yep, Grego-Claus!
I could surely use it. I'm not sure about similarity with 85 & 86 shifters so, but screw spacing should be a good check. Mind comparing with pic above?
If good, please mail to me. I'll refund shipping.
Tnx, Mark. Pretty good now. Found myself having breakfast in a hospital bed on New Year's day - LOL! Spent the eve there because I had vertigo that doc blamed on some virus that affects the inner ear. Past 2 days left me light-headed but all's well now. Drove Ruby Tuesday to work today. This weekend, I'll be working on headlight system upgrade harness. Review of our schematics shows that the headlight has similar flaw as the cranking system. My measurements show we drop around 10% of battery voltage on wire resistance. That's a significant loss of power to bulbs and hence brightness- That's why our headlights are so dim .
I initially planned to actually modify stock wiring and up-size the wires, but decided otherwise. A Plug-and-play harness would mean:
Also looked at the Putco one online to save me time but there are too many bad experiences/reviews with one. I don't want that Made in freakin' China crap. Heck! I want mine made with pride in my garage in the U.S of A.
I could surely use it. I'm not sure about similarity with 85 & 86 shifters so, but screw spacing should be a good check. Mind comparing with pic above?
If good, please mail to me. I'll refund shipping.
Hope you're well, RAD.... wishing you a very Happy New Year!
I initially planned to actually modify stock wiring and up-size the wires, but decided otherwise. A Plug-and-play harness would mean:
- Less diving in the spaghetti soup,
- Easy to restore to stock; not that I'd want to, but just as a back up in case something in harness goes bad.
- Easy for others to try harness if it works with their system (86-88 4Runners, or other trucks with similar switched-ground dimmer-combo schematic)
- Easy to share build details with you guys so you can make your own easily =D
Also looked at the Putco one online to save me time but there are too many bad experiences/reviews with one. I don't want that Made in freakin' China crap. Heck! I want mine made with pride in my garage in the U.S of A.
Last edited by RAD4Runner; 01-04-2013 at 10:53 PM.


