When you click on links to various merchants on this site and make a purchase, this can result in this site earning a commission. Affiliate programs and affiliations include, but are not limited to, the eBay Partner Network.
Woke up this morning on my birthday and realized I'm pretty sure I'm going to have to pull the motor again and take a look at it to see what the metal clunking issue is. I've got little to no power and it's running really rich. I may try and adjust the timing and valves again, as well as run a wet and dry compression test and leak down test. My intuition tells me that the wrong valve seals on there was allowing a bunch of oil into the cylinders and the rings didn't seat right if at all because of it.
I may slap together that other motor and drop it in there just for the time being so I can have my daily driver back up and running....we'll see.
I'll post all of my diagnostic findings and compression check numbers on the forum here in case someone has gone through the same ordeal.
It shouldn't have had any metal shavings floating around as it was hot tanked and cleaned before the machine shop bored out the cylinders and cleaned thoroughly afterwards. I'm really hoping if the cylinder walls are scored, it'll be able to be honed out.
Not looking forward to pulling the motor again, but I am looking forward to having it up and running when I finally get everything resolved.
Luckily, my dad drove his farm truck up this weekend, so it isn't my only vehicle and I can park it at the house and begin to tear it back down.
you mentioned youre hearing a metal clanging noise which you assumed was the crank scraper rubbing, which could be metal in the engine, or even the bearings possibly. you wont catch any aluminum, but an idea to see if there is any metal floating around is slap a magnet on the oil pan or use a magnetic drain plug. when i pulled my pan to clean out the oil pickup tube i didnt pull the motor. i unbolted the motor mounts, tranny mounts and jacked it as high as i could. it worked for me and made it way easier to fix since i was working on the road and didnt have access to a cherry picker.
I'm planning on using the stethoscope to try and get a general idea of where the noise is coming from before I start pulling anything apart. The crank scraper was just my initial hypothesis...but I'll definitely hoist it up high with the cherry picker and drop the pan and pull it that way. I didn't think about the metal shavings that could be coming off from whatever is rubbing, but there wasn't any dust on the magnetic drain plug when I changed the oil last week. I'll also do a full compression test on each cylinder (wet and dry) and a leak down test as well just to try and diagnose if it's the rings without having to tear it down all the way to them to see. Pulling the head off and looking down into the cylinders isn't a problem because I have several Head Gaskets for this laying around and I got the ARP Studs that can be reused instead of the factory style bolts that stretch when they're initially torqued and you're chancing it to use them again.
If those numbers look bad, or I can't figure out what's going on with the noise....then I'll go ahead and pull it. Luckily, I've got another longblock sitting on a stand in my livingroom and may toss it in in the interim so I can still have it as my daily driver. Of course I'll have to pull off the dual sidedraft weber setup on that one, but it should be good to go.
I'm under a crazy workload and deadlines at work and was at the office all weekend, but that may end up affording me Thursday and Friday off to make up for it if I can get everything turned in on time (woo hoo 4 day weekend to work!)
On a side note, I worked a deal and got what I thought was a free Warn 8274 on a deal I did a couple of weeks ago. (bought a M10000 for $200, the guy threw in an 8274 for free....sold the M10000 a week later for $450) I used some of the cash and bought a genuine Warn motor (upgraded 4.7HP unit).
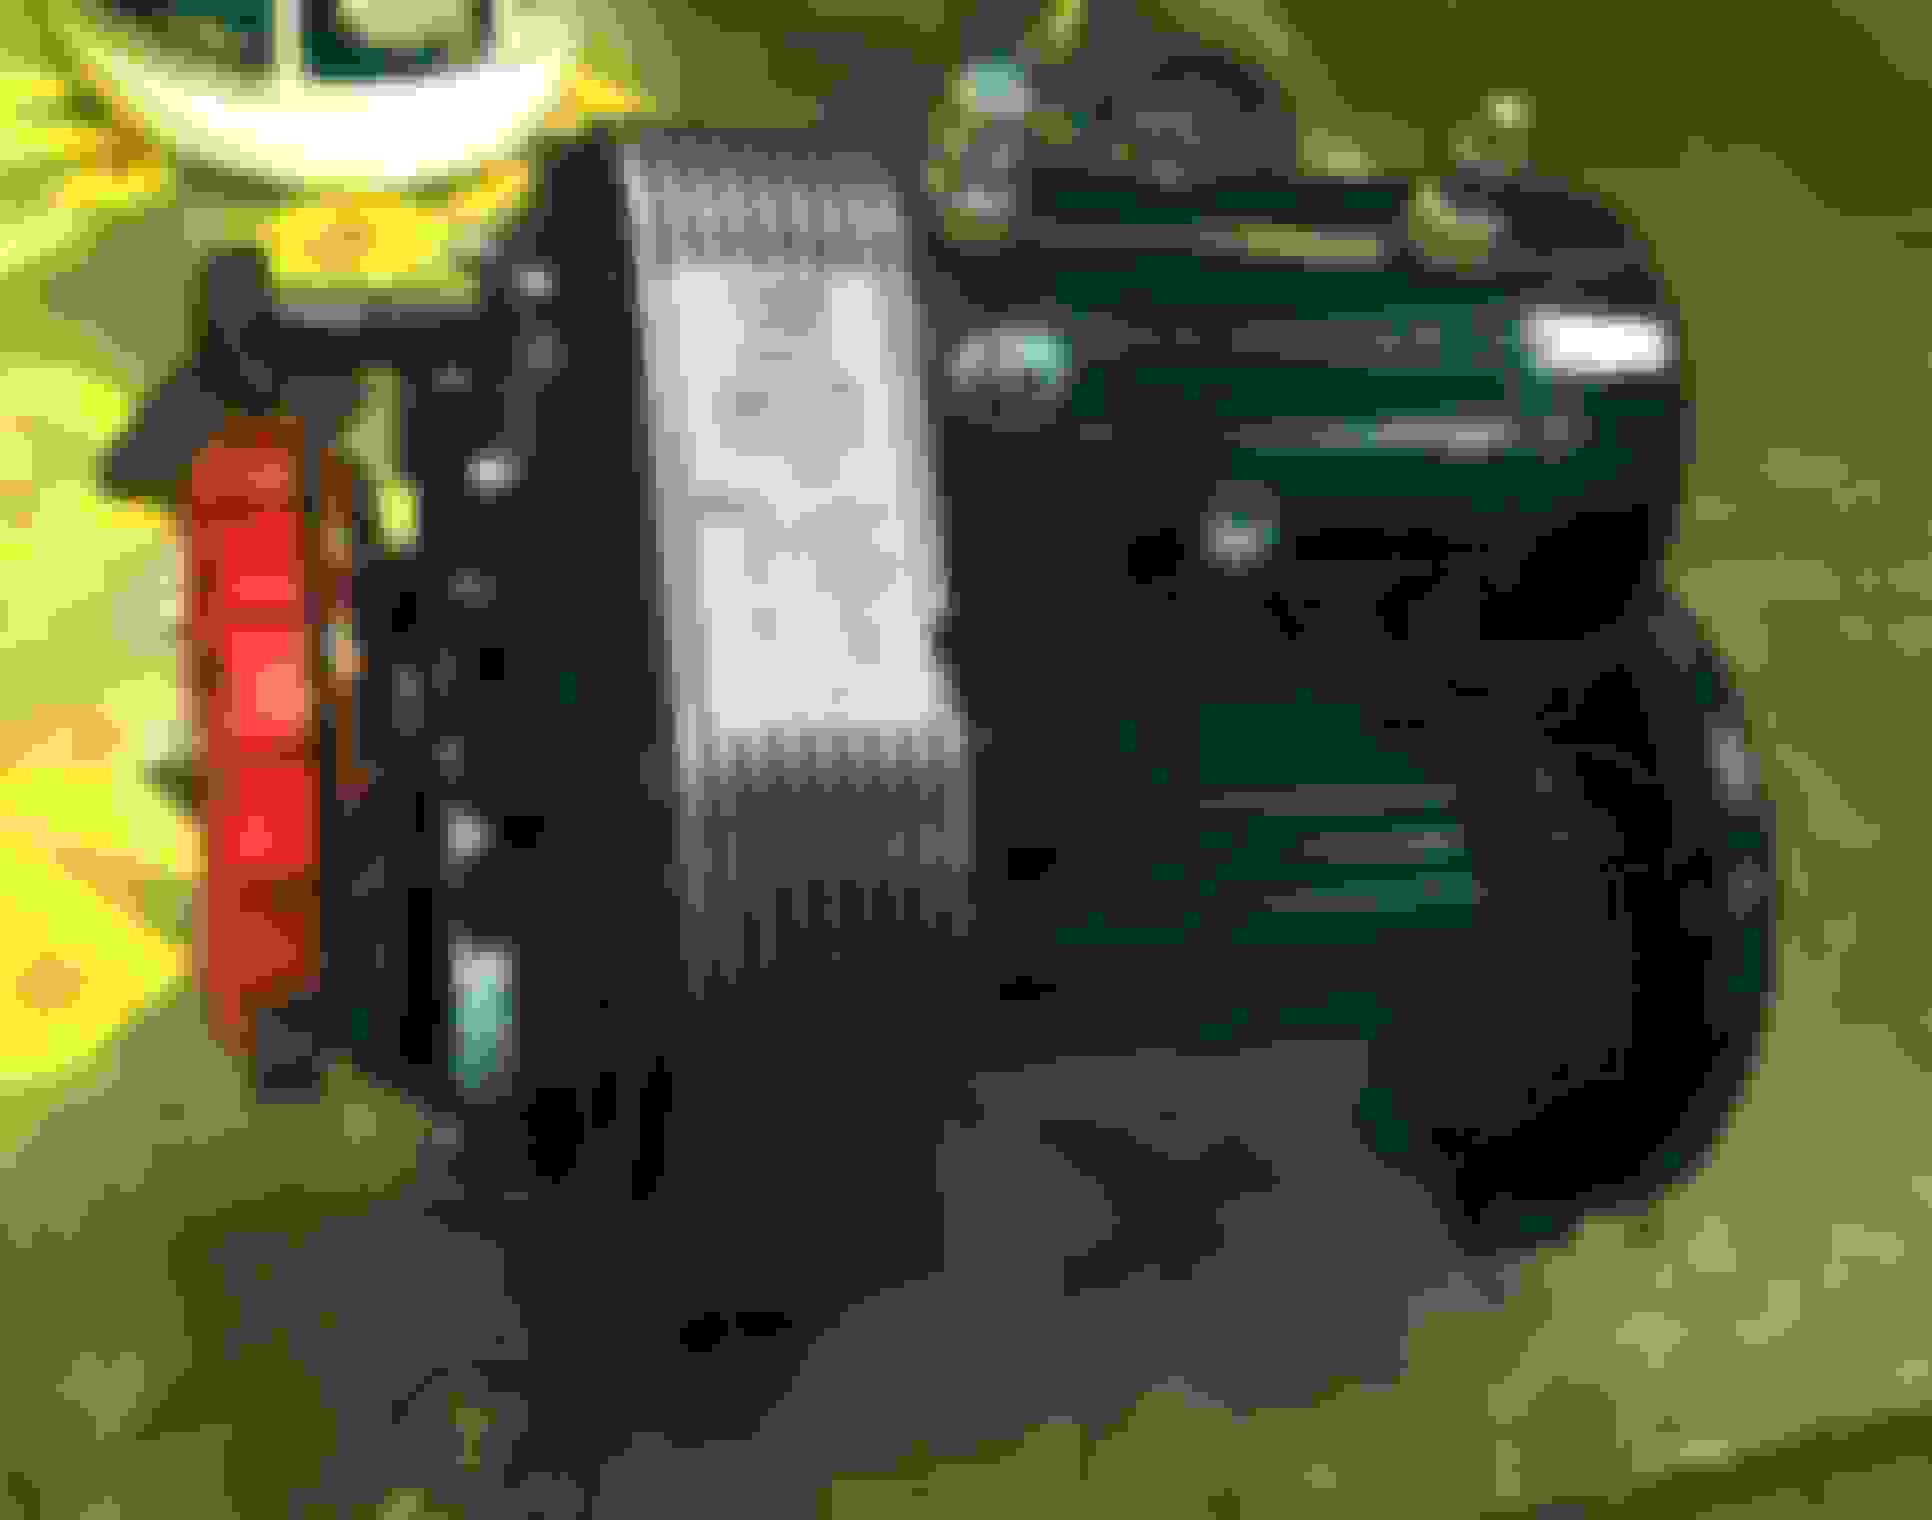
Well, it turns out after a little more research, my winch ISNT an 8274. It's missing the clutch release handle and only has a 5 digit SN. From everything I've read it's an 8074 that only had power in and power out (it will spool out faster than most people walk, so that's not a problem). These winches came as a dealer option in '76-78 on Jeeps and actually had a Jeep sticker on the top. It was missing the solenoids and was in overall downright awful shape. So I took it apart (much easier said than done) one night while watching movies. To get the break apart I had to use a 3-jaw puller and completely pound the thing off of there little by little with a hammer.
Got it all apart, and when I was up at the shop, decided it would be much easier to sandblast it clean than degrease and wire brush it. Here are some before shots as well as some of a few of the parts post sand blasting.
I'm currently painting it black and red and will be ordering new bearings and rope hopefully before Christmas.
Warn 8074 (8274 minus the clutch handle) were a dealer option on Jeeps from '76-78 or so.
it rained all weekend here and I didn't get a chance to even look at the truck. I did however head up to the shop and got some work done on the winch. By the beard of Zeus I barely got the cam off of the brake shaft and then was able to chuck it up in the lathe to drill and tap the brake end of the shaft to use a more reliable bolt and washer setup than the clip. They also had more media in the sandblaster, so I got to finish blasting the lower housing (really didn't want to pull out the Q-tips and degreaser to clean that bugger up).
This should be the last busy week I have for a while and I'll be able to get some work done soon. Stay tuned for updates.
I had to help a guy swap out motors this week in 28 degree weather overnight, so I was a little burned out on working on the 4runner and whatever issues it may have.
I did however get the winch finally finished and reassembled. I still have to buy a contactor and 150' of dyneema amsteel blue winch line for it along with the switches and cables to hook it up, but as far as having it ready to be able to mock up the bumper, I should be good to go. This was a Jeep dealer option 1976-78 Warn 8074 winch and was missing the freespool clutch. In order to up the resale value and have the convenience of the freespool option, I went ahead and milled out the area for it and tapped and threaded the bolts to add this freespool clutch to it. I also put a 1/4" NPT to 1/8" NPT drain plug in the bottom of the housing and a fill plug in the top side of the housing. Another mod I'd seen and liked was drilling the hardened tool steel break shaft to put a bolt on the end instead of the clip that is prone to popping off under load.
Modifications / things I replaced along with associated part #s
Warn 75936 motor new 9000# 4.5hp from 9000x- $100 off ebay - still in box
Mcmaster 6661K104 - Double sealed 40mm x 17mm bearing for motor - $10
Warn 15879 splined pinion gear - $20 Summit
Warn 8326 Freespool Clutch assembly (Added) - $70 Summit
Mcmaster 1263K194 - 4" stainless 3/8" OD shaft for upper housing (turned on a lathe to add "E" clip retaining clips to prevent walk - $10
Mcmaster 5905K132 - Double Sealed roller bearing for 3/8" Shaft Diameter, 9/16" OD, 5/8" Wide x 2 for upper housing gear shaft - $10
Warn 37489 - 8274 label for upper housing - $5 Summit
Warn 7613 - break shaft O-ring - $2 Summit
Warn 7612 - Break Shaft outer radial Seal - $7
Warn 8680 - Lower housing service kit (plastic washers and lower oil seal) - $30 Summit
Warn 8356 Capped Needle bearing for break shaft - $20 Summit
McMaster 4452K161 - 1/4" NPT to 1/8" NPT SS fitting (to be used as drain and filler plug tapped into case and sealed) x2 - $10
McMaster 4452K541 - 1/8" NPT hex drain plug SS X2 - $2
Various other hardware / washers / nuts / etc....all stainless
Here's the results:
all cleaned up and polished
SS fill plug - probably should have put it on the other side so it didn't interfere with the gears (I had to grind it down some on the inside), but I'm relocating the Solenoid pack to under the hood to have more room for my lights so it shouldn't be a problem
New Warn 8274 sticker (I Checked with Warn, they don't offer the original Jeep dealer sticker for the 8074, and since I added the freespool clutch....it should be fine, although it's certain to confuse someone down the road that tries to look up the 4 digit serial # without a date code!
Freespool clutch added and installed
I've heard one of the main points of failure is the break retaining clip popping off under a load, so I chucked it up in the lathe and drilled and tapped a 5/16" bolt into the end and turned off the other part I didn't need
Upgraded 9000 lb 4.5HP motor over the original 2.3 HP Prestolite motor.
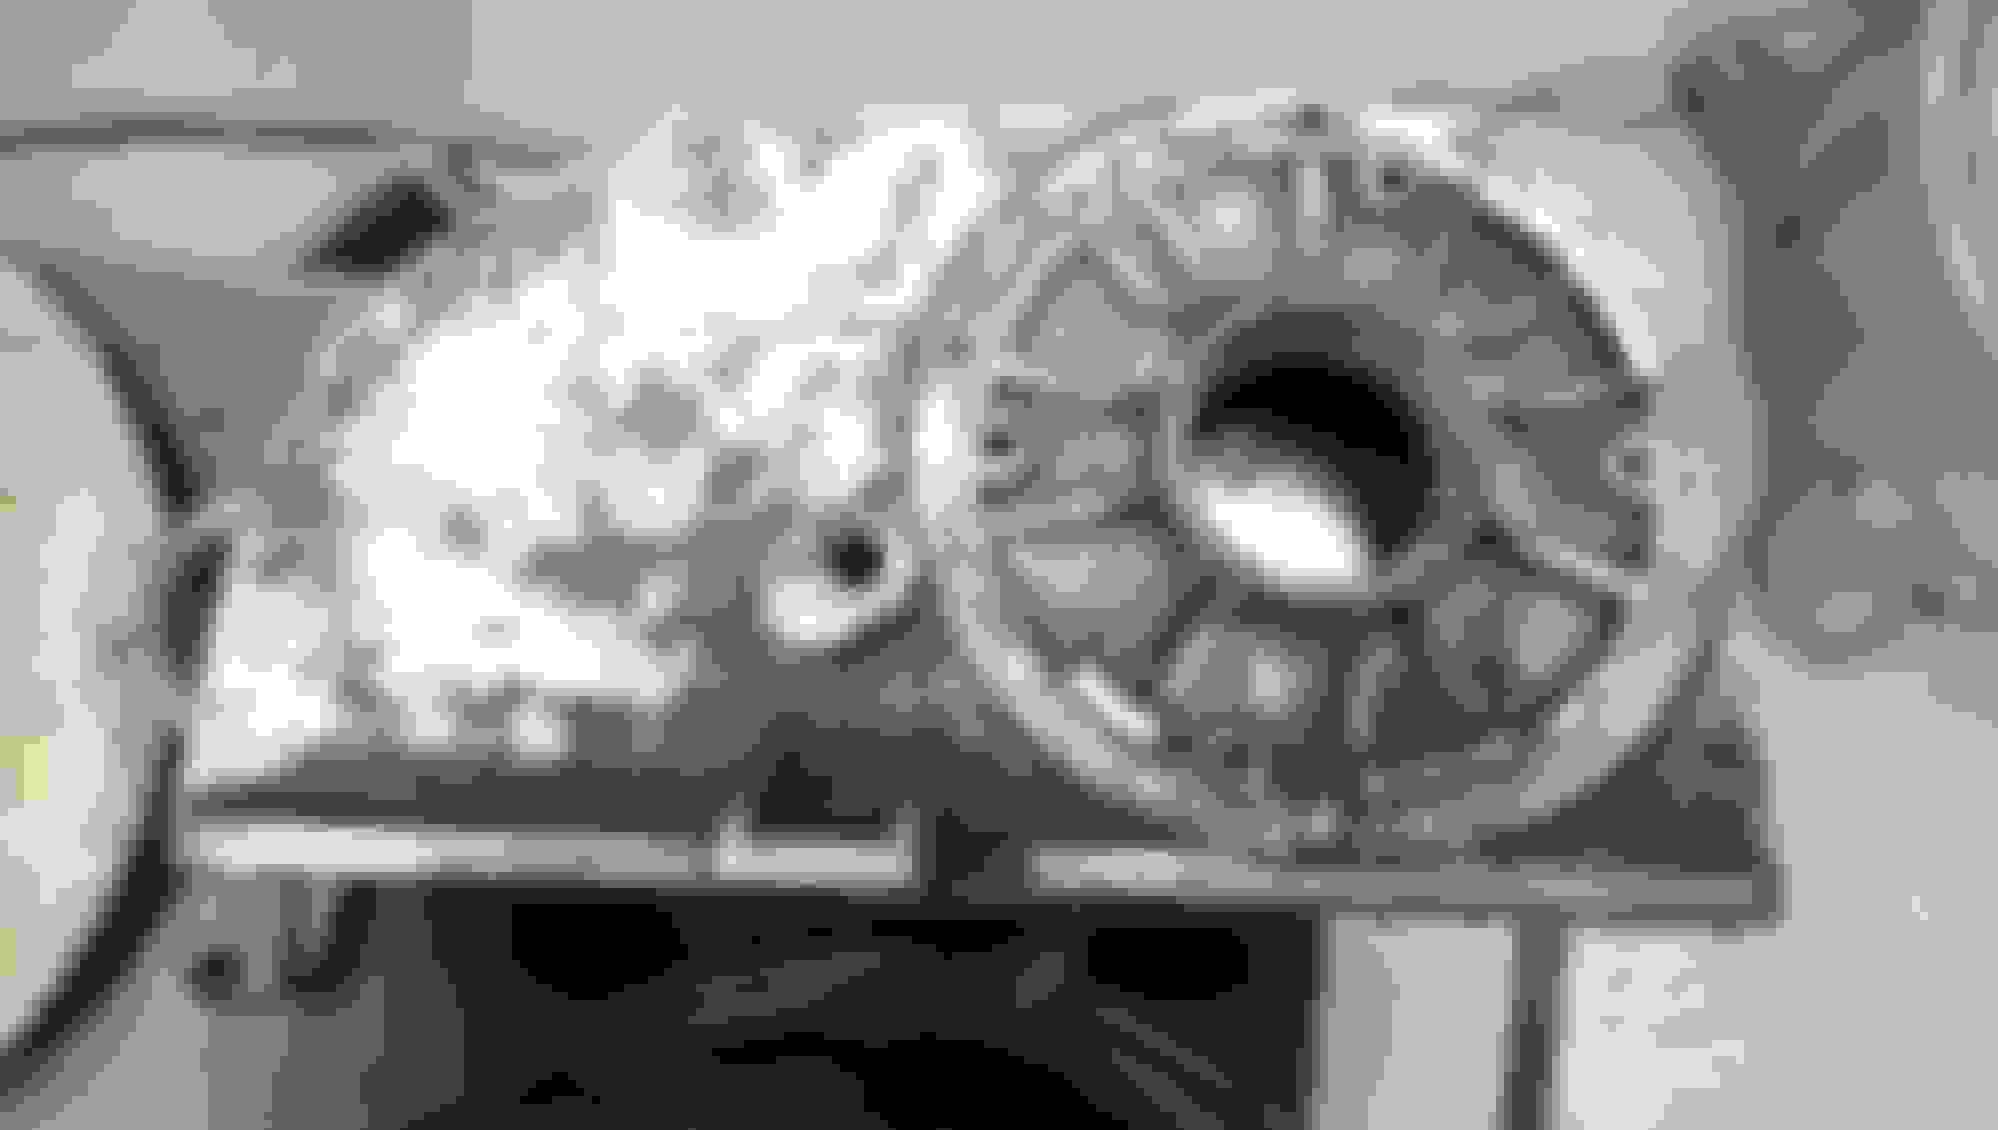
Well the good news is that it finally stopped raining on the weekend and I was able to get out and assess the issues with the engine. After following the guidelines (warming up the engine, pulling all of the plugs, and doing multiple test on each cylinder and averaging them out) I checked the compression.
Compression was as follows:
Cylinder #1 - 165
Cylinder #2 - 170
Cylinder #3 - 175
Cylinder #4 - 175
***all within spec, but probably should have been a bit higher (in the 180-190 range) because of the KB high compression pistons I have in there
The bad news is the leak down test. Every cylinder was either in the low end of the yellow, or in the red. For an engine with less than 2500 miles on the new motor, and one that is just burning up oil like crazy (pretty much oily wet at the exhaust pipe), this means massive blow-by past the rings, not to mention other potential issues from the metal clanking sound.
So the plan is to pull it and re-ring it at this point, hoping that it doesn't have to be re-bored and just needs the glazing to be broken and re-honed.
The question i'm asking myself is whether or not I want to try and do this again at the house, or take it into a shop (or send it off) to have it re-honed, re-ringed, and re-assembled as a full longblock. Another question I have is whether or not I should slap the turbo block I have together and drop in in the 4Runner to have a daily driver in the meantime while I'm working on getting the "bulletproof" motor back up and running.
not sure which direction I'm going to go in as of yet, but might wait on my Tax return to decide that for me.....we'll see.
As you can imagine, more than a year after having the first one blow up on me, I'm pretty frustrated with the entire thing and worn down from every free weekend spent working on it to no avail. Luckily, I just happen to be reading the book "Shop Class as Soul Craft" which is about learning useful skills by actually doing the work yourself, and the emotional satisfaction of completing something and seeing it through to the end, which has taken a bit of the sting, or at least some of my frustration out of the equation. I have multiple other projects and things I want to do to the rig, but I'm already way over budget on this part of the project and still don't have a reliable Toyota (which is why I bought the thing in the first place).
I have read your whole thread but it was a while ago, so I'm sorry if I ask some questions that have been answered before.
When you are doing the leak down, why do you think it comes from the block and not the head?
Why do you think the metal clanking sound comes from the block not the head?
You wanted a bulletproof engine, did you get the block balanced (should not help in normal driving reliabilty, just aking out of curiosity).
After adding the Arp rod bolts, did the rods get re-sized?
Did the block get honed acording to the ring type/material used?
Had anything been done to aid in oil flow (not pressure) ?
Just brainstorming with you and adding some life to this thread, really bums me out to see a guy learning his way by himself but hitting walls after walls, don't give up I feel your pain! A great man once said the most knowledgable man is not one who knows everything, but one who knows where to get the correct answers! There are many great books on competition engine building and blueprinting out there, makes for a great read!
I have read your whole thread but it was a while ago, so I'm sorry if I ask some questions that have been answered before. There's never a dumb question, especially when you're trying to figure something like this out
When you are doing the leak down, why do you think it comes from the block and not the head? I'm not 100% sure that the leak down failure is from the rings not seating, but it makes the most sense. This is a brand new head, the head gasket isn't blown and is properly sealing, and it was a freshly machined .40 over block
Why do you think the metal clanking sound comes from the block not the head? I actually think that the metal clanking is either the crank hitting the crank scraper (aftermarket part I should probably remove, but thought I needed at the time, the dual row timing chain hitting somewhere, or possibly the valve train. I'm not sure, but am hoping to find it if I do a full tear down / rebuild....again.
You wanted a bulletproof engine, did you get the block balanced (should not help in normal driving reliabilty, just aking out of curiosity). The block was balanced and blueprinted by the shop I took it to. They had it for over 8 months, did all of the port and polishing as well as installing the hardened stage 5 SS valve seats and Pro guides and Viton seals on the wrong head (earlier 81-84 model I'm trying to sell at the moment) and determined my other head was cracked. So I ordered a brand New LCE head that they put oversized valves into and the dual springs with chromoly retiners and hardened keepers along with the EFI pro camshaft.....all from LCE.
After adding the Arp rod bolts, did the rods get re-sized? The machine shop assembled the lower end of the short block. All I remember was them asking if I wanted to use the standard or the ARP, and I went with ARP (as reflected on my bill). using different bolts would cause a need to shorten the rods????
Did the block get honed according to the ring type/material used? Originally had Total Seal gapless rings installed by the machine shop. I would assume they honed it to the correct specs for that, but when I disassembled it the first time (no power and massive blow by), they had put the gapless ring in the wrong groove and upside down. I changed the rings out to the regular Total Seal ductile iron plasma moly coated "Street" rings from LCE and used the correct bottle brush hone when doing that. The issue I think arises from the wrong (oversized) valve seals designed and made for the "Pro guides" (much bigger / fatter) than the stock ones. Although I had re-purchased the Pro guides and hardened SS valve seats, the machine shop did not install them as I think they were upset they had already done all of the same work on the wrong head (their mistake). Because it had the wrong valve seals on it, it was literally sucking oil down into the cylinder every time a valve opened. I'm not a super engine buff, but that would cause a ton fo carbon buildup and is not the ideal conditions for rings to seat. If it turns out It needs to be re-ringed, I'll probably go with the basic standard Hastings rings
Had anything been done to aid in oil flow (not pressure) ? I pulled the block from a 2WD 90's truck out of a junk yard with less than 100,000 miles on it, and was obviously a grandpa's truck based on the medical adjusting seat that was installed. Block was hot tanked and fully cleaned. all new Freeze plugs and rebuild kit. Turbo oil pump installed with adjustable oil pressure modulator with oil cooler and dual remote K&N 3001 oil filters. Upgraded valve rods with better oiling holes (LCE). Is there more that can be done than that to increase oil flow?
Just brainstorming with you and adding some life to this thread, really bums me out to see a guy learning his way by himself but hitting walls after walls, don't give up I feel your pain! A great man once said the most knowledgable man is not one who knows everything, but one who knows where to get the correct answers! There are many great books on competition engine building and blueprinting out there, makes for a great read!
haha....I'm definitely not trying to build a competition engine. I don't want to be the baddest guy out mudding or rock crawling. I just knew the reputation for these engines being super reliable and the most bulletproof Japanese engine that has come out thus far (D21 from Nissan a close second). I'm just trying to build a reliable long lasting motor that I can put in my rig, because I was figuring this will be my daily driver for the next 10-15 years at least.
You may of not intended to build a comp engine but that sort of what you done with the parts you ordered and mods you made.
The intake swirl you done, I wouldn't of, sometimes more isnt better and without a flow bench you may of killed flow with a low pressure area.
I never seen you fit the crank scraper? it has to be file fitted to your engine
Question your machine shop, even they have off days
Machine shop porting and polishing a head is a big red flag UNLESS they have done hundreds of toyota heads and know with flowbench time the port corrections they make work.
this may be a cause of you leak seats not properly installed
My guess is the crank scraper rubbing since you didnt fit it properly, and with the high oil pressure it washed the cylinder and the rings didnt seat
Did you have the proper crosshatch when you honed the block?
So many questions
hate your having this type of problems, im sure you'll get it straight, good luck
To be built proof you just have to use quality parts and proper maintenance
You may of not intended to build a comp engine but that sort of what you done with the parts you ordered and mods you made.
The intake swirl you done, I wouldn't of, sometimes more isnt better and without a flow bench you may of killed flow with a low pressure area.
because of the bored out throttle body, and LCE venturi spacer, along with the increased airflow and size of the 82 supra AFM, the original smaller diameter opening of the intake was a choke point. That's why I simply matched the swirl pattern and diameter of the LCE Throttle Body spacer and continued those lines into the intake.
Originally Posted by SwVa_1stGen
I never seen you fit the crank scraper? it has to be file fitted to your engine
The Crank scraper was fitted to the motor with proper spec-ed clearance.
Originally Posted by SwVa_1stGen
Question your machine shop, even they have off days
Machine shop porting and polishing a head is a big red flag UNLESS they have done hundreds of toyota heads and know with flowbench time the port corrections they make work.
this may be a cause of you leak seats not properly installed
My guess is the crank scraper rubbing since you didnt fit it properly, and with the high oil pressure it washed the cylinder and the rings didnt seat
Did you have the proper crosshatch when you honed the block?
So many questions
hate your having this type of problems, im sure you'll get it straight, good luck
I definitely question the machine shop. They're more of a performance shop used to building 383 strokers and big block hot rod stuff, so I'm guessing my 4 angry Japanese squirrels got put on the back burner for a good bit. They do quality work, but I feel like they weren't really paying attention, or had just rushed the job to get it done. Sad, BC the work cost a good bit.
The hone had a great crosshatch (there are pics somewhere in the thread), but I'm guessing the slightly higher oil pressure and thinner oil coupled with the wrong valve seals (really loose) were just soaking the cylinder walls and never allowed the rings to build up the correct glaze on the walls and seat properly.
haha....I'm definitely not trying to build a competition engine. I don't want to be the baddest guy out mudding or rock crawling. I just knew the reputation for these engines being super reliable and the most bulletproof Japanese engine that has come out thus far (D21 from Nissan a close second). I'm just trying to build a reliable long lasting motor that I can put in my rig, because I was figuring this will be my daily driver for the next 10-15 years at least.
Allright, first for the rods, re-sizing does not mean length, it means re-sizing the bores of the rods, where they can distort with the different clamping force recomended by companies like arp. Upgraded rod bolts give more control of rod bearing clearance 'stretch' (all rods stretch) at high rpms (6000+ rpms on 22r). I'm guessing they did. In my experience with machine shops who specialize in v8s is that they just don't take 4 cylinder engines seriously, some despise them and just do not care, they see it as a waste of time. Not all of them, but a good majority of them, they do not see them as ''real'' engines, just rice burners, old mentality you know?
You have the right to question everything the machine shop did, and picking up a book on engine blueprinting and competition assembling will give you confidence and knowledge, it is not hard, it just takes time and attention to detail where everything adds up to one big recipe. It is actually like making a dish, where everything has to work together for a complete recipe, not just parts thrown at it which a lot of them are just marketing hype. The crank scraper? Does nothing for you, reliability or power wise. It was built to reduce pumping loses on big crank motors spinning really fast where even then can the gains can barely be measured, and keeping oil in the pan on big v8s spinning really fast, it was big in the 70's, now unless I'm mistaken not a lot of people run them, they run baffled pans or dry sump. It's a markerting thing, just like those spiral adapters. You want turbulence where the air is wetted by fuel droplets for atomisation (dispersing fuel droplets to keep them from puddling up and forming a more homogenous burn - less timing and fuel for same power - more effiency - more power), turbulence before that can just cost flow in most cases. Just drop the oil pan and spin the crank by hand to see if it's hitting or close (those scrappers can distort with windage and block pressures). A choke point in the intake? Maybe more of a high venturi point for added air velocity and better torque (maybe not too). Many head porters will say that you aid the air in where it wants to go, not make it go where you want it. High flow oil pump? Most of them marketed as high flow actually have higher pressure and that's it. High pressure does not equal higher flow. Those two external oil filters reduce flow and pressure I'm sure, they'll just allow you longer oil change intervals.
At the same time, do a leak down test again and check for hissing sound from the bottom with the oil pan removed (the rings), then remove the oil cap from valve cover and check for hissing again (bad valve guides), then remove intake and exhaust manifold and check for hissing again (bad valve job/valve seal on intake and exhaust valve). Do a dry/wet compression test (with oil) to check the condition of the oil control rings. Make sure injectors are disconected when doing a compression test and don't focus on the actual numbers, all gauges read different. Too tight oil tensioner can make rattling sounds from the timing chain (from experience). Here is my minor mod for increasing oil flow :
The pics don't show the finished product and I'm not saying it's the best thing but it definately helps, that's on the timing chain cover. Keeping oil velocity while removing restrictions and keeping the same pressure as stock. Your oil cooler? Maybe not a good idea unless you are under load for longer periods of time or at high rpms like on a track or high speed runs, oil needs a proper temperature just like coolant to have good properties (maybe it doesn't affect I'm not sure on your oil cooling setup).
SwVa_1stGen makes good points. Don't despair, it will work, you don't fail you just learn. These engines have a reputation of being bulletproof because they are too underpowered to hurt themselves, but when you up the power, there are weak points. You need to know what part does what and why does it help, hardened valve seats? Why? Many of these engines are used for circle tracks because of the rules limitation, check out what they do, sometime it's super simple but all in the details not the parts. Keep it up and keep us updated, try to find a good import machine shop and make them do just the machine work, then check and double check their work, assemble yourself with many mock-ups, don't leave anything unknown. Look at www.speedtalk.com, lots of knowledge there, and many with 22re experience in the racing world where realiability, longevity and part combination are crucial.
Just drop the oil pan and spin the crank by hand to see if it's hitting or close (those scrappers can distort with windage and block pressures).
The Crank Scraper (don't worry I'm going to pull it off of there when I tear down) was installed on an engine stand with the block flipped over and I rotated the assembly to make sure it had proper clearance all of the way around and no interference, but obviously it could have shifted or something and is more of a pain / worrisome problem than it's really worth, which is why I'll be pulling it.
Originally Posted by gillesdetrail
High flow oil pump? Most of them marketed as high flow actually have higher pressure and that's it. High pressure does not equal higher flow. Those two external oil filters reduce flow and pressure I'm sure, they'll just allow you longer oil change intervals.
It's the common upgrade for these 22R's to run the Turbo Higher FLOW oil pump, not just higher pressure. Although, with the addition of the dual remote filters and the oil cooler, I also added in the adjustable oil pressure control so I could make sure the oil pressure drop caused by this addition could be balanced out. For the fist 500 miles I used the regular type filter and proper Break in oil, as I really didn't want the high ZDDP oil clogging up the cooler and in all honesty at $15 a quart didn't feel like buying the now 8qts required to fill the whole system.
Originally Posted by gillesdetrail
At the same time, do a leak down test again and check for hissing sound from the bottom with the oil pan removed (the rings), then remove the oil cap from valve cover and check for hissing again (bad valve guides), then remove intake and exhaust manifold and check for hissing again (bad valve job/valve seal on intake and exhaust valve). Do a dry/wet compression test (with oil) to check the condition of the oil control rings. Make sure injectors are disconected when doing a compression test and don't focus on the actual numbers, all gauges read different. Too tight oil tensioner can make rattling sounds from the timing chain (from experience). Here is my minor mod for increasing oil flow :
Dry and wet compression test done by the book, and leak down test also done by the book with an automotive stethoscope to listen for blow by hiss. Brand new head / guides / etc. so I doubt they're the issue. Like I said, it had the wrong / oversized seals on it and was sucking oil down into the cylinder. The oil consumption wasn't bad at first although I could tell it was burning oil. Now it's gotten much worse and everything I've read leads me to believe it's the rings not properly seating as the symptoms are all the same. I'll definitely do your oil flow mod on the timing cover and try to clear out any other passages that may be able to be slightly modified. I've got the higher oiling rocker shafts, the turbo pump and pressure adjust-ability, but will look into other avenues of insuring proper oil flow. (I also chased and re-tapped the head stud holes to make sure there wasn't anything blocking those passages and ensures proper torque readings.
When I get a free weekend, I'll pull the motor and start the disassembly. I'm going to go through the entire thing again and make sure everything is up to spec and find out where the metal clanking noise is coming from, as well as get the new set of rings in there with a proper hone on the cylinder.
On a side note.....got a stupid awesome deal (arrived last night) on a Pro Torquer cam shaft, new set of OEM rockers, and Street Springs (LC Engineering "Cam Kit" seen on Ebay for $549)....for $100 shipped (Craigslist). All of it was still in the packaging and brand new. This will be going on the other block ($250 5,000 miles) / head ($50 Topline with SS oversized italian valves) I'm building up (Currently in my living room) that's bored .60 over with H-beam rods and forged pistons and a $400 clutch to be paired up with a dual side draft weber set up ($200)...all parts I got on Craigslist or off this site for stupid cheap.
it's supposed to be 76 degrees here all weekend and I'm planning on trying to pull the motor and start tearing it down.
Lets see how much I can get done in a couple of days....
Are you still after bulletproof or have you changed your mind and going onto all out high performance?
Because the more performance parts you add, the less of a daily driver it becomes, you'll have to run higher octane fuel to a point, and after that you'll have to run pure racing fuel
The grinding in the other engine is the crank scraper, you failed to pry the crankshaft forward and aft and then check clearance , all cranks have end play, just rotating the crank done nothing
Last edited by SwVa_1stGen; 01-30-2016 at 02:52 AM.
 12-06-2015, 04:55 AM