When you click on links to various merchants on this site and make a purchase, this can result in this site earning a commission. Affiliate programs and affiliations include, but are not limited to, the eBay Partner Network.
Dude... i'm going through this process currently. Bought an 86 DLX Runner on Craigslist in mid May. Decided to drive it to East Texas for Memorial Day weekend to show my family and i made it to Canton before it started overheating and losing power. Luckily i have family south of Tyler and they came with a truck/trailer and we took it there to look it over. Had a bad knock so we decided to overhaul it ourselves. This is my first overhaul ever and again, i'm lucky to have family who are experienced in cars.
I've been driving back and forth to East Texas every weekend since Memorial Day to work on the truck. we FINALLY got the engine back in the truck, but there are a myriad of issues mystifying us. I live in Dallas. Once mine is up and running i'd love to meet up and check yours out!!
here's mine:
Nice Truck Man! Looks cleaner than mine I think!
you need to get that thing back to the metroplex so you can spend your time working on it and not driving back and forth to work on it.....but I understand just working with what you've got.
I've got a busted '86 sitting in the drive way as well that I've almost got back up and running, so let me know if you need any parts or anything else. I've got several rough totes of parts for these guys I've pulled together.
I'm still working on mine getting it up to the reliability I can count on for a daily driver, but should have the trans seal in this week and put that fire out.
Let me know if you run into a road block out there in Canton or need anything. Sometimes it's nice to have another set of eyes on it.....especially eyes that have just done everything you're doing.
You see all of these "fancy" kits people purchase now that are "cold air intake" kits. that's because cooler air is denser and burns better than hot air. as this was one of Toyota's firs't EFI models, they were under the assumption that running the air across the top of the radiator to warm it up would make it easier to burn and more efficient. Actually the opposite is true. Colder air is better. So one of the modifications a lot of people do to these engines is to move the battery to the other side of the motor and move the air intake to the battery side.....sometimes even building a box like the below picture. I'm planning on doing something similar, but am looking at different options like the K&N Apollo closed air system versus building one from scratch. This will all be plumbed with larger diameter tubing as my TB, intake, and even my MAF (AFM) are larger....so the stock diameter tube is now my choke point.
Right, more oxygen in denser air. I imagine the engineers were aware of this when they designed the 22re and opted for the existing setup for another reason such as compactness. My CAI experience was underwhelming - put one on a 3vze before when the hose cracked and it didn't make a lick of difference, which is what I've heard from most others who tried them.
If you size up the afm and tubing you may see some gains but be sure that you have the right injectors (and tuned ecu?) to handle it. Even the most bulletproof 22re will burn up in a hurry if it runs lean. Pretty much any performance tuning you do to an engine is going to come at the expense of lifespan.
you need to get that thing back to the metroplex so you can spend your time working on it and not driving back and forth to work on it.....but I understand just working with what you've got.
I've got a busted '86 sitting in the drive way as well that I've almost got back up and running, so let me know if you need any parts or anything else. I've got several rough totes of parts for these guys I've pulled together.
I'm still working on mine getting it up to the reliability I can count on for a daily driver, but should have the trans seal in this week and put that fire out.
Let me know if you run into a road block out there in Canton or need anything. Sometimes it's nice to have another set of eyes on it.....especially eyes that have just done everything you're doing.
pm me.....I'm up in Denton.
joel
right on, i'm with you on the daily driver. my hope is to have it in that neighborhood by this or next weekend. so that i can at least drive it back to Dallas! it kills me that i have to drive there to just work on it, but i'm getting a chance to do this work with my dad, which makes it all worth it. I'm a beginner in all of this. When we started i had no idea what was under the hood, but at this point, after pulling, tearing down & rebuilding, i have a greater understanding of the 22re and what makes it tick. I got word yesterday that the 4th cylinder wasn't firing and they think it might be the fuel injection (i had the injectors cleaned & tested at RC Engineering out in Cali. great people. i doubt it was the injectors, but possibly could've installed them too tight) or it could be the vacuum system. The mechanic who gave it a look yesterday said we did a good job (which is a big compliment all things considered). If we can figure out why we're misfiring we'll be in business!! i'll pm you so we can exchange emails. I really enjoyed reading your build. And I was jealous that you were able to work in your living room! we were basically outdoors in the Texas heat in an old, open-air garage. we did have access to every tool you could possibly need and no, we weren't in any gravel!
If you size up the afm and tubing you may see some gains but be sure that you have the right injectors (and tuned ecu?) to handle it. Even the most bulletproof 22re will burn up in a hurry if it runs lean. Pretty much any performance tuning you do to an engine is going to come at the expense of lifespan.
Yeah, I'm probably going to go with a closed box or the Apollo system and run a custom snorkel - all with 4" pipe up to the filter. I've got an upgraded AFM, Bored TB, and TB Spacer. so the intake pipe is now my choke point. I'll definitely make sure it's not running lean with upgraded injectors, and the guy I bought the turbo block from (Still sitting in my living room) isn't too far away and actually solders up and programs his own "Megasquirt" style fuel management systems that could help me tune it properly. I'm not trying to build a race car, just want a reliable ride that runs as it should.
With all of the porting and oversized valves in the head, and the long tube header (should have got the larger off road one) the flow has been increased quite a bit, and I want to make sure the intake is equaled out. I think having systems unbalanced and lop sided will definitely cause premature wear....whether you're running lean or really rich. Equilibrium and balance are always good when it comes to engines.
When we started i had no idea what was under the hood, but at this point, after pulling, tearing down & rebuilding, i have a greater understanding of the 22re and what makes it tick.
There's a reason that these are considered some of the best 4cly engines ever built. I know some out there will argue that point, but for simplicity and reliability's sake.....it's tough to go wrong with a 22R (also the same mentality behind me owning an 870 pump 12ga and a 1911 - those designs are just more reliable and easy to work on). I had only taken apart an 80's honda motorcycle engine up to this point, but am quickly learning and may even buy a Toyota mechanic's shirt just for laughs.
Originally Posted by graylikethecolor
I got word yesterday that the 4th cylinder wasn't firing and they think it might be the fuel injection or it could be the vacuum system.
I try to start with the easiest and cheapest things first. check your plugs, and wires (you can swap 3 to 4 to see if #3 isn't firing now) cap, rotor, then I'd start chasing injectors....looking to see if you've got a clogged fuel rail (does your fuel pressure regulator make a hissing sound when the ignition is on) and so forth.
I stopped by the stealership and got a full printout of the vacuum system for my '89 (because my haynes manual only goes up to '88), but you could do the same for your '86....which is really helpful and sometimes more clear than the FSM. I'm sure you'll get it all figured out.
I had received my new dipstick, trans front seal + gasket and new clutch fork boot in this past week so I decided to go ahead and drop the transmission and install the new seal.
Kicking myself the entire time I'm doing this for not replacing it when I had the engine out. Kids, if you're listening......go ahead and replace your trans front main seal when there's enough room in front of it to sit in an Adirondack chair in your engine bay, instead of 500 miles later when you have to pull the transmission by yourself in a gravel driveway.
got the front jacked up a little higher on some stands a buddy let me borrow along with a race jack (better and slightly safer than the scissor jack and cinder block I had been using).
removed the shifters and covered the holes with duct tape to keep stuff from falling in.
unbolted the transmission....and I've heard a ton of people complaining about how to get to the top two 17mm bolts near the firewall on the top of the trans....well, lemme show you my way =)
72 extensions and a dog bone wobble knuckle. That's how I get to those two bolts.
disconnected the back up light switch and the other electrical connection as well as the speedo cable. Dropped both axles and plan on cleaning them up and got a mini grease gun to repack all the fittings / joints.
how do you slide a transmission back by yourself? those red ratcheting straps of course.
Got it out and down safely somehow. noticed the bellhousing was just soaked in oil and got it cleaned up and removed the front plate to get to the main seal. The gasket was blown and there was definitely a small part of the seal missing.
my shift boot was totally torn to crap, so I replaced it as well. I used a little bit of shoe goo on it when installing so it'll stay in place this time
decided what better time than to go ahead and change out the fluids as well....just for good measure. Wow. $21 a quart Royal Purple 80W90 synthetic with a little bit of lucas synthetic. Since I already had the shifter out and off, I just filled it up from there until it was running out the side check/fill bolt as per the FSM. There was a good amount of metal dust on the magnet, and the oil was pretty burned, so I'm guessing it hasn't been changed in a good while and will appreciate the extra TLC that $70 worth of fancy oil will provide.
Didn't get enough oil to do the transfer case so I'll have to pick up some more, and it was getting late, I was beat up....and just down right beat. re-installation will occur hopefully this evening or sometime this week. I'm going to make sure I degrease everything with super purple cleaner not because I like the vanity of having things look pretty...but I do like being able to immediately identify the source and volume of any and all leaks....and I figure it'll be a heck of a lot easier to clean while it's out swinging from my engine hoist.
I also figured I'd show off that fancy new $15 disco yellow dipstick.
notice my redneck 'safety" ring of electrical tape around the battery terminal. The last thing you want to do when you're hot, tired, sweaty, and aren't thinking straight is go to lay a wrench down and weld it to the fender along with getting the crap shocked out of you.
Was up working late last night, but got the oil in the transfer case changed out to royal purple 75W90 with some Lucas stabilizer. I got the entire trans scrubbed down with a mixture of Super Purple degreaser, Cascade dishwasher soap, and dawn diluted down in a bucket (good to note the duct tape prevented any splatters of emulsifiers from getting inside the trans or transfer case. I'd be careful using straight Super Purple because it's very strong and will make your skin peel and the vapors can be tough to breathe.
I noticed the top seal to my shifter had more oil around it than normal, and I figured it was probably leaking a good bit. I unbolted the cover and discovered the gasket was folded / twisted / not in there right. Cleaned everything up with some B12 Chemtool and laid out a nice bead of Ultra Grey to seal it all back up. I also pulled the "Dust shield" for the front axle got it cleaned up and all of the slung grease off the inside and will probably paint it before re-installing it (rusty). I don't have the bottom 1/2 of the dust shield, but will double check the '86 to see if I can rob it from there.
BTW, the low for that night was 87 here in Texas. 87 and humid.
Hoping to get this trans back in this weekend, and now that it's all cleaned up with new fluids and seals, it should run like a champ.
***Important side note***
I didn't change out the seals on either the rear or side output shafts. HOWEVER because of the design and ease of access, these can easily be swapped out in the future if I see any leaks. Unlike the front seal, these can be changed out by draining the fluid and simply removing the center bolt / cap that holds them in place.
Managing the impossible and discovering other issues
Just because I forgot, here's a shot of the busted seal that was on the transmission causing the leak in the first place and the clutch to slip or not engage.
I'm guessing the 1/4" play in the crank from the front to the back from the loss of the thrust washers also caused this seal in the transmission to go bad.
So I had quite a weekend. Wrestled with that Transmission till about midnight Saturday and just wasn't able to get it in. Woke up the next day hoping a couple of friends would be able to come over and help, but they ended up working. Finally, I took a measurement of the bottom of the bell housing to the rear of the block and the top of the bellhousing to the rear of the block and realized that my angle was completely off. The weight of the transmission as it slid off must have slightly rotated the block on the engine mounts just enough to allow it to slide back and off. Now, trying to get it back on was nearly impossible, especially if you're by yourself in a gravel drive with a standard floor jack.
So, I wheeled the hoist over and hooked a chain to the front lift point on the motor and cranked it up putting tension on the block and allowing it to rotate on the motor mounts (didn't disconnect or unbolt anything and wasn't trying to lift the entire front end of the vehicle with the hoist, just a bit of tension.) Boom. I measured again and actually had to lower the back end of the trans and differential to get the angle right and it slid right in. (Never force the transmission in, you can break splines, ruin seals, and all kinds of other stuff that will have you doing the same job again later).
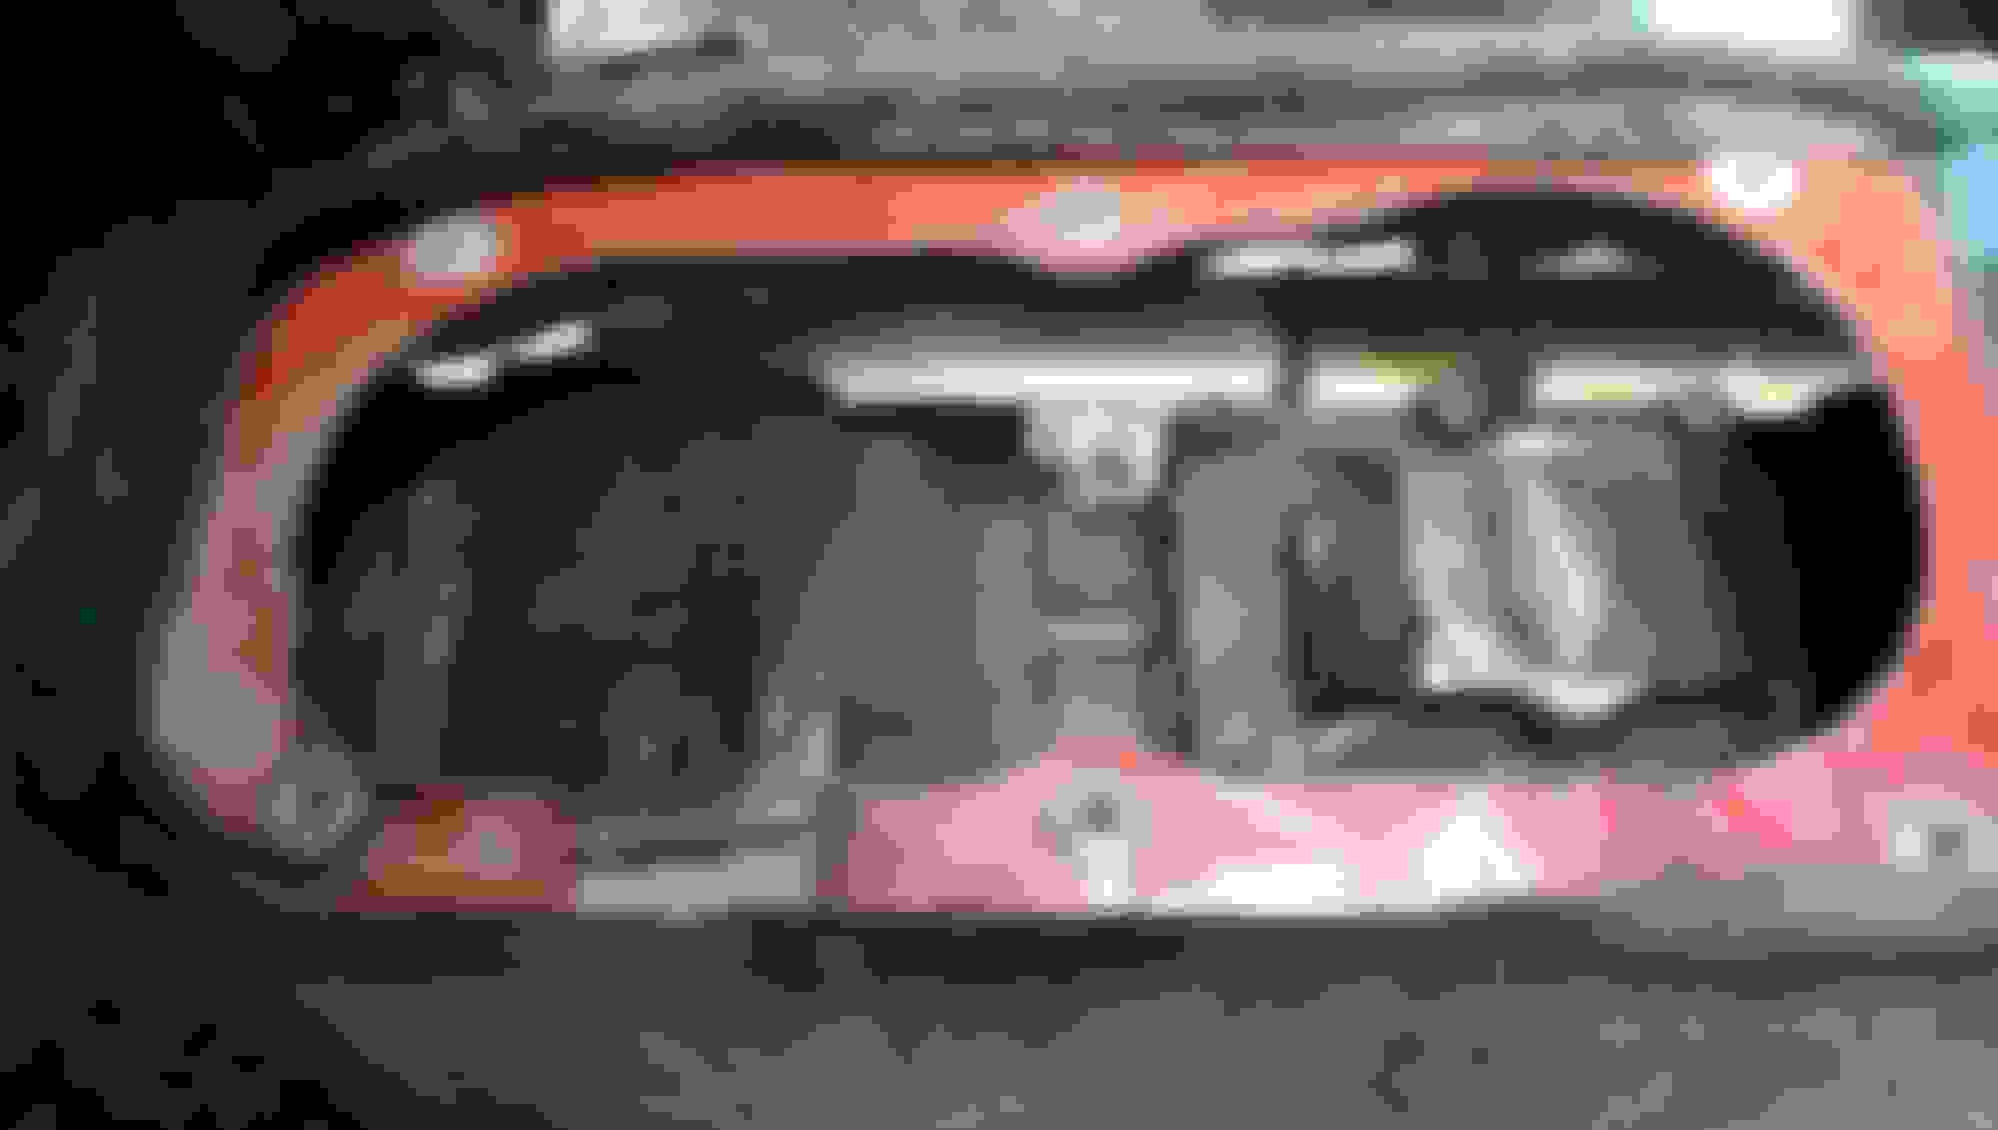
So, while i still had the jack, I though maybe now would be a good time to rotate my tires. I had noticed the wear on my front tires was really off, not on the inside or the outside, but feathered like I had a toe-in or toe-out issue. So I rotated the feathered tires to the back and just so happened to see the situation below. What's wrong with this picture?
That's right. Either the PO had a wreck, or the front driver's side tire hit something really hard and completely broke off the support piece for the front shock. Annnnnnd I've been driving around (hopefully not that long) without any suspension on the driver's side. Here's what it's supposed to look like:
SOooooooo......tonight I'm going to take some thinner gauge steel home from work and fashion two giant "washers" for lack of a better term so that I can limp this truck down to the shop, where I'm hoping to fabricate and weld in some 1/4" plate or something to beef up this front shock mount so it doesn't happen again. I'll do both sides at the same time so that 6 months from now the same thing doesn't happen to the other side. Also, this explains a lot about how and why my front end was so far out of alignment. I'll probably try to go ahead and order new front shocks when I can as I'm sure at least one is completely toast.
Also, as a side note: I'm usually not impressed with whatever little gimmicky new fangled tool is out that can do the one thing that none of your other tools can do, but I saw this down at Sears, and thought it might come in handy some time. Turns out I put both top bolts (previously installed with 72 extensions and a dog bone wobble joint) in with this crazy little hand driven gyroscopic ratchet.
came in a set of 1/4" drive and 3/8" drive for about $30 at sears.
So I got a couple of "washers" fabbed up really quickly out of some scrap 12 ga powdercoated steel so that I could temporarily fix the shock enough to drive the rig down to the shop to fab up and weld in a more permanent solution.
So.......I took off Sunday morning to drive to the shop and made it to the end of the block before I realized I had a fuel leak and needed to turn around.
Don't really feel good driving it like that, so I'm to the point that I'm just completely frustrated in dealing with stupid copper crush washers and banjo fuel fittings. I think I'm going to either try to find some metric barb fittings to swap in tonight, or just order full AN fittings and hose for both sides of the filter (Not sure what size yet).....the fuel rail inlet (M14 x 1.5) and the smaller hose that goes up to the cold start injector.
Hopefully after that is fixed, I'll be able to get it to the shop and weld in better shock tower supports on both sides.
I'll keep everyone posted.
BTW, got the trans out of the 86 and replaced the clutch (With the one that was still in usable condition from my blown engine), but it needed a throw out bearing (completely destroyed the other one getting it off) and full seals, so I ordered those today.
"so I'm to the point that I'm just completely frustrated in dealing with stupid copper crush washers and banjo fuel fittings."
dude, this feeling all day.
"I think I'm going to either try to find some metric barb fittings to swap in tonight, or just order full AN fittings and hose for both sides of the filter (Not sure what size yet).....the fuel rail inlet (M14 x 1.5) and the smaller hose that goes up to the cold start injector."
i'm STILL having fuel leak issues, after replacing o-rings on injectors and adjusting that dampner/pressurizer thing on the end of the rail, so,
we talked about doing what you describe above but i don't know where to start. if you go this route, i will be picking your brain for info!!
Last edited by graylikethecolor; 08-17-2015 at 01:42 PM.
i'm STILL having fuel leak issues, after replacing o-rings on injectors and adjusting that dampner/pressurizer thing on the end of the rail, so,
we talked about doing what you describe above but i don't know where to start. if you go this route, i will be picking your brain for info!!
So I took out the other fuel banjo bolts last night to see what size they were and ran over to Home Depot to make certain.
Both bolts from the fuel line to the cold start injector
both bolts on either side of the Fuel Filter
I'm trying just to find some metric hose barbs that would work, and will probably be able to find some that work for the 14M x 1.0 and the 12M x 1.25, but the M8 x 1.0 is going to be nearly impossible to find. So, I may just buy a 3/8" NPT and use a Tap and Die set to cut the threads down to M8 1.0. I'm going to grab some stuff tonight and see if I have the dies I need. I'll keep you posted, and make 2 kits if I get one figured out. Personally, I'd much rather have standard fuel line hose that I can replace if needed versus a $180 dealer only specialty hose that would be impossible to find if you're anywhere but the stealership.
I ran into the same problem you had with fuel lines, they are old and just break easily. If you have access to the proper tools, replacing all your soft fuel lines with -AN is really easy, you can either order all the proper AN to banjo fittings, I checked they are available. Or you can throw your stock pieces into a lathe and make fittings you can weld too. Then just get AN line in whatever length fits you needs. Its very easy to eliminate all the stock soft fuel line sections.
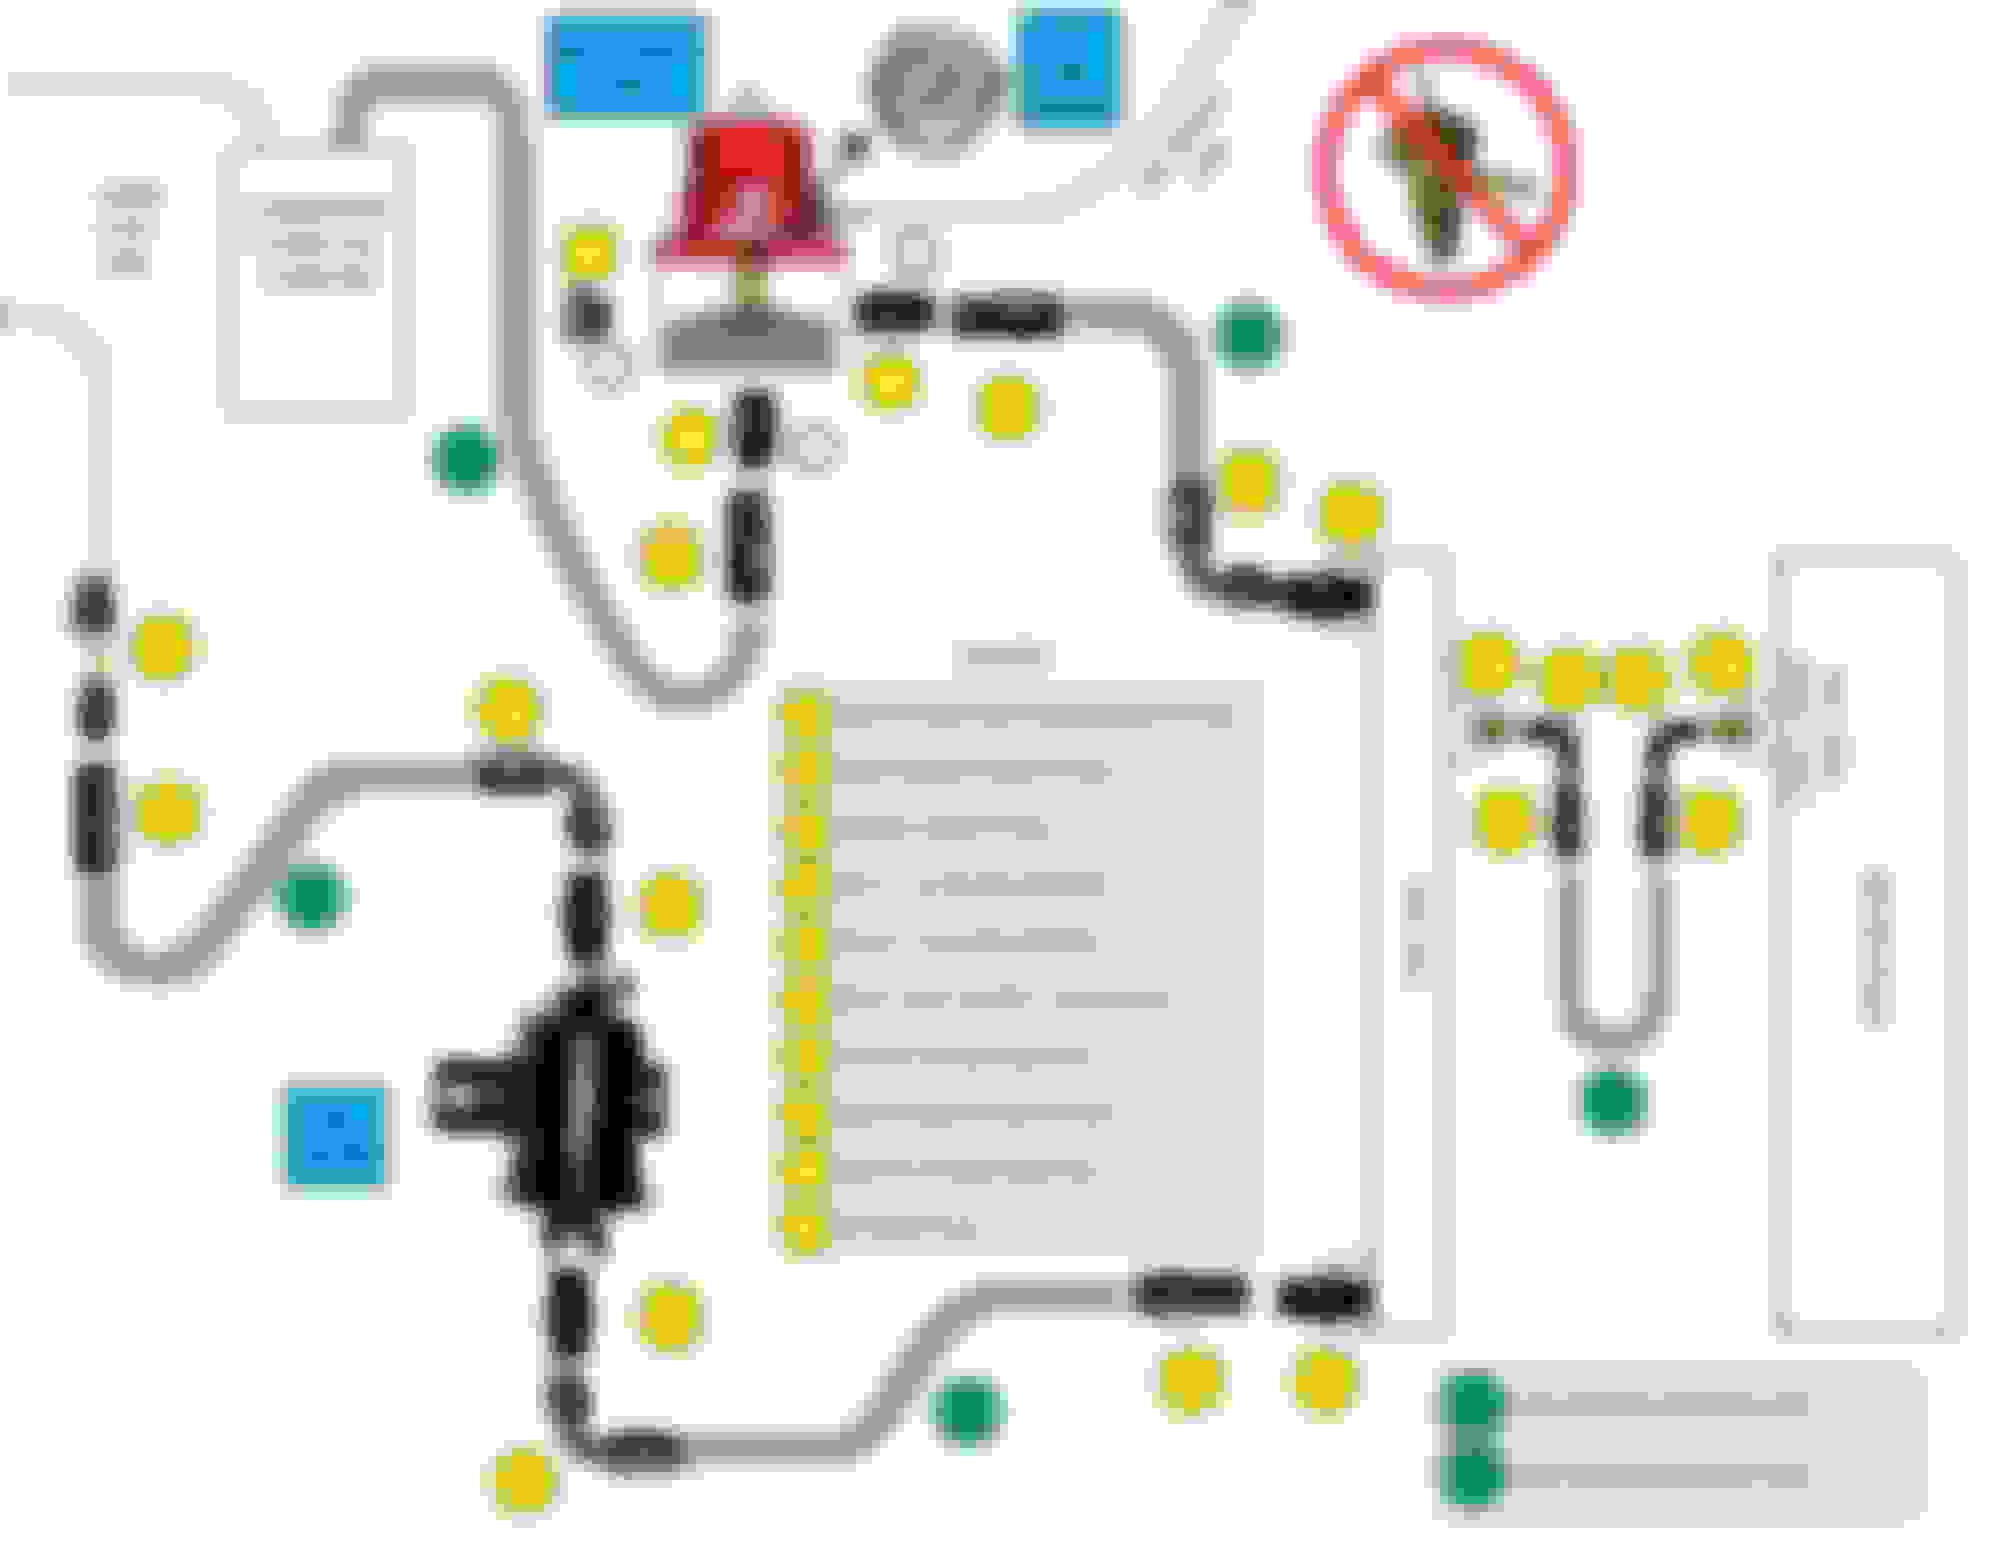
Stock
So here's my initial layout on what I'm thinking for converting everything over to AN fittings. Please feel free to comment if you have any ideas or thoughts.
I'm not 100% convinced if my current Fuel Pressure regulator works, but it would definitely be nice to have the Aeromotive adjustable regulator and the fuel filter near each other and easily accessible, along with the gauge so I would know what's going on.
That fuel setup looks like a lot of time and $$, serious tuner setup? Vacuum testing a reg is easy and will tell you if the diaphram has failed, only problem Ive ever seen with one. http://m.youtube.com/watch?v=qJB0918vXQc
For crush washers you can heat them cherry red, sand lightly and reuse. Been doing for years and never had a leak.
Sure those bolts are tight enough without some lever action?
That fuel setup looks like a lot of time and $$, serious tuner setup?
My issue isn't the copper crush washers (although thanks for the awesome tip), it's the stupid banjo fittings and my hose running from my fuel filter to the rail (completely shot). The only place I've been able to find a new hose is the dealership, and they want $180. I had thought about TIG welding a couple of fittings to the end of the banjo lines, like what was shown, or even just brazing a barb fitting on to them and using standard fuel hose.
I've priced the whole thing out (minus the adjustable regulator) and it's all about $150 for the adapters, hoses, and fittings. I know it's overkill to go with Army Navy (AN) fittings, but this is the "Quest for a more bulletproof 22RE" and hoses that are good enough for a deuce and a half, should be fine for this little rig.
An auto parts store formerly near me that crimps hydraulic fittings was able to fit a new end to a rubber air hose for a couple bucks. If you can find the fittings, (or reuse the others, but that's the point of no return if it doesn't work...) a similar place could probably do the fuel line for you. Tractor and heavy equip places have the machines for it.
An auto parts store formerly near me that crimps hydraulic fittings was able to fit a new end to a rubber air hose for a couple bucks. If you can find the fittings, (or reuse the others, but that's the point of no return if it doesn't work...) a similar place could probably do the fuel line for you. Tractor and heavy equip places have the machines for it.
Every shop like that I've gone to claimed the hose was too small to work with. I'll see what I can come up with / weld / braze, but will probably end up going with the AN fittings.
 07-27-2015, 01:49 PM