When you click on links to various merchants on this site and make a purchase, this can result in this site earning a commission. Affiliate programs and affiliations include, but are not limited to, the eBay Partner Network.
Thanks for trying to make me feel better. Yes, I do know how to fix it now and I have some paint left over. I had just ordered a new bumper and in a way I would have felt worse if I dented a new chrome step bumper.
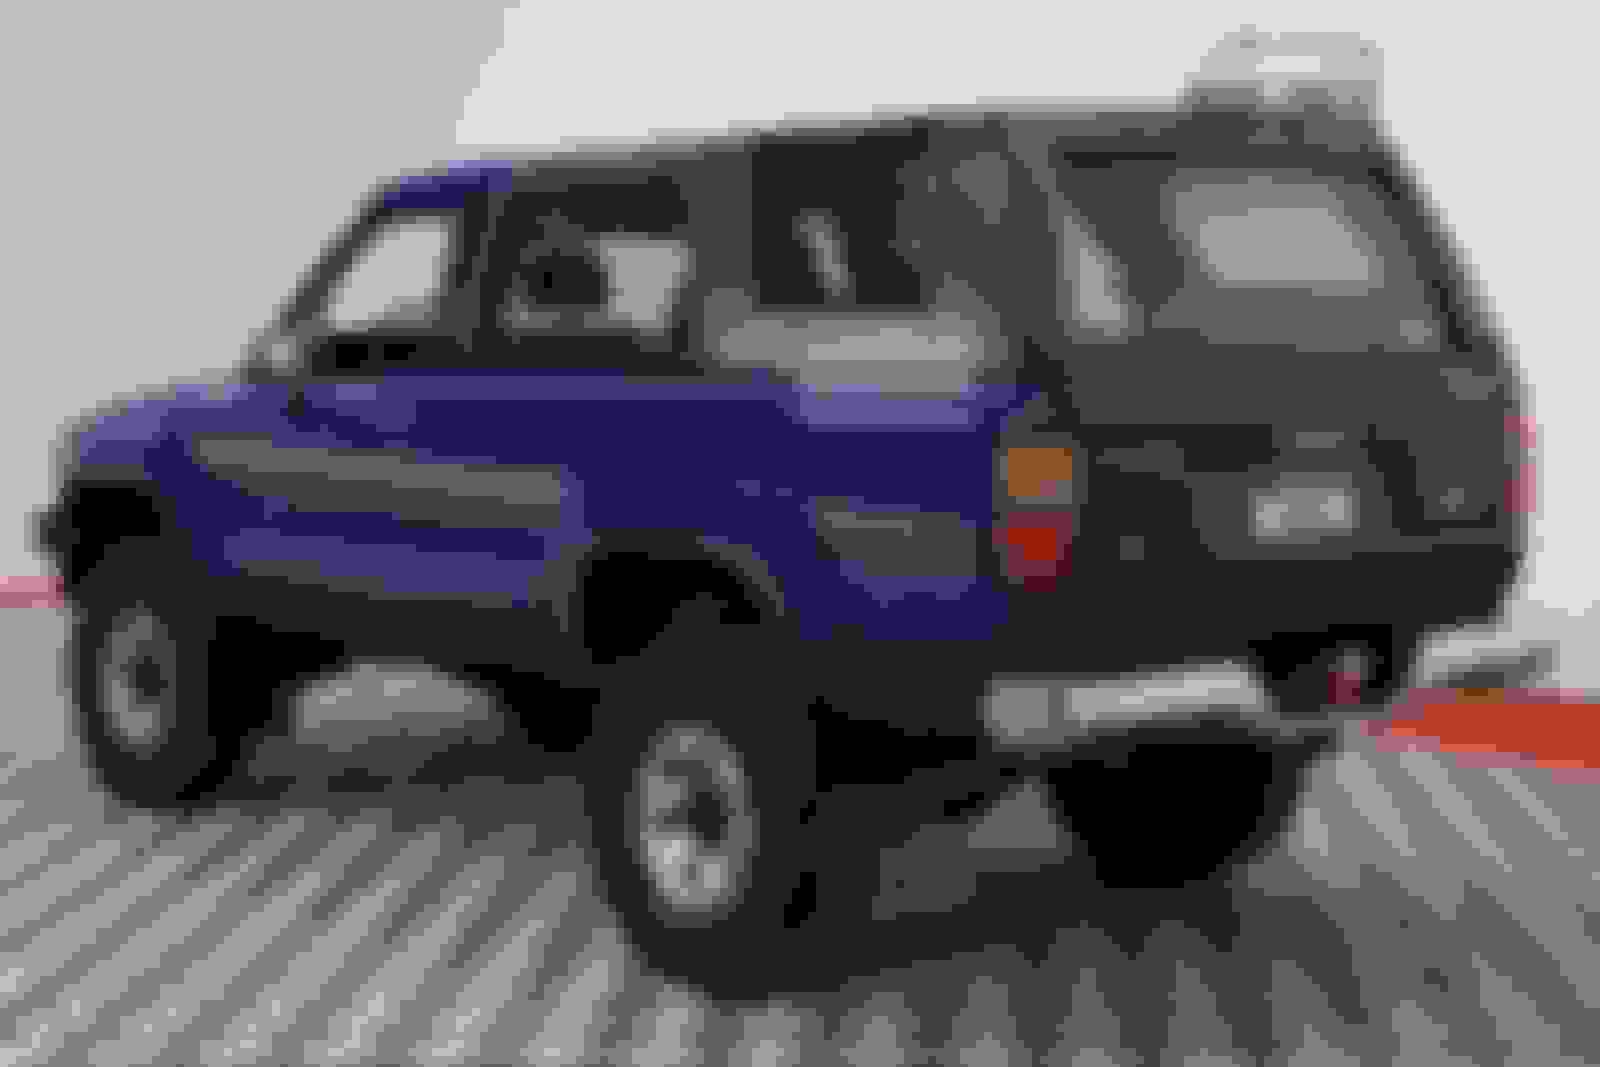
I went with the 90's Tacoma step bumper like this one in the photo below because it looks closest to my original, but that one is all bent up. I ordered it from Rock Auto and it should arrive by next Weds.
Last edited by Melrose 4r; 10-04-2018 at 12:21 PM.
The paint looks great! What type of paint did you hit the interior panel with?
it is made by SEM and costs about $25 per can but only took one can to do both panels and I still have some left over.
see Charles4x4 thread for the exact paint number. I followed his lead.
Edit: Paint is SEM color coat 15303 Graphite.
Last edited by Melrose 4r; 10-08-2018 at 11:27 AM.
Looking awesome!! I have a dent in the exact same place LOL
Can't beat OEM graphics
How do those panels hold the paint? I tried the exact same thing on my mustang dash, prepped meticulously, but it scratched right off.
I had to treat them more roughly than I had hoped getting them in because the roll bar was in place but no scratches whatsoever.
and I didn�t use primer. This paint bites right in.
I had to treat them more roughly than I had hoped getting them in because the roll bar was in place but no scratches whatsoever.
and I didn�t use primer. This paint bites right in.
Received my new parking lights from an ebay seller but to my surprise, no screws or plastic anchor pieces.
They had shown the screws an anchors in the photos...
So I emailed them and they replied saying they are reshipping the order and I can keep the first set.
OK, I appreciate the quick response, but not very convinced the second order will include the hardware either.
If that's the case I'll just have to see what I can get at the hardware store. As I said in a previous post, I am now finding
some of the parts to crappy too put back on the truck.
But hey, I did call it a "restomod" so it's all good.
i received the second set of lights the other day and no surprise, these did not come with screws or anchors either.
i went to Ace hardware and easily found some that will work.
Any update?
I'd like to ask you some things about the paint process. If you could start the paint job all over again, what would you do differently? Do you have suggestions to make?
Any update?
I'd like to ask you some things about the paint process. If you could start the paint job all over again, what would you do differently? Do you have suggestions to make?
It's tough to answer because I had to learn some things as I went along. This time I had to begin with "confidence builders" like the hood and fenders. I had to learn how to tell when I had done
sufficient prep work and could move on to the next step in the process. Next time, I will do all the body work before doing any primer or paint work. But still, each vehicle is different, and each panel
on a vehicle may require different repairs.
What I would recommend for a beginner:
Use quality materials for filler, sandpaper, masking tape, masking paper, paint and primer.
Get a decently rated spray gun - does not have to be expensive <$200, but read the reviews.
Have somebody you can ask lots of questions. Paying somebody to consult is worth it.
If you remove the doors, DO NOT remove the seam sealer around the hinges. Assuming your doors shut nicely now, these are the witness marks you need to put them back on correctly.
Label all bags of screws, trim, etc better than you would think you need to. It will save you time.
Take lots of photos in disassembly...it cannot hurt!
Use a basecoat/clearcoat process. It may cost more but is much more forgiving than a single stage paint process. Start with a simple respray in the same color- much less work.
Spray cans- etching primer, color and clear, = all applicable where needed. (again, buy quality)
My paint job is not perfect, but not finished yet either, I need to touch up rockers below the doors where the paint is thin, due in part to the bright sunlight conditions I was spraying in(snowblindness) and I need to wetsand and buff the clear for a nicer finish.
That's all I can think of at the moment. Feel free to keep asking questions. more photos coming soon!
As for the chrome step bumper, I received it in good order. neither the brackets from my original 1986 chrome step bumper or the brackets that came with it will position the bumper as shown in this photo so I will need to cut the original brackets and reweld them.
Over the weekend, I decided to figure out how to relocate my two power amps from the floor below/behind the driver's seat to somewhere in the rear. First I thought I would hide them behind the interior panels but that would have turned out to be a lot of work to weld up supports and still make the amps accessible. So for now I figured out how to use the roll bar to mount them by making some panels. I decided I wanted the amps to show and have the ability to tweak them easily.
I started by making a cardboard template then transferring that to 1/2" plywood. I painted that flat black and used 2" clamps to hold the roll bar. I wanted to make them rattle-free so I cut some foam flooring into strips and used double sided tape to secure them to the outer sides of the roll bar. The foam crushes down when the clamps are tightened, ensuring a good grip.
Foam strips and tape
First panel hung
See the foam strip between the roll bar and panel.
Not bad!
I'm pretty happy with this for now. I may go back in and cover these with Tolex, the black kind of plastic found on guitar amps at a later date.
Last edited by Melrose 4r; 10-17-2018 at 03:51 AM.

 10-04-2018, 11:39 AM