malteserunner's 1987 4Runner Build-Up Thread
#362
I used a local guy in my area. He's got a good reputation, and just moved to a bigger and better location.
After putting in a lot of time at work the past couple weeks, and some patience with the machine shop, it looks like I'll be getting the 4Runner back on the road soon. I'll be picking up the motor tomorrow, then heading to Dbcfr's place Friday after work to start building the engine. I'm very excited to get this thing back on the road, and on the trail. I'll make sure to bring the camera, and take some pics of the build.

After putting in a lot of time at work the past couple weeks, and some patience with the machine shop, it looks like I'll be getting the 4Runner back on the road soon. I'll be picking up the motor tomorrow, then heading to Dbcfr's place Friday after work to start building the engine. I'm very excited to get this thing back on the road, and on the trail. I'll make sure to bring the camera, and take some pics of the build.

Last edited by malteserunner; 05-05-2011 at 12:56 AM.
#365
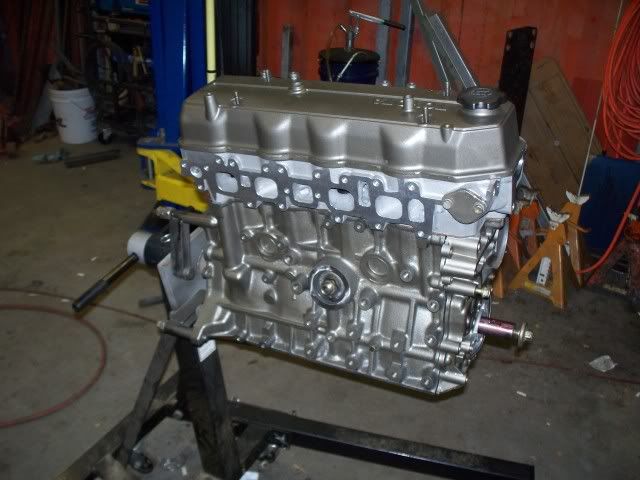
The last two nights we've worked until 2:30 in the morning, after work to try to get the engine built. It's coming along nicely, but we're taking our time so things are done just right per the FSM. So far the engine is assembled, and the initial timing is set. The timing and valve covers are just sitting in place, to get an idea what the final product will look like. There's a little more cleaning/painting to do on the brackets and accessories, then we can get the rest buttoned up.
Piles of parts...

Crank going in...

Bottom end assembled...

Head torqued...

Done for the night...

Piles of parts...

Crank going in...

Bottom end assembled...

Head torqued...

Done for the night...

#367
WOOO HOOOO! LOOKS AWESOME, Adam! There's a place that does their rebuilds that color, ....can't remember whom. Love it! You're doing the valve cover black and silver too?
Mine? Not so great hahaha.
Mine? Not so great
 hahaha.
#368
Thanks guys! I also love that color. Chef, the valve cover is going to be the same as pictured, but with the 'TOYOTA' bare aluminum. Should turn out pretty sweet. I can't wait to hear this thing run, and drive my 4Runner again. I'll be putting in some more late hours tomorrow night, and all day Wednesday. I'll update my progress then.
#369
Well, after a long day of work, we're starting to see the light at the end of the tunnel. A couple more small things to install, then the engine is ready to be dropped in. If our schedules allow, it should be done Sunday (my next day off). I'll keep my fingers crossed. Today went smoothly, except for a couple boogered up threads to repair, and a snafu with some missing bolts that weren't actually missing. Otherwise I'm happy to have made as much progress as we did. It sure takes a lot of extra time and patience to clean and paint all the little pieces, but in the end it will be worth it. Pics...
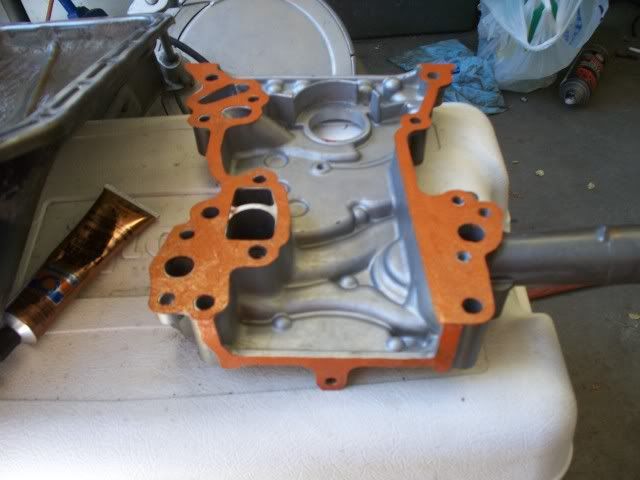
Copper RTV was used on most of the gaskets...

Water and Oil pumps installed...

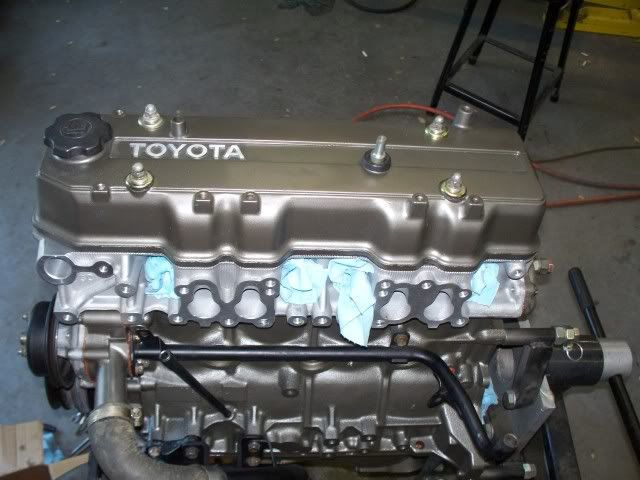
Finished the letters on the valve cover, and installed some of the accessories...

Intake going on...

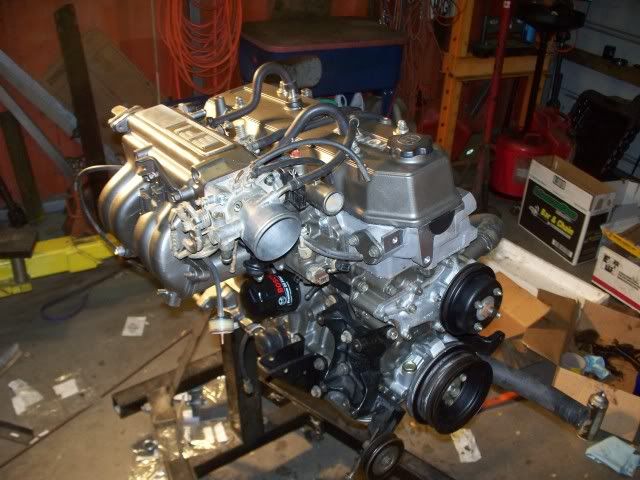
And, a preview of the finished product...

Overall this thing is turning out beautiful. It's all been done right, so it should be a great running little motor. With any luck, It'll even be able to get out of it's own way.
Copper RTV was used on most of the gaskets...

Water and Oil pumps installed...

Finished the letters on the valve cover, and installed some of the accessories...

Intake going on...

And, a preview of the finished product...

Overall this thing is turning out beautiful. It's all been done right, so it should be a great running little motor. With any luck, It'll even be able to get out of it's own way.
#372
DANG! ..just suweeeeeeeeeet!
Only thing I had a lil trouble with on a buddies when installing it complete.... freakin couple injector connectors and some of the harness stuff that went in the hole there. But man, REALLY, really looks great!
Only thing I had a lil trouble with on a buddies when installing it complete.... freakin couple injector connectors and some of the harness stuff that went in the hole there. But man, REALLY, really looks great!
#373
Thanks for the compliments, guys! We got the last little bit of odds and ends squared away tonight, so it's ready to go in on Sunday. The starter was acting up before the rebuild, so it got pulled apart and refurbished. Also, I ordered a set of Energy Suspension pieces that I read work well as motor mounts (Part # 3.1108G), since my mounts were cracked and falling apart. I'll post a review on these as time goes on.
Chef, the upper intake wont be in place when we install the engine, and the lower intake is notched so the wiring harness slips right into place. I've seen this method done countless times, without ever having any problems. And since you brought up injectors...I'm glad to report after religiously using Lucas Upper Cylinder Lubricant at the pump, my injectors look incredibly clean. That stuff is awesome.
Chef, the upper intake wont be in place when we install the engine, and the lower intake is notched so the wiring harness slips right into place. I've seen this method done countless times, without ever having any problems. And since you brought up injectors...I'm glad to report after religiously using Lucas Upper Cylinder Lubricant at the pump, my injectors look incredibly clean. That stuff is awesome.
#375
#379
Wow, that notch thing is such a simple and GREAT idea! Man, ...I just keep coming back to look at this thing! lol.
Just found a short block today and took it apart, ...hope it's gonna work fine for my -re-re-rebuild! hahaha.
Just found a short block today and took it apart, ...hope it's gonna work fine for my -re-re-rebuild! hahaha.
#380
It's alive!! We dropped the engine in Sunday, but a couple setbacks kept us from getting it finished. After work Monday, we reached the point where it was ready to be fired up. However, there was a fuel leak from the damper that put an end to that night. We fixed the leak, but had to remove the throttle body to do so. That left us waiting for another throttle body gasket. The gasket wasn't available until Wednesday, so we got some much needed rest Tuesday night. So the engine has now been run and the initial break in is complete. Aside from chasing a few pesky leaks, I am extremely happy with the results thus far. This is by far the quietest 22RE I have ever heard, and even driving it easy, I can tell it has a lot more power than before. We did the cam break in, then drove for about 30 miles under various loads under acceleration and engine braking. Afterwards the oil and filter were changed. Now I'll drive it for another 500 miles before the next oil change, then I'll get to see what it's made of. I'm happy to report that the polyurethane motor mounts only added minimal vibrations. Here are some pics taken over the past few days...
Cleaning the engine bay before install...


Lubing the input shaft and clutch fork...


On the hoist, ready to go in...


And, finally installed...

I'll get some pics of the final product in the next day or two. Now I have to watch closely for leaks, and break it in right. Time for sleep...
Cleaning the engine bay before install...


Lubing the input shaft and clutch fork...


On the hoist, ready to go in...


And, finally installed...

I'll get some pics of the final product in the next day or two. Now I have to watch closely for leaks, and break it in right. Time for sleep...


