When you click on links to various merchants on this site and make a purchase, this can result in this site earning a commission. Affiliate programs and affiliations include, but are not limited to, the eBay Partner Network.
As soon as we removed the old gears from the diff, my friends are like OH OH OH I want one! Paperweight on a desk never looked so good
Update on some progress I am making in efforts to make my vehicle look better, more fresh and even more stock.
The donor 1995 has been very nice to me thus far. I still have the main parts to sell though, namely both 4.88 diffs which I thought would sell quickly.
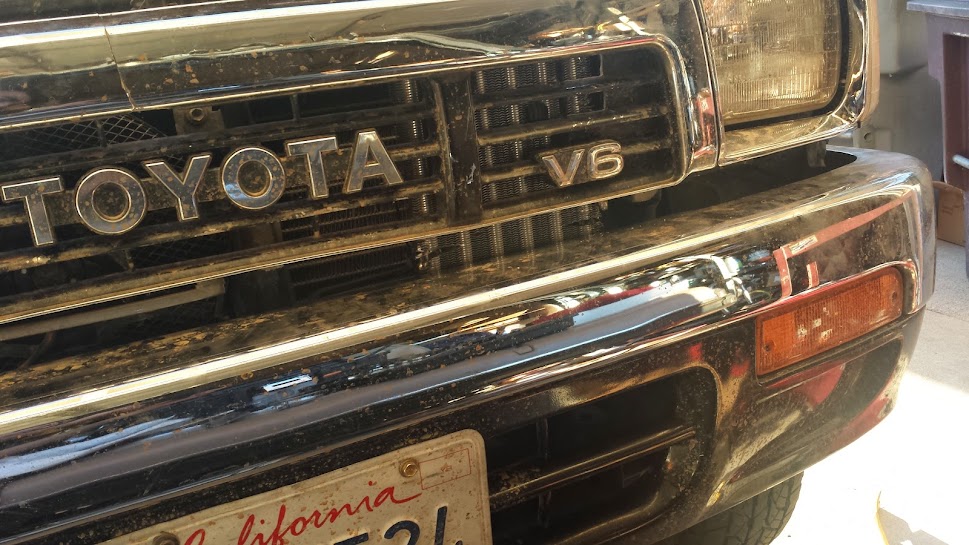
Anyway, I digress. I replaced my banged up front bumper and rear bumper ends with the 1995. I installed the rear factory mudflaps from the 1995 as well.
Factory wheels went on. Until these went on, I hadn't realized that the other ones the car came with had additional offset and was sitting further out of the frame. lame!
ANd this now definitively answers the question that when I was searching I got a lot of "it should" and "I don't see why nots".. SO a 1992, 1993, 1994, 1995 front and rear bumper fit on a 1989, 1990 and 1991 (I wrote all the dates for future search results)
Turns out I don't have pics of the rear. oops
ANother note, on cardone remanufactured steering gears. I purchased one via rockauto a few days before I purchased my donor car. Instead of returning it I thought, heck, let me just have a new unit on there (as apposed to swapping the 1995 which didn't seem to have any leaks). After the installation I was disgusted at the steering gear. Had a huge amount of play and the adjusting nut was stuck. I broke a large screwdriver tip trying to adjust it! It was downright dangerous on the road, but I had to drive it home the first night, it was too late. Next day I contact cardone tech support to see if I'm missing anything, he said no, send it back. I returned the unit and installed the 20 year old one from the donor 4runner and it is perfect. No play, no leaks, no sounds
Hi everyone, updating my build thread. I started a thread about my 1.5 inch body lift. I had some issues that I worked out, but there is still one pending! It's in this thread. https://www.yotatech.com/forums/f116...issues-284418/
Also, I am collecting the suspension lift components now. I have the balljoint spacers for the front, and I know which coil springs I want to buy for the rear, but am having a tough time finding the shocks that make sense. Most of the longer shocks for the 1.5 inch lift also have a longer compressed length, which makes it pointless to use since I want the bumpstops to do their jobs and not let the shocks limit the travel.. So far the only shockthat would work without modifications to the shock mounting points is the OME shock... I forgot the model number. lol.
Here she is after the 1.5 inch body lift.
Here she is with her new hayden oil cooler. I put this inline with the B&M one on the bottom. My transmission oil temp issues are perplexing and worrying. THe tanny is rebuilt with just 10k miles. It's shifting beautifully and otherwise doing very well, but the oil temps it's seeing is confusing. Lucky for me, I have a spare tranny that only has 150k in the garage, so I'm just waiting for this one to die. But meanwhile I did want to give it a fighting chance. Found this hayden cooler that was thin enough to fit behind the grille, although I did have to re-mount the grille about 3/4 inches forward. I haven't had time to put it through it's paces yet. we'll see...
It was a tight fit and required some mickey mousing...
It's been awhile since I checked in on your build. Looks like it's going well. How long did it take to get your parts from 4crawler? I ordered mine about 5 or 6 weeks ago and still don't have them. I know he makes orders when they are ordered just wondering. How much are you looking to get out of the 4.88s? Would like to run them when I finish my 3.4 swap.
thanks... actually I'm a little further along than I've been keeping up on the build thread. I spent a long detour trying to figure out my tranny heating issue...
as for your question, I think it took about 1.5 weeks to get them. 5 to 6 weeks looks like a long time, but really it depends on the item you ordered. I would ask him what the eta is, he's also on these forums if you don't know, he's a pretty helpful guy. What did you order?
Ordered 2 inch body lift with the associated brackets for shifter, bumper, new bushings, and 1.5 inch ball joint spacers. Do you still have the 4.88s?
Ordered 2 inch body lift with the associated brackets for shifter, bumper, new bushings, and 1.5 inch ball joint spacers. Do you still have the 4.88s?
I do have the 4.88, but I'm keeping it now. Decided it was more worth my money than the 5.29 (i think thats what it was..) I had planned on earlier. My tire size will max out at 33 inches, so the 4.88 gearing will be just a tad bit lower than stock.
I'm waiting to get the front locker before I install them to my '91 .
For your order from 4crawler, send him an email...
It's been a few months, was out of the country for a while and been on a few rides. The 4Runner is doing very well in the trails.. that rear locker has made all the difference in the world.
So, body lift was done few months ago and I had been acquiring the parts for a suspension lift. I finally decided on which shocks to get, actually, I would argue that they are the ONLY shocks that are proper for a 1.5 inch suspension lift... the compressed and stretched lengths fit JUST right (old man EMU 60072 and 60073). Unfortunately the local shop I ordered the shocks from screwed my work plan up by not delivering the shocks as they promised they would. Offroad unlimitted in Burbank.... I suggest you guys try other places first and only go here when you must. THe attitude of the owner is annoying... SO I installed the rest of the lift until I get the shocks on wed.
Well, the rear springs went on with no issues. The front 1.5 inch BJ spacers not so. I didn't read anyone else having these issues on the web... The problems were, first the ball join spacer was not fitting in the a-arm. (spacers from 4crawler). We have to trim an edge off (sorry no pics, if you need details let me know) before it would fit. Then, I found that when you put the ball joint base on the spacer the two edges (the round edges around the bolt hole) on the wide side don't fit in the a-arm casing. I had to hack the under part of the a-arm a bit to make it fit.. I hope I didn't miss something that would have resolved this... (EDIT!! 4Crawler site had the all this info and mentioned some cutting is required.. my searchign skills have failed ME!!)
... Here are some of the pics..
I bought the rear springs from a member here. Downey HD coils I was pretty happy with this since it seems that the downey coils have great reviews.
Next thing... get some new tires to match the lift...
Yeay! New SHocks! FInally .. ARB EMU Nitrochargers, GREAT SHOCKS! Such a difference. Meanwhile I thought with the 1.5" BJ spacers I should get some manual hubs. Got them and started cleaning and re-greasing them yesterday
FIrst thing is first, Alignment.. finally.. up until this point it was done on my driveway. lol.
Shocks! Went on with no issues.
Testing here to see if the shock is being stretched all the way out. I don't want the axle to hang on the shock. Unfortunately the sway bar was doing it's job, so I removed it but haven't tested again.
If the shock is supporting the axle, I think I would be installing some limiting straps.. Also, please ignore my tiny tires... gotta spread out the expense
Before I cleaned and re-painted them. I should have it installed today.
ANd the benefits of the body lift have been showing up everywhere
Next major item on my list is to re-do my valve covers. THey are leaking and getting oil all over my beautiful engine! My biggest regret during hte engine rebuild has become the fact that I didn't get new-er valve covers. I had a feeling the old ones were warped a bit, so the new gaskets didn't help. Sucks!
The item after that will be the tummy tuck, flat belly, drive train lift... that goes with a new skid plate / tranny mount.
Hey rattlwagon, thanks. yah that was a VERY fun trip and I was loving all of the 4Runner's upgrades
The drivetrain lift/tummy tuck idea starts with an expensive skid plate/tranny support. Then I decided instead of doing the work to push the gas tank up in it's stock location, I rather move it to the stock spare tire location like others have done. Seems like less work, cleaner and better weight distribution. Anyway, all these things need to wait until I buy a house (currently in escrow )
Nothing too interesting on this post, but wanted to keep the thread complete. Here is a pic of the manual hubs installed. Love the look, and I am feel much better with the CV's not spinning for no good reason, especially with the BJ lift.
So, in an all out war on work this morning, I am going to ramble a little bit.
This weekend I will have a lot of time on my hands and plan on working on the 4Runner a bit more. I want to get the front left fender from my donor car sanded, primed, painted and installed. I don't like the near ghetto look of the crushed and ghetto-repaired fender!
Then, I'll clean up the donor 4.88 differentials and make them ready for swap when I can afford to buy the front locker (in the middle of buying a house!)
I will also start removing the spare tire from the stock location and start work on fitting the gas tank back there! I HATE the gas tank stock location... The drawback is that I'll have to carry my spare in the car for some time until I get a new rear bumper with tire carrier... or I can mickey mouse a tire carrier to fit on the hitch>?? hmmm...
Got to do some work on the 4Runner today. I started by finally prepping and painting the driver side fender from my donor car. This is what the one on my 4Runner looks like now. I spray painted it a while back to hide the crappyness a bit
Then I sanded it with various grits of sandpaper to get all the scratches, clear coat and other damages off. Had to go to bare metal in some parts...
THen I primed it, I underestimated how much primer I would need so I ran out of my black primer and luckily had some other color around. Oh, by the way, this is a rattle-can job
First thin layer of paint. Oh, I searched around and it turns out autozone has a 'Toyota black metallic" paint that should be pretty close to the 1991 4Runners stock paint.
Second coat. Stupid sprayer can nozzle spit out a couple of blobs and i had a hard time fixing that.. I think one of them will end up showing a bit
This being the first time i attempted to do a clean spray can paint job, I was a bit confused when the final layer of paitn came out matt and almost a 'lite' black if that makes any sense.. Anyway, it was getting late and I read around for what to do next. Turns out I need to buff a bit and then spray the clear coat. So, I did a quick buff on the bottom area where it won't show much and sprayed with clearcoat.
So the small white dots on the very bottom side is probably form me not takign to much of the paint off on that side. There is some thicker anti-corrosive material sprayed on there and I didn't want to remove it. From the top side it doesn't show much.
While waiting for the paint to dry, I took the donor cars 4.88 IFS out to de-grease in preparation for the near future swap and addition of locker.
OH, and I installed a new horn. sounds WAY better.. I'm not embarrassed to use my horn now. LOL
All in all, was a fun and tiring day. My back is complaining at the moment and I want to play some video games
So, I ordered many many quarts of synthetic transmission fluid. Currently I have conventional fluid in there. I have been having small little problems here and there and I want to see if the synthetic fluid will make a change.
The issues are the heat, the oil heats up way to much when the torque converter is not locked. I had to install two tranny oil coolers in order to keep the temps under 200 F, Not sure what the cause is, but my tranny is otherwise working very very well.
Funny thing I say that, and follow with... the second problem I am having is that in the morning (or the first time I start the car that day) the transmission takes about a mile on the fwy before it decides it wants to shift in to overdrive. This started more or less randomly a few months ago and has stayed the same, in other words it hasn't gotten worse. Some research suggested that this is more or less 'normal'... yeah, I don't accept that so finally I am trying to do something about it.
I purchased 12 quarts of cheap synthetic ATF and 12 quarts of Mobile one synthetic atf and one bottle of seafoam for tranny. Seafoam goes in tonight, drive around for couple days to 'clean' things. Then the idea is to drain the oil, fill with the cheap stuff, then run the rest of the cheap stuff through the tranny cooler lines. Once the 12 quarts of the cheap stuff is done, I'll drive it around for a little while (in 4x4 as well). Then, i'll drop the tranny pan and drain and change filter. I'll button everything back up and do the oil flush again through the cooler lines. From all of my research, this is probably going to give me a good flush of the old fluid and all (or 98%???) of the new fluid back in. After all of this wonderful work, I hope there is a difference in the transmission operation and better heat handling.
If all else fails I'm out 3 hours of my life and $160 in oil. I have a spare tranny with 100k less miles sitting in the garage
If anyone would like to add any comment to this process please do so!
EDIT:: I just thought of a question I should ask in the tech forum about the tranny oil routing... Does the output to the cooler come from the reservoir/pan or...?
Yeay! I finally got around to installing the driver side fender! I painted it a week or so ago (see above). So this was my first attempt ever at body prep and paint. I learned a LOT in the process, but some of it was too late for this fender. lol. I used the dupli color paint, exact match etc etc.. but the quality was NOT good. Rust Oleum is much better quality that I can tell. The clearcoat I used was rust oleum brand and it has a very different spray (lot more volume) so I screwed up a bit moving from the dupli color spray (much finer spray, less volume) and had some booboos.. I fixed those today with some 1500 grit sandpaper. Was running out of time so I quickly did a compound rub/polish to have a semi clean look before I drove to the bar
ANyway, BEFORE!
AFTER
If you are thinking oh it's so much different than the door panel... hold your horses! There are a lot of clearcoat scratches from the last few times I went wheeling... On the passenger side I had polished a test area to see the effects, and it will match pretty decent once I polish the panels around the new fender.
Here is the test polished look.
TOmorrow is going to be a big day.. the tranny is getting a flush and new synthetic fluid! (on my driveway ) Can't wait!

 09-13-2014, 07:20 AM


 It's in this thread.