
Dutchbelly's 1988 4runner Build-up
 07-14-2011, 06:59 PM
#261
Registered User
Thread Starter
Join Date: Apr 2011
Location: Southern Ontario
Posts: 428
Likes: 0
Received 0 Likes
on
0 Posts
Old Man Emu install
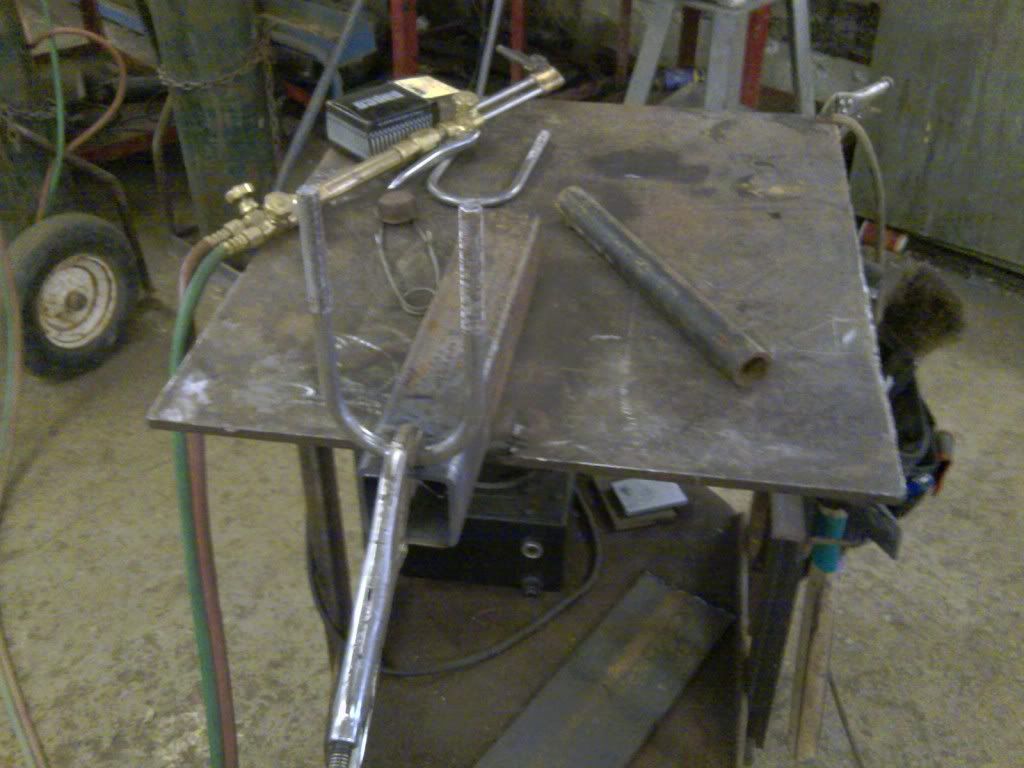
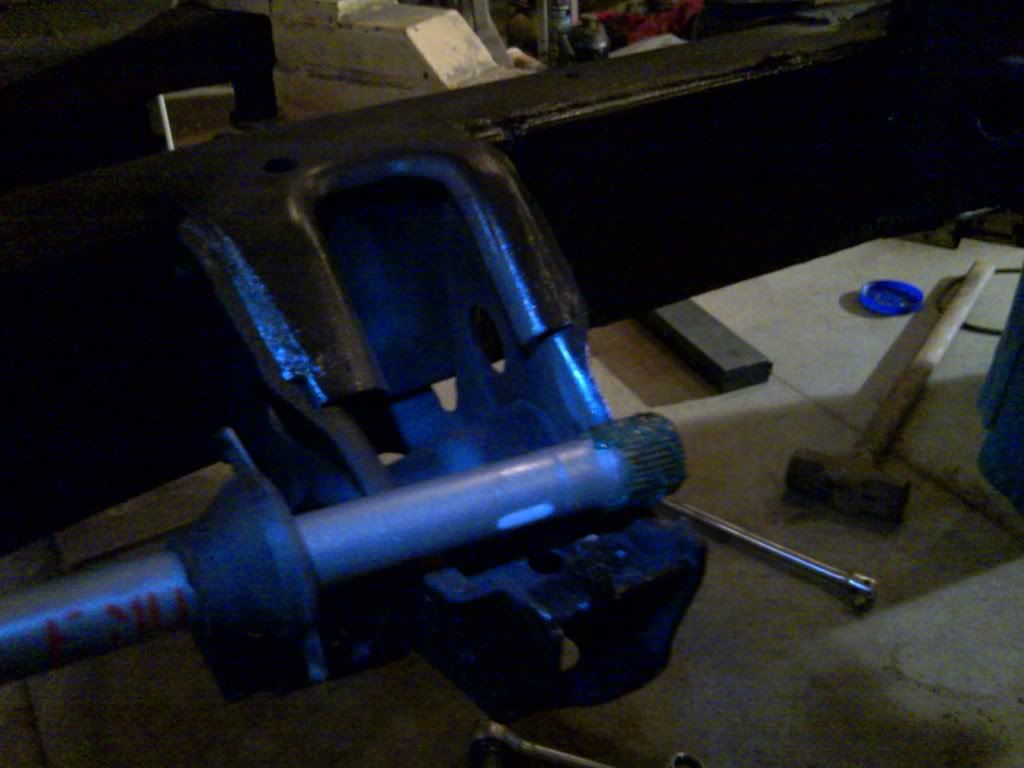
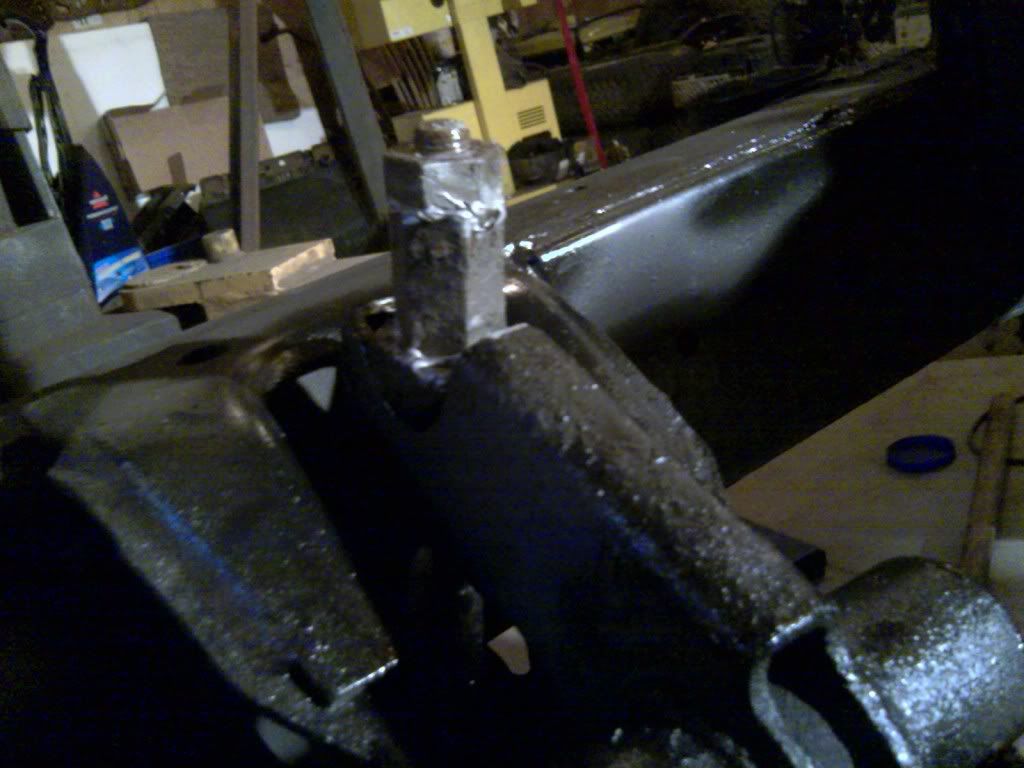
Got back at it tonight. Still no bushings, so I can't finish the rear suspension, but I'm putting it in anyway so I can fit up brake lines soon. First things first here's a quick recap on how I reworked the trailer U bolts I found for 3 bucks instead of buying the toyota ones for 50 bucks. I did find out later I could get them made for 21 bucks a pop from a trailer repair shop nearby, but I'd already bought these:
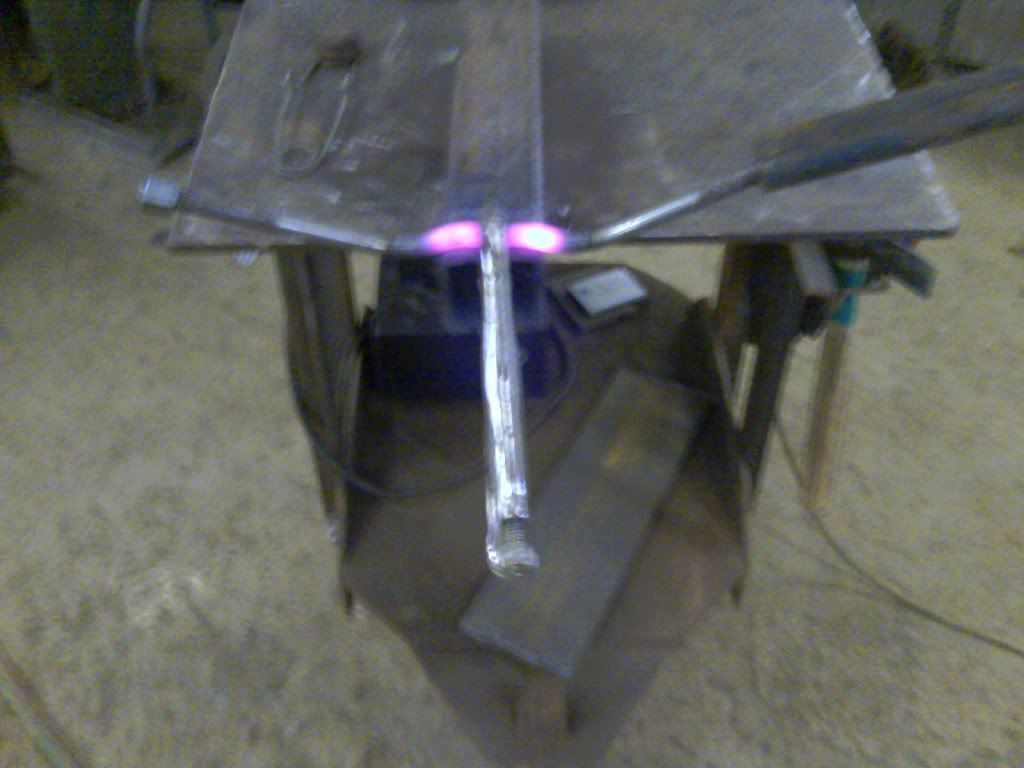
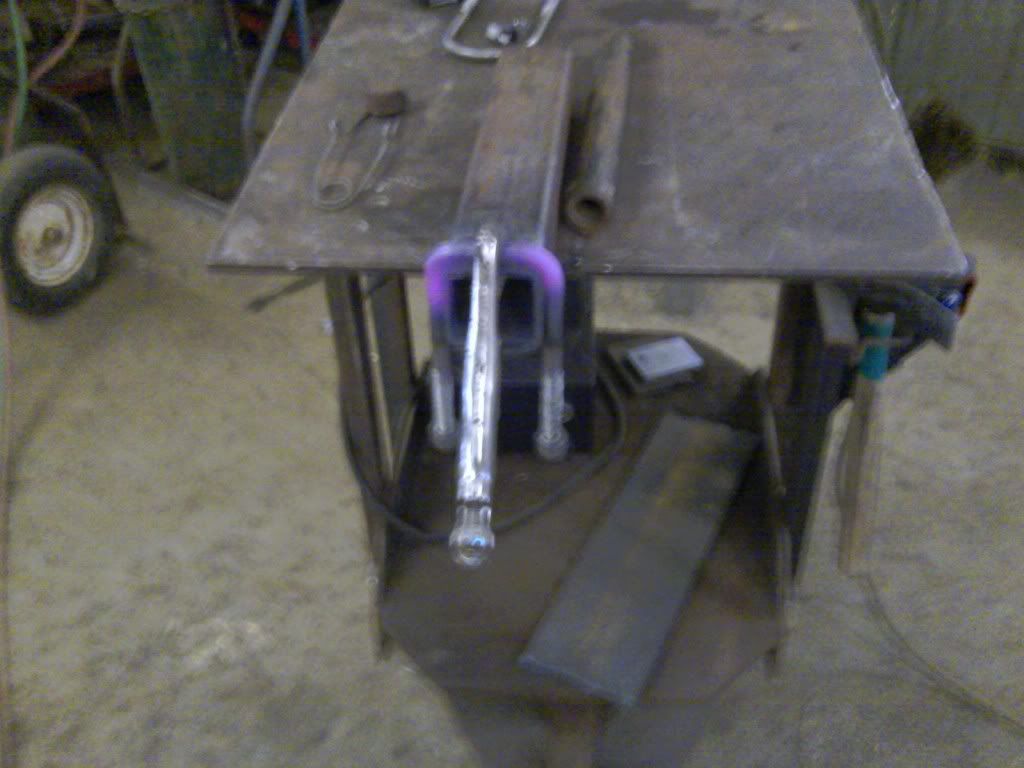
I did that for all four. Only took maybe 10-15mins or so.
Here's a pic comparing the old leafs with one of the OME leaf packs:
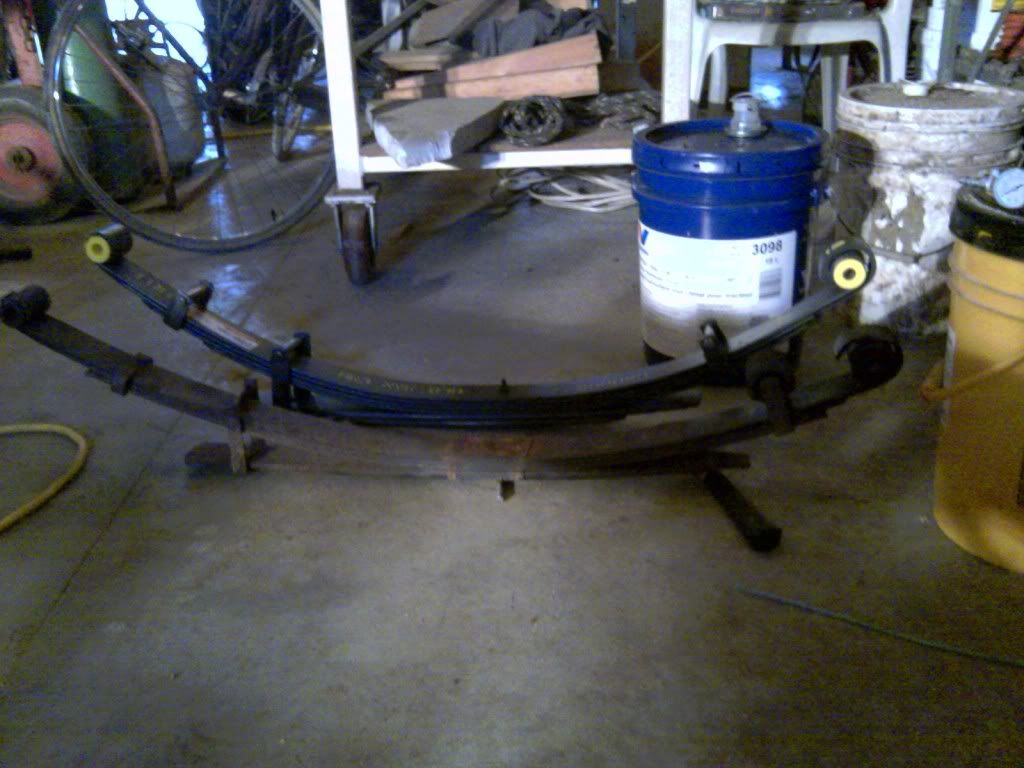
And Installed:
I need to replace the bolts going through the front bushings for the leafs on both sides. They bonded to the old bushings and I could not for the life of me get them to tap through and out. They would just bounce. I cut the one side out instead. I'm wondering now if I should have heated up the bolt red hot so the bushing would melt a bit, and then tap the bolt out. I might do that with the other side tomorrow night so I can take the bolt with me to find a new pair. I only did one side of the leafs and one side of the torsion bars tonight to get the pics all done for you guys. I'll end up finishing the rest tomorrow night, hopefully by then I'll have all the bushings, and can really get something done without having to clean my hands to take pics, lol.
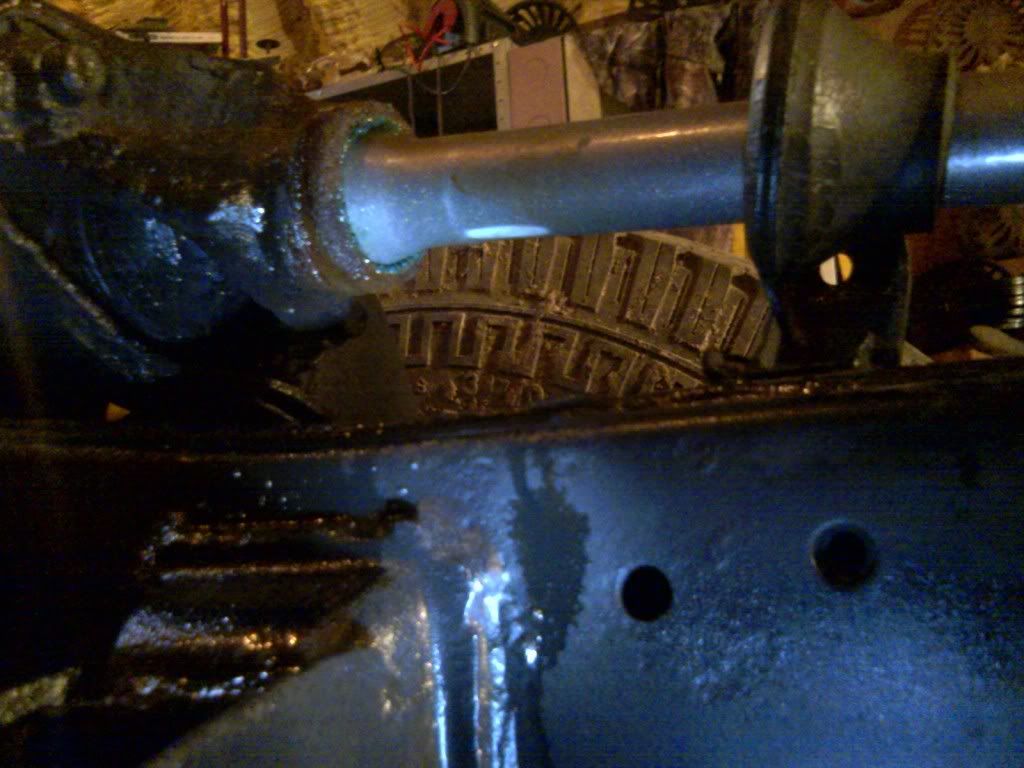
Popped the boots from each end of the torsion bar and threw some heat to the adjusting nuts to free them up. It might not have been necessary but I'm sick of fighting with old bolts.
I let it cool. Here are a couple closer pics of each end:
Here it is almost free at the back end. If you do this sometime, tap the torsion arm every once in a while while loosening the nuts. Otherwise it can bind, and then all of a sudden jump with a lot of force.
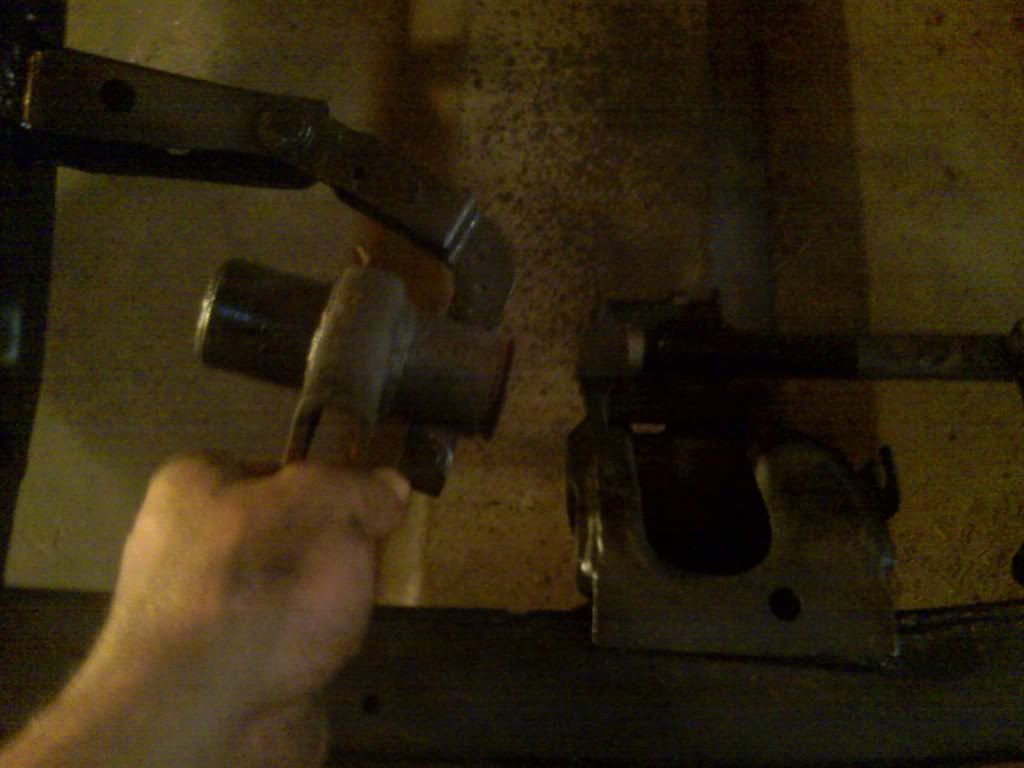
The torsion arm bracket popped off really easily. You can see how clean the splines were on the torsion bar. I hope the driver side goes as easily.
The front end of the bar didn't free up as easily. I had to soak it with penetrating oil, and wiggle it around a whole lot. I also tapped it on the opposite end with a hammer a bunch to get the splines to free up.
Comparisons:
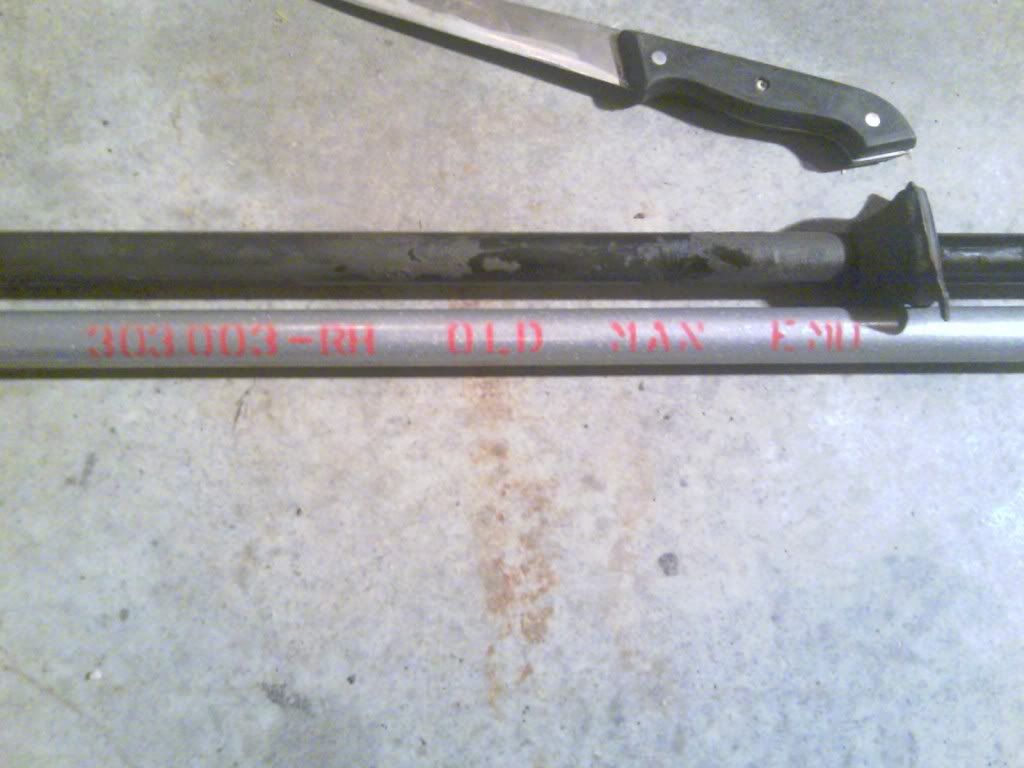
The look pretty much the same size. I'm wondering now if these were a waste of time/money. I'll never know.
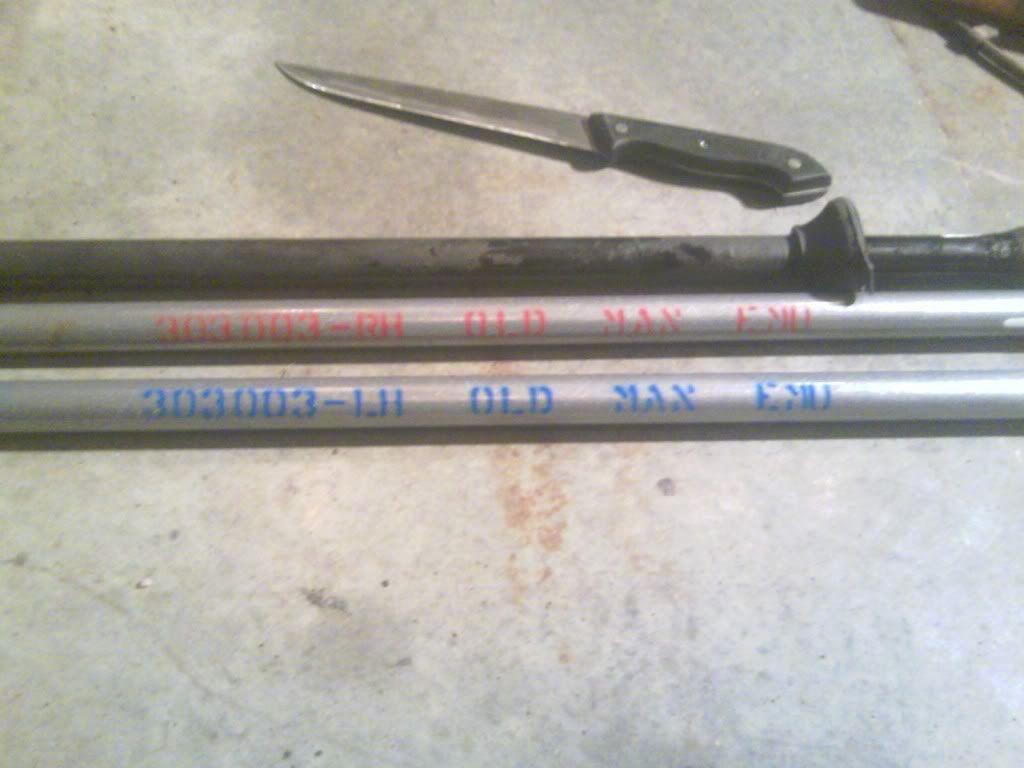
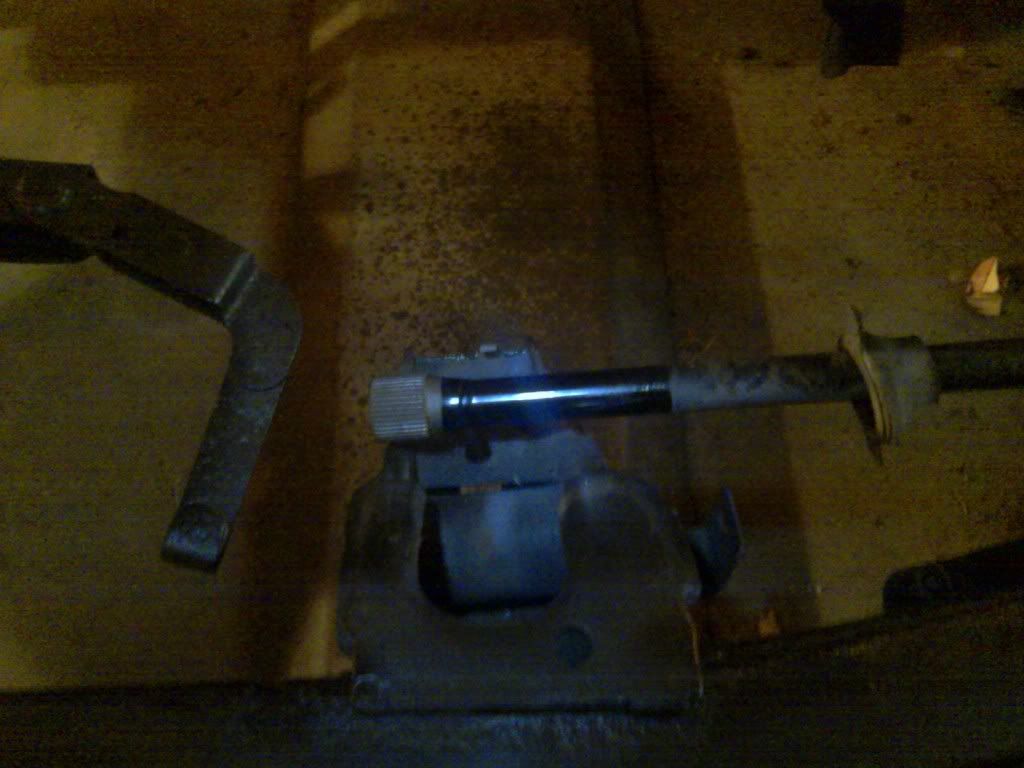
I took the boots off the factory rod and put them on the OME one. I also threw some grease on the splines. You'll notice there is one spline that is different from the rest. The rod has to go into it's carriers with that odd spline lined up properly. The white paint mark is aligned with the odd spline.
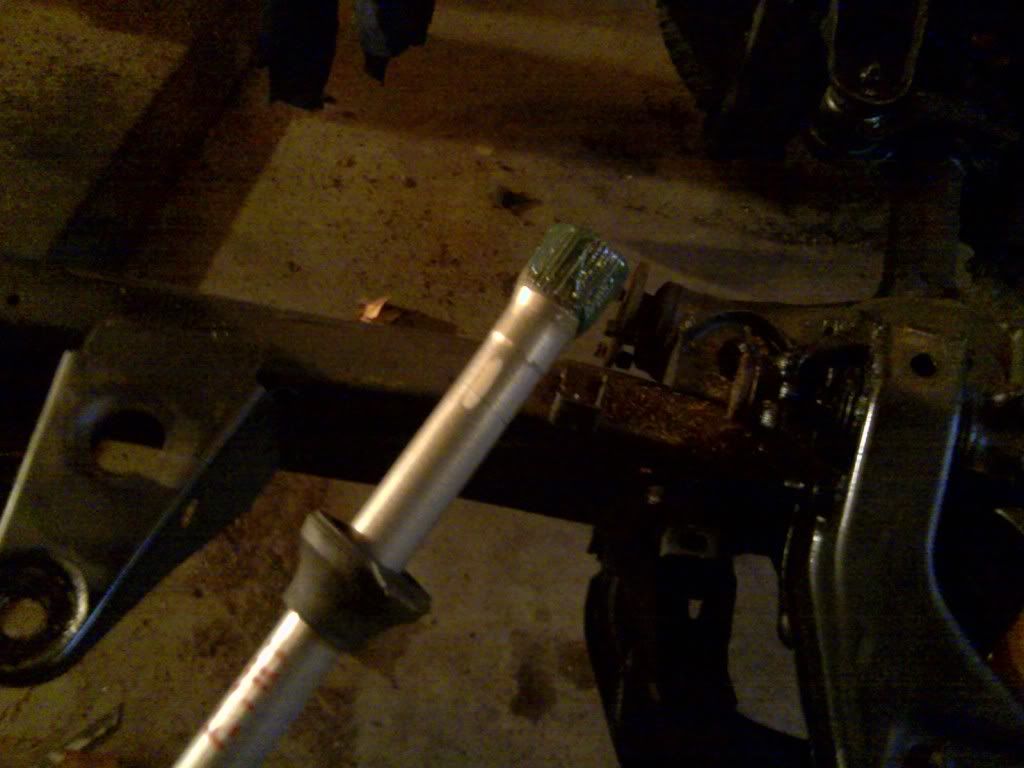
The second pic there shows where the mark ended up after the install. I threw a bit of grease inside the boot and snapped the boot onto its place. And back to the front:
Install is pretty much reverse of removal. I didn't set the crank on the bars yet because I'm going to wait until the truck is actually all together for that. All in all a good night.
Jump to next OME post>>
I did that for all four. Only took maybe 10-15mins or so.
Here's a pic comparing the old leafs with one of the OME leaf packs:
And Installed:
I need to replace the bolts going through the front bushings for the leafs on both sides. They bonded to the old bushings and I could not for the life of me get them to tap through and out. They would just bounce. I cut the one side out instead. I'm wondering now if I should have heated up the bolt red hot so the bushing would melt a bit, and then tap the bolt out. I might do that with the other side tomorrow night so I can take the bolt with me to find a new pair. I only did one side of the leafs and one side of the torsion bars tonight to get the pics all done for you guys. I'll end up finishing the rest tomorrow night, hopefully by then I'll have all the bushings, and can really get something done without having to clean my hands to take pics, lol.
Popped the boots from each end of the torsion bar and threw some heat to the adjusting nuts to free them up. It might not have been necessary but I'm sick of fighting with old bolts.
I let it cool. Here are a couple closer pics of each end:
Here it is almost free at the back end. If you do this sometime, tap the torsion arm every once in a while while loosening the nuts. Otherwise it can bind, and then all of a sudden jump with a lot of force.
The torsion arm bracket popped off really easily. You can see how clean the splines were on the torsion bar. I hope the driver side goes as easily.
The front end of the bar didn't free up as easily. I had to soak it with penetrating oil, and wiggle it around a whole lot. I also tapped it on the opposite end with a hammer a bunch to get the splines to free up.
Comparisons:
The look pretty much the same size. I'm wondering now if these were a waste of time/money. I'll never know.
I took the boots off the factory rod and put them on the OME one. I also threw some grease on the splines. You'll notice there is one spline that is different from the rest. The rod has to go into it's carriers with that odd spline lined up properly. The white paint mark is aligned with the odd spline.
The second pic there shows where the mark ended up after the install. I threw a bit of grease inside the boot and snapped the boot onto its place. And back to the front:
Install is pretty much reverse of removal. I didn't set the crank on the bars yet because I'm going to wait until the truck is actually all together for that. All in all a good night.
Jump to next OME post>>
Last edited by Dutchbelly; 07-16-2011 at 01:12 PM.
 07-15-2011, 04:42 AM
#263
Registered User
Thread Starter
Join Date: Apr 2011
Location: Southern Ontario
Posts: 428
Likes: 0
Received 0 Likes
on
0 Posts
It's probably just as well you brought that up in case anyone does what I did with the u bolts Twisted. It's not as simple as just saying it makes them weaker. It depends how much heat you apply and more importantly how quickly you cool it down. when you heat steel it expands and softens. when it cools down it shrinks and hardens even more than it expanded when it was heated. The rate at which you cool it effects how hard and brittle the steel becomes. The steel molecules need time to adjust to temperature changes if you want to retain flexibility and tensile strength. the worst thing you can do is heat it up white hot bend it and shock cool it in a bucket of water. the best thing you can do is only heat it as much as is necessary like a nice orange and let it slowly cool by itself. and if all this is scary you can pay toyota 50 bucks a bolt lol
Edit: Posting this diagram from my FSM here for reference:
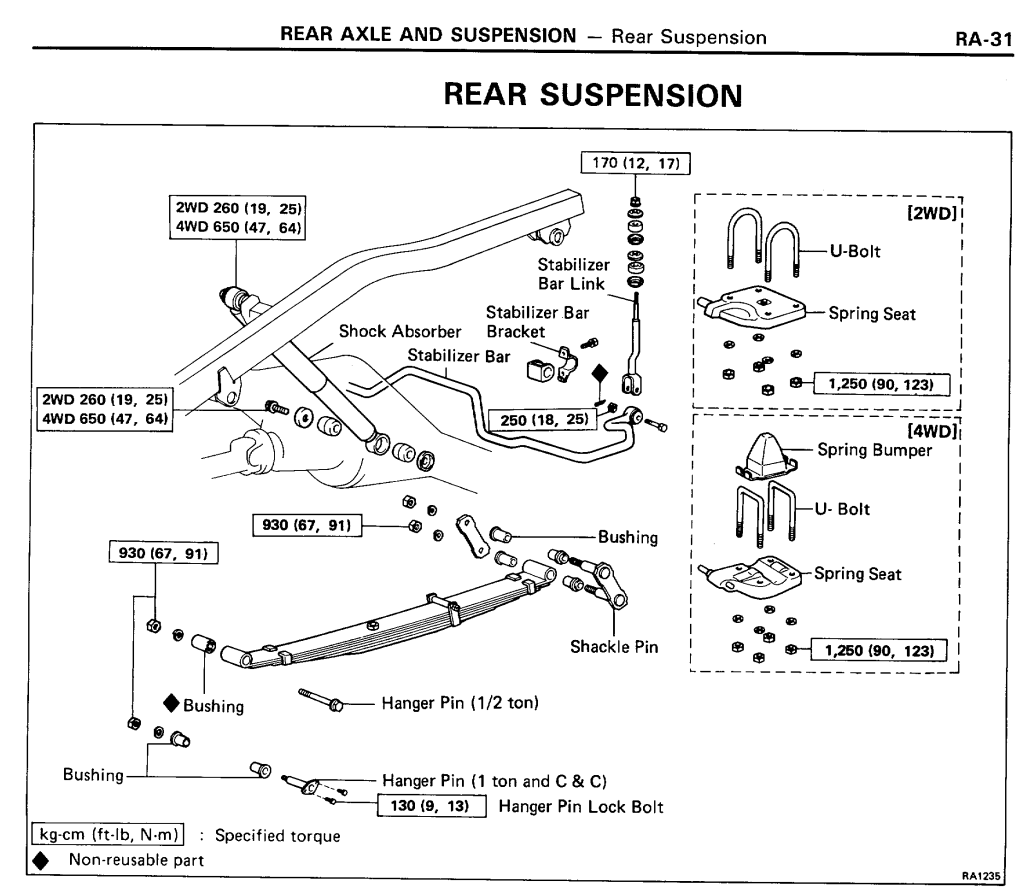
Edit: Posting this diagram from my FSM here for reference:
Last edited by Dutchbelly; 07-16-2011 at 10:37 AM.
07-15-2011, 05:51 AM
#264
Super Moderator
Staff
iTrader: (1)
Join Date: Aug 2008
Location: Anderson Missouri
Posts: 11,788
Likes: 0
Received 25 Likes
on
22 Posts
Good job on coming up with a fix for new U-bolts.
I have had the same problem on gettting the bolts out of the bushings. Now when I have to remove one, it is almost a given I am going to replace the bushing and bolt sometimes get ruined while getting it out.
What you get done in a nite takes me a week.lol
I have had the same problem on gettting the bolts out of the bushings. Now when I have to remove one, it is almost a given I am going to replace the bushing and bolt sometimes get ruined while getting it out.
What you get done in a nite takes me a week.lol
07-15-2011, 09:30 AM
#265
Dude, ...... stop doing such awesome write ups and incredible work! lol. Honestly, that was great reading! And, ..... well, ..... YOU WILL feel the diff in the T-bars! ONLY thing I would ask is, ...."You sure the PO didn't have Downey T-bars in there or something? I seem to remember Downey's side by side pic being a lil more obvious.... But I'm pretty sure the OME's do they're job just fine, Dutch! Lots of write ups on that! I can't even get my adjuster nut on top to break free from the other one! Been wanting to relax my t-bars since the bj spacer install and all the rest. It's just too stiff since I've pushed up on that upper arm with those! lol.
Keep at it, man!
Keep at it, man!
07-15-2011, 09:54 AM
#266
Registered User
Thread Starter
Join Date: Apr 2011
Location: Southern Ontario
Posts: 428
Likes: 0
Received 0 Likes
on
0 Posts
Heh thanks for the kind words Chef. I try to be really specific on this thread because I can remember what it was like for me years ago. When I bought my first 4runner I didn't know the first thing about them, but dreamed of fixing one up like I'm doing now. I would spend hours on any given evening reading build threads on sites like this one, and 90% of the time I wouldn't know what any of the terms meant unless the writer was really specific. I try to keep those memories in mind when I do a write up.
If you're trying to break free your lock nut try heating up 3 sides of the nut till they're orange, hold the adjusting nut with a 22mil wrench and try to crack free the lock nut with a socket and johnson bar. This way hopefully 3 sides will be free from rust while glowing, and three sides will still be stiff enough to take the force of the socket without rounding the corners. Just do this to break it free. I'd let it cool before trying to thread it too far up. You want the bolt cool as possible so you don't have to worry about snapping and having to replace it. I took a wire brush to the exposed threads to clean it up, too. I forgot to mention this.
Edit: I'm sorry I thought you meant the lock nut, but I see now you said adjusting nut. Oops!
Last edited by Dutchbelly; 07-15-2011 at 09:55 AM.
07-15-2011, 05:42 PM
#268
Registered User
Thread Starter
Join Date: Apr 2011
Location: Southern Ontario
Posts: 428
Likes: 0
Received 0 Likes
on
0 Posts
No worries Twisted. You were completely justified with your post because every time steel is heat treated it's characteristics change. If you didn't speak up there's a good chance someone could have made a set of really brittle U bolts because I didnt' specify. I don't need that on my conscience so I'm in your debt.
07-15-2011, 09:50 PM
#269
You know, I don't even know what the heck I'm talkin about lately! lol. Heck, I'm the KING of detail(apparently next to you! lol) and what i meant was that, .....>>>>>>>
** I can't get the two nuts to separate so I can RELAX my torsion bars! The top one(lock?) wont break free of the big nut looking thing below it(adjuster?). I know it's adjusted by the bolt head at the bottom, facing the ground,...but it has to be freed up first, .....and without the body off like you, it's REALLY tough getting leverage in there. I had 2-22mm open/closed wrenches and a BFH.... NOTHING, and there's NO, and I mean NO rust that I can see on any of it, bolts-nuts or otherwise. lol.
** I can't get the two nuts to separate so I can RELAX my torsion bars! The top one(lock?) wont break free of the big nut looking thing below it(adjuster?). I know it's adjusted by the bolt head at the bottom, facing the ground,...but it has to be freed up first, .....and without the body off like you, it's REALLY tough getting leverage in there. I had 2-22mm open/closed wrenches and a BFH.... NOTHING, and there's NO, and I mean NO rust that I can see on any of it, bolts-nuts or otherwise. lol.
07-16-2011, 10:11 AM
#270
Registered User
Thread Starter
Join Date: Apr 2011
Location: Southern Ontario
Posts: 428
Likes: 0
Received 0 Likes
on
0 Posts
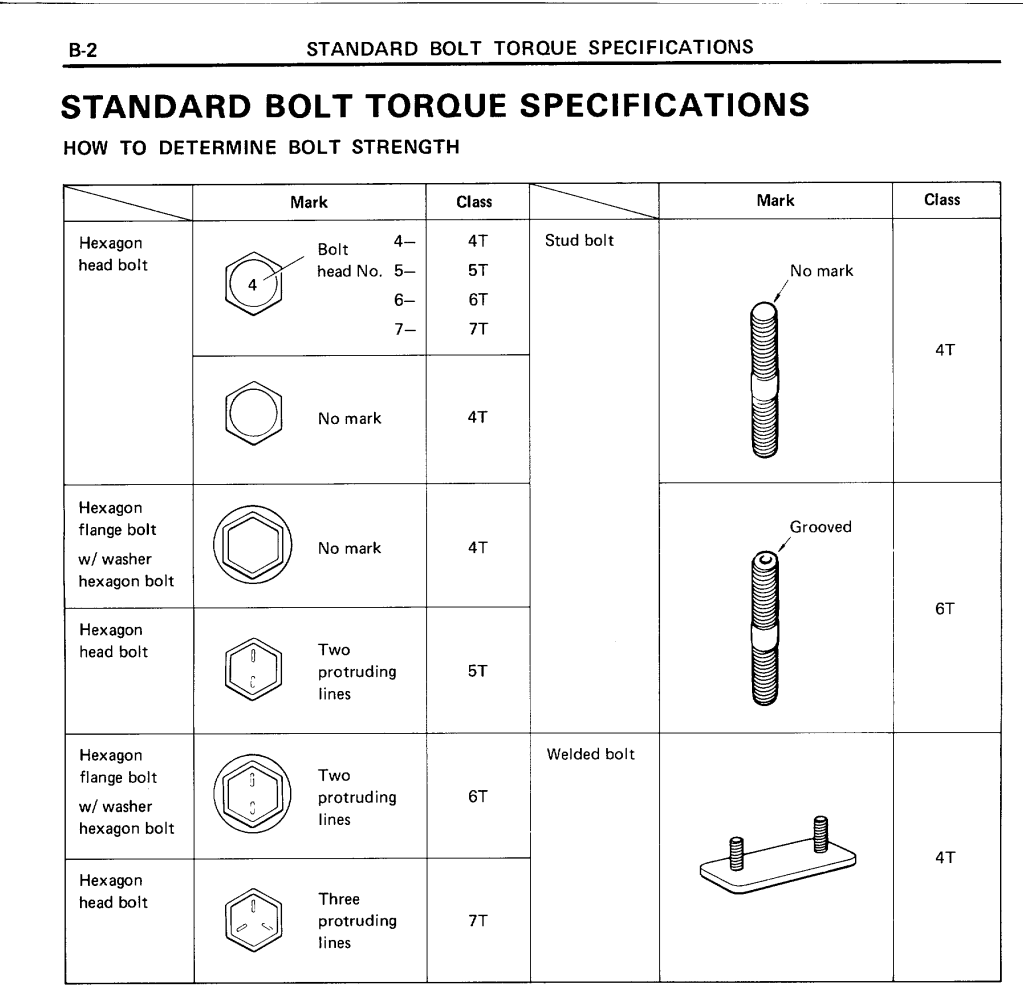
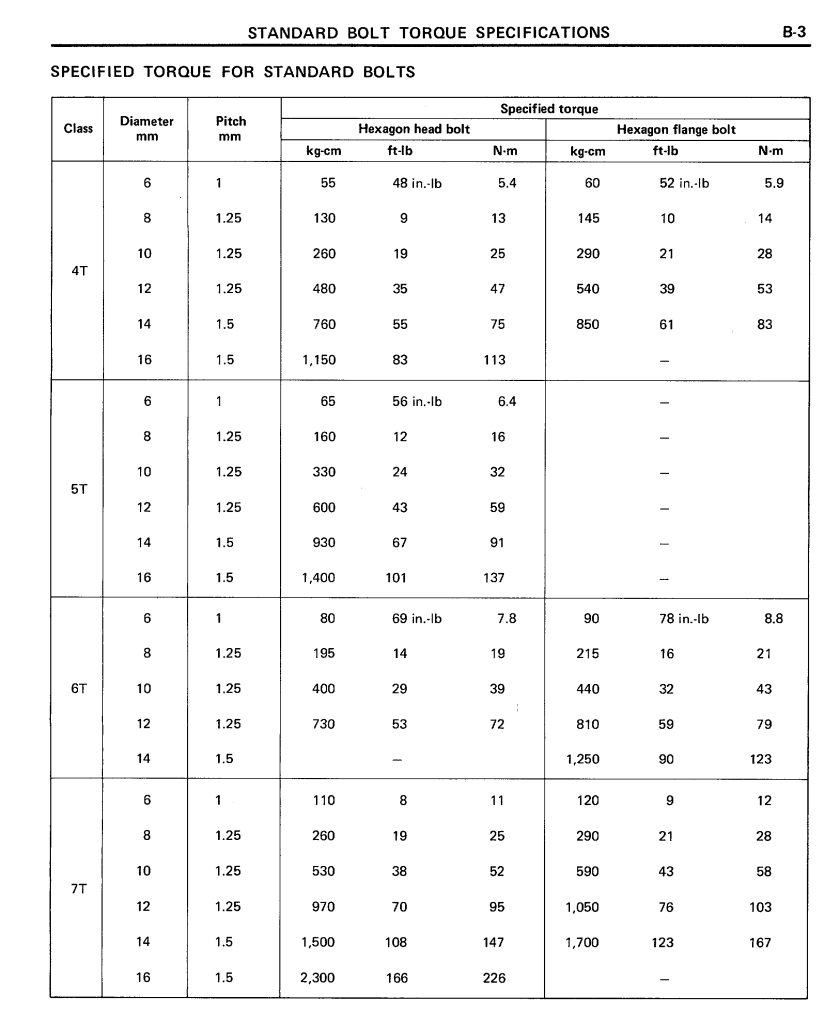
Bolt Torque Specs
I've been snooping through my FSM, and there are a few diagrams I'm going to post on here so I can access them from my phone when I'm working on my truck. Hope they come in handy for you guys, too.
07-16-2011, 12:20 PM
#271
Registered User
Thread Starter
Join Date: Apr 2011
Location: Southern Ontario
Posts: 428
Likes: 0
Received 0 Likes
on
0 Posts
I was hoping I could use my signature as a thread index, but I'm hitting the limit for signature length. I see some people with pics and multiple links in their sigs. What's the difference? Do some people get longer sigs?
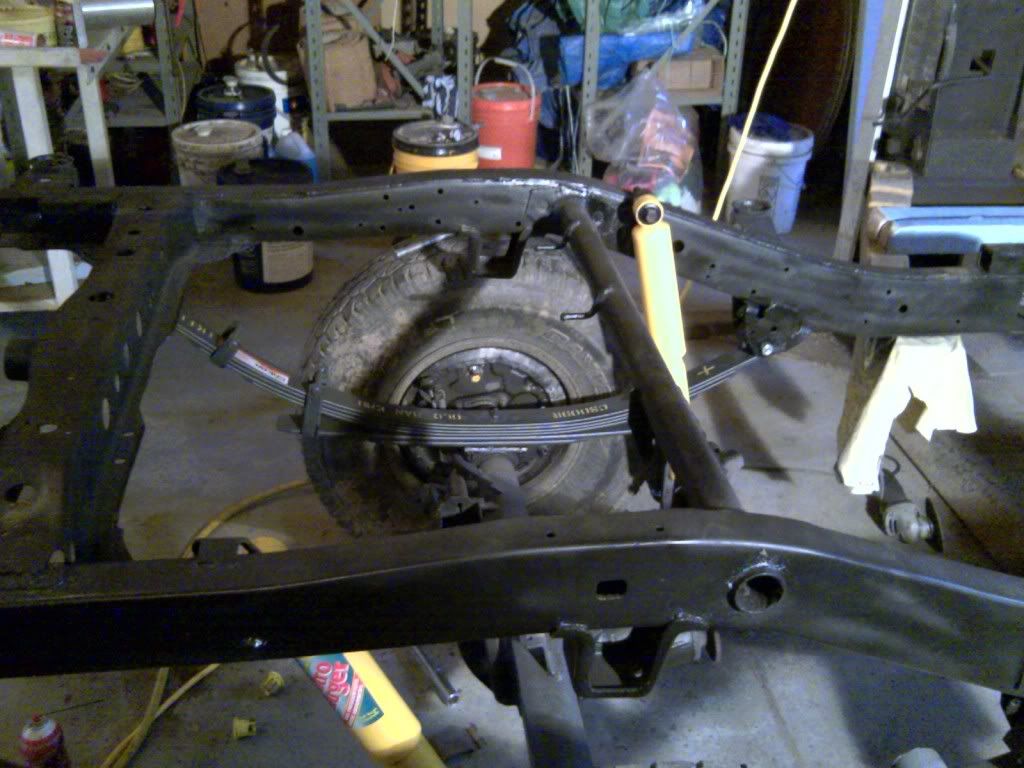
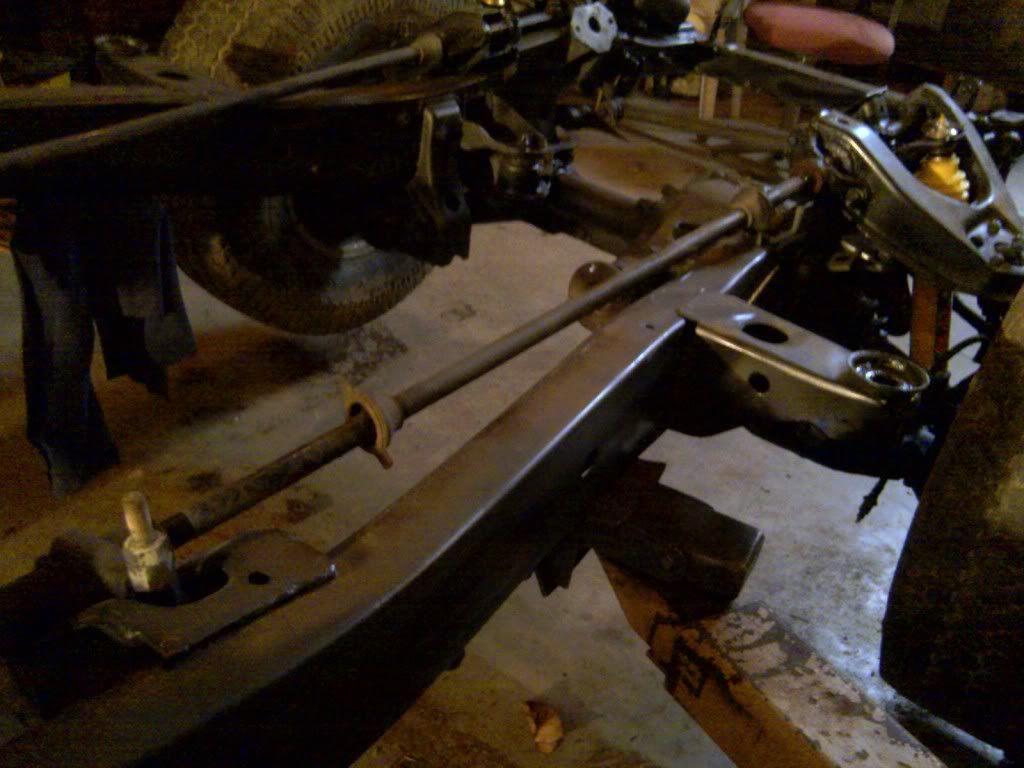
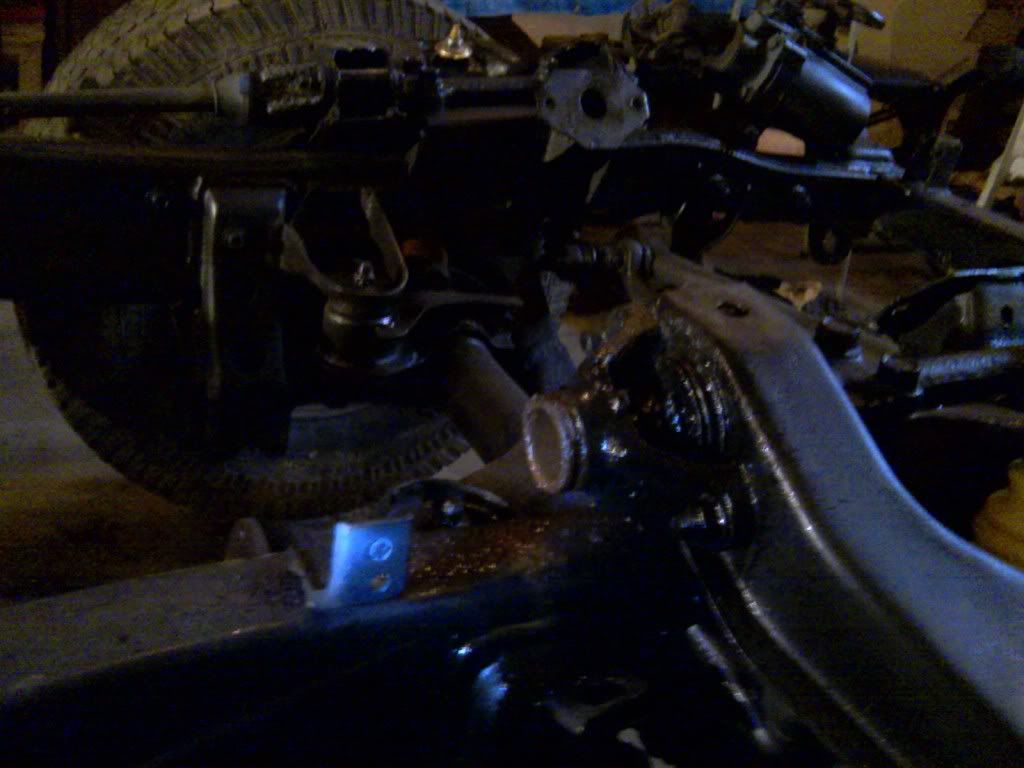
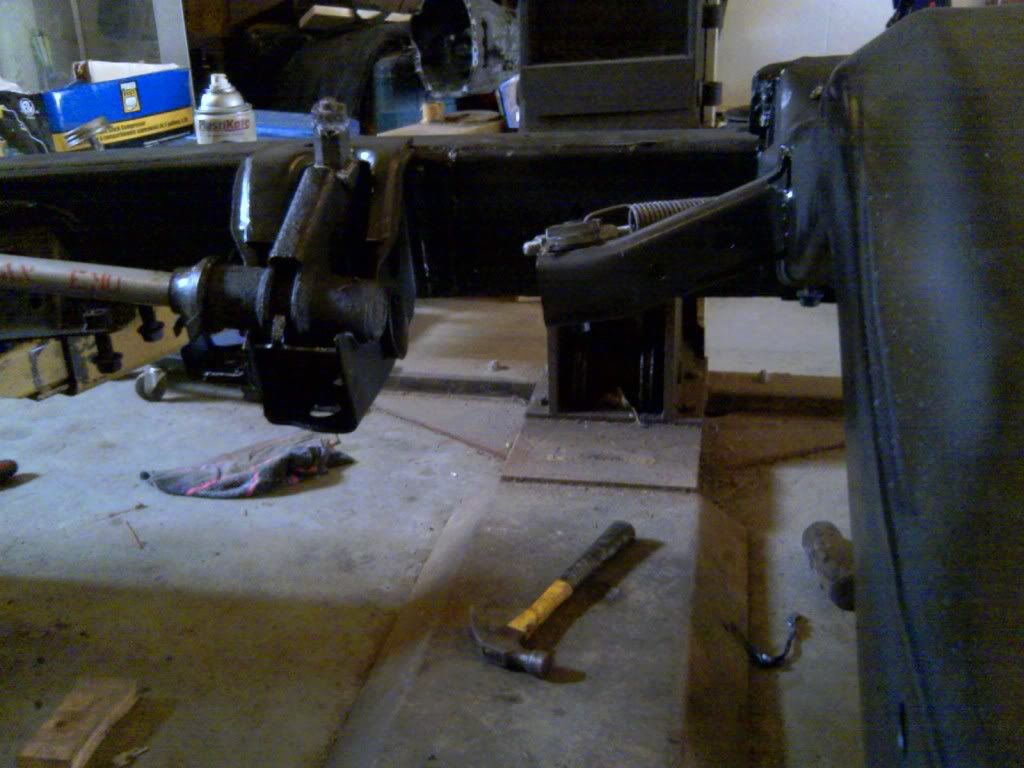
I'm taking the day off which means I've sat here at the computer reading build threads and researching. I started cleaning up my thread a bit and found a couple pics I forgot I had taken. I think this is a really good pic comparing stock suspension with OME for the rear axle at least:
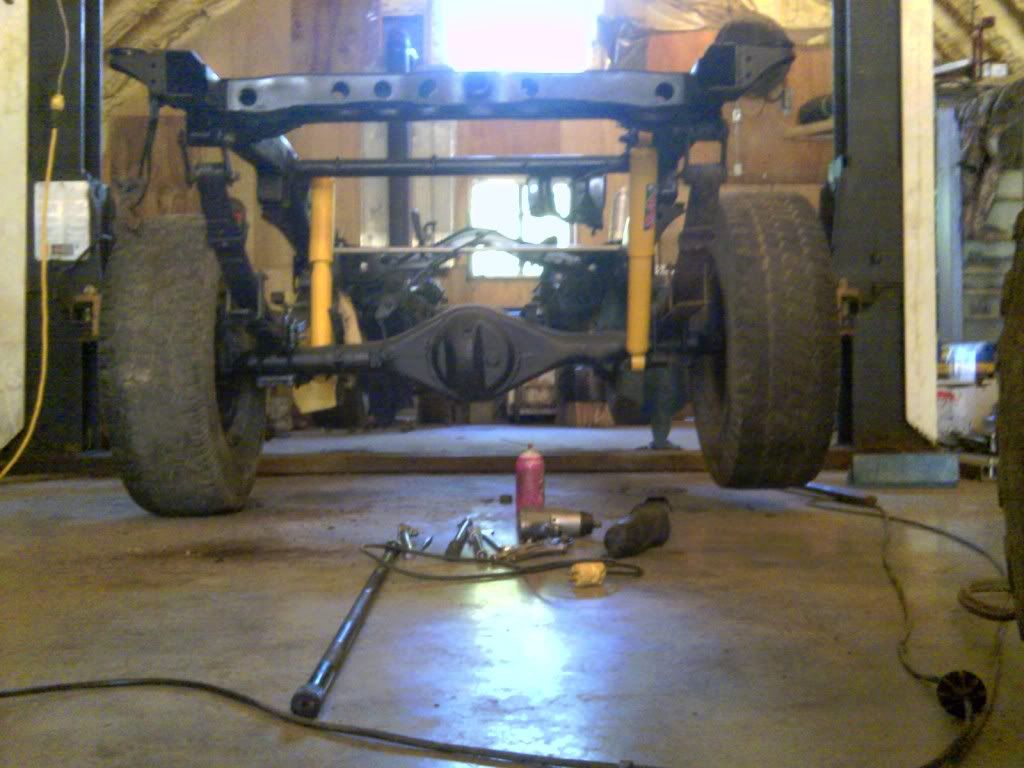
The frame is sitting level. You can see the rear left tire contacts the ground with the OME suspension, but the stock suspension on the right is hovering almost 2 inches off the ground. That's a nice difference in wheel travel.
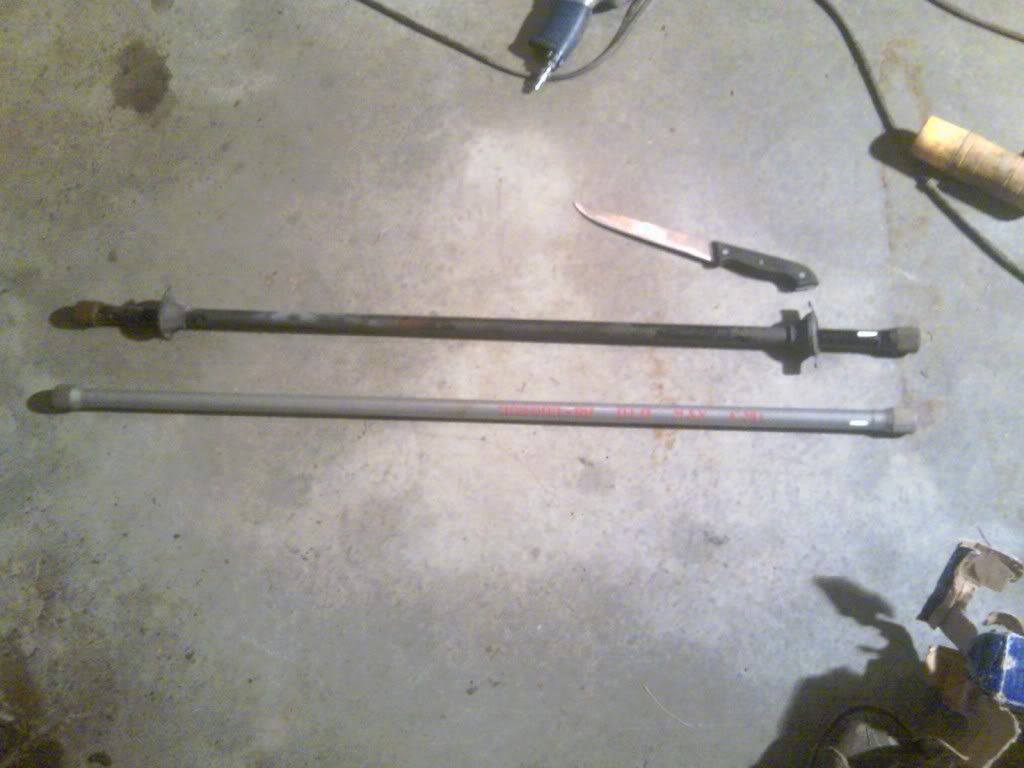
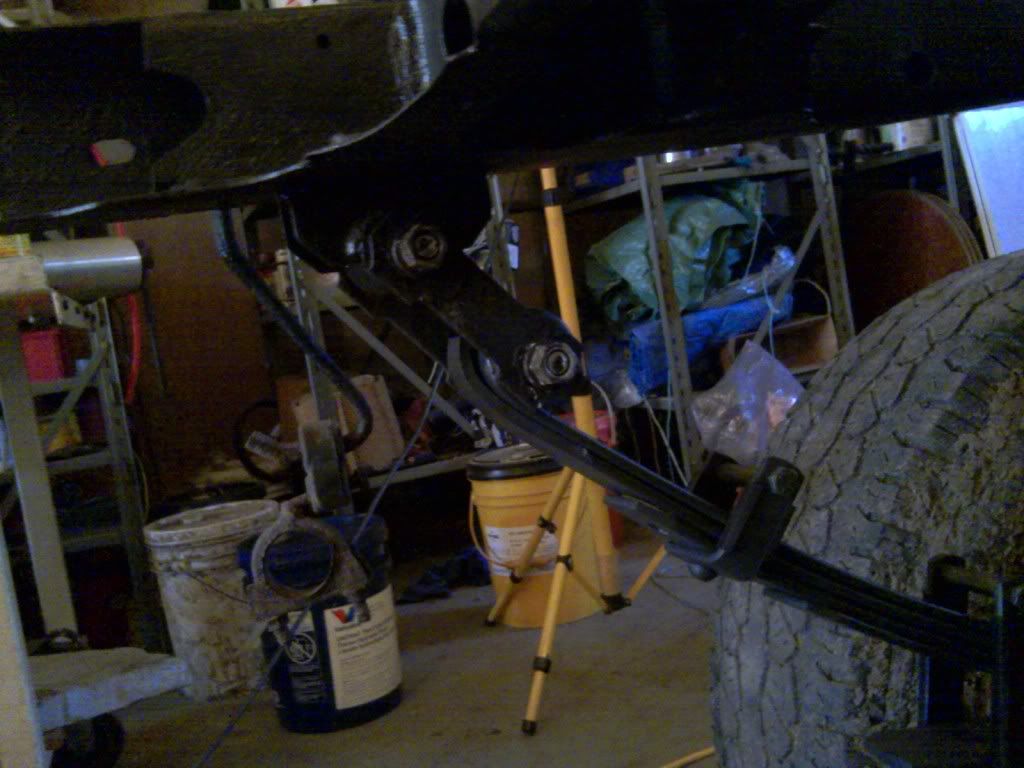
Here's a couple pics comparing the difference in leafs:
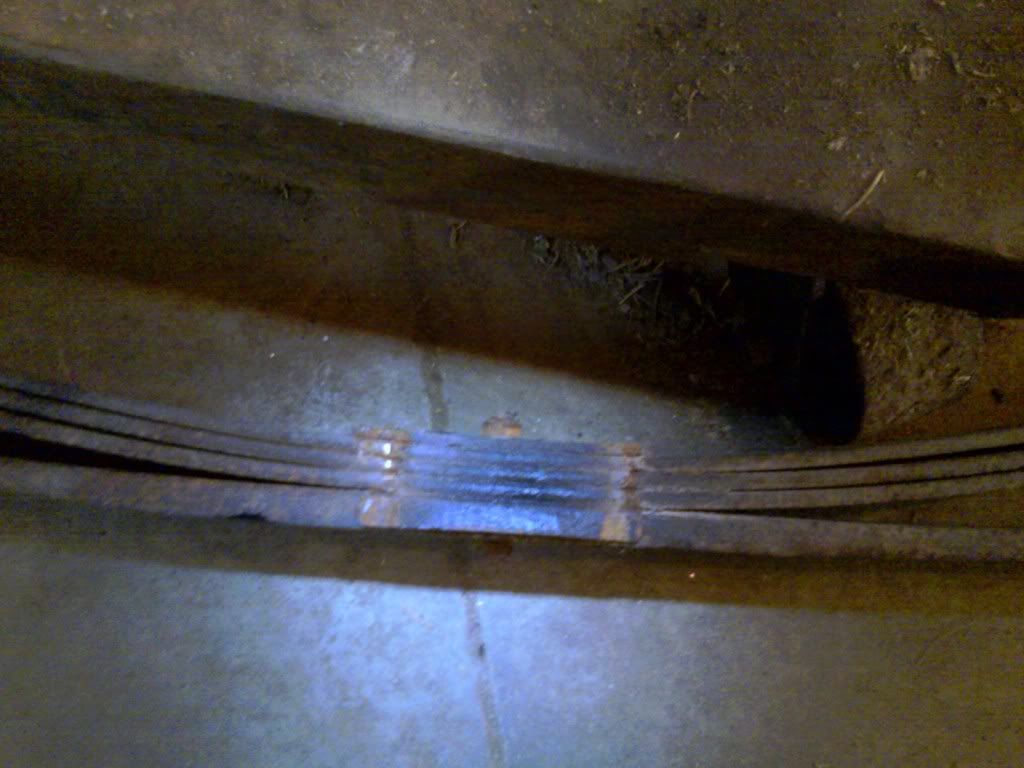

There are 6 leafs in the OME leaf pack, and only 4 in the stock. I didn't even get the heavy duty springs. I imagine these leafs won't sag very quickly. Kind of a wierd shackle angle though:
Jump to next OME Post>>
I'm taking the day off which means I've sat here at the computer reading build threads and researching. I started cleaning up my thread a bit and found a couple pics I forgot I had taken. I think this is a really good pic comparing stock suspension with OME for the rear axle at least:
The frame is sitting level. You can see the rear left tire contacts the ground with the OME suspension, but the stock suspension on the right is hovering almost 2 inches off the ground. That's a nice difference in wheel travel.
Here's a couple pics comparing the difference in leafs:
There are 6 leafs in the OME leaf pack, and only 4 in the stock. I didn't even get the heavy duty springs. I imagine these leafs won't sag very quickly. Kind of a wierd shackle angle though:
Jump to next OME Post>>
Last edited by Dutchbelly; 08-01-2011 at 06:44 PM.
07-16-2011, 02:01 PM
#273
I think your sig get's longer capabilities(more characters allowed) as you increase your post output. I noticed as I hit like 3000 and so forth(and back) it changed. Shoot a message to Corey or DC or something, ...they could tell ya if I'm right, lol.
 lol.
07-16-2011, 05:03 PM
lol.
07-16-2011, 05:03 PM
#275
Registered User
Thread Starter
Join Date: Apr 2011
Location: Southern Ontario
Posts: 428
Likes: 0
Received 0 Likes
on
0 Posts
Yes, it'll settle when the truck is actually a truck instead of just a frame with shiny yellow shocks. It's just interesting to see the differences between the stock suspension and the OME one even before the truck has weight to it. I wish I had bought the greasable shackles. I might check to see what the Wabfab ones would be after the yotatech discount I've heard about. I could drill out a set of bolts myself and tap them for grease fittings but if I were to make every part this truck won't be on the road for years from now. It's just that there are things I want to spend money on, and things I really don't. I was looking at the LC Engineering site today and dear Lord you could go through a lot of money quick on engine parts from them. I was planning on working on the truck again tomorrow but I forgot I have 2 ball games. My hobbies are getting in the way of each other.
I dont' want to bug the moderators with questions. I can only imagine how many times they get pm'd for things I should be able to find on the forums so I'd rather go without knowing than bug them. Any clue what your signature limit is Chef? I really wanted to make mine into a thread index, It would be so handy to jump to sections if this thread continues to grow. Do contributing members get perks? I keep meaning to throw in a donation because this site is great, I just hate using credit cards. Or credit at all. Using old fashioned cash stops me from ever falling into debt.
Edit: Is there a way to change the Tags for the thread? some of them are a bit misleading on mine. One says 7in. I don't have a 7inch anything. Say that out loud at a party!
Last edited by Dutchbelly; 07-16-2011 at 05:37 PM.
07-18-2011, 12:03 AM
#277
Super Moderator
Staff
iTrader: (1)
Join Date: Aug 2008
Location: Anderson Missouri
Posts: 11,788
Likes: 0
Received 25 Likes
on
22 Posts
I cant help with the amount of characters allowed. I have a tough enough time trying to add to my signature page. I dont remember how I did it.
As far as an index page I use my first page and first post on my thread. Maybe something similar would work for you.
As far as an index page I use my first page and first post on my thread. Maybe something similar would work for you.
07-20-2011, 04:15 PM
#278
Registered User
Thread Starter
Join Date: Apr 2011
Location: Southern Ontario
Posts: 428
Likes: 0
Received 0 Likes
on
0 Posts
Finally got back out to the truck and finished the rear suspension. I had to buy a pair of 14mm bolts for the front of the leaf springs and all the bushings aren't here, but the new leafs are in on both sides and it won't take long to finish when the bushings do arrive. It's been tough to motivate myself to get out to the farm to work on the truck lately because it's been so hot, but tonight I felt pretty good about what I completed. I also put the other torsion bar in and was going to connect the back cable for the parking brake but the one bolt that holds it to the axle was snapped, and it looks like it's not just any old bolt. It'll probably end up being a dealer only part knowing my luck. Toyota will want $43.75, the deed to my house and advertising rights to Rav4 forehead tattoos for my entire family. I'll try to take a pic of it later. The bolt I mean, not my forehead.
07-22-2011, 03:17 AM
#279
Super Moderator
Staff
iTrader: (1)
Join Date: Aug 2008
Location: Anderson Missouri
Posts: 11,788
Likes: 0
Received 25 Likes
on
22 Posts
Laughing about the cost. I feel your pain. I had a key made for my wife from a key place for my 88. It got hung up as it is a little thicker then a Toyota key. Cost me $8 for a blank from Toyota, still have to get it cut.
They had it order it. I maybe getting that tattoo also.
They had it order it. I maybe getting that tattoo also.
07-24-2011, 07:16 PM
#280
Registered User
Thread Starter
Join Date: Apr 2011
Location: Southern Ontario
Posts: 428
Likes: 0
Received 0 Likes
on
0 Posts
Gettin this build moving again
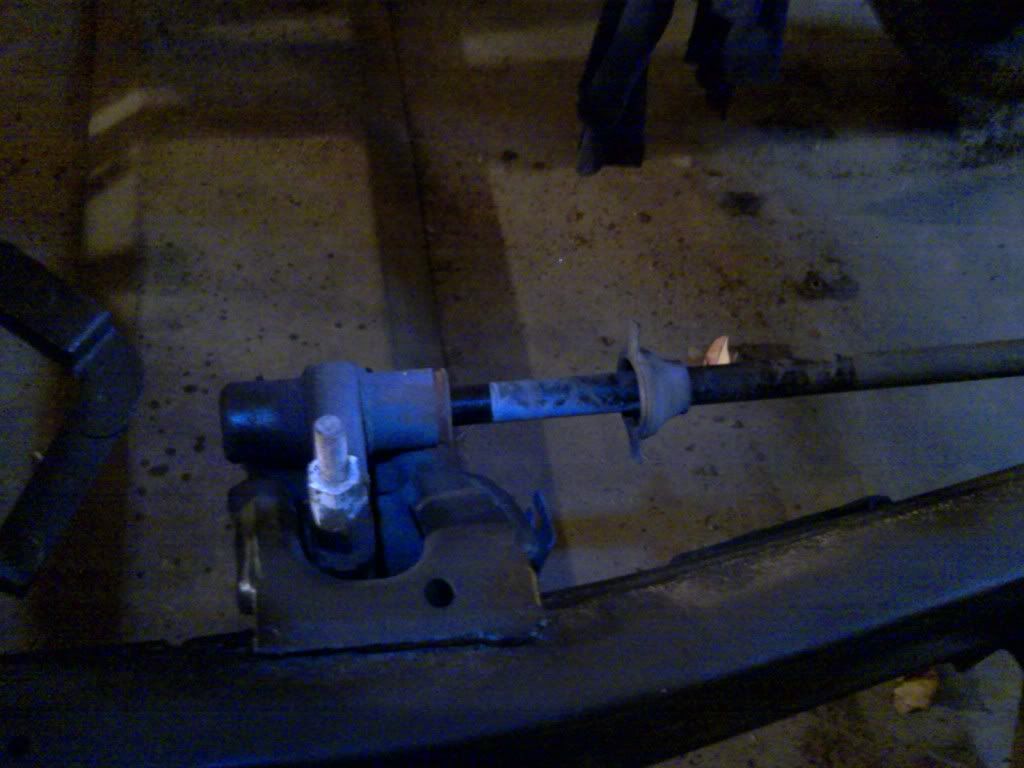
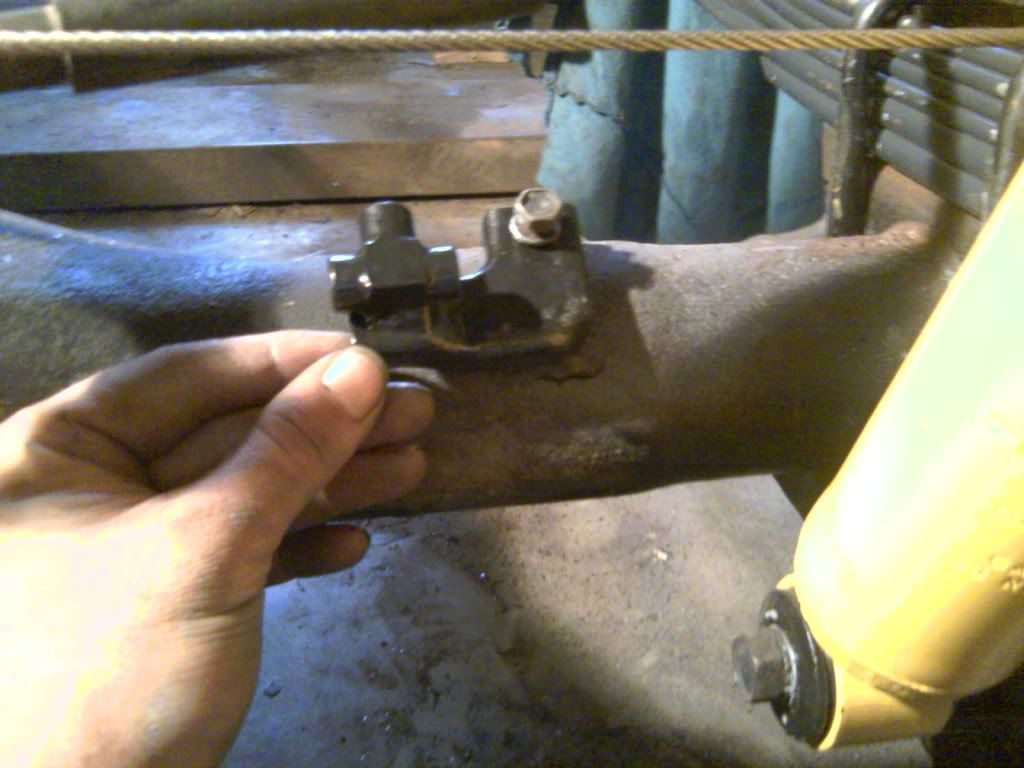
I've been waiting on parts and getting almost nothing done, and decided it was time I did something anyway. I'm not a big fan of doing things out of order because it always seems to slow me down later, but I'm sick of getting nothing done. Here's a pic of the bolt that holds the parking brake cable to the rear axle:
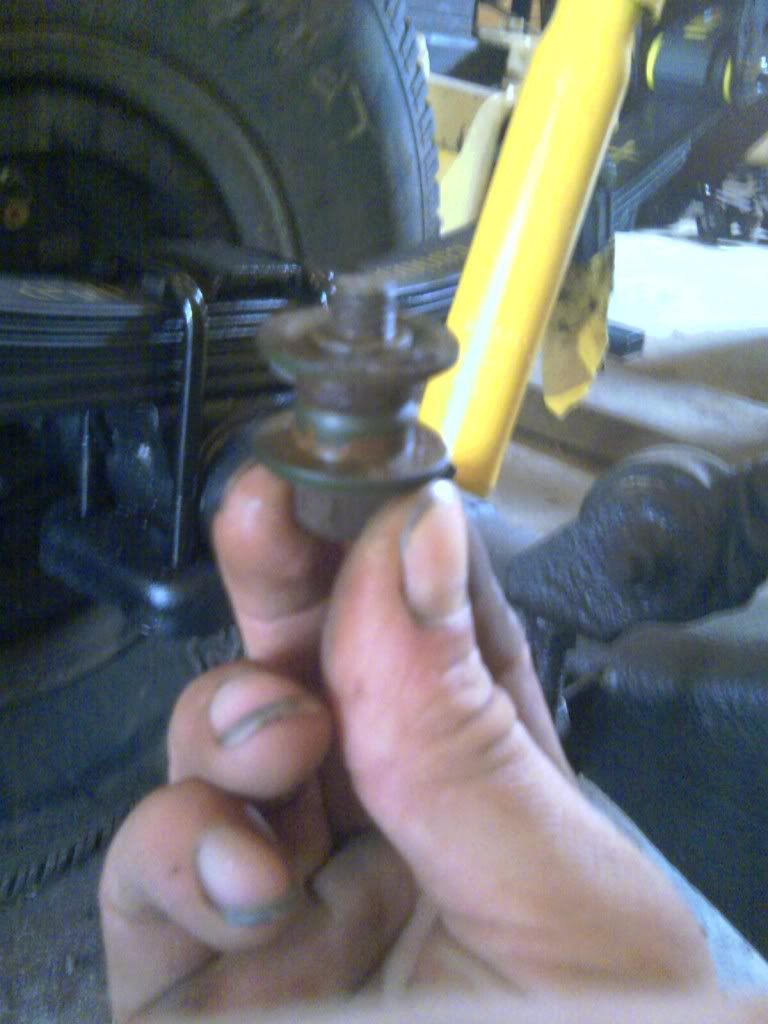
I snapped it off during the removal, and it sits flush with the bottom of the bracket it's supposed to bolt to:
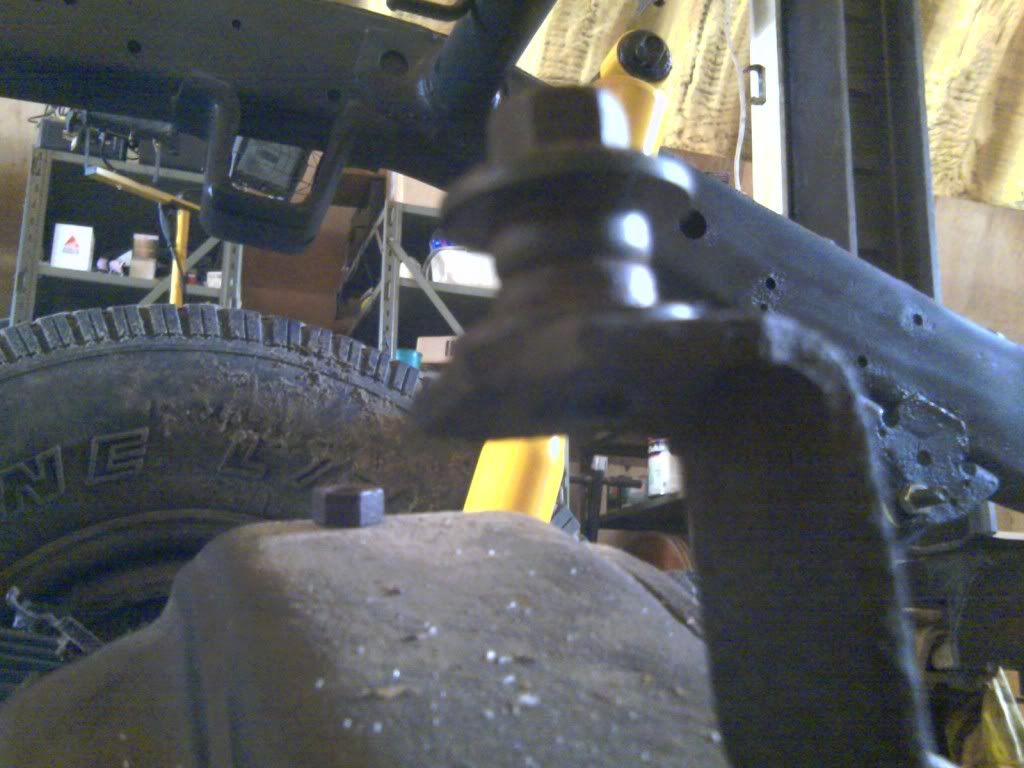
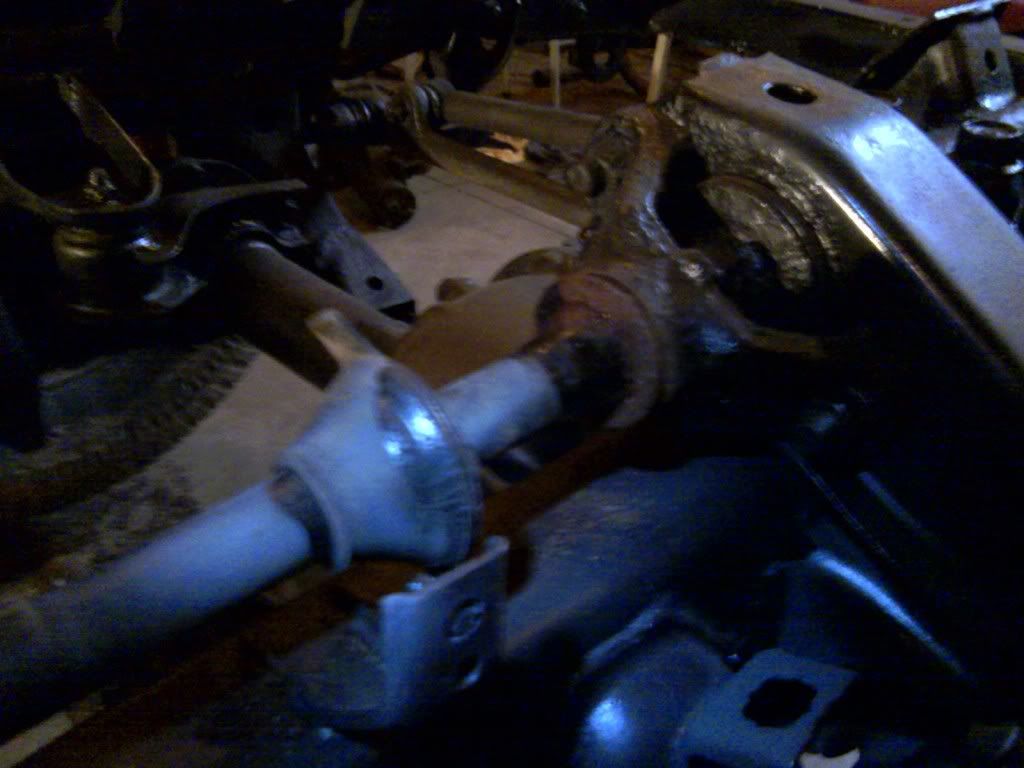
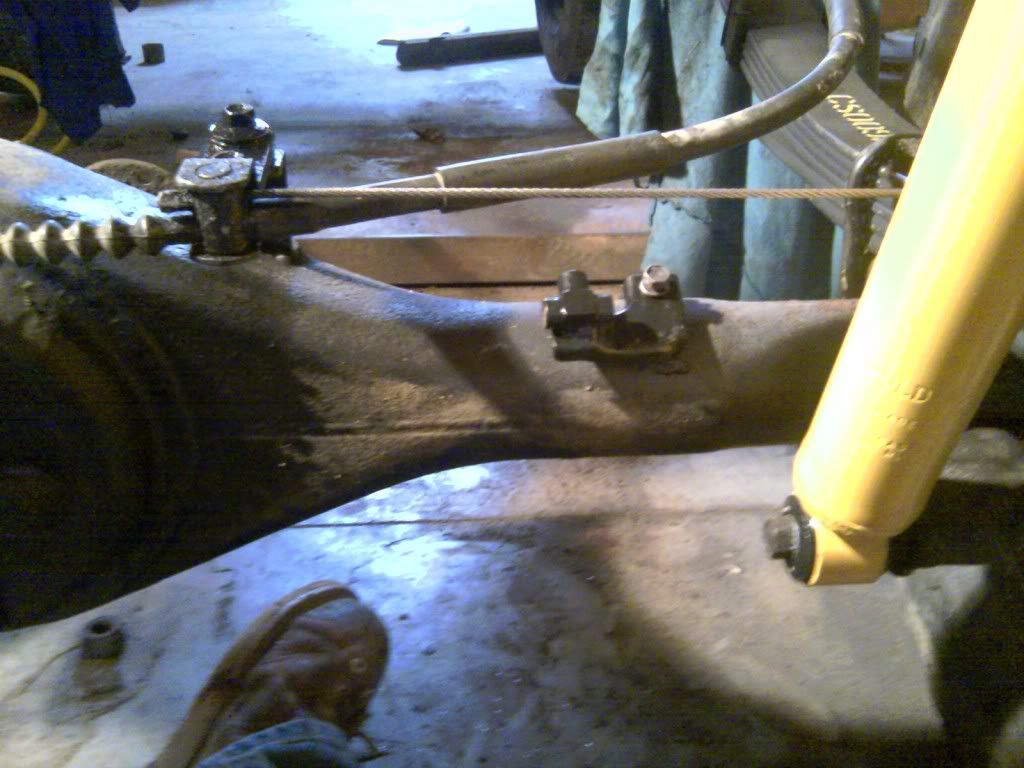
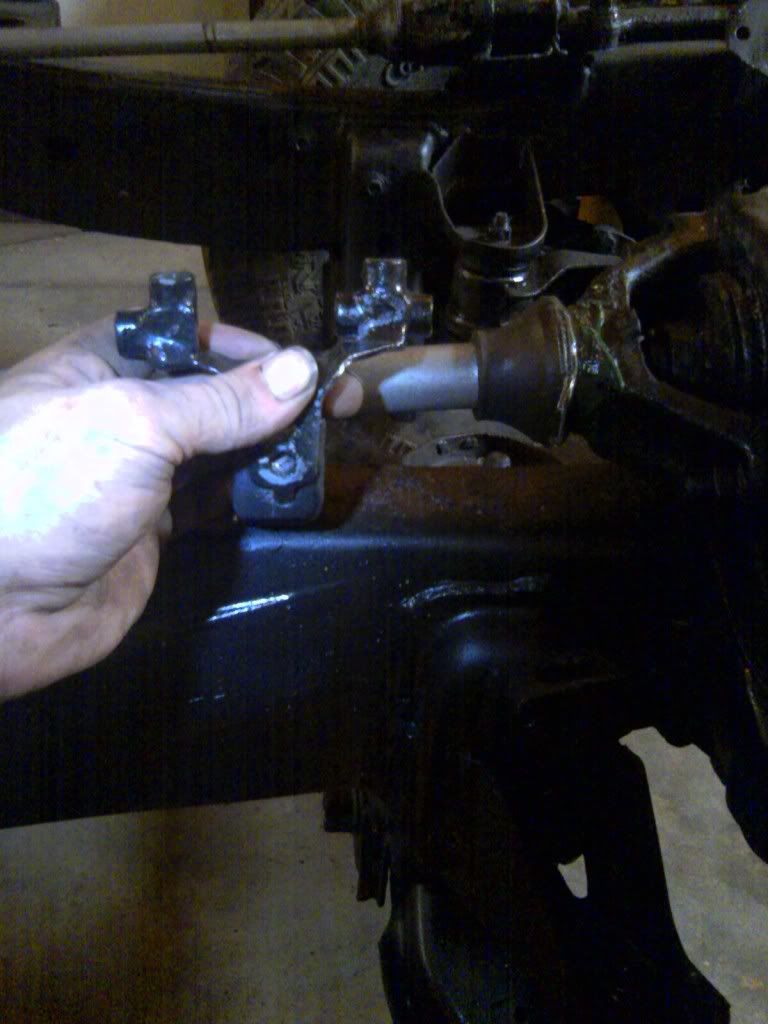
I still need to see if I can get a replacement bolt but I made a couple modifications just to get the thing in place for now:
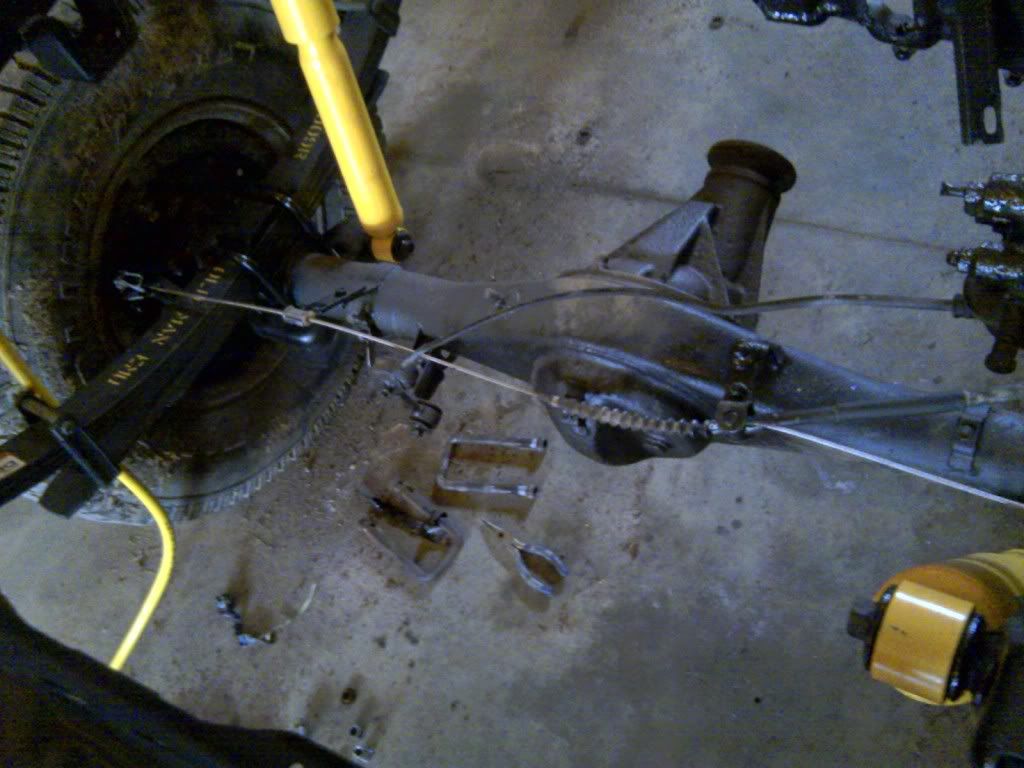
So there it is back in. I do need a new bolt for this bracket that holds the plastic slider for the left side of the parking cable:

Found a new problem to troubleshoot, kinda hard to show from these pics, but the front bracket for the parking cable is now 2 inches higher than it used to be because I lifted the crossmember for the drivetrain lift:
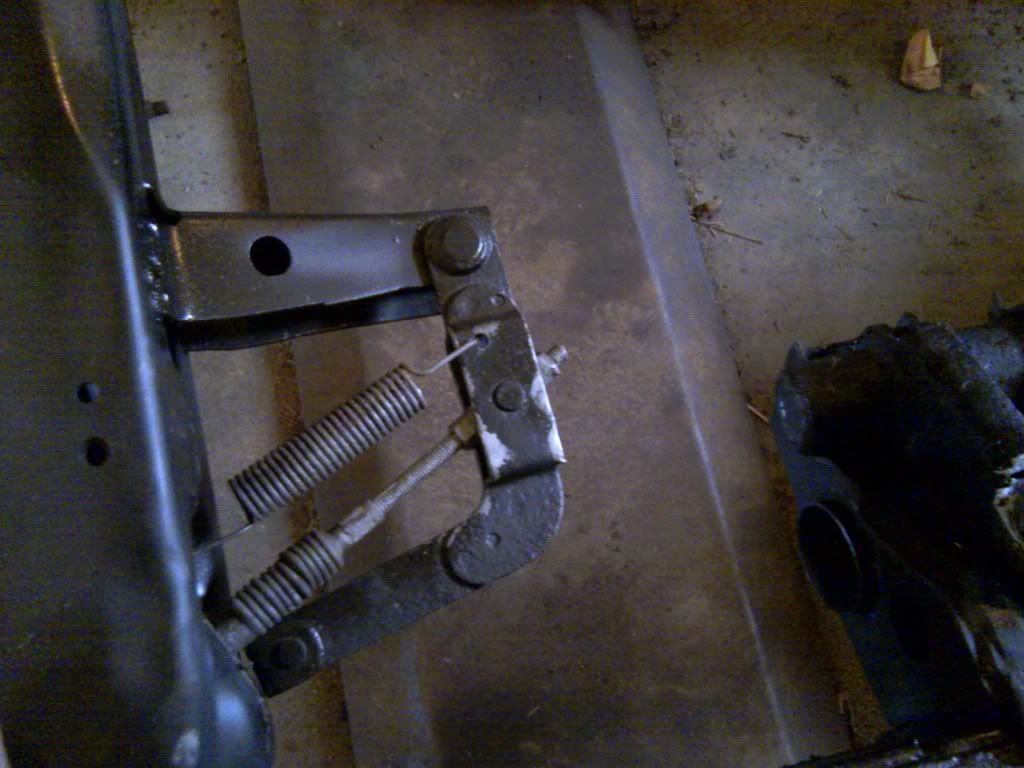
I'll have to tweak that a bit when I connect the front cable to the bracket.
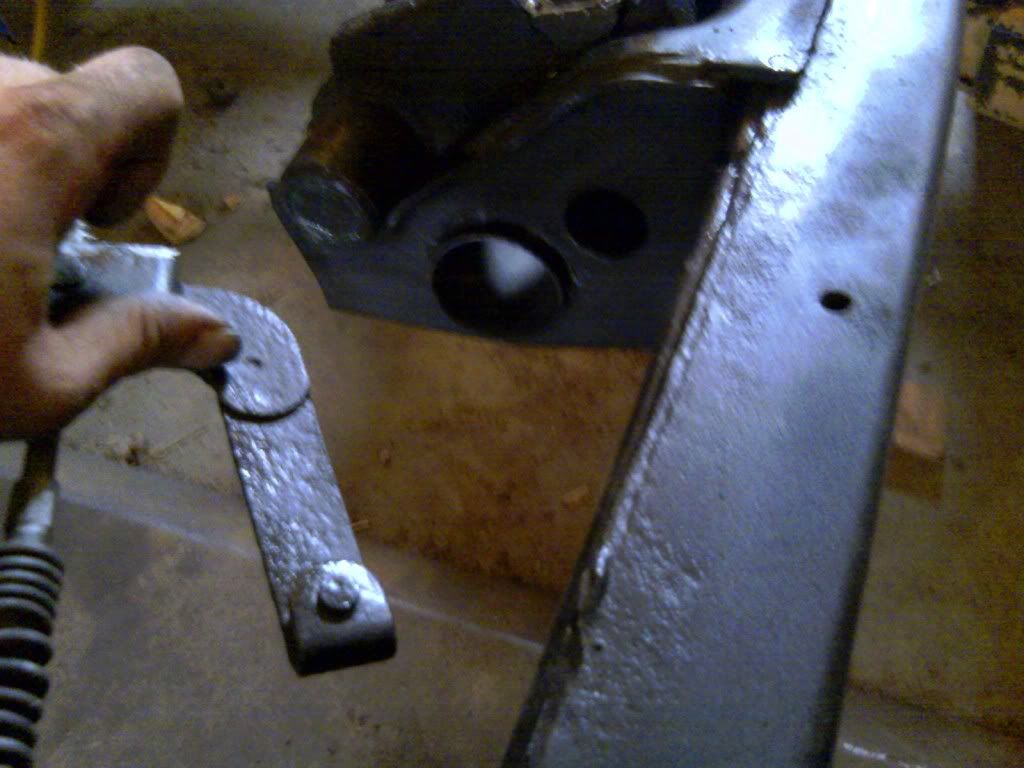
I moved on to this rear brake line bracket:
I tried connecting the rear flex line, and put the rear suspension at full droop and realised the line isn't long enough. This made me scratch my head a bit, because I wasn't expecting this to be a problem. The OME Suspension stuff gives an extra 2 inches of travel, so I expected a bit of change, but this line wasn't even close to long enough. I ended up searching for and finding the old rear flex hose and comparing the two. The original was much longer, so I'm thinking my parts guy ordered the wrong one. I then noticed while looking in my parts box that he had ordered me two of them. I only need one for the rear brakes so I'll have to have a bit of a chat with him.
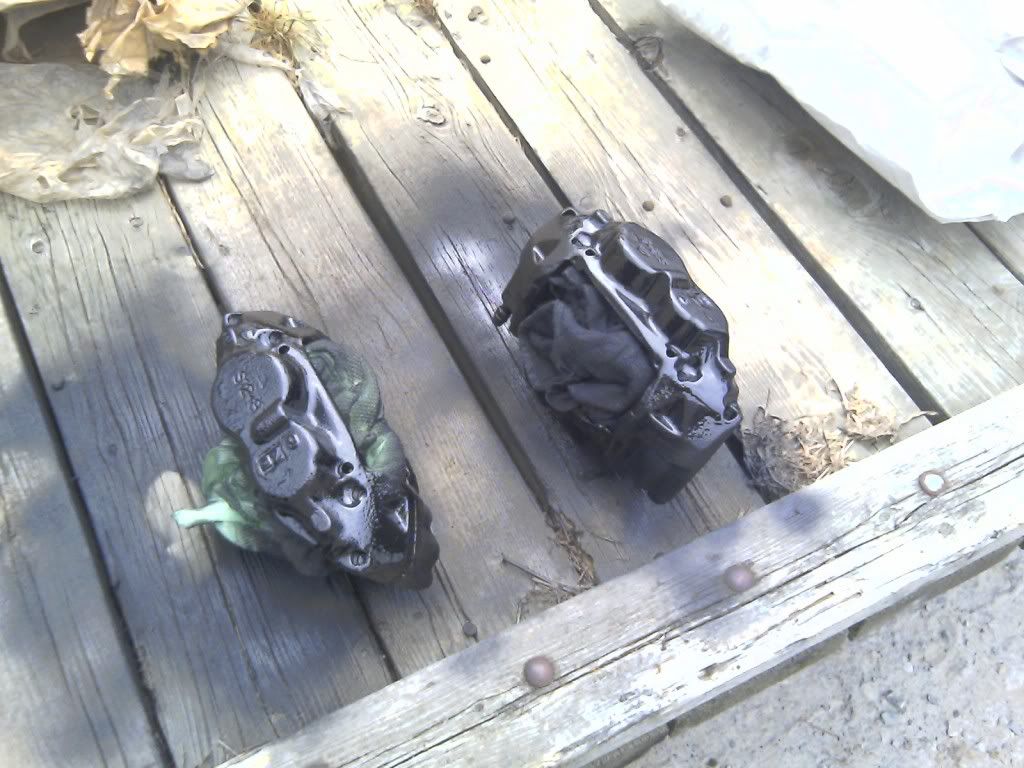
I then doublechecked the front flex brake lines, and they were fine. I painted up the front calipers:
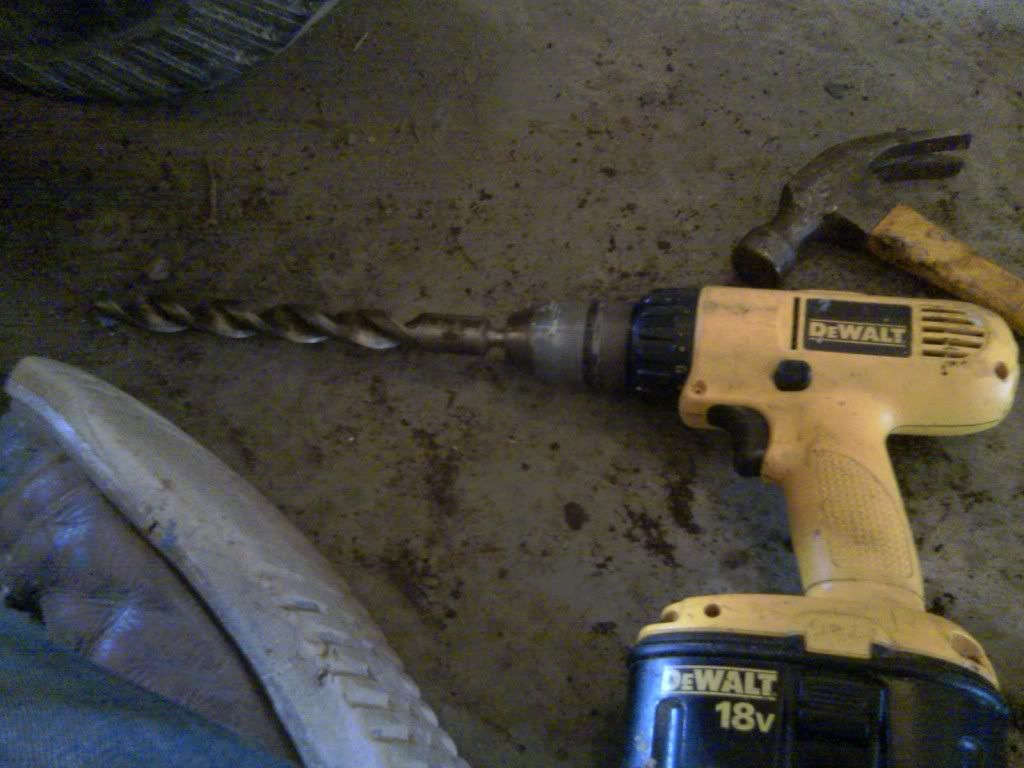
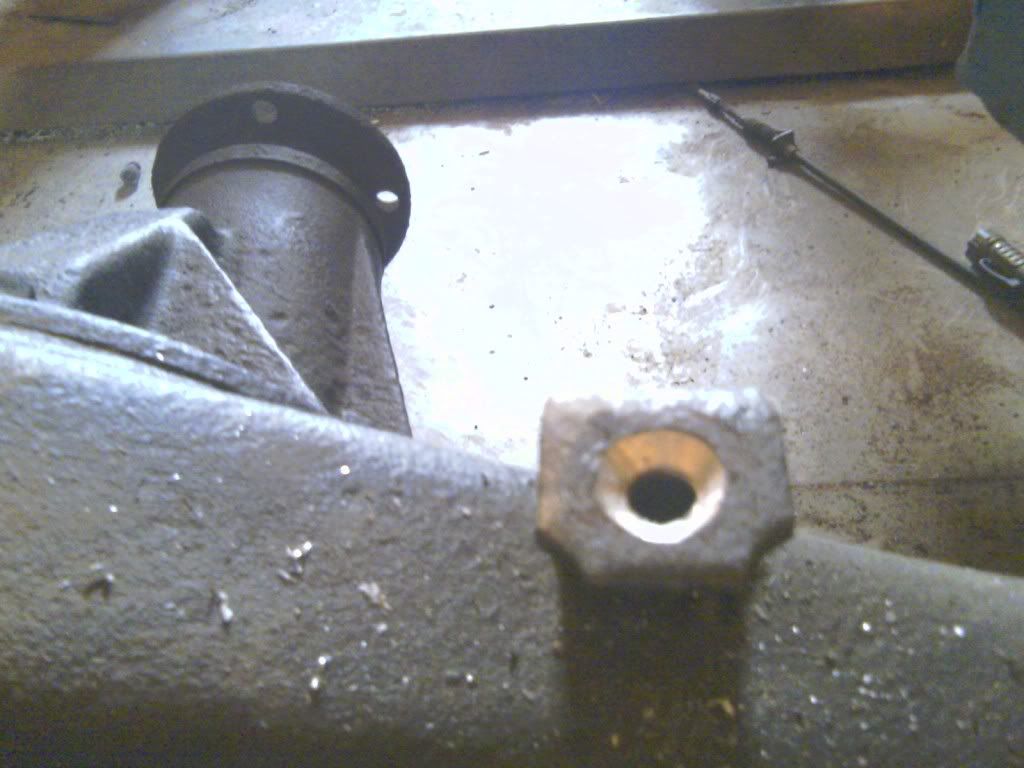
and while they were drying I tried to put the front brake line bracket on but realised I needed to drill out a snapped off bolt for it. I'll have to get a replacement bolt for it this week:
I then threw together the front brakes, and the flex lines:
Pictures like that make me feel really good about all the work I've done. Everything is starting to look really clean.
Anyways. If I get the right bolts, all I have left on the brakes before the body goes back on is bending and flaring all the steel lines. I wanted to get more done, so I looked around and found this:
It's the rear spare tire chain assembly, and it's seized. I threw it into a 5gallon pail full of the old gas I emptied from the tank. It won't work as well as diesel, but if it works, I don't ruin diesel for no reason. I still wanted to get more done so I pulled all the bolts from the transmission that was still hanging from the engine hoist. I had put all the bolts into the holes during the pull because I didn't want to take the time to make a template. So now I made a template.
And yes, if you look closely you'll see one hole in the bottom left that is missing a bolt. Which worries me. I started cleaning up the tranny/transfer case but didn't get very far before I ran out of time.
I forgot to mention I also put the gaskets into the front hubs. I took some pics, but I'm not sure they're really necessary to post. Was a really good day.
I snapped it off during the removal, and it sits flush with the bottom of the bracket it's supposed to bolt to:
I still need to see if I can get a replacement bolt but I made a couple modifications just to get the thing in place for now:
So there it is back in. I do need a new bolt for this bracket that holds the plastic slider for the left side of the parking cable:
Found a new problem to troubleshoot, kinda hard to show from these pics, but the front bracket for the parking cable is now 2 inches higher than it used to be because I lifted the crossmember for the drivetrain lift:
I'll have to tweak that a bit when I connect the front cable to the bracket.
I moved on to this rear brake line bracket:
I tried connecting the rear flex line, and put the rear suspension at full droop and realised the line isn't long enough. This made me scratch my head a bit, because I wasn't expecting this to be a problem. The OME Suspension stuff gives an extra 2 inches of travel, so I expected a bit of change, but this line wasn't even close to long enough. I ended up searching for and finding the old rear flex hose and comparing the two. The original was much longer, so I'm thinking my parts guy ordered the wrong one. I then noticed while looking in my parts box that he had ordered me two of them. I only need one for the rear brakes so I'll have to have a bit of a chat with him.
I then doublechecked the front flex brake lines, and they were fine. I painted up the front calipers:
and while they were drying I tried to put the front brake line bracket on but realised I needed to drill out a snapped off bolt for it. I'll have to get a replacement bolt for it this week:
I then threw together the front brakes, and the flex lines:
Pictures like that make me feel really good about all the work I've done. Everything is starting to look really clean.
Anyways. If I get the right bolts, all I have left on the brakes before the body goes back on is bending and flaring all the steel lines. I wanted to get more done, so I looked around and found this:
It's the rear spare tire chain assembly, and it's seized. I threw it into a 5gallon pail full of the old gas I emptied from the tank. It won't work as well as diesel, but if it works, I don't ruin diesel for no reason. I still wanted to get more done so I pulled all the bolts from the transmission that was still hanging from the engine hoist. I had put all the bolts into the holes during the pull because I didn't want to take the time to make a template. So now I made a template.
And yes, if you look closely you'll see one hole in the bottom left that is missing a bolt. Which worries me. I started cleaning up the tranny/transfer case but didn't get very far before I ran out of time.
I forgot to mention I also put the gaskets into the front hubs. I took some pics, but I'm not sure they're really necessary to post. Was a really good day.
Last edited by Dutchbelly; 07-24-2011 at 07:19 PM.


