
dark_fairytales 1986 Pickup Build-Up Thread
 12-24-2011, 09:14 AM
#141
Registered User
Thread Starter
Join Date: Oct 2008
Location: Sacramento, Crawlifonia
Posts: 1,621
Likes: 0
Received 7 Likes
on
4 Posts
They may push the rearend to the sky, but.... If you notice I bought the Ruffstuff Frenched Hangers. This means in the future, If I find the rear is to high for my liking, or setup. I can cut the Hangers off and then french them into the frame. There is also a lot of adjustment you can achieve with the shackle placement, or the type of shackles you use.
I am still working with the philosophy of working with what you have and improve what needs improving.
I am still working with the philosophy of working with what you have and improve what needs improving.
 12-24-2011, 09:47 AM
#142
Registered User
It probably wouldnt be bad if you had some weight in the back. remember, you are bumperless, sliderless, and nothing in the back. If you add all that, it'll lower it quite a bit, im sure.
12-26-2011, 08:22 PM
#143
Registered User
Thread Starter
Join Date: Oct 2008
Location: Sacramento, Crawlifonia
Posts: 1,621
Likes: 0
Received 7 Likes
on
4 Posts
Made some more progress today. The plan today, was too mockup the drivers side chevy spring and make sure that the Hangers were true and parallel.
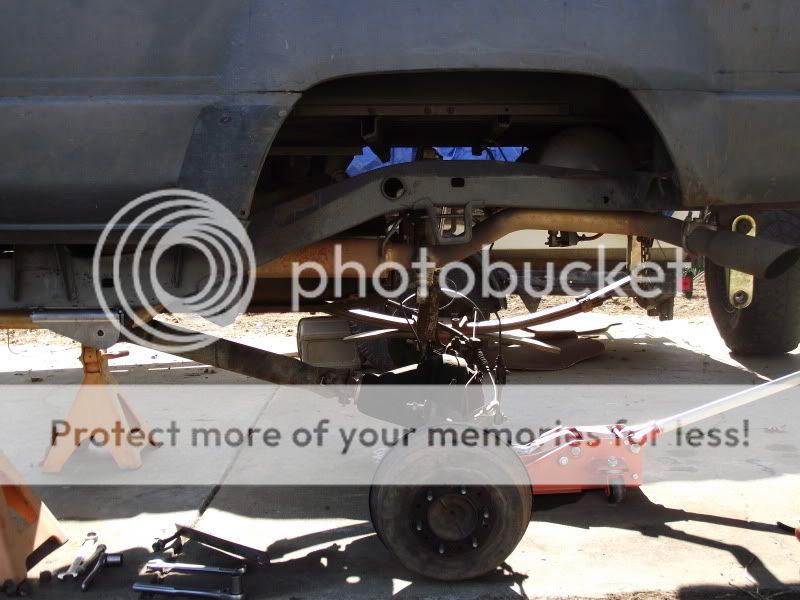
So after getting the frame to sit on the Jack-stands and removing the rear wheels. I started loosening all of the fasteners to the driver side rear suspension. Sense everything has been off twice before in the past, the disassemble went graceful. Here are some pictures of the drivers side completely removed and the Jack relaxed to make room for the chevy spring.
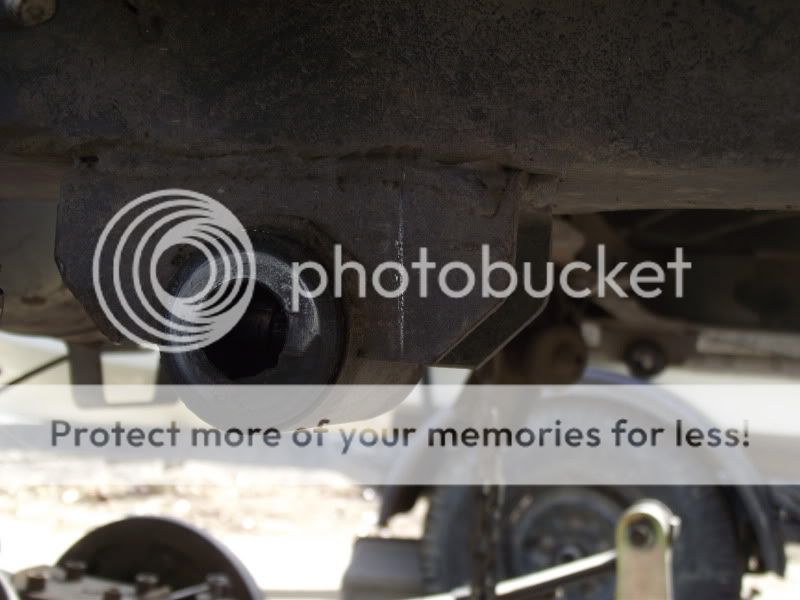
I then placed the 63" spring in position. At this point I was very happy with my work. The tacked Hanger stayed absolutely rigid and the tack welds held firm. I needed to mockup the U-bolts and U-bolt plate, so too trace an outline where I would need to grind away at the Leaf-spring. For those of you who may not know. The chevy Leaf-spring is wider then the stock Toyota springs. For the U-bolts to fit in the proper location. You must grind away at the sides of the Leaf-spring. Here is a picture of the traced outline.
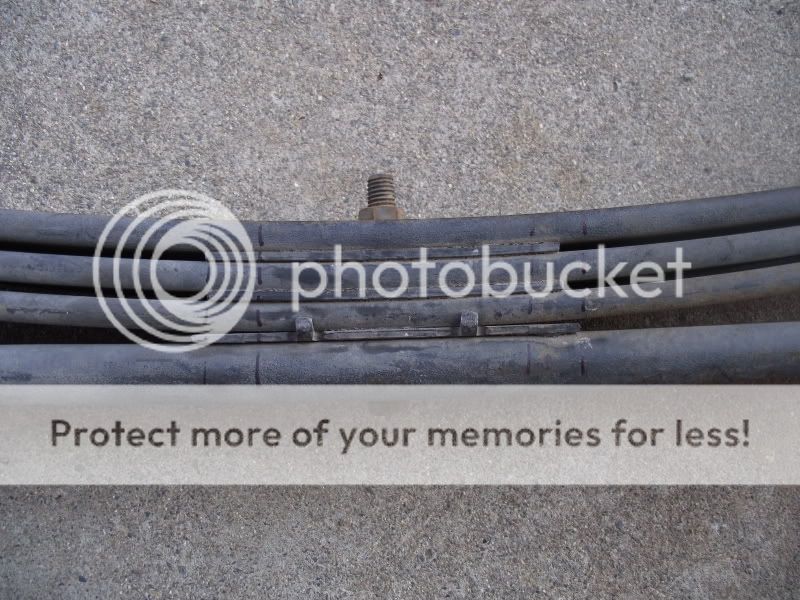
There is very little grinding that needs to be done on both sides. Here is an example of how little grinding is required too get the Chevy's to fit a Toyota U-bolt flip kit.
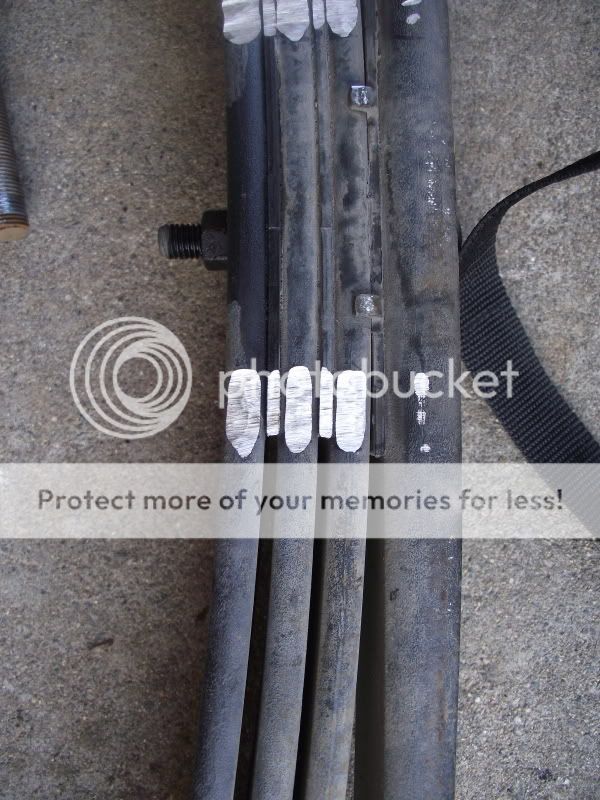
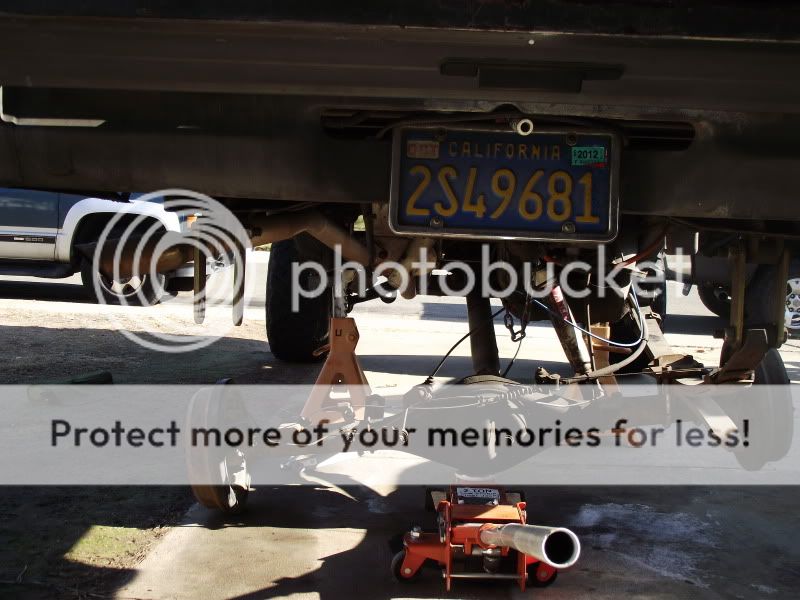
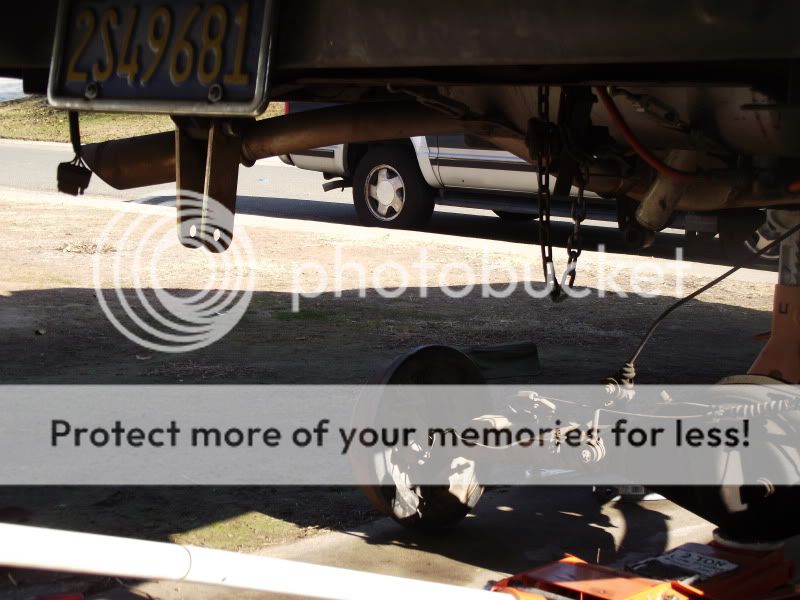
When I finished with the needed grinding. I began to remove the locator Pin so I could take the overload leaf out of the spring pack. I then discovered during the reassembly of the spring pack, that I needed too make threads further down the shank of the locator pin, or the pack would not be tightened up properly. Once the Pack was all back together, I mocked up the Chevy again too look at Shackle-hanger placement and ride height. I put the wheels back on and removed the Jack-stands. Then relaxed the Jack so the truck could sit on the new spring. You will see a 4x4 between the frame and the spring-eye where the shackle will be placed. Here are a few pictures of the truck sitting on all fours with the new spring and no shackle.
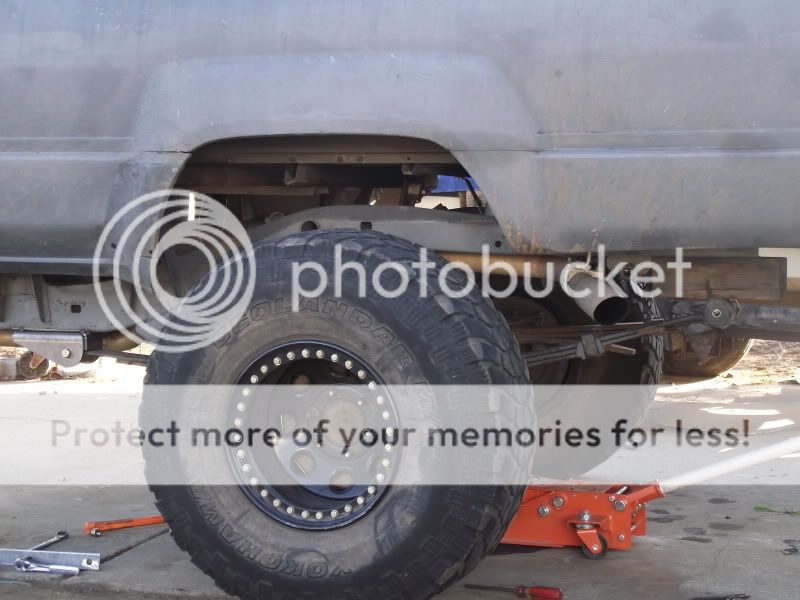
I was truly happy too see that everything turned out strait. There will be a little rake in the rear but it is not really noticeable. I am sure the springs will settle just a hair and when I get the bumper/ tire carrier built, the suspension will be as level as it needs to be.
Next up will be too do some trimming of the stock shackle hanger, tack up the new shackle hanger and then most likely finish welding everything up. I do not foresee any issues or hiccups, so the next update I should have the Chevy springs burned in and finished.
So after getting the frame to sit on the Jack-stands and removing the rear wheels. I started loosening all of the fasteners to the driver side rear suspension. Sense everything has been off twice before in the past, the disassemble went graceful. Here are some pictures of the drivers side completely removed and the Jack relaxed to make room for the chevy spring.
I then placed the 63" spring in position. At this point I was very happy with my work. The tacked Hanger stayed absolutely rigid and the tack welds held firm. I needed to mockup the U-bolts and U-bolt plate, so too trace an outline where I would need to grind away at the Leaf-spring. For those of you who may not know. The chevy Leaf-spring is wider then the stock Toyota springs. For the U-bolts to fit in the proper location. You must grind away at the sides of the Leaf-spring. Here is a picture of the traced outline.
There is very little grinding that needs to be done on both sides. Here is an example of how little grinding is required too get the Chevy's to fit a Toyota U-bolt flip kit.
When I finished with the needed grinding. I began to remove the locator Pin so I could take the overload leaf out of the spring pack. I then discovered during the reassembly of the spring pack, that I needed too make threads further down the shank of the locator pin, or the pack would not be tightened up properly. Once the Pack was all back together, I mocked up the Chevy again too look at Shackle-hanger placement and ride height. I put the wheels back on and removed the Jack-stands. Then relaxed the Jack so the truck could sit on the new spring. You will see a 4x4 between the frame and the spring-eye where the shackle will be placed. Here are a few pictures of the truck sitting on all fours with the new spring and no shackle.
I was truly happy too see that everything turned out strait. There will be a little rake in the rear but it is not really noticeable. I am sure the springs will settle just a hair and when I get the bumper/ tire carrier built, the suspension will be as level as it needs to be.
Next up will be too do some trimming of the stock shackle hanger, tack up the new shackle hanger and then most likely finish welding everything up. I do not foresee any issues or hiccups, so the next update I should have the Chevy springs burned in and finished.
12-26-2011, 09:23 PM
#145
Registered User
Thread Starter
Join Date: Oct 2008
Location: Sacramento, Crawlifonia
Posts: 1,621
Likes: 0
Received 7 Likes
on
4 Posts
Wow, that is all you have to say Troy?
I can tell you this much. I measure six times and will only need to weld once. LOL. I have been very happy with my progress.
I can tell you this much. I measure six times and will only need to weld once. LOL. I have been very happy with my progress.
12-26-2011, 09:41 PM
#147
Registered User
Join Date: Mar 2009
Location: (LSD) Lower Slower Delaware
Posts: 1,169
Likes: 0
Received 0 Likes
on
0 Posts
 12-26-2011, 10:09 PM
#148
Registered User
Thread Starter
Join Date: Oct 2008
Location: Sacramento, Crawlifonia
Posts: 1,621
Likes: 0
Received 7 Likes
on
4 Posts
Thanks for the props RMP, I do my best too document what I can. I also try to post up the things that are not posted about much, such as grinding the Leaf-springs.
12-27-2011, 07:35 AM
#151
Registered User
Thread Starter
Join Date: Oct 2008
Location: Sacramento, Crawlifonia
Posts: 1,621
Likes: 0
Received 7 Likes
on
4 Posts
Just be sure too give your self enough time too do the install when that time comes. The process will not be enjoyable if your in a hurry, B-yotaful.
I am glad that you plan to use this build thread as a reference for your own project. If you encounter questions, hit me up.
I am glad that you plan to use this build thread as a reference for your own project. If you encounter questions, hit me up.
12-28-2011, 02:52 PM
#152
Registered User
Thread Starter
Join Date: Oct 2008
Location: Sacramento, Crawlifonia
Posts: 1,621
Likes: 0
Received 7 Likes
on
4 Posts
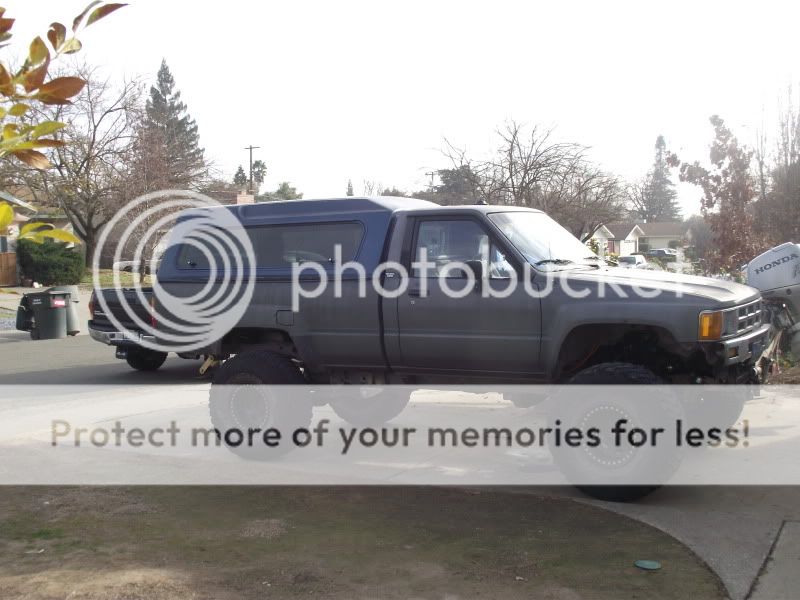
I am extremely happy with myself today. I finished installing the 63" Chevy springs. All of my time a patience paid off. The fab work turned out strait, true and parallel. So time to get on with the pictures and details of the grand finish.
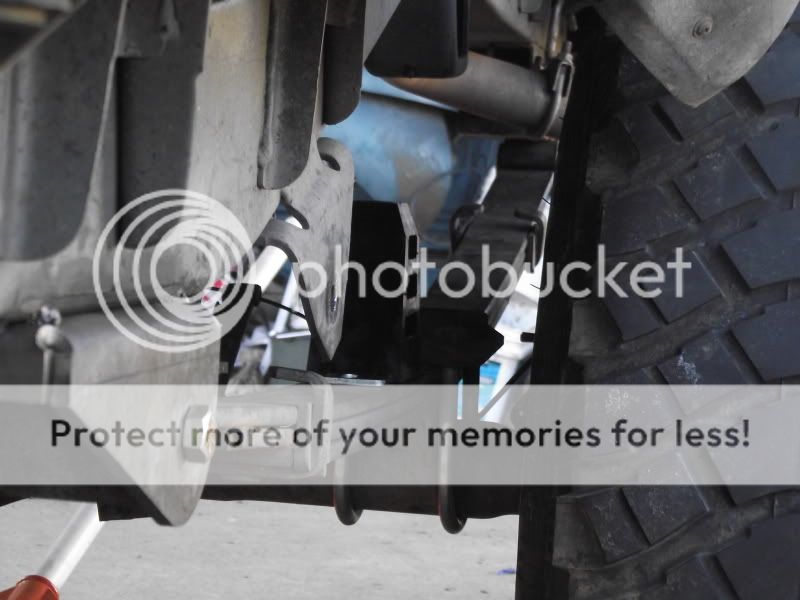
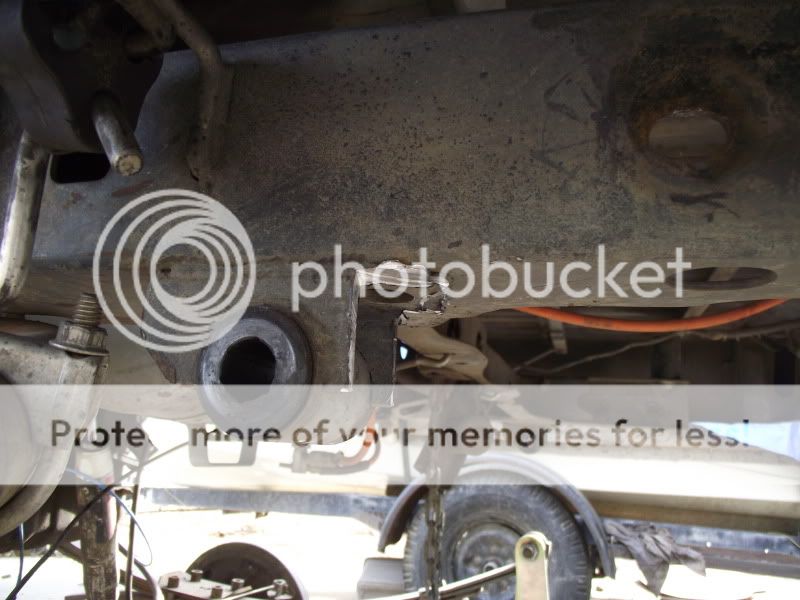
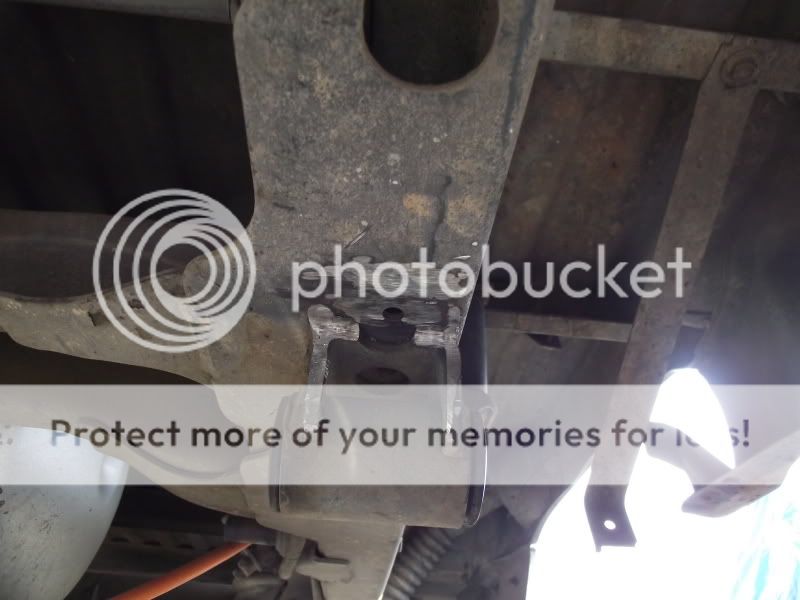
This thing was in the way of the placement of the new Shackle-hanger. I did not want to cut it off if I did not need too. You never do know if it will come in handy for something in the future. I trimmed as little as need, so I measured 10" from the end of the frame and mad the mark you see in the picture.
After measuring and marking both sides of the stock Shackle-hangers. I grabbed the cut off wheel to start the trim job.
I then cleaned up the scares with 40 minutes of grinding on each side. After all the miserable grinding, I was glad too be able to put the grinder down. Here is my sexy grinding job.
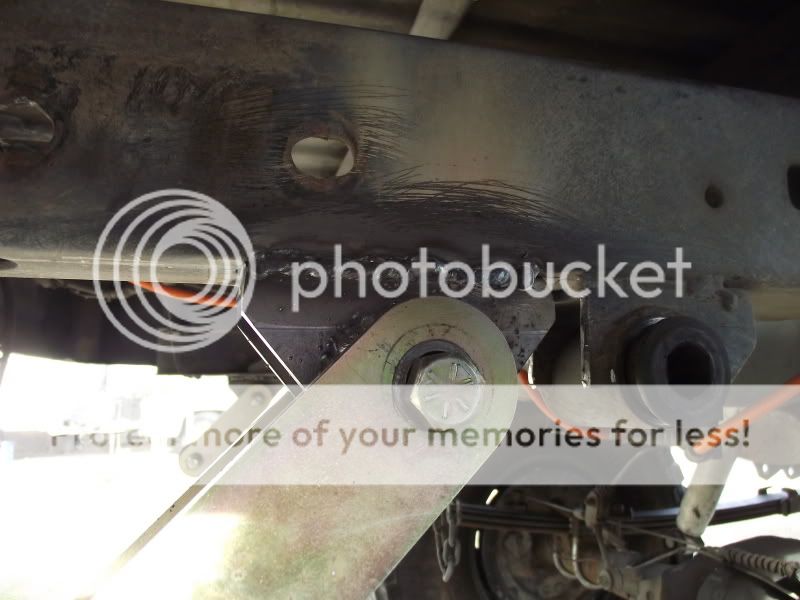
That is right, 44 degrees. Not the perfect 45 degrees but close enough for me.

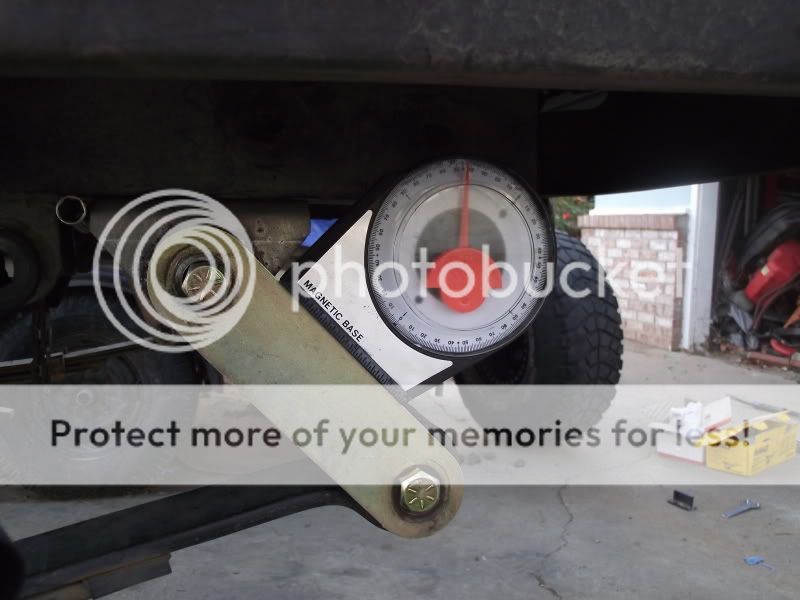
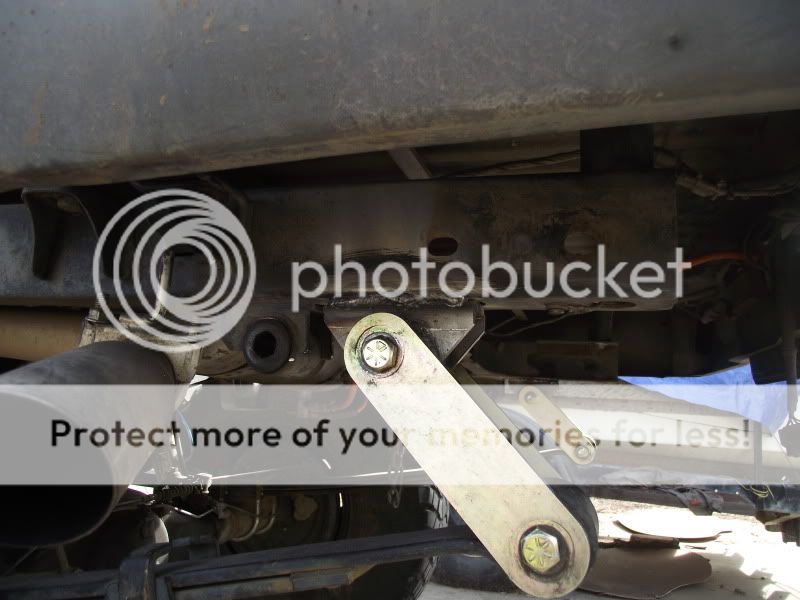
Here is what I used as a spacer to achieve the 44 degrees while the weight was on the spring.

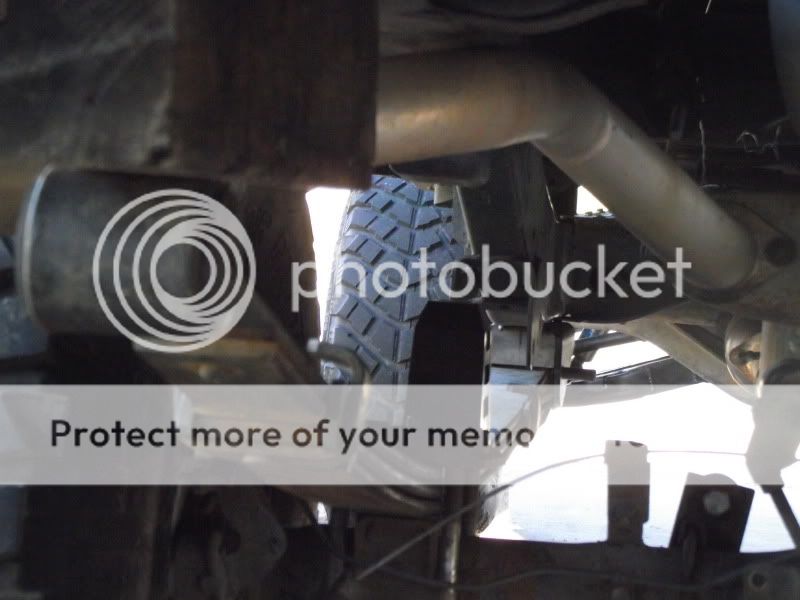
Jacking the weight onto the spring worked great. The force kept the Shackle-hanger clamped to the frame while I tacked it in place. Both shackles are the same at 44 degrees.
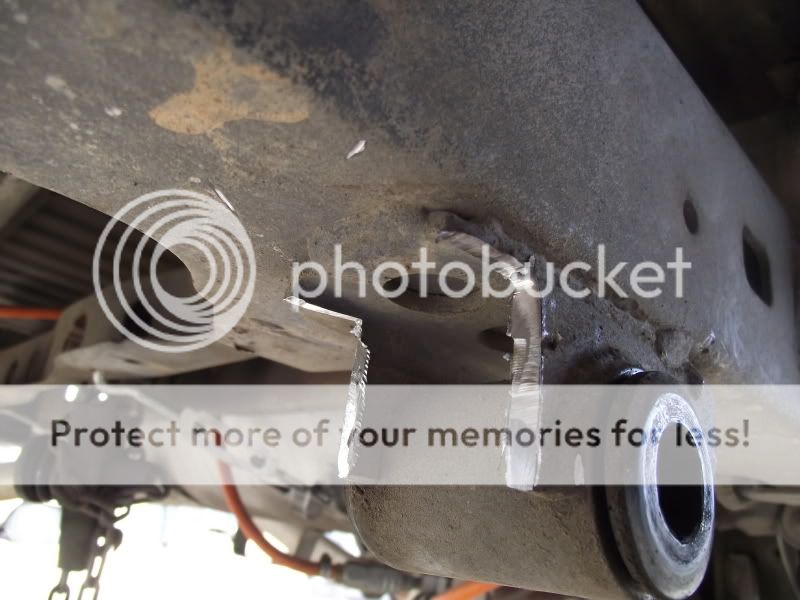
Now to get to the bad news. My welds did not turn out as pretty as I would have hoped. The beads do look buggery, but I know I got good penetration, because I could see it in the puddle when I was running the bead. Some of the possitions were difficult to feel comfortable and made it hard to stay consistent. So to my shame here are my ugly welds.
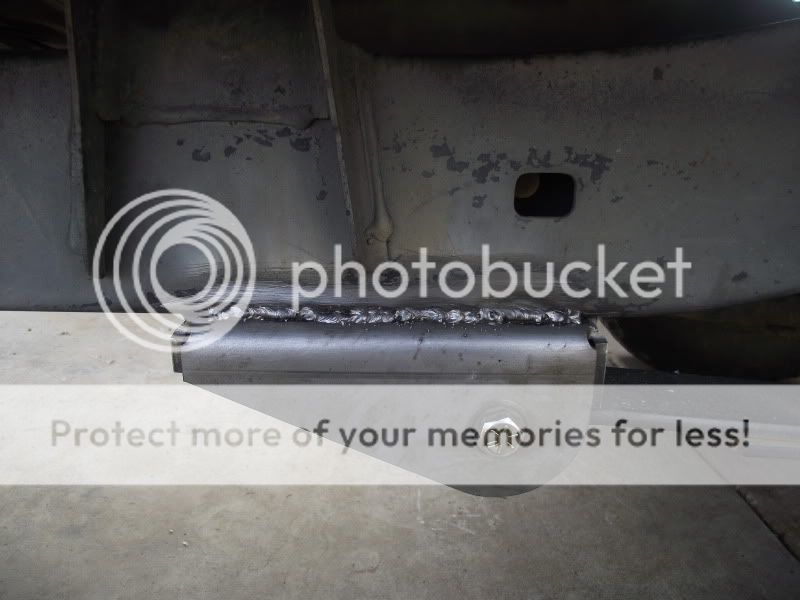

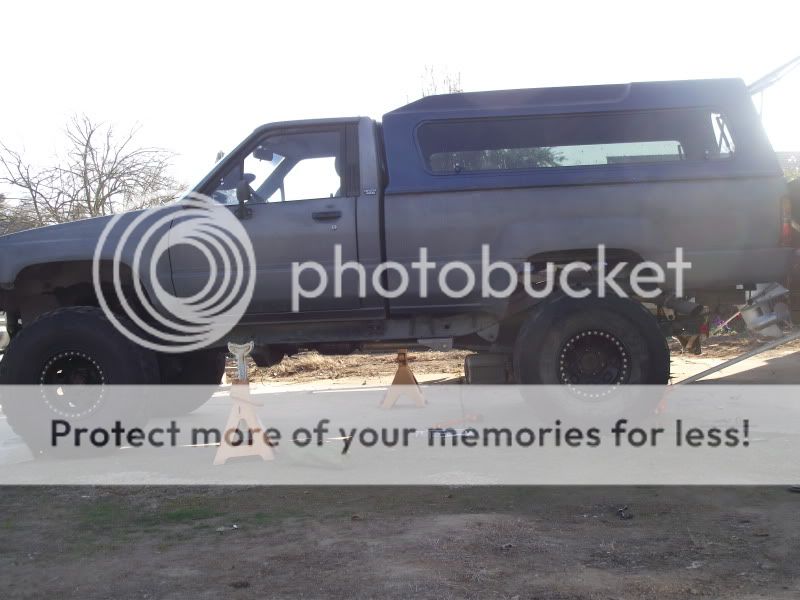
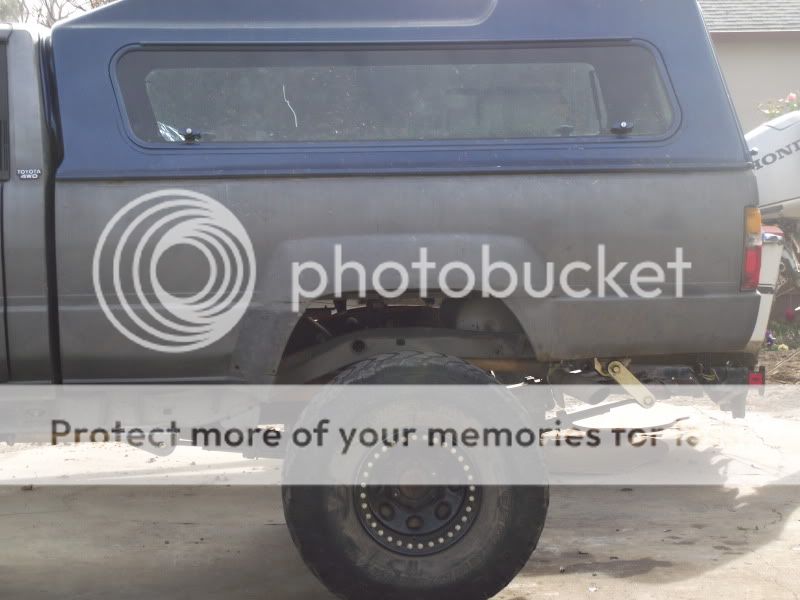
For my personal pride in my work. here is the truck sitting on all fours and at ride height
I surely know I need more welding practice and flux core sucks. I am going to practice more before I tackle the drive-train lift of the Winch mount. So practice here I come.
This thing was in the way of the placement of the new Shackle-hanger. I did not want to cut it off if I did not need too. You never do know if it will come in handy for something in the future. I trimmed as little as need, so I measured 10" from the end of the frame and mad the mark you see in the picture.
After measuring and marking both sides of the stock Shackle-hangers. I grabbed the cut off wheel to start the trim job.
I then cleaned up the scares with 40 minutes of grinding on each side. After all the miserable grinding, I was glad too be able to put the grinder down. Here is my sexy grinding job.
That is right, 44 degrees. Not the perfect 45 degrees but close enough for me.
Here is what I used as a spacer to achieve the 44 degrees while the weight was on the spring.
Jacking the weight onto the spring worked great. The force kept the Shackle-hanger clamped to the frame while I tacked it in place. Both shackles are the same at 44 degrees.
Now to get to the bad news. My welds did not turn out as pretty as I would have hoped. The beads do look buggery, but I know I got good penetration, because I could see it in the puddle when I was running the bead. Some of the possitions were difficult to feel comfortable and made it hard to stay consistent. So to my shame here are my ugly welds.
For my personal pride in my work. here is the truck sitting on all fours and at ride height
I surely know I need more welding practice and flux core sucks. I am going to practice more before I tackle the drive-train lift of the Winch mount. So practice here I come.
Last edited by dark_fairytales; 12-28-2011 at 08:16 PM.
12-29-2011, 04:32 PM
#153
Registered User
Thread Starter
Join Date: Oct 2008
Location: Sacramento, Crawlifonia
Posts: 1,621
Likes: 0
Received 7 Likes
on
4 Posts
Well after driving around a bit sense finishing the install. I have determined that the three leaf pack maybe a little too stiff. I need to measure and order new shocks of course and mount the new shock tabs still. I also have not loaded up the rear with much weight, but I have a prediction the chevy's will still be a bit stiff. After I work out getting new shocks and all. I may pull the rear suspension apart once more too remove the center leaf. I am happy with the 63's as they are but a smoother ride would be nice.
 12-29-2011, 05:03 PM
#155
Registered User
Join Date: Mar 2010
Location: Sc Pa
Posts: 365
Likes: 0
Received 0 Likes
on
0 Posts
Dark welds aren't that bad. the first time I welded I didn't have a helmet so I just kept tacking till it held. My face got so burnt I could hardly see for three days hahah. Keep up the good work.
12-29-2011, 06:03 PM
#156
Registered User
Join Date: Mar 2009
Location: (LSD) Lower Slower Delaware
Posts: 1,169
Likes: 0
Received 0 Likes
on
0 Posts
Nice......for the welds, just grind off a little and some black paint it will look great.
or do what I did, send your kid to school and have them teach him to weld...LOL
or do what I did, send your kid to school and have them teach him to weld...LOL
12-29-2011, 09:18 PM
#158
Registered User
Join Date: Mar 2009
Location: (LSD) Lower Slower Delaware
Posts: 1,169
Likes: 0
Received 0 Likes
on
0 Posts
Cool on the welding certification, had my son do a lot of welding before he did work on my Toyota. But I did buy him a welder. Best of luck on the build
01-02-2012, 10:45 AM
#160
Registered User
Thread Starter
Join Date: Oct 2008
Location: Sacramento, Crawlifonia
Posts: 1,621
Likes: 0
Received 7 Likes
on
4 Posts
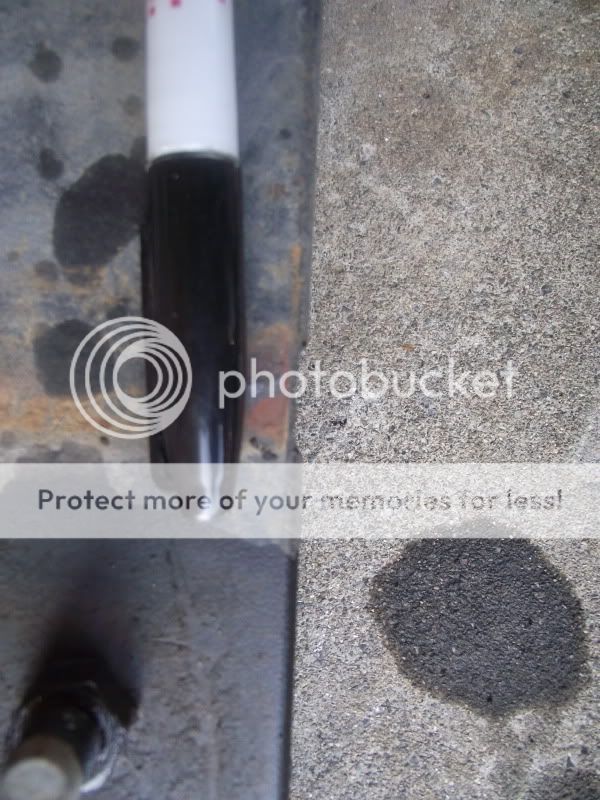
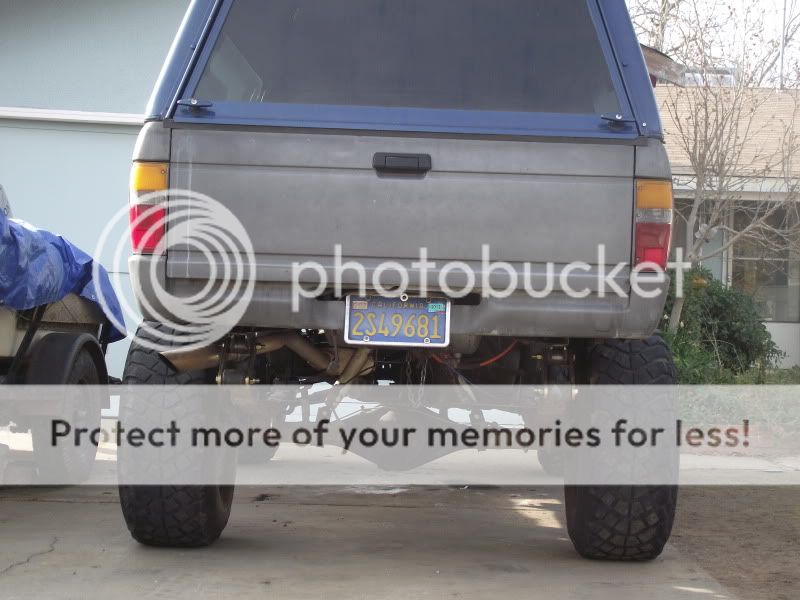
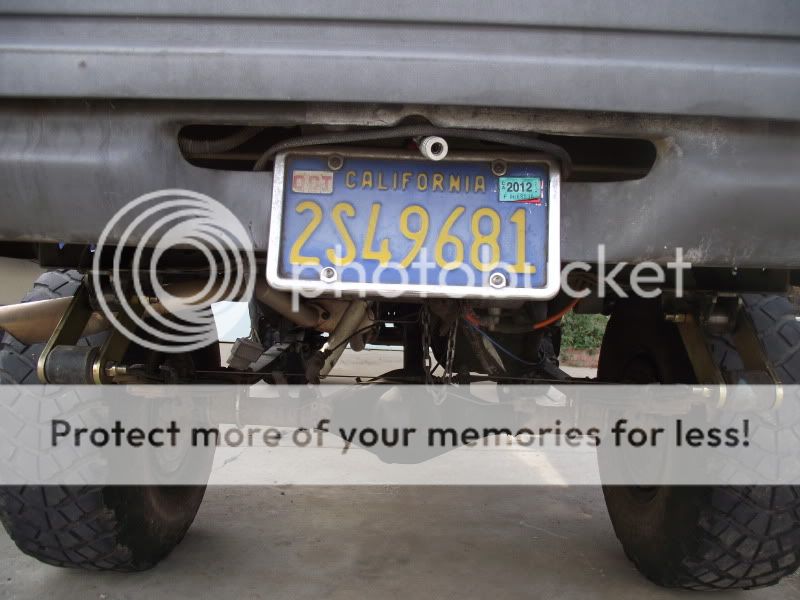
Made some more progress yesterday. Due to the added droop the chevy's provide, the brake hose needs to be longer. I solved this problem with a different approach. Instead of ordering an extended brake hose from from Marlin or TG. I decided to order a stock replacement hose from a local parts store.
There is some purpose to my madness and you may agree as well. When looking at a stock replacement rear brake hose. I noticed one end was male and the other female.
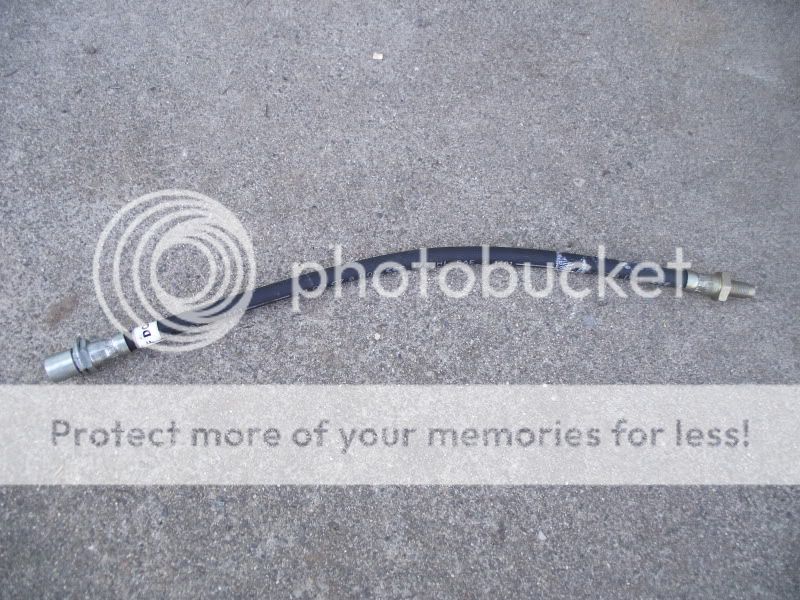
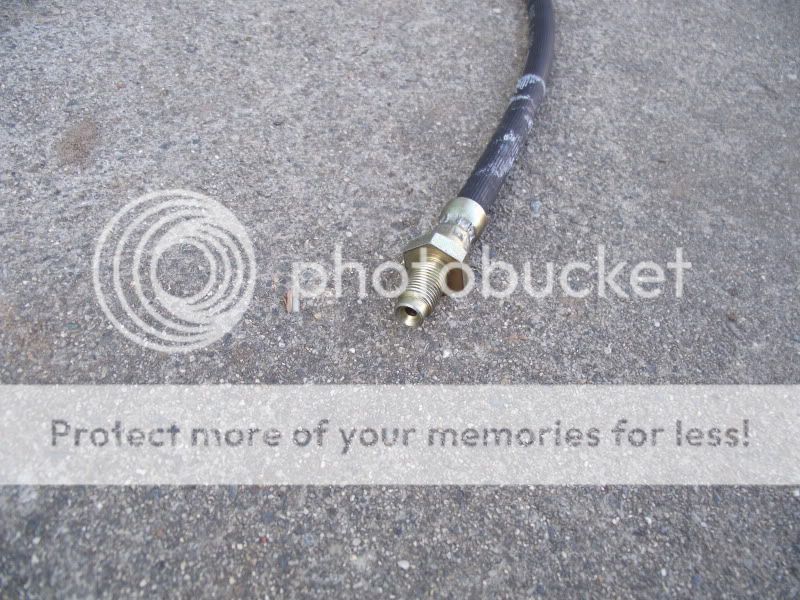
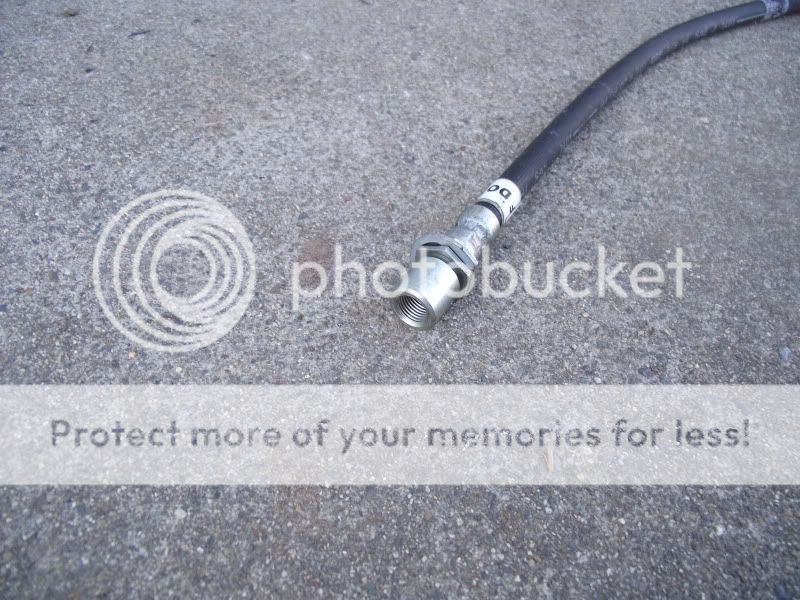
Sense the threads on both ends are a mirrored image of each other. It is possible to thread two identical hoses together. This idea got me thinking. If one hose ever failed on the trail or off the trail. I could simply pull the extra length out and stick with the other half of the two hoses. I would not need to carry an extra hose around with me as spare parts. The other bonus is cash savings. Not only does the stock replacement cost much less. I can always find a stock replacement just about any place I may be, if I did have a failure.
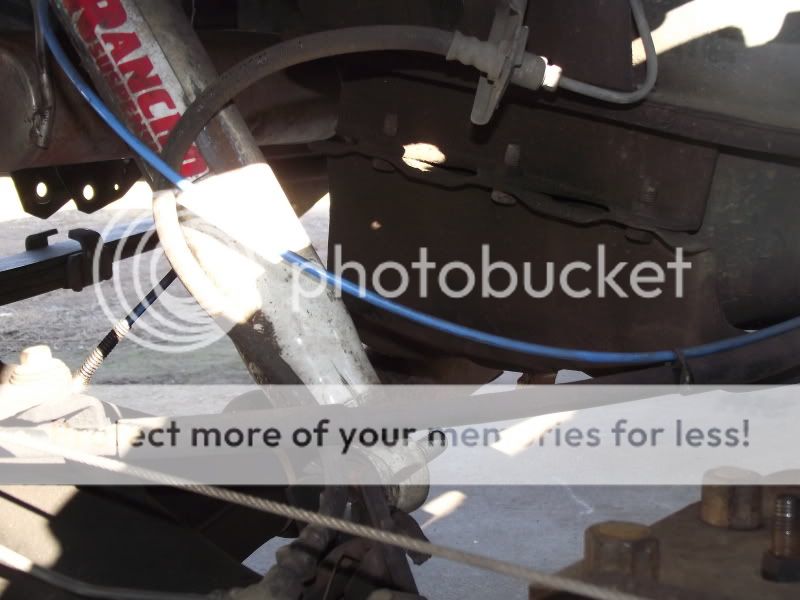
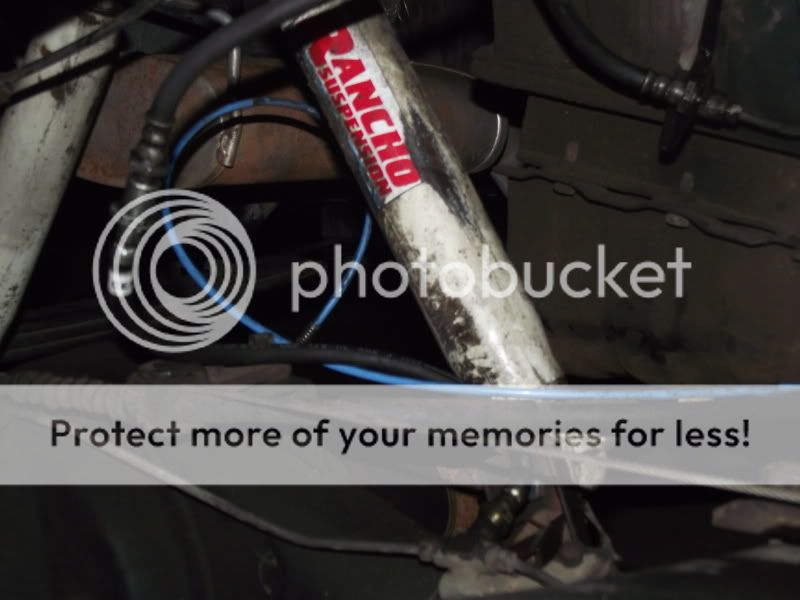
Here are some pictures of before and after. Don't mind the shoddy shocks, they are being replaced soon.
There is some purpose to my madness and you may agree as well. When looking at a stock replacement rear brake hose. I noticed one end was male and the other female.
Sense the threads on both ends are a mirrored image of each other. It is possible to thread two identical hoses together. This idea got me thinking. If one hose ever failed on the trail or off the trail. I could simply pull the extra length out and stick with the other half of the two hoses. I would not need to carry an extra hose around with me as spare parts. The other bonus is cash savings. Not only does the stock replacement cost much less. I can always find a stock replacement just about any place I may be, if I did have a failure.
Here are some pictures of before and after. Don't mind the shoddy shocks, they are being replaced soon.


