
dark_fairytales 1986 Pickup Build-Up Thread
 07-11-2017, 06:05 PM
#481
Registered User
Thread Starter
Join Date: Oct 2008
Location: Sacramento, Crawlifonia
Posts: 1,621
Likes: 0
Received 7 Likes
on
4 Posts
I did it without breaking any piston rings. After going through each piston and cylinder I verified that I only need to swap the ring on pistons 2 and 3. It was nerve racking when I pulled the rings, and I almost biffed it, but all turned out well. It did however take me Four attempts too get the piston to slide into cylinder 3, the oil ring kept hanging up on the lip of the block; my good friends Determination and Patients got her in place though.
And of course it did not happen without pictures.


And of course it did not happen without pictures.

 07-14-2017, 08:23 AM
#484
Registered User

Join Date: Jul 2017
Posts: 15
Likes: 0
Received 0 Likes
on
0 Posts
After all this time, I am finally starting a build thread. I am starting with an idea for a Winch mount I plan to build. I will work out the square tube bumper after I finish with the Winch mount plans.
I am curious to see what other YT members have to say about my Winch mount design. I drew it up on Google sketchup.
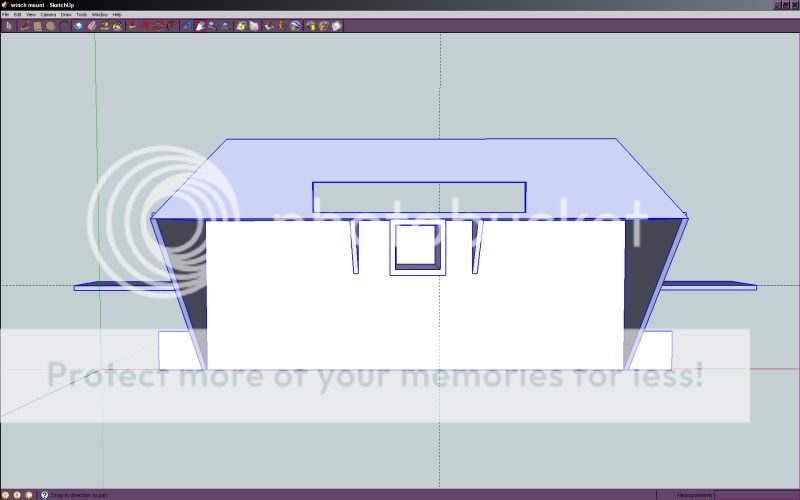
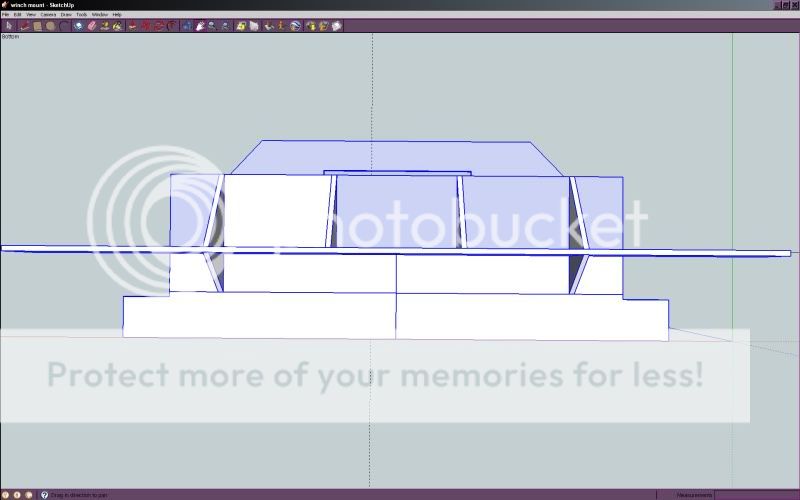
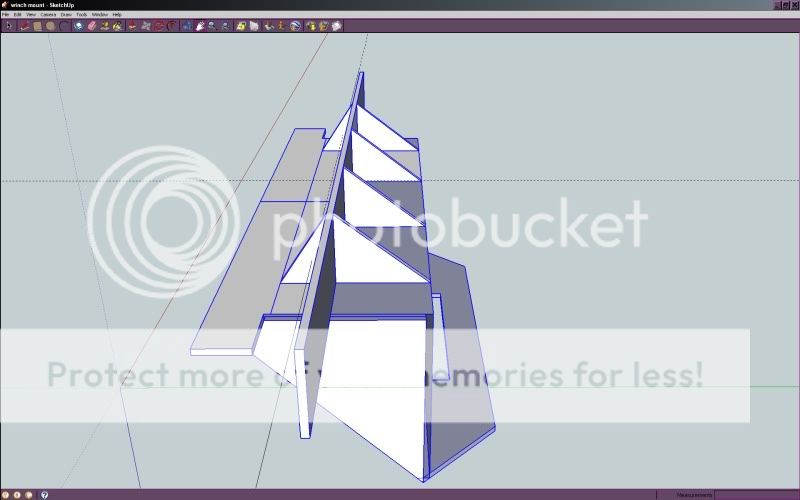
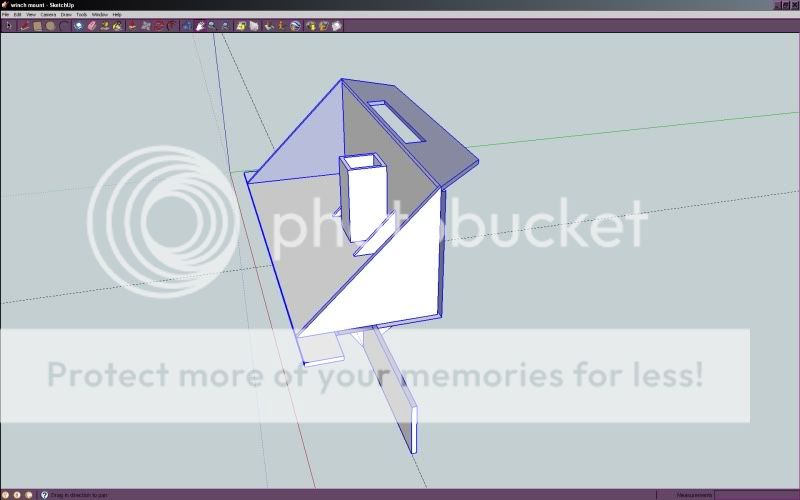
So what do you all think so far?
There will be more to come shortly. I have all the parts I need to start the 63" chevy swap and the new to me Blazeland LT kit.
I am curious to see what other YT members have to say about my Winch mount design. I drew it up on Google sketchup.
So what do you all think so far?
There will be more to come shortly. I have all the parts I need to start the 63" chevy swap and the new to me Blazeland LT kit.
07-14-2017, 02:20 PM
#486
Registered User
Thread Starter
Join Date: Oct 2008
Location: Sacramento, Crawlifonia
Posts: 1,621
Likes: 0
Received 7 Likes
on
4 Posts
The rings are matched too the cylinder, but not the piston. Pistons 4 and 1 were in the right orientation so those rings did not need to swapped. However, pistons 2 and 3 were not right, so I needed to move the rings off of piston 2 and put them on piston 3 and vise-versa, Now all it right.
I will do a build thread for the bumper when I do it, but there has been other projects around the house that have kept me from building it.
I will do a build thread for the bumper when I do it, but there has been other projects around the house that have kept me from building it.
 07-15-2017, 09:00 AM
#488
Registered User
Thread Starter
Join Date: Oct 2008
Location: Sacramento, Crawlifonia
Posts: 1,621
Likes: 0
Received 7 Likes
on
4 Posts
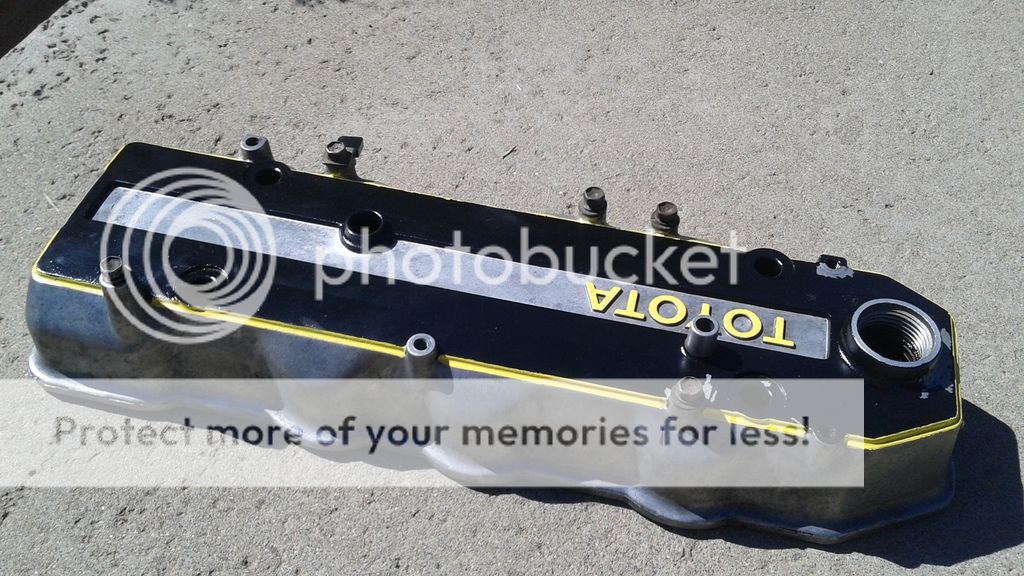
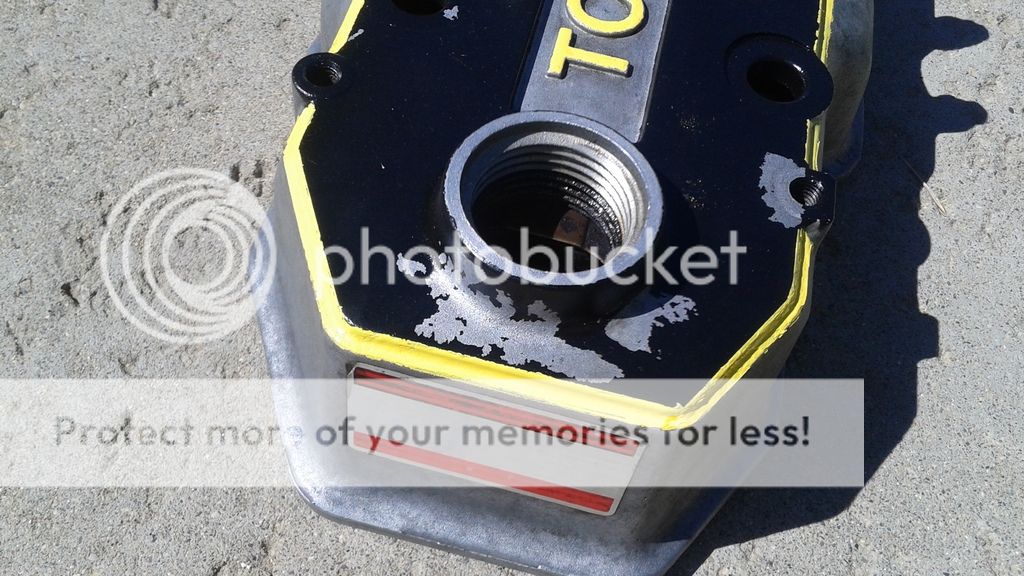
Thanks Magnet18, it has been alot of work to get the engine to the point it is. Most of the tough stuff is done at this point so things should start moving along pretty quickly now. When all assembled the engine should look really good, however I messed up the paint on the valve cover so I will be re-doing the valve cover ( kind of embarrassing for me).


 07-15-2017, 07:28 PM
#492
Registered User
Thread Starter
Join Date: Oct 2008
Location: Sacramento, Crawlifonia
Posts: 1,621
Likes: 0
Received 7 Likes
on
4 Posts
Valve to piston clearance:
INTAKE = .112
EXHAUST = .126
RECOMMENDED =.080
That should be the very last measurement that I need to make regarding the new rotating assembly, OH WHAT A FEEL'IN!!!
UPDATE
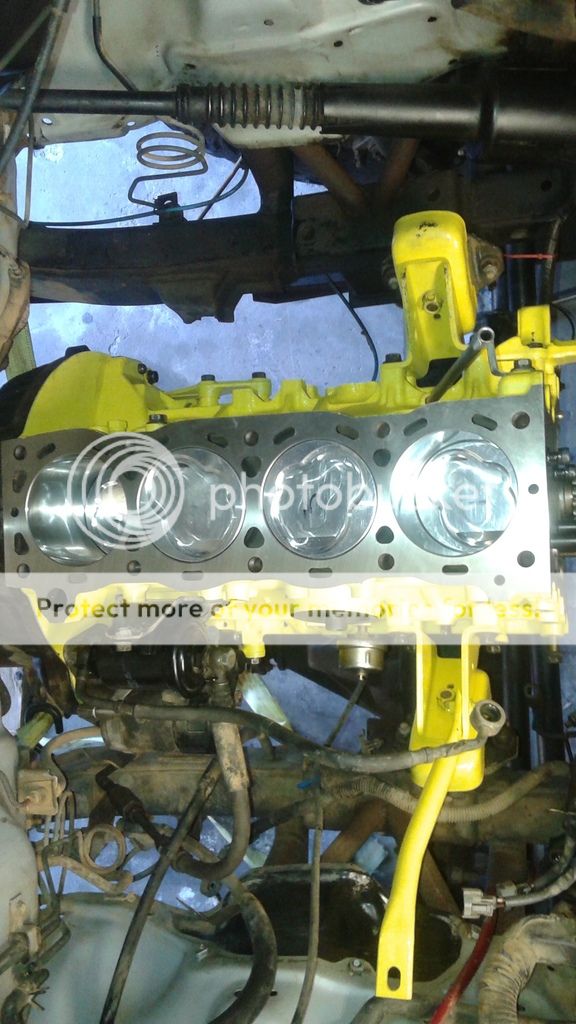
I decided to work late tonight (11:30PM). I finished this evening with torquing the head down. I am making some real progress now.

INTAKE = .112
EXHAUST = .126
RECOMMENDED =.080
That should be the very last measurement that I need to make regarding the new rotating assembly, OH WHAT A FEEL'IN!!!
UPDATE
I decided to work late tonight (11:30PM). I finished this evening with torquing the head down. I am making some real progress now.
Last edited by dark_fairytales; 07-15-2017 at 10:36 PM.
07-16-2017, 04:39 PM
#494
Registered User
Thread Starter
Join Date: Oct 2008
Location: Sacramento, Crawlifonia
Posts: 1,621
Likes: 0
Received 7 Likes
on
4 Posts
Today the engine is really starting too look like a 22re. I installed the timing set, cover, oil pump, alt. mounting bracket, A/C mounting bracket, water pump.


07-18-2017, 07:18 PM
#495
Registered User
Thread Starter
Join Date: Oct 2008
Location: Sacramento, Crawlifonia
Posts: 1,621
Likes: 0
Received 7 Likes
on
4 Posts
Well I know this is not that big of a deal, but it really feels like one step closer to the finish for me. I really took my time getting the oil pan installed tonight; I did my best too keep the pan looking pretty and not scratch the paint, or get the silicone sealant all over the place. Hopefully the pan is sealed up good, it would suck to have to re-do the silicone because of a leak.

Last edited by dark_fairytales; 07-19-2017 at 04:57 PM.
07-24-2017, 02:34 PM
#496
Registered User
Thread Starter
Join Date: Oct 2008
Location: Sacramento, Crawlifonia
Posts: 1,621
Likes: 0
Received 7 Likes
on
4 Posts
Latest update, the engine is almost complete. The garage was boiling, but I kept plugging away at this thing. I should have it running this week, or certainly the weekend.

07-28-2017, 11:20 PM
#497
Registered User
Thread Starter
Join Date: Oct 2008
Location: Sacramento, Crawlifonia
Posts: 1,621
Likes: 0
Received 7 Likes
on
4 Posts
This is a great feeling, this is the very last part in my two parts boxes.
Here is the completed engine.
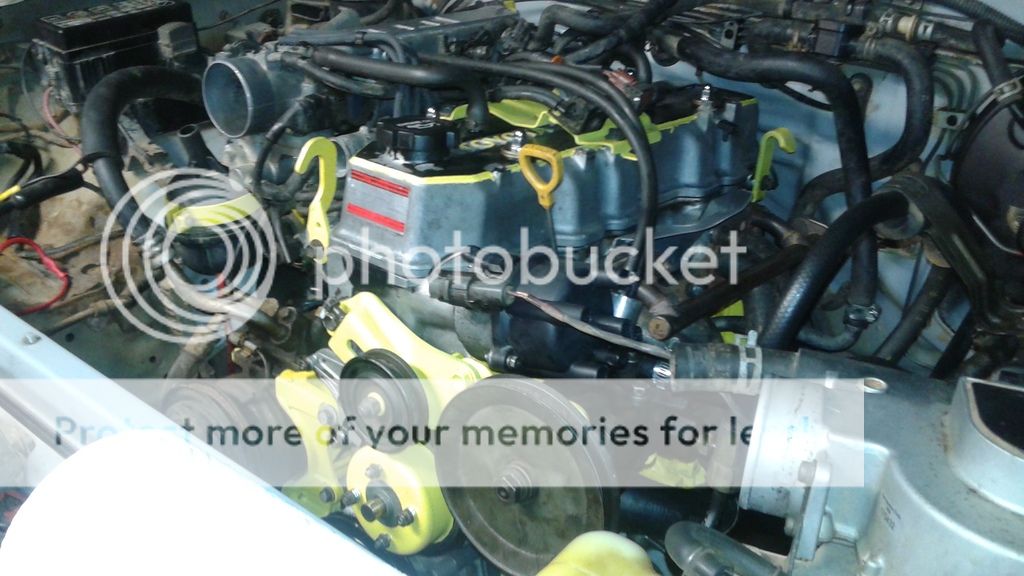
Waiting on the electric fan to be delivered which is keeping me from finishing the radiator and coolant install, hence no start up video. I will have this thing on the road in no time.
07-29-2017, 02:08 PM
#500
Registered User


