
dark_fairytales 1986 Pickup Build-Up Thread

 06-14-2017, 11:04 AM
#463
The 22re in my 4wd -- I'm joking though, I'm not going to rebuild it, rather just engine swap it if I were to touch it....but I do need to give it attention and re-do my leaky timing cover. Tired of seeing oil stains under my truck and I've been considering selling it, so may be good to have no leaks.
Do you have an engine hoist at your place? I may need to come by and have shop day aside from that body work I mentioned. I believe the Hilux may need a new rear main seal, there's a spot of oil appearing under the center of the truck, oil not trans fluid.
Do you have an engine hoist at your place? I may need to come by and have shop day aside from that body work I mentioned. I believe the Hilux may need a new rear main seal, there's a spot of oil appearing under the center of the truck, oil not trans fluid.
06-14-2017, 03:25 PM
#464
Registered User
Thread Starter
Join Date: Oct 2008
Location: Sacramento, Crawlifonia
Posts: 1,621
Likes: 0
Received 7 Likes
on
4 Posts
unfortunately I do not have a cherry-picker. I pulled mine using my come-along attached to the truss of the roof with only the crank and clutch in the block. I would like a cherry picker, but storage is the issue.
 06-15-2017, 04:21 PM
#466
Registered User
Thread Starter
Join Date: Oct 2008
Location: Sacramento, Crawlifonia
Posts: 1,621
Likes: 0
Received 7 Likes
on
4 Posts
I have thought about a fold up unit, however space for storage is still very limited; my garage is full, its a long story and with persistent work I will the garage whole functional again.
06-15-2017, 04:53 PM
#467
Registered User
Thread Starter
Join Date: Oct 2008
Location: Sacramento, Crawlifonia
Posts: 1,621
Likes: 0
Received 7 Likes
on
4 Posts
In the past two days I have been working diligently and have gotten Two steps closer to reassembly. I wanted to make sure that the new block and rotating assembly were in spec., and sure enough it is. The main journals all speced. out at exactly .038 clearance. .038 is exactly half way between the FSM suggested of .022-.055, that made me happy.
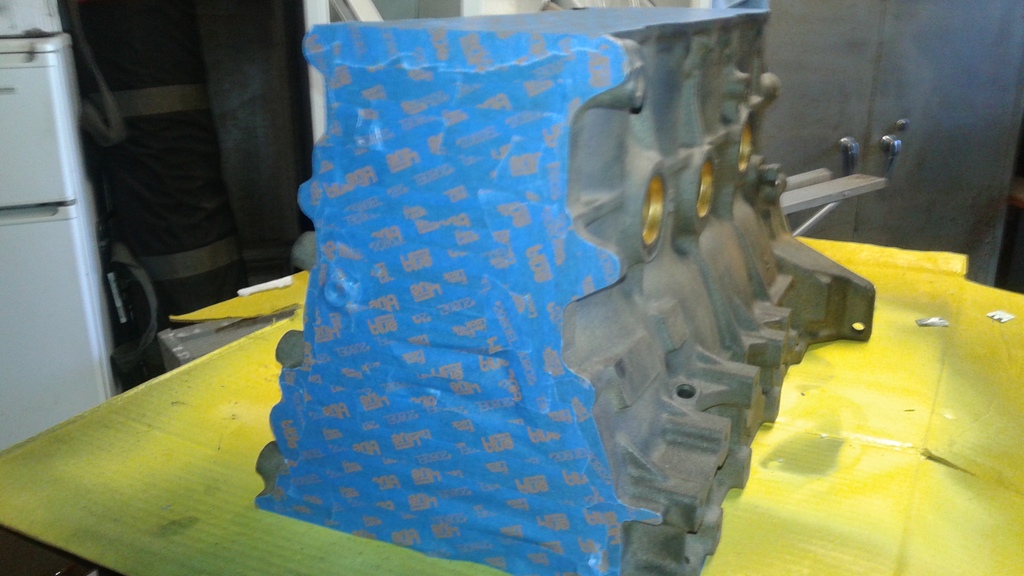
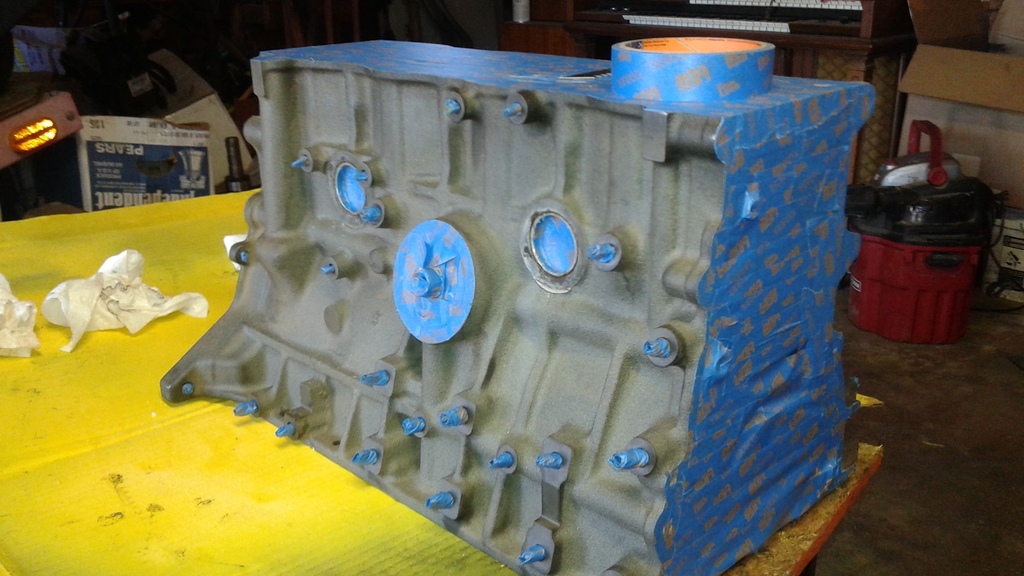
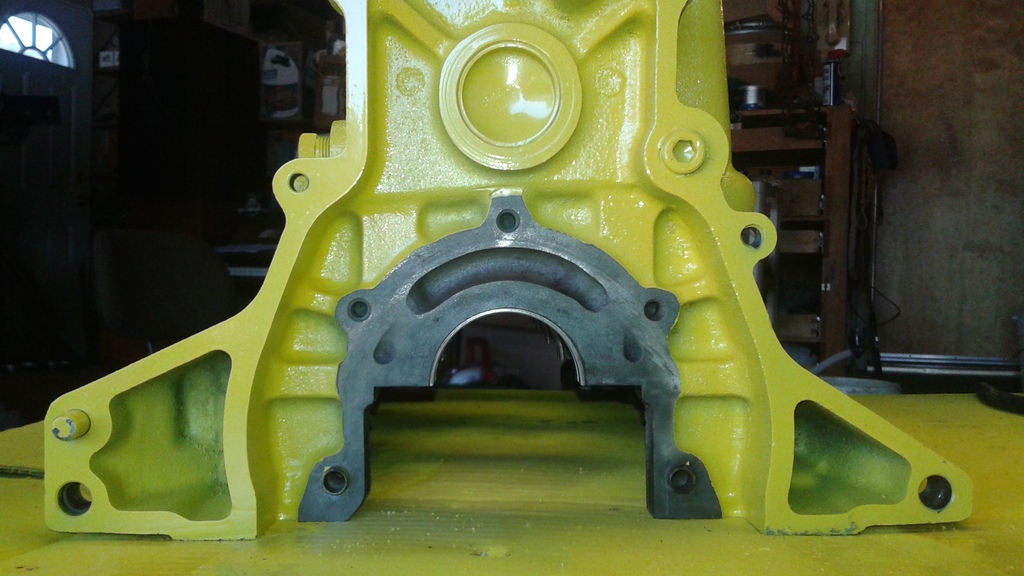
Masking was done in Two sessions; it was hot in the garage and masking is kind of boring. Session Two was especially monotonous with having to mask out all of the threaded bolt holes. I have spent far too many hours in my life masking things. I am glad I still have what it take to do a professional job.
SESSION ONE:
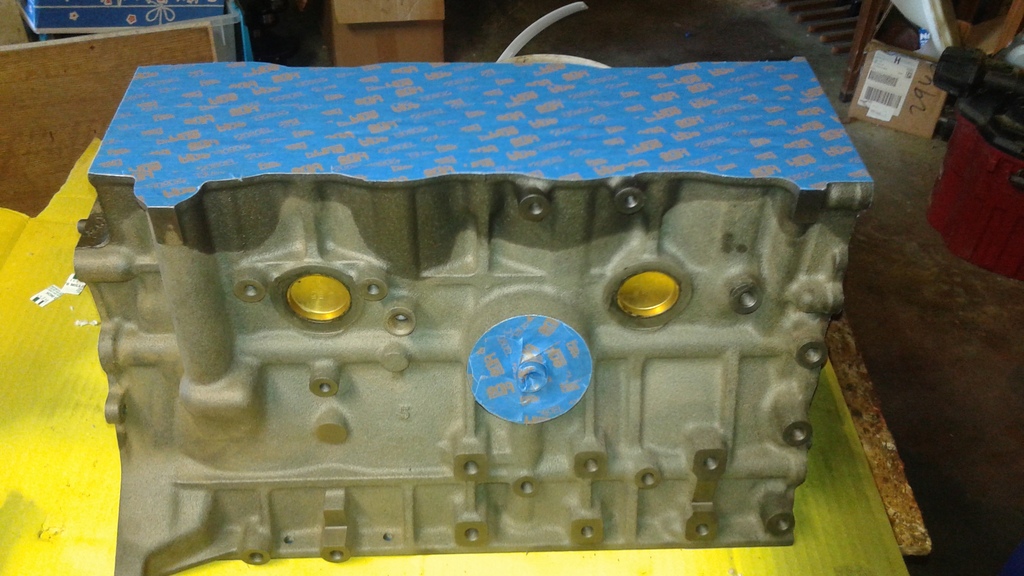
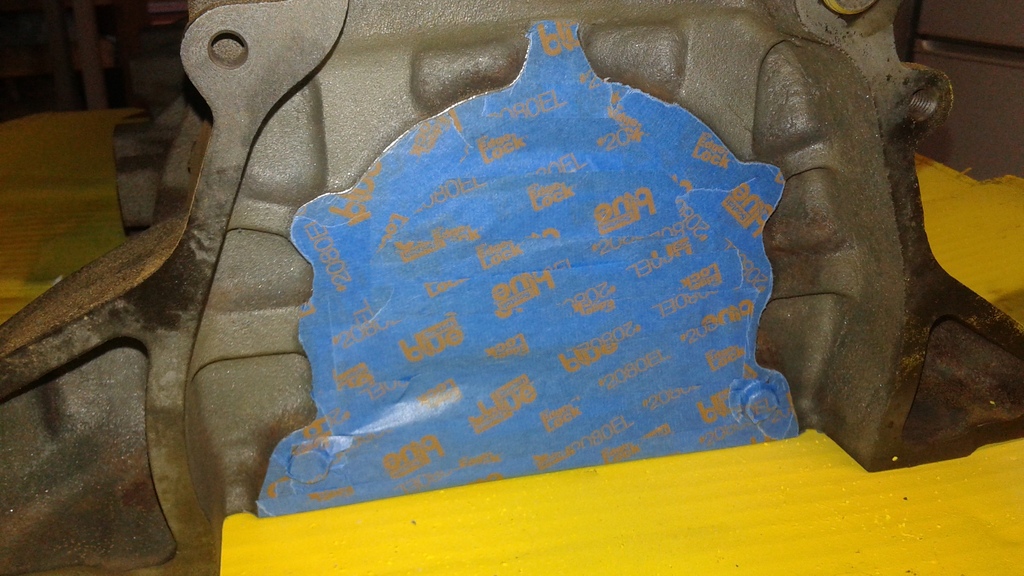
SESSION TWO:
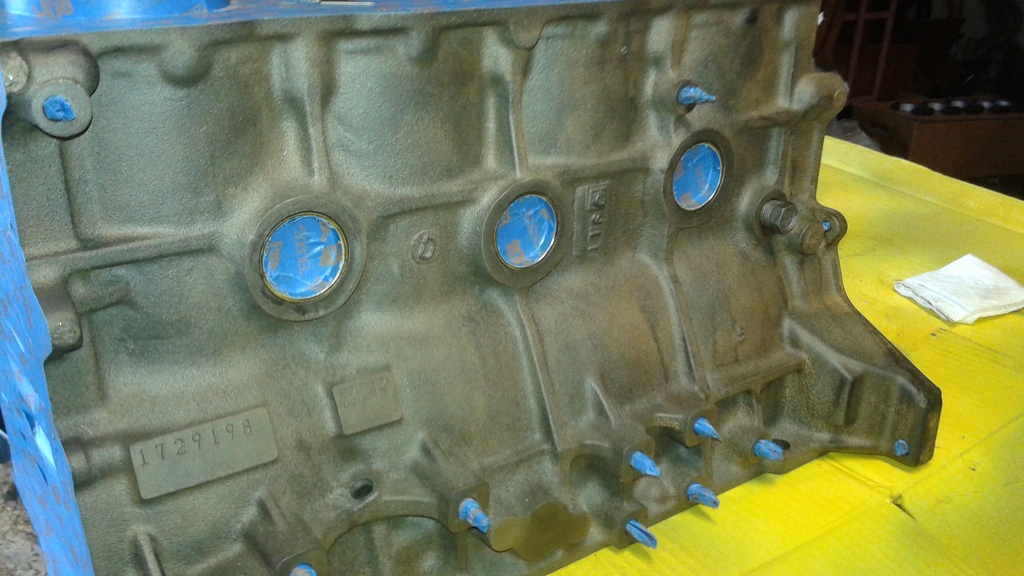
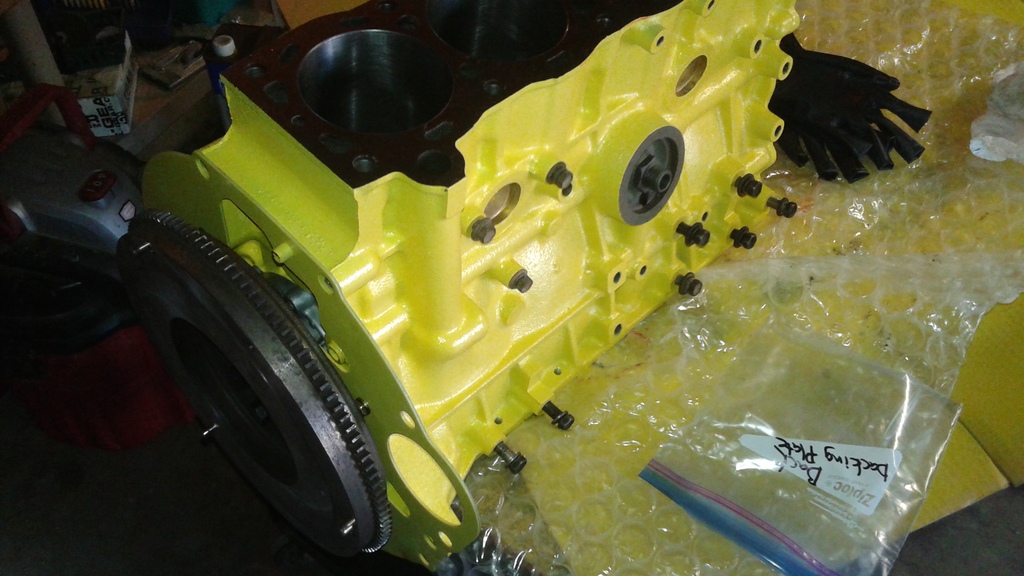
Finally! I am done with all the painting. HOORAY!!!
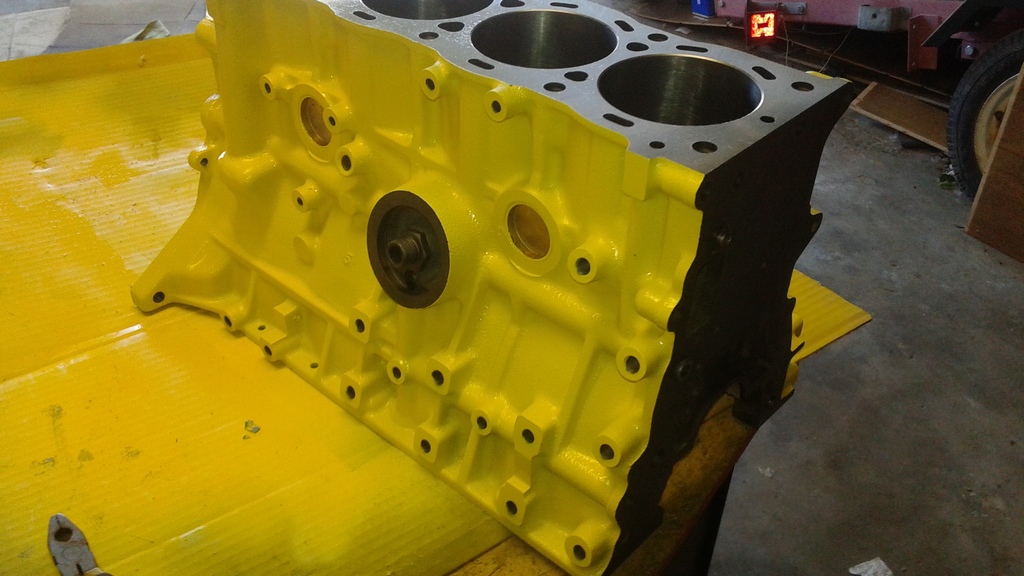
Next I will be putting the crank, flywheel, and clutch on then I can drop the block into the engine bay.
Masking was done in Two sessions; it was hot in the garage and masking is kind of boring. Session Two was especially monotonous with having to mask out all of the threaded bolt holes. I have spent far too many hours in my life masking things. I am glad I still have what it take to do a professional job.
SESSION ONE:
SESSION TWO:
Finally! I am done with all the painting. HOORAY!!!
Next I will be putting the crank, flywheel, and clutch on then I can drop the block into the engine bay.
06-18-2017, 12:18 PM
#468
Registered User
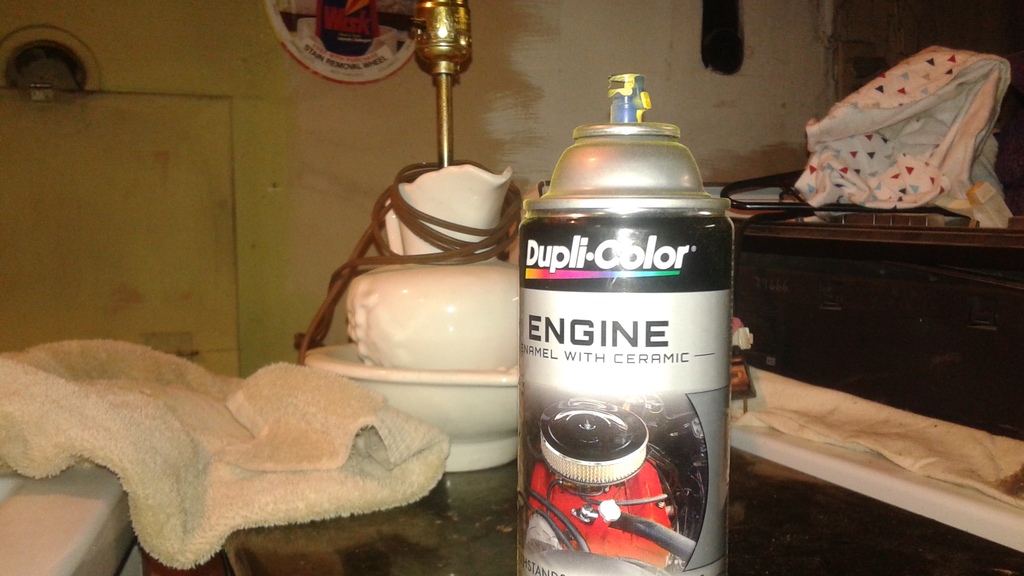
I love that yellow paint! What brand is it? I just pulled the motor out of my 88 4runner yesterday. I'm miles off but I can't stop thinking about what colour I'm going to paint my block. Decisions decisions. Keep up the good work, mate!
Josch
Josch
 06-22-2017, 06:49 PM
#470
Registered User

Join Date: Feb 2017
Location: central california
Posts: 15
Likes: 0
Received 0 Likes
on
0 Posts
Well, I am very happy to have stuck with this thread. It sounds like you are doing what I plan to do to my 85 (engine-wise), so I'll eagerly await all the updates and progress. Why did you decide to just buy the stroker kit and not buy a whole new short block?
06-26-2017, 05:37 PM
#471
Registered User
Thread Starter
Join Date: Oct 2008
Location: Sacramento, Crawlifonia
Posts: 1,621
Likes: 0
Received 7 Likes
on
4 Posts
UPDATE
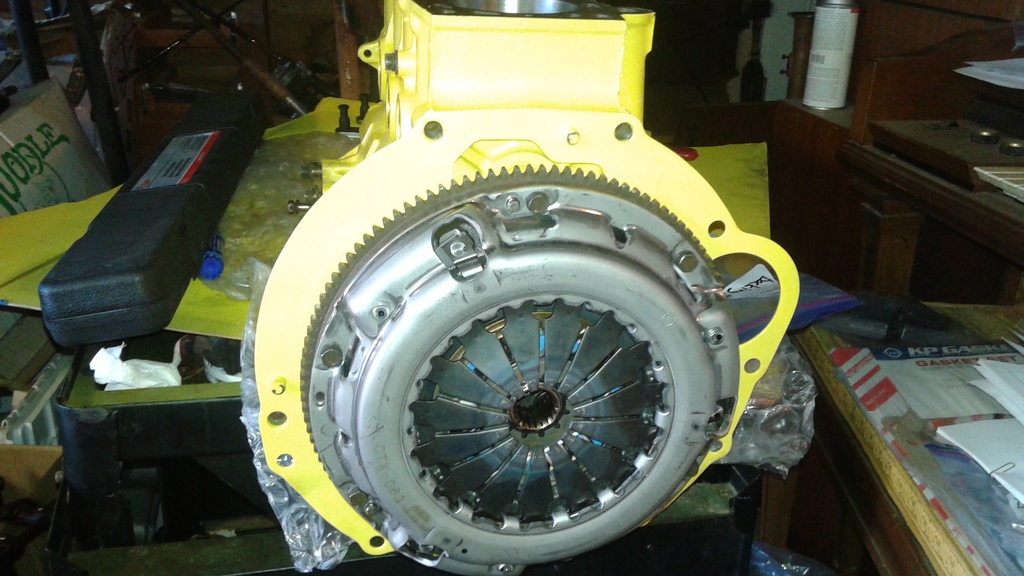
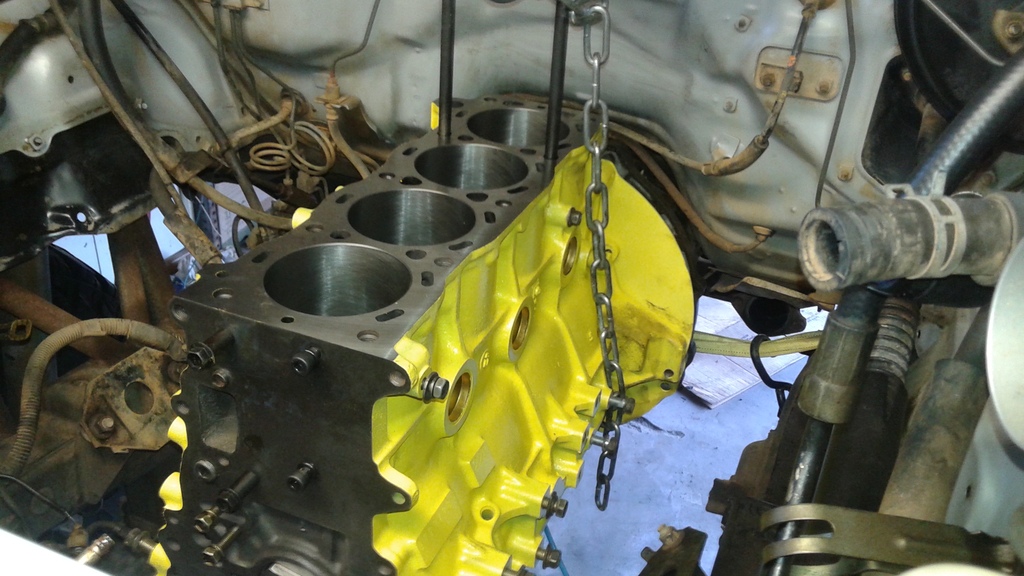
This afternoon I returned home from a Four day back woods hiking trip to Shealor Lake, and shortly after my return I started to work on the engine reassembly. I pre-threaded all the bolts that were on the block for organizational purposes, installed the backing plate and spotted the flywheel in place. I will not be able to torq the flywheel or the clutch until I can get my brother too counter the crank rotation with the pulley tool. Any way here is a picture of the progress.
More progress this evening, as stated yesterday I got the flywheel and clutch all torqued up today.
Last edited by dark_fairytales; 06-27-2017 at 06:42 PM.
06-29-2017, 07:11 PM
#472
Registered User
Thread Starter
Join Date: Oct 2008
Location: Sacramento, Crawlifonia
Posts: 1,621
Likes: 0
Received 7 Likes
on
4 Posts
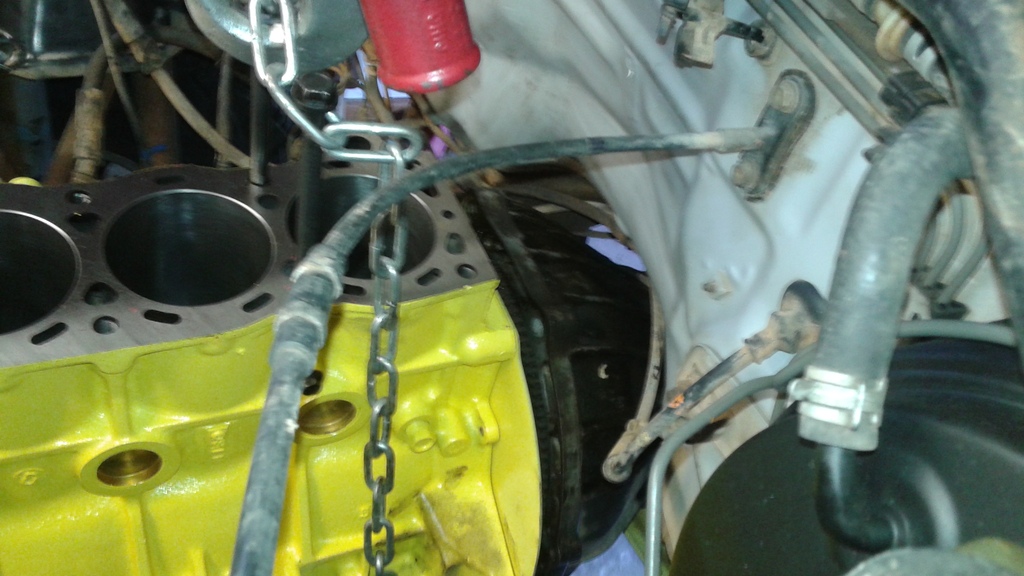
I made great progress this evening. The clutch slid right on to the transmission input shaft on the first attempt at installing the block. Everything aligned perfectly as if the engine and transmission were pulled together magnetically for their first kiss. Here are some pictures of the moment as it took place.
About an hour after first contact I had the motor mounts and all of the major bellhousing bolt torqued up. This was a glorious moment.
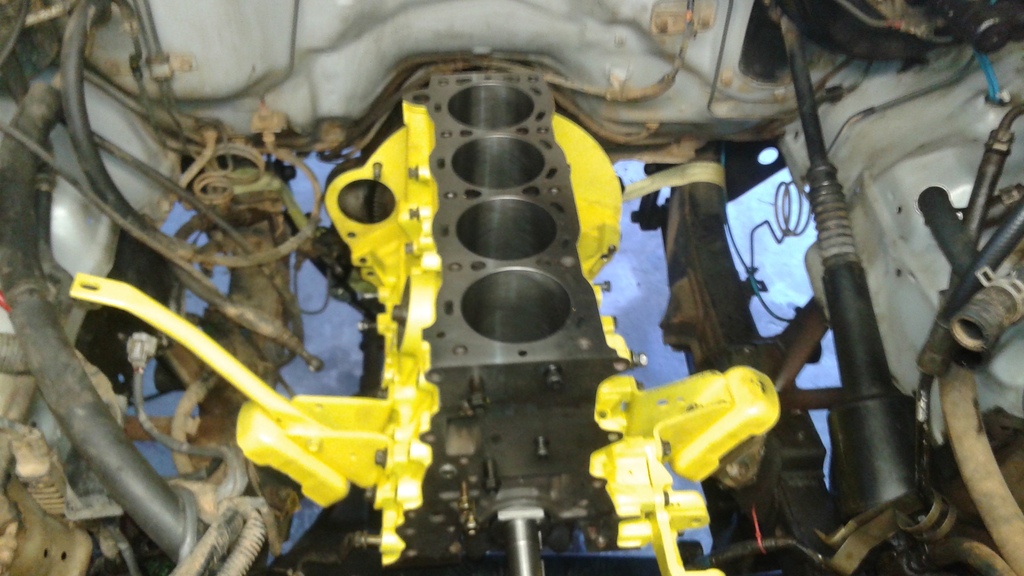
About an hour after first contact I had the motor mounts and all of the major bellhousing bolt torqued up. This was a glorious moment.
 07-01-2017, 11:12 AM
#474
Registered User
Thread Starter
Join Date: Oct 2008
Location: Sacramento, Crawlifonia
Posts: 1,621
Likes: 0
Received 7 Likes
on
4 Posts
Well I ran into another road block (not good since I thought I had a Four day weekend this 4th of July). I had everything prepared so I could install the pistons and connecting rods into their corresponding cylinder. Turns out the machine shop did not pay attention too the valve relief cut into the tops of the pistons, so the pistons that are numbered do not match the alignment to the head.
Now I must pull the rings off of the pistons re-orient the piston to the head and cylinder, and then install the correct rings matching the correct cylinder. The problem is I do not want to break a ring, so I have ordered the best ring expander I could find, and that tool will not show up until the 7th July.
Oh what a feeling!
07-01-2017, 06:06 PM
#476
Registered User
Thread Starter
Join Date: Oct 2008
Location: Sacramento, Crawlifonia
Posts: 1,621
Likes: 0
Received 7 Likes
on
4 Posts
yup, I do not think I will ever end up there again. Kind of sucks, it is the second machine shop I must put on the list of no goes that I have done business with.
07-04-2017, 03:46 PM
#478
Registered User
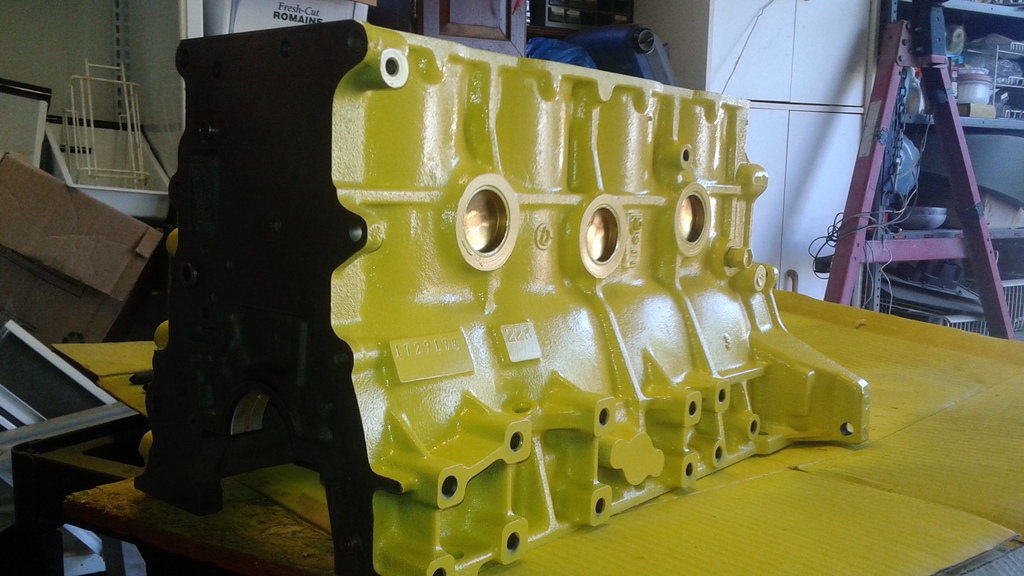
I've been watching this build and I'm really liking the color you picked.
If someone said "I'm gonna paint my engine bright yellow", I'd have said don't it's gonna be ugly. I'd have been wrong.
I've got mine torn down to a short block due to a stripped a head bolt, and I've been thinking about one of those 60's-era bluish-greens they used on Buick and Chrysler v8's. That yellow is surprisingly good though.
07-04-2017, 06:45 PM
#479
Registered User
Thread Starter
Join Date: Oct 2008
Location: Sacramento, Crawlifonia
Posts: 1,621
Likes: 0
Received 7 Likes
on
4 Posts
Thanks for agree with my color choice gsp4life. I was hoping to do something different that would not conflict with the silver grey of the body and I think the yellow will turn out to be a choice. Also I wanted something high contrast to lighten up and otherwise dark engine bay and also a color scheme that would reveal fluid leaks in the future. Since I have down time until the weekend I am working on painting the valve cover and intake plenum.
07-04-2017, 06:46 PM
#480
Registered User
Thread Starter
Join Date: Oct 2008
Location: Sacramento, Crawlifonia
Posts: 1,621
Likes: 0
Received 7 Likes
on
4 Posts
Thanks for agree with my color choice gsp4life. I was hoping to do something different that would not conflict with the silver grey of the body and I think the yellow will turn out to be a choice. Also I wanted something high contrast to lighten up and otherwise dark engine bay and also a color scheme that would reveal fluid leaks in the future. Since I have down time until the weekend I am working on painting the valve cover and intake plenum.


