
dark_fairytales 1986 Pickup Build-Up Thread

 09-15-2014, 09:16 AM
#362
Registered User
Looks good. Ive always thought about clear coating bare steel like that but never have. Im thinking hard about going with Davez shackles are bushings. I like that fact that they have the sleeve. Just about all my TG bushings have split and busted and all the 4runner has done is sit in the yard for 6 months. It doesnt run yet to drive it. Plus I imagine it makes getting the bolts in alot easier.
09-15-2014, 10:31 AM
#363
Registered User
Thread Starter
Join Date: Oct 2008
Location: Sacramento, Crawlifonia
Posts: 1,621
Likes: 0
Received 7 Likes
on
4 Posts
Thanks mate
Thanks, I wanted to do something different that I have never saw, and started with the T-case crossmember.
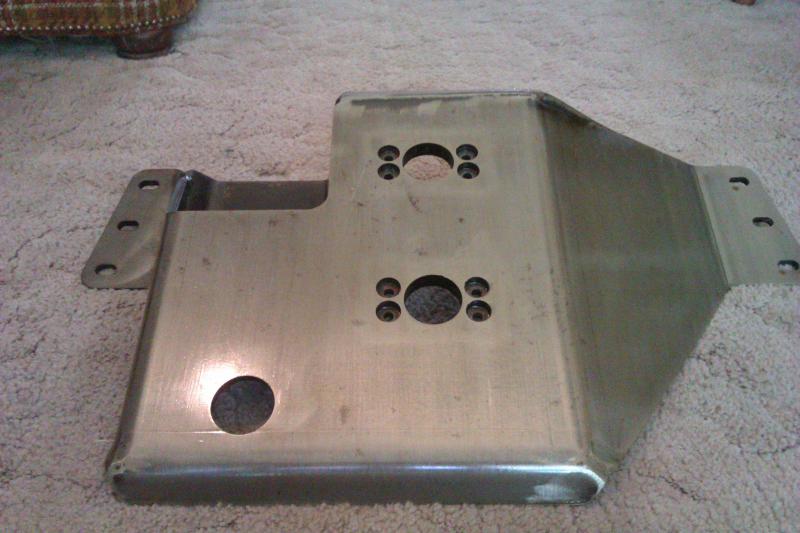
My plan has been to do the same finish to every part I add to the rig. The bumpers I build will have the same finish as well.
As for the sleeves making it easier to side the bolts in, I would not agree. The tolerances are really tight, and one can not use the threads of the bolt to screw in against the bushing. However the suspension is much more solid, and next to no play. In my opinion TG bushings are crap, but my only comparison is my current rig, and I could not find any signs of grease that was applied by the PO. So, my issues with TG bushings could really just be the PO.
Looks good. Ive always thought about clear coating bare steel like that but never have. Im thinking hard about going with Davez shackles are bushings. I like that fact that they have the sleeve. Just about all my TG bushings have split and busted and all the 4runner has done is sit in the yard for 6 months. It doesnt run yet to drive it. Plus I imagine it makes getting the bolts in alot easier.
My plan has been to do the same finish to every part I add to the rig. The bumpers I build will have the same finish as well.
As for the sleeves making it easier to side the bolts in, I would not agree. The tolerances are really tight, and one can not use the threads of the bolt to screw in against the bushing. However the suspension is much more solid, and next to no play. In my opinion TG bushings are crap, but my only comparison is my current rig, and I could not find any signs of grease that was applied by the PO. So, my issues with TG bushings could really just be the PO.
09-15-2014, 12:44 PM
#364
Registered User
I know the sleeved bushings for my motor mounts, tcase mount, and 63's in the back where a LOT easier that my front TG springs and shackles. Plus I just used the threads to remove the bolts yesterday and just about ruined the bushing (even tho they were already ruined from cracking). Just a matter of opinion I guess.
Im curious to see how well the clear coat holds up on bare metal. Im sure it will be fine tho.
Im curious to see how well the clear coat holds up on bare metal. Im sure it will be fine tho.
09-16-2014, 10:18 AM
#367
Registered User
Thread Starter
Join Date: Oct 2008
Location: Sacramento, Crawlifonia
Posts: 1,621
Likes: 0
Received 7 Likes
on
4 Posts
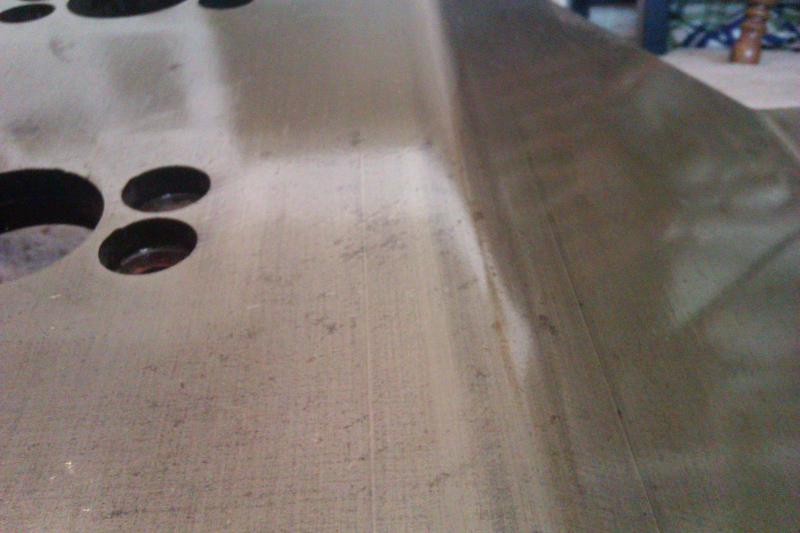
yes the UV will yellow it some, but I am not worried about it that much. If I wanted to go all out, I could use a two part catalyzed coating, but Poly-acrylic is cheap and bought just about anywhere.
11-02-2014, 05:24 AM
#369
Registered User
Thread Starter
Join Date: Oct 2008
Location: Sacramento, Crawlifonia
Posts: 1,621
Likes: 0
Received 7 Likes
on
4 Posts
I stopped making progress, because my money is limited, and my brother has my starter and battery installed in his custom cab at the moment. My brother is jobless currently, so the situation required me to scavenge off of my rig. I am contemplating buying a new battery for my brothers custom cab, but not until I can get a cheap starter from pick-n-pull.
I have not quite made up my mind yet about the situation, but I believe I will have decided what too do by the end of the month.
On another note, I was in the process of removing the Smitty Built winch from the Warn front bumper, and have ran into a snag, trying to remove the two front bolts holding the winch to the bumper. Space is tight, and my current tools can not get a square bite on too the bolt. I need to spend some money to buy a 16mm pivoting ratcheting spanner.
11-02-2014, 06:36 AM
#370
Registered User
I stopped making progress, because my money is limited, and my brother has my starter and battery installed in his custom cab at the moment. My brother is jobless currently, so the situation required me to scavenge off of my rig. I am contemplating buying a new battery for my brothers custom cab, but not until I can get a cheap starter from pick-n-pull.
I have not quite made up my mind yet about the situation, but I believe I will have decided what too do by the end of the month.
On another note, I was in the process of removing the Smitty Built winch from the Warn front bumper, and have ran into a snag, trying to remove the two front bolts holding the winch to the bumper. Space is tight, and my current tools can not get a square bite on too the bolt. I need to spend some money to buy a 16mm pivoting ratcheting spanner.
I have not quite made up my mind yet about the situation, but I believe I will have decided what too do by the end of the month.
On another note, I was in the process of removing the Smitty Built winch from the Warn front bumper, and have ran into a snag, trying to remove the two front bolts holding the winch to the bumper. Space is tight, and my current tools can not get a square bite on too the bolt. I need to spend some money to buy a 16mm pivoting ratcheting spanner.
 11-09-2014, 11:27 AM
#373
Registered User
Thread Starter
Join Date: Oct 2008
Location: Sacramento, Crawlifonia
Posts: 1,621
Likes: 0
Received 7 Likes
on
4 Posts
Well I am working on clearing out the garage, and decided to get the shell out of the way by placing it on the bed.
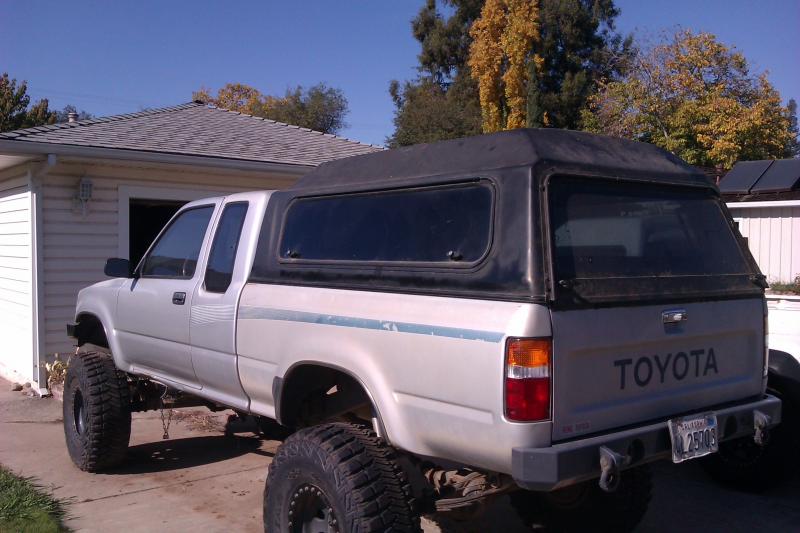
I bought the shell before I bought the truck, and the shell has been sitting in the garage since. The shell needs to be fully rebuilt so the shell will not stay that way, but now that the shell on; I can now see something I have added to the truck that make the truck seem more like it is my rig.
I bought the shell before I bought the truck, and the shell has been sitting in the garage since. The shell needs to be fully rebuilt so the shell will not stay that way, but now that the shell on; I can now see something I have added to the truck that make the truck seem more like it is my rig.
10-02-2015, 10:20 PM
#375
Registered User
Thread Starter
Join Date: Oct 2008
Location: Sacramento, Crawlifonia
Posts: 1,621
Likes: 0
Received 7 Likes
on
4 Posts
Thanks for the Subb paynemw, I am glad the thread is inspirational to you.
This past week I have the 89 all together, charged the battery, and cranked her over. I was super excited to hear it run again. But, there is a new problem now, the idle is high. I think its the idle air control valve, maybe there is an air pocket in the coolant line. I hope to narrow the issue down this weekend.
Once the high idle issue is solved I get insurance on her and go pass smog. I am damned ready to enjoy my investment.
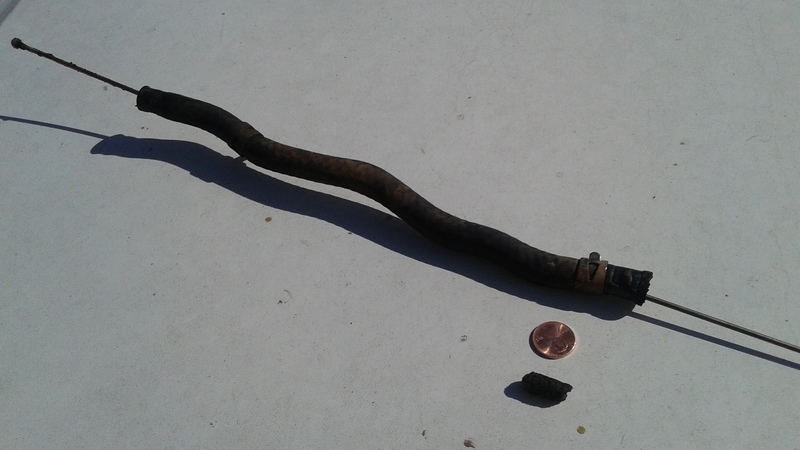
I solved the high idle problem. Turns out the coolant hose that runs from the intake manifold to the Auxiliary Air Control Valve was clogged with what looked like felt. The clog felt like really compacted dryer-lint. The clog is next to the penny in the picture.
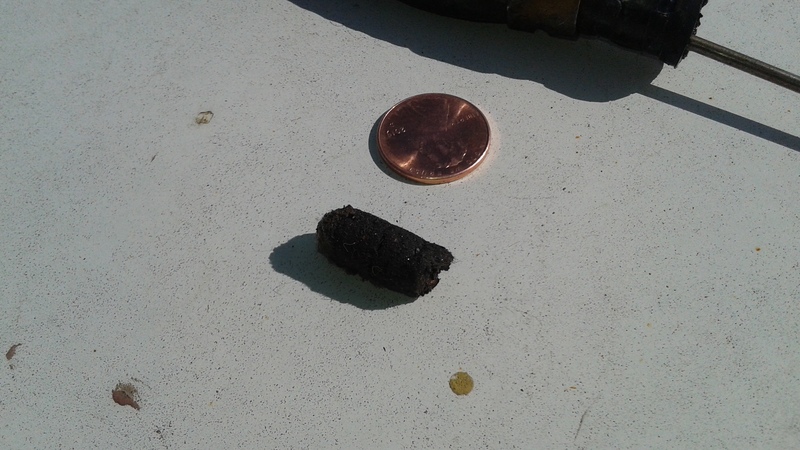
I punched the clog out with an old CB antenna through the coolant hose.
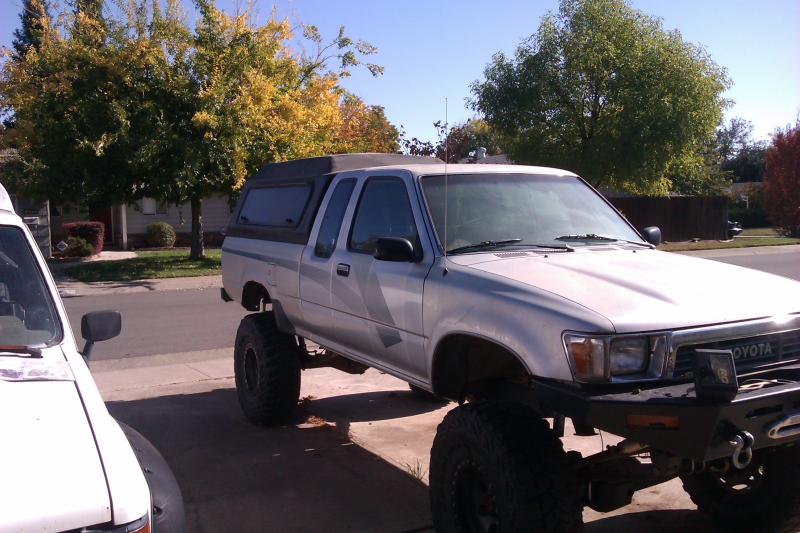
Here is a poser shot, I finally got too drive on to some dirt (my front yard ).
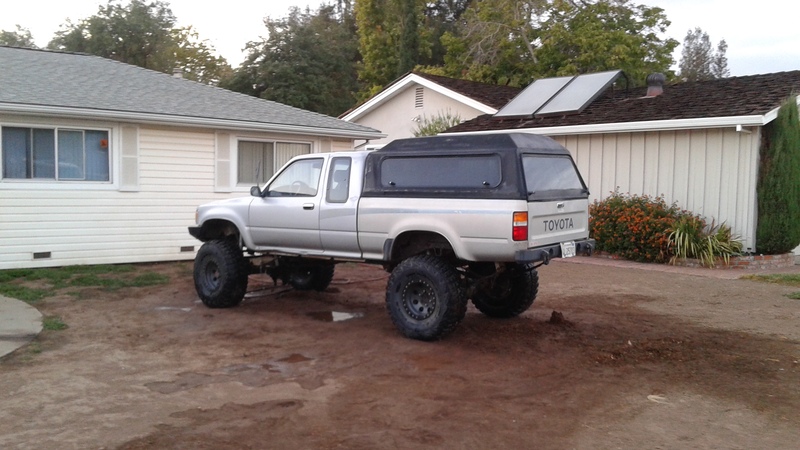
This is the first time the truck has moved since I bought it, and I decided to wash off all the dust that has accumulated over the past three years.
This past week I have the 89 all together, charged the battery, and cranked her over. I was super excited to hear it run again. But, there is a new problem now, the idle is high. I think its the idle air control valve, maybe there is an air pocket in the coolant line. I hope to narrow the issue down this weekend.
Once the high idle issue is solved I get insurance on her and go pass smog. I am damned ready to enjoy my investment.
I solved the high idle problem. Turns out the coolant hose that runs from the intake manifold to the Auxiliary Air Control Valve was clogged with what looked like felt. The clog felt like really compacted dryer-lint. The clog is next to the penny in the picture.
I punched the clog out with an old CB antenna through the coolant hose.
Here is a poser shot, I finally got too drive on to some dirt (my front yard ).
This is the first time the truck has moved since I bought it, and I decided to wash off all the dust that has accumulated over the past three years.
Last edited by dark_fairytales; 10-04-2015 at 10:25 PM.
10-05-2015, 08:35 AM
#377
Registered User
Thread Starter
Join Date: Oct 2008
Location: Sacramento, Crawlifonia
Posts: 1,621
Likes: 0
Received 7 Likes
on
4 Posts
Dang is right, it has been a long time coming, now just a few more steps and I can hit the road/ trail.
Update:
I moved the truck to the drive way and rotated the tires. I then put the truck in 4low and drove it down the street while riding the breaks too remove surface rust. During the rust removal the engine came up to temp and the engine was idling high again. I suspect there are more fibers in the coolant. I had no idea what the source of the fibers was, so I googled "fibers in coolant". Sure enough the fibers are from Bar's Leak (I did notice copper looking specs floating in the coolant yesterday ). This is frustrating, I now have to flush all this crap out of the engine, pull the thermostat, and remove the auxiliary air control valve. Then after I am sure the crap is all out, I get to check for leaky coolant system, which we all know is as much fun as getting a metal sliver in a finger.
Last edited by dark_fairytales; 10-05-2015 at 10:38 AM.
10-07-2015, 12:47 PM
#378
Super Moderator
Staff
iTrader: (1)
Join Date: Aug 2008
Location: Anderson Missouri
Posts: 11,787
Likes: 0
Received 25 Likes
on
22 Posts
I cleaned a motor out the sealant looked like rock salt. Surprised to see that Bars leak looked like foam. Great looking truck and great to see it moving under its own power.
10-07-2015, 10:12 PM
#379
Registered User
Thread Starter
Join Date: Oct 2008
Location: Sacramento, Crawlifonia
Posts: 1,621
Likes: 0
Received 7 Likes
on
4 Posts
Absolutely Terry, it does feel really great to be able to move it again.
This Saturday I will put it in the driveway to start the flushing session. I will pull all of the hoses checking for clogs, and replace any that may turn out to be gunked up.
Update 10/17/2015
I got the entire coolant system fully flushed. When I went to remove the throttle body I discovered a second clog in the coolant line in the same location as the first clog, but this time the clog was inside the auxiliary air control valve. I then proceeded to take the valve off of the throttle body and found soot and buildup from the stop leak crap that the PO had poured in.
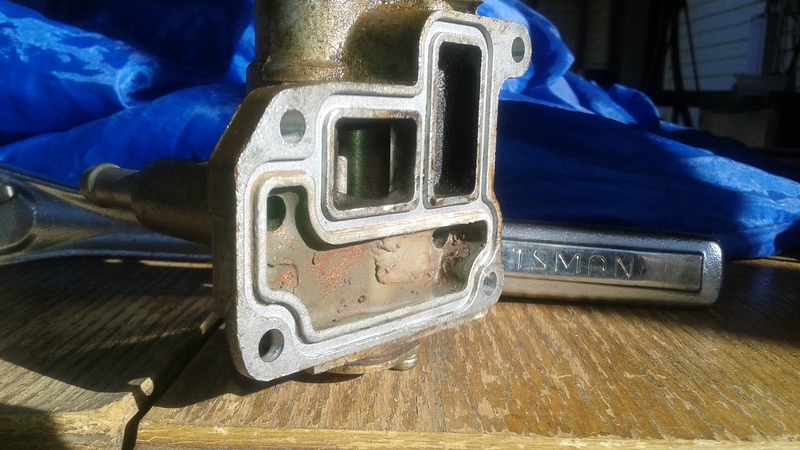
The buildup was thick enough that I could write my initials with a toothpick.

I decided to replace the phillips screw with 5mm hex head bolts with a thread pitch of .80 when installing the valve back onto the throttle body. The screws took on some damage during removal so I was not going to use stupid phillips screw again.
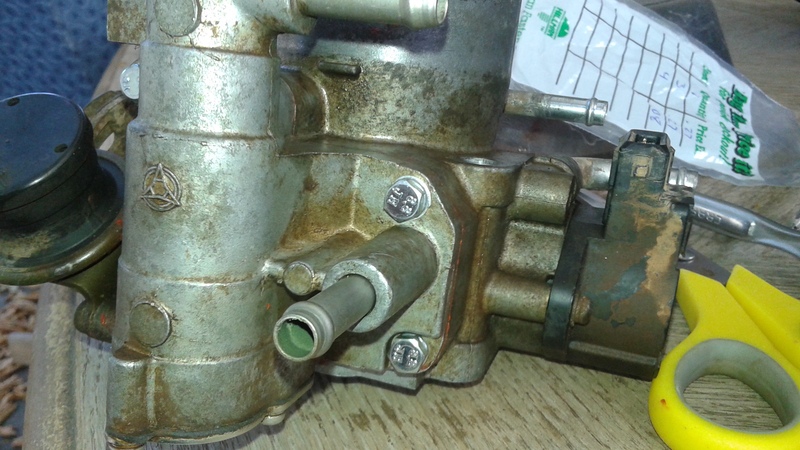
It is all together again and now idles perfect, O WHAT A FEELIN!!!
This Saturday I will put it in the driveway to start the flushing session. I will pull all of the hoses checking for clogs, and replace any that may turn out to be gunked up.
Update 10/17/2015
I got the entire coolant system fully flushed. When I went to remove the throttle body I discovered a second clog in the coolant line in the same location as the first clog, but this time the clog was inside the auxiliary air control valve. I then proceeded to take the valve off of the throttle body and found soot and buildup from the stop leak crap that the PO had poured in.
The buildup was thick enough that I could write my initials with a toothpick.
I decided to replace the phillips screw with 5mm hex head bolts with a thread pitch of .80 when installing the valve back onto the throttle body. The screws took on some damage during removal so I was not going to use stupid phillips screw again.
It is all together again and now idles perfect, O WHAT A FEELIN!!!
Last edited by dark_fairytales; 10-17-2015 at 10:18 AM.


