
coryc85's 1988 4Runner Build-Up Thread
 11-30-2013, 10:20 AM
#481
Registered User
i did thank you one thing ive wanted to do messy as it is is spray down the inside of the frame with used oil after a bath to get salt ect out but i dont have a sprayer able to handle it
 01-05-2014, 04:03 PM
#482
Registered User
Thread Starter
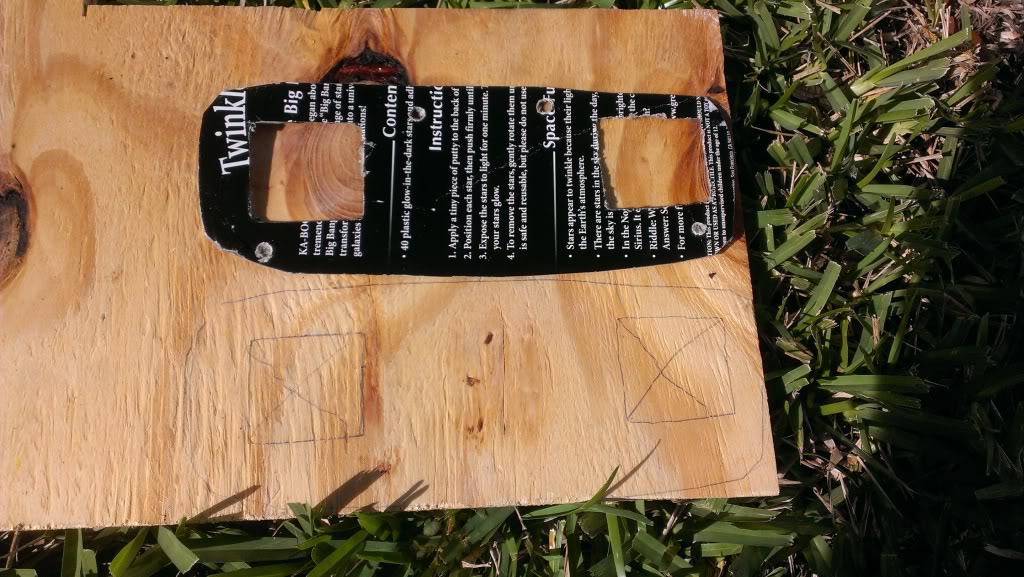
I was off work for 2 weeks and I finally managed to do one little project on my truck. I've been wanting to follow Bryan's steps here http://forum.ih8mud.com/79-95-toyota...n-project.html for some much needed interior lighting for a LOONG time. Nearly a year ago I bought the fancy rear view mirror/maplight combo from Chef and it's just been sitting there. I read thru Bryan's thread again, then went out there and tackled it. The first thing is that the square buckets on the back of the maplight will NOT fit up into the older 4Runners without either trimming the metal inner roof skin or making a spacer that is the thickness of the buckets. I looked at the roof skin and I decided to make a spacer. I had a piece of plywood that was perfect, I think it's 3/8" but not sure. First I made a cardboard template outline of the maplight. Then I transferred that over to the plywood.
I just sanded the edge and spray painted the spacer black. I also drilled the 3rd mounting hole just like Bryan did in his thread.
Next step is wiring. My dome light wires go into a connector right on the side of the fuse panel, so I unplugged it, pulled the little terminals out of the connector and soldered wire right onto the terminals and then shoved them back in.

I fed my wire down the A pillar trim and it popped out right between the dash and the front door and I could reach up under the dash and grab it and pull it in there. I pulled down the rubber headliner trim between the visor and the windshield and fed the other end of wire up through there and out the hole for the mirror.
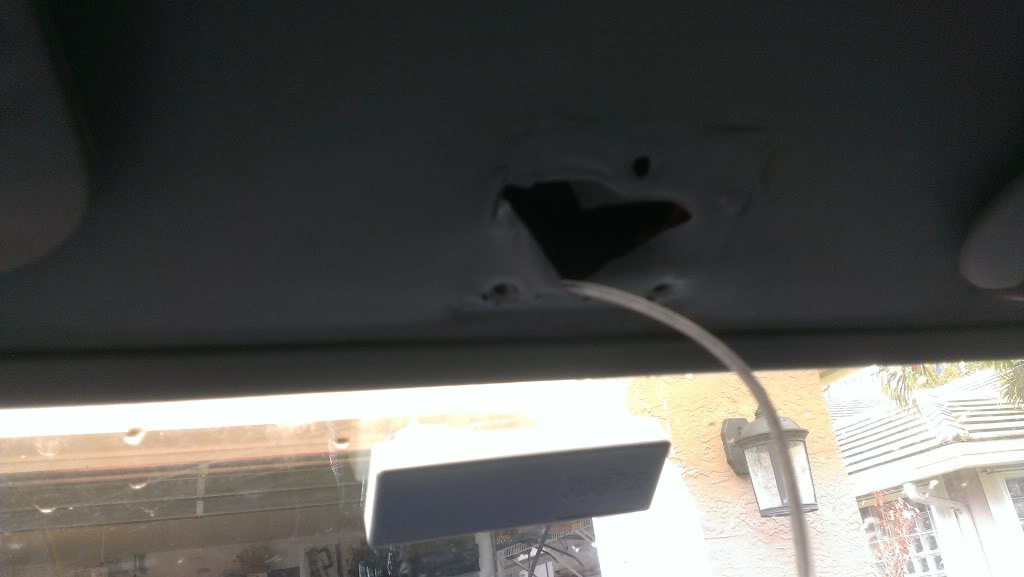
Soldered the maplight connector on there and done.
I did have to go get some longer M6 1.0 machine screws because of the spacer.
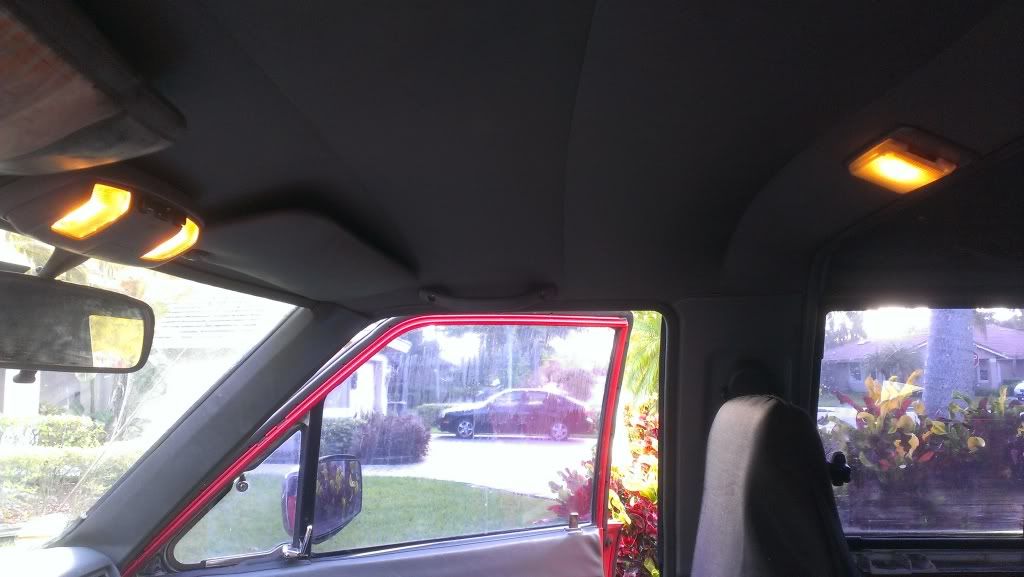
Next step is to get LED bulbs to really brighten up the cab and I'd like to follow Bryan's thread for cargo area lighting as well.
I just sanded the edge and spray painted the spacer black. I also drilled the 3rd mounting hole just like Bryan did in his thread.
Next step is wiring. My dome light wires go into a connector right on the side of the fuse panel, so I unplugged it, pulled the little terminals out of the connector and soldered wire right onto the terminals and then shoved them back in.
I fed my wire down the A pillar trim and it popped out right between the dash and the front door and I could reach up under the dash and grab it and pull it in there. I pulled down the rubber headliner trim between the visor and the windshield and fed the other end of wire up through there and out the hole for the mirror.
Soldered the maplight connector on there and done.
I did have to go get some longer M6 1.0 machine screws because of the spacer.
Next step is to get LED bulbs to really brighten up the cab and I'd like to follow Bryan's thread for cargo area lighting as well.
01-05-2014, 11:25 PM
#485
Super Moderator
Staff
iTrader: (1)
Join Date: Aug 2008
Location: Anderson Missouri
Posts: 11,788
Likes: 0
Received 25 Likes
on
22 Posts
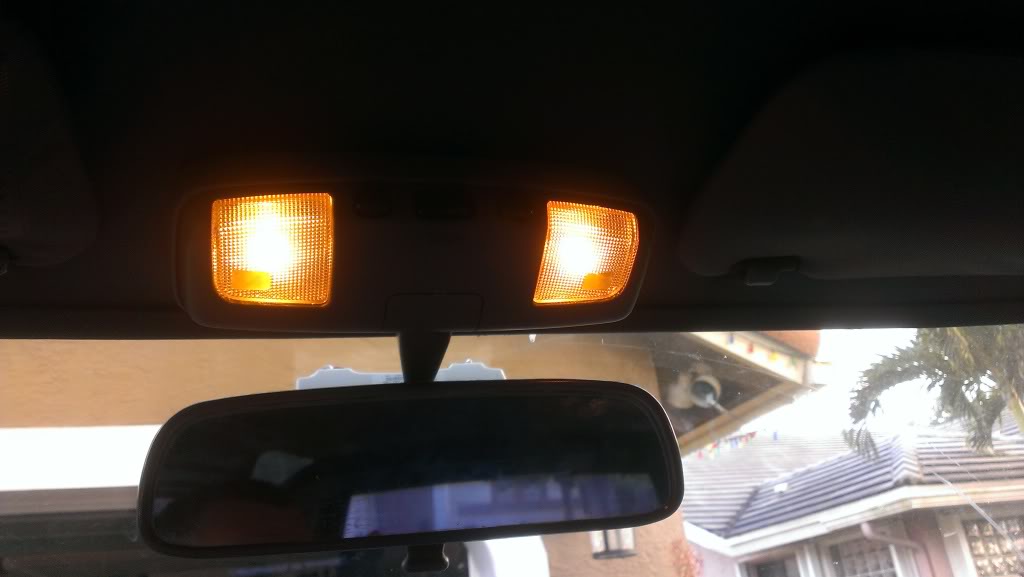
The extra light up front makes a big difference and that is a much better setup then what came from the factory. The dome light in back just isn't enough. Looks great.
01-06-2014, 04:41 AM
#486
Registered User
Thread Starter
Thanks Twisted!
Terry - yeah very weak lighting from the factory. From what I see in Bryan and Chef's threads, adding these lights plus changing to LEDs makes a huge difference.
01-06-2014, 06:09 AM
#487
Registered User
Thread Starter
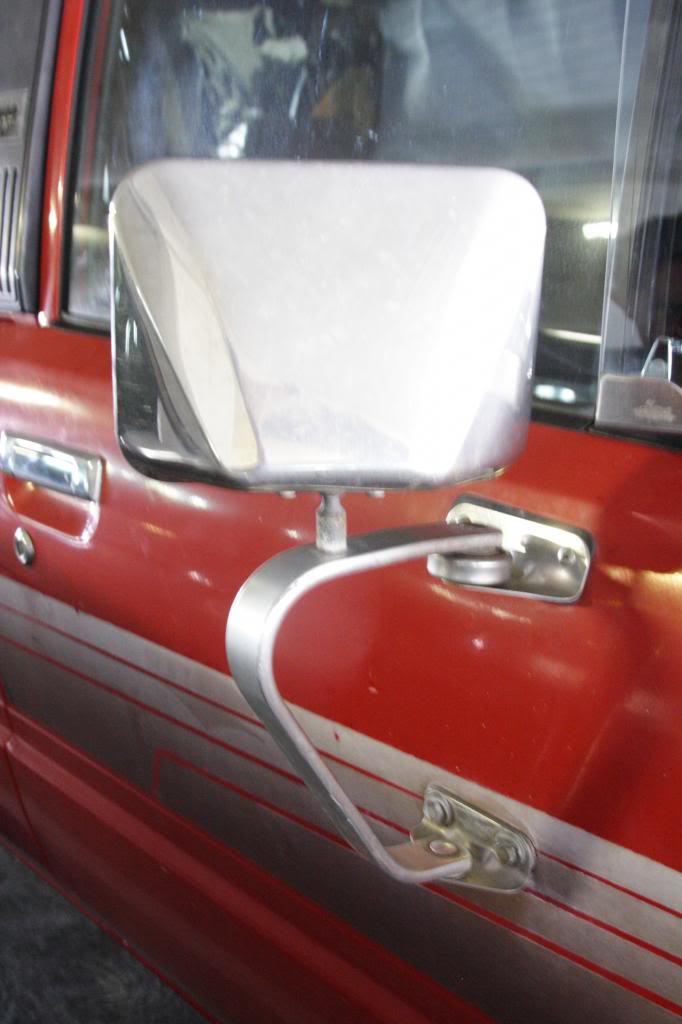
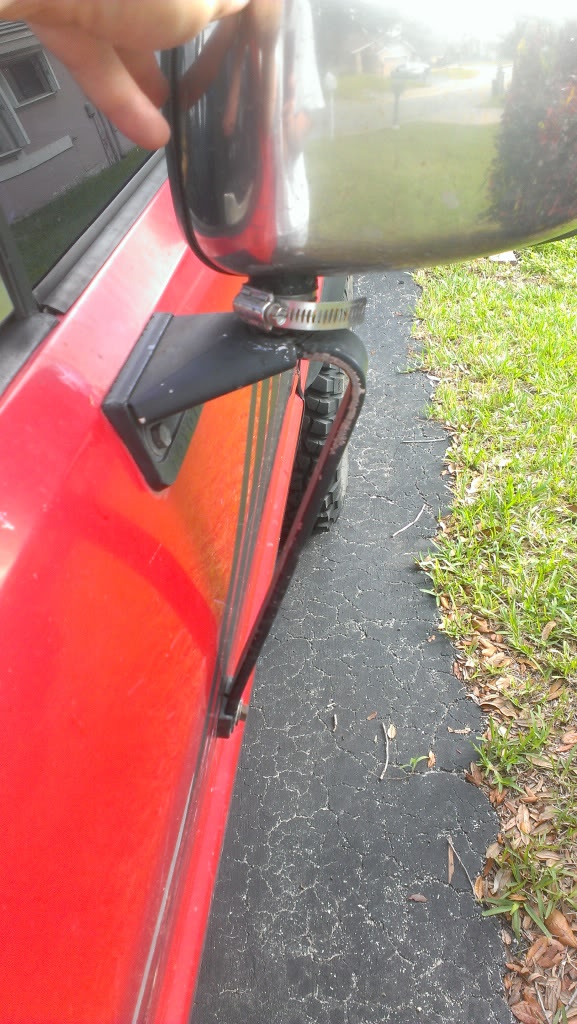
I guess I am on a mirror kick lately. I have what I think are the towing style side mirrors:

You can see that I have a hose clamp around the stem of the mirror. The driver side mirror has always been a bit floppy. The PO put a screw through the plastic stem, but I don't think it went into the inner metal core, so it was doing nothing. I took the screw out and the plastic was cracked and finally it started to crumble. This hose clamp is my attempt to keep it together, but now it is REALLY flopppy, basically useless right now.
I really need a new plastic stem I guess, but even then I really don't see what keeps the inner metal core from rotating (other than tightening down the screw up thru the base). Trying to decide if I should make one out of a wooden down. Just drill a hole in the dowel and push that metal core up through it.
Last edited by coryc85; 01-06-2014 at 06:20 AM.
01-06-2014, 08:05 AM
#488
01-06-2014, 09:20 AM
#489
Registered User
Thread Starter
Oh and when you say your mirrors are all metal, do you mean even the part that my hose clamp is around in the above picture?
Last edited by coryc85; 01-06-2014 at 09:21 AM.
01-19-2014, 11:48 AM
#490
Yes (I guess there are so many variations among the trims of the Pick-up and 4Runners). Mine looks like this.
Stem that holds mirror on bracket is metal

... and I do not see evidence on door mounting that anything has been modified.
AND thank you very much for thinking of me Re: Wiper arm tip. However, I'd like to research some more and see if I can find one from a newer generation (fatigue/exposure to the elements) that would fit
01-26-2014, 12:54 AM
#491
Super Moderator
Staff
iTrader: (1)
Join Date: Aug 2008
Location: Anderson Missouri
Posts: 11,788
Likes: 0
Received 25 Likes
on
22 Posts
I intentionally installed the doors for this type of mirror just for the purpose of towing on my 86 runner. I had a set on my 2wd and now the brackets are hard to find. Kind of regretting that decision now. Some will eventually pop up but they are slow to find. I have heard of using a Fords truck mirror on the bracket but have never tried it myself.
01-28-2014, 06:31 AM
#492
Registered User
Thread Starter
Hi Cory,
Yes (I guess there are so many variations among the trims of the Pick-up and 4Runners). Mine looks like this.
Stem that holds mirror on bracket is metal
... and I do not see evidence on door mounting that anything has been modified.
AND thank you very much for thinking of me Re: Wiper arm tip. However, I'd like to research some more and see if I can find one from a newer generation (fatigue/exposure to the elements) that would fit
I intentionally installed the doors for this type of mirror just for the purpose of towing on my 86 runner. I had a set on my 2wd and now the brackets are hard to find. Kind of regretting that decision now. Some will eventually pop up but they are slow to find. I have heard of using a Fords truck mirror on the bracket but have never tried it myself.
02-03-2014, 05:07 AM
#493
Registered User
Thread Starter
Decided to take both mirrors off the truck and get a look at the parts to see why the driver side is so floppy.
3 12mm bolts hold the mirror arm onto the door, and then you need a Torx T40 bit to get the bolt out that holds the mirror onto the arm.
Here are the driver and pass side plastic stems side by side. You can see that the one on the right is cracked and has some holes drilled by the PO.
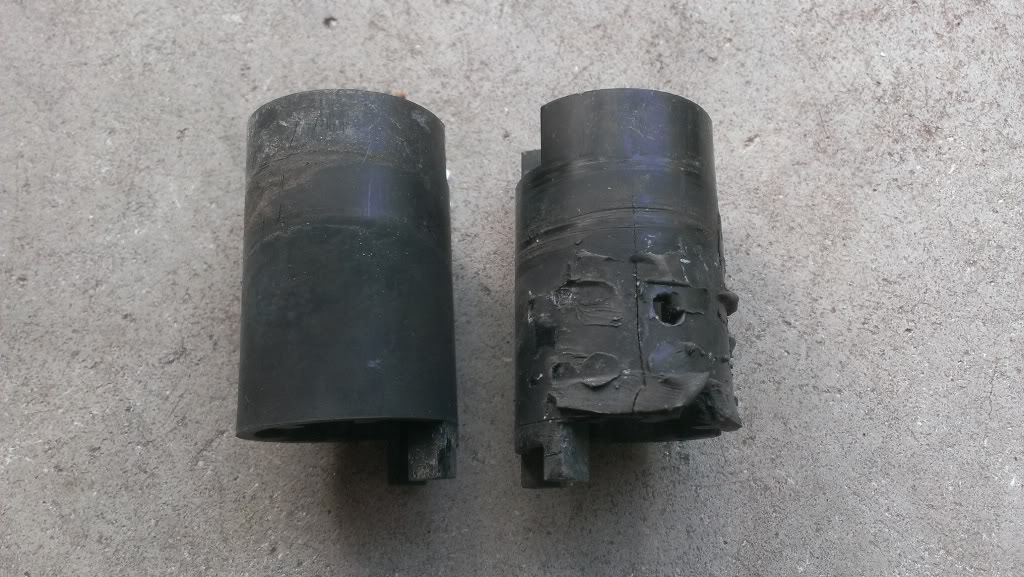
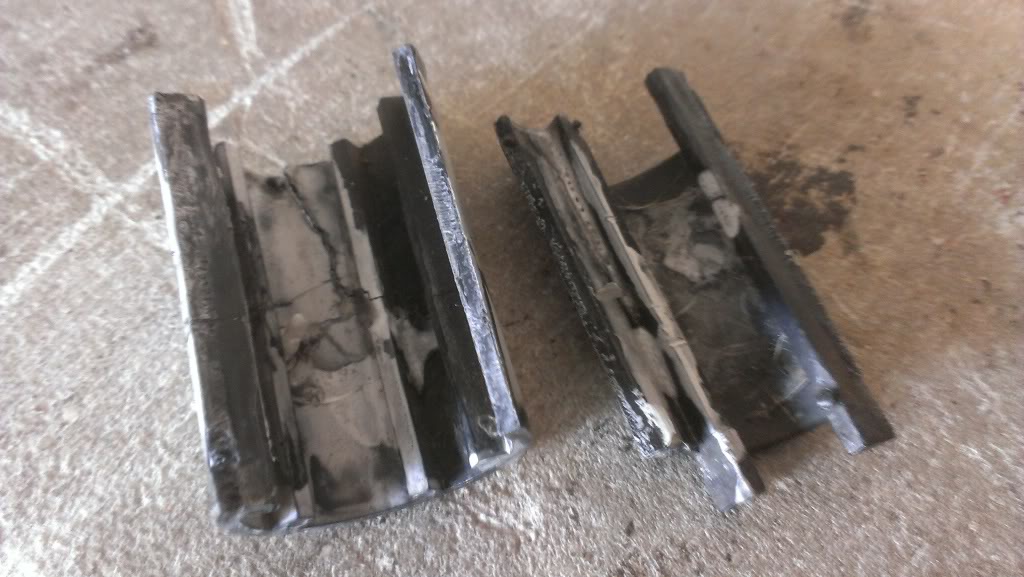
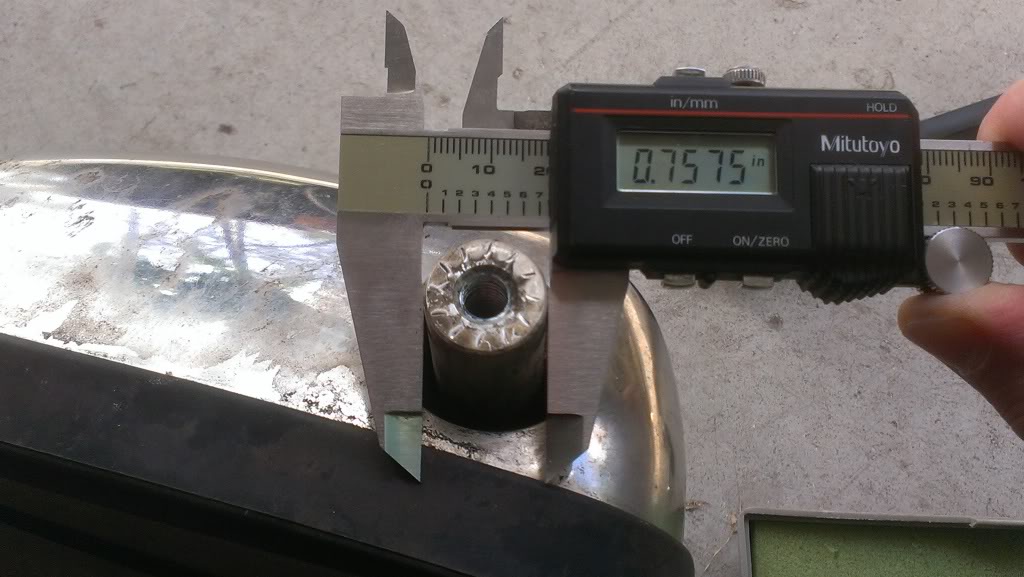
Here is a closeup of how the plastic sleeve has some little tabs that go into a pie shaped cutout in the arm bracket. I guess this keeps the plastic stem from turning.

And here is the plastic sleeve slides onto the inner metal stem. From what I can see, nothing actually prevents the metal stem from turning against the plastic sleeve, other than tightening down the Torx bolt as much as possible.

There is a lock washer that sits between the metal stem and the mirror bracket that has teeth on it, I suppose by cranking down on that Torx bolt, it will keep the metal stem from turning...maybe the plastic sleeve is just for some wider support...I don't really know.
I'm going to see if it's made of ABS plastic, if so I can use MEK to glue it, and I have some small ABS beads that I can dissolve in the MEK to make some paste to help hold it together better. I'll give that a try since I have everything.
3 12mm bolts hold the mirror arm onto the door, and then you need a Torx T40 bit to get the bolt out that holds the mirror onto the arm.
Here are the driver and pass side plastic stems side by side. You can see that the one on the right is cracked and has some holes drilled by the PO.
Here is a closeup of how the plastic sleeve has some little tabs that go into a pie shaped cutout in the arm bracket. I guess this keeps the plastic stem from turning.
And here is the plastic sleeve slides onto the inner metal stem. From what I can see, nothing actually prevents the metal stem from turning against the plastic sleeve, other than tightening down the Torx bolt as much as possible.
There is a lock washer that sits between the metal stem and the mirror bracket that has teeth on it, I suppose by cranking down on that Torx bolt, it will keep the metal stem from turning...maybe the plastic sleeve is just for some wider support...I don't really know.
I'm going to see if it's made of ABS plastic, if so I can use MEK to glue it, and I have some small ABS beads that I can dissolve in the MEK to make some paste to help hold it together better. I'll give that a try since I have everything.
02-03-2014, 09:44 AM
#494
High tech mirror repair! Lol... I need to do mine... Of course, its 20 years older at least..., but the bottom line is that mine is sloppy and I have very tight donor housing. I have begun to really plant roots in the habit of not slamming the driver door! It makes a huge huge huge difference in how quickly my power mirror(at least in my era of power mirrors)... grows floppy. Haha
02-03-2014, 10:01 AM
#495
Registered User
Thread Starter
Mark - it's really amazing how something so simple as a floppy mirror can cause such headaches.
Cyberjunk gave me a great idea to make a new piece out of a "polytetrafluoroethylene rod" as he put it. Some kind of plastic, which they do surprisingly sell on Amazon. I think that's a fantastic idea, but I want to first try to fix mine with MEK and the dissolved ABS. If I was one of those guys with a lathe and some real machining skills I'd probably whip up a new one real quick...but I'm not. Anything I do will be a lot of hand cutting, drilling, and sanding/filing to get it shaped right.
Cyberjunk gave me a great idea to make a new piece out of a "polytetrafluoroethylene rod" as he put it. Some kind of plastic, which they do surprisingly sell on Amazon. I think that's a fantastic idea, but I want to first try to fix mine with MEK and the dissolved ABS. If I was one of those guys with a lathe and some real machining skills I'd probably whip up a new one real quick...but I'm not. Anything I do will be a lot of hand cutting, drilling, and sanding/filing to get it shaped right.
02-07-2014, 09:18 AM
#496
Super Moderator
Staff
iTrader: (1)
Join Date: Aug 2008
Location: Anderson Missouri
Posts: 11,788
Likes: 0
Received 25 Likes
on
22 Posts
Like Mark said about slamming doors. One of my pet peeves. It is not only hard on mirrors but hinges and latches. I had a truck for 20 years and my third gen doors still open and close like new.
As soon as I can find the same mirror brackets as yours, I am going to have to find a way to make them work most likely and will follow your lead.
As soon as I can find the same mirror brackets as yours, I am going to have to find a way to make them work most likely and will follow your lead.
02-07-2014, 09:45 AM
#497
Cory,
I hope you could find an all-metal one like on mine. I guess that's one thing we Yota brothers should all be looking for at the yard. Too bad, the junkyards are 45-minute drive from me

Anger management tool. Still cheaper than going to the shrink - LOL!
Last edited by RAD4Runner; 02-07-2014 at 09:46 AM.
02-09-2014, 07:11 AM
#498
Registered User
Thread Starter
Ray - yeah that MEK stinks...maybe a good thing, but I could not find my can anywhere. So I used Acetone to dissolve the ABS pellets....and it did not work:
I don't think the thing is made of ABS, my dissolved ABS did not stick very well it. After it dried, I tugged on it and it broke in half...oh well. This old plastic is so brittle. So my next step is to get some Delrin or that poly rod that junk4u told me about.
The original piece is roughly 1.25 inches in diameter
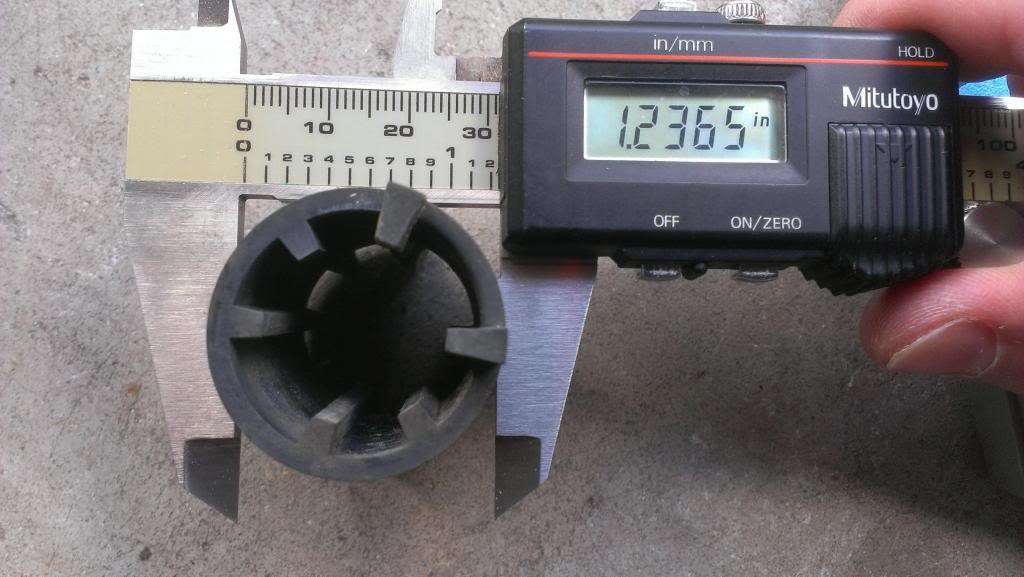
And I'll have to drill a 3/4" hole in it to fit onto the mirror shaft.
I did go ahead and paint the arms and bracketry so I can at least put back one of the mirrors for now.

I don't think the thing is made of ABS, my dissolved ABS did not stick very well it. After it dried, I tugged on it and it broke in half...oh well. This old plastic is so brittle. So my next step is to get some Delrin or that poly rod that junk4u told me about.
The original piece is roughly 1.25 inches in diameter
And I'll have to drill a 3/4" hole in it to fit onto the mirror shaft.
I did go ahead and paint the arms and bracketry so I can at least put back one of the mirrors for now.
02-11-2014, 11:58 PM
#499
Super Moderator
Staff
iTrader: (1)
Join Date: Aug 2008
Location: Anderson Missouri
Posts: 11,788
Likes: 0
Received 25 Likes
on
22 Posts
I responded to your PM, just wanting to make sure it went thru. I think your part of the country and the west coast is about the only part of the country that isn't froze out. The build threads have slowed down. Was out in shop for a minute and that was enough for me. It was cold!!!
03-19-2014, 05:50 PM
#500
Registered User
Thread Starter
Not a lot to report, but a few weeks ago I ordered a 1ft long, 1.25in diameter Delrin rod from Amazon. It was like $10. I took it out in the garage and cut off a piece with the hacksaw that is the right length for the plastic mirror support piece. Next I drilled a pilot hole, then a larger hole (45/64ths) in the piece. I really needed the hole to be 3/4", but I did not have a drill bit that size. I want a tight fit anyway, so I'm going to work the hole with a round file to open it up a bit so it will slide onto the metal shaft of the mirror.
Here is the piece of Delrin with the hole drilled
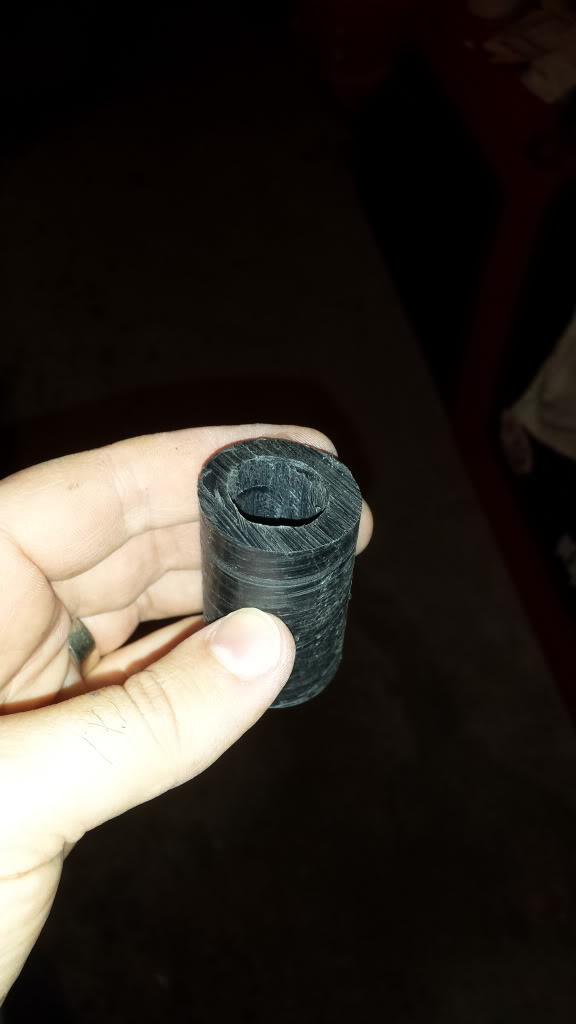
So I need to open the hole up a bit to fit onto the mirror stem, and then trim one end of it to have the moon shaped tab that sits in the metal mirror bracket. I think this is going to work to be a suitable replacement for the brittle plastic piece.
On a side note, I took the top off the Runner a few weeks ago and I've been keeping it in the garage to keep it dry. It was a beautiful day here on Saturday, so we installed the car seats and took both boys out for lunch in the truck.

Here is the piece of Delrin with the hole drilled
So I need to open the hole up a bit to fit onto the mirror stem, and then trim one end of it to have the moon shaped tab that sits in the metal mirror bracket. I think this is going to work to be a suitable replacement for the brittle plastic piece.
On a side note, I took the top off the Runner a few weeks ago and I've been keeping it in the garage to keep it dry. It was a beautiful day here on Saturday, so we installed the car seats and took both boys out for lunch in the truck.


