
coryc85's 1988 4Runner Build-Up Thread
 10-26-2013, 02:08 PM
#461
Registered User
Thread Starter
Terry - thank you for the offer. It's not all that hard to disassemble the case...the link to Marlin's instructions are here http://www.marlincrawler.com/tech/gu...1-gear-install
Right around step 30 is where you are getting to the hi/lo shift rail. I'm exploring every avenue to get one, including possibly getting one from a dealer, but the part might be not available. If you can get it out, I would appreciate it, if it's a lot of trouble then don't even worry about it, I'll find one somewhere.
Right around step 30 is where you are getting to the hi/lo shift rail. I'm exploring every avenue to get one, including possibly getting one from a dealer, but the part might be not available. If you can get it out, I would appreciate it, if it's a lot of trouble then don't even worry about it, I'll find one somewhere.
 10-26-2013, 02:43 PM
#462
Terry - thank you for the offer. It's not all that hard to disassemble the case...the link to Marlin's instructions are here http://www.marlincrawler.com/tech/gu...1-gear-install
Right around step 30 is where you are getting to the hi/lo shift rail. I'm exploring every avenue to get one, including possibly getting one from a dealer, but the part might be not available. If you can get it out, I would appreciate it, if it's a lot of trouble then don't even worry about it, I'll find one somewhere.
Right around step 30 is where you are getting to the hi/lo shift rail. I'm exploring every avenue to get one, including possibly getting one from a dealer, but the part might be not available. If you can get it out, I would appreciate it, if it's a lot of trouble then don't even worry about it, I'll find one somewhere.
10-26-2013, 05:09 PM
#463
Registered User
Thread Starter

Last edited by coryc85; 10-26-2013 at 05:15 PM.
10-26-2013, 06:14 PM
#464
Registered User
what model of trans do you have cory?
i have a shifter seat an ball that martin crawler sent me by mistake an said to give to a friend dont worry bout returning it
so ive got the white seat if it'll fit its yours let me know
i have a shifter seat an ball that martin crawler sent me by mistake an said to give to a friend dont worry bout returning it
so ive got the white seat if it'll fit its yours let me know
10-27-2013, 05:59 PM
#465
Registered User
Thread Starter

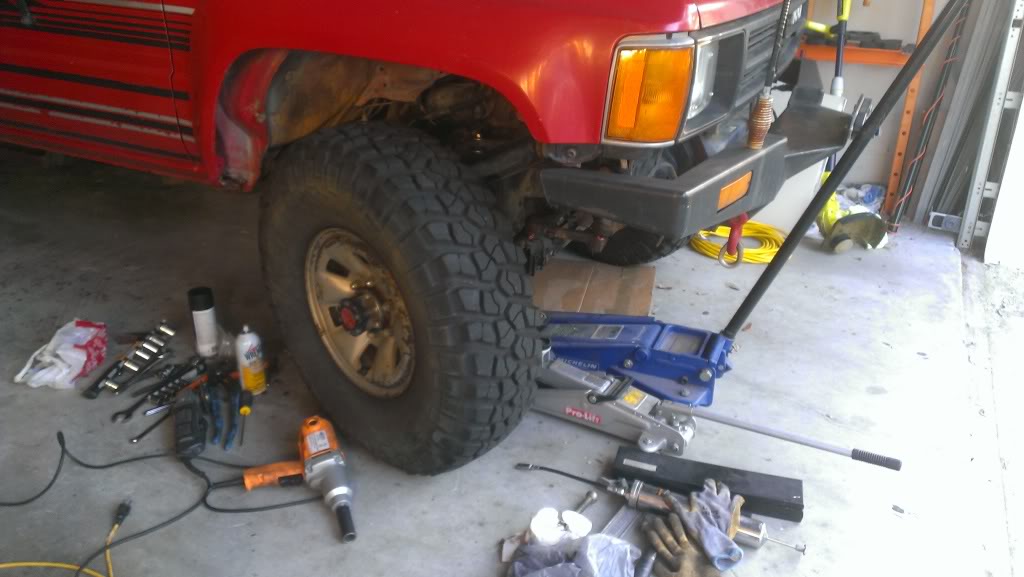
Started installing my BJ spacers today. My balljoints themselves are not that old, so I won't be changing them at this time. I did grease the upper and lower joints after I installed the spacer.
Here is the pass side with the ball joint unbolted from the UCA.
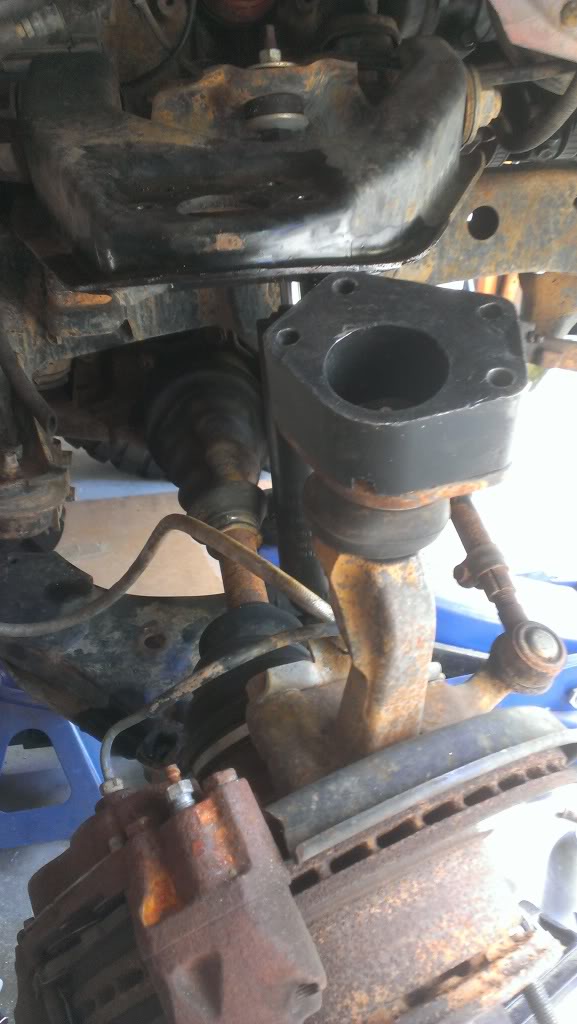
I used a big socket between the bumpstop and the UCA to keep the arm up.

Here it is fitted in there after trimming the lip.

And wheel back on. I turned the wheel like that so I could grease the lower balljoint.
I'll get to the driver side one day this week.
10-28-2013, 09:08 AM
#467
Registered User
Thread Starter
I have locked up W56 tcase. Probably the same case you have. Let me see if I can find where I have it at and can get the part out of it. Is it something I could get out with basic tools? I have never been into one and practicing on it is the reason I kept it and for parts as well. Just have not gotten around to taking it apart.
11-01-2013, 07:33 AM
#468
Registered User
Thread Starter
Well, finally found a hi/lo shift rail from a guy on the Marlin Crawler forum...he is shipping it on Monday. It is a rail from a forward shift case, so I have to cut the front end of it off to fit in my top shift case...
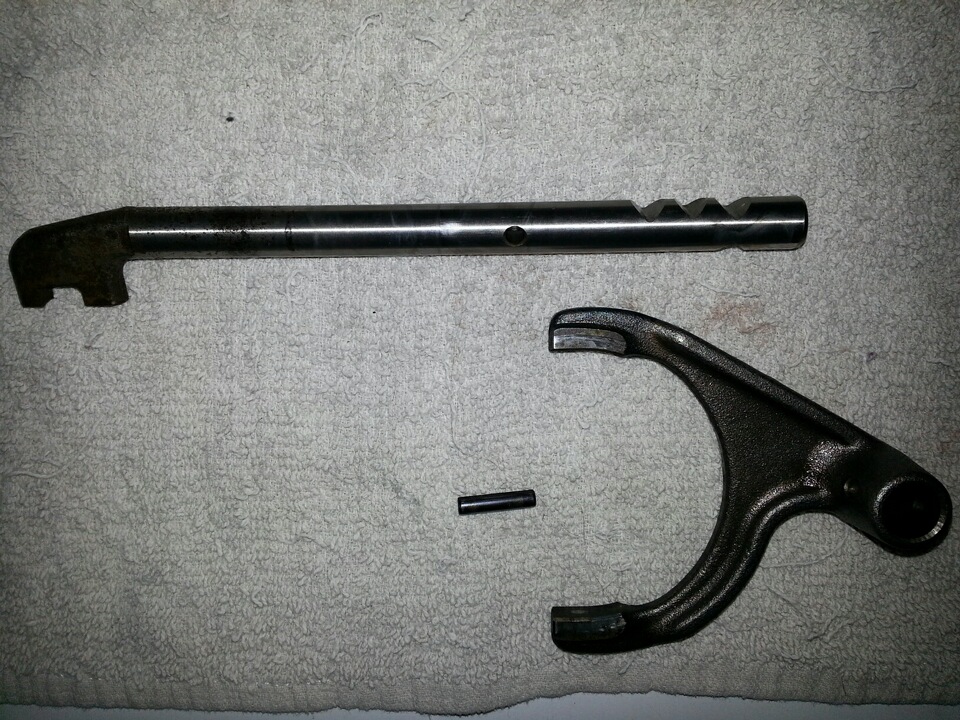
And here is a pic from someone on the web showing how to cut it....since I already have the correct shift fork I won't need to cut that little notched section off for the shifter.
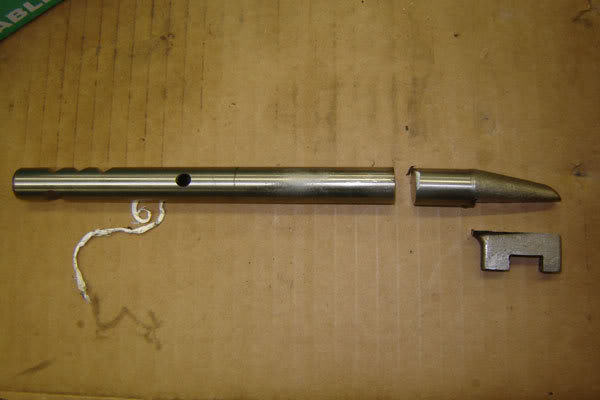
If I get the rail next week, I should be able to get the case together in time to install it for my trip to Ocala.
And here is a pic from someone on the web showing how to cut it....since I already have the correct shift fork I won't need to cut that little notched section off for the shifter.
If I get the rail next week, I should be able to get the case together in time to install it for my trip to Ocala.
11-03-2013, 11:33 AM
#470
Registered User
Thread Starter
Thanks Chef.
Looong morning in the garage. I finished up the driver side BJ spacer, and wow what a pain. I thought it would be much easier since I had already done the passenger side. I undid the 4 nuts from the ball joint, removed the joint from the upper arm, used my C clamp and a socket to press the studs out of the ball joint. Then I cut the back of the opening to fit the spacer. All that went great. Then I think the CV shaft was binding, keeping me from pushing the spindle back up in there. I fought for a while with that, then decided to remove the diff end of the CV shaft. I did that, and really it wasn't much easier, but I finally managed to wrangle the bj and spacer back up into the A arm and bolt it on. Then I spent a long time prying and jacking on the end of the CV shaft to get it back onto the diff flange. Thank god my studs were long ago removed and converted to bolts. I got it all back together, all my greasable points on the front end are greased. I just want to change my oil and I'll be just about ready for the trip.
I should be getting that shift rail later on this week, and had to order 2 shifter springs and a detent ball as well since I'm missing those parts. It's getting down to the wire on whether or not this tcase will be ready to install before I leave.
11-03-2013, 11:59 PM
#471
Registered User
Join Date: Oct 2011
Location: Meridian,MS
Posts: 23
Likes: 0
Received 0 Likes
on
0 Posts
coryc you have an amazing runner man!!! I just read through your whole thread and it's definitely inspiring to get out there and do the work on my runner for sure! keep up the great work and pics!
11-04-2013, 04:48 AM
#472
Registered User
Thread Starter
Thanks Dirty. I wouldn't use the word amazing to describe my truck, but I do love it. As with most people here on Yotatech, I have spent countless hours working on the truck, and who knows how much money on upgrades and replacement parts...and it still looks kindof beat up. Welcome to Yotatech, look forward to seeing some posts on your truck.
11-04-2013, 11:16 AM
#474
Registered User
Join Date: Oct 2011
Location: Meridian,MS
Posts: 23
Likes: 0
Received 0 Likes
on
0 Posts
Yeah, well I think I'm gonna sell my runner and find another one in better shape that I can already be driving....I just don't have alot of time right now to build the bottom end and get it road worthy
11-12-2013, 06:58 AM
#475
Registered User
Thread Starter
So, one thing you absolutely have to do after installing BJ spacers is an alignment. I had some major \ / camber after the spacers were installed.
Step 1 was to adjust the torsion bars to set the height where you want it. These are my initial measurements from 2 years ago...
Doing some reading on the BJ spacers, so I went out and measured my fenders before I start the install:
Front Rim to Fender Measurements:
Pass: 13.25"
Driver: 13.625"
Rear Rim to Fender Measurents:
Pass: 11.75"
Driver: 11.625"
I read that factory height is between 13.5 and 14", so my truck is right in there, although I've got a little side to side variance that I will adjust out. I'm shooting for an inch of lift, so I'll probably relax the tbars a bit once I get the spacers in. A good link on adjusting the tbars is http://www.off-road.com/trucks-4x4/t...ent-19258.html
Using Matt16's great alignment writeup https://www.yotatech.com/forums/f116...ite-up-163432/
I first pushed the rear cam bolt way out to give me lots of caster. Then I jacked the front crossmember up close to the lower control arm to get one tire mostly off the ground. This made it easier to adjust the front cam bolt to set the camber. I used a carpenters square and just measured from the square to the rim. My method was to adjust the cam, lower the jack to put the weight on the tire, check for vertical camber, jack up and readjust, lower and recheck until I got nearly vertical. Did that on both sides. Here you can kindof see how the rear cam is facing and the front cam.

Once the camber and caster were set, I then set the toe with the string method described in Matt's writeup. Loosened the tie rod adjusters and turned them until my front wheels were within 1/8" of toe in.
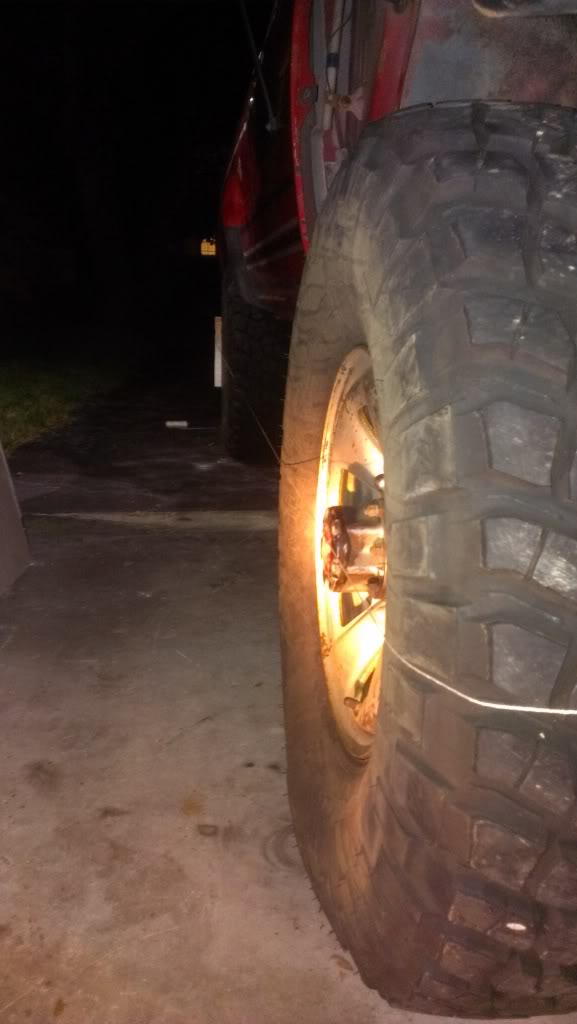
Drove the truck to work today, and it feels pretty good. The steering wheel is about a half a degree to the right, almost negligible, but I notice it. I might check the camber and the toe again before my trip on the 15th.
11-14-2013, 05:10 AM
#476
Registered User
Thread Starter
While doing all this work under the front end of the truck, I noticed an oil leak from the crank seal area...
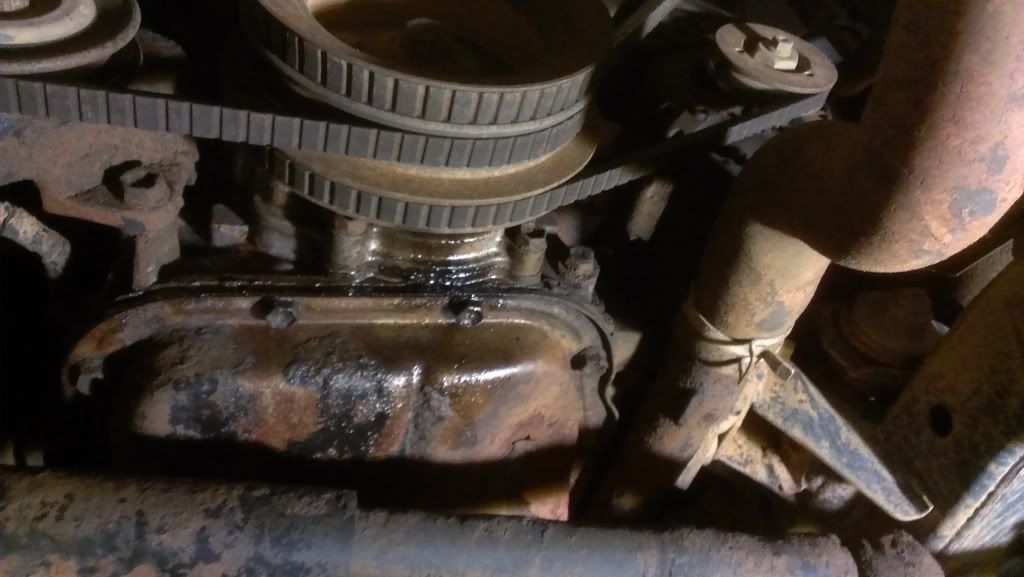
I have changed this seal, probably 3 years ago and not that many miles 15k at the most. But I did use a speedi sleeve at that time. Anyhow, I have another crank seal and oil pump gasket in the garage, so I decided to fix this oil leak. It's only about a 20 minute job to get the oil pump off.
Here is a pic of the crank pulley after I knocked the old speedi sleeve off and hit it with some 150 sandpaper. The groove is still pretty noticeable.
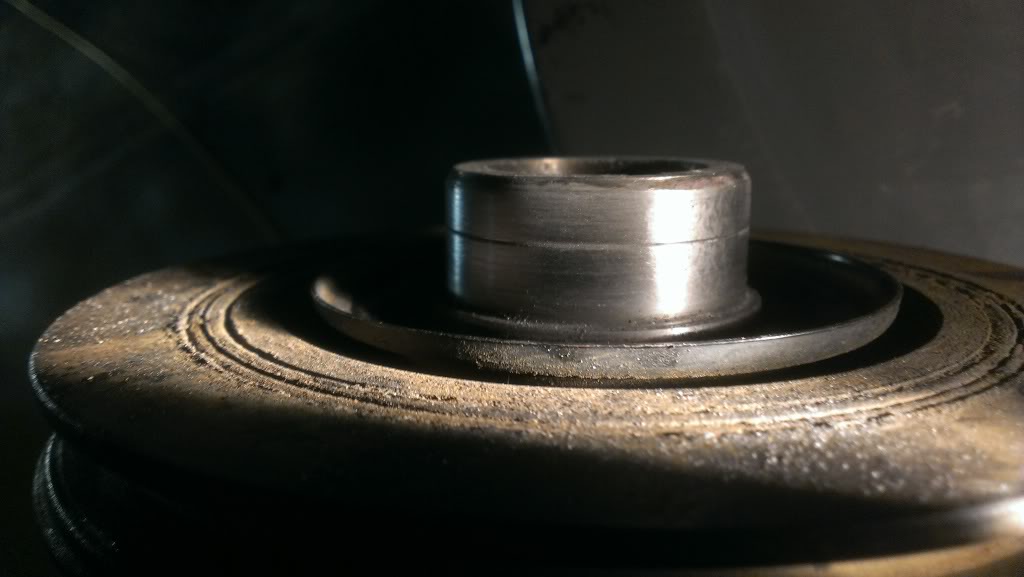
I found this post on pirate from Marlin Crawler himself talking about sanding the back edge of the crank seal to let it sit deeper in the oil pump housing and putting the seal in a different spot on the crank pulley, so I used 80 grit sandpaper and sanded the seal down on the back until the metal edge was exposed.
I did not finish putting it all back together, but I will do that tonight. I will put some vaseline in the pump, put grease on the lip of the seal, install fresh oil pump gasket and hopefully no more leaking.
I have changed this seal, probably 3 years ago and not that many miles 15k at the most. But I did use a speedi sleeve at that time. Anyhow, I have another crank seal and oil pump gasket in the garage, so I decided to fix this oil leak. It's only about a 20 minute job to get the oil pump off.
Here is a pic of the crank pulley after I knocked the old speedi sleeve off and hit it with some 150 sandpaper. The groove is still pretty noticeable.
I found this post on pirate from Marlin Crawler himself talking about sanding the back edge of the crank seal to let it sit deeper in the oil pump housing and putting the seal in a different spot on the crank pulley, so I used 80 grit sandpaper and sanded the seal down on the back until the metal edge was exposed.
I did not finish putting it all back together, but I will do that tonight. I will put some vaseline in the pump, put grease on the lip of the seal, install fresh oil pump gasket and hopefully no more leaking.
11-25-2013, 10:13 AM
#478
Registered User
Thread Starter
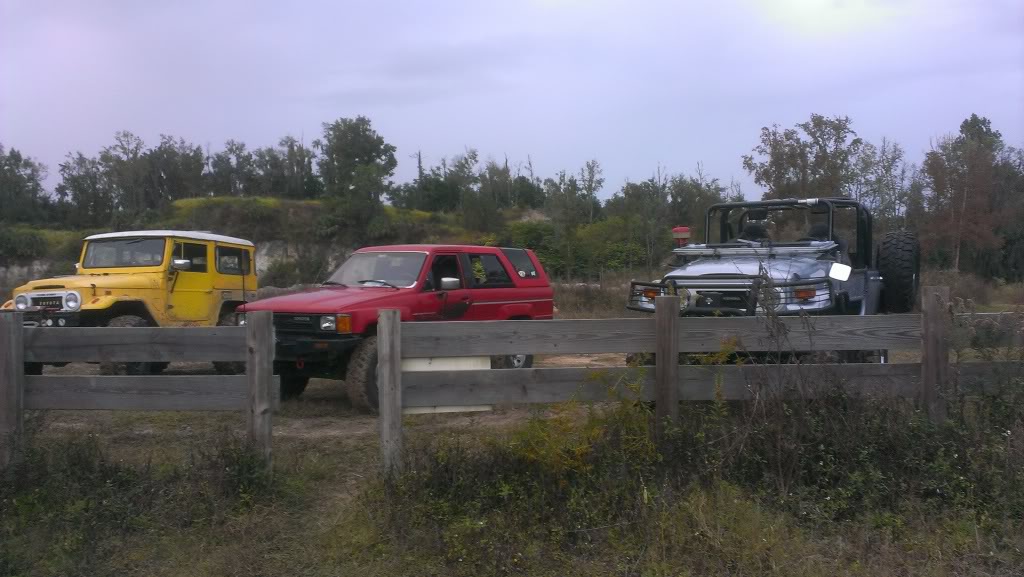
Well, I got back last night from HardRock Cycle Park in Ocala. I met up with the FLCA and had a great time, that park is a lot of fun.
My truck did fine, both on the 5 hour highway drive up there and off roading. There was one hill I could not climb. I got to the super steep part and just spun the tires in 1st gear low range, tried it again in 2nd gear and just did not have the power to muscle the truck up. Since I did not get my 4.7 gears into that case I wasn't able to try them out, I'm wondering if that would have helped. Several inclines when I went down in 1st gear low, the truck was accelerating and I had to use some braking. I would have really enjoyed having the 4.7s to control that better. Also, these guys got me really thinking hard about putting an Aussie or some other lunchbox locker up front.
Last week I ran across a killer deal on a Budbuilt single case crossmember and it was waiting for me when I got back last night, so I'll put up some pics of that soon. The 4.7s will be going in soon along with the budbuilt.
My engine leak seems to be sealed up pretty good, so I'm happy for now. Oh, the truck got a tad over 20mpg on the way up to Ocala, so that's awesome.
11-30-2013, 07:42 AM
#480
Registered User
Thread Starter
Thanks kornhusker...I was pretty happy with the results, it drives pretty good.
Haven't done anything since the trip, just hosed the truck down to get all the sand and dirt off. Hopefully I will get a chance over the holidays to get a few little things done.
Hope everyone had a good Thanksgiving.
Haven't done anything since the trip, just hosed the truck down to get all the sand and dirt off. Hopefully I will get a chance over the holidays to get a few little things done.
Hope everyone had a good Thanksgiving.


