
coryc85's 1988 4Runner Build-Up Thread
 08-29-2013, 03:14 PM
#441
Registered User
Thread Starter
yes, you can get an all-metal radiator online for a bit more than fixing the old one. i got mine from radiator barn, but they're out of business now.
here's a thread with a bunch of good info and some good links to other shops
https://www.yotatech.com/forums/f116...83/index2.html
whatever you do, don't get a plastic-metal rad. they suck.
the fan should do okay* with the stock alternator, but i would definitely upgrade the wiring from a) the alt to batt, b) the engine block to the chassis, and c) the chassis to batt. it's called the "big three" upgrade, and there's a few good threads out there
*(but i would consider an upgrade soon)
several all metal radiators are avail on ebay as well i got an all aluminum one with 3 cores for the 90 for 135 n its worked great
id have a shop look at it, fins can be fixed easy they even make a fin straightening tool my radiator both side plates were broken loose due to the bop she took to the nose an i sweat soldiered them back on easy not hard if youve done any copper water pipe repairs

DO NOT get any plastic an metal radiators they fail regularly and at the plastic potions also not repairable the aluminum is crimped an glued to the plastic
id have a shop look at it, fins can be fixed easy they even make a fin straightening tool my radiator both side plates were broken loose due to the bop she took to the nose an i sweat soldiered them back on easy not hard if youve done any copper water pipe repairs
DO NOT get any plastic an metal radiators they fail regularly and at the plastic potions also not repairable the aluminum is crimped an glued to the plastic
Had the same issue on my radiator and didn't think anything of it, did the same as Cyberhorn and soldered it right up, except I used a little silver solder.
the fins you can get a FIN COMB from any HVAC shop or store that sells AC supplies, not sure how well they would work on the radiators as i never tried it on those before, but it should work fine since the concept of the fins are the same.
the fins you can get a FIN COMB from any HVAC shop or store that sells AC supplies, not sure how well they would work on the radiators as i never tried it on those before, but it should work fine since the concept of the fins are the same.
 08-31-2013, 05:43 PM
#442
Registered User
Thread Starter
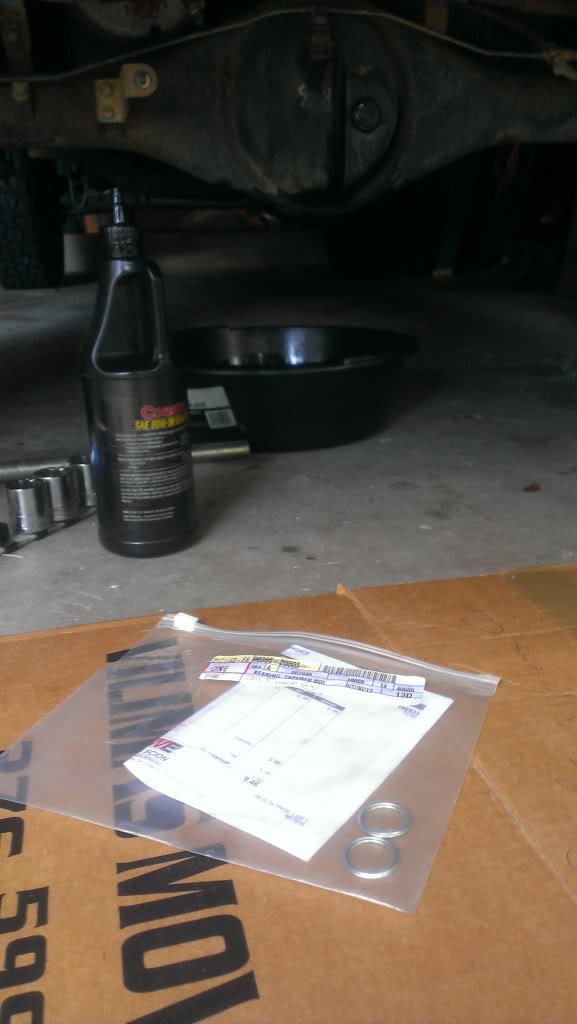
I noticed a drip from the rear diff in the driveway a couple weeks ago. So knowing that I was getting close to the 500 miles of break-in on the new diff, I ordered new drain and fill plug gaskets and waited until I hit the 500 mile mark. The new metal crush washers were .96 cents apiece, so I ordered 4. Since my last ones were original, I'm really hoping that was causing the drip and not the new pinion seal or worse the RTV seal on the 3rd member.
09-10-2013, 05:05 PM
#444
Registered User
Thread Starter
Well, so far have not seen any drips of oil hanging off the diff, looks dry to me, so I'm crossing my fingers that it was just old crush washers.
Haven't really done much on the truck, been working on some deals to some rear slider windows, specifically the driver side..my frame is rusty. Problem is all the good ones are far away and the shipping is a killer. Junk may have found me some, so I'm looking into his lead.
My current problem is a snap ring on the tcase main shaft...this is in that dismantled case that I am building up to put 4.7s in. You have to remove the 6809 main bearing to get the 4.7 gears on, and guess what, you have to get this snap ring off. I have 3 different snap ring pliers and I cannot get that ring off. Here is a pic

Every time I squeeze it, one side of the ring will come out of the groove or the other, but not both. I am out there cussing and sweating in the garage over a little snap ring.
Haven't really done much on the truck, been working on some deals to some rear slider windows, specifically the driver side..my frame is rusty. Problem is all the good ones are far away and the shipping is a killer. Junk may have found me some, so I'm looking into his lead.
My current problem is a snap ring on the tcase main shaft...this is in that dismantled case that I am building up to put 4.7s in. You have to remove the 6809 main bearing to get the 4.7 gears on, and guess what, you have to get this snap ring off. I have 3 different snap ring pliers and I cannot get that ring off. Here is a pic
Every time I squeeze it, one side of the ring will come out of the groove or the other, but not both. I am out there cussing and sweating in the garage over a little snap ring.
09-10-2013, 05:26 PM
#445
These are the type I've had to use on those type of suckers in the past.......
http://item.mobileweb.ebay.com/viewi...d=251254415519
From the pic, looks as though thats what you have in the left in the pic?
http://item.mobileweb.ebay.com/viewi...d=251254415519
From the pic, looks as though thats what you have in the left in the pic?
09-10-2013, 06:22 PM
#446
Well, so far have not seen any drips of oil hanging off the diff, looks dry to me, so I'm crossing my fingers that it was just old crush washers.
Haven't really done much on the truck, been working on some deals to some rear slider windows, specifically the driver side..my frame is rusty. Problem is all the good ones are far away and the shipping is a killer. Junk may have found me some, so I'm looking into his lead.
My current problem is a snap ring on the tcase main shaft...this is in that dismantled case that I am building up to put 4.7s in. You have to remove the 6809 main bearing to get the 4.7 gears on, and guess what, you have to get this snap ring off. I have 3 different snap ring pliers and I cannot get that ring off. Here is a pic
Every time I squeeze it, one side of the ring will come out of the groove or the other, but not both. I am out there cussing and sweating in the garage over a little snap ring.
Update - Sometimes its a good idea to do this in a box closed 4 walls like a box. I've had those snap rings ping out and shoot out like on those hubs when i was cleaning one of them up. Luck me I decided to do it in a box and it just shot inside the box.
Last edited by junk4u; 09-10-2013 at 06:26 PM.
09-10-2013, 06:44 PM
#447
Registered User
you need some heavier duty snap ring pliers. Not that all my tools are name brand but i have snap on snap ring pliers that would do the trick.Otherwise use a couple flathead screwdrivers and a pick. And safety glasses.Congrats on the reduction kit on the tcase. Im sure youll like it!
09-11-2013, 09:42 AM
#449
Registered User
Thread Starter
These are the type I've had to use on those type of suckers in the past.......
http://item.mobileweb.ebay.com/viewi...d=251254415519
From the pic, looks as though thats what you have in the left in the pic?
http://item.mobileweb.ebay.com/viewi...d=251254415519
From the pic, looks as though thats what you have in the left in the pic?
Cory - that snap ring has always been a nightmare to me as well. What i usually do now that I know is have one of the small screw drivers available to me once one side lifts off the groove i slide that screw driver in there and then as I squeeze the snap rings pliers rotate the screw driver around in the groove lifting the ring out. Hope that helps.
Update - Sometimes its a good idea to do this in a box closed 4 walls like a box. I've had those snap rings ping out and shoot out like on those hubs when i was cleaning one of them up. Luck me I decided to do it in a box and it just shot inside the box.
Update - Sometimes its a good idea to do this in a box closed 4 walls like a box. I've had those snap rings ping out and shoot out like on those hubs when i was cleaning one of them up. Luck me I decided to do it in a box and it just shot inside the box.
you need some heavier duty snap ring pliers. Not that all my tools are name brand but i have snap on snap ring pliers that would do the trick.Otherwise use a couple flathead screwdrivers and a pick. And safety glasses.Congrats on the reduction kit on the tcase. Im sure youll like it!
I see MarlinCrawler sells a set of pliers made by Wilde...not sure if those would get this ring off though. SK Tools has the SKT-7636, which might do it, anybody got any direct experience with a specific pair of snap ring/lock ring pliers? I don't really wanna spend Snap On kind of money...I wish one of you guys lived closer to me so I could borrow this stuff.
09-11-2013, 01:04 PM
#450
Mine are specifically "For certain end to end spaces" and MAC..... My neighbor actually got a new pair and gave me his. He's a plumbing contractor, and he also uses a hydraulic tool for these that sweep in a Crescent motion " ( " ....... That tool holds the spread while you pry in a Crescent rotational manner. The hydraulic tool also has a clamp that grabs the solid portion above or below the snap ring.
Can u use a ratcheting clamp to hold the handle portion of the pliers to somewhat free up your grip hand?
Can u use a ratcheting clamp to hold the handle portion of the pliers to somewhat free up your grip hand?
09-22-2013, 01:36 PM
#451
Registered User
Thread Starter
Haven't made any progress on the snap ring..got lots of tips from different people. One thing is I need to tap on the bearing to relieve any tension. I'll get to that soon I hope. Busy washing cars and trying to clean up the garage this weekend. I did, however, manage to get my driver side window rubber channel replaced. Junk found a guy on eBay selling both sides for $46 shipped, so I bought them. My passenger side is fine, just the driver side was torn right up that upper corner near my ear. Lots of wind noise and probably loosing some AC too.

My old one went right into the garbage.
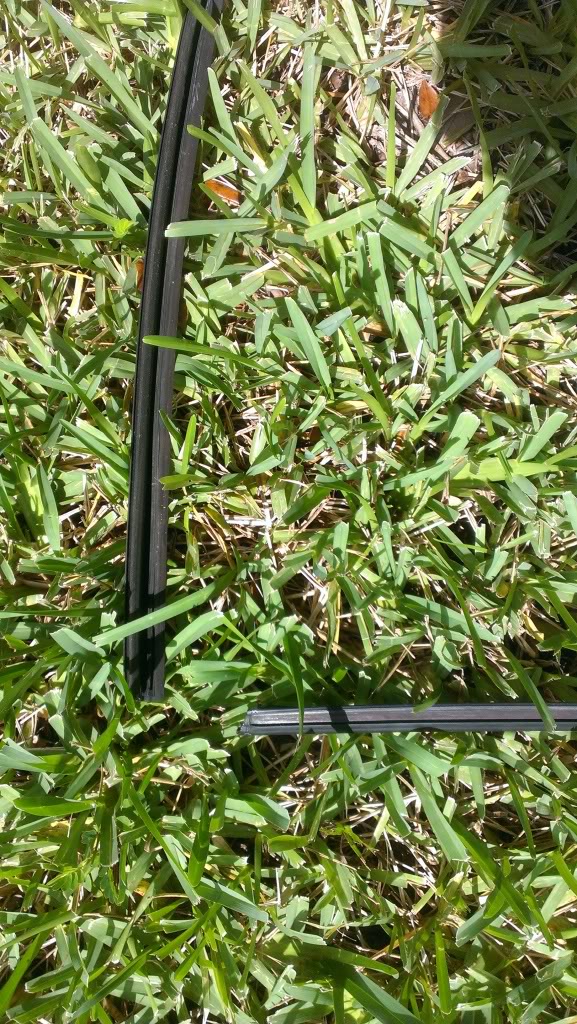
My old one went right into the garbage.
10-16-2013, 05:46 PM
#452
Registered User
Thread Starter
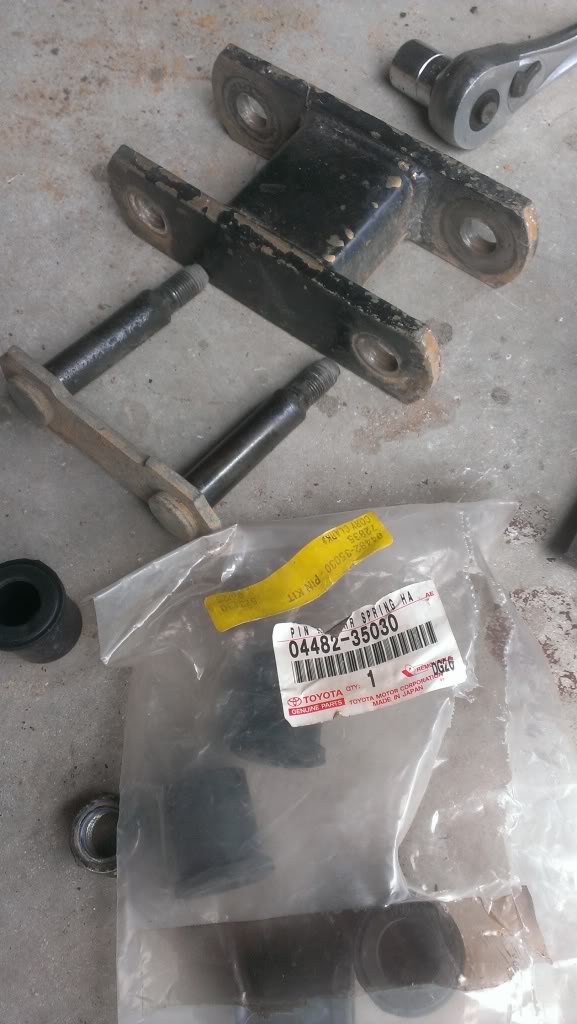
I'm planning on attending the FL TLCA Turkey Trot in late November up in Ocala, FL at an offroad park called HardRock. These kinds of things always get me motivated to do stuff to my truck. I figure the BJ spacers and longer rear shackles would be a good thing to get on the truck before this trip...so today I went out there and knocked out the rear shackles...I bought these things a couple years ago, they are 2" longer than stock and man they are stout.
I have to run to HF in the next few days to get some discs for my grinder so I can install the BJ spacers up front.
Also, I'd really like to get that 4.7tcase put back together and throw that in there as well. Feels good to at least get one thing done though.
I have to run to HF in the next few days to get some discs for my grinder so I can install the BJ spacers up front.
Also, I'd really like to get that 4.7tcase put back together and throw that in there as well. Feels good to at least get one thing done though.
10-17-2013, 06:42 PM
#453
Registered User
Thread Starter
I measured the edge of the rim to the fender lip on both sides of the rear...driver side is 14.25 inches and pass side is 13.75 inches, so I've got about .5 inches of lean. You can kindof see it when looking at the truck, I guess I have a weak spring on that side with the gas tank there.
Made a bit of progress on my 4.7 case. I FINALLY got the snap ring off the main shaft that holds the big 6809 bearing on there. 2 screwdrivers, a big one and a small one finally did the trick. With that snap ring off, I was able to press the bearing
off, get that big gear off there and replace it with the Marlin gear. Put the bearing back on, and moved on through the instructions until I hit my next snag...I think I'm missing one of the 2 shift rails, the shorter of the two. Either the guy never sent it with the rest of the crap in the box, or I lost it. I looked for about 30 minutes and can't find it. Oh well, gotta find one or pull my tcase in the truck and take it apart. At least I'm getting somewhere I think.
10-20-2013, 12:42 AM
#454
Super Moderator
Staff
iTrader: (1)
Join Date: Aug 2008
Location: Anderson Missouri
Posts: 11,788
Likes: 0
Received 25 Likes
on
22 Posts
Did you get your door seal just from an individual or a store on ebay? I have replaced a few of those door seals and they make a huge difference. I am always on the look out for good door seals when in the yards. I bought a new set for Mistys truck, but the last set I got off a camper when were in great shape.
Does your truck have the saggy butt going on with the lean as well? The Zuk mod fixed on of my leans.
Glad to see you got the clip off, but understand parts do grow legs at times. Happpened to me more then once.
Does your truck have the saggy butt going on with the lean as well? The Zuk mod fixed on of my leans.
Glad to see you got the clip off, but understand parts do grow legs at times. Happpened to me more then once.
10-20-2013, 12:46 PM
#455
Registered User
Thread Starter
Did you get your door seal just from an individual or a store on ebay? I have replaced a few of those door seals and they make a huge difference. I am always on the look out for good door seals when in the yards. I bought a new set for Mistys truck, but the last set I got off a camper when were in great shape.
Does your truck have the saggy butt going on with the lean as well? The Zuk mod fixed on of my leans.
Glad to see you got the clip off, but understand parts do grow legs at times. Happpened to me more then once.
Does your truck have the saggy butt going on with the lean as well? The Zuk mod fixed on of my leans.
Glad to see you got the clip off, but understand parts do grow legs at times. Happpened to me more then once.
Yeah as the years go on life gets busier and i lose more stuff. With this part though , I don't know if I ever had it in the package that was sent to me or if I lost it somewhere in the garage. Don't know if I want to tear my tcase apart that's in the truck to get the shift rail or not.
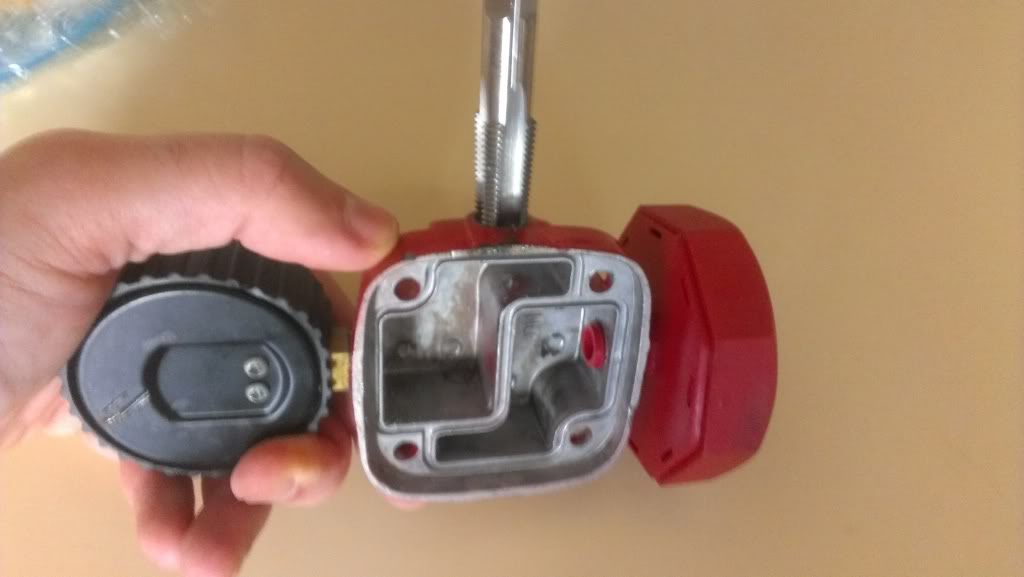
I have had this superflow air compressor for years, but the air fitting broke making it unusable. I finally decided to fix it so I could take it on my trip. I drilled the hole out with a 7/16 drill bit, and then tapped it with a 1/4 18 npt. I'm also going to replace the power wires with some heavier wire that I have.
Last edited by coryc85; 10-21-2013 at 04:58 AM.
10-22-2013, 05:04 AM
#456
Registered User
Thread Starter
Well, I did some more digging last night, and at this point I'm pretty certain that I do not have the hi/lo shift rail for this transfer case. I contacted the seller and he could not find it in his garage either, so I need one. If anyone has a spare hi/lo shift rail please let me know.
Here is a pic of what I need I copied from Marlin's site...they are out of stock by the way. I only need the rail, not the shift fork.
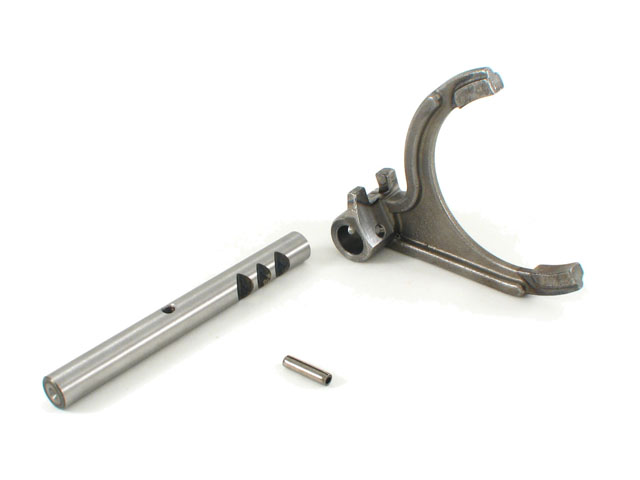
Here is a pic of what I need I copied from Marlin's site...they are out of stock by the way. I only need the rail, not the shift fork.
Last edited by coryc85; 10-22-2013 at 05:08 AM.
10-22-2013, 09:54 AM
#457
Hey buddy, go to yotamasters.com , grab the phone number is give Eric a call. I'm sure Scotty as well might have something like that in his shop stored away. I know that Eric Hansen who owns yotamasters does a lot of transmission, gears and so forth... You never know.
Looking forward to your future posts and work, as usual!
Looking forward to your future posts and work, as usual!
10-24-2013, 05:30 AM
#459
Registered User
Thread Starter
No progress yet on the transfer case rail. I've posted some wanted ads on different forums, I'd rather get the rail from a member.
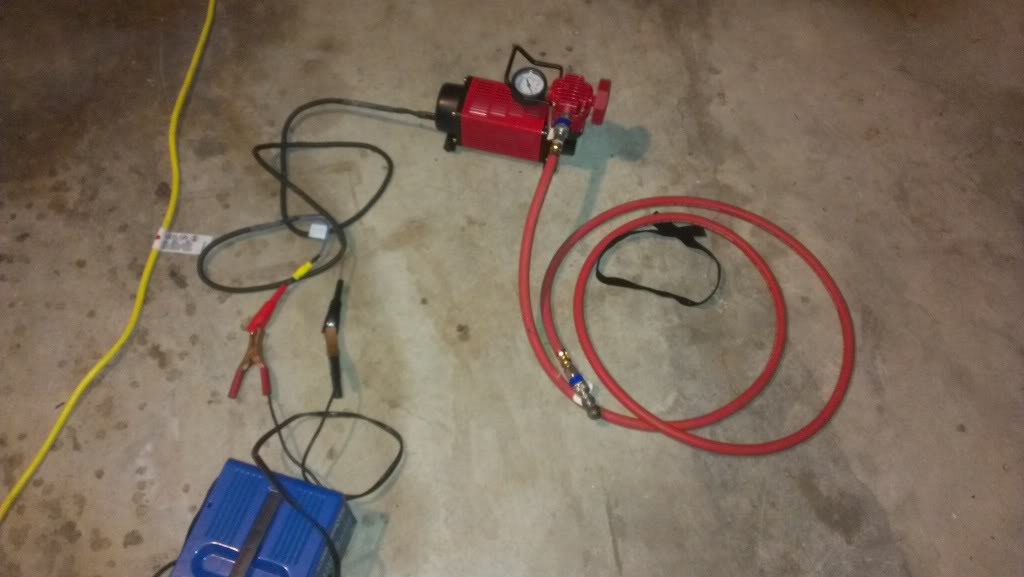
Finished up the work on my little superflow air compressor. The other day I drilled and tapped the output hole to fit a standard quick coupler. So tonight I opened up the electrical end cap and soldered in a heavy duty connector which is thicker wire and is a nice automotive style connector so I can remove the power cord.
Here is a shot with the end cap opened up. You see the new connector there on the left and the stock relay there on the right. A lot of people change that relay, I may do that at some point in the future, but for now it works.
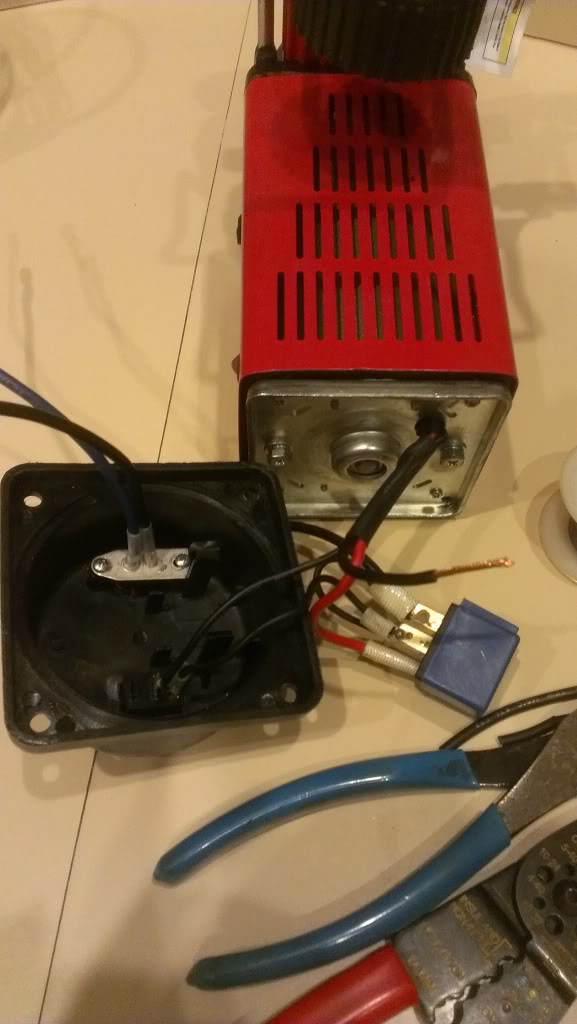
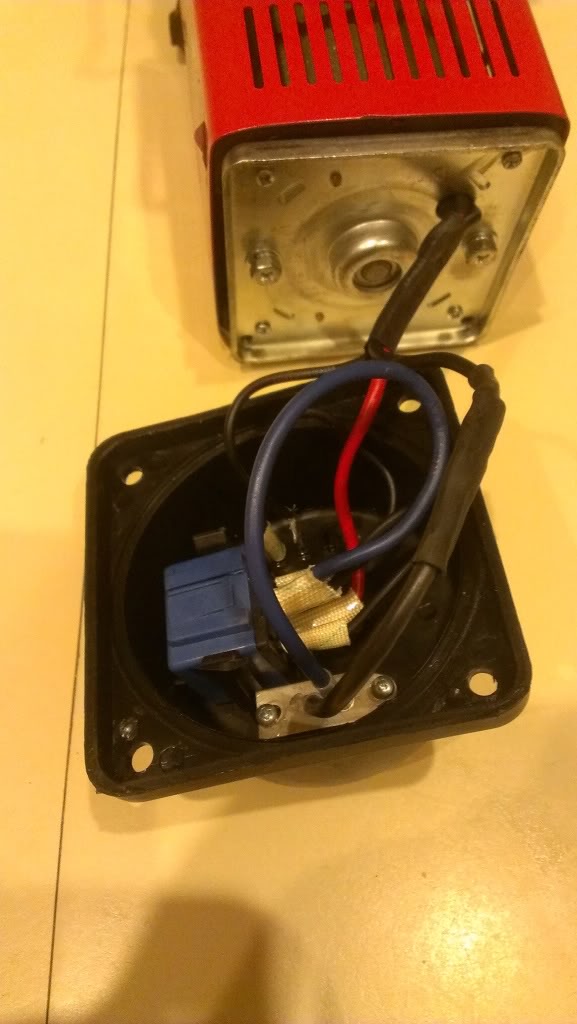
All soldered up and heatshrink installed, relay stuffed back in its spot.
Here is a view of the end cap back on, you can see the new connector just peeking out of the original hole and the mating DC cable laying there next to it.
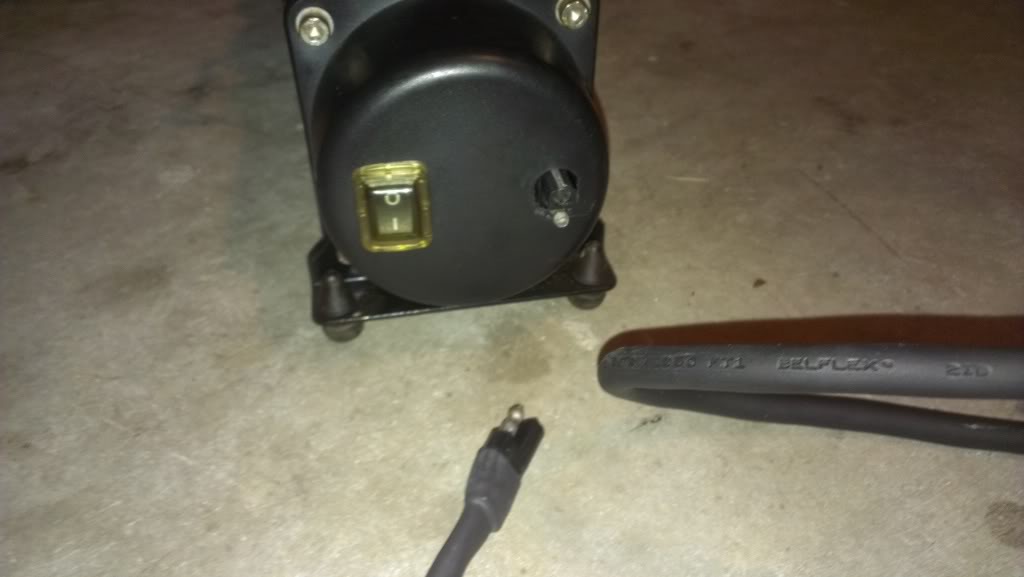
And here I am testing the compressor all put back together. Still gotta go pick up one of those air guns that Chef mentioned to really try it out.
Finished up the work on my little superflow air compressor. The other day I drilled and tapped the output hole to fit a standard quick coupler. So tonight I opened up the electrical end cap and soldered in a heavy duty connector which is thicker wire and is a nice automotive style connector so I can remove the power cord.
Here is a shot with the end cap opened up. You see the new connector there on the left and the stock relay there on the right. A lot of people change that relay, I may do that at some point in the future, but for now it works.
All soldered up and heatshrink installed, relay stuffed back in its spot.
Here is a view of the end cap back on, you can see the new connector just peeking out of the original hole and the mating DC cable laying there next to it.
And here I am testing the compressor all put back together. Still gotta go pick up one of those air guns that Chef mentioned to really try it out.
10-26-2013, 12:43 AM
#460
Super Moderator
Staff
iTrader: (1)
Join Date: Aug 2008
Location: Anderson Missouri
Posts: 11,788
Likes: 0
Received 25 Likes
on
22 Posts
I have locked up W56 tcase. Probably the same case you have. Let me see if I can find where I have it at and can get the part out of it. Is it something I could get out with basic tools? I have never been into one and practicing on it is the reason I kept it and for parts as well. Just have not gotten around to taking it apart.


