
coryc85's 1988 4Runner Build-Up Thread


 06-21-2013, 06:15 PM
#362
Registered User
Thread Starter
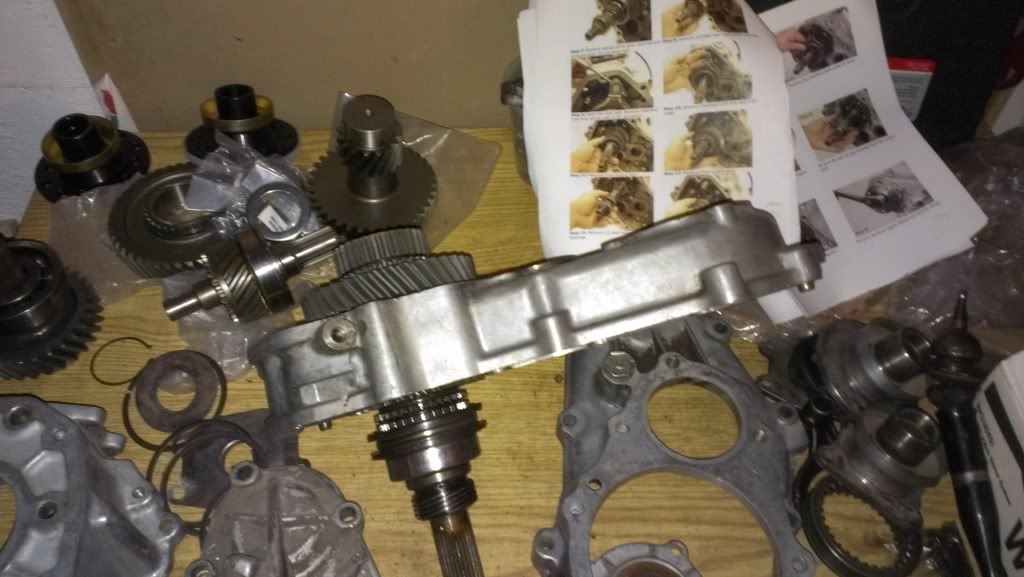
Small Update...got the 4.7 gears and fully disassembled tcase from a member on here.
I printed out the Marlin and TrailGear installation guides and just started going thru everything to see if I am missing anything...so far looks like everything is there. Just have to finish breaking it down and start the install of the 4.7s.
In the upper left corner of the pic, you see the Marlin 4.7 gearset, you also see 2 triple drilled tcase flanges that I got from Marlin wayy back when the were on some kind of super sale for $5 each..been hoarding those for a couple years now.
Also received my Bondo Hair and Evap-O-Rust from Amazon, no time yet to start cleaning up the inner fender holes, but hopefully soon.
Last edited by coryc85; 06-21-2013 at 06:24 PM.
06-23-2013, 06:38 AM
#364
Registered User
Thread Starter
Thank you Mark, yeah I did know that, I've been reading the install instructions from Marlin. Also been following your thread, man your truck has transformed in the last few days. Dual cases, 4.7s, solid axle, rebuilt tranny and tcase, new driveshafts....
06-24-2013, 10:56 AM
#365
Registered User
Thread Starter
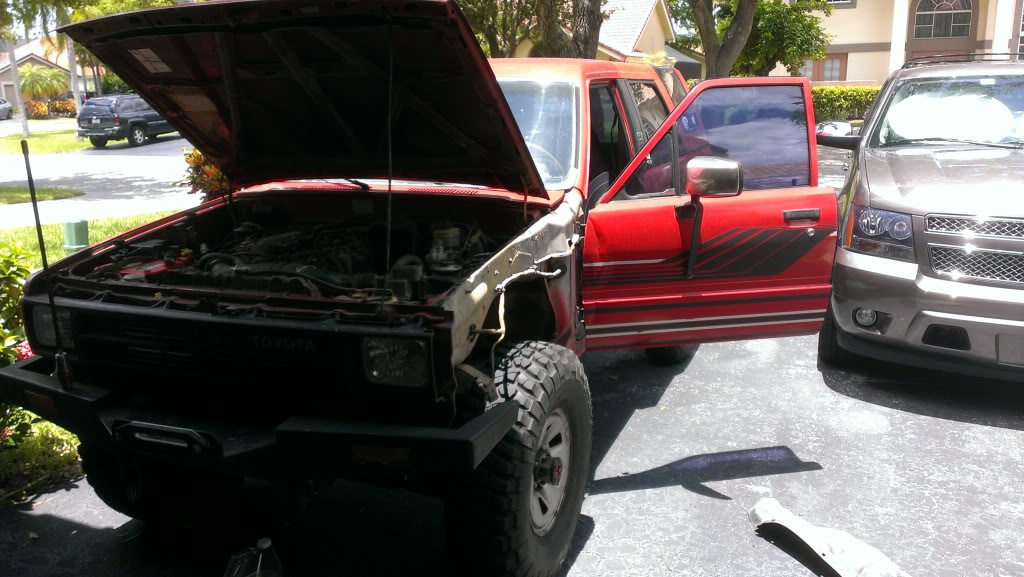
So got a little bit of progress on the rust hole situation...
Started by removing the driver side fender...9 10mm bolts and it's off
Here's a closeup of the rust hole I'm dealing with.

I pried that rubber boot out of there for the wire harness and then I hit the area with a wire wheel to remove the loose scaly stuff. And then I used the Evap-O-Rust on it. The directions say for a large area that cannot be immersed in the liquid you should soak paper towels in the stuff and tape them to the area. I first wiped the area with a soaked towel and then soaked some new paper towels and taped them on there. It says to leave it on for 24 hours, I'm gonna check it again in a few hours and re-wet the towels if needed.

And finally since it will probably rain sometime in the next 24 hours, I tucked the old girl into the garage.

Started by removing the driver side fender...9 10mm bolts and it's off
Here's a closeup of the rust hole I'm dealing with.
I pried that rubber boot out of there for the wire harness and then I hit the area with a wire wheel to remove the loose scaly stuff. And then I used the Evap-O-Rust on it. The directions say for a large area that cannot be immersed in the liquid you should soak paper towels in the stuff and tape them to the area. I first wiped the area with a soaked towel and then soaked some new paper towels and taped them on there. It says to leave it on for 24 hours, I'm gonna check it again in a few hours and re-wet the towels if needed.
And finally since it will probably rain sometime in the next 24 hours, I tucked the old girl into the garage.
06-24-2013, 12:42 PM
#367
Registered User
im watching to see how that evapo rust works
that rust hole is from leaves cloggin the side drain an water sitting there i had some surface stuff there but nothing major like yours i primed an painted then hit it with undercoat through the drain area need to eventually get into the cowl area an undercoat the inside of it or use roofing tar brushed in
that rust hole is from leaves cloggin the side drain an water sitting there i had some surface stuff there but nothing major like yours i primed an painted then hit it with undercoat through the drain area need to eventually get into the cowl area an undercoat the inside of it or use roofing tar brushed in
06-24-2013, 01:04 PM
#368
Registered User
Just read through your thread good looking truck!
I ordered my 4.88 R&P and after reading your thread I'm going to try to tackle it myself, I bought the R&P's because i can get them cheaper than a local shop and i was going to get them to set up my difs just because of all the work involved, it looks like its very intimidating but as long as i take it slow i hope mine turn out as nice as yours did!
I ordered my 4.88 R&P and after reading your thread I'm going to try to tackle it myself, I bought the R&P's because i can get them cheaper than a local shop and i was going to get them to set up my difs just because of all the work involved, it looks like its very intimidating but as long as i take it slow i hope mine turn out as nice as yours did!
06-24-2013, 05:12 PM
#369
Registered User
Thread Starter
Thanks irab, good to know!
Yeah, I had some debris under the cowl that I pulled out a few months ago, it had prob been in there for many years. I'll clean it out again to make sure this never happens again.
Thanks man. Yeah the gear setup is a bit intimidating, but if I can do it, anybody can. Good luck, saw your thread so I'll be following along.
im watching to see how that evapo rust works
that rust hole is from leaves cloggin the side drain an water sitting there i had some surface stuff there but nothing major like yours i primed an painted then hit it with undercoat through the drain area need to eventually get into the cowl area an undercoat the inside of it or use roofing tar brushed in
that rust hole is from leaves cloggin the side drain an water sitting there i had some surface stuff there but nothing major like yours i primed an painted then hit it with undercoat through the drain area need to eventually get into the cowl area an undercoat the inside of it or use roofing tar brushed in
Just read through your thread good looking truck!
I ordered my 4.88 R&P and after reading your thread I'm going to try to tackle it myself, I bought the R&P's because i can get them cheaper than a local shop and i was going to get them to set up my difs just because of all the work involved, it looks like its very intimidating but as long as i take it slow i hope mine turn out as nice as yours did!
I ordered my 4.88 R&P and after reading your thread I'm going to try to tackle it myself, I bought the R&P's because i can get them cheaper than a local shop and i was going to get them to set up my difs just because of all the work involved, it looks like its very intimidating but as long as i take it slow i hope mine turn out as nice as yours did!
06-27-2013, 05:44 PM
#372
Registered User
Thread Starter
Junk - well...yeah I used the wire wheel on the rust the first day to knock the loose stuff off. Then I followed the instructions on the Evapo-Rust bottle and wet some paper towels, taped them onto the rusty area and the let it sit overnight. I checked the towels periodically and re-wet them a few times. I was not thrilled with the progress the next day, so then I got a brush and brushed the Evapo-Rust on about every hour from like 6pm to 10pm....here is the progress after those 2 approaches...
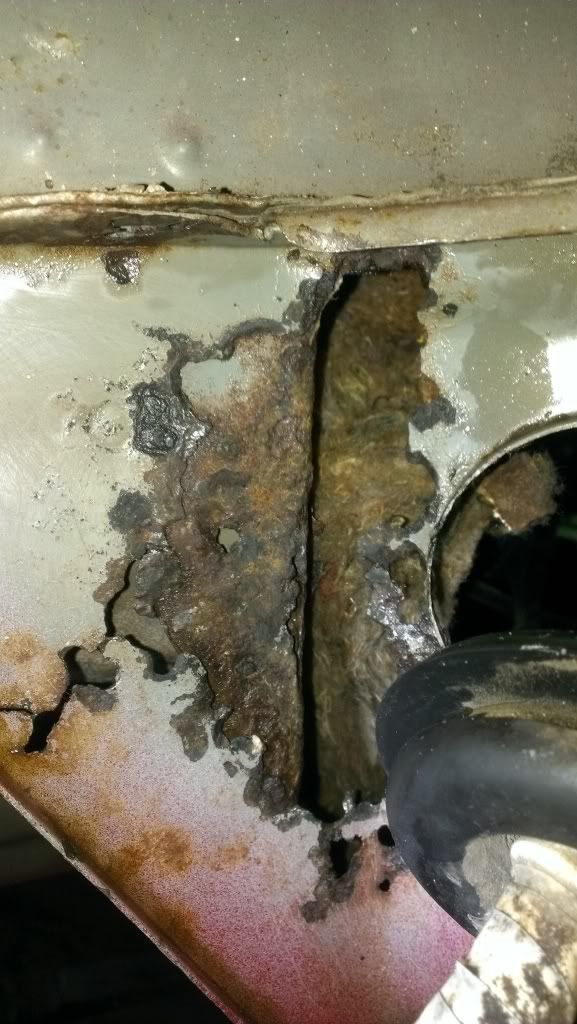
I'm still not thrilled, I'm thinking of using some of that rust converter spray or possibly naval jelly. I want to get as much of the rust converted as I can before I cover it with the fiberglass. Looking at my own picture there, I might hit that area in the middle there with the wirewheel again, then do more of the Evapo....just want it as good as I can get it.
I'm still not thrilled, I'm thinking of using some of that rust converter spray or possibly naval jelly. I want to get as much of the rust converted as I can before I cover it with the fiberglass. Looking at my own picture there, I might hit that area in the middle there with the wirewheel again, then do more of the Evapo....just want it as good as I can get it.
Last edited by coryc85; 06-27-2013 at 05:45 PM.
06-28-2013, 10:52 AM
#375
Registered User
Thread Starter
Twisted....hmmm I hadn't really considered por-15, but now you've got me interested, thanks. Been reading up on it a bit. Did you use the cleaner and metal prep or just the paint? I think the Por-15 would definitely be a more permanent fix.
06-28-2013, 11:27 AM
#376
Registered User
Thread Starter
Ok Twisted, thanks for spending my money for me 
Just ordered a quart of por-15 black and the metal prep thru eBay but from Eastwood. Should be here on or before next Wednesday, which is perfect, I'll have the long 4th weekend to apply it. The reviews of the stuff are awesome, and they claim it sticks best to rusty metal, which is exactly what I've got. The quart is hopefully enough to do both driver and passenger sides, inside and out.
Just ordered a quart of por-15 black and the metal prep thru eBay but from Eastwood. Should be here on or before next Wednesday, which is perfect, I'll have the long 4th weekend to apply it. The reviews of the stuff are awesome, and they claim it sticks best to rusty metal, which is exactly what I've got. The quart is hopefully enough to do both driver and passenger sides, inside and out.
06-28-2013, 01:50 PM
#377
Registered User
as ive got a lot of scaley rust under mine (its shoving multiple layers of undercoat off) details on the por process an application would be helpful if it would be cost effective for me
06-30-2013, 02:13 PM
#378
Registered User
por 15 is phenomenal stuff, its all in your prep work tho. take your time and be thorough.
when done properly por 15 will last forever =p
when done properly por 15 will last forever =p
06-30-2013, 02:23 PM
#379
POR15 is pretty expensive,... But if you do it properly you can reverse and stop some further resting and save yourself a lot of time on metal work in the future. I was told to make sure you do any of the middle work in welding that you need to do first after coming out and so forth... The news that exactly two directions and considering humidity and everything else, after because I guess it doesn't deal with a million degree welder stick to well? Hahaha... I have no clue as I've never worked with it but I do know that as was said everyone I've ever read it has echoed the sentiment of taking your time and doing exactly what it says.
07-01-2013, 03:53 AM
#380
Super Moderator
Staff
iTrader: (1)
Join Date: Aug 2008
Location: Anderson Missouri
Posts: 11,788
Likes: 0
Received 25 Likes
on
22 Posts
I was surprised to see your truck had rust on it, but can see where the debri just held water and how it started it to rust. Does your windshield cowl have the black screens underneath it? Some of the screens I have seen have a wire mesh on them and some dont from my experience. If by chance yours doesnt, the screens are interchangeable from different years and from 2 wheel drive to 4 wheel drive. I am thinking it may have been in option on some of these trucks but still not sure. It will help keep the debri out, and I have still seen some get debri even with the screens.
I may be trying to fix a transfercase for a guys runner. It has a crack in the back of the case and is leaking. Is tearing a transfer case apart a doable job? I dont have a press or anything so am just wondering if this is something I should or shouldnt try. Worse case scenario, I will swap out the leaky tcase with a good one.
I was unable to get to a computer so have some more catching up to do yet, but will get there. Looking good.


