
coryc85's 1988 4Runner Build-Up Thread

 05-15-2013, 04:59 AM
#322
Registered User
Thread Starter
Junk - hah! secretly and quietly  I do have some differential updates which I will post tonight along with some pictures. Also I have been contemplating this axle bearing thing. My dad has convinced me to try the "redneck" method and slam the axle down on a piece of wood to try and remove the bearing. I think I'll give it a shot and if it doesn't work, I'm going to order that tool from eBay. Hopefully tonight I can remove the snap ring and give one of the axles a few slams to see if it moves at all.
I do have some differential updates which I will post tonight along with some pictures. Also I have been contemplating this axle bearing thing. My dad has convinced me to try the "redneck" method and slam the axle down on a piece of wood to try and remove the bearing. I think I'll give it a shot and if it doesn't work, I'm going to order that tool from eBay. Hopefully tonight I can remove the snap ring and give one of the axles a few slams to see if it moves at all.
05-15-2013, 05:37 AM
#323
Cory, I'm going to assume mean doing what they suggest in this post.
https://www.yotatech.com/forums/f116...bearing-95854/
I saw a video of this before it took about 4 to 5 tries before his bearing came off, but it seems to work for a bunch of people.
https://www.yotatech.com/forums/f116...bearing-95854/
I saw a video of this before it took about 4 to 5 tries before his bearing came off, but it seems to work for a bunch of people.
05-15-2013, 06:16 AM
#324
Registered User
Thread Starter
Junk - that's exactly what I'm talking about. I figure I'll give it a shot, if it doesn't work, I'll buy the tool. If it does work, it saves me $150.
05-15-2013, 01:52 PM
#325
Super Moderator
Staff
iTrader: (1)
Join Date: Aug 2008
Location: Anderson Missouri
Posts: 11,788
Likes: 0
Received 25 Likes
on
22 Posts
I cant see what it would hurt doing it that way with wood. $150 would go along way on other things and something you most likely would not need for quite some time. Hope everything goes well.
05-16-2013, 05:04 AM
#326
Registered User
Thread Starter
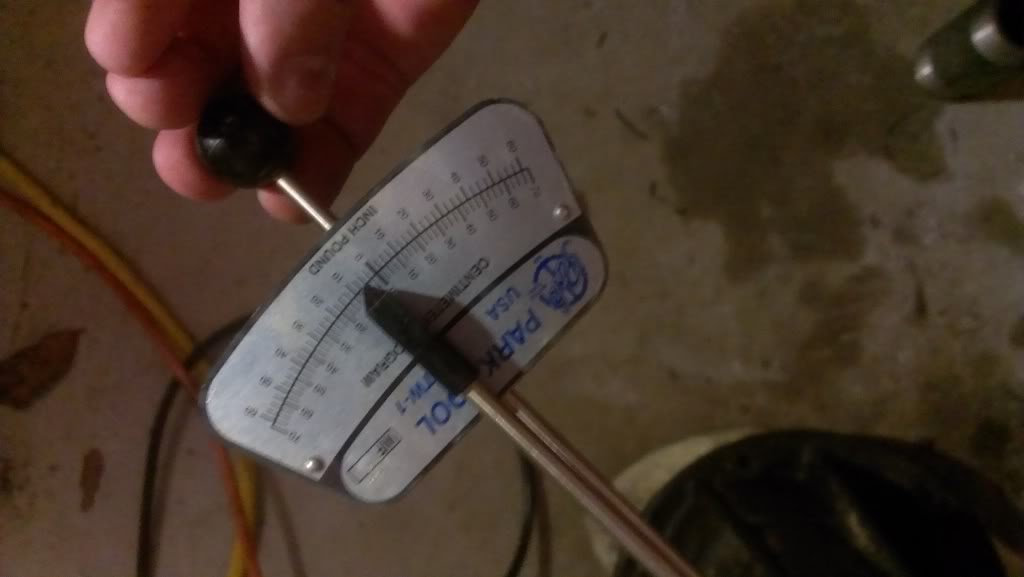
Ok, so I finished up the diff the other night. Where I last left off was the pinion shim stack was around .074, giving me a slightly deep pattern which Zuk approved of. So the next thing to do is to remove the carrier, put the pinion seal in and button that end of it up. Well I did that, and I did not like my preload. It seemed like once I cranked the pinion nut down, the preload was WAYY too much, like 30 in-lbs. This did not seem right to me. So I removed the pinion seal (now garbage), pressed out the pinion, added shims to the spacer. I must have done this 3 times before I got smart and measured the crush sleeve that was in there. I had to add about .060 worth of shims to the solid spacer to get right near that crush sleeve length. With that, the pre-load was a nice 5 in-lbs...
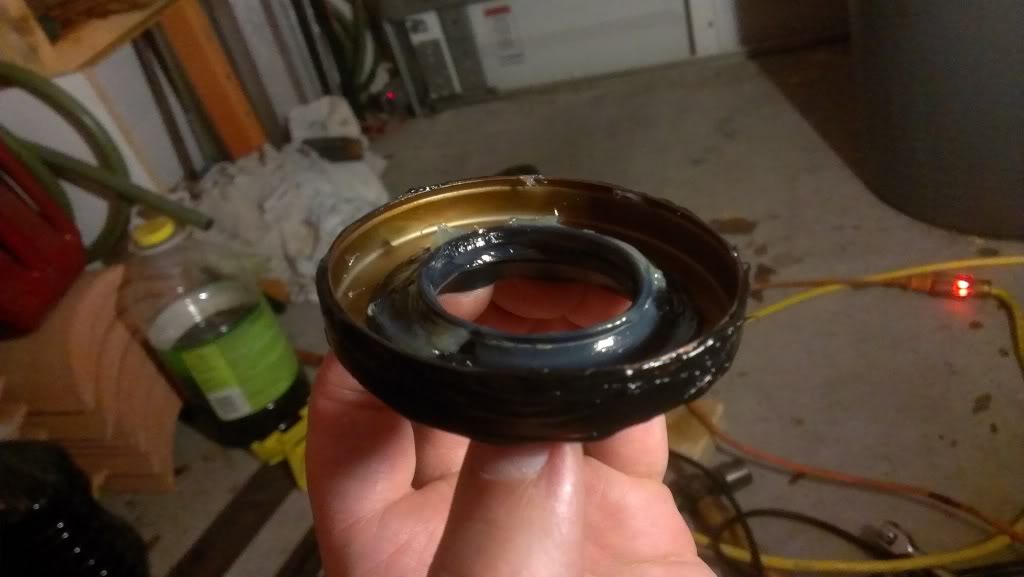
So I took off the nut one more time, put the splash guard in, loaded up the new seal with grease on that inner spring, and some RTV around the edge
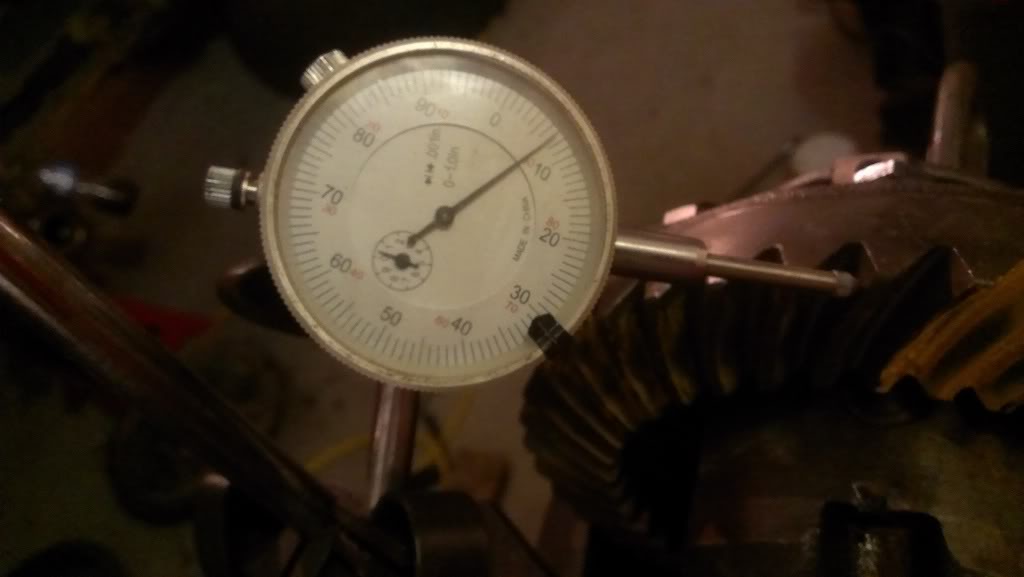
I put the flange on and cranked the pinion nut (red loctited) with the impact as much as it would go. Preload is nice and easy to turn by hand. Next I put the diff back in my little holder and loaded up the carrier as I've now done like 4 times. Set my backlash to .007, and checked it in 4 places around the ring gear.
Once the backlash is dialed in, I then marked the adjusters with a sharpie and cranked the non-ring gear side as far as I could, noting how far that was, I went over to the ring gear side and cranked that one the same distance. And just for good measure, I checked the backlash one more time and it was good. Installed my new adjuster lock tabs and this diff is DONE.
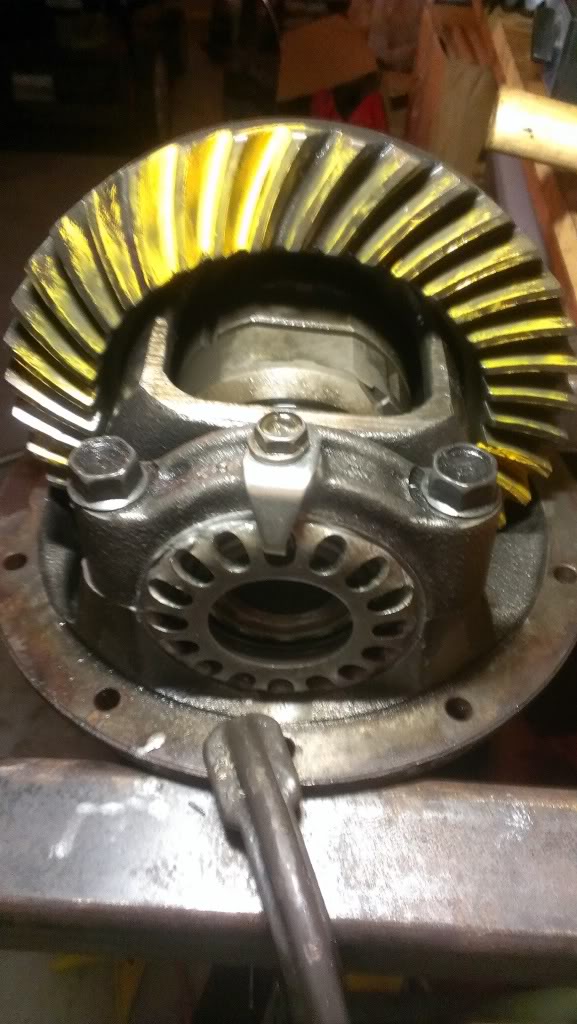
I think Zuk approves...
So I took off the nut one more time, put the splash guard in, loaded up the new seal with grease on that inner spring, and some RTV around the edge
I put the flange on and cranked the pinion nut (red loctited) with the impact as much as it would go. Preload is nice and easy to turn by hand. Next I put the diff back in my little holder and loaded up the carrier as I've now done like 4 times. Set my backlash to .007, and checked it in 4 places around the ring gear.
Once the backlash is dialed in, I then marked the adjusters with a sharpie and cranked the non-ring gear side as far as I could, noting how far that was, I went over to the ring gear side and cranked that one the same distance. And just for good measure, I checked the backlash one more time and it was good. Installed my new adjuster lock tabs and this diff is DONE.
I think Zuk approves...
05-16-2013, 05:09 AM
#327
Registered User
Thread Starter
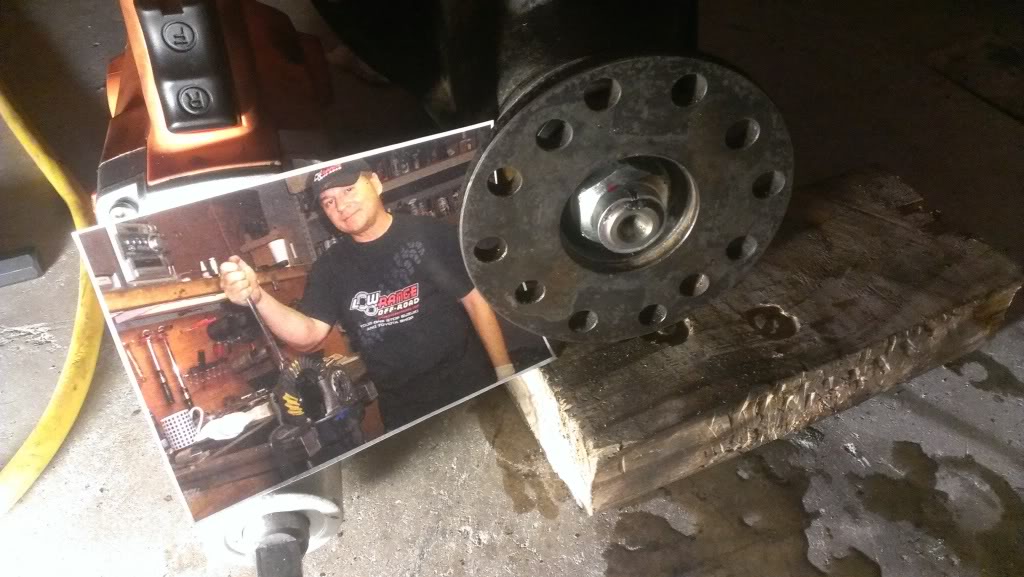
Yeah Terry, $150 would be great to spend on some other things. Well, last night I worked on the axle for a bit. It took me prob 30 minutes to remove that darn c clip on there. I had to modify my snap ring pliers a bit to get them to open up more. Once I got the clip off, I put down a piece of 1/2 masonite shelving, then laid a 2x8 on top and slammed the axle about 5 times. I gave up because it was 11pm and I was tired, but I don't think it moved yet. I'll have to examine it closer today to see. It does hurt your hands, so I was wearing gloves and using rags as extra padding. I'm gonna try some more pounding before I give up on this method.
05-16-2013, 05:18 AM
#328
Awesome Cory...
On that bearing... I saw a video and i can't seem to find it, but he was actually picking it up and slamming it down on (not holding on to it). You can mess up a lot of things doing it that way, he eventually got it off after a few tries. If I find the vid, I'll post the link.
On that bearing... I saw a video and i can't seem to find it, but he was actually picking it up and slamming it down on (not holding on to it). You can mess up a lot of things doing it that way, he eventually got it off after a few tries. If I find the vid, I'll post the link.
05-17-2013, 09:05 AM
#329
Registered User
Thread Starter
Well, being the ever impatient person that I am, I measured my press last night to make sure I could get the tool in there and today I ordered that durasolid axle bearing puller from ebay. I was doing a little web searching afterwards, and I noticed I could have bought it for a bit cheaper from Durasolid's own website, but they seem to be some kind of overseas supplier of parts...buying thru ebay gives me a little more piece of mind. If you look thru enough google search results, it looks like Durasolid was at one time a supplier to Yukon, and Yukon actually has a puller tool listed as the YT P71 that looks identical to this one I bought. I'm guessing Durasolid has ripped off the Yukon designs. I usually don't like supporting blatant ripoffs, but at least I'm guessing Yukon really doesn't sell too many of the pullers, their main product is the gears and lockers.
On another note, I wanted to start the truck last night just so it doesn't sit for too long. All it did was click, but the battery does not seem to be dead. I think I need to do RAD4Runners starter relay mod to move the high current load away from the ST1 ignition contacts. Ray's link is here https://www.yotatech.com/forums/f199...l#post51975700
On another note, I wanted to start the truck last night just so it doesn't sit for too long. All it did was click, but the battery does not seem to be dead. I think I need to do RAD4Runners starter relay mod to move the high current load away from the ST1 ignition contacts. Ray's link is here https://www.yotatech.com/forums/f199...l#post51975700
05-18-2013, 02:10 PM
#330
Registered User
Thread Starter
I just did RAD4Runner's starter fix, we'll see if this totally eliminates my occasional click only. Thanks for all the info RAD! This was pretty quick and easy. I chose to run a fused wire straight to the battery instead of tapping into the fusible link in the fuse box. This is about a 20 minute job, start to finish. That red in line fuse holder goes straight over to the battery. Ugh, my engine bay is DIRTY.

Last edited by coryc85; 05-18-2013 at 02:11 PM.
05-18-2013, 02:27 PM
#331
Registered User
yeeeep it is dirty
mean green spray degreaser cheap at wally world soak it down with that let it sit then hose it down i barely had to do any rubbing on mine an it came clean!
mean green spray degreaser cheap at wally world soak it down with that let it sit then hose it down i barely had to do any rubbing on mine an it came clean!
05-19-2013, 03:33 PM
#332
Registered User
Thread Starter
Waiting for my bearing tool, so yesterday I did that start relay fix. Today I cleaned up my driveshaft, I wire brushed it and used mineral spirits on it. Tomorrow I plan to paint it black and then install the new ujoint.

Last edited by coryc85; 05-19-2013 at 05:40 PM.
05-19-2013, 05:42 PM
#334
Registered User
Thread Starter
As for the starter relay fix, it sure seems like a good idea, and definitely if you have ever experienced just a click and you know your battery is good.
05-19-2013, 06:19 PM
#335
Registered User
so far no clicking just crank an vroom
the mean green i use it after (an in) my electrolysis derusting it leaves no residues an ive painted right after its dry strips oil an grease like mad
kris my roommate he works repairing appliances they got in a wolf range rebuild (restaurant style) it had 20 yrs of cooked in grease an ect they blasted it with meangreen took it down to the local car wash an it was sparkling clean for them to rebuild
05-21-2013, 09:56 PM
#337
Liking The Rear Bumper!

... Ugh, my engine bay is DIRTY.
05-22-2013, 05:29 AM
#338
Registered User
Thread Starter
RAD - you have a good eye....I really cannot get that spare down with the normal tool..it just won't fit between the bumper and the body. So I made a new tool, which is just a little piece of round bar welded to the end of a bolt to give me a T shape, then I use a socket wrench and a couple of extensions to lower the spare. It is a pain in the butt. Roger Brown notched the bottom of his tailgate so he could fit the tool in there, I don't think I want to do that, plus I'm planning at some point to make a rear tire carrier.
05-22-2013, 09:33 AM
#339
Yeah, special tool's gonna be my workaround until I get a swing-out tire carrier.
Saw Roger Brown's suggestion, but not sure if it would work with geometry of my after-market bumper, so like you I don't want to notch the tailgate.
Hope your click-only issue is gone?
Regards,
Ray
05-24-2013, 05:39 AM
#340
Registered User
Thread Starter
Received my axle bearing tool from Durasolid yesterday. First of all, it looks pretty well made. It comes with 2 thick plates that bolt to the backing plate, one of which has the pattern for our trucks. Then you slip the tube over the axle shaft and screw the tube into the plate. Here it is sitting on there:
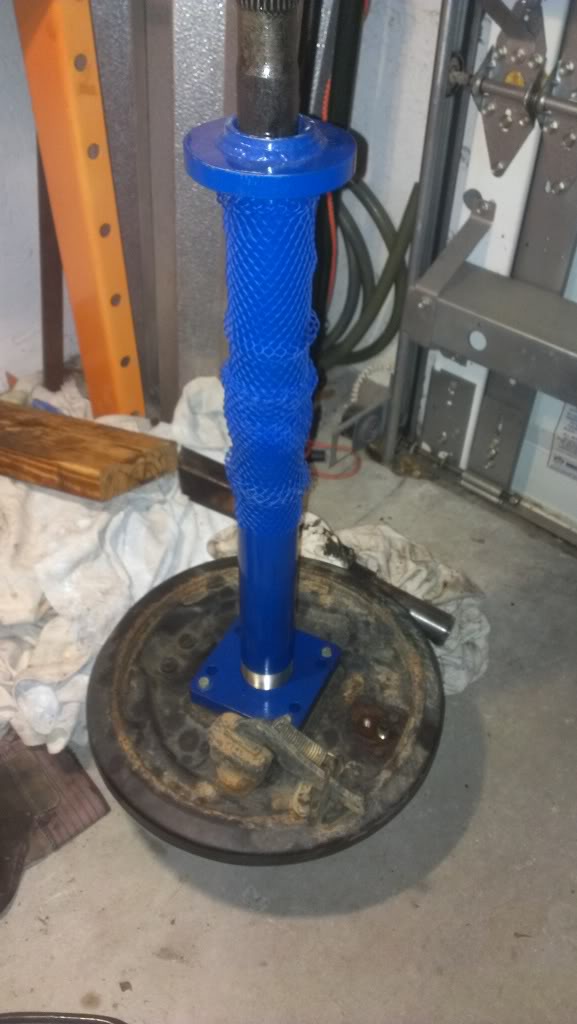
I'll have to look at it closer this weekend, but the plate does not want to sit all the way flush with the backing plate, I think it's the threads on the inner hole of the plate interfering with the retaining ring on top of the bearing. Should be an easy fix with some filing. So far I am happy with it, seems like it will do the job.
I'll have to look at it closer this weekend, but the plate does not want to sit all the way flush with the backing plate, I think it's the threads on the inner hole of the plate interfering with the retaining ring on top of the bearing. Should be an easy fix with some filing. So far I am happy with it, seems like it will do the job.


