
coryc85's 1988 4Runner Build-Up Thread
 05-07-2013, 04:54 PM
#301
Registered User
one of my sticker people say they've talked to ya before mark lol they recognized the got zuk
any how i contacted 4 of them 2 have gotten back to me
and the second one
these would be on high quality vinyl (5-10 yrs) an various colors available
any how i contacted 4 of them 2 have gotten back to me
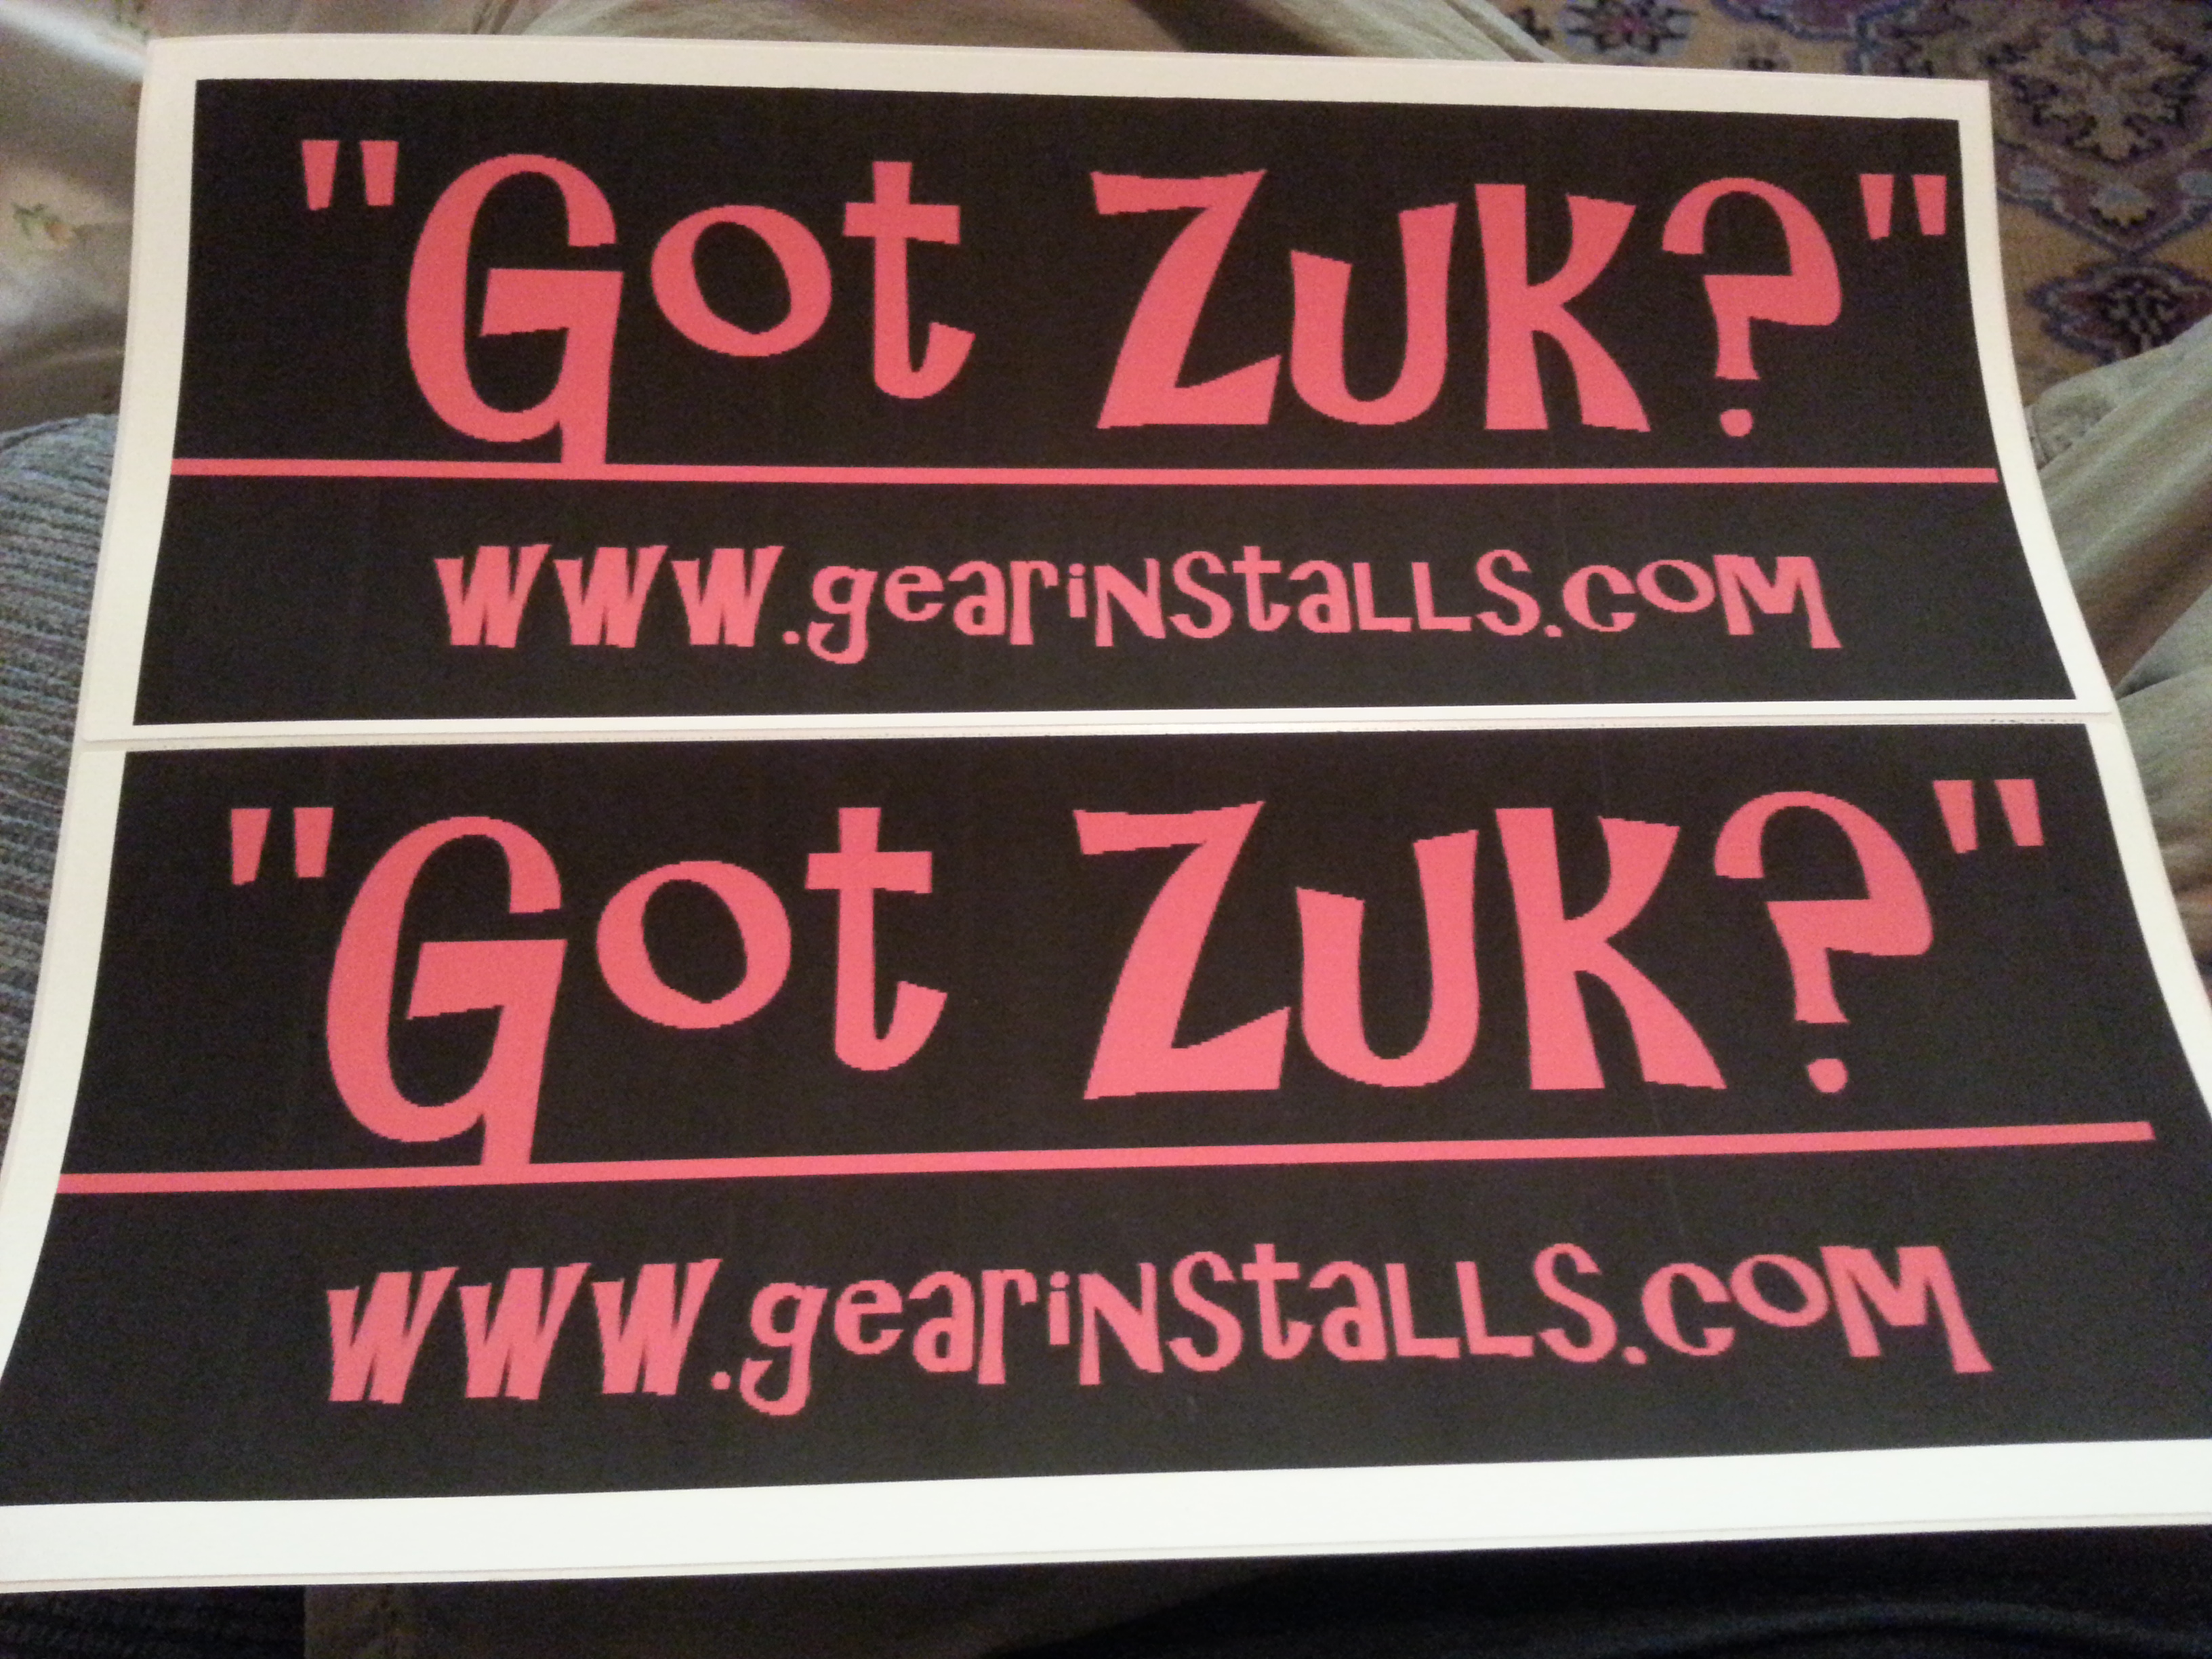
I sent him the info a while ago but if he wanted just the text a 4"x7" would be (for bulk orders) about a $1 each. If he wanted the text on a black background it would be ~$2 each.
$2/pc 10+
$1.65/pc 30+
USD Bulk orders do not come with shipping, so if you're in the continental US, look for around $3 for shipping.
$1.65/pc 30+
USD Bulk orders do not come with shipping, so if you're in the continental US, look for around $3 for shipping.
 05-07-2013, 05:05 PM
#302
Awesome! I honestly dont remember speaking to anyone! Lol.... I have it in my photobucket & can download back to my computer....but I cant find it in my PC.... grrrr.
I was just trying to do again/over on paint and I can set the background color up there.....but I cant seem to get the background color to show up on my screen (in the box I will type red on jn paint) grrrrrr! What am I doing wrong?
I was just trying to do again/over on paint and I can set the background color up there.....but I cant seem to get the background color to show up on my screen (in the box I will type red on jn paint) grrrrrr! What am I doing wrong?
05-07-2013, 05:38 PM
#304
Zuk - Yeah very good point, hard to hold onto that thin little shim and sand it. I filed the edges off the shims as you suggested, there was definitely a raised edge there. Pattern pics are below...
Ooh, that's a pretty good idea Dragon. I may try that in the next gear setup
Chef - yeah that's the one! I love it.
Please Terry...Zuk makes it look easy, I'm just following his recipe. And I just want to say that I have been slowly accumulating the stuff to do this. You absolutely need a press, and the in-lb torque wrench sure is handy. The dial indicator is also a must, and the electric impact makes getting that pinion nut off pretty easy. So once you have the stuff, all you have to do is read Zuk's setups about 5000 times and you're ready to give it a try. The body work that you do is what amazes me, I will never be able to fix a dent like you can, let alone paint my whole truck. I'll have to leave that to the pros.
On to the gears...first, I dissassembled the entire diff.
Ok, so then I filed off the inner and outer edges of the shims. Stacked them up, a .020, 3x .015, and a .010...adds up to .075 so you would think. I measured them in my hand and they were like .083...then I got smart and clamped them in the vise, I read about .081. That was not gonna help since I was shooting for .074. I then took the .020 out and substituted a .015 clamped it all in the vise and measured .0735, rotated it in the vise and measured .074...so I used them. Put them on the pinion, pressed the bearing on, sat pinion on some 2x4s, sat diff on it, dropped in the spacer and shim, tapped outer bearing on, put on flange, tighted nut until about 15 in-lb preload, flip housing over, sit the carrier in, put in adjusters, then the caps. The caps take me forever by the way. Set backlash to .008...check the pattern...
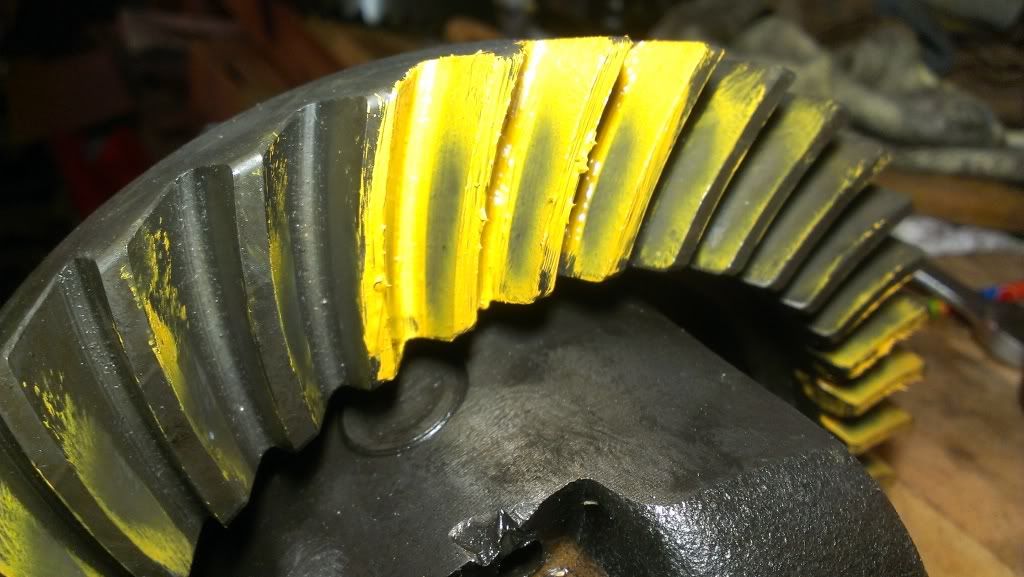
Here's the coast side
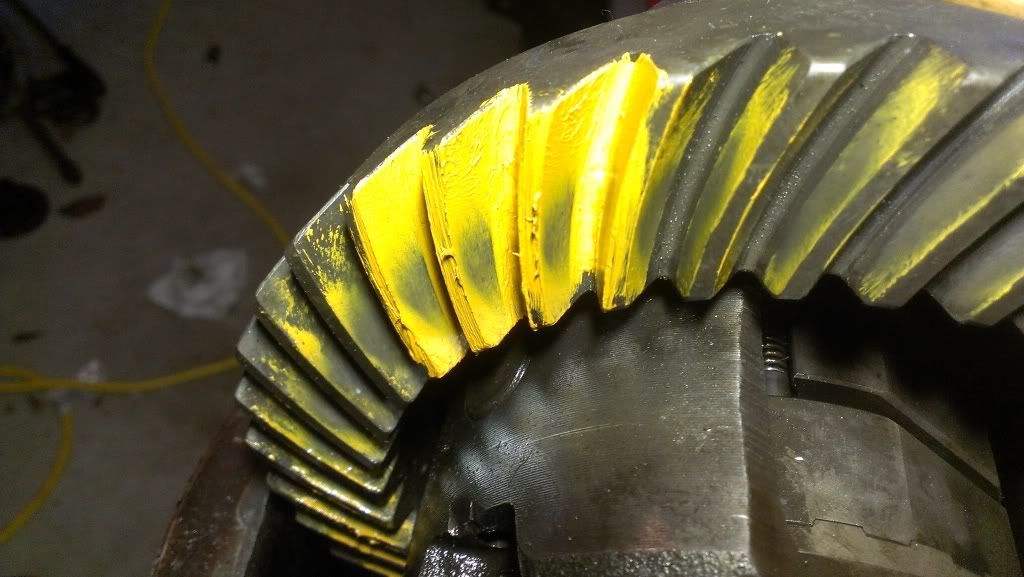
And the pinion for good measure

I'm no expert, but I think I like it. It has definitely moved in a good direction, but I think it might still be a tad on the deep side. We'll see if the Guru of Gears thinks it's good enough. If he concurs, then I will put the seal in (not forgetting to grease the spring and use RTV), crank the nut down with loctite, ding it, check the BL again, crank in some carrier bearing preload, loctite in the adjuster hold down tabs and call this baby done.
Ooh, that's a pretty good idea Dragon. I may try that in the next gear setup
Chef - yeah that's the one! I love it.
Please Terry...Zuk makes it look easy, I'm just following his recipe. And I just want to say that I have been slowly accumulating the stuff to do this. You absolutely need a press, and the in-lb torque wrench sure is handy. The dial indicator is also a must, and the electric impact makes getting that pinion nut off pretty easy. So once you have the stuff, all you have to do is read Zuk's setups about 5000 times and you're ready to give it a try. The body work that you do is what amazes me, I will never be able to fix a dent like you can, let alone paint my whole truck. I'll have to leave that to the pros.
On to the gears...first, I dissassembled the entire diff.
Ok, so then I filed off the inner and outer edges of the shims. Stacked them up, a .020, 3x .015, and a .010...adds up to .075 so you would think. I measured them in my hand and they were like .083...then I got smart and clamped them in the vise, I read about .081. That was not gonna help since I was shooting for .074. I then took the .020 out and substituted a .015 clamped it all in the vise and measured .0735, rotated it in the vise and measured .074...so I used them. Put them on the pinion, pressed the bearing on, sat pinion on some 2x4s, sat diff on it, dropped in the spacer and shim, tapped outer bearing on, put on flange, tighted nut until about 15 in-lb preload, flip housing over, sit the carrier in, put in adjusters, then the caps. The caps take me forever by the way. Set backlash to .008...check the pattern...
Here's the coast side
And the pinion for good measure
I'm no expert, but I think I like it. It has definitely moved in a good direction, but I think it might still be a tad on the deep side. We'll see if the Guru of Gears thinks it's good enough. If he concurs, then I will put the seal in (not forgetting to grease the spring and use RTV), crank the nut down with loctite, ding it, check the BL again, crank in some carrier bearing preload, loctite in the adjuster hold down tabs and call this baby done.
 05-07-2013, 05:39 PM
#305
Registered User
Thread Starter
I'm in for one! Thanks Chef...and thanks Dragon for investigating sticker vendors.
05-07-2013, 05:42 PM
#306
Registered User
Thread Starter
Awesome Zuk! Thank you, thank you, and thank you. Looks like I will button this thing up, I could not have done this without your guidance, both your website and you double checking my patterns here.
05-07-2013, 05:46 PM
#307
I swear this is not pink! My phone does that in some lighting, grrrr. And I would do it smaller. Also, its matt finish, I missed that in my ignorance filled shopping trip down the clearance isle at Office Depot, haha. I will do some smaller ones for now until I get some Shiney ones like Dragon had there, lol........
Last edited by ChefYota4x4; 05-07-2013 at 05:48 PM.
05-07-2013, 05:52 PM
#308
Registered User
 05-08-2013, 04:47 AM
#313
Registered User
Thread Starter
Thanks kornhusker!
Thanks Chef. It's really not too bad as long as you aren't in a hurry. It takes time to do it right. I don't know how long it takes Zuk to tear a third down and re-shim, but probably takes me an hour, and most of that time is getting those darn carrier bearing caps lined up with the adjusters. Then there there is all the other little goodies you have to do to finish it up. Anyway, you can certainly do it.
I'm glad you and Dragon are seriously looking into getting these stickers made.
I'm glad you and Dragon are seriously looking into getting these stickers made.
Last edited by coryc85; 05-08-2013 at 04:49 AM.
05-08-2013, 11:42 PM
#317
Hahaha..... I look forward to getting one for myself. Just have to figure out how much for how many.... Then I'll just share the cost by selling them for whatever they cost me/+ Shipping out. I REALLY like that one with the Capital letters..... I know it's not for everyone....BUT, on my ole Ruby REDRUM, ....it'll flow with the scheme! lol. Black makes red POP, and I don't want it blending with the Yotatech Sticker, otherwise I'd to it clear background(which I know is more).... Only corner rear window space I have left is on the "YOTATECH" sticker side... which has had it's own window.... until this one comes, hahaha.
05-08-2013, 11:46 PM
#318
Cory, .... an HOUR?  ..... I'm not gonna bank on that for myself... BUT, I think it's worth a shot.... I should have all the tools and can borrow any others... Plus, my machinist will likely let me do it there... We'll see. Only thing is I can't decide on which locker for the front. I would likely throw a spartan up there as well. Done right by me.... I get some serious hills conquered with that bugger, lol.
Might have more info to share soon......... Just have to keep my mouth shut for now, lol. Life is just too sporadic for me, for too long, to jump the gun any more. Wish list? SURE, ... >>>>> UNIMOG! hahaha.
..... I'm not gonna bank on that for myself... BUT, I think it's worth a shot.... I should have all the tools and can borrow any others... Plus, my machinist will likely let me do it there... We'll see. Only thing is I can't decide on which locker for the front. I would likely throw a spartan up there as well. Done right by me.... I get some serious hills conquered with that bugger, lol. Might have more info to share soon......... Just have to keep my mouth shut for now, lol. Life is just too sporadic for me, for too long, to jump the gun any more. Wish list? SURE, ... >>>>> UNIMOG! hahaha.
05-09-2013, 05:22 AM
#319
Registered User
Thread Starter
Cory, .... an HOUR? ..... I'm not gonna bank on that for myself... BUT, I think it's worth a shot.... I should have all the tools and can borrow any others... Plus, my machinist will likely let me do it there... We'll see. Only thing is I can't decide on which locker for the front. I would likely throw a spartan up there as well. Done right by me.... I get some serious hills conquered with that bugger, lol.
Might have more info to share soon......... Just have to keep my mouth shut for now, lol. Life is just too sporadic for me, for too long, to jump the gun any more. Wish list? SURE, ... >>>>> UNIMOG! hahaha.
..... I'm not gonna bank on that for myself... BUT, I think it's worth a shot.... I should have all the tools and can borrow any others... Plus, my machinist will likely let me do it there... We'll see. Only thing is I can't decide on which locker for the front. I would likely throw a spartan up there as well. Done right by me.... I get some serious hills conquered with that bugger, lol. Might have more info to share soon......... Just have to keep my mouth shut for now, lol. Life is just too sporadic for me, for too long, to jump the gun any more. Wish list? SURE, ... >>>>> UNIMOG! hahaha.
Chef - an hour was just for a teardown to re-shim it. There is MUCH more time involved in the whole process. I just meant after a pattern check, if you need to re-shim, you're looking at about an hour of work to get back to where you can check the pattern again.
As for the front locker, I'm conflicted as well. I really want an ARB up there, but not too sure I wanna drop that kind of money on the front diff. I'd like to be able to flip the switch and turn it off in case I ever drive in icy conditions, or sometimes on muddy side hills it would be nice to turn it off. But it usually comes down to bottom dollar, and I just can't see myself spending that kind of money on the front diff. So most likely, when I get around to it, I'll put an Aussie or similar up there.
And what is this secret you are keeping from us? What more might you have to share? You can't say that and then not share it!
Last edited by coryc85; 05-09-2013 at 05:23 AM.
05-09-2013, 11:42 AM
#320
Oh boy, well it doesn't really matter as long as I can pull it off how long it takes... After all the crap I've been through the taking for ever and all the odd obstacles I've had that no one else seems to have... And considering that I like to do things right the first time, I have no problem with taking me an entire week! Hahahaha. Thanks so much for doing this great write-up and thanks again to Zuk! I won't lie, effin when I tackled if I will definitely be contacting him to make sure I'm doing everything right!


