
ChefYota4x4's 1987 4Runner Build-Up Thread
 09-30-2013, 08:30 PM
#7801
Registered User
iTrader: (4)
Join Date: May 2010
Location: People's Republic of California
Posts: 720
Likes: 0
Received 15 Likes
on
12 Posts
 Hilarious! I'm not as ocd as you, but that rusted/acid corroded bracket caught my eye big time! I was thinking "maybe his broke and he just got that from the yard...."
Come on....take it off wire wheel it, sand it, primer, and paint.
 09-30-2013, 10:23 PM
#7802
Hahaha, yeah, the hold down is a bit yucky,....but still solid as ever, and while I plan to do an aftermarket hold down,..... I felt that could come soon after? 
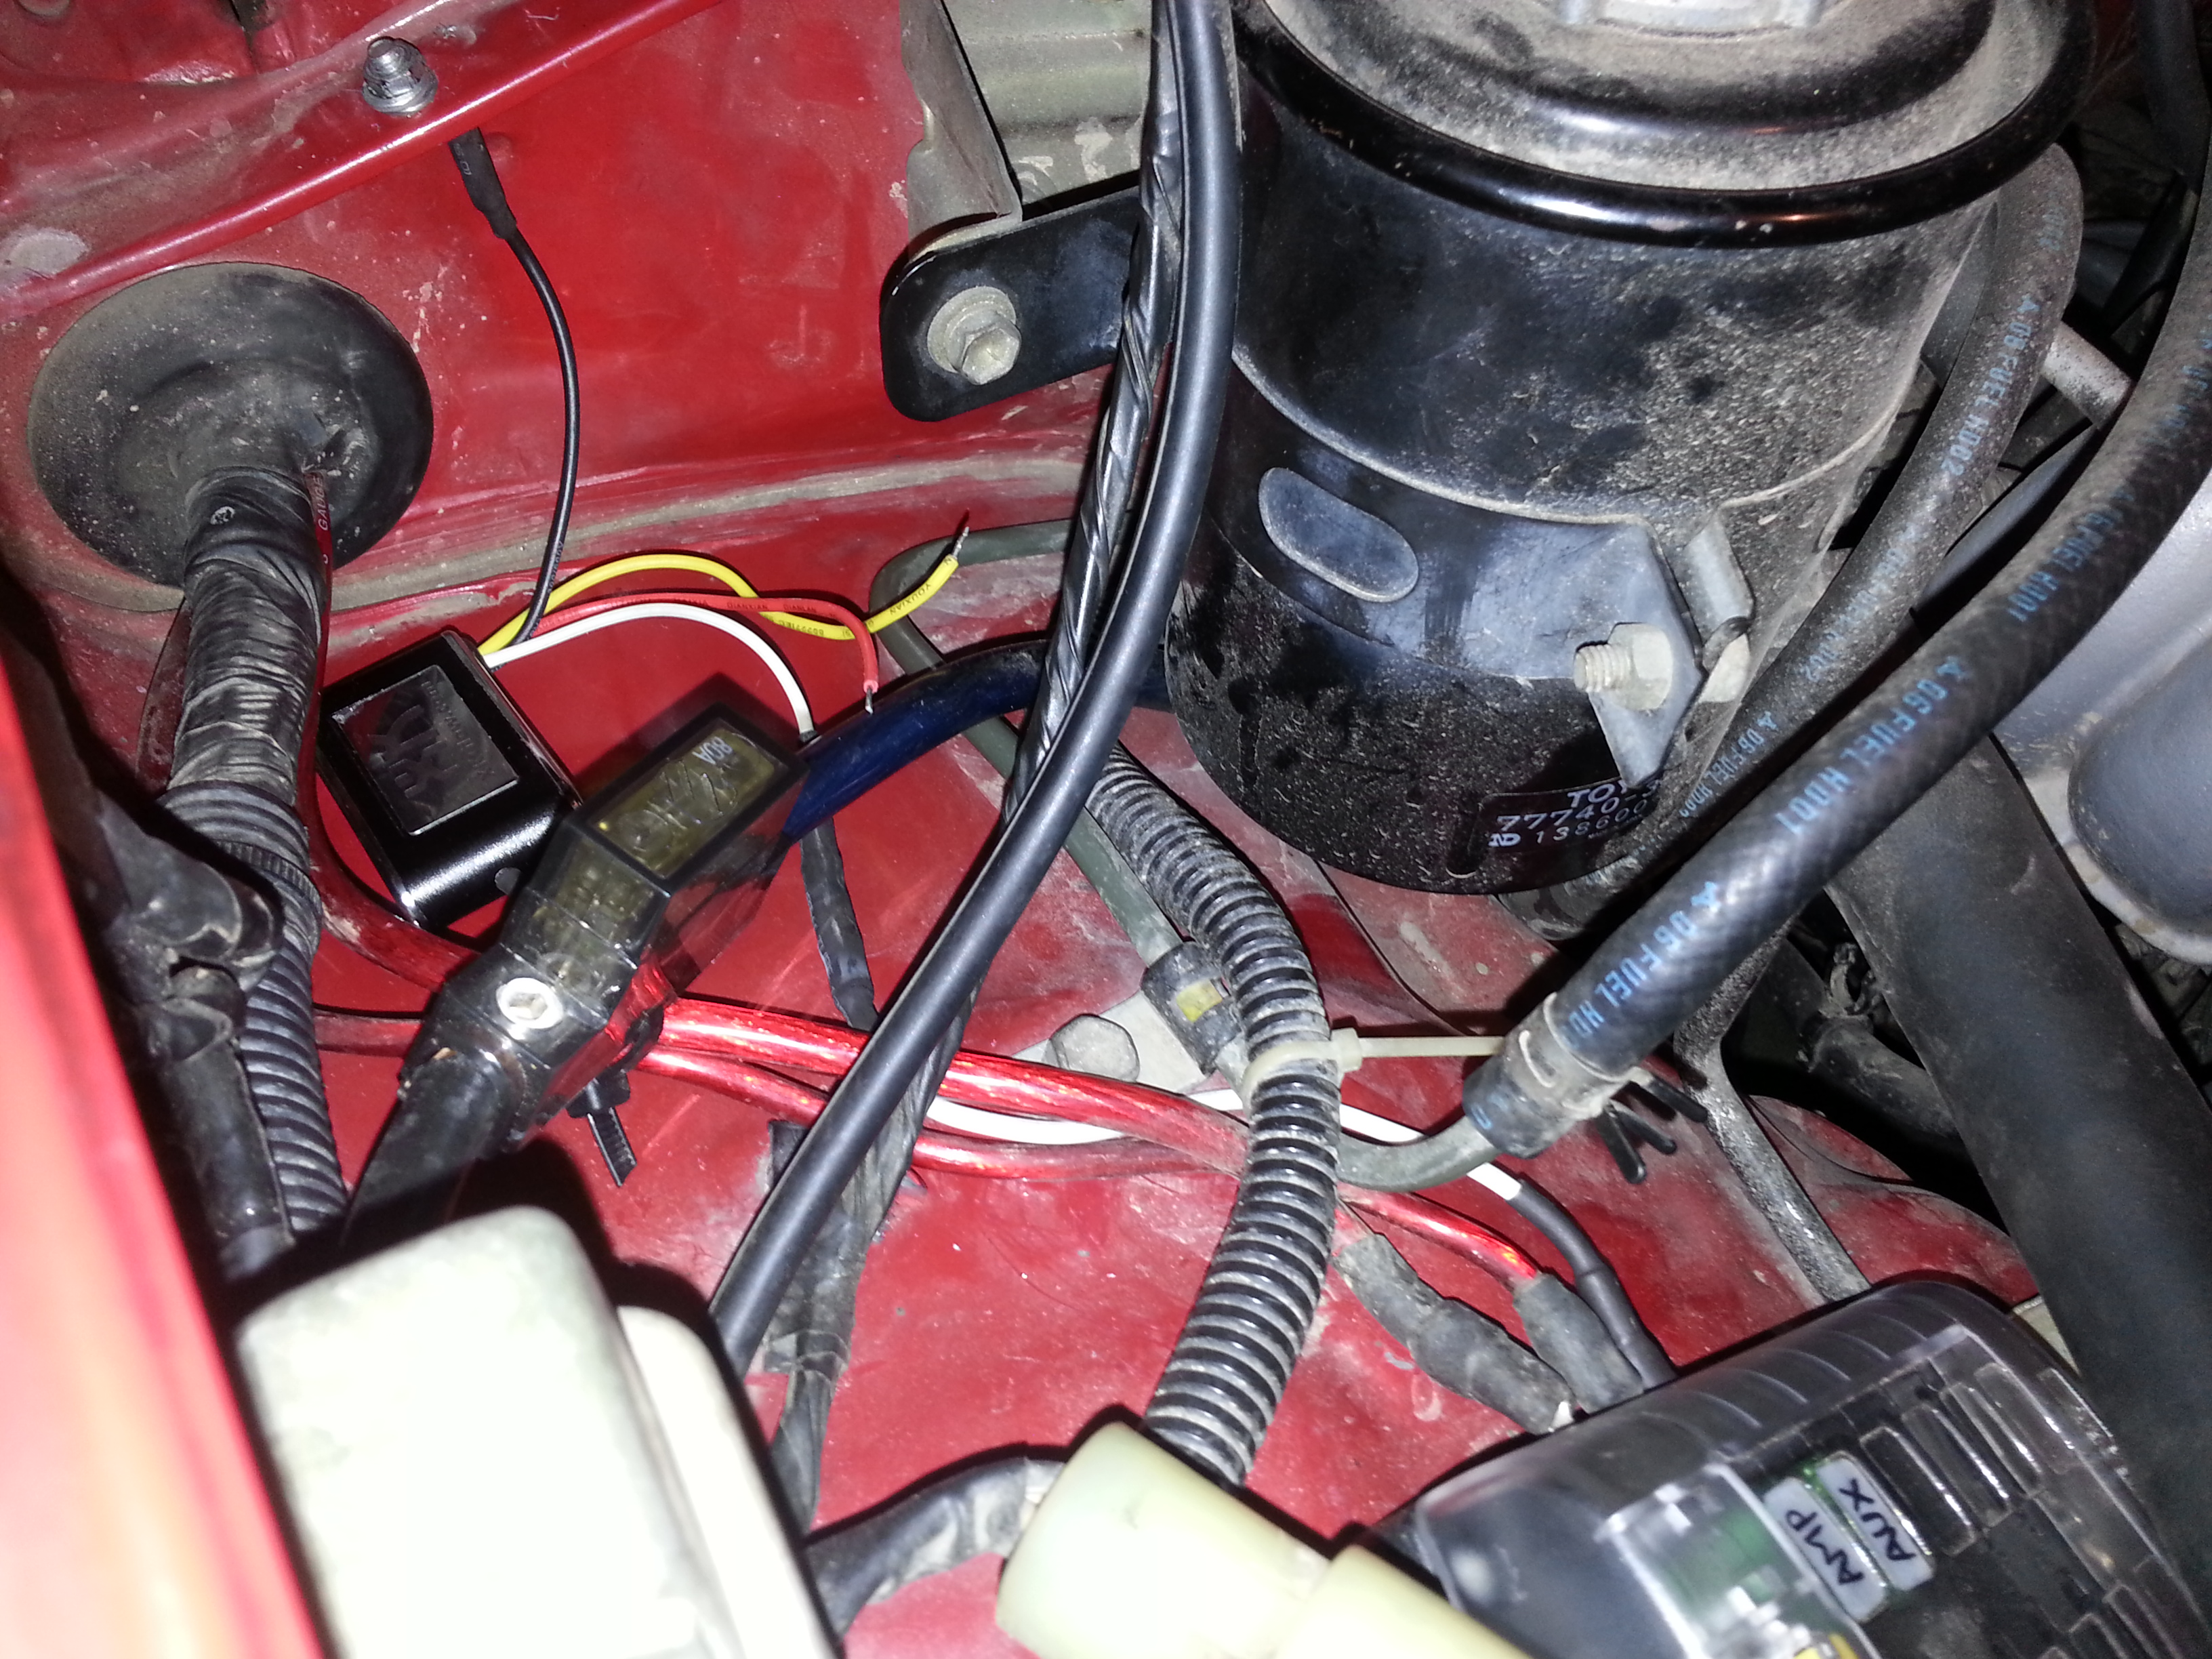
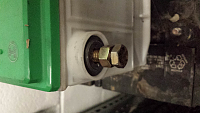
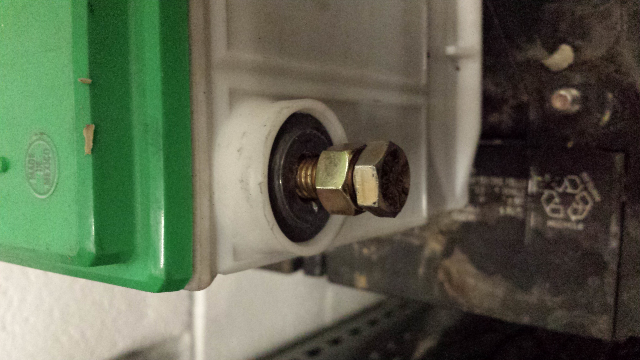
Ray, I think the pic is confusing.....It's taken from the charcoal cannister angle. Same polarity orientation/and it's totally clear of all fender/fire or otherwise-walls. I'm using the side post on the positive terminal, as you can see, and I'm running my OBA, Fusible link Wire and Aux Fuse Block off of it. I used a quality side post w/extension/nut and lock washer to secure those wires I just mentioned to it.... And am now only running my starter wire off the top post, but I've changed that top part to a quality/new terminal. Used the top-stud type, so now I have a nice clean post on top on each side to quickly add my winch when needed, using a nut on top of the top studs. Woot! Haha....
PS: I had to modify a couple of the connectors as the studs on the new terminal and side post stud extension were much larger in diameter......
****************************************
XK Glow Rock Lights:......
After finally wrapping up the battery install, I ran the XK Glow relay module positive input wire(WHITE) to the Aux Fuse Block, Relay Negative(BLACK) to the Firewall Pinchweld.... The Red and Yellow will feed the pairs of wires down each side that will power the Rock Light Pods....
The remote will be on my Keychain, most often (always, on trips), so it will always be a HOT. This will be cool to click it on from the campfire chair, to make it easier to get to my rig/get in when it's pitch black. ........
Ready to run the lights and mount, tomorrow. Can't wait! > > >
*****************************************
PSS: If anyone has a suggestion as to the battery tie down, please lemme know? I was going to use aluminum U-track I have (it will be more rigid than flatbar).......??????????? If Rugged or TG or Addicted has a good one for tge job..... I'm down with that. HOWEVER, this factory dude has never given me a problem and the battery has always been extremely secure... As it is right now. So maybe I should just peel off all of the vinyl coating or whatever is on there and sand it down and hit with hammered? I have some red engine plant as well, but actually I was thinking of just taking it down to have a powder-coated really quickly at powder coating maniac. I do like hints here and there of the stock look.
Ray, I think the pic is confusing.....It's taken from the charcoal cannister angle. Same polarity orientation/and it's totally clear of all fender/fire or otherwise-walls. I'm using the side post on the positive terminal, as you can see, and I'm running my OBA, Fusible link Wire and Aux Fuse Block off of it. I used a quality side post w/extension/nut and lock washer to secure those wires I just mentioned to it.... And am now only running my starter wire off the top post, but I've changed that top part to a quality/new terminal. Used the top-stud type, so now I have a nice clean post on top on each side to quickly add my winch when needed, using a nut on top of the top studs. Woot! Haha....
PS: I had to modify a couple of the connectors as the studs on the new terminal and side post stud extension were much larger in diameter......
****************************************
XK Glow Rock Lights:......
After finally wrapping up the battery install, I ran the XK Glow relay module positive input wire(WHITE) to the Aux Fuse Block, Relay Negative(BLACK) to the Firewall Pinchweld.... The Red and Yellow will feed the pairs of wires down each side that will power the Rock Light Pods....
The remote will be on my Keychain, most often (always, on trips), so it will always be a HOT. This will be cool to click it on from the campfire chair, to make it easier to get to my rig/get in when it's pitch black.
........Ready to run the lights and mount, tomorrow. Can't wait! > > >
*****************************************
PSS: If anyone has a suggestion as to the battery tie down, please lemme know? I was going to use aluminum U-track I have (it will be more rigid than flatbar).......??????????? If Rugged or TG or Addicted has a good one for tge job..... I'm down with that. HOWEVER, this factory dude has never given me a problem and the battery has always been extremely secure... As it is right now. So maybe I should just peel off all of the vinyl coating or whatever is on there and sand it down and hit with hammered? I have some red engine plant as well, but actually I was thinking of just taking it down to have a powder-coated really quickly at powder coating maniac. I do like hints here and there of the stock look.
10-01-2013, 01:22 AM
#7803
Ordered this as primary, for now, as mine is starting to corrode on the hold down perpendicular brackets... I will remove them and have new ones welded on to fit my new batteries width (it's more narrow, but longer)....
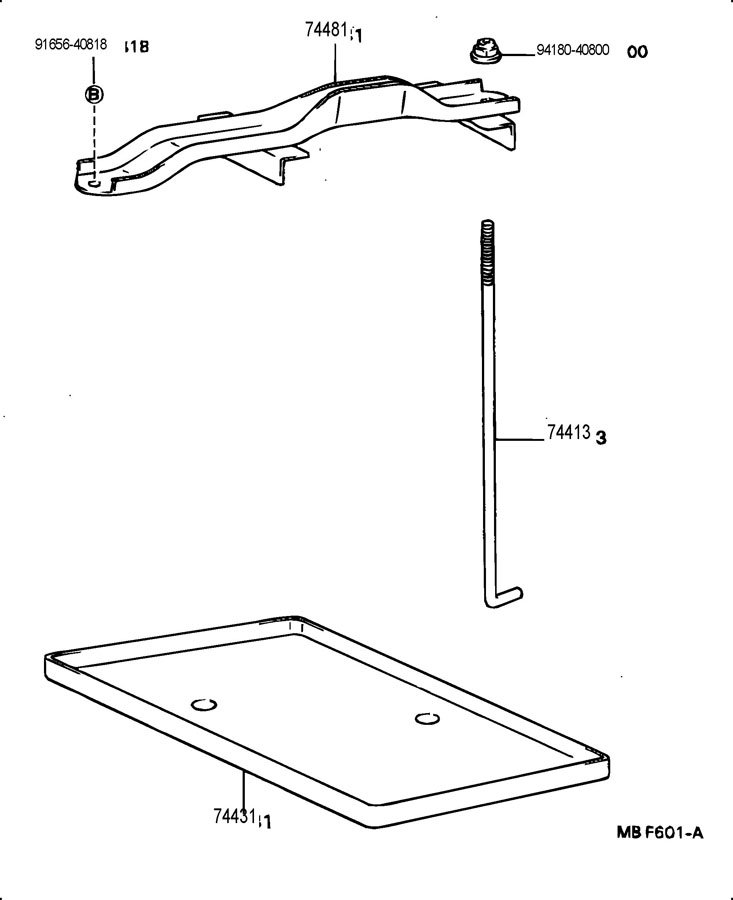
74404-89114
CLAMP SUB-ASSY, BATT˟
74404-89114
CLAMP SUB-ASSY, BATT˟
10-01-2013, 03:27 AM
#7804
Registered User
I need to make one also for mine is missing!! And yhe one on my 88 truck is corroded and looks horrible. Speedway Motors also makes some nice aftermarket battery stuff including a sweet aluminum one but i think its custom for optimas??
10-01-2013, 11:06 AM
#7806
I gotta repeat though, the stock reinforced bracket never once came loose or allow the battery to move even the tiniest amount. Never damaged any of the batteries either, and I don't really see a need for a battery to be inside of a cage as long as it is secured properly. I have seen some good retainers that hold it from all four corners like a rectangle. Those have to be exactly the right size. But, they can easily work with just simply fixing a bolt to the tray on top or should I say retainer, and then fixing another bolt to the existing threaded hole in the core support. What a way to do it, and I've even seen guys take that Trail Gear cage and mount there a fuse block to it.
I don't know, I gave them the dimensions and I'm waiting to hear back from them. I miss Con-ferr..... They use to have carriers bolted into the under battery portion and had a dimpled tray and everything. (Toyota still has those trays available by the way... 35 bucks plus shipping.) .....
I like Trail Gear dual battery trays a lot. But I don't see running the batteries in the engine bay working that way. Not for me anyway. However, running an isolator to a second battery in the rear could work. Just probably not necessary. I don't leave my stereo on with the amp going all night long, etc. In fact, that's why I included a quick disconnect for the power to my amp, so that when I'm on trips and I don't have my subwoofer, what the heck is the point of having the amp pulling juice, right? Its funny, when I was younger, that stereo I had was on, the Alpine, until it shut off automatically to save my battery. Now, I'm good just having it on for a little while here and there, and usually not at all when there are people to socialize with. Lol
10-01-2013, 11:37 AM
#7807
This one's from Speedway motors appears to be for the Optima, & I don't like at all how close across the bar arches get to the terminals. I'm sure they give you space to fit your terminal, but it seems pretty close to me... If I did have an Optima....
http://www.speedwaymotors.com/Billet...ery+Hold+Downs
4wheelparts, Rugged Ridge, addicted, Pep Boys, shocking how many places sell them. I just been looking a little bit. .... We will see. For now, I will be content with the stock setup. Its very solid and takes up very little space and no modifications necessary.
10-01-2013, 12:27 PM
#7809
Registered User
iTrader: (1)
Join Date: Apr 2007
Location: las vegas, hawaii
Posts: 245
Likes: 0
Received 0 Likes
on
0 Posts
Have you looked into the measurements for optima batteries or the Deka ones? From TG pics the Deka battery looks to be a bit wider than the optimas. I too want to get the dual posted battery to run accessories off of as you are doing. So I am definitely following the right person.
10-01-2013, 11:34 PM
#7810
Have you looked into the measurements for optima batteries or the Deka ones? From TG pics the Deka battery looks to be a bit wider than the optimas. I too want to get the dual posted battery to run accessories off of as you are doing. So I am definitely following the right person.
Look forward to seeing whatever you do man. Post a link to your girlfriend or send me a private message, whatever you want.
10-02-2013, 12:46 AM
#7812
Ok, made a lil more progress today. I'm currently running the two pairs of wires, separately, from the remote relay module +/- 'outs' .....
Getting the pairs Soldered into each 'out' wire from the relay module was a bit tight, as I didn't have much play and had to reach in there to do the soldering of everything... But I feel very comfortable in saying that this install should last as long as I decide to leave it in there. It was a bit more work then I thought, but these kind of projects always seem to be, hahaha. I only have so much time each time I head out there, but considering all the details and I'm putting into this, just curious thing out of the way and safely and in a hidden manner.... I guess it's taking this long as I should expect...
Here's a video I did up to the point I start mounting the lights. It just explains the light kit and remote and how I chose to install it. So far I'm very pleased with ease and I'm glad that I got the remote. I think it's definitely a bonus! As far as the strobe and breathe selections, Mehhh....lol. But I guess for safety sake on the side of the road and so forth, are having people being able to find you a little easier when you're in trouble, it could come in handy some day........
Up front of the axle... As I mentioned in the video, it is much lighter in person with my eye then I can get it to show on the camera. I will take a picture with my Canon and adjust the time that I leave the shutter open until I come up with one what I feel is an accurate representation of what I see with my eye.... Anyway...
Over the driver knuckle/behind the shock tower, on the inner fender skirt (you'll see in the video)...
Speaking of videos, here's the second video that I took which was after only installing for lights so far. Needless to say, it's definitely brighter than appears on the radio. If you watched through most of it you will see when I do the breathe selection on the remote the camera address and you can see a little better. With my eye I can tell you it's actually literally whites of the axle and ground in front of the truck really well! The ones behind the shock tower lights up the knuckle studs and everything else incredibly well also.....

 10-02-2013, 07:33 AM
#7814
Registered User
iTrader: (1)
Join Date: Apr 2007
Location: las vegas, hawaii
Posts: 245
Likes: 0
Received 0 Likes
on
0 Posts
Looking good.
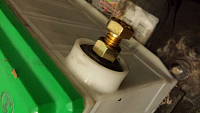
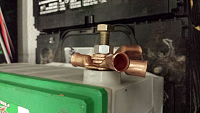
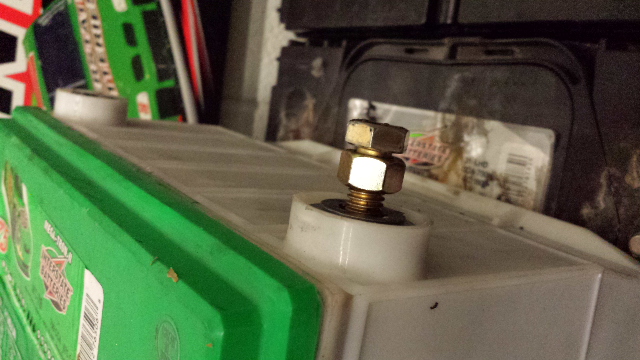
If you need more room on that positive side terminal, you can use a nut and bolt, same threading of coarse. The bolt should bottom out and the nut will secure down how ever many power wires you need.
If you need more room on that positive side terminal, you can use a nut and bolt, same threading of coarse. The bolt should bottom out and the nut will secure down how ever many power wires you need.
10-02-2013, 11:04 AM
#7815
Thanks! Me neither! Haha
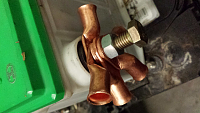
Okay, you're going to have to explain a little more. The thing that I got is basically a brass bolt with a wide hex head and then a stud out of the top( so it's basically a stud with a hex head in the middle, or I guess a bolt with studs going out from each end, in opposite directions, both having different threads) ... The outer one which is where I have a nut on there with a lock washer over three very large connectors that come on 4AWG.... and a 10AWG fatty connector. Maybe do a video for me with special effects and hand shadow figures and so forth? Lol... Just kidding. Okay maybe just a drawing? Hehe
Okay, you're going to have to explain a little more. The thing that I got is basically a brass bolt with a wide hex head and then a stud out of the top( so it's basically a stud with a hex head in the middle, or I guess a bolt with studs going out from each end, in opposite directions, both having different threads) ... The outer one which is where I have a nut on there with a lock washer over three very large connectors that come on 4AWG.... and a 10AWG fatty connector. Maybe do a video for me with special effects and hand shadow figures and so forth? Lol... Just kidding. Okay maybe just a drawing? Hehe
Last edited by ChefYota4x4; 10-02-2013 at 11:17 AM.
10-02-2013, 03:05 PM
#7817
Registered User
iTrader: (1)
Join Date: Apr 2007
Location: las vegas, hawaii
Posts: 245
Likes: 0
Received 0 Likes
on
0 Posts
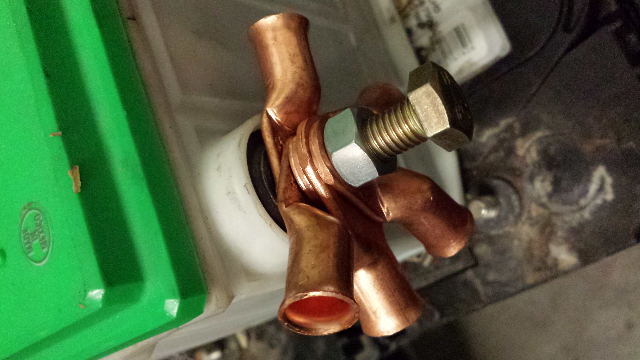
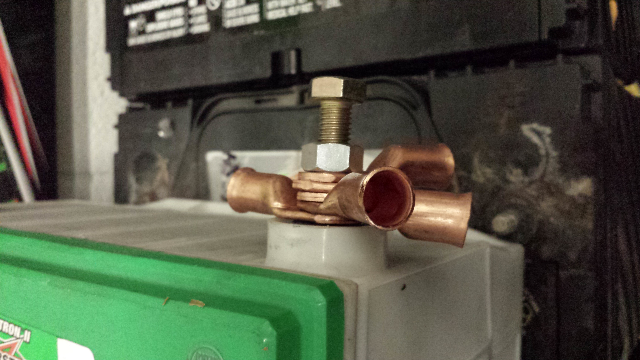
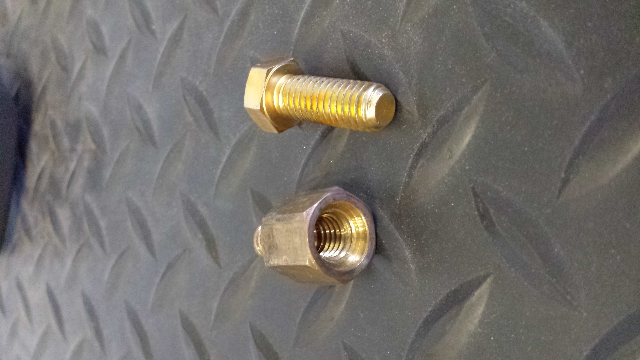
This is what I was talking about using same threading bolt 3/8" -16pitch threads is this one
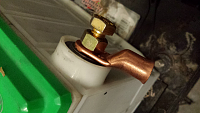
Below is a longer bolt holding 5 leads on it. Hopefully you wont be needing this many.
The lower one is what looks like to be the one you're using. The upper one is just a different type that could also be used with a longer bolt.
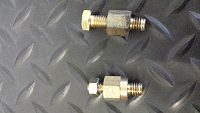

This sandwhich type setup is to run extra leads on it. The brass bolt is what secures the main battery cables and the secondary hold down is for aux.
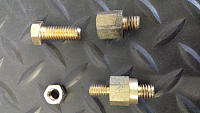
Hope this helps


Below is a longer bolt holding 5 leads on it. Hopefully you wont be needing this many.
The lower one is what looks like to be the one you're using. The upper one is just a different type that could also be used with a longer bolt.

This sandwhich type setup is to run extra leads on it. The brass bolt is what secures the main battery cables and the secondary hold down is for aux.

Hope this helps
Last edited by frm_808; 10-02-2013 at 03:14 PM.
10-02-2013, 08:07 PM
#7820
what is wrong with 5 leads of the battery? a distribution block that i see cant push more than 30amps i think. even 30amps maybe pushing it. i dont think a block can handle 5 30amp-100amp loads


