
ChefYota4x4's 1987 4Runner Build-Up Thread
 09-06-2013, 08:18 PM
#7661
Haha nothing crazy in the works.
Currently I have a 1984 Toyota pickup 4x4 dlx that I got for my first car in March! (Btw I'm 16) Was really excited about that. After all my research online and I found out that the truck needs some work: leaf springs, shocks, rebuilt knuckles, and some other things. I got the truck for a steal at $2500 and thinking about it, I could probably make money off of it with out really putting any money into it! So, after buying it a month or so later I discovered the first gen 4runners and fell in love with them. So by the end of this year I want to sell the truck and find a 4runner. Also btw I love the red color of yours and I think your truck is awesome!!
Currently I have a 1984 Toyota pickup 4x4 dlx that I got for my first car in March! (Btw I'm 16) Was really excited about that. After all my research online and I found out that the truck needs some work: leaf springs, shocks, rebuilt knuckles, and some other things. I got the truck for a steal at $2500 and thinking about it, I could probably make money off of it with out really putting any money into it! So, after buying it a month or so later I discovered the first gen 4runners and fell in love with them. So by the end of this year I want to sell the truck and find a 4runner. Also btw I love the red color of yours and I think your truck is awesome!!
Love PU's and some ppl need those for dd's instead, 4Runners just dont suit their needs.But for me? 4Runnin FTW! Hahaha
 09-06-2013, 09:23 PM
#7662

Yeah, I'm excited to find a 4runner! Will post a thread once I get one
09-06-2013, 09:28 PM
#7663
Well, I got a lil time today, so I did my front breather extension again (the SAS left it short).......

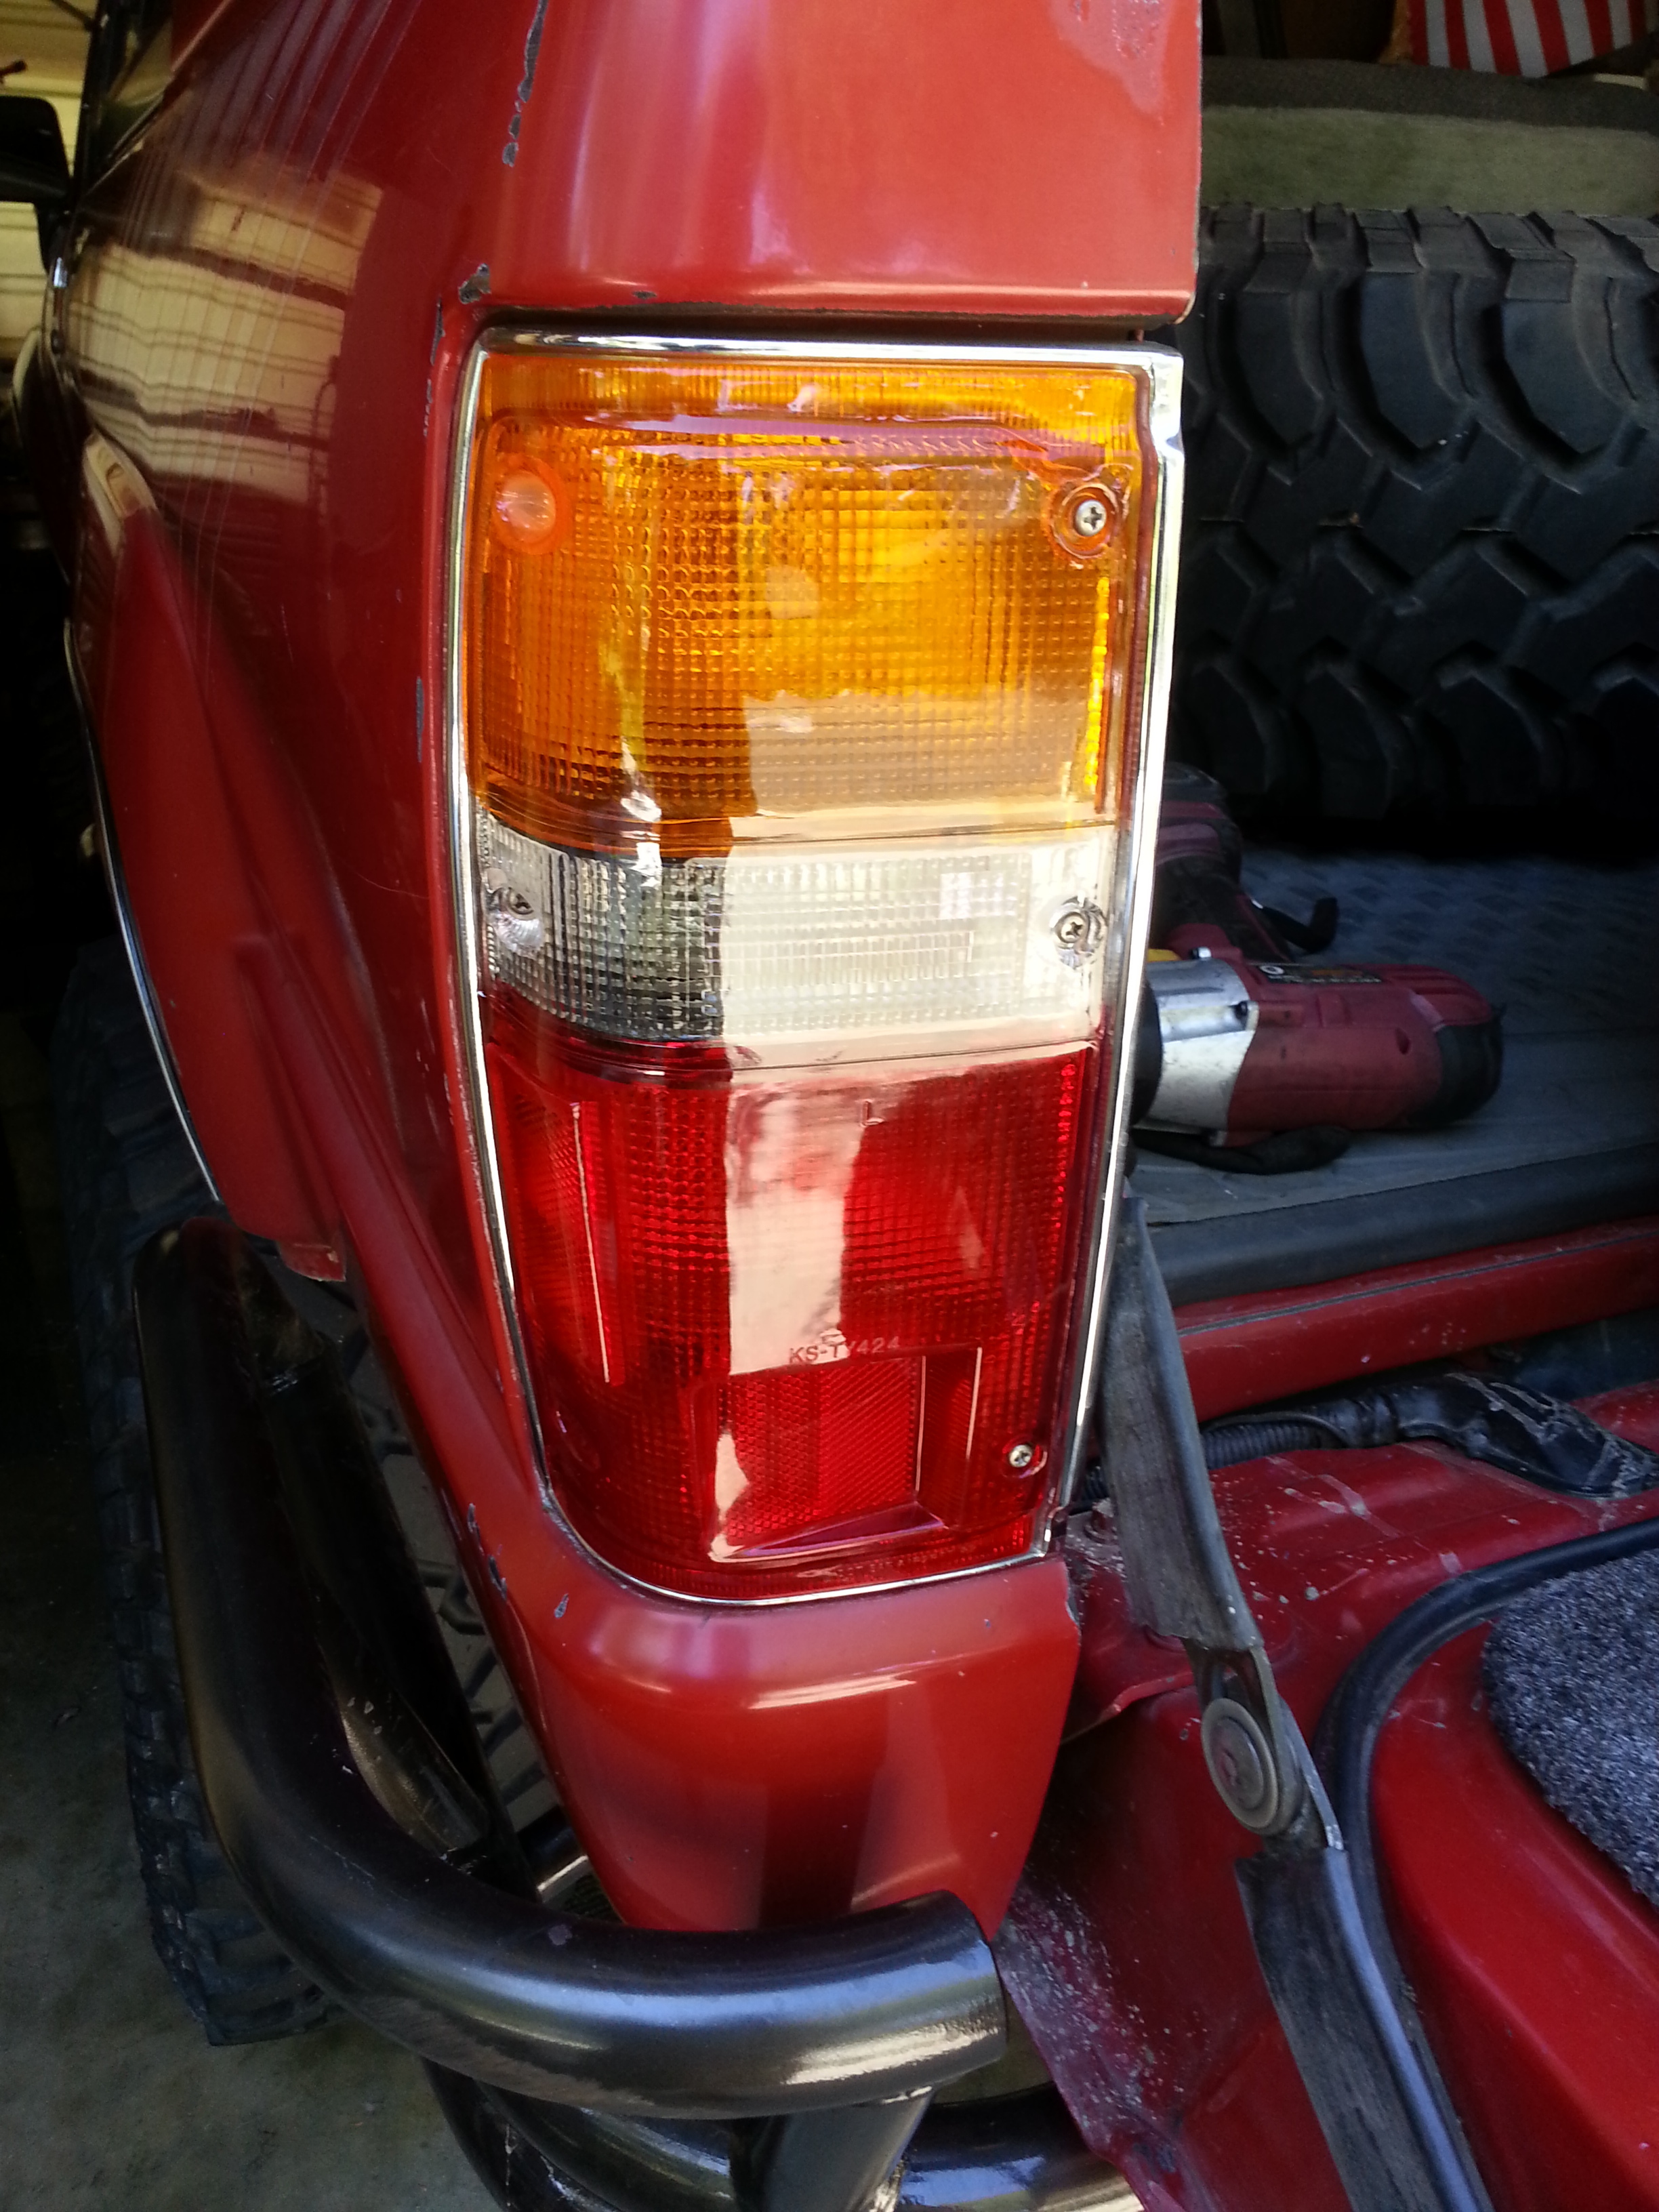
Then I slapped on my replacement taillight.......
Then, decided I should give Terry's/Inferno's temp guage fix a shot.....
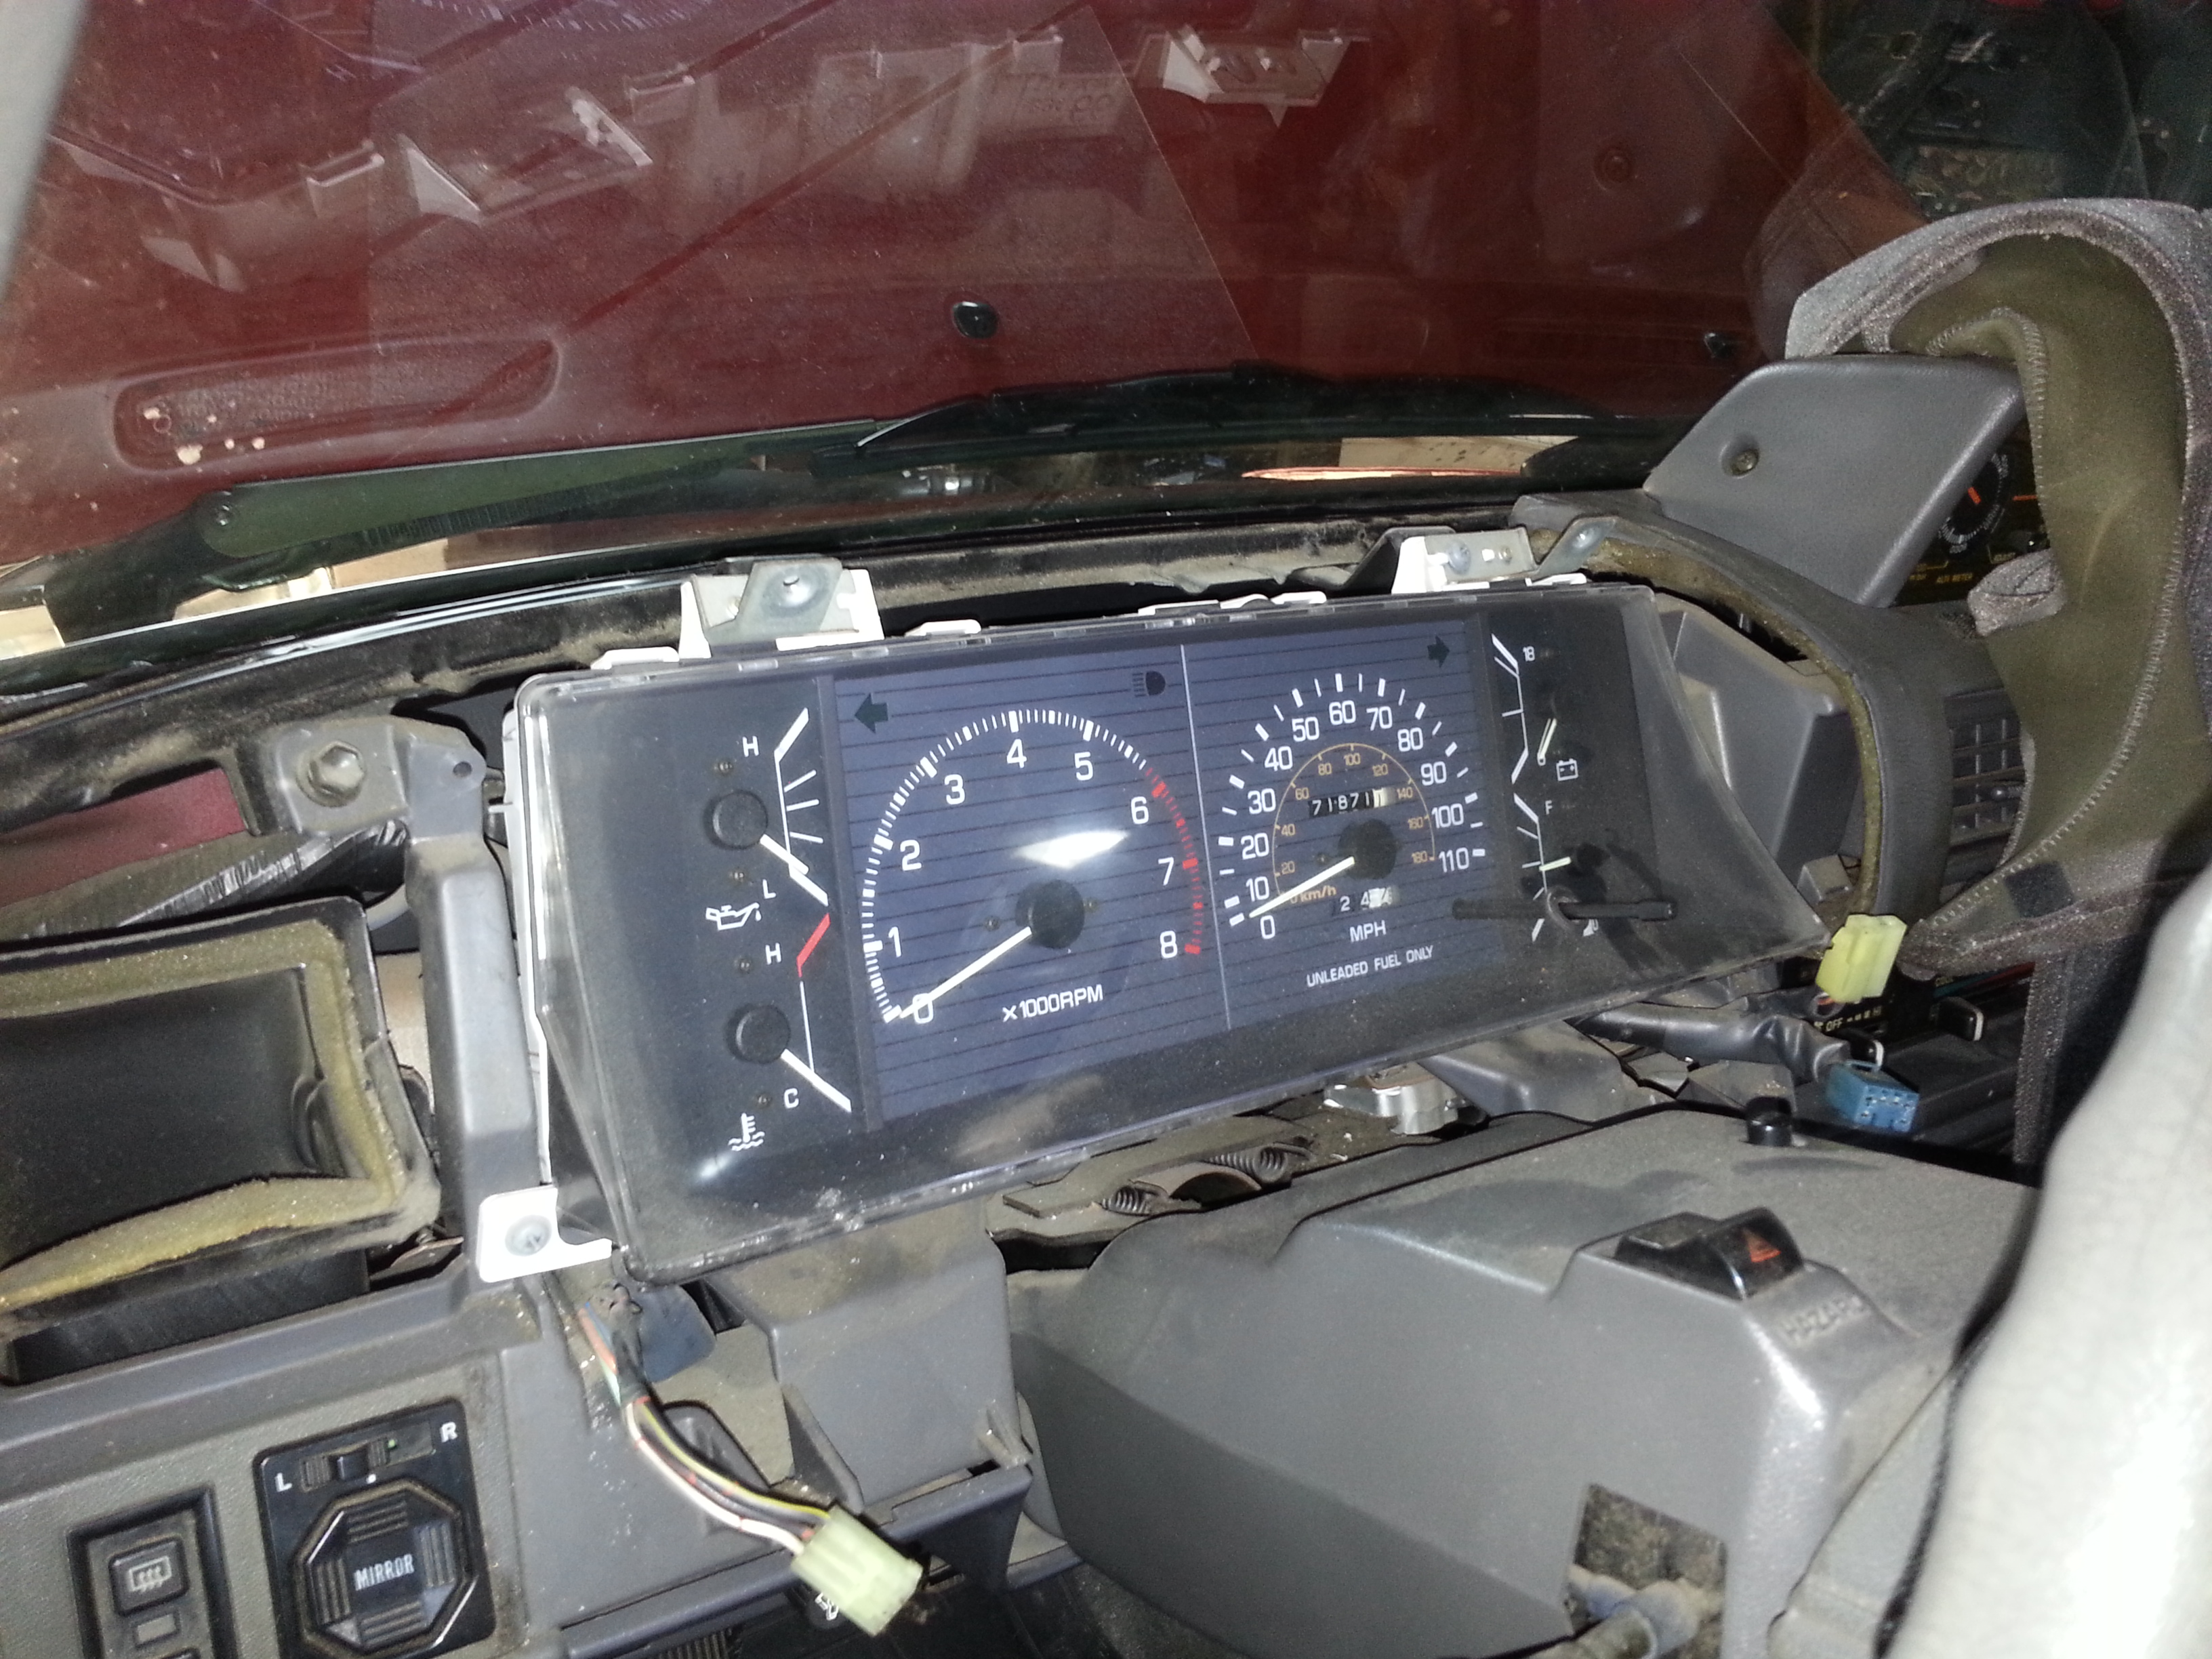
I found it to be nearly perfect.... And, I seem to have the insulation/damper piece on the back of the metal housing for the temp sender that Terry says he never sees.....(Except for in Infernos thread)
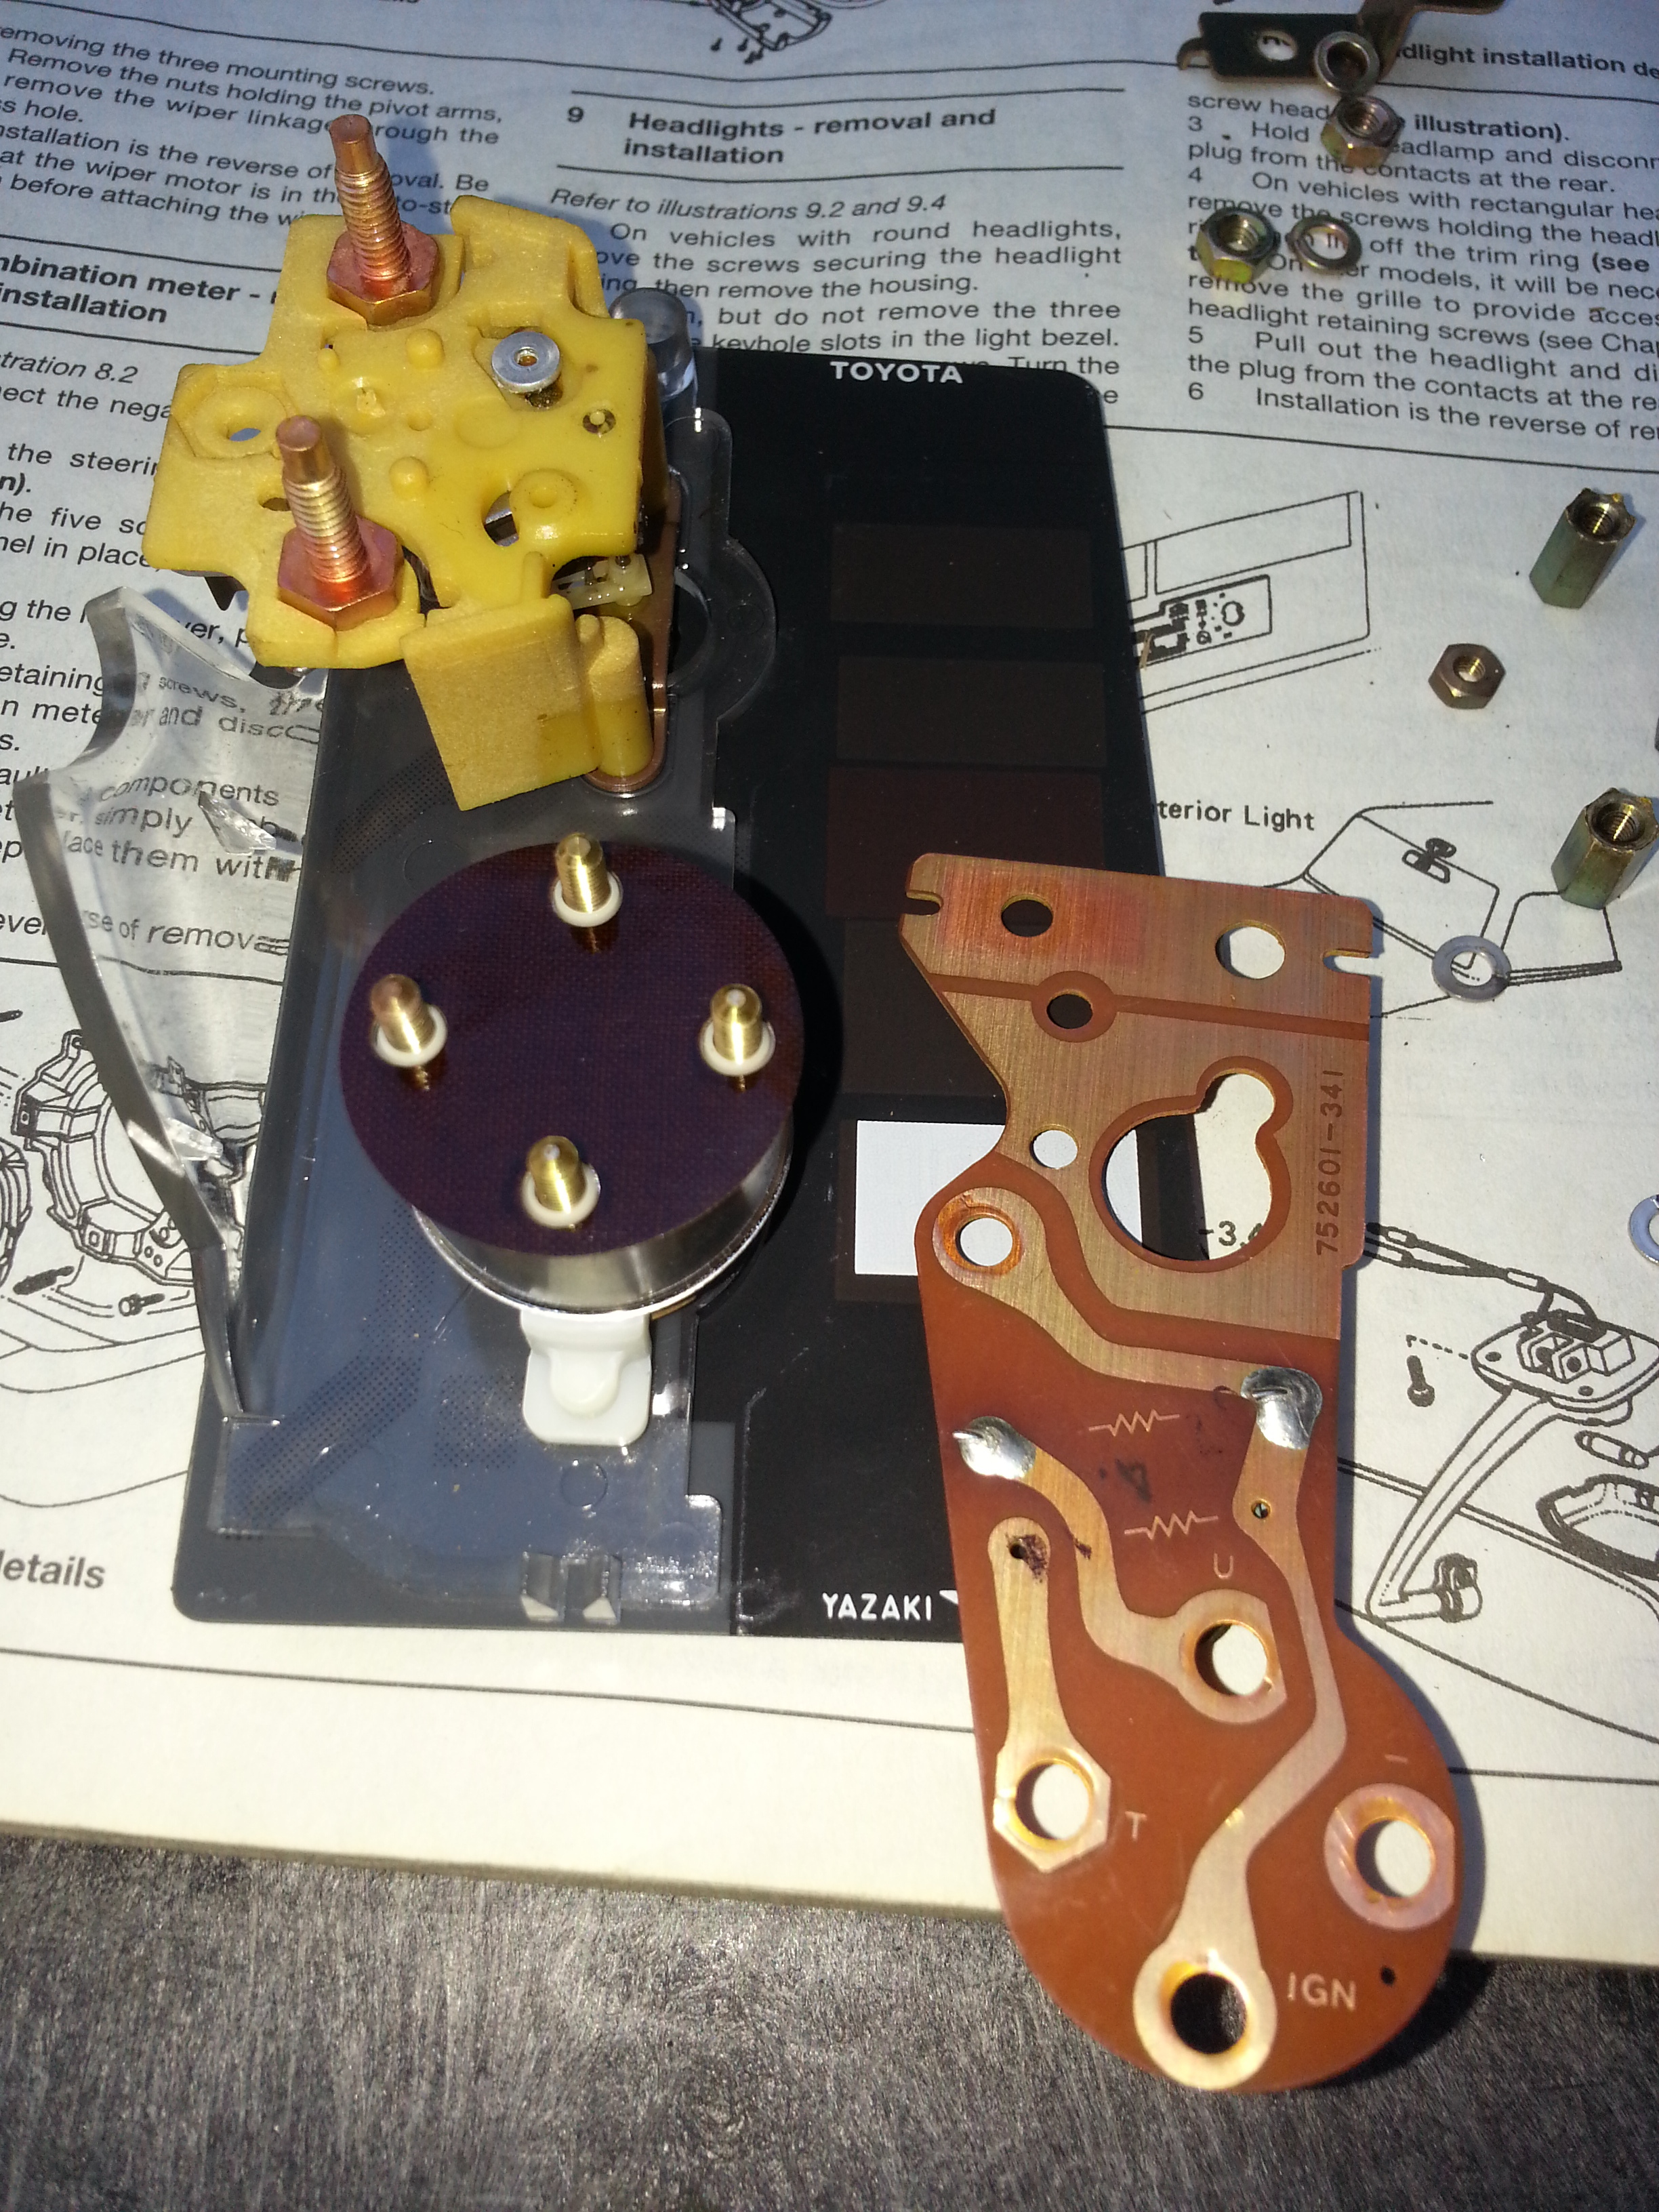
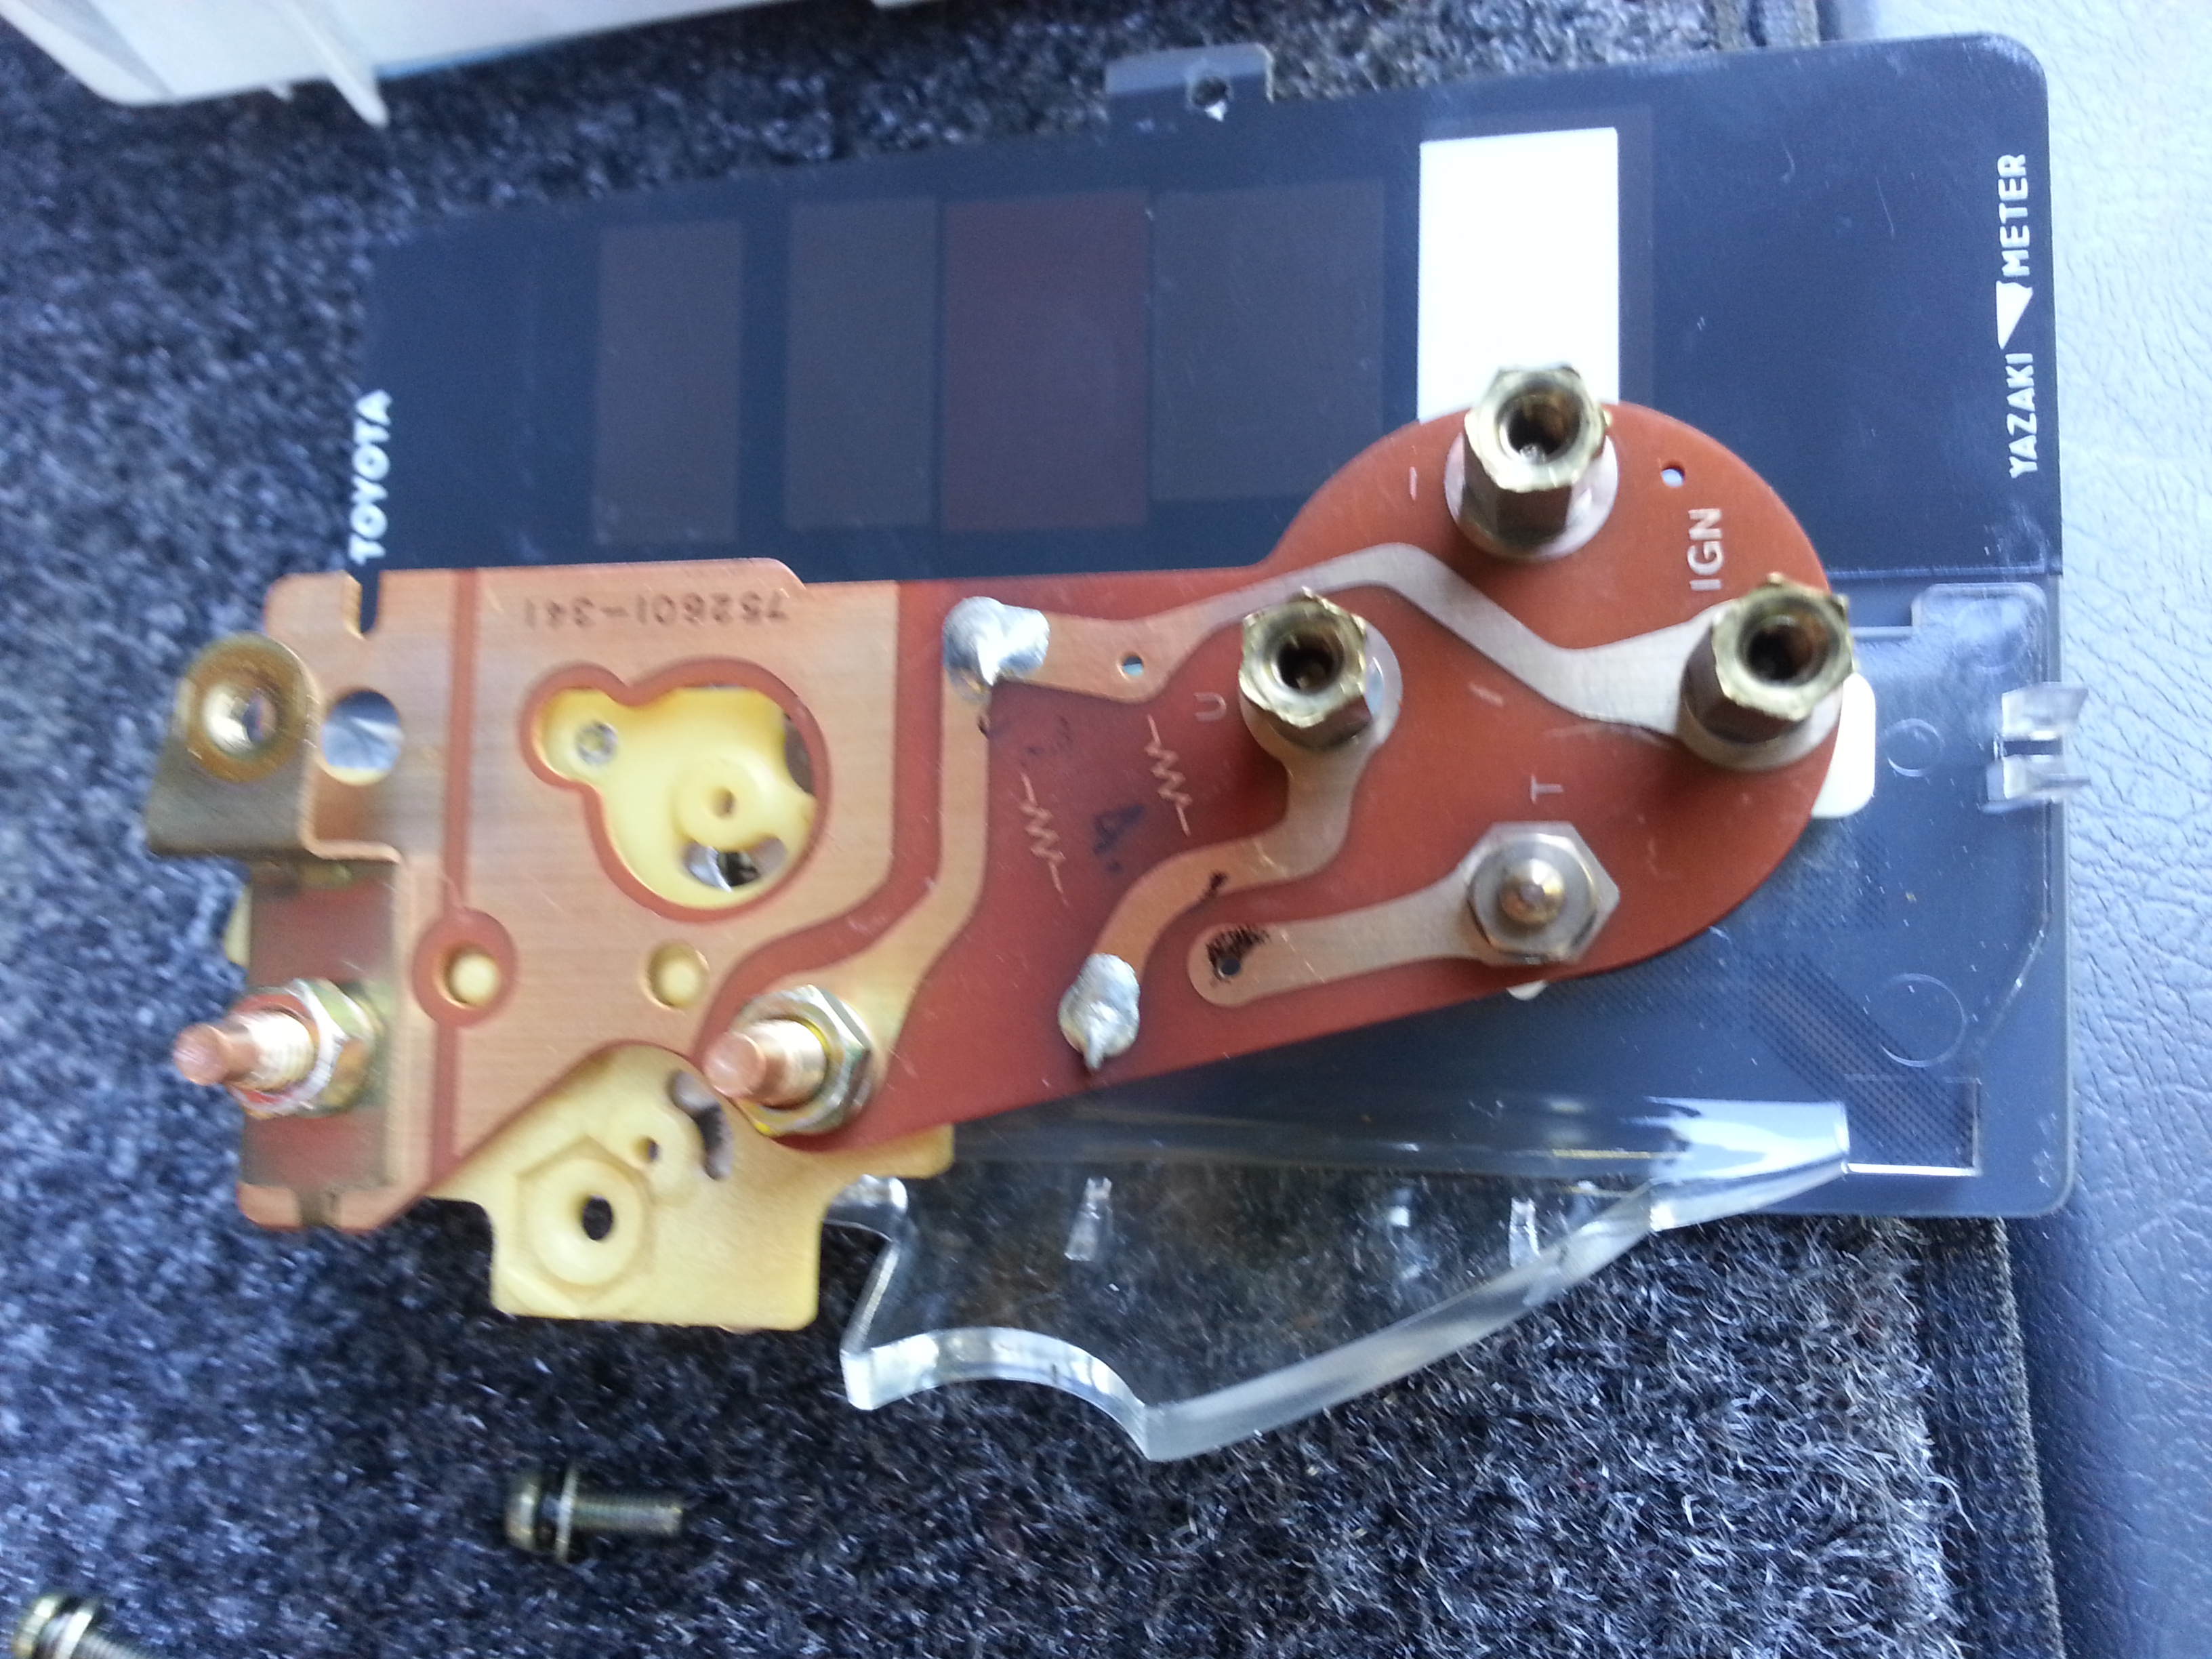
Here's a shot of both of the teeeeeeny wires that come off the spool to the arm that gauges the coolant temp as relayed by the Temp Sending Unit......
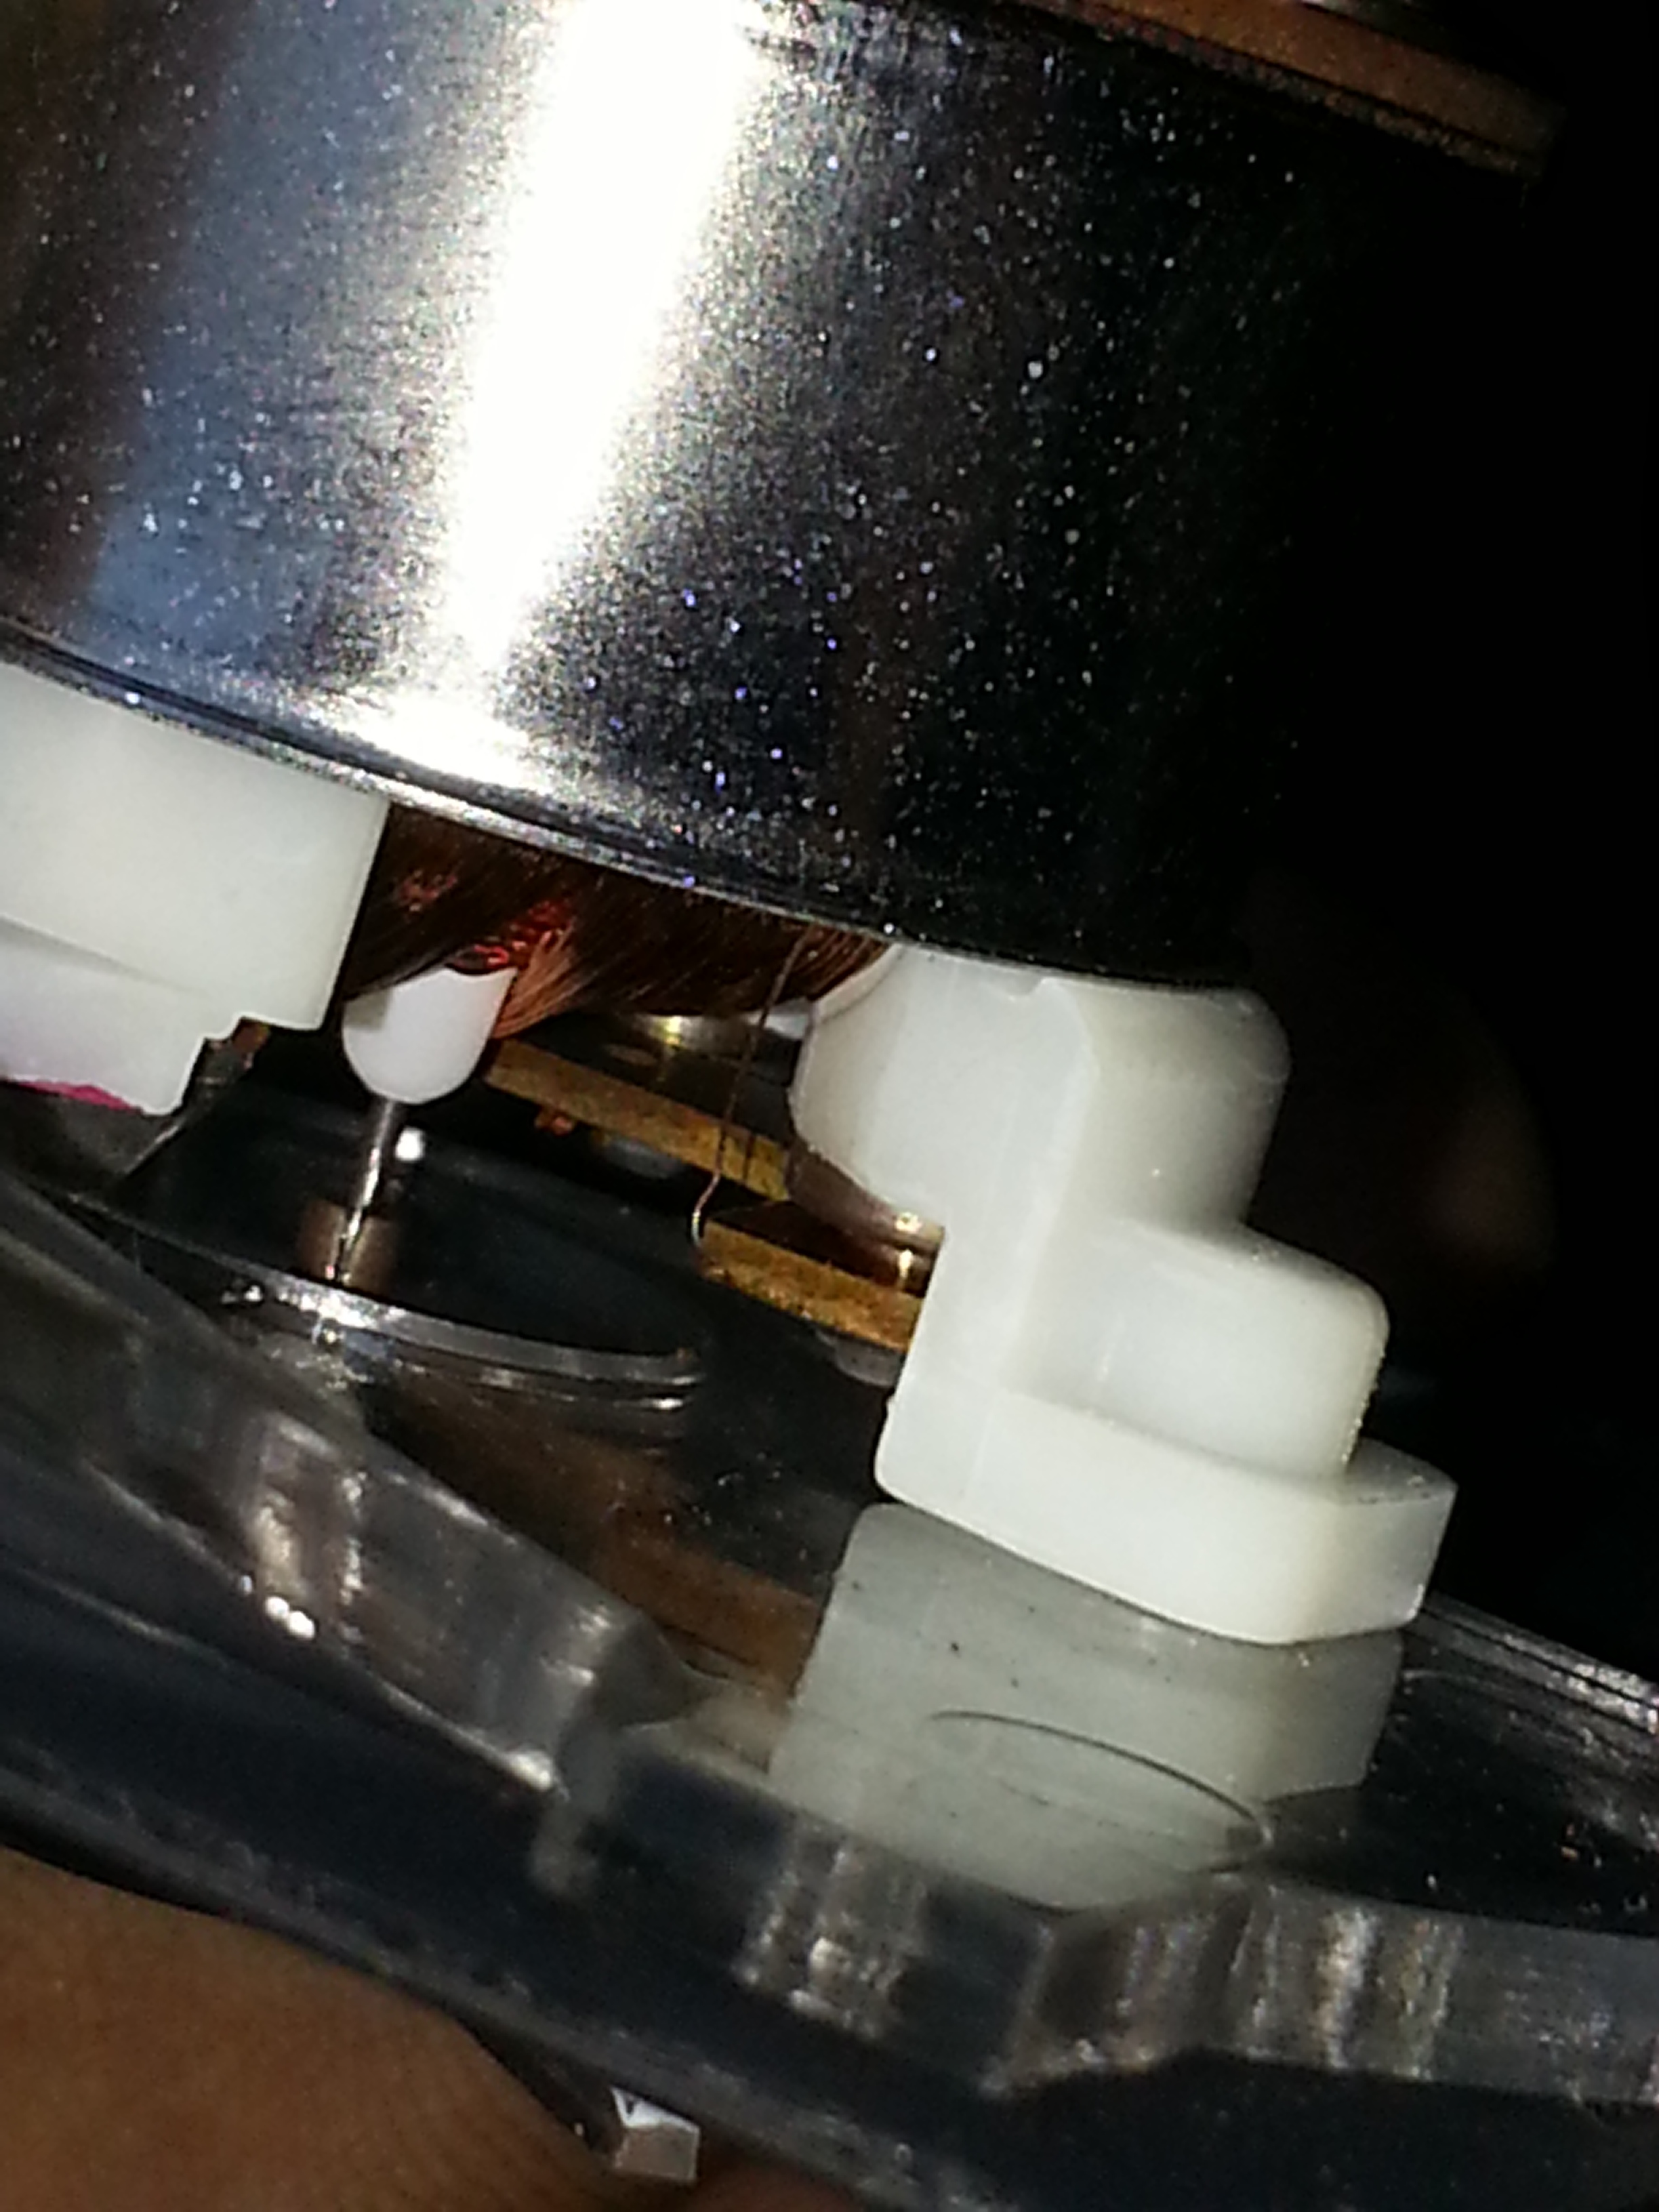
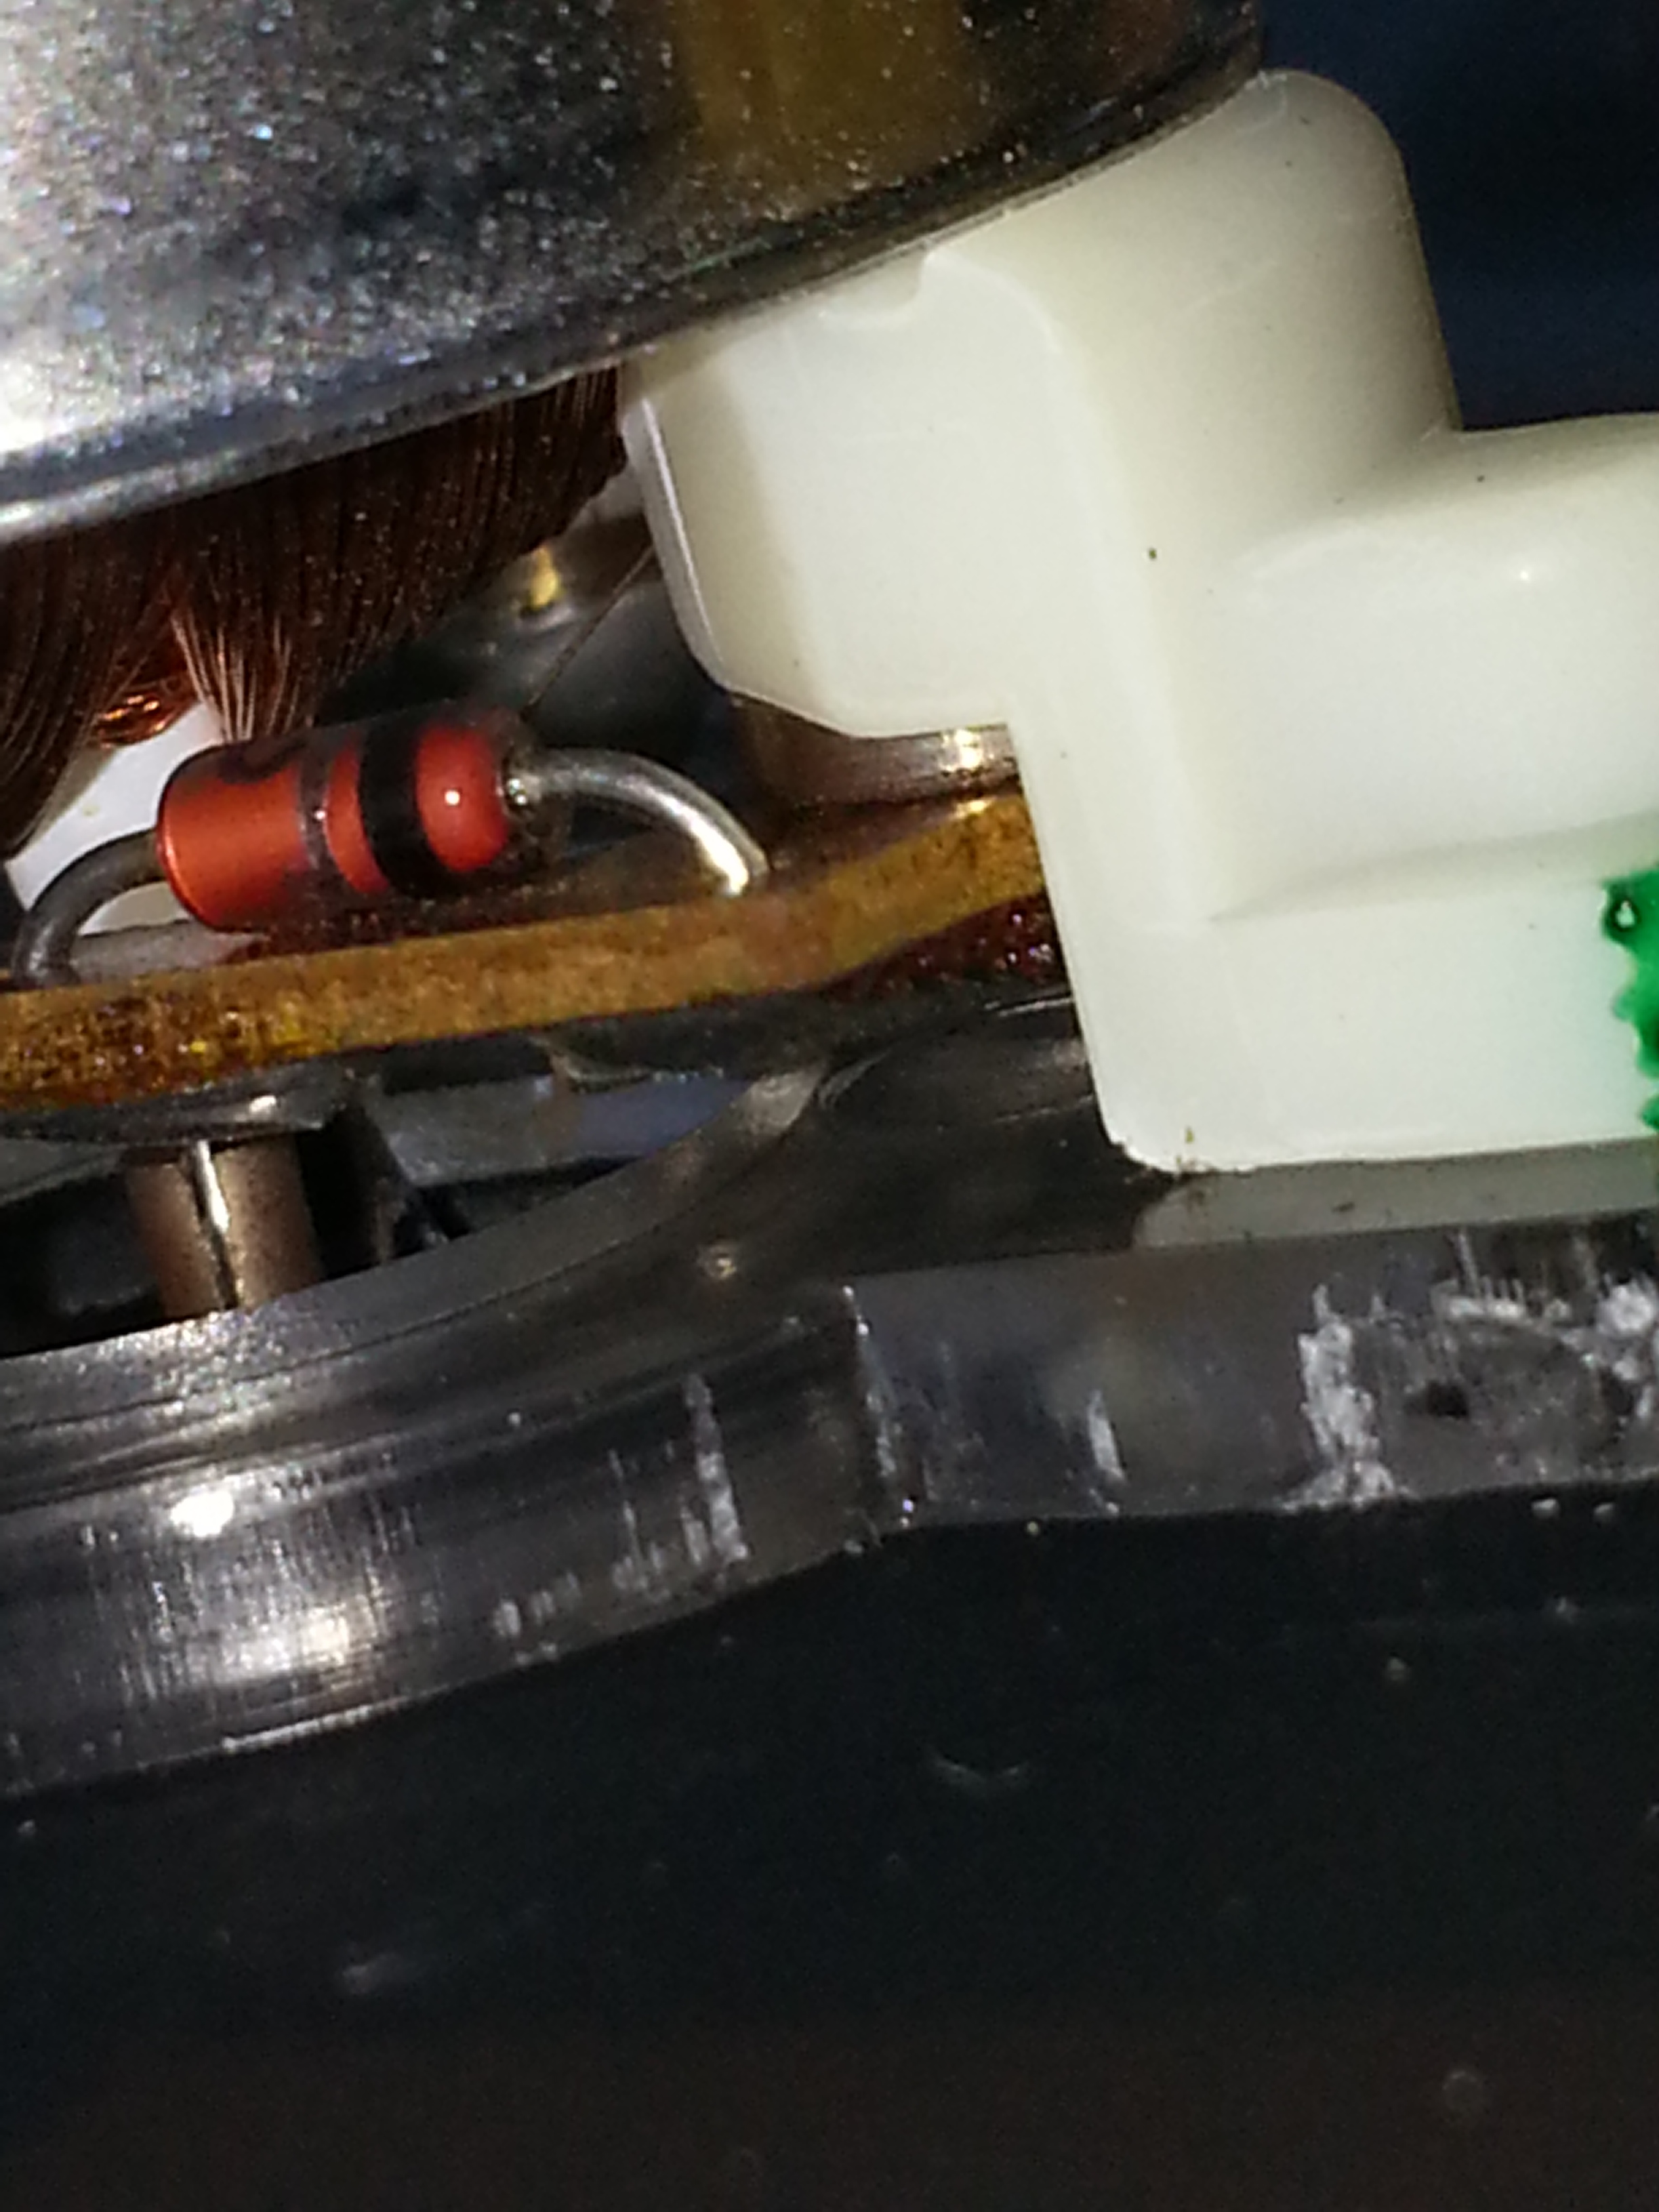
( Curious if anyone thinks that the sleeve where the needle rod goes into looks cracked, or is it supposed to be that way?)
I assembled everything and reinstalled the guage cluster.... It started out cold, and I can't know if it gradually went up or not..... I ran off to a scream for help from the neighbor...... Came back and it was in a lower spot than it's been in years..... Gradually, I THINK, it came up to the "1/3" spot it always sits when fully warm.
Tomorrow I'll do a video from cold to fully warm..... It either worked cleaning it up or not..... PLEEEEEEASE?!?! Hahaha.
Then I slapped on my replacement taillight.......
Then, decided I should give Terry's/Inferno's temp guage fix a shot.....
I found it to be nearly perfect.... And, I seem to have the insulation/damper piece on the back of the metal housing for the temp sender that Terry says he never sees.....(Except for in Infernos thread)
Here's a shot of both of the teeeeeeny wires that come off the spool to the arm that gauges the coolant temp as relayed by the Temp Sending Unit......
( Curious if anyone thinks that the sleeve where the needle rod goes into looks cracked, or is it supposed to be that way?)
I assembled everything and reinstalled the guage cluster.... It started out cold, and I can't know if it gradually went up or not..... I ran off to a scream for help from the neighbor...... Came back and it was in a lower spot than it's been in years..... Gradually, I THINK, it came up to the "1/3" spot it always sits when fully warm.
Tomorrow I'll do a video from cold to fully warm..... It either worked cleaning it up or not..... PLEEEEEEASE?!?! Hahaha.
Last edited by ChefYota4x4; 09-06-2013 at 10:21 PM.
09-07-2013, 12:40 PM
#7664
Dang,.... Looks like everybody's going away for the weekend again. I used to do that, where I would take the following week after the holiday off... Screw those crowds of 15,000 wherever! Hahaha...
Anyway, I wanted to share that my super top secret top fuel high-performance modification has arrived... I'm not even sure my truck can handle this!...
>
>
>
>
>
>
>
>
>
>
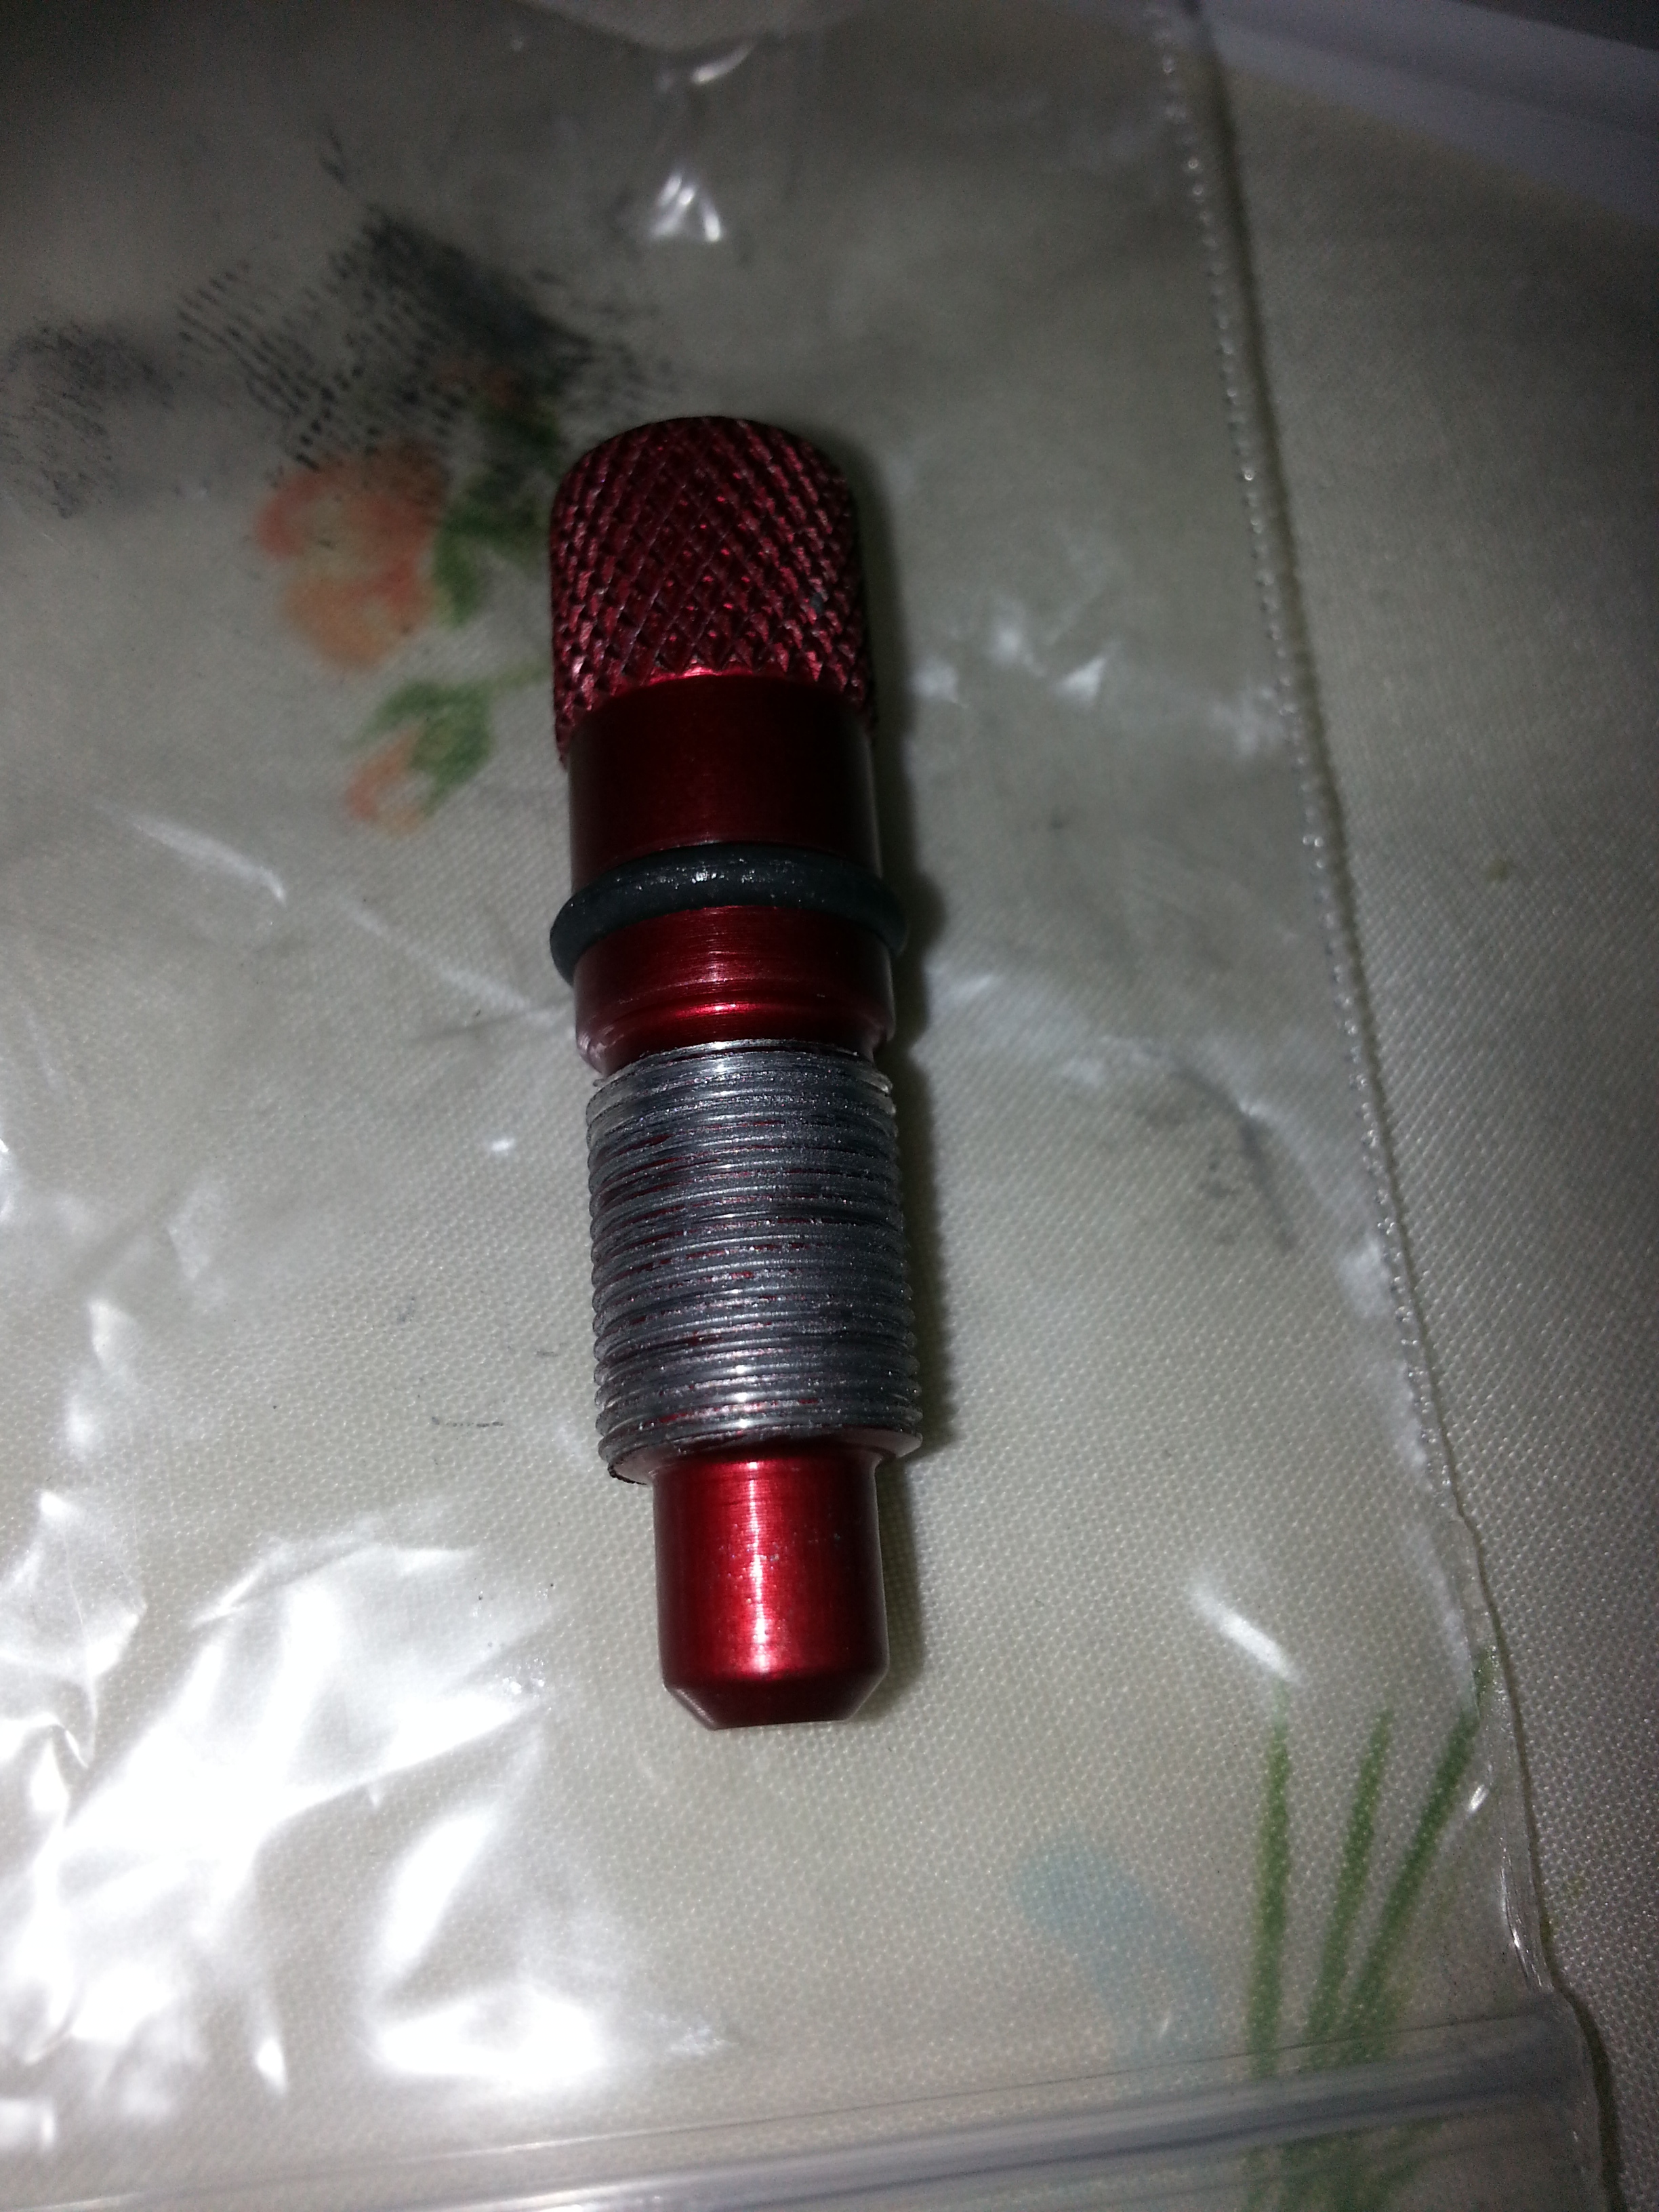
Hahahhahah...... Okay, its not a performance mod, I apologize... Lol. However, I'm hoping it will stop the idle screw from backing out on the inclines and while I don't really need it I had a gift card basically for LCE... So I grabbed the only thing I really needed from them. This way I can take out my old one and get set up with the new wiring and slap it in my little ziplock baggie in the glove box of extra goodies...
Anyway, I wanted to share that my super top secret top fuel high-performance modification has arrived... I'm not even sure my truck can handle this!...
>
>
>
>
>
>
>
>
>
>
Hahahhahah...... Okay, its not a performance mod, I apologize... Lol. However, I'm hoping it will stop the idle screw from backing out on the inclines and while I don't really need it I had a gift card basically for LCE... So I grabbed the only thing I really needed from them. This way I can take out my old one and get set up with the new wiring and slap it in my little ziplock baggie in the glove box of extra goodies...
09-07-2013, 02:33 PM
#7666
I'm not sure buddy, but one thing is for damn sure, no matter how hard I turn and squeeze on that thing I cannot get it to go lower than 800 rpm. I took the o-ring of it and slapped it on my factory idle adjustment screw... I got it down to about 750 again. The odd thing is that now my AC idle up is working constantly and that's before I change back and forth on the idle screws. Even more odd is the fact that when I first started the truck, which is when the air conditioning VSV always works, it didn't.... But since then for the last 45 minutes, like a little kid messing with electric windows for the first time, I flipped the thing on of a hundred times and I cannot get it not to work! Lol. I have no freaking clue.... I also have absolutely zero ideas as to why the LC engineering fancy screw will not go down any further, it is exactly the same size... I guess it's much tighter because the threads are all new? All I know is I had a towel on there and was turning this time as I can and I have pretty durn strong hands... I was afraid to break the darn thing off in there! I could not get the thing to go down below 800 rpm using that new adjustment screw. I thought maybe the AC I'll up was only working because the RPM was reading over 800 rpm? Nope, I adjusted it back down to 750 as far as a gauge is concerned and..., well, let's just say it keeps working. The problem is whatever's going on I know it's not going to last Considering the extremely odd gremlins that I have going on.
Also, my cleaning up of the temperature gauge did absolutely nothing. It seems to work yesterday but now it is stuck right in the third even when I started cold. But I did read the thread somewhere that said the RPM module somehow, the portion that is in the gauge itself, relays whether or not the AC I'll up can work... What I don't understand about that is that I would think it would stop the clutch from engaging at all... It doesn't, and no matter how long I've been driving around the AC always comes on and blows cold. I'm totally sick of this crap, to take a little tangent turn. Lol.
Also, my cleaning up of the temperature gauge did absolutely nothing. It seems to work yesterday but now it is stuck right in the third even when I started cold. But I did read the thread somewhere that said the RPM module somehow, the portion that is in the gauge itself, relays whether or not the AC I'll up can work... What I don't understand about that is that I would think it would stop the clutch from engaging at all... It doesn't, and no matter how long I've been driving around the AC always comes on and blows cold. I'm totally sick of this crap, to take a little tangent turn. Lol.
Last edited by ChefYota4x4; 09-07-2013 at 02:38 PM.
09-07-2013, 03:34 PM
#7668
Super Moderator
Staff
iTrader: (1)
Join Date: Aug 2008
Location: Anderson Missouri
Posts: 11,788
Likes: 0
Received 25 Likes
on
22 Posts
I really thought that would fixed your guage. I have never seen one with a red resistor either. They have all been white. I had just met mightymouse when you called. I will plan on calling you Monday nite.
09-07-2013, 04:23 PM
#7669
Registered User
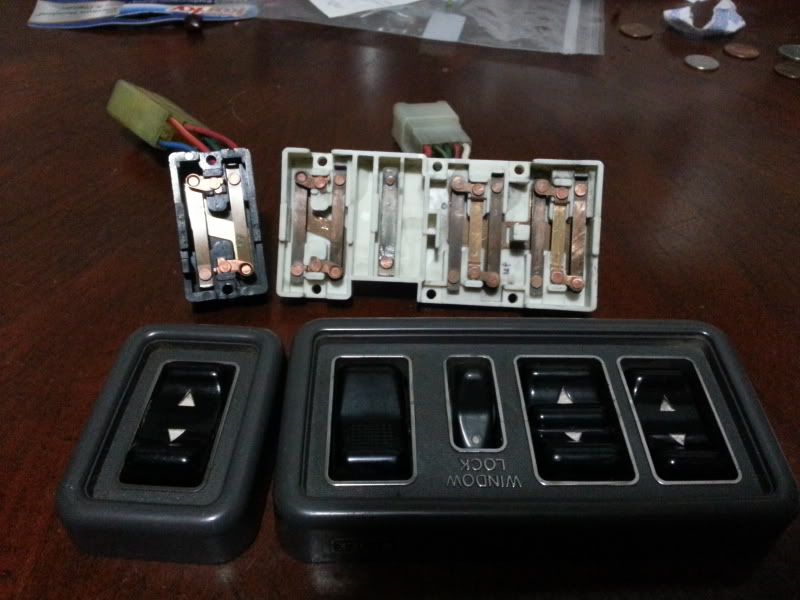
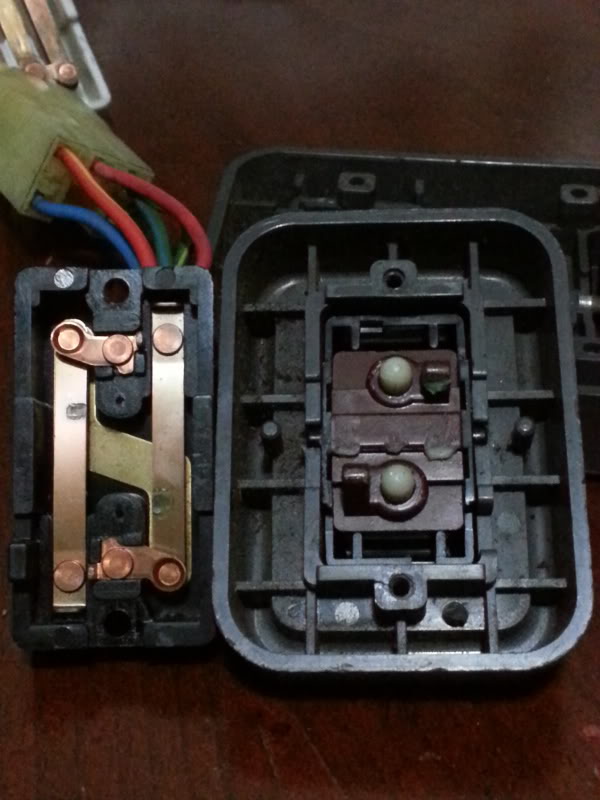
MARK Found you a replacement passenger side window controll button for $15 lol http://compare.ebay.com/like/350859809235?var=lv<yp=AllFixedPriceItemTypes&var=sbar
This one is $10.95
http://www.rakuten.com/prod/hqrp-pow...ngId=282573736
this one is $25
http://www.switchdoctor.net/toyota-4...FUSCQgod_WIAig
MASTER WINDOW SWITCH!
$70 http://www.switchdoctor.net/toyota-4...FYaDQgodfjgAJg
$80 http://compare.ebay.com/like/390361688458?var=lv<yp=AllFixedPriceItemTypes&var=sbar
Granted none of these are factory. They are all aftermarket. but heck they all look like the original. i could care less. So long as they work properly.
You see, you dont need to pay $340 at a toyota parts store for this. I'd much rather buy one of these whenever mine ever goes out.
09-07-2013, 04:33 PM
#7670
Thanks a lot for posting that buddy! That's good to know they're available as Toyota faces out every single thing that we could possibly need! Lol.
Ima go order that thing, the passenger side one at least. My driver side one works for yours up or down but not the passenger. Sweet!
Ima go order that thing, the passenger side one at least. My driver side one works for yours up or down but not the passenger. Sweet!
 09-07-2013, 10:21 PM
#7674
First, I went out today and installed the LC engineering idle air adjustment screw... No matter how tight I screwed that thing and I could not get it down below 800 rpm. Then I installed my factory one again with the new o-ring ring from the LC engineering adjustment screw... And, well, it worked and went all the way in had I wanted it to. They are exactly the same length and amount of threads... I just don't understand why it's getting so tight near the bottom. The factory one screws in or out without a lot of resistance but with some after the new o'ring...... But, there are no hamburger threads inside the throttle body or on the factory screw. Either LC Engineering didn't get this right or I just have to screw it in and out a few times? That makes me a little nervous as I got one throttle body screw hole to mess with... Okay this is just sounding terrible by now! Haha. But you'll know what I mean.
Then, it seems to be idling around 800 rpm with the screw nearly all the way in... Then the AC idle up VSV worked every single time after a few minutes of warm up even... It worked all day And stayed at 800 rpm on the idle and I'll be up on the AC... Until this evening, when I came back from dinner... I pulled in the garage clicked on the AC and it would not idle up. Secondly, the idle after around 6 p.m., from that point on, never wanted to stay above 700 or 750. Something is freaking going on in regards to ambient temps outside. I'll get back to all that later...
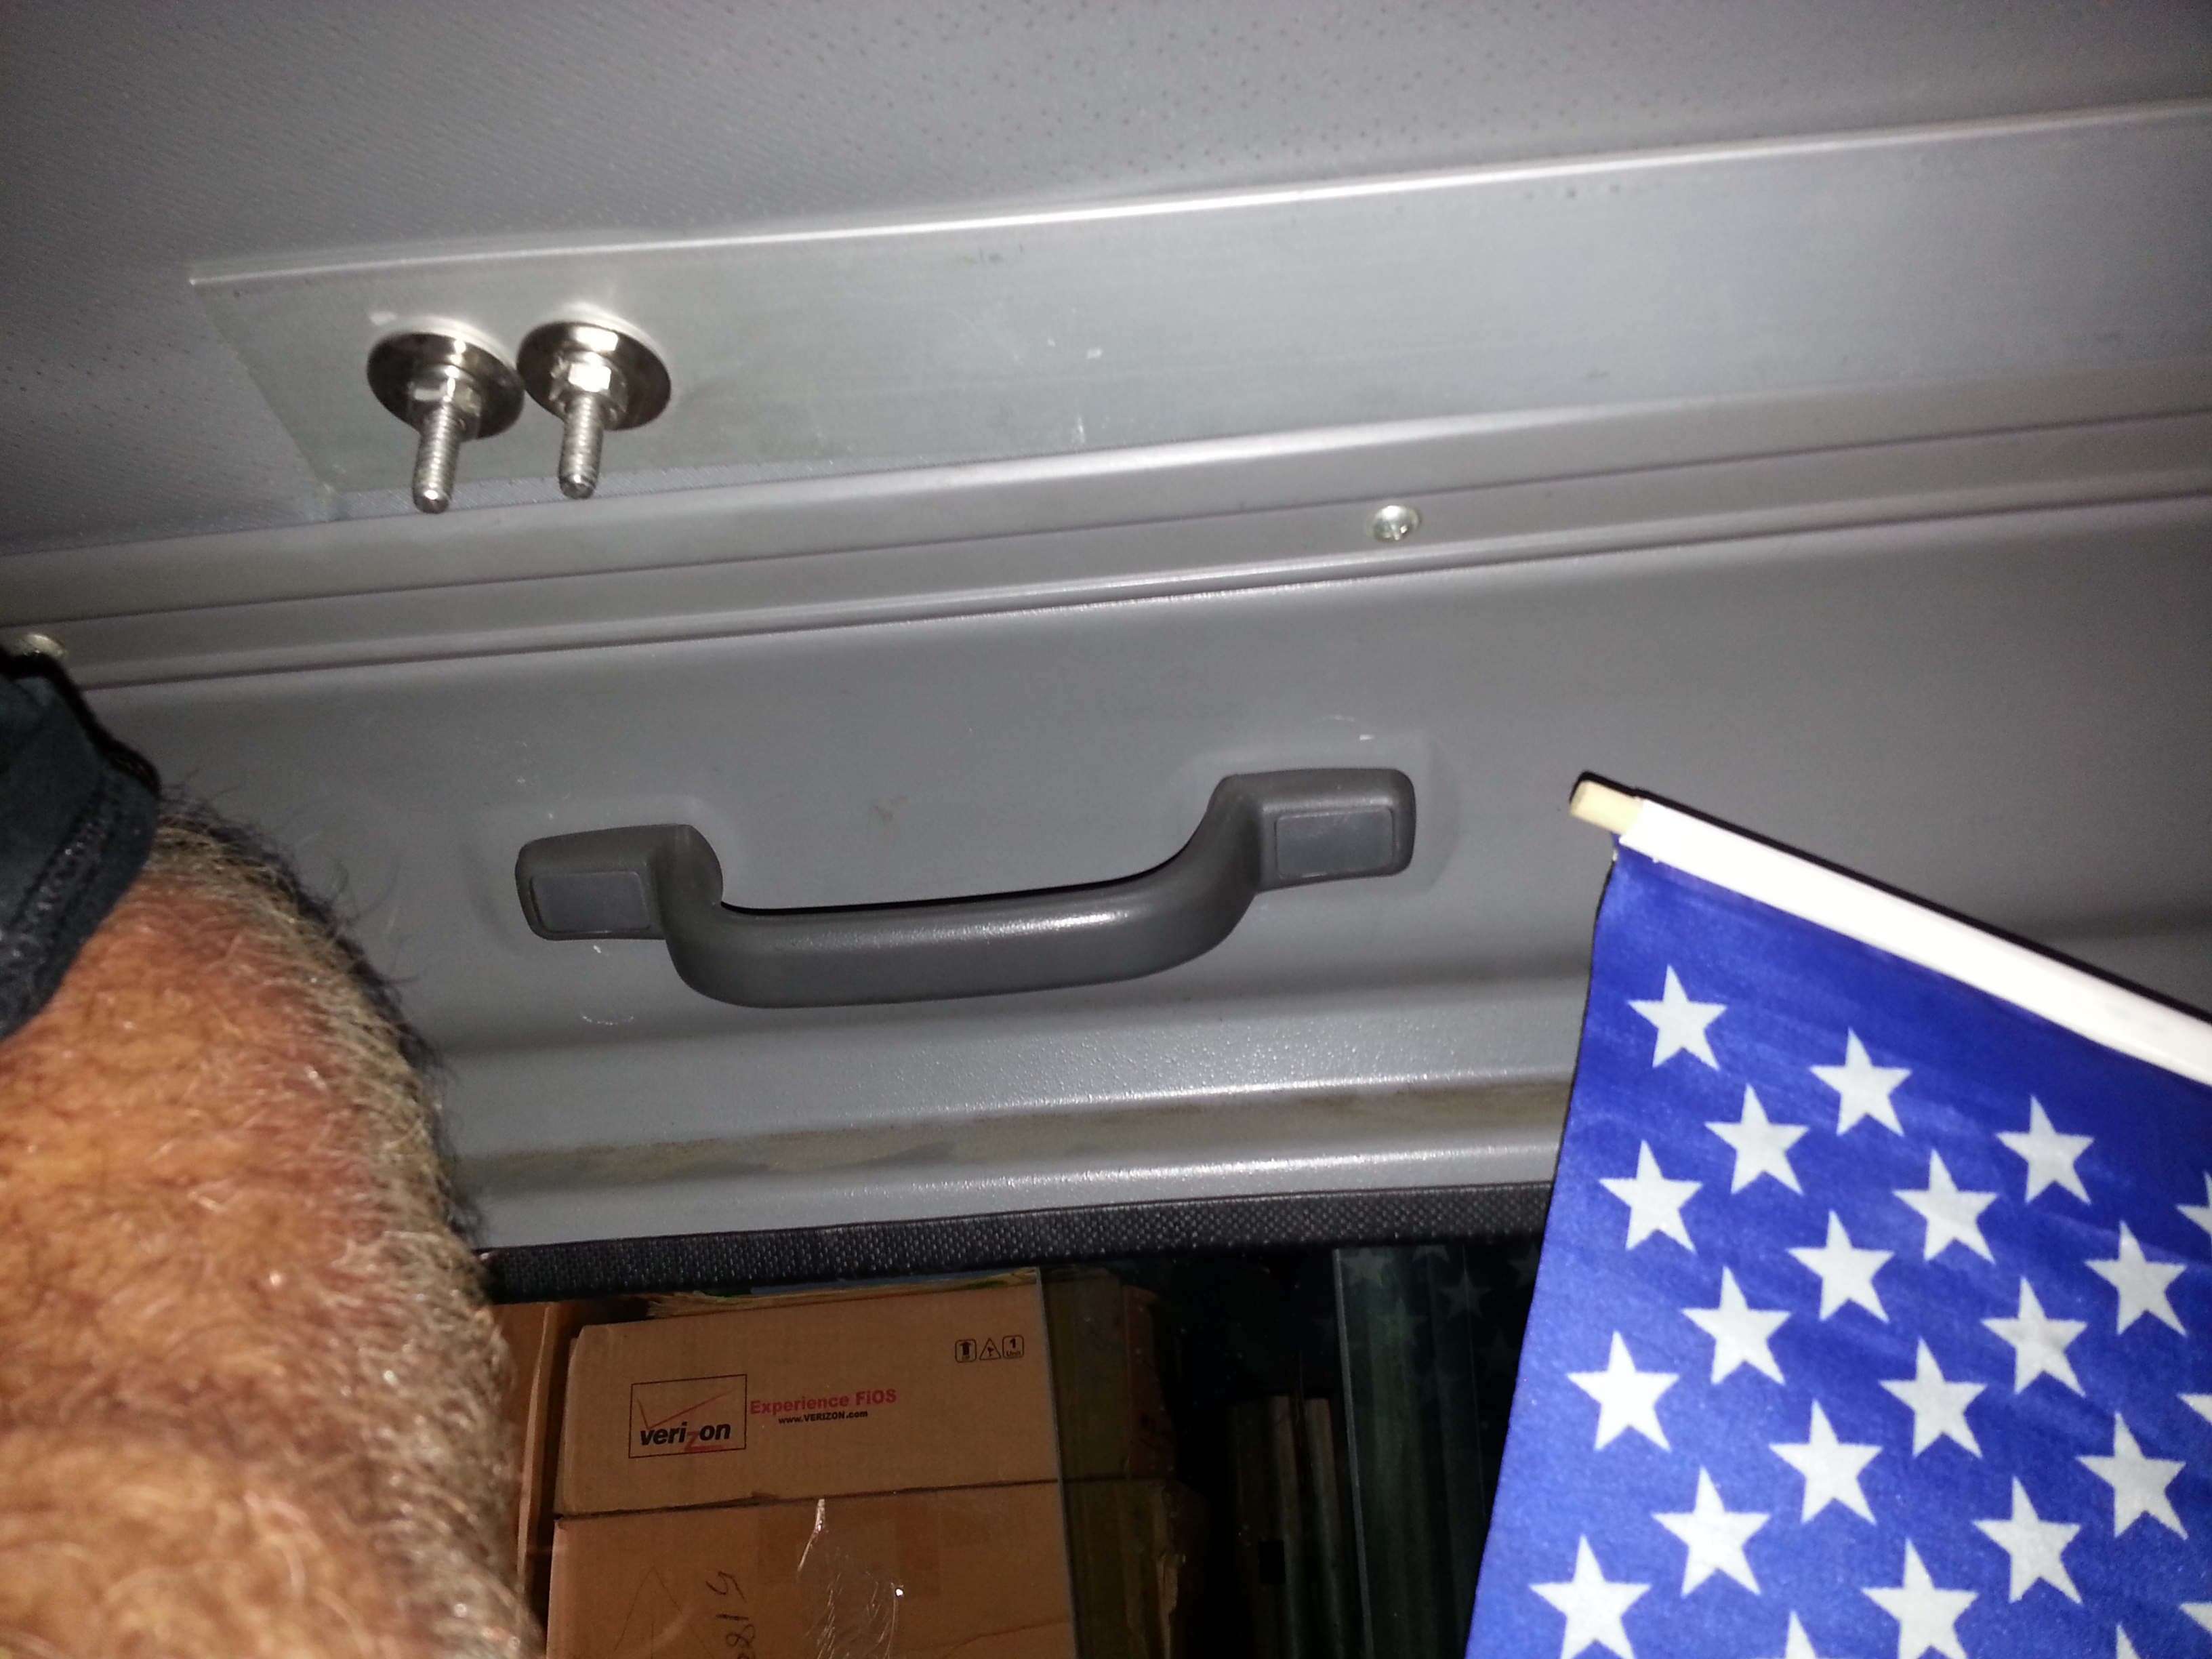
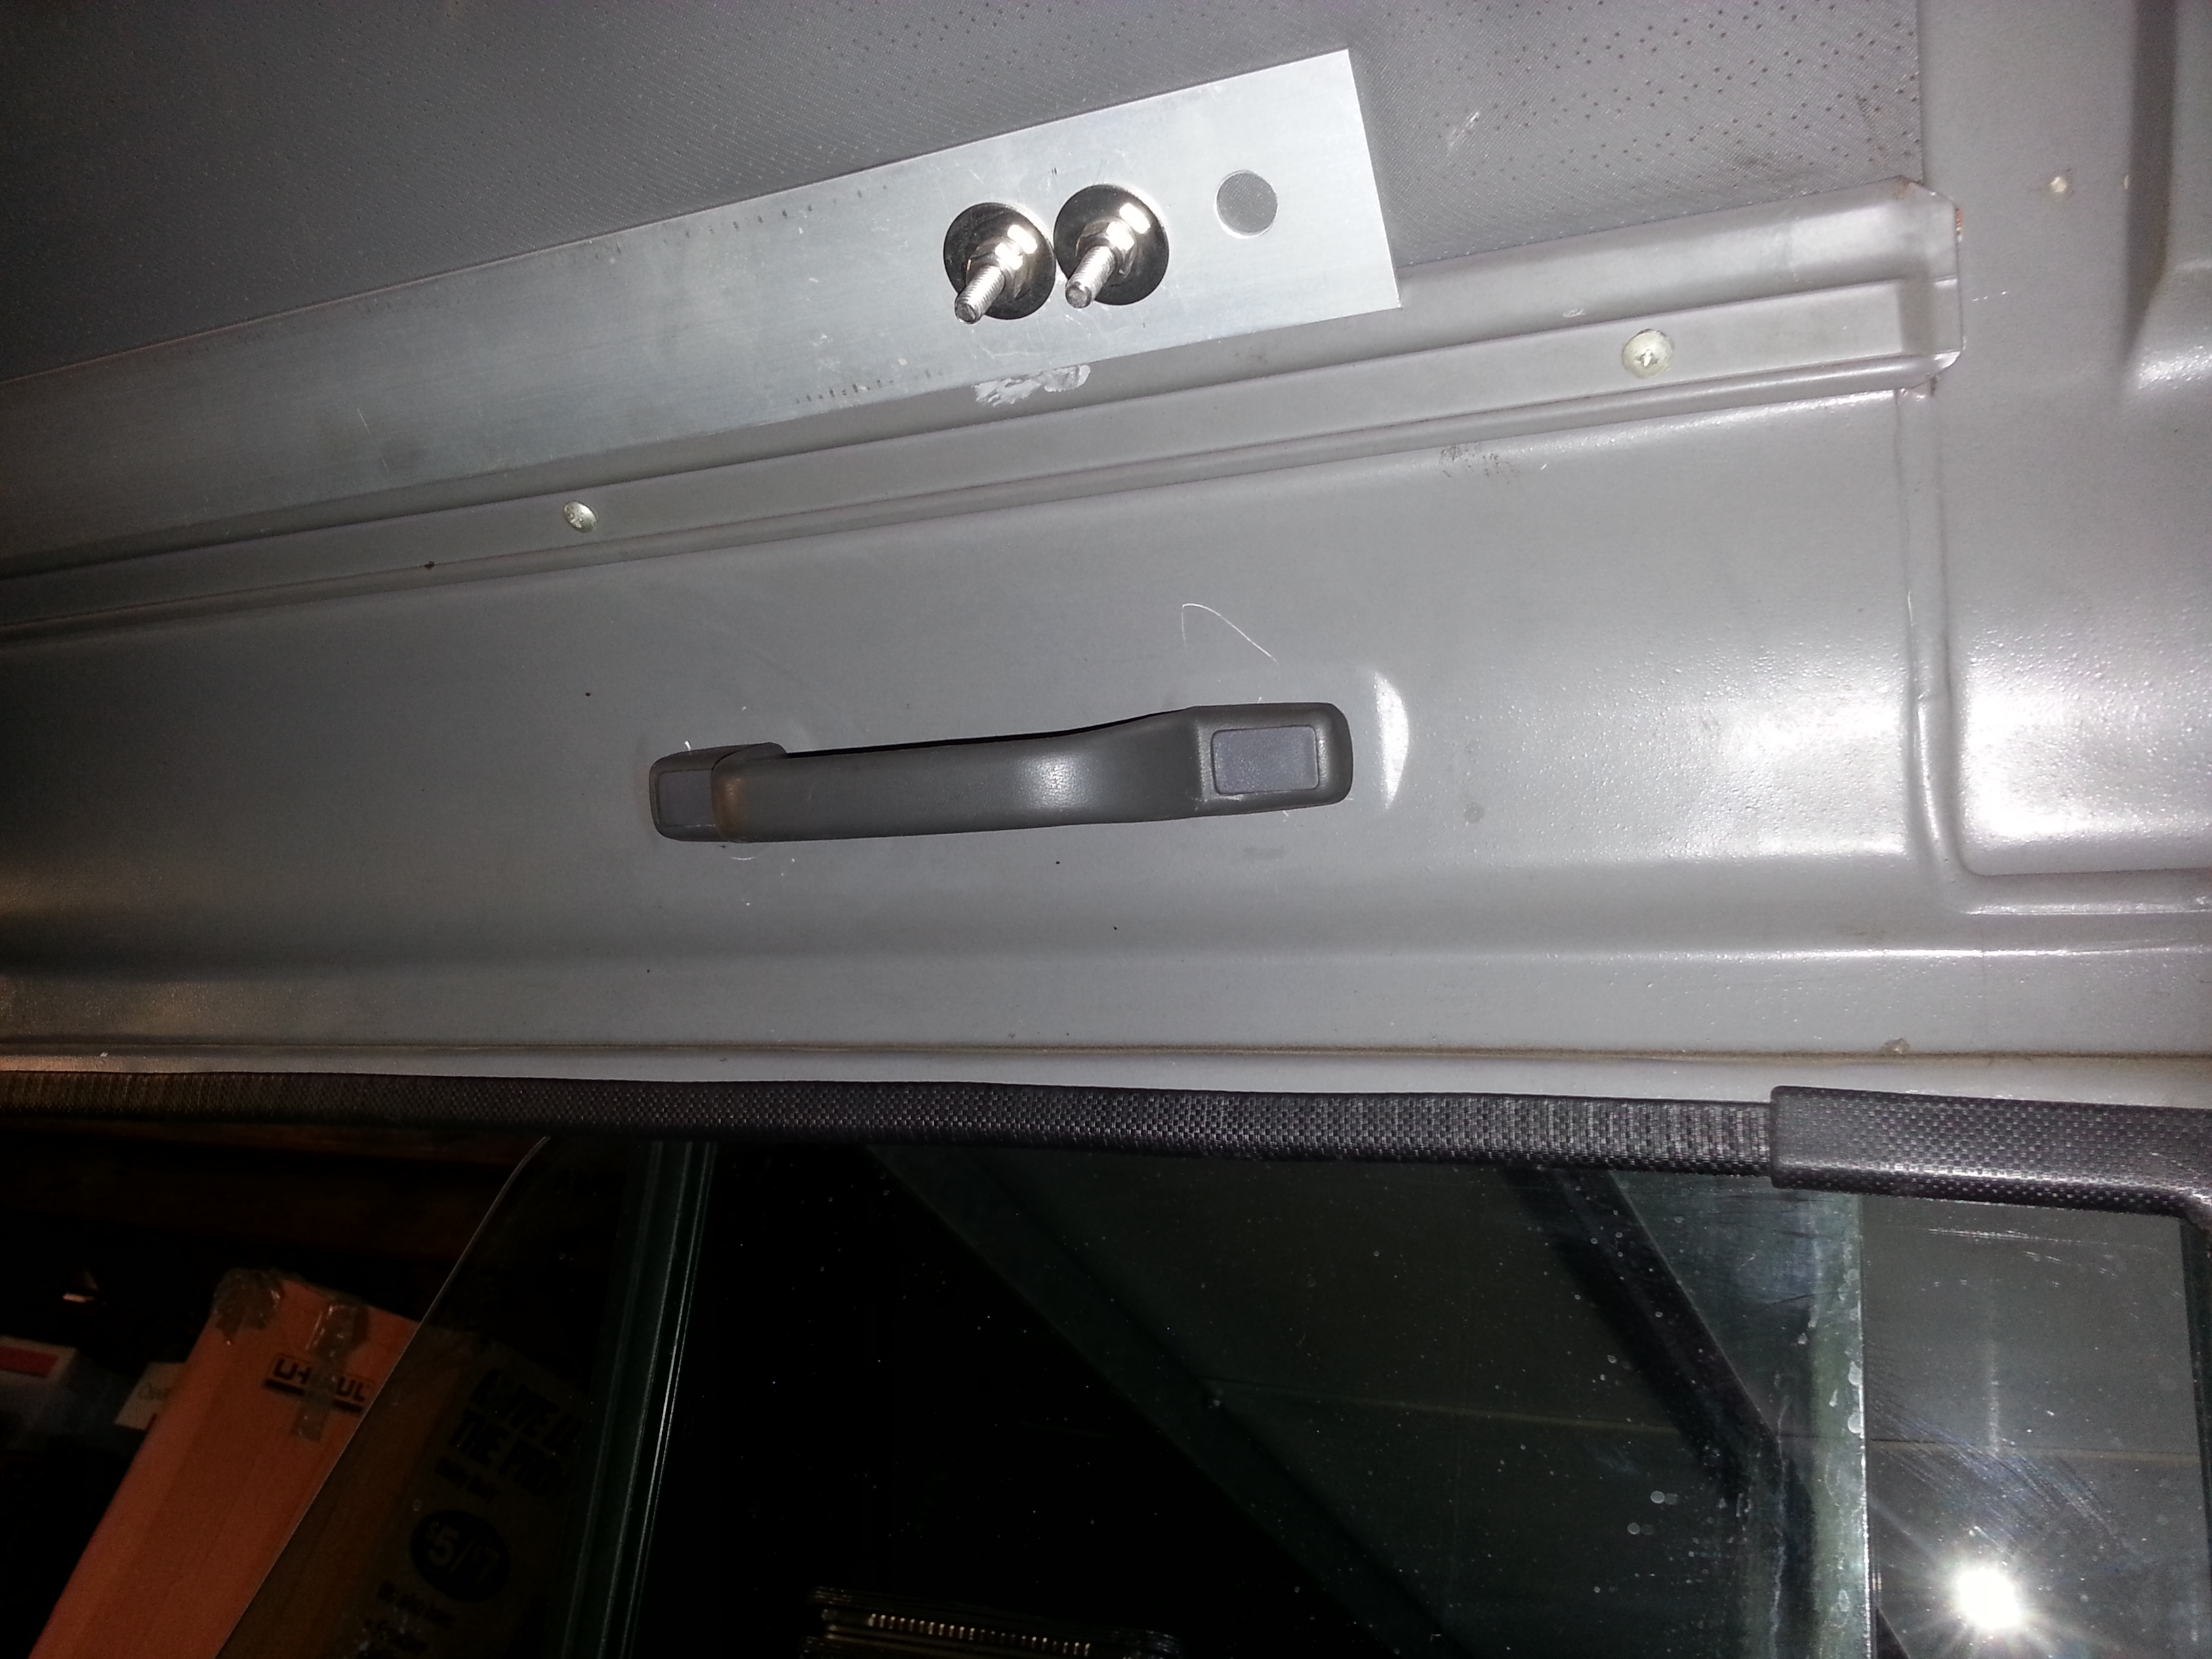
Got the oh crap handles in todayn in back......

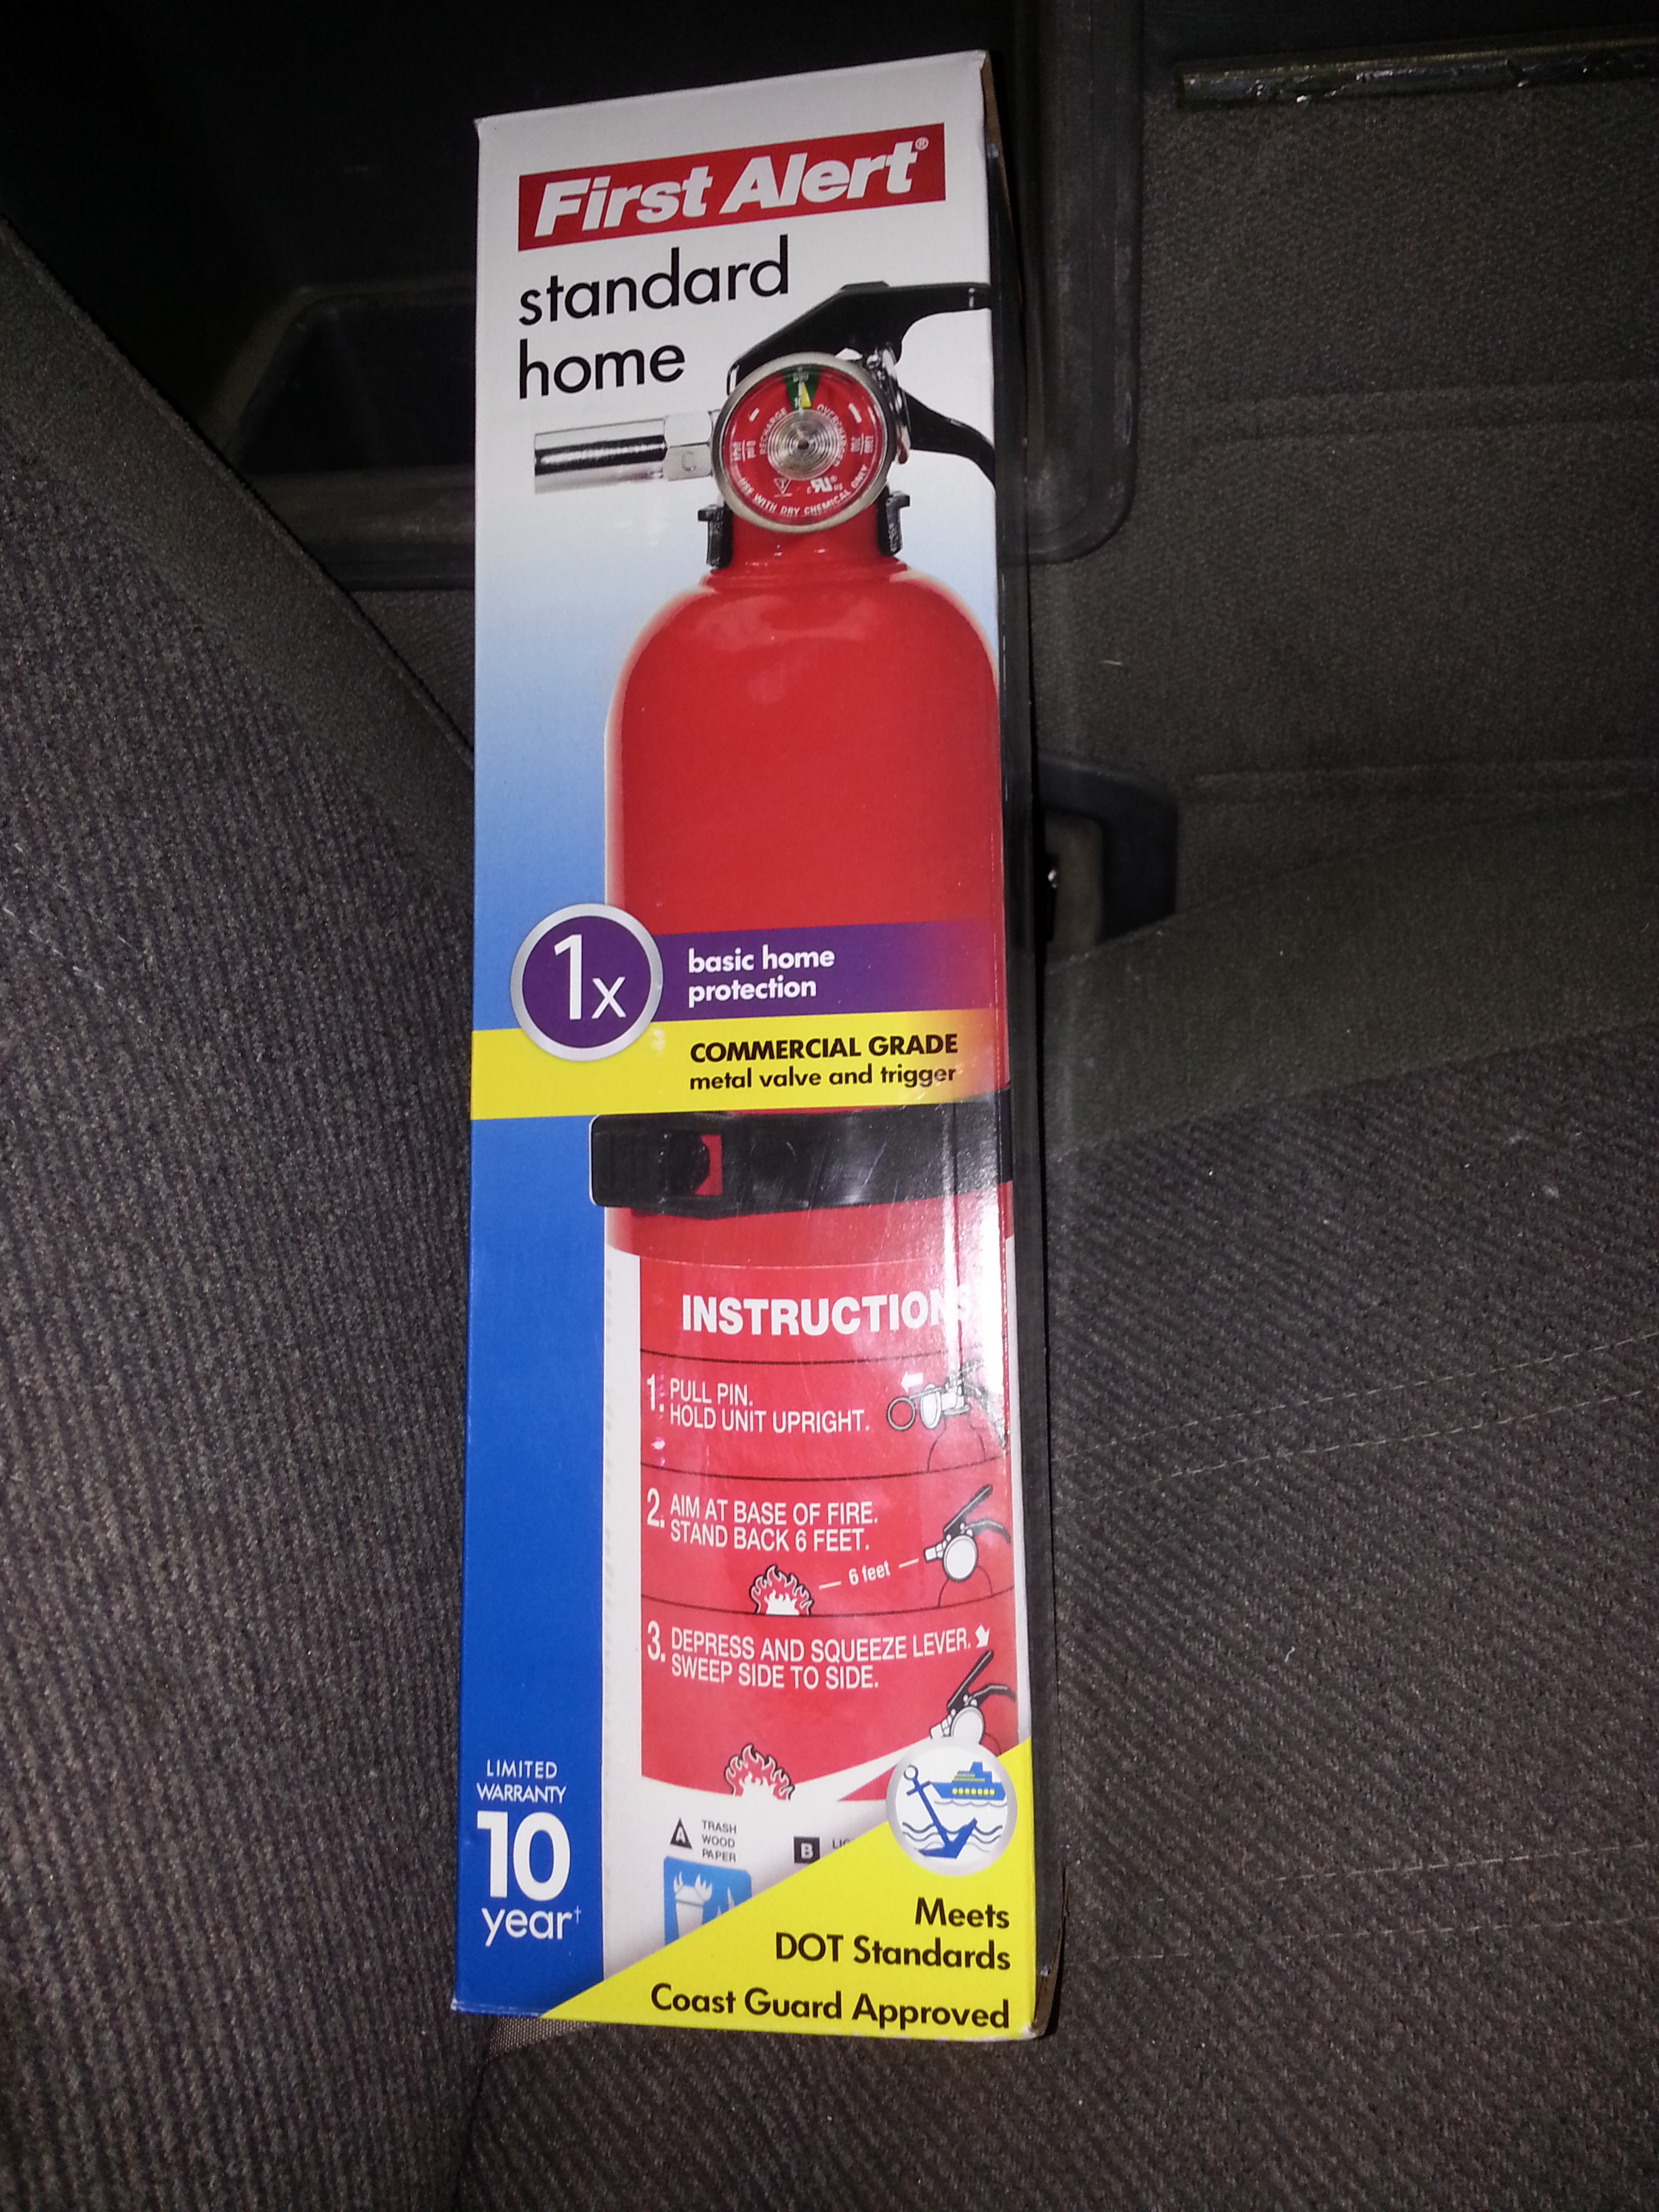
Picked this up the other day, not sure if I mentioned this either...
Oh yeah, that's right, I did rundown and harvest most of what's left of the Reed - Hass avocados... 2 trips, 140#.....


Oh, yeah, and I probably forgot to mention that I had gotten this hat almost destroyed getting that transmission out at the yard. It was completely covered in grease and I thought it would never come clean... Gotta love Palmolive!...

Ordered this, thanx Richard.....
http://pages.ebay.com/motors/link/?n...d=321167626181
Then, it seems to be idling around 800 rpm with the screw nearly all the way in... Then the AC idle up VSV worked every single time after a few minutes of warm up even... It worked all day And stayed at 800 rpm on the idle and I'll be up on the AC... Until this evening, when I came back from dinner... I pulled in the garage clicked on the AC and it would not idle up. Secondly, the idle after around 6 p.m., from that point on, never wanted to stay above 700 or 750. Something is freaking going on in regards to ambient temps outside. I'll get back to all that later...
Got the oh crap handles in todayn in back......
Picked this up the other day, not sure if I mentioned this either...
Oh yeah, that's right, I did rundown and harvest most of what's left of the Reed - Hass avocados... 2 trips, 140#.....
Oh, yeah, and I probably forgot to mention that I had gotten this hat almost destroyed getting that transmission out at the yard. It was completely covered in grease and I thought it would never come clean... Gotta love Palmolive!...
Ordered this, thanx Richard.....
http://pages.ebay.com/motors/link/?n...d=321167626181
Last edited by ChefYota4x4; 09-07-2013 at 10:28 PM.
 09-08-2013, 08:54 AM
#7679
I was gonna say if you get the idle screw set and where you want it. I would dab a little silicone on it. It will keep it in place and its something you don't adjust all the time.
09-08-2013, 11:00 AM
#7680
Cheaper is definitely good......., sometimes, hahaha
My problem in doing that( silicon ) is that I seem to have some very obvious Auto adjusting going on which seems to be related to ambient temperatures. Yesterday, having nothing to do with altitude or anything else, I started it cold and warmed up the rig, and it did its thing and wound up around 800 or 850 rpm... It was really difficult to get it to go down below that, even after it was fully warm and have been running for about 20 to 30 minutes. I also might worry about minuscule particles of silicon winding up in those tiny vacuum ports or just the main one that bypasses the throttle plate?
*****************************
I'm supposed to be getting that TTTS switch number 2 delivered today. He got them mixed up and have to retest and clean up the one for me. I will not screw with this thing any further until I get the new cold start injector time switch, TTTS switch number 2 and sending unit and heater core hoses all replaced. I'm just tired of screwing with this thing because it's impossible to diagnose when it does its own thing spore attic Lee and intermittently. Like it has a total mind of its own.


