
ChefYota4x4's 1987 4Runner Build-Up Thread
 07-28-2013, 07:16 AM
#7241
Registered User
Wow that is terrible news for your friends. I hope the young fella pulls the family through alright. Prayers are with him to keep being strong.
 07-28-2013, 11:35 AM
#7243
Thanx much guys! He loved stopping and hearing the truck updates, lol. Lived right up the street, across from my sister. They would walk the dog (wife on a scooter, she can barely walk).... And he would always stop to chat for a minute... I think he just wanted to take a break from walking too... It was so funny, he would turn around when she would say come on now honey let's keep going... And he would tell her, "oh that's easy for you to say that with your 20 horsepower and comfort seats!" Hahahahaha.
His son will definitely handle business. He just had a daughter and got married and has really stepped up as a man in a very short period of time from where he was.
I just hope for tons of support for her, because I know how this can literally take out the widow in short order if she doesn't have a lot of support and love and people that just will not listen to her when she says, "I just want to be alone", for like 6 months. They were in their early 60's on 47 years of marriage... So you can pretty much put it together that they were together their entire life from the time they became adults... So definitely, she has to be absolutely crushed. She's one of the most positive and helpful and serving minded people I've ever met... In spite of her illness... While she very well may always have that obvious dark spot in her eyes from here on out... I just have a feeling that she will turn that darkness into light and definitely use her gift of servitude to help heal her heart a little bit at least.
I tell your man,.... Its so easy to forget how short and fragile life is. I guess that's a part of us that is a form of built-in mechanism... Just like doctors work in such destitute situations all around them... We just learn to press forward. I just try to make sure but I'm not pressing forward so quickly that I can't Be of major use to someone who needs it... That much I do know, that is the feeling of being pretty much abandoned when I'm in dire straits. Not often, and I think that is just something that became useful to me, so that I really knew what it feel like to be in real need of some support and to not have any. Gotta take the dark and then turn it into something useful that brings some light to someone's life! It's good to be grateful for having perfect health and so forth... It's even better that while you have it to reach out and help those that don't... Because we can bet our butt's that one day, we will be right where they are,.... and hopefully not, .....but possibly even worse.
07-28-2013, 11:42 AM
#7244
I'm assuming you watch the videos, dragon?
I absolutely do not want to do that, hahahaha... No really, it's a very fine thread and it would be very easy to bugger it up... & I just simply don't have access to two more and don't want to pay $15 to just experiment. I totally understand what you're saying... But the problem with making them shorter is that you actually then increase either the travel of the lever backwards in the console... Or in order to just keep it deep enough into each hiem, and then having a shorter connecting rod, you are changing the angle of the hiems as well as bringing the lever too close to your cut out in the floor... It would possibly work in order to accommodate some setups, but I still have plenty of threads to go in each of the hiem joint inserts/threaded portion. I basically started the threading of the connecting rod into the rear joint threading and then started the front one by hand while having it free from the lever... Then I simply just turned the rod counter clockwise from the center and it wound up screwed into each joint threading the same amount of times... In a way this can come to work against you as you will have to completely remove the front one again if you want to adjust in or out of one or the other.....
Does that make sense?
Last edited by ChefYota4x4; 07-28-2013 at 11:44 AM.
07-28-2013, 11:57 AM
#7245
I also took some pictures for my Toyota brother, Teuf.....
They are not the greatest pictures and I need to do it in a better sitting with my better camera or just always set my flash to go off when it's really bright outside but I'm underneath in the shadow. Anyway I just took a few...
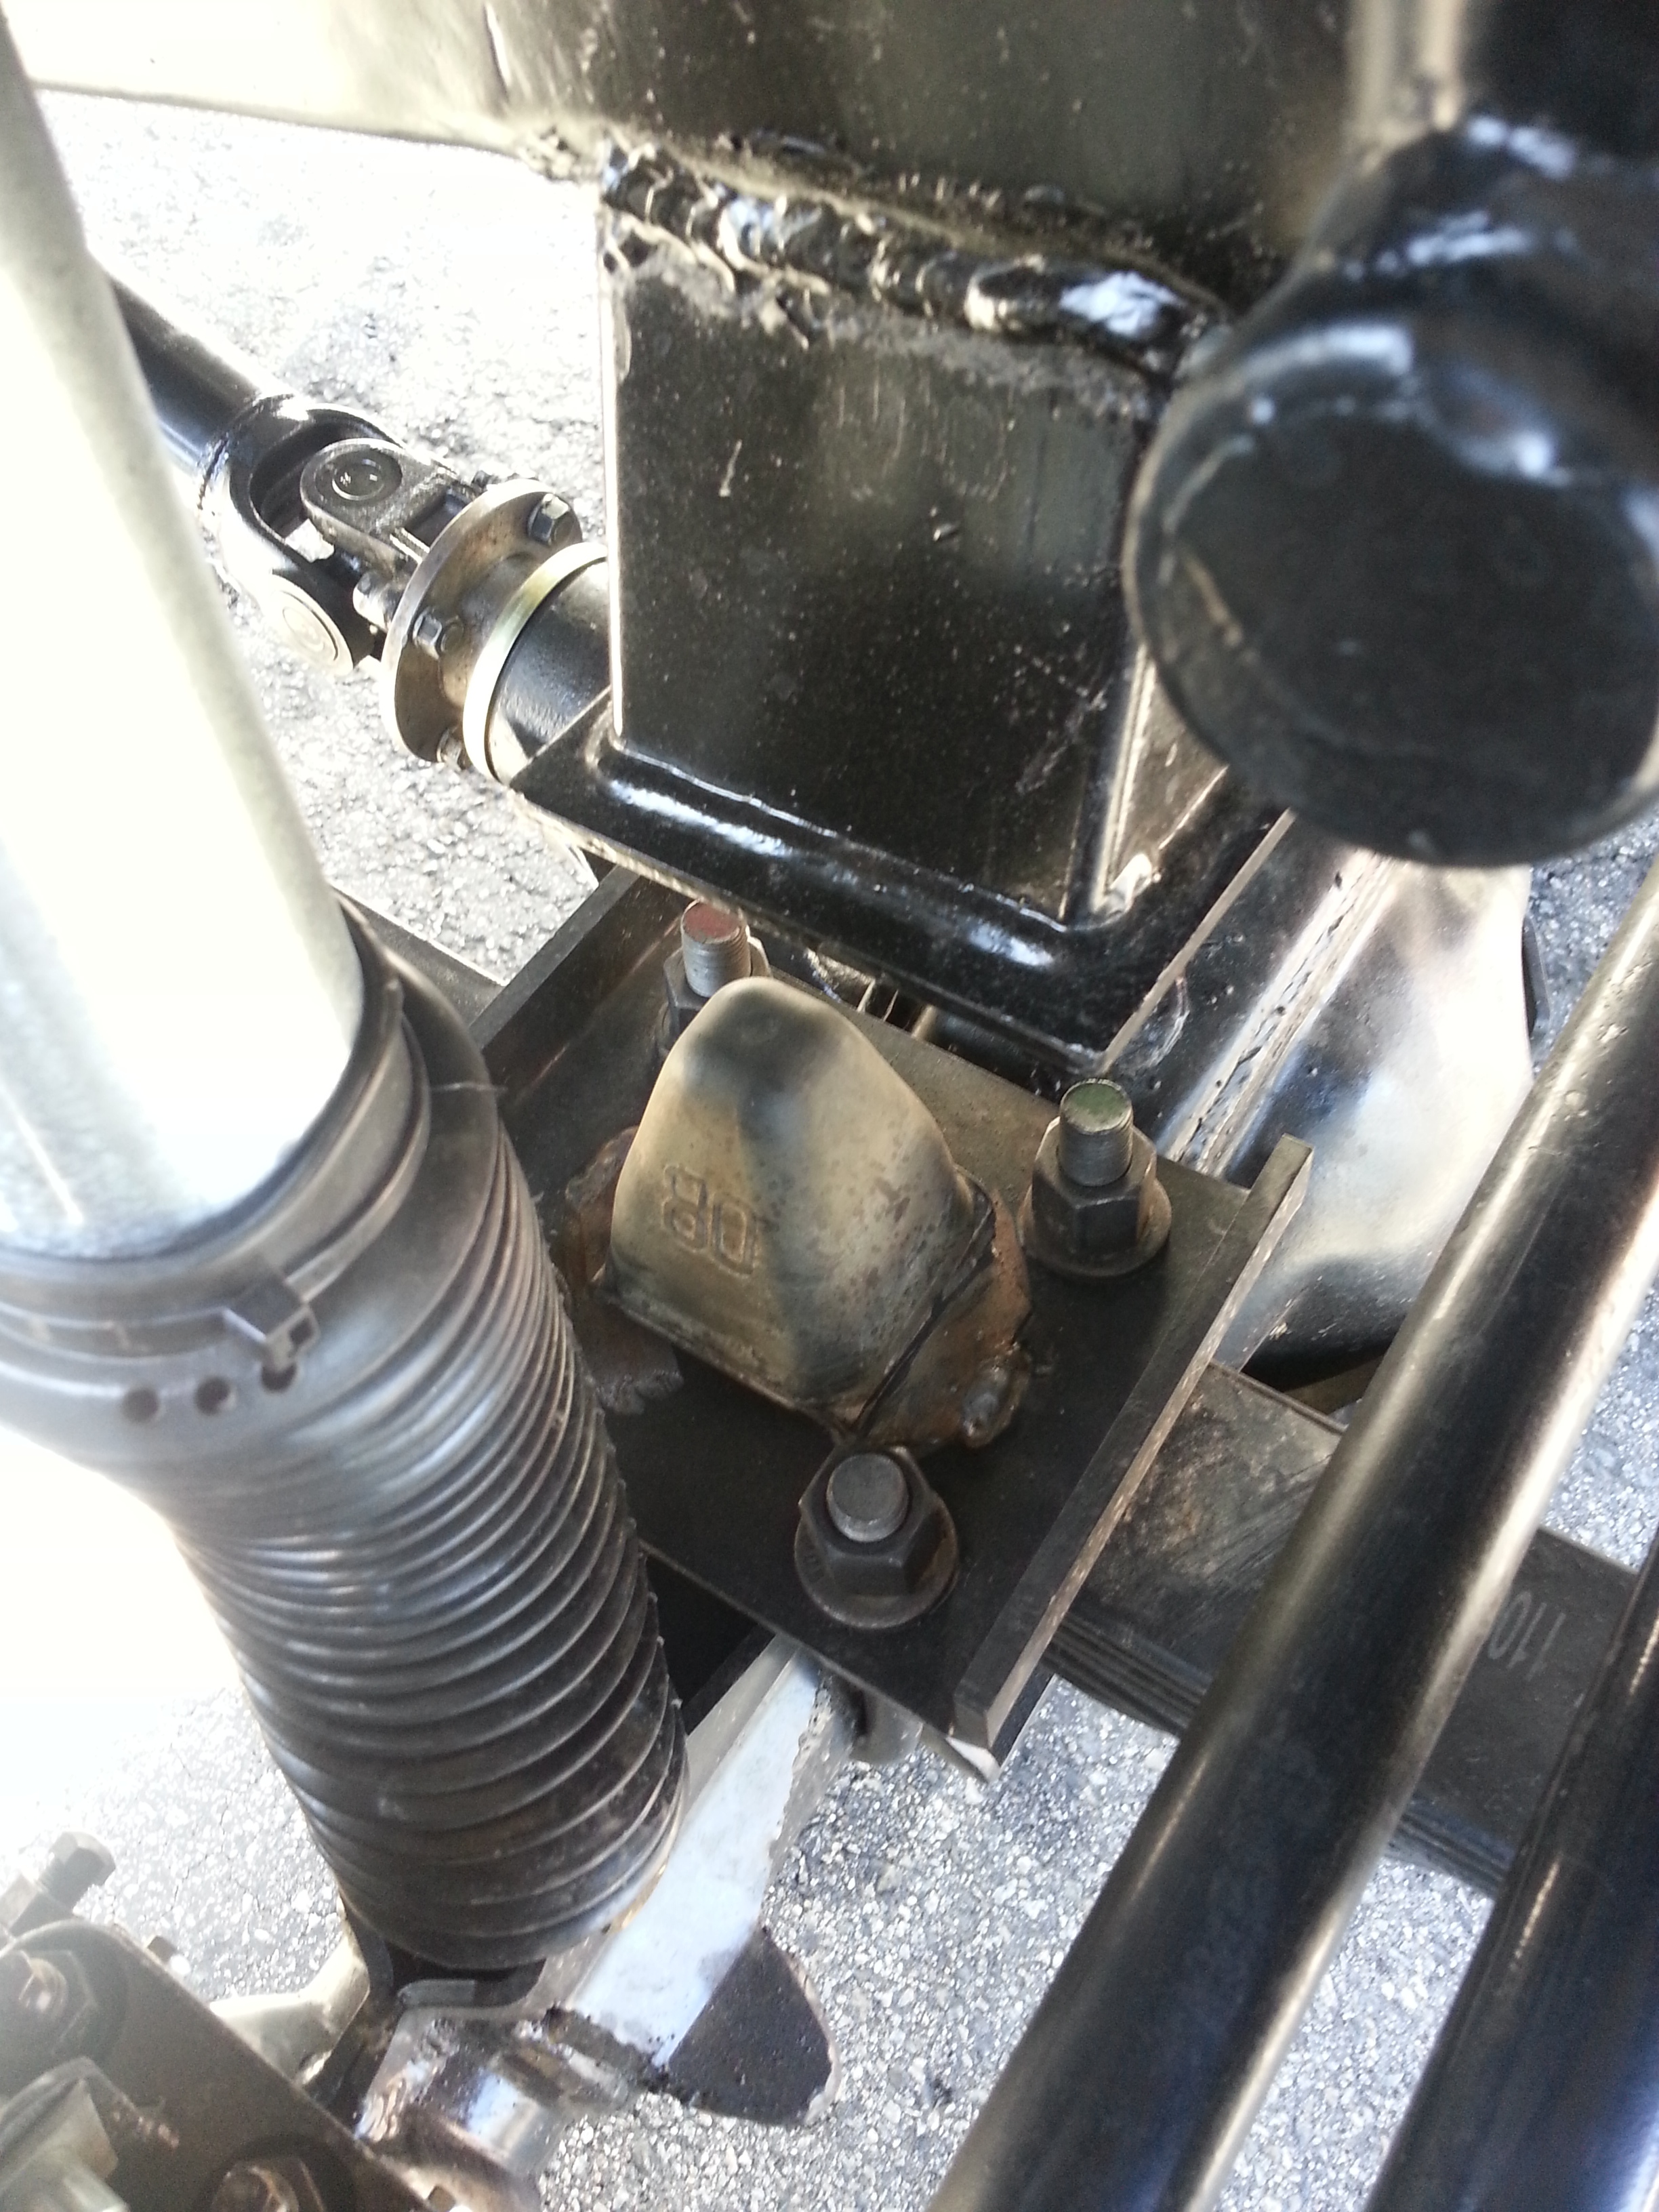
Frame reinforcement plate... Just below the bumper...

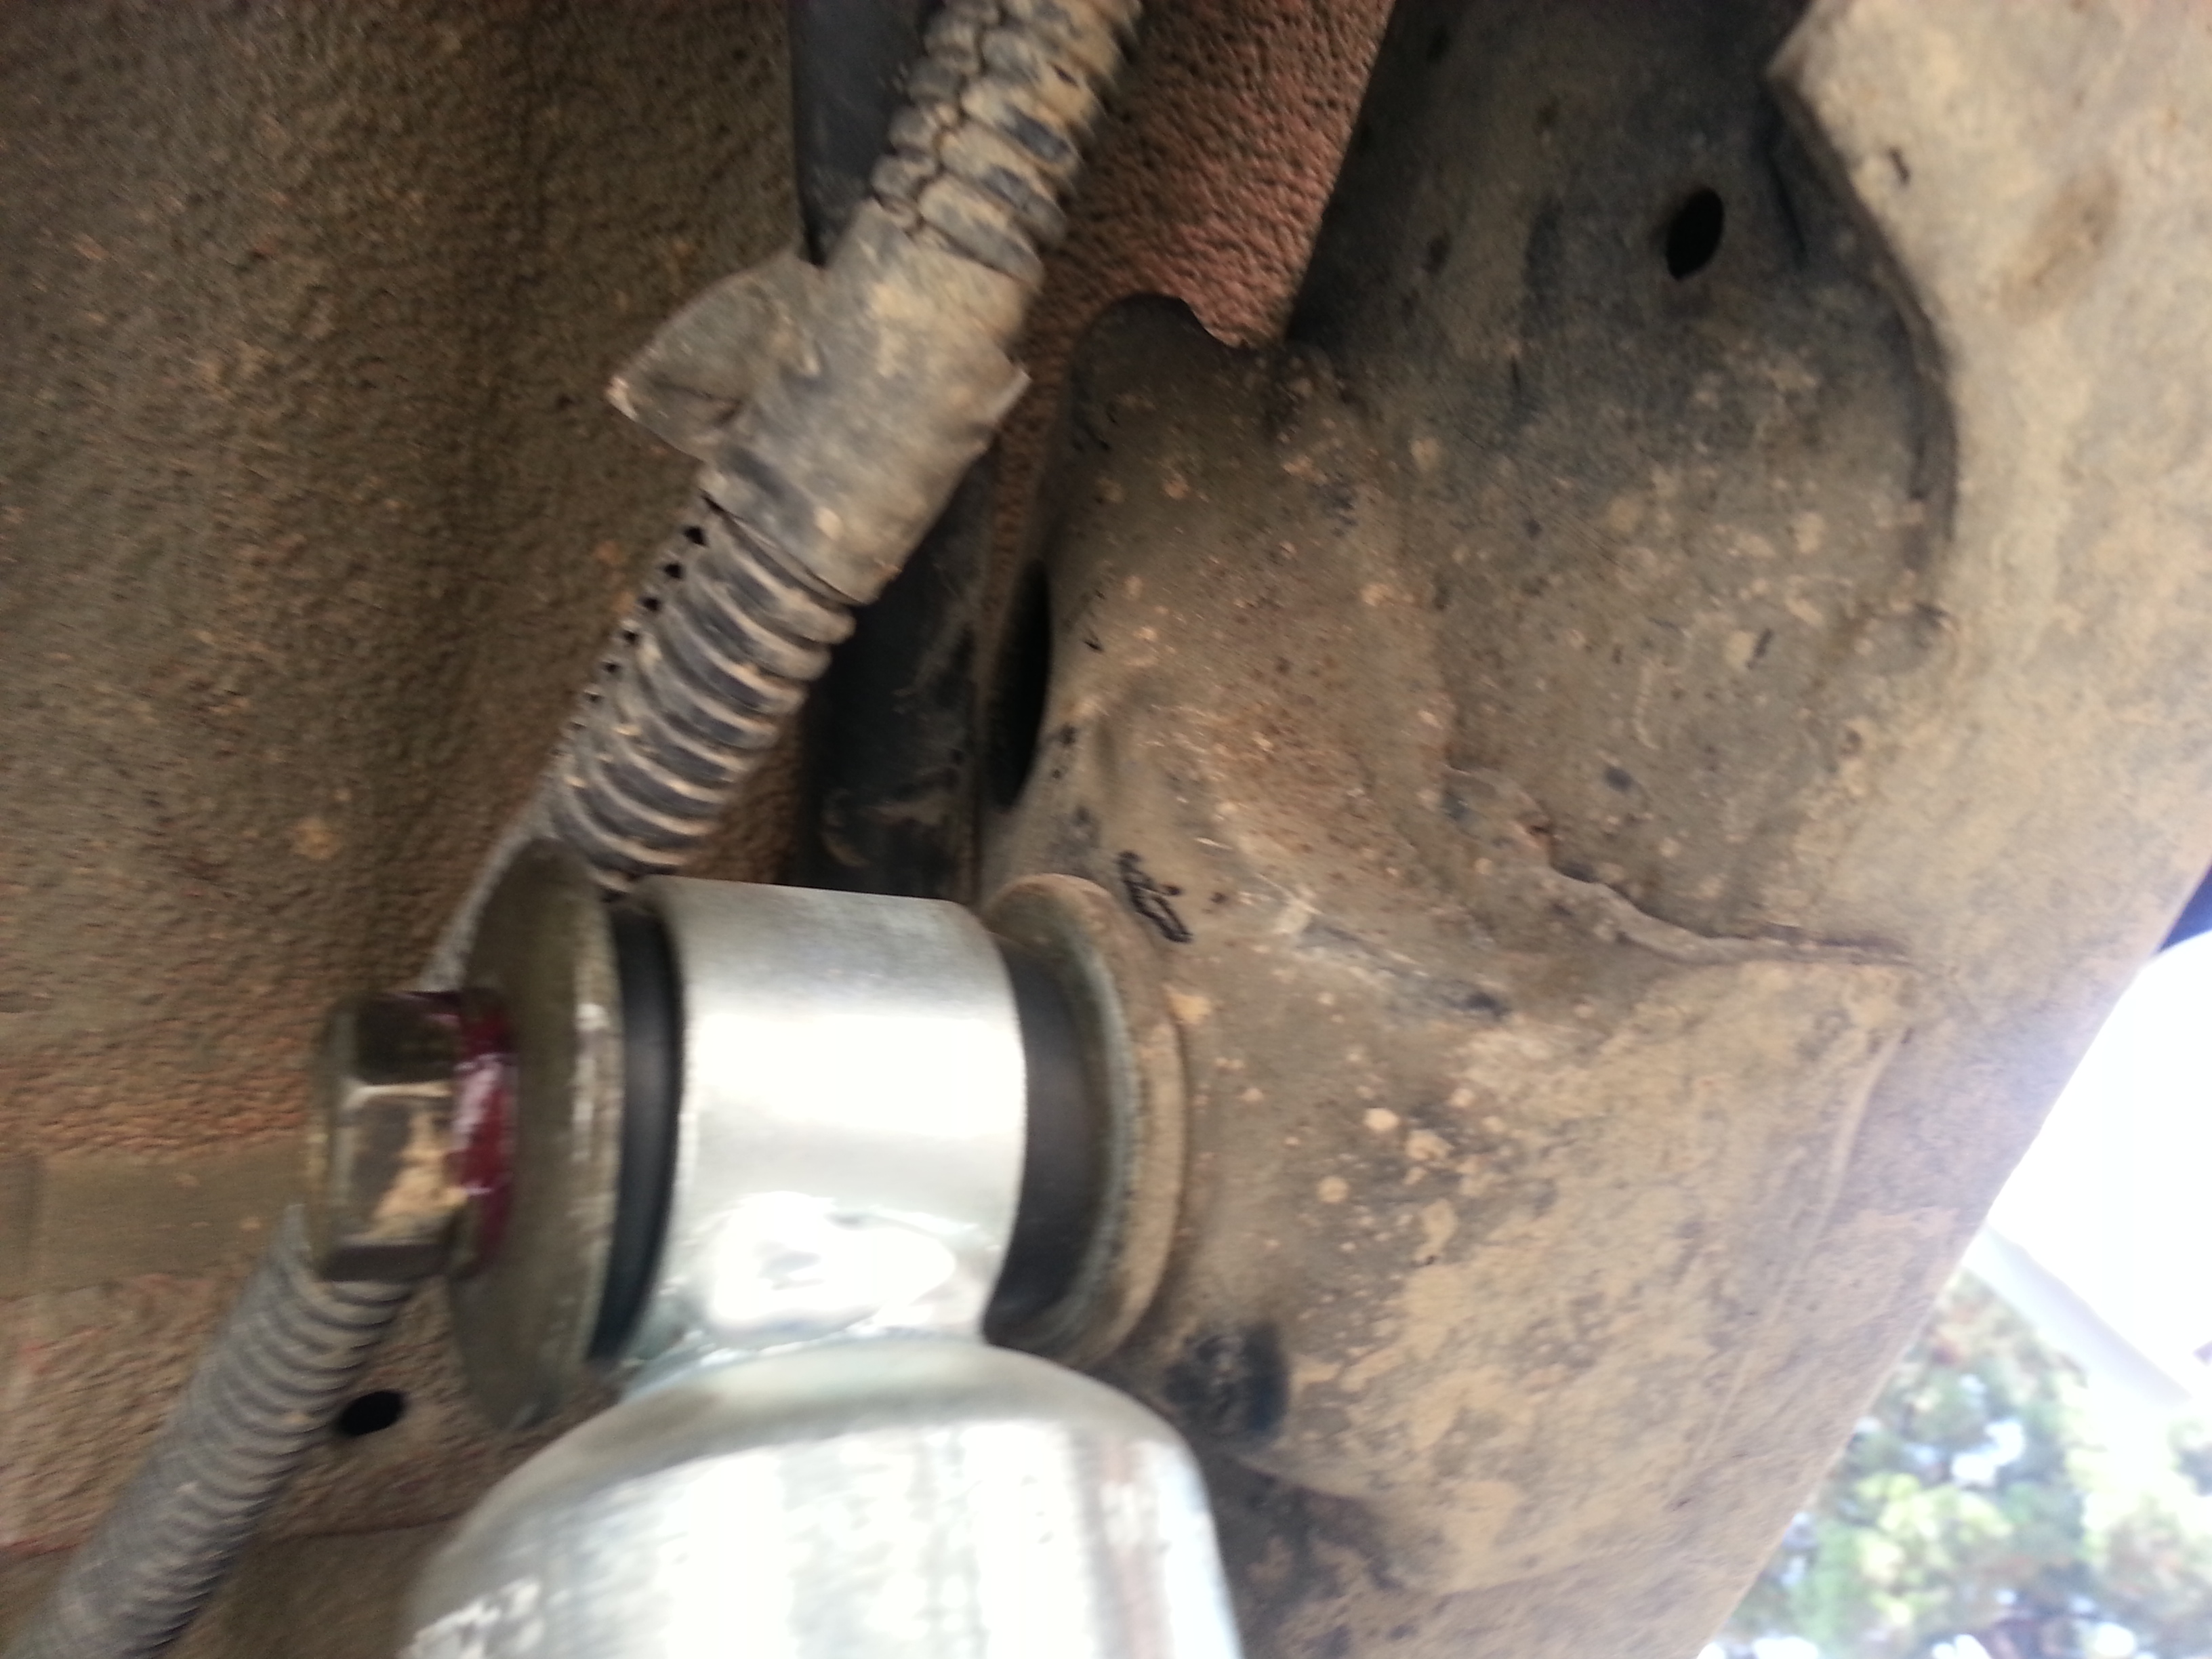
Rear shackle angle...
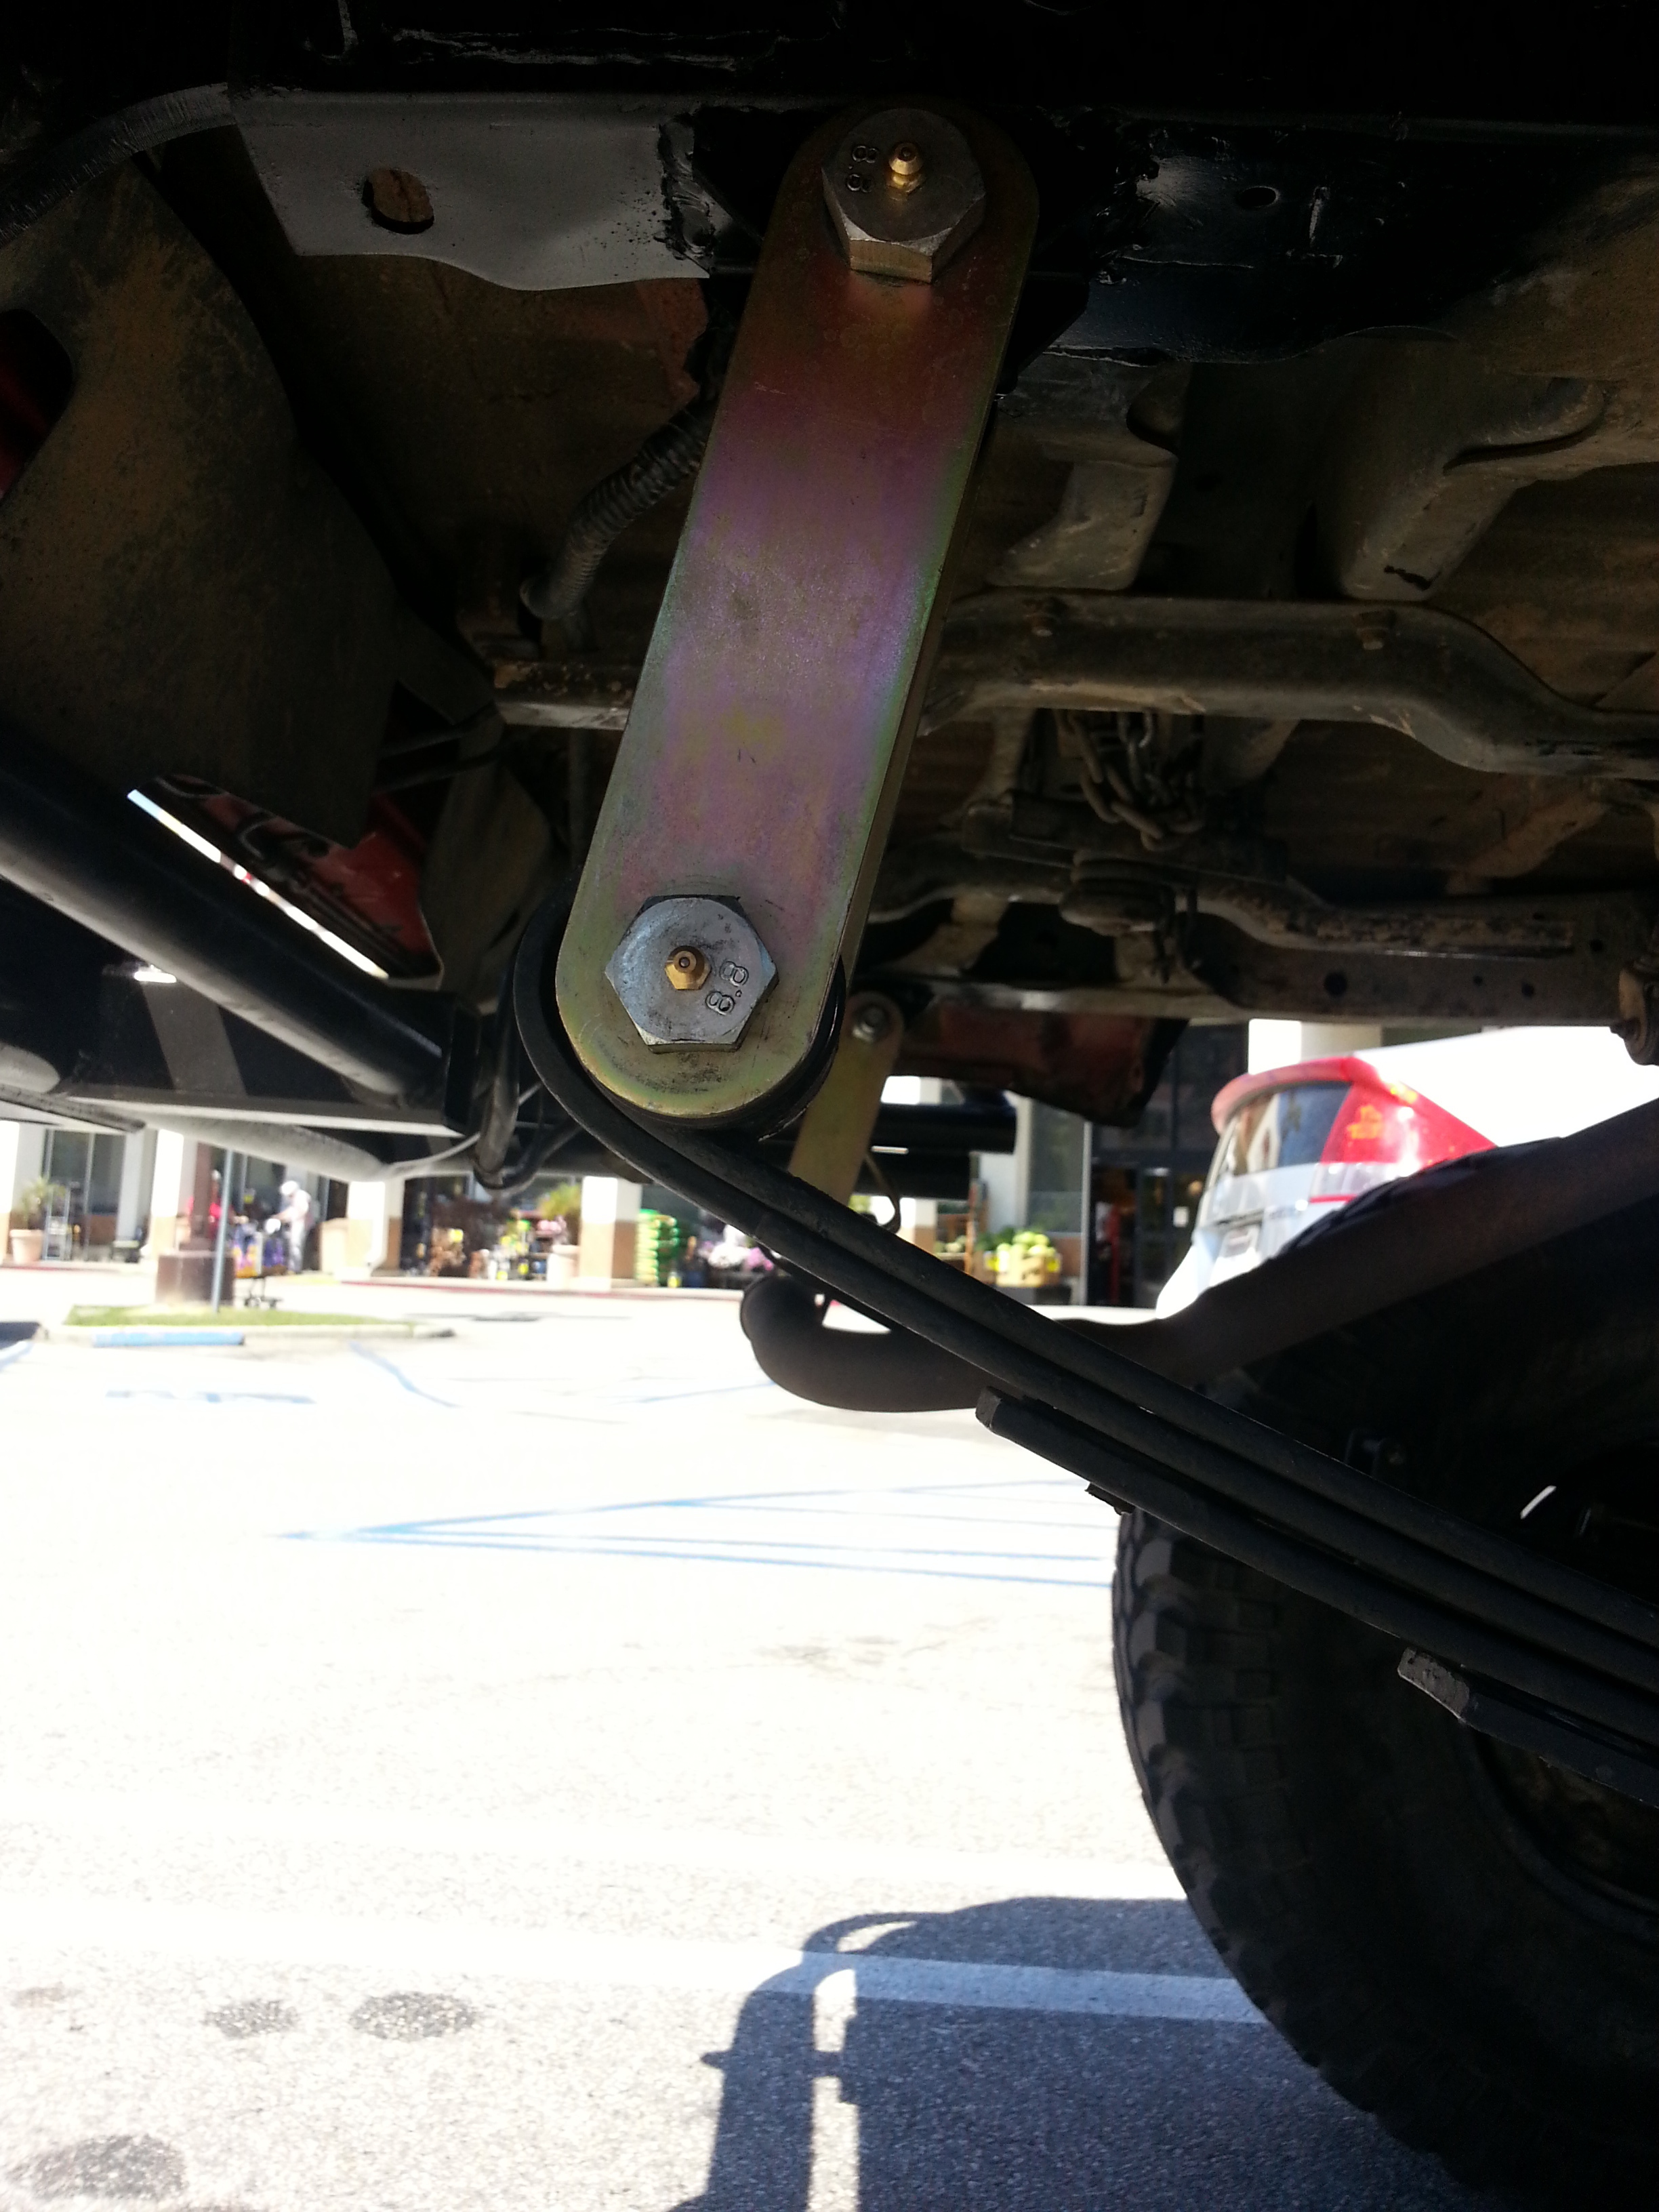
hanger mount....
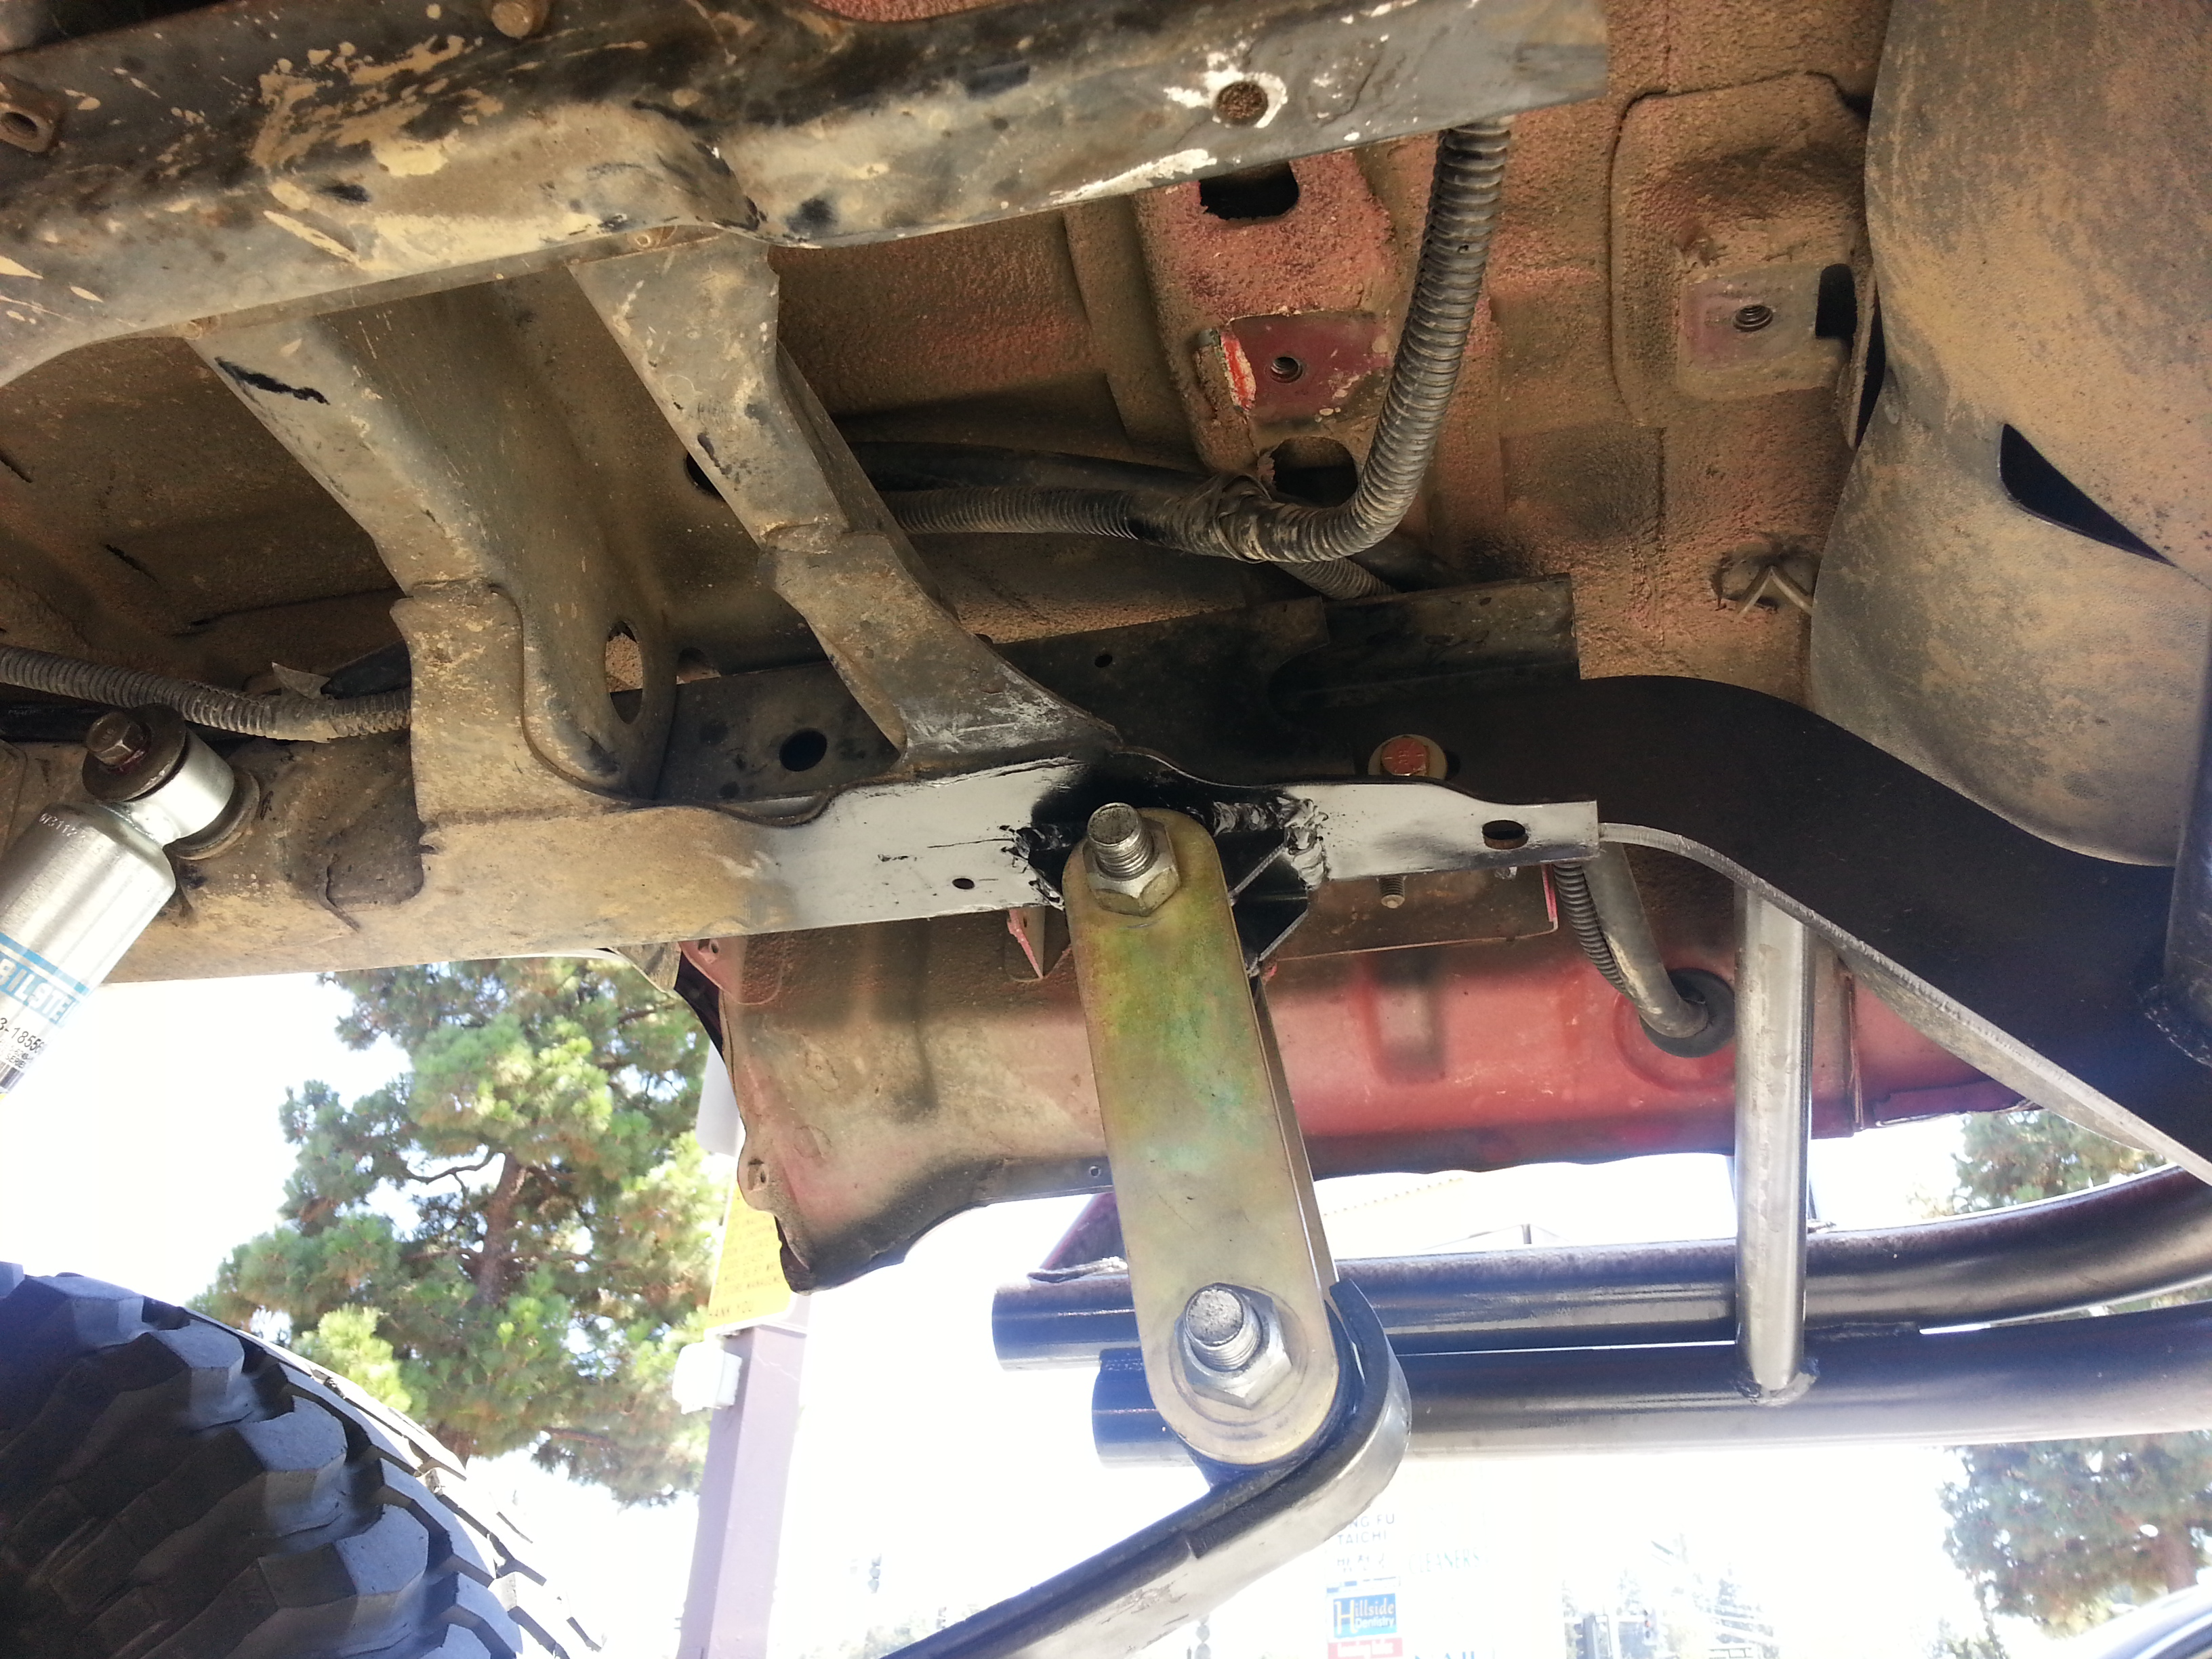
rear differential breeder extension routing and mounting.....

Front springs shackle hanger mount and shackle angle ....
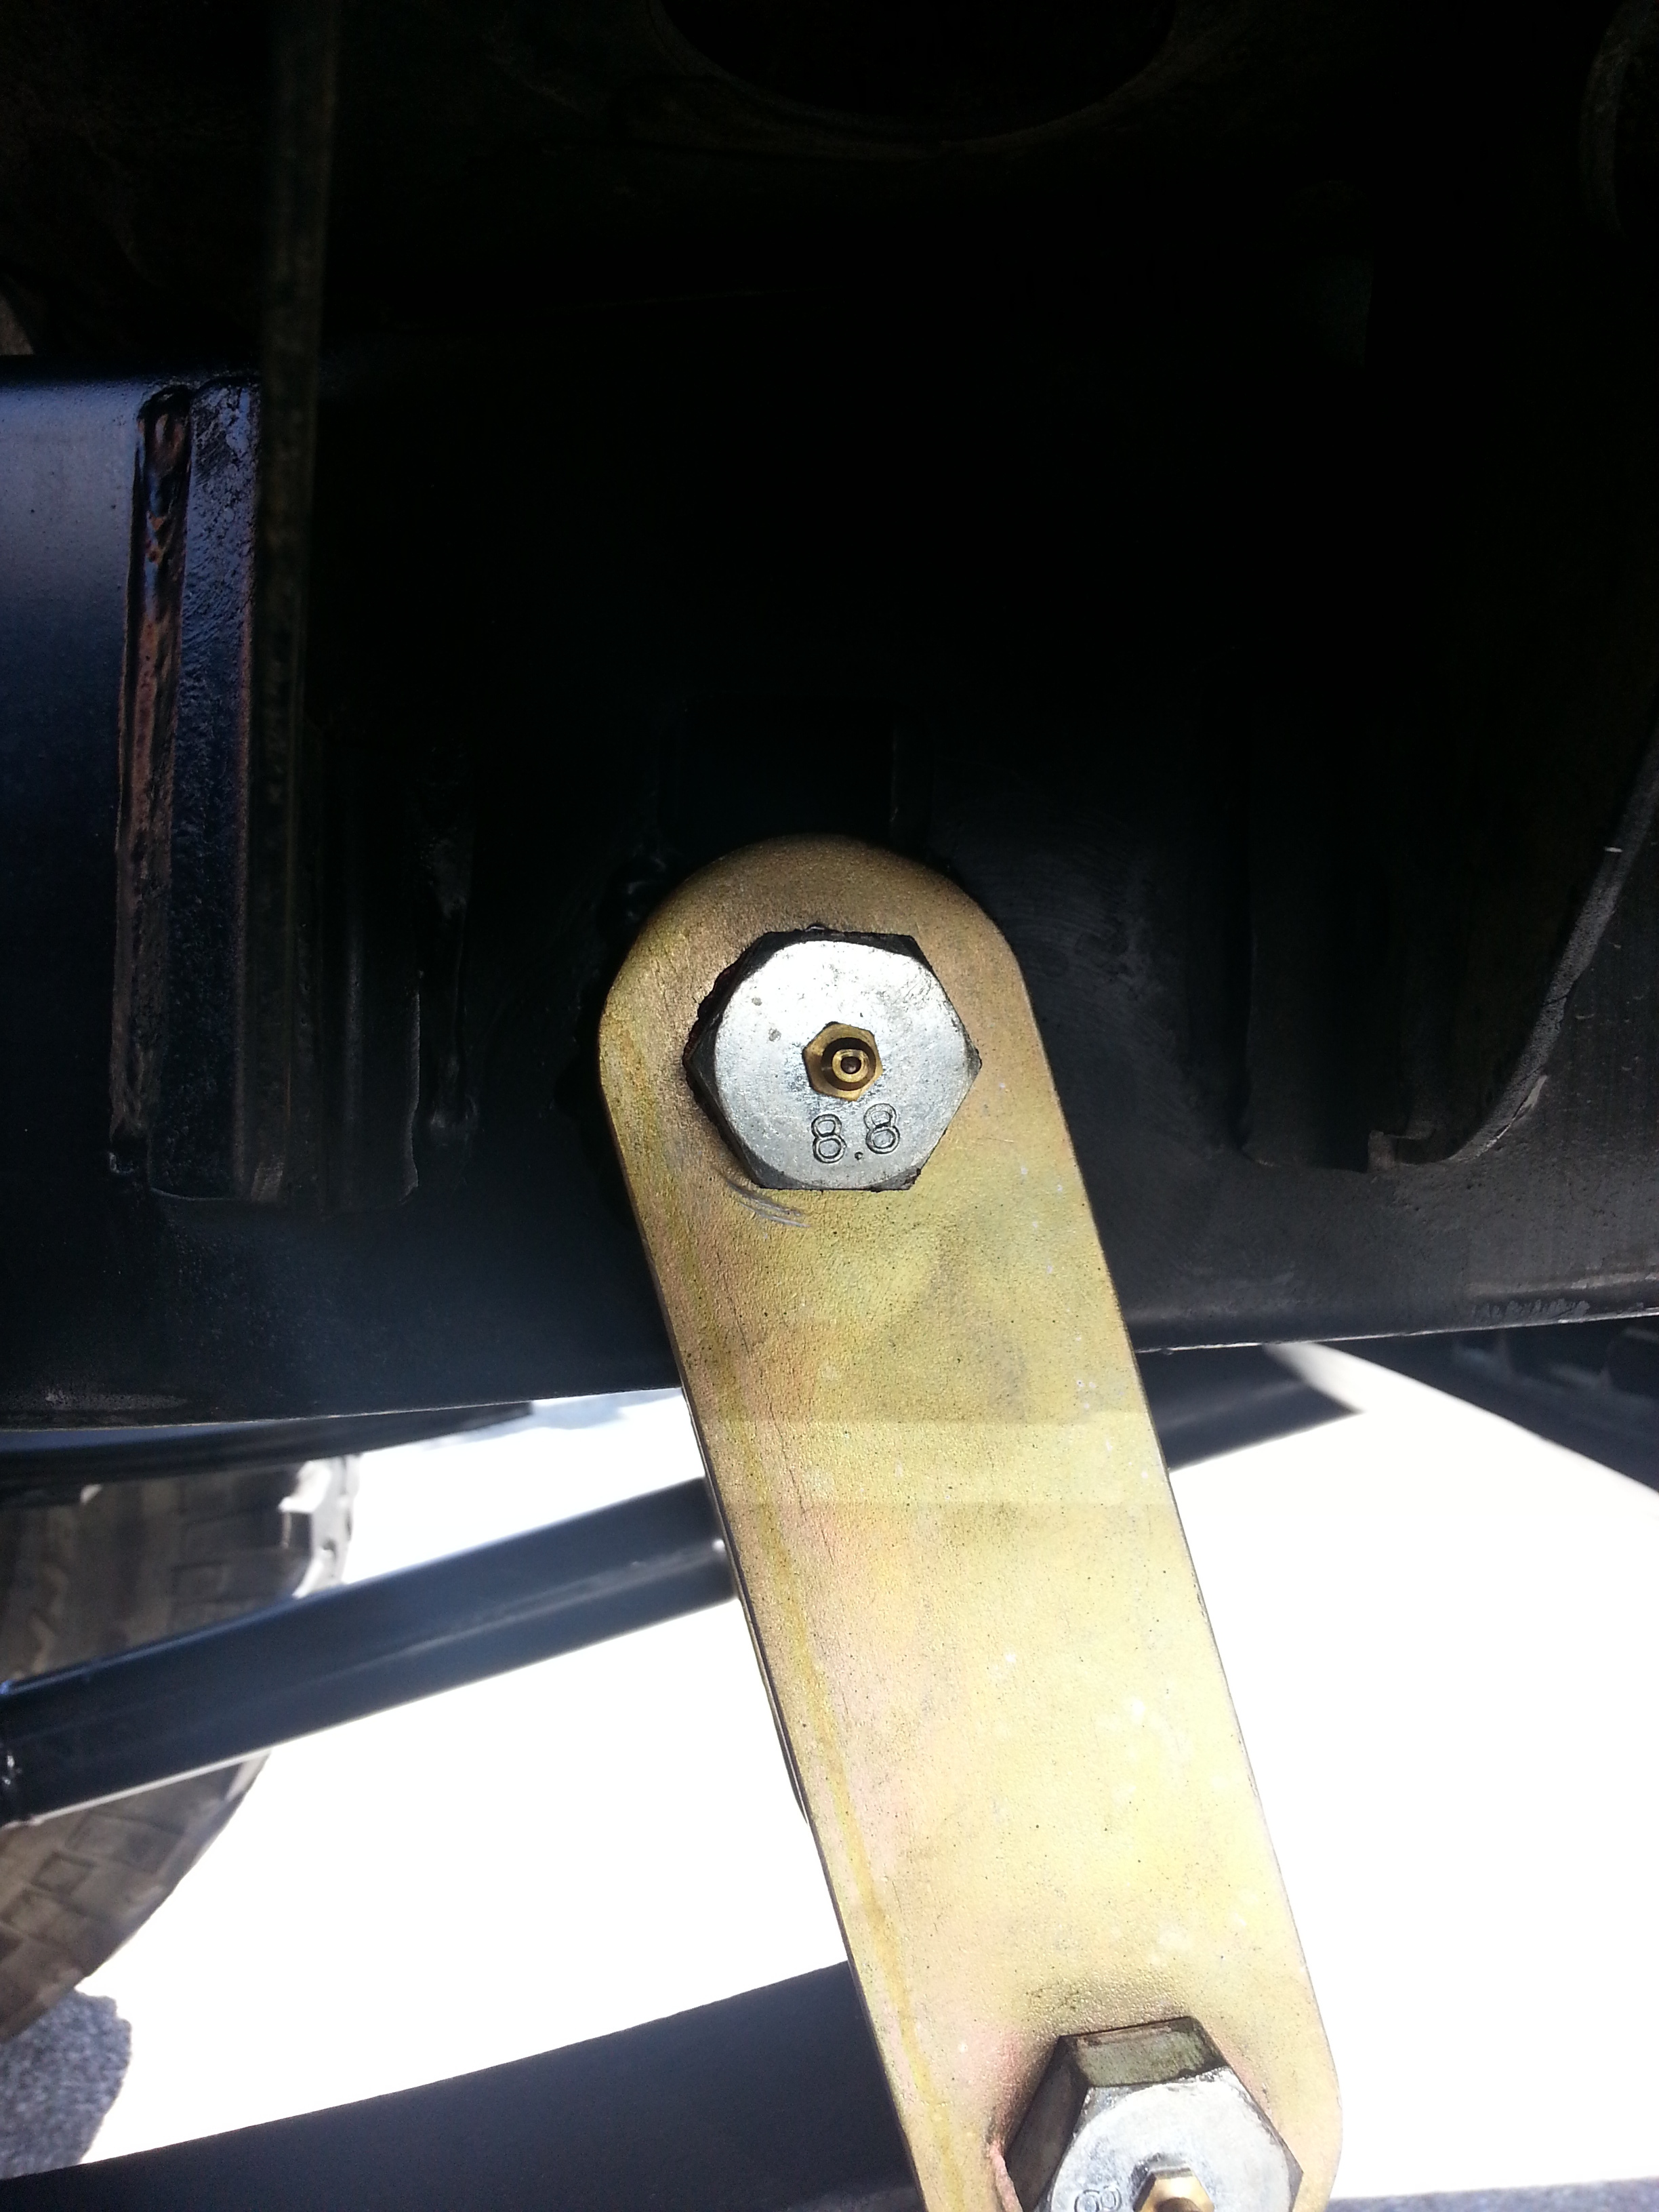
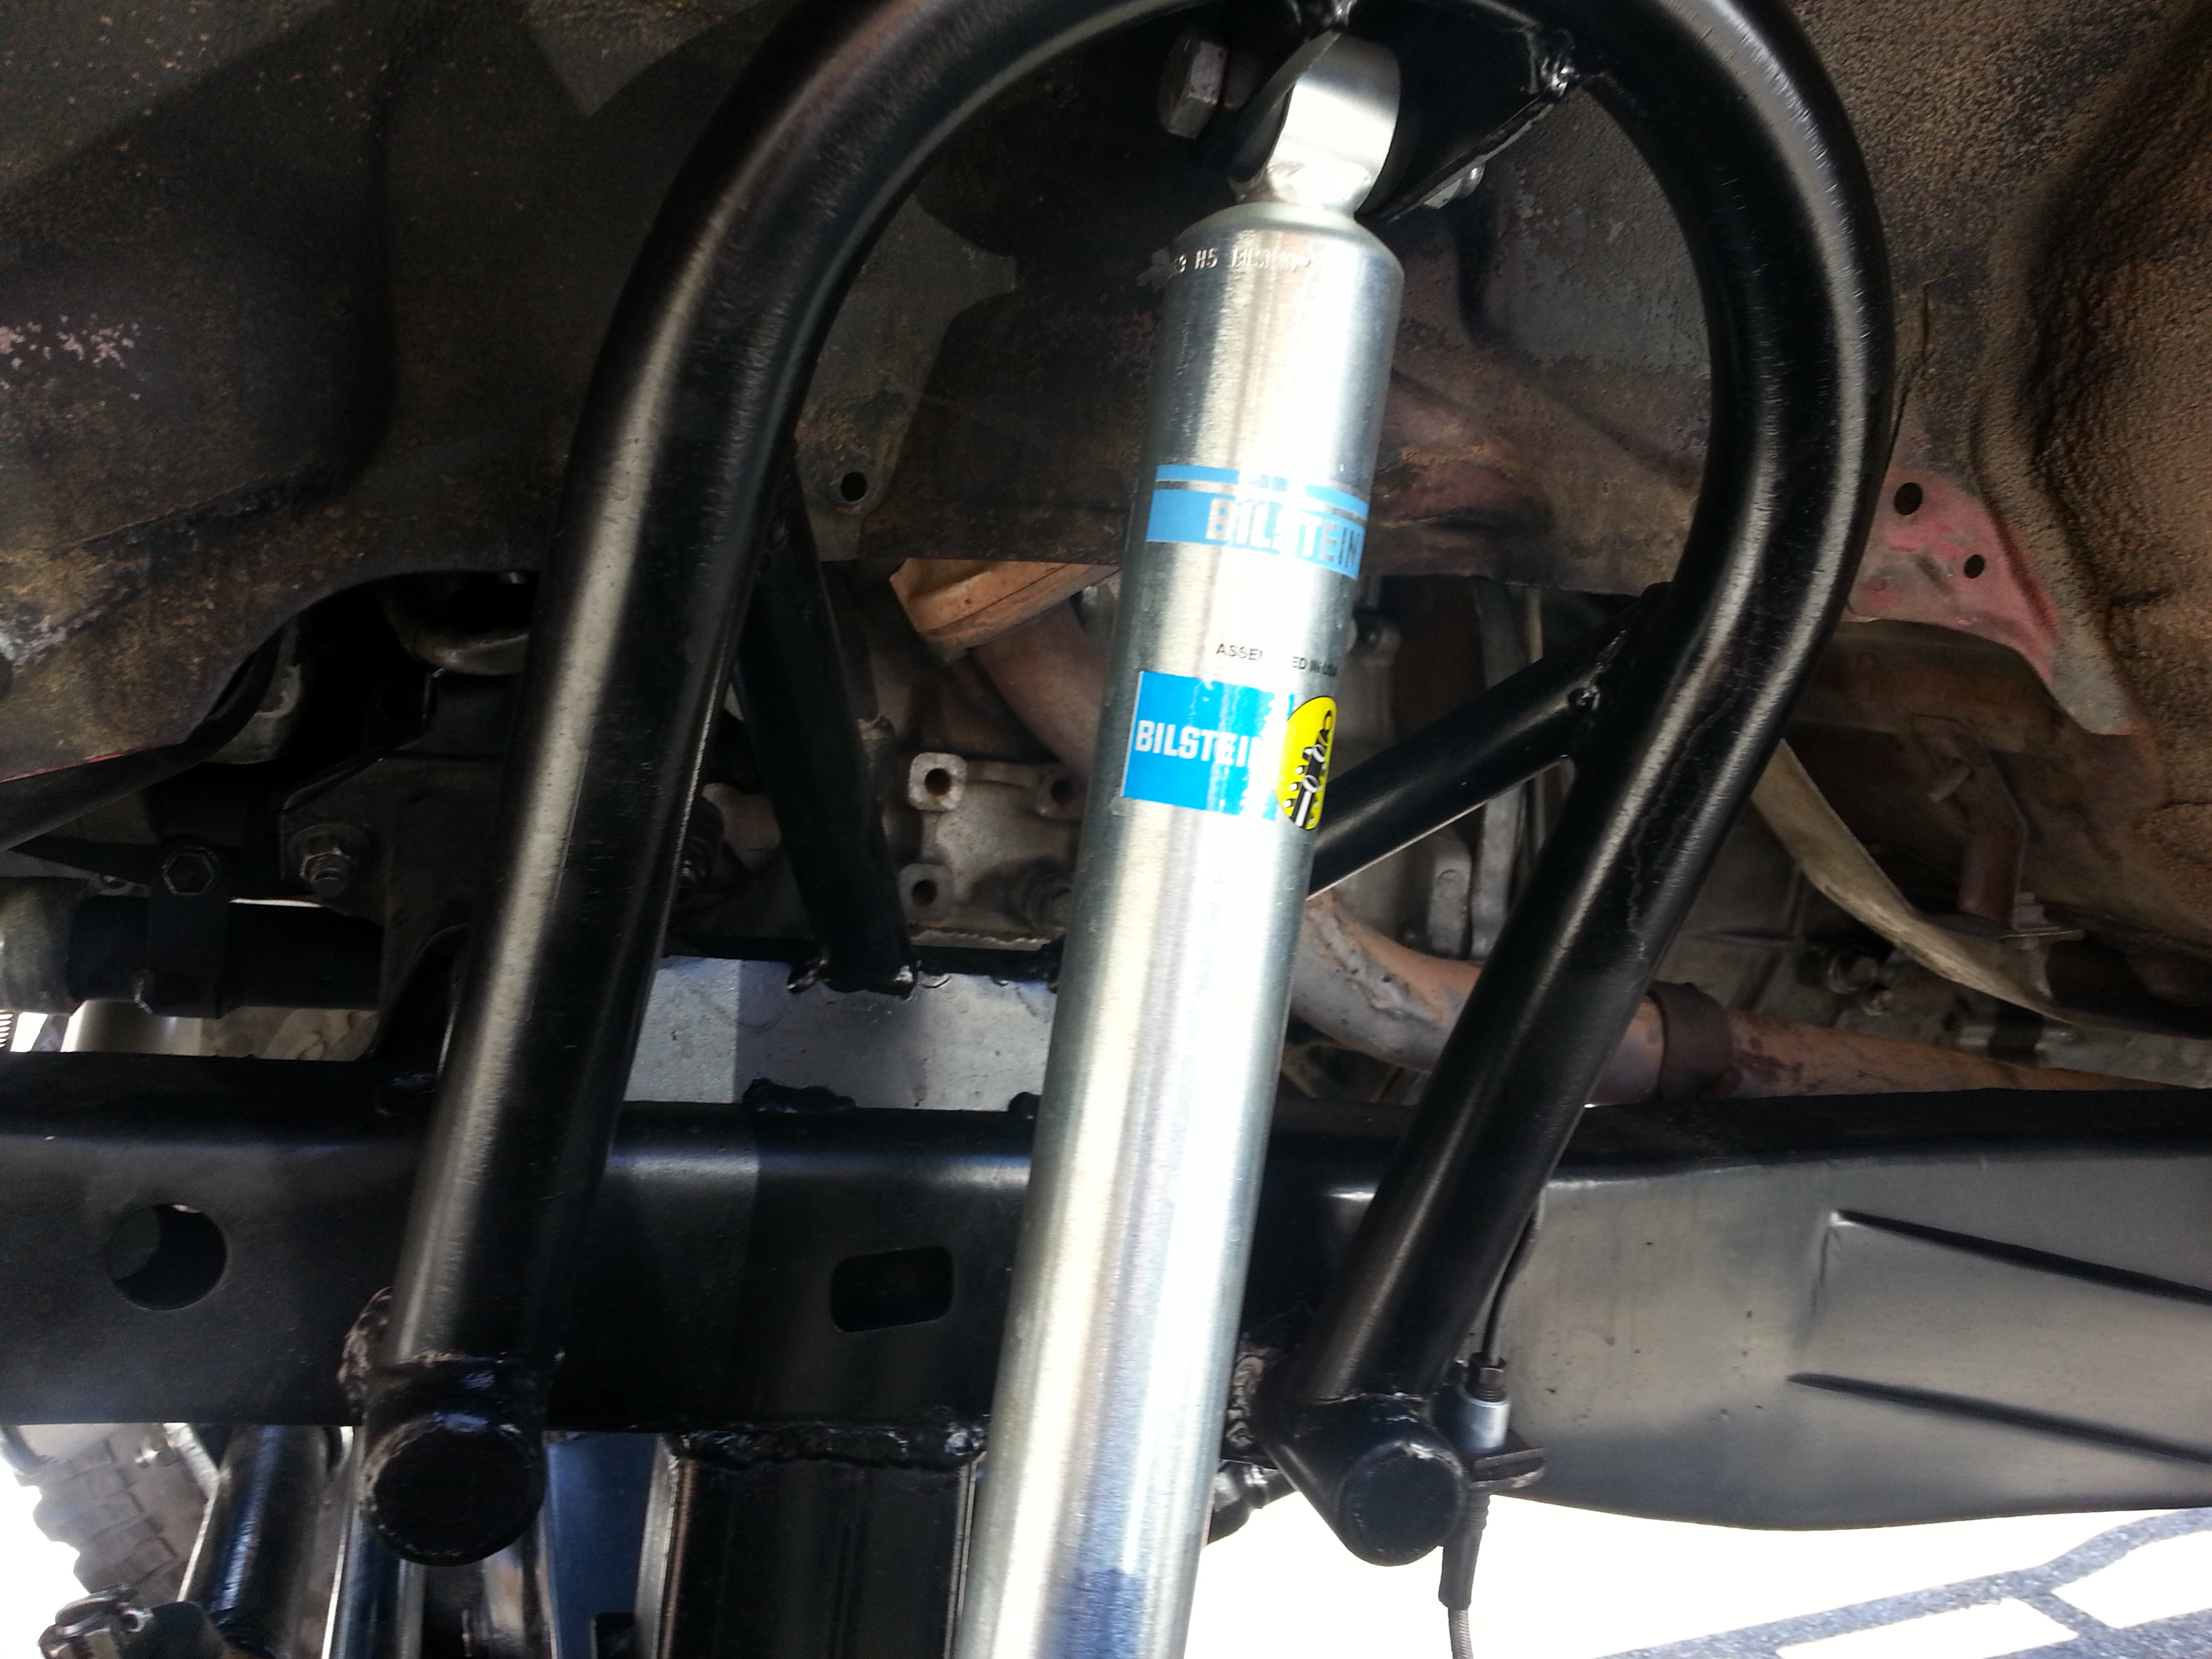
Rear shocks mounted...
Shock hoop angle carefully set at 10 degrees and 3 and shock absorbers well did securely 2 motor mount bracket cover ..
Another angle of the bump stop... I couldn't get level to show everything at the right angle because the light was so glaring it was messing up the picture... So like I said whatever you need just let me know and I will take as many pictures as you want as I'm out there setting up my rock lights or whatever, okay?
They are not the greatest pictures and I need to do it in a better sitting with my better camera or just always set my flash to go off when it's really bright outside but I'm underneath in the shadow. Anyway I just took a few...
Frame reinforcement plate... Just below the bumper...
Rear shackle angle...
hanger mount....
rear differential breeder extension routing and mounting.....
Front springs shackle hanger mount and shackle angle ....
Rear shocks mounted...
Shock hoop angle carefully set at 10 degrees and 3 and shock absorbers well did securely 2 motor mount bracket cover ..
Another angle of the bump stop... I couldn't get level to show everything at the right angle because the light was so glaring it was messing up the picture... So like I said whatever you need just let me know and I will take as many pictures as you want as I'm out there setting up my rock lights or whatever, okay?
07-28-2013, 01:04 PM
#7246
Pretty much wrapped up the Triple Sticks clearance/contact when torquing issue. ...
But, since the 2wd/4wd passenger side stick is tighter to the down arch of the tunnel on the passenger side of the tunnel, I'm going to have to get creative in order to use my shifter bezel or even to seal it up properly.... It overhangs slightly on the pass. side, and I don't want the proverbial "SHUT THE DOOR, I DON'T WANT TO AIR CONDITION THE OUTDOORS!" factor in play, causing me to yell at myself! Haha.
I think a piece of wedge wood, triangular, drilled out from the back and using stainless plate over it, with a t-nut coming in from the backside, then use some FrostKing closed cell foil backed and thormoshield to insulate around everything..... All over a sheet of rubber that brings the plane to flush for the 2 shifter boots (keep the triple shifter boot from bowing)... I should have a bit of a plan. The carpet might get stretched to beyond its cover area.....but I have an idea for that/and I think the method I mentioned will move it over enough to cover that portion of the carpet.....
It's not so much about it looking perfect as it is about the insulation and noise reduction factor. I wish I could secure some thermal shield up into the boot or something... But I will have to settle for coming up with a form of homemade boot. Once again the problem is that the snap in rain on the underside of the shifter surround will not clear at the triple sticks. So I will have to cut out the bezel on the passenger side and at the very rear so that the rubber triple stick boot can clear and not become cut up by the plastic. It's actually quite amazing how much that plastic piece increases noise reduction and insulation from heat... And I want it back. There has to be some way and I will try to figure it out. First thing first is to secure the bottom most setup and seal it well and then I can focus on fitting the plastic surround bezel.
This is a one shot deal, and I always welcome any input that anyone has. I will insulate and mount everything to the floor and then do some video of the plastic bezel to give everyone a better idea what I'm talking about. I want to keep that piece because it has the frontmost pocket and would look pretty cool, and it also mounts in the rear 2 the front most portion of the console. One of the problems I might have is that I'm not sure I will be able to mount the brace any longer... So I might have to come up with something the offsets the bottom of the base... It might be pretty difficult considering the fixed mounting nuts in that bracket are countersunk. Grrrr! Lol
 07-29-2013, 11:43 AM
#7253
Registered User
Hell yeah man! I will try to keep up as best I can. Been hard with no internet lately. Been using my phone mostly.
07-29-2013, 11:27 PM
#7254
Okie doke......
I might have some time in the next few days, sporadically, to get on the remaining projects. ...
1. Button up the triple stick boot and cut to fit W56 metal bezel (basically cut in half as you may have seen in the videos?)...
Here's a pic of what I'm going to have to seal up (the passenger side is going to be the more difficult)......
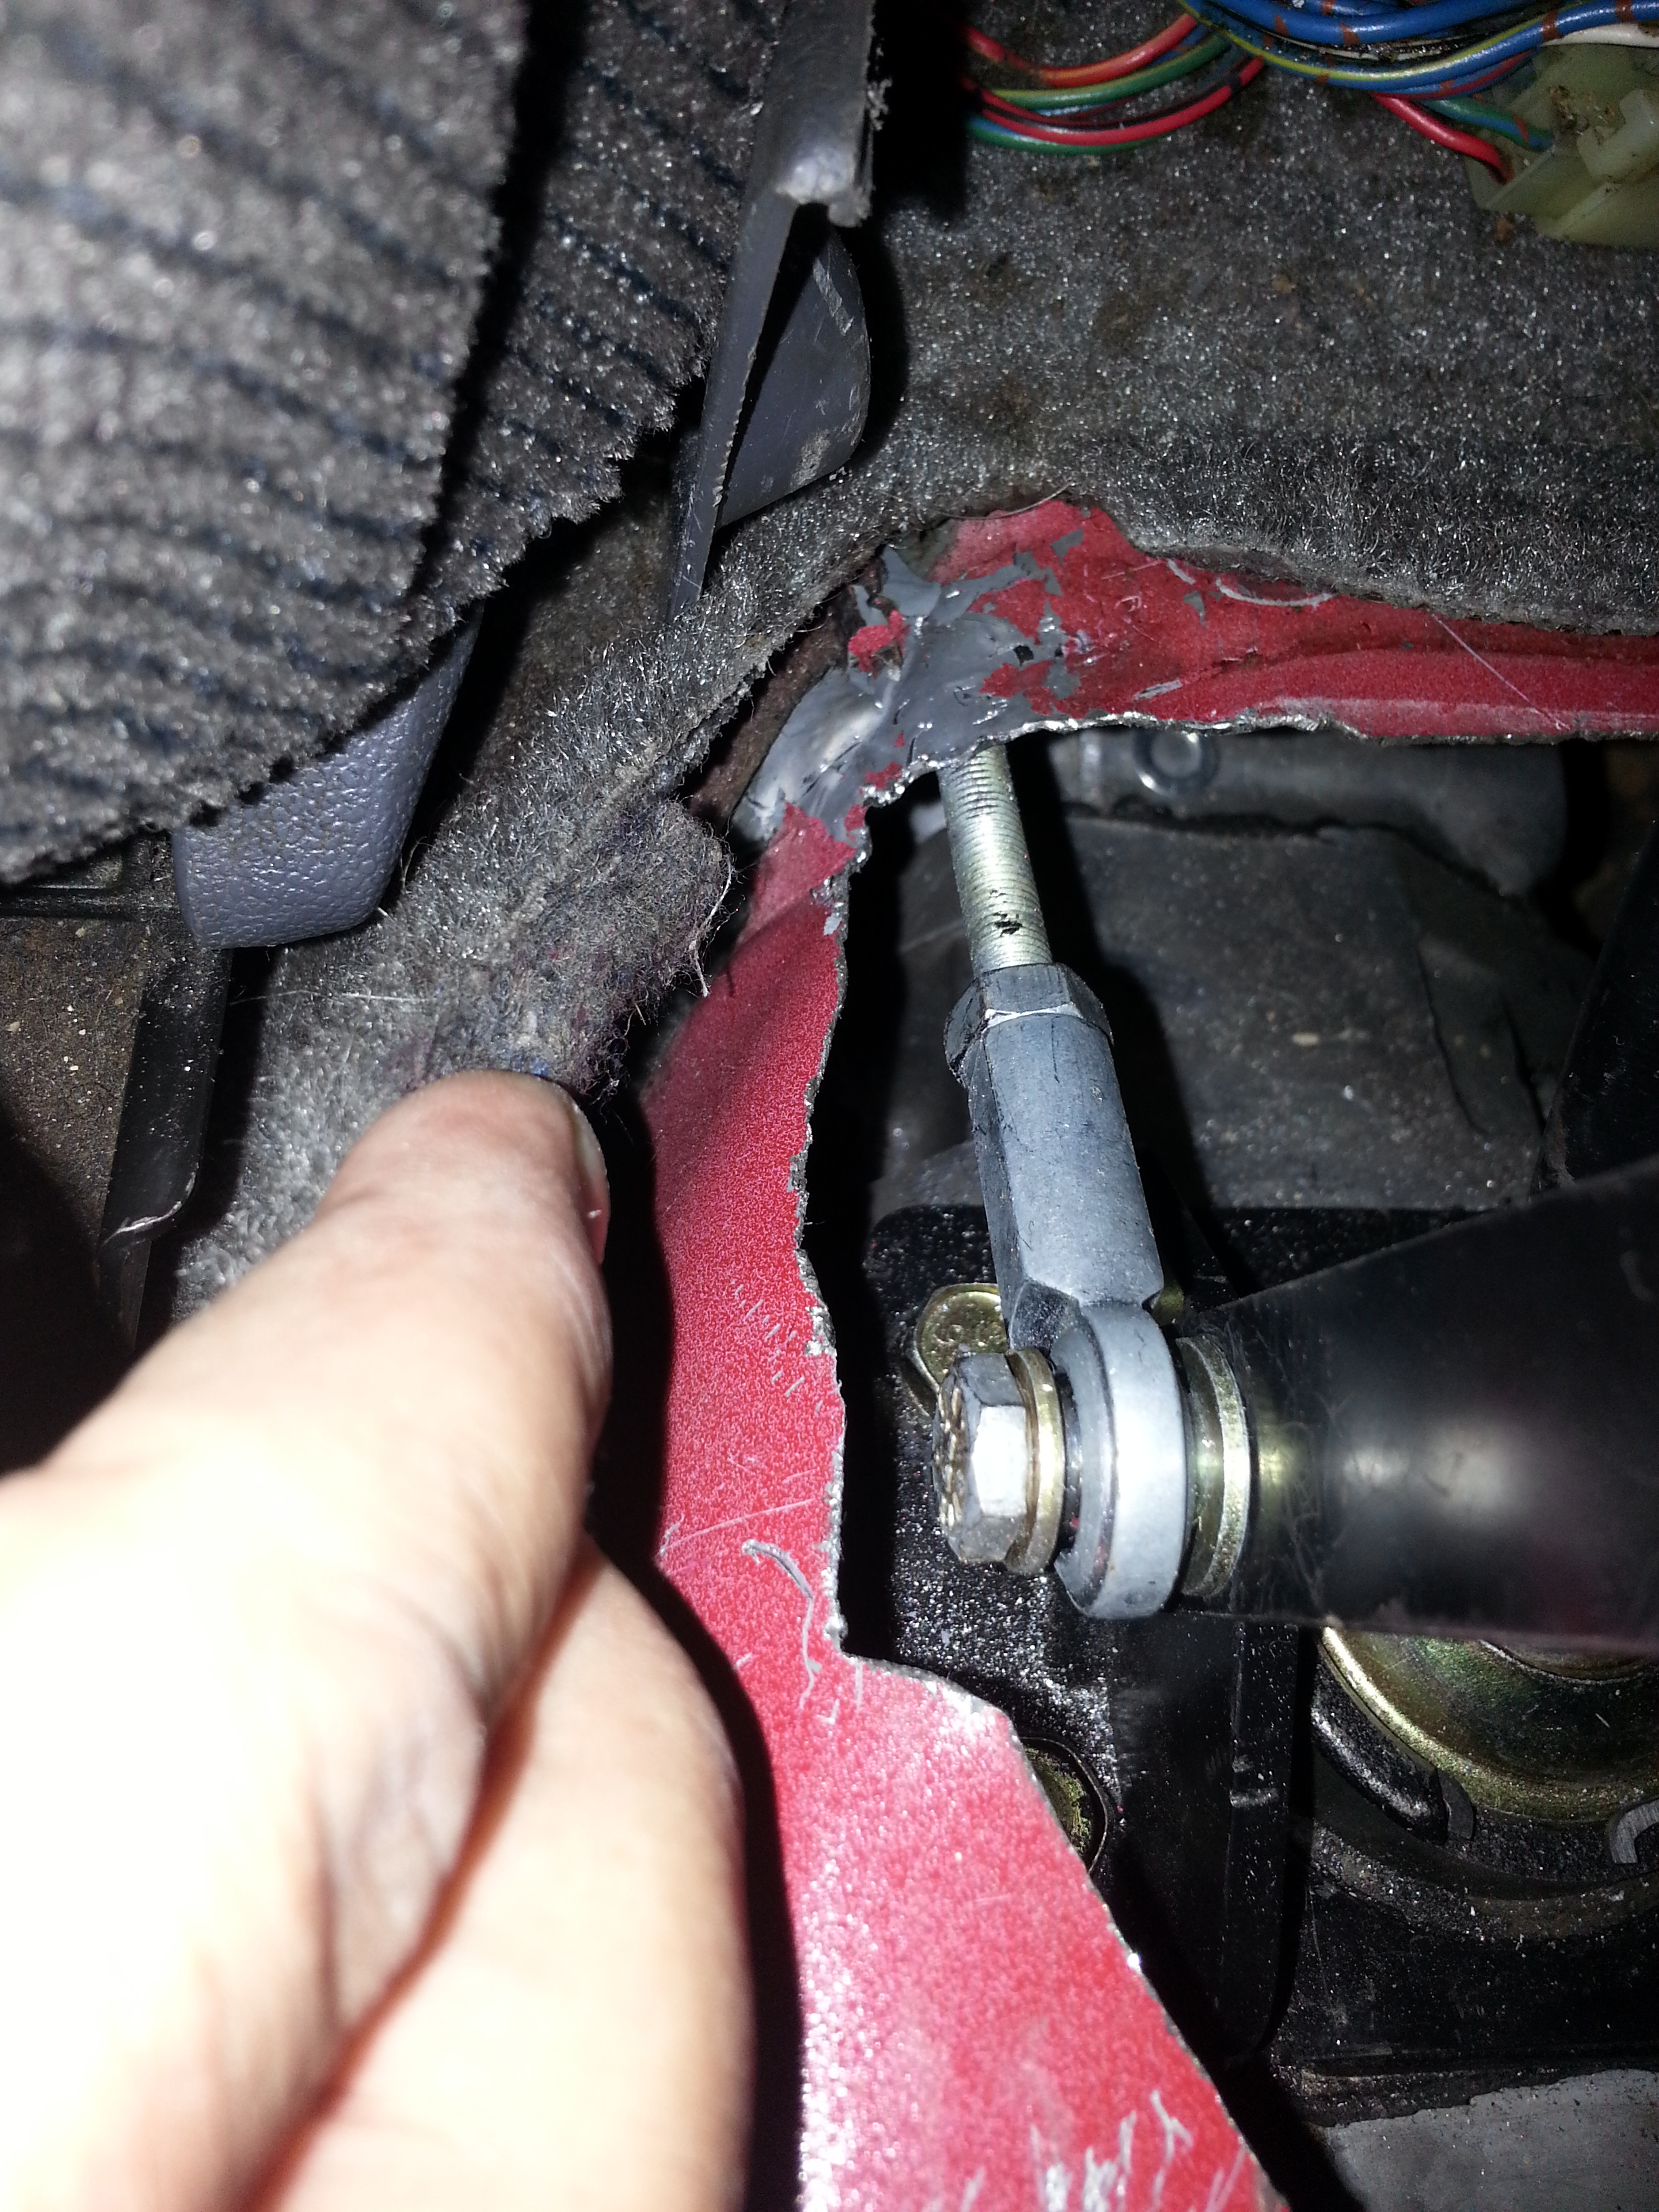
^^^^^ I'm thinking I can build up ThermoShield around that corner to make it flat/to prevent hot air from rushing in, but I may have to actually build it up with something solid and then lay the ThermoShield on top of a level base........ ???
ANY INPUT ON THIS from any fabricatorily inclined people would be greatly appreciated!
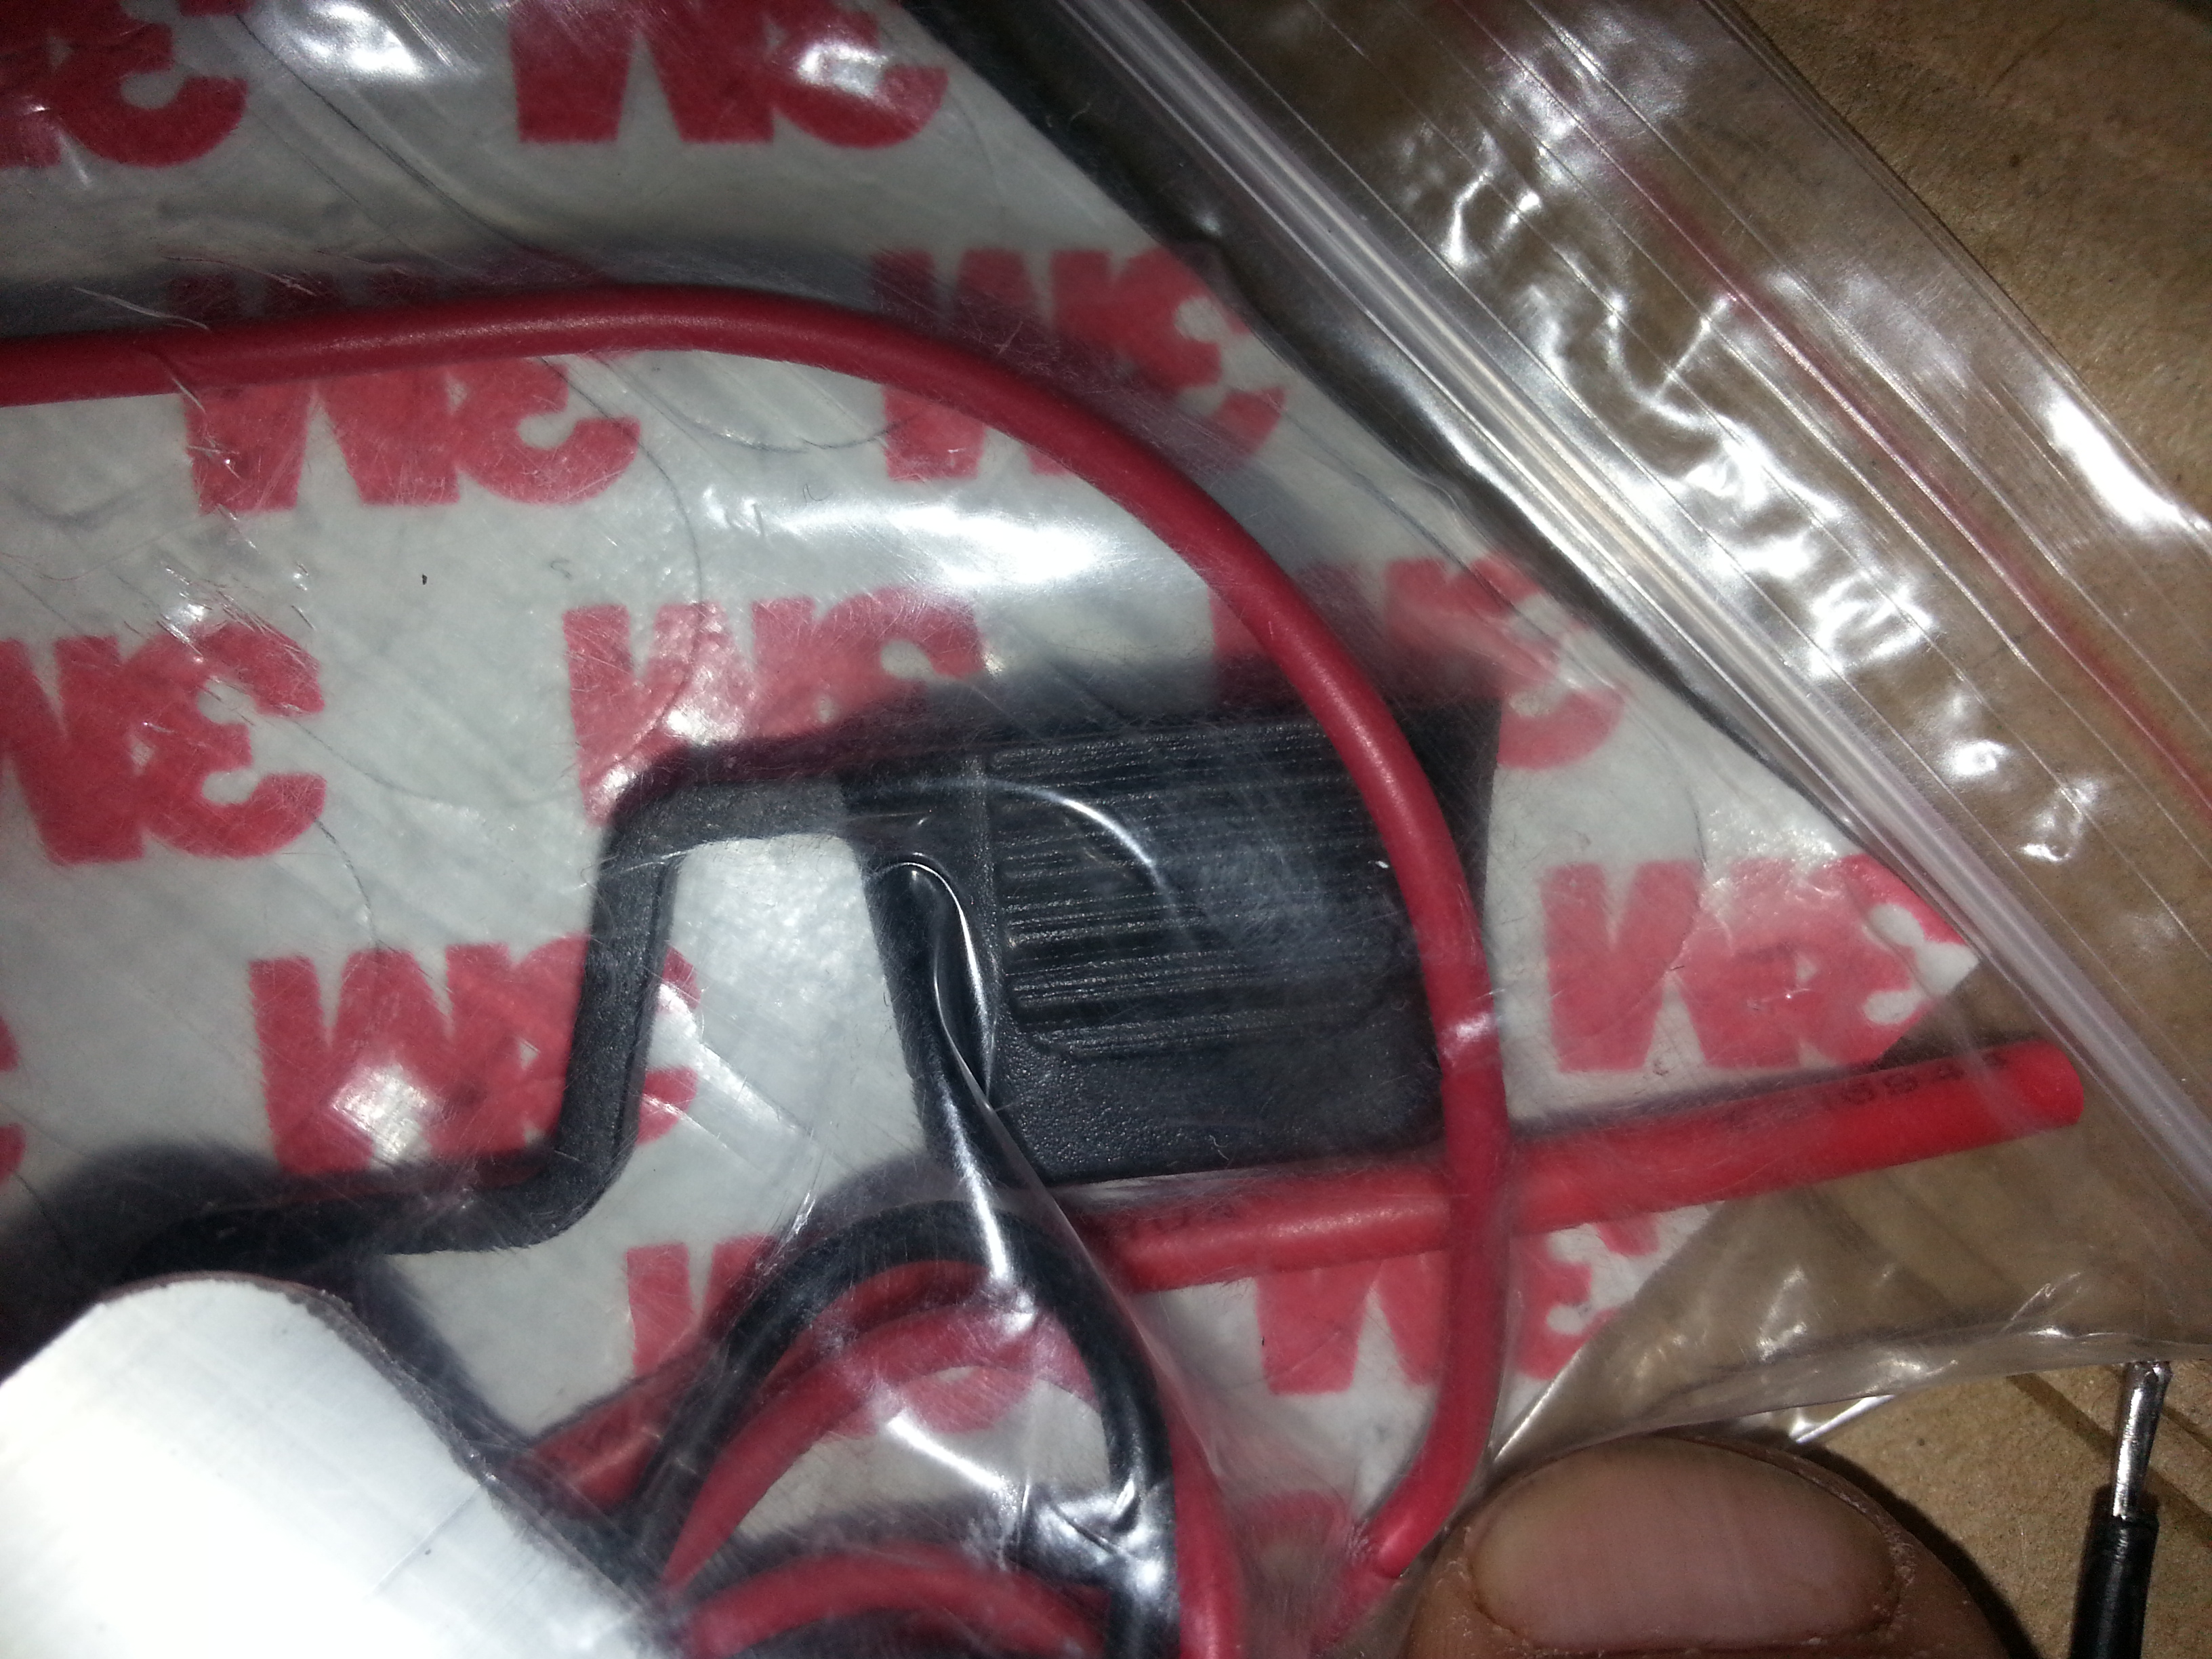
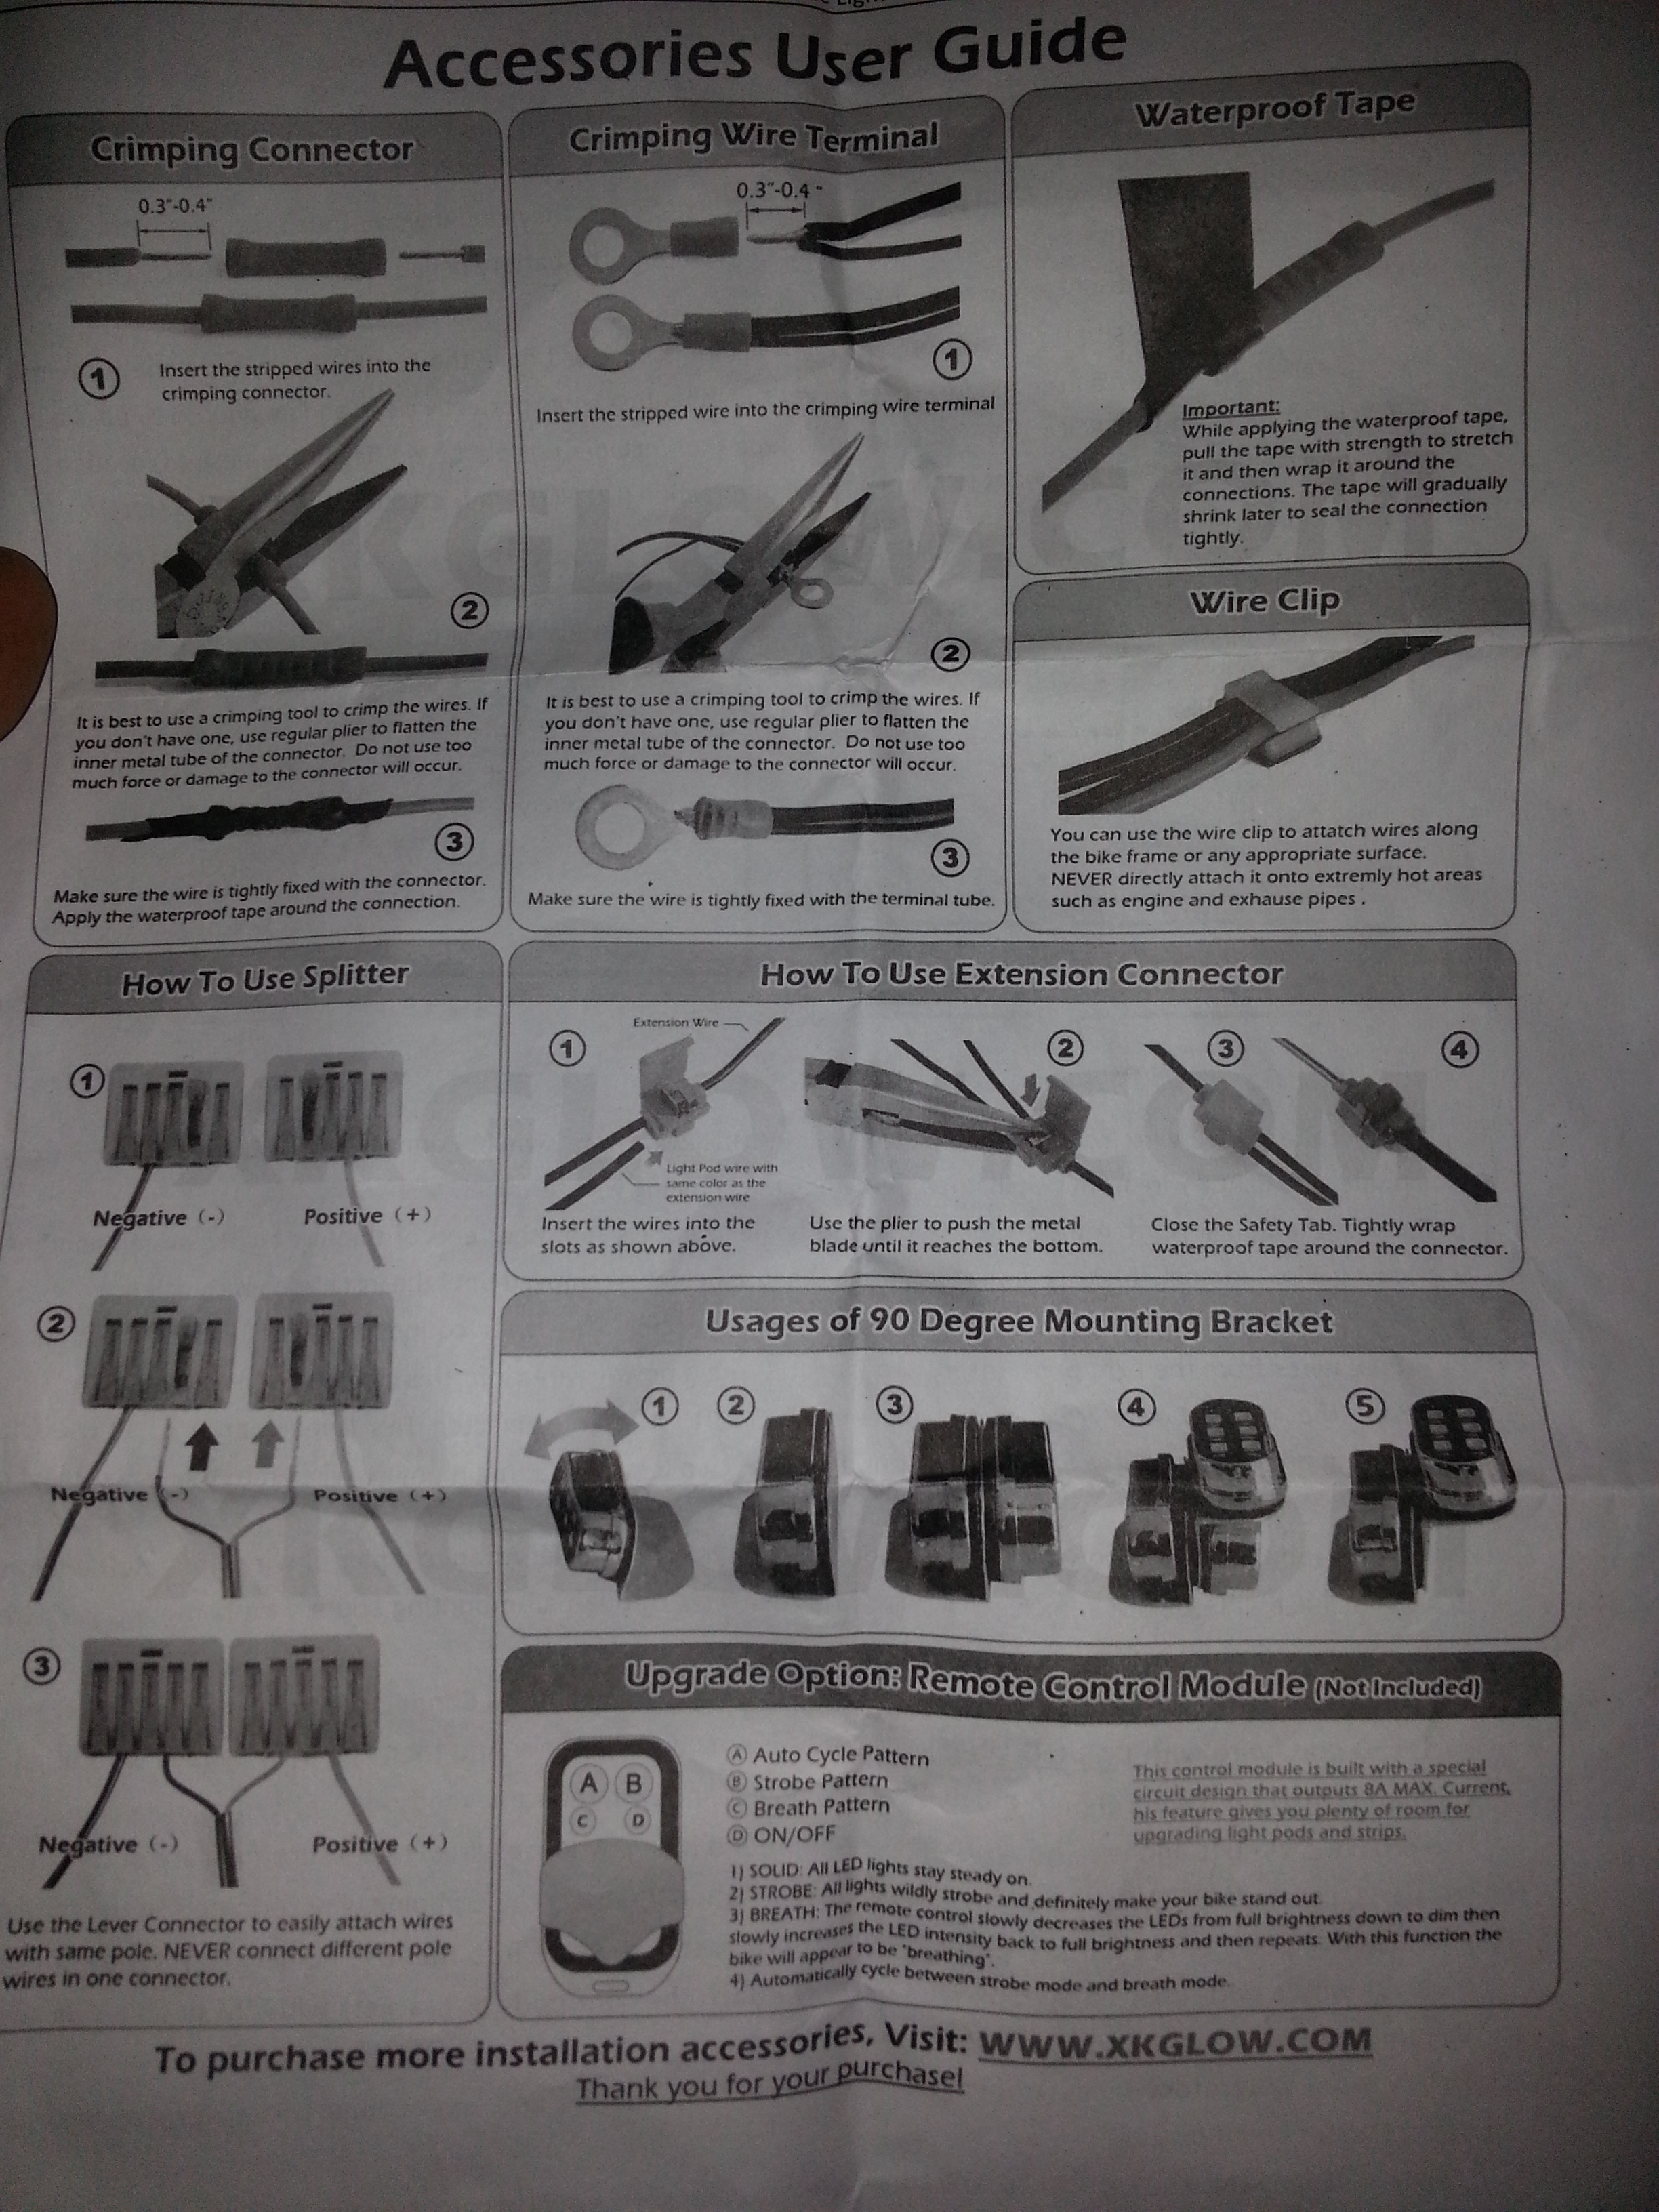
2. XK Glow 18 fixture/108 SMD Bulbs total. ...
I looking at the instructions and I'm not sure I get it.....
The layout has a "switch" coming off the battery behind a fuse.... And, then lists the "control module w/antenna" separately... And on the paper it states, "The wireless remote control is available too & sold separately blah blah blah".... Something of the sort.....
This kit is supposed to be complete. .. And I'm sure it is..... But for some reason it's listing a switch that isn't here....
This is what I have....
Control module w/antenna. ...
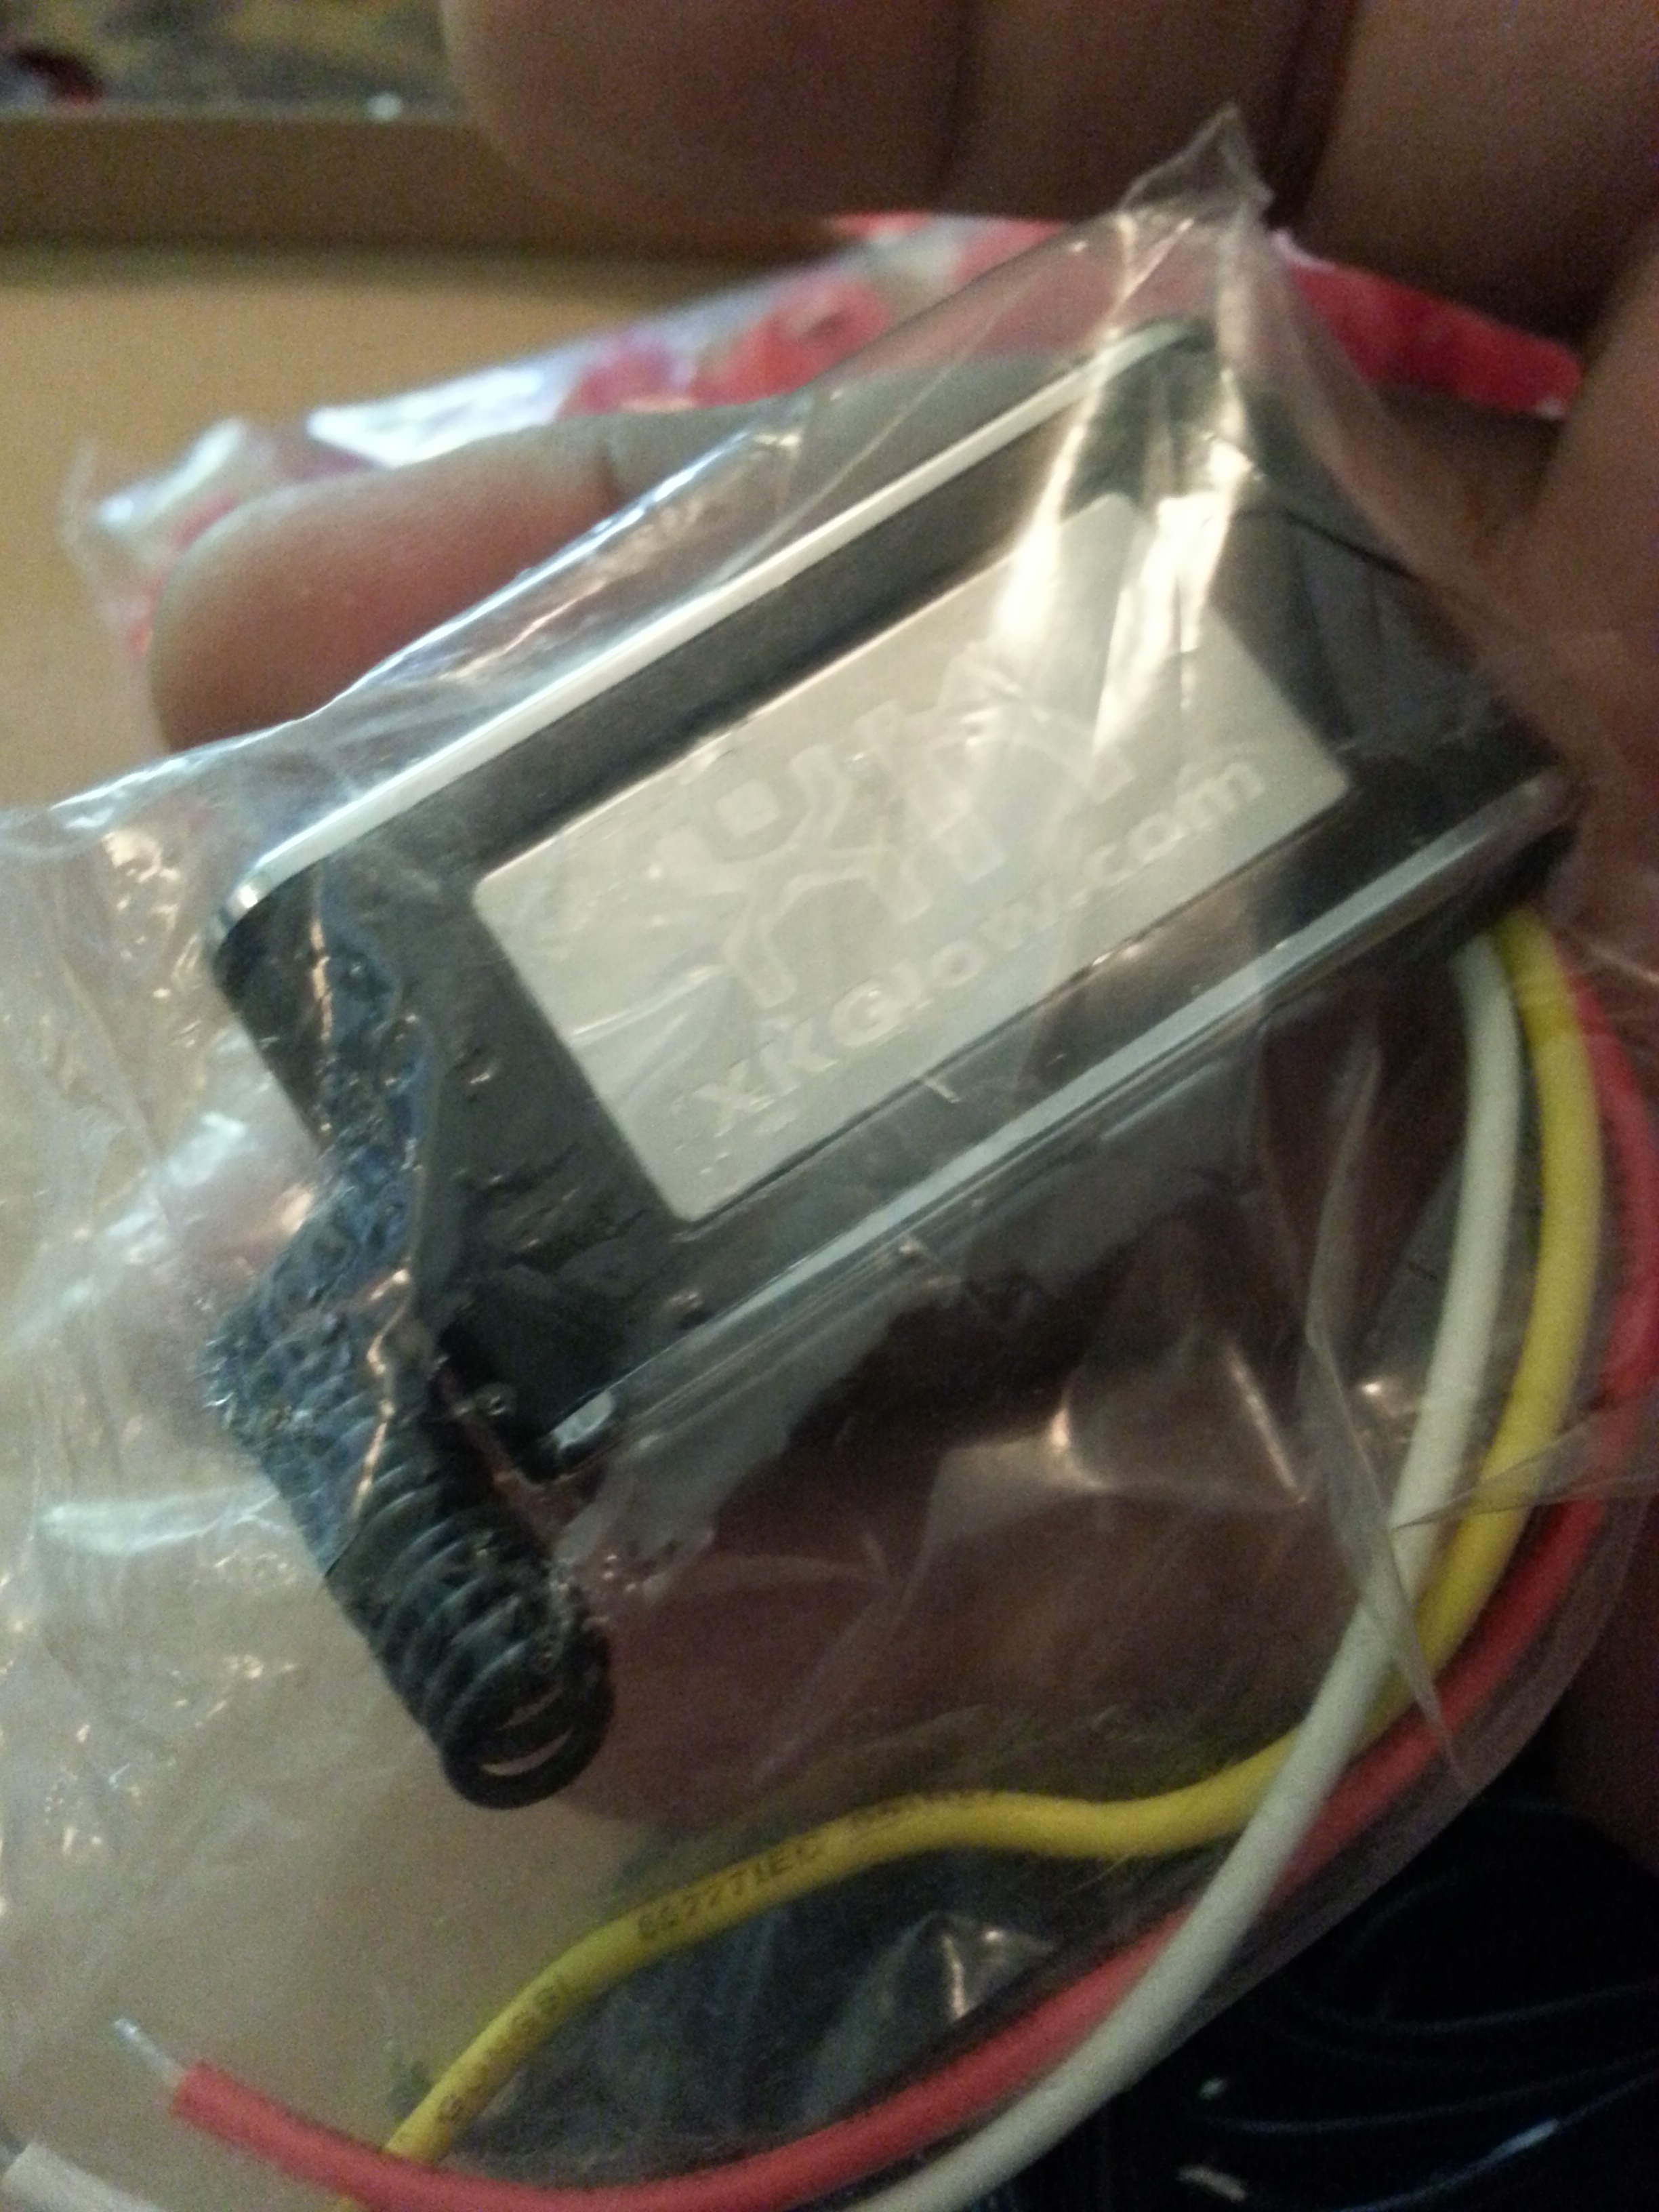
Lights...
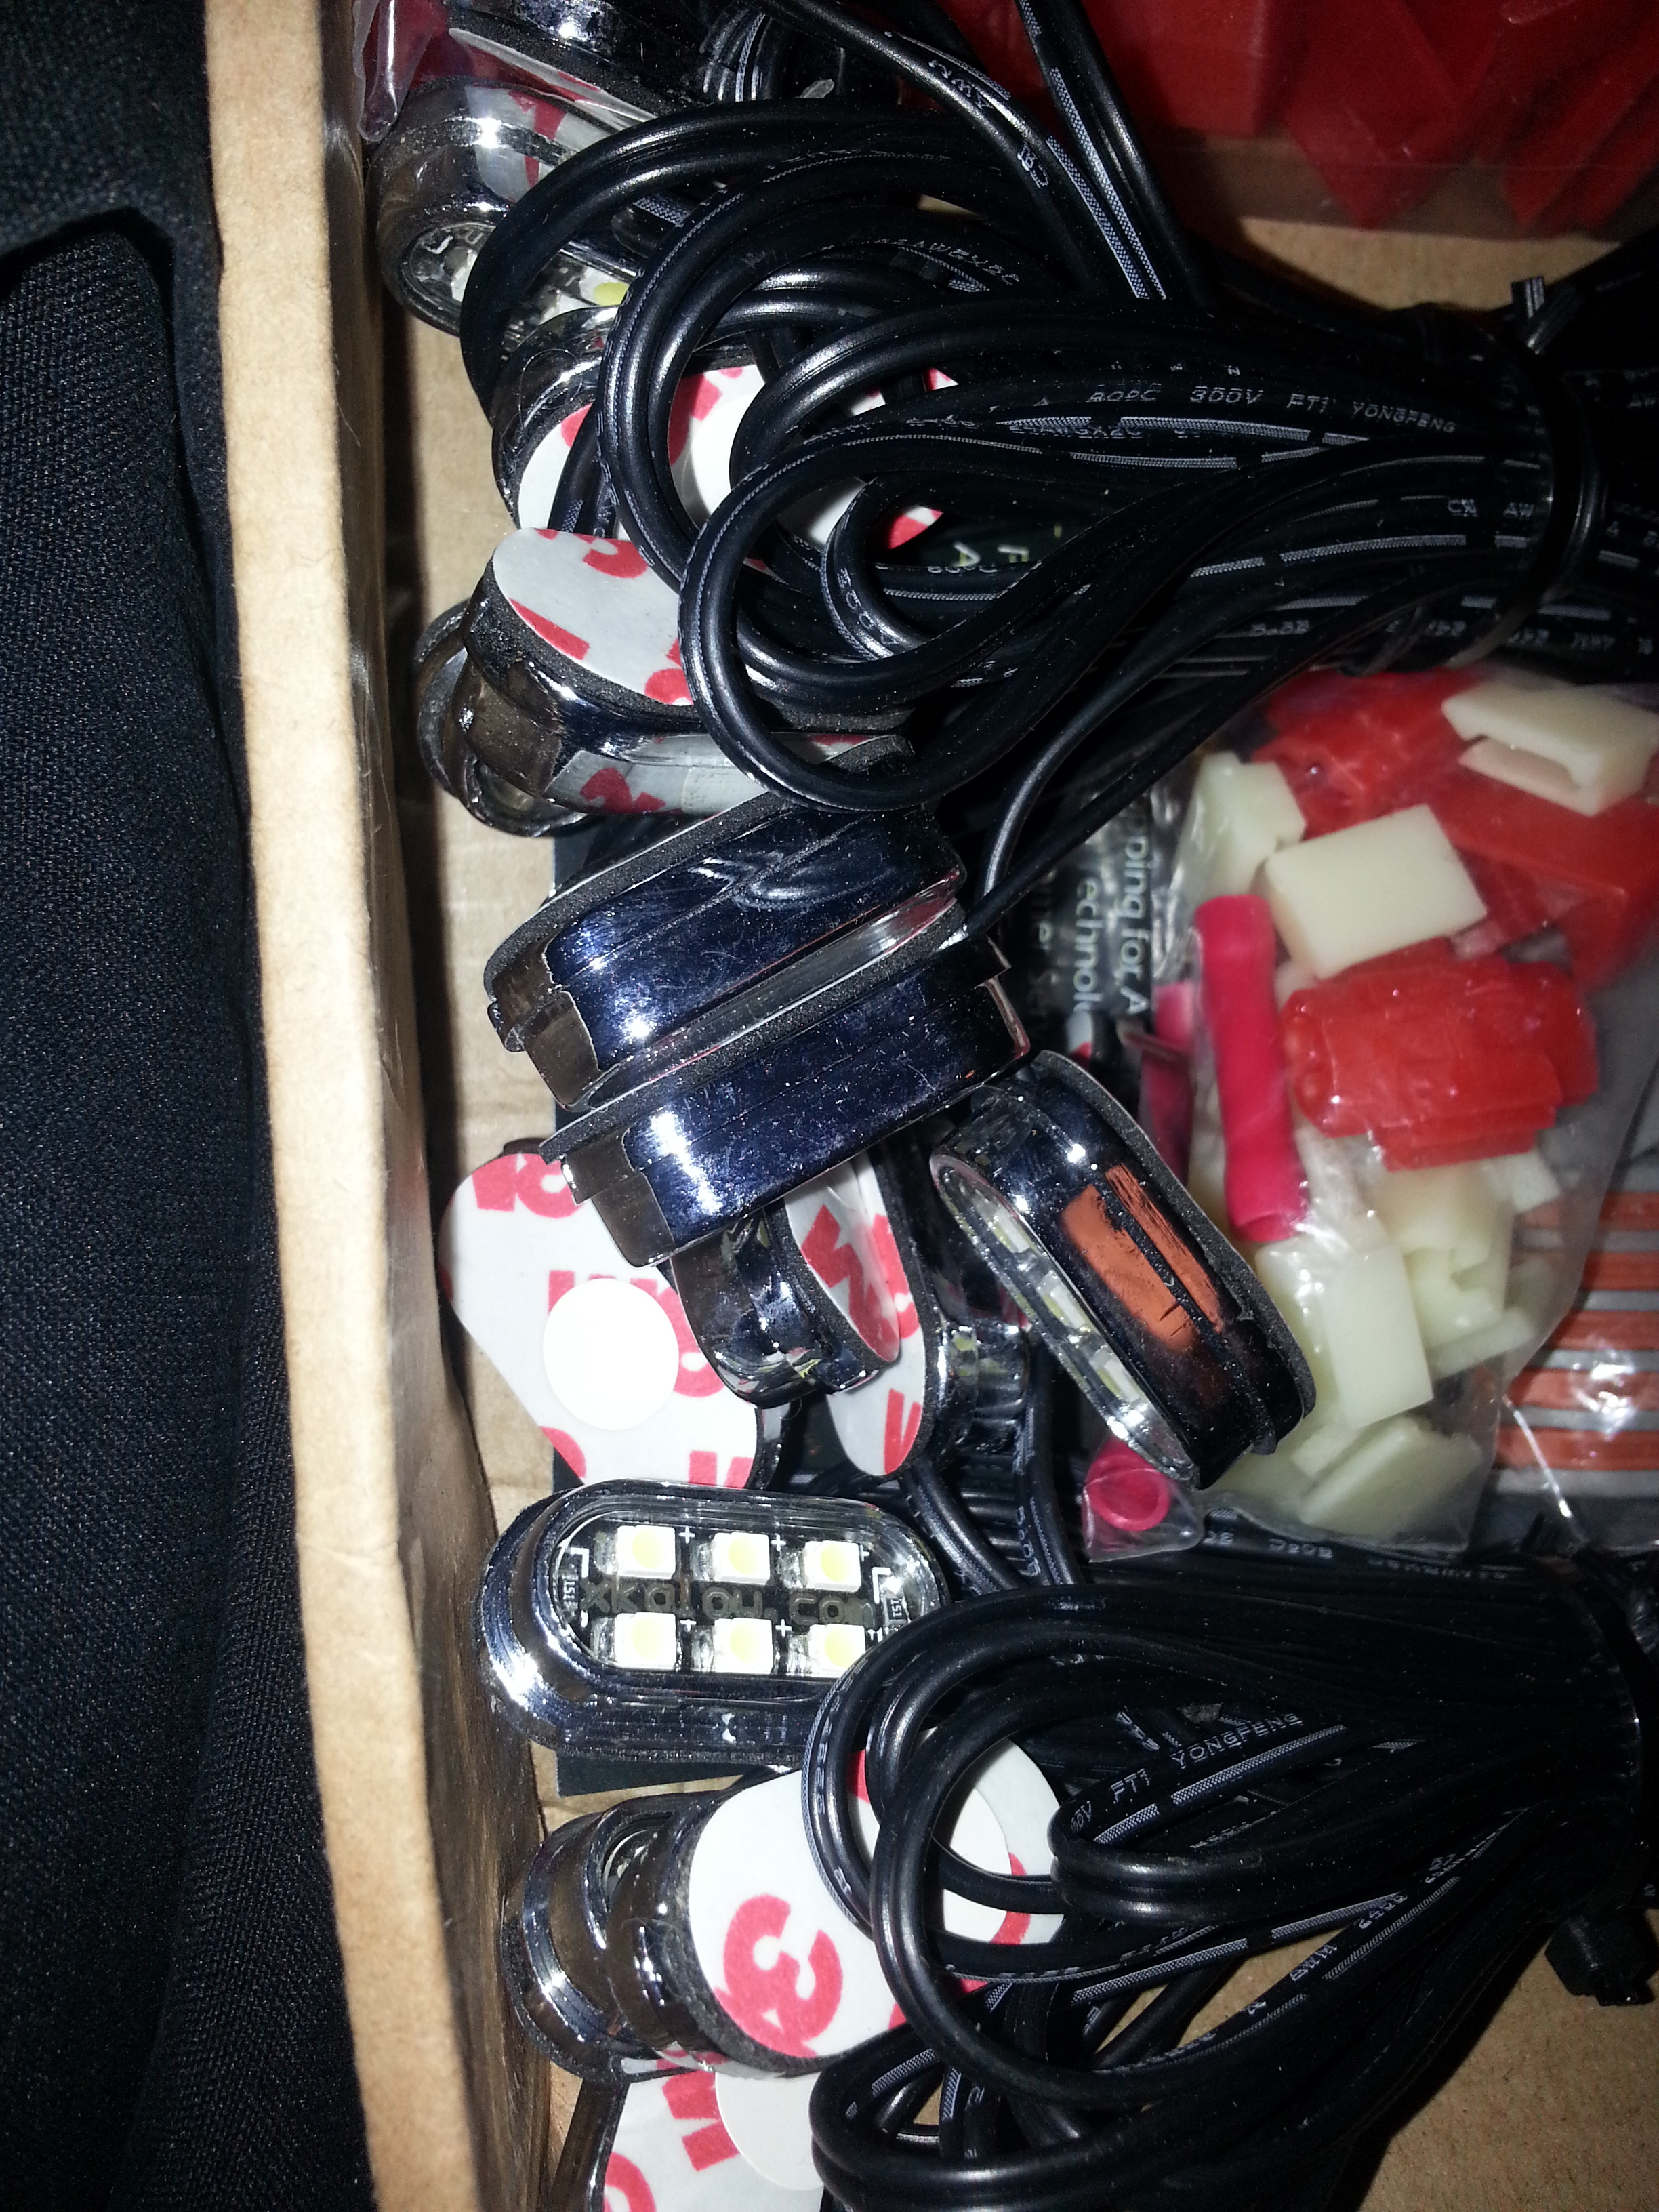
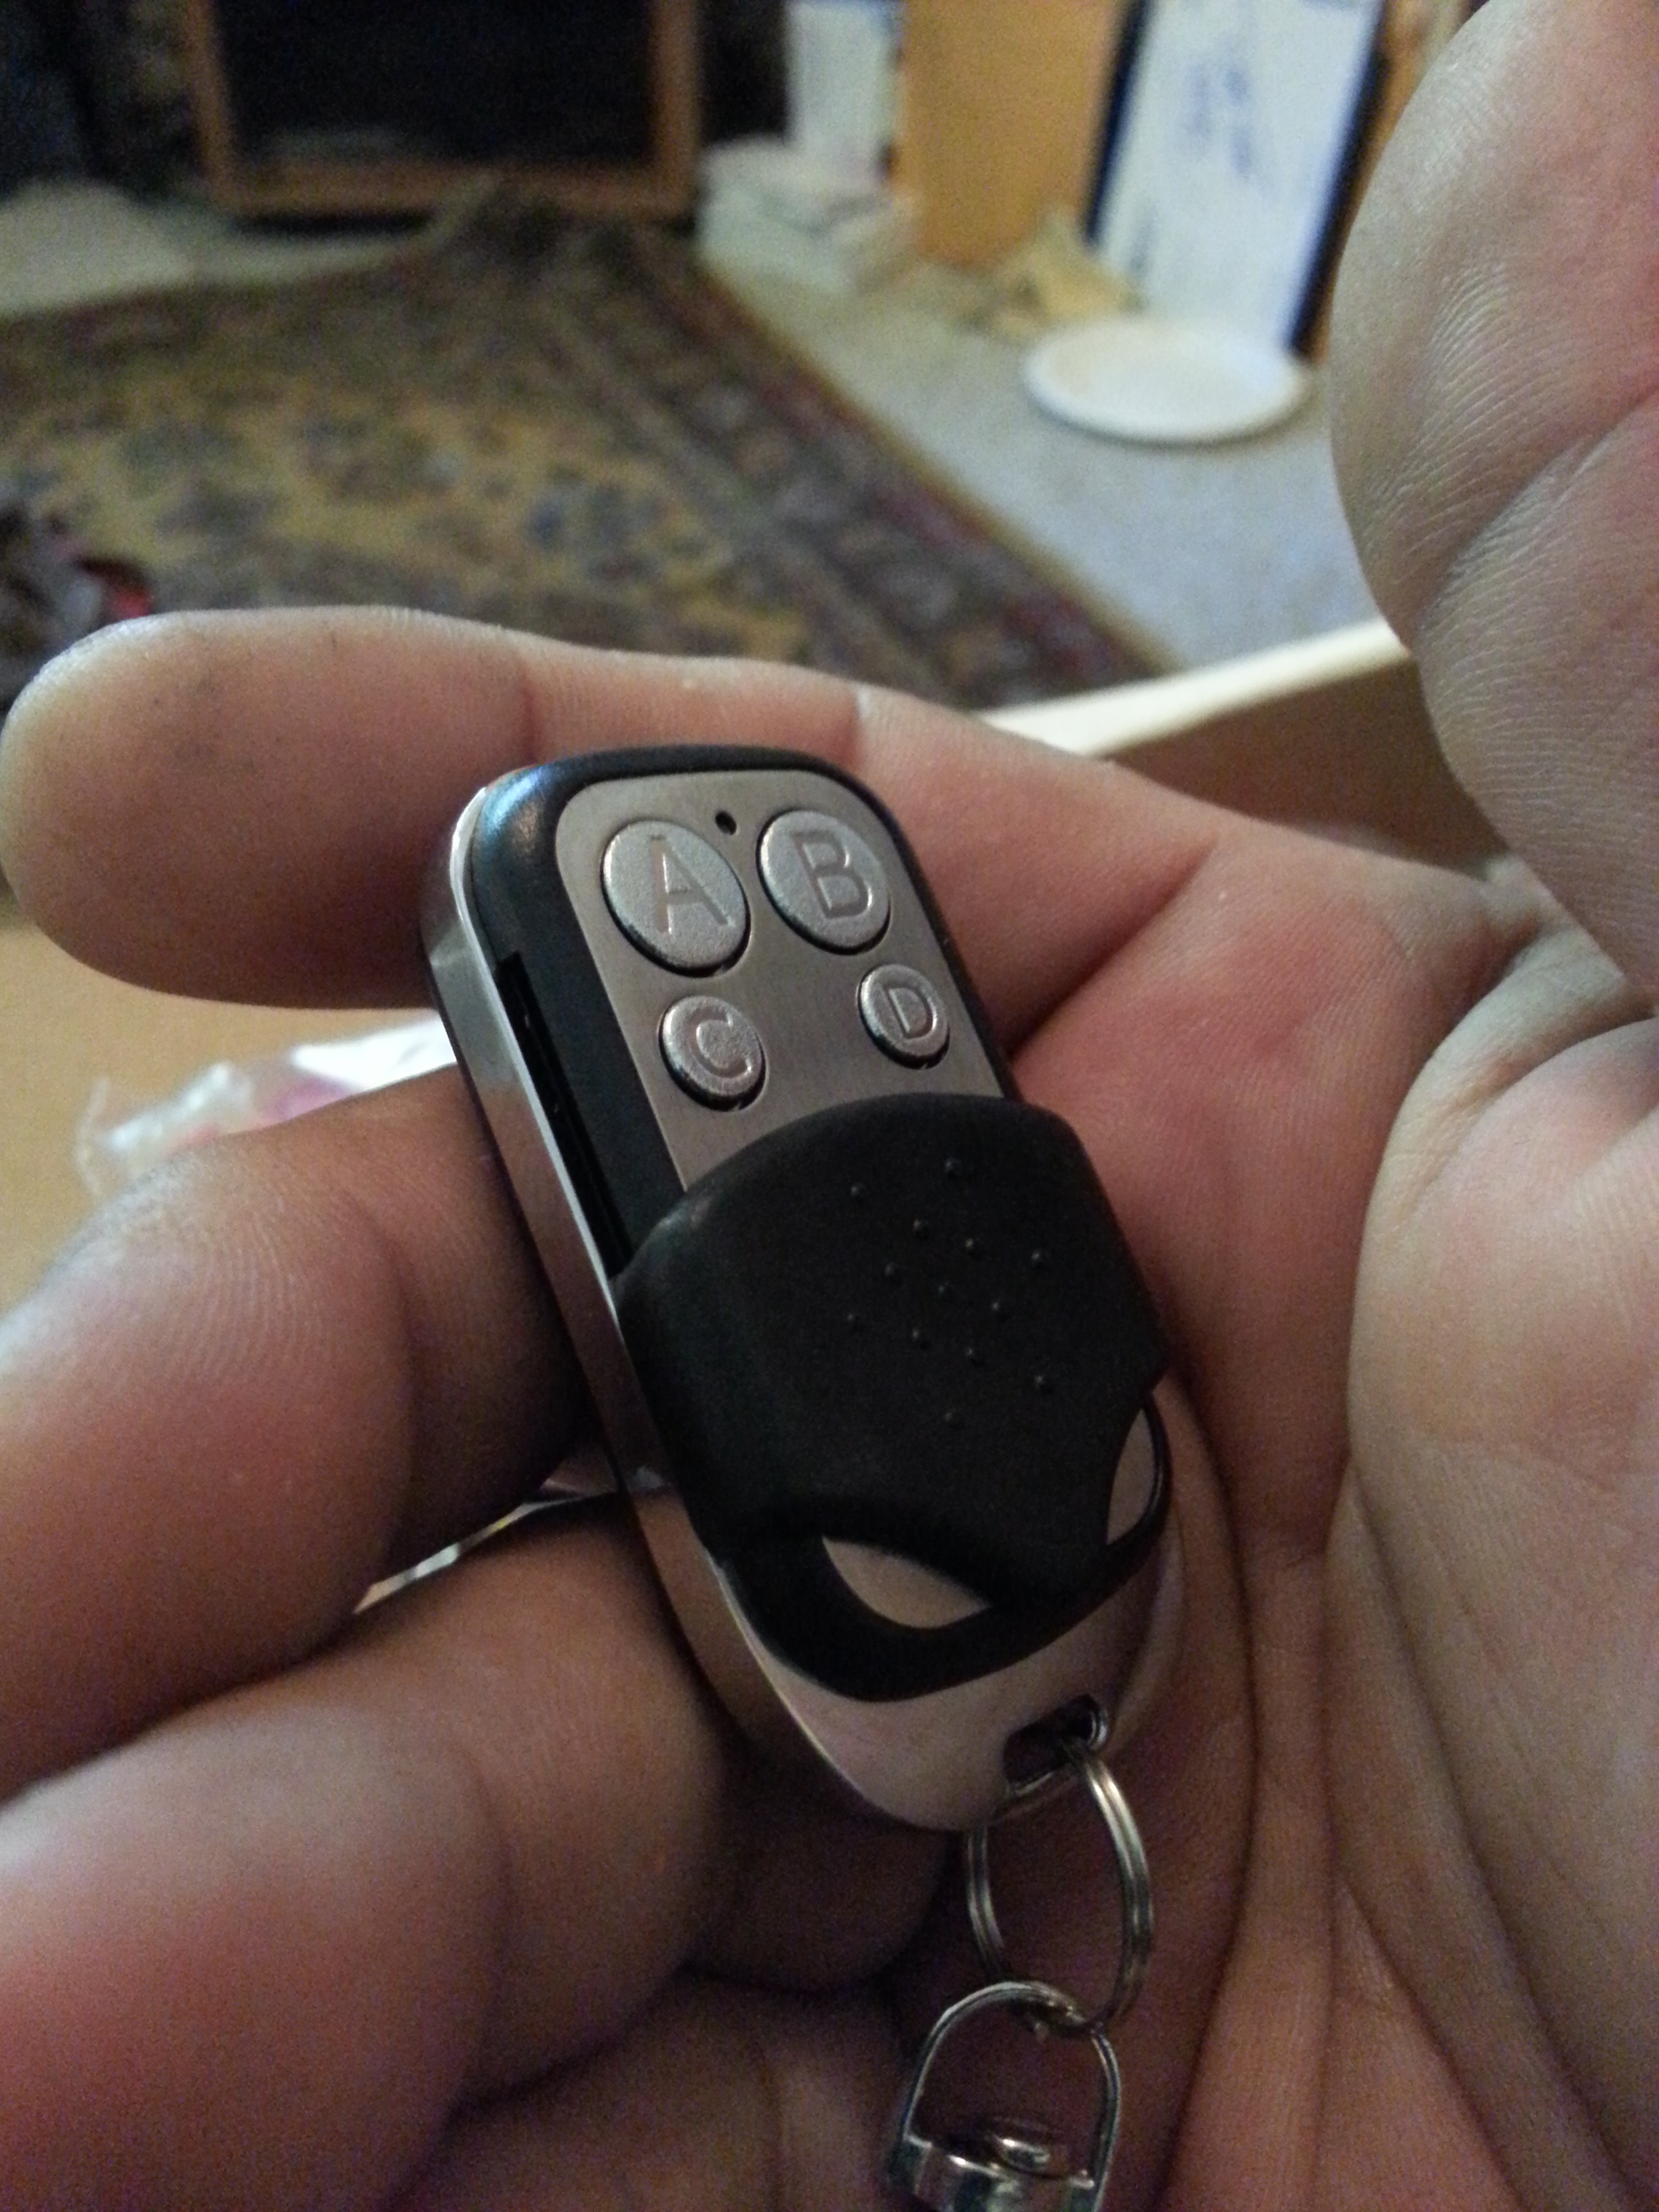
Remote....
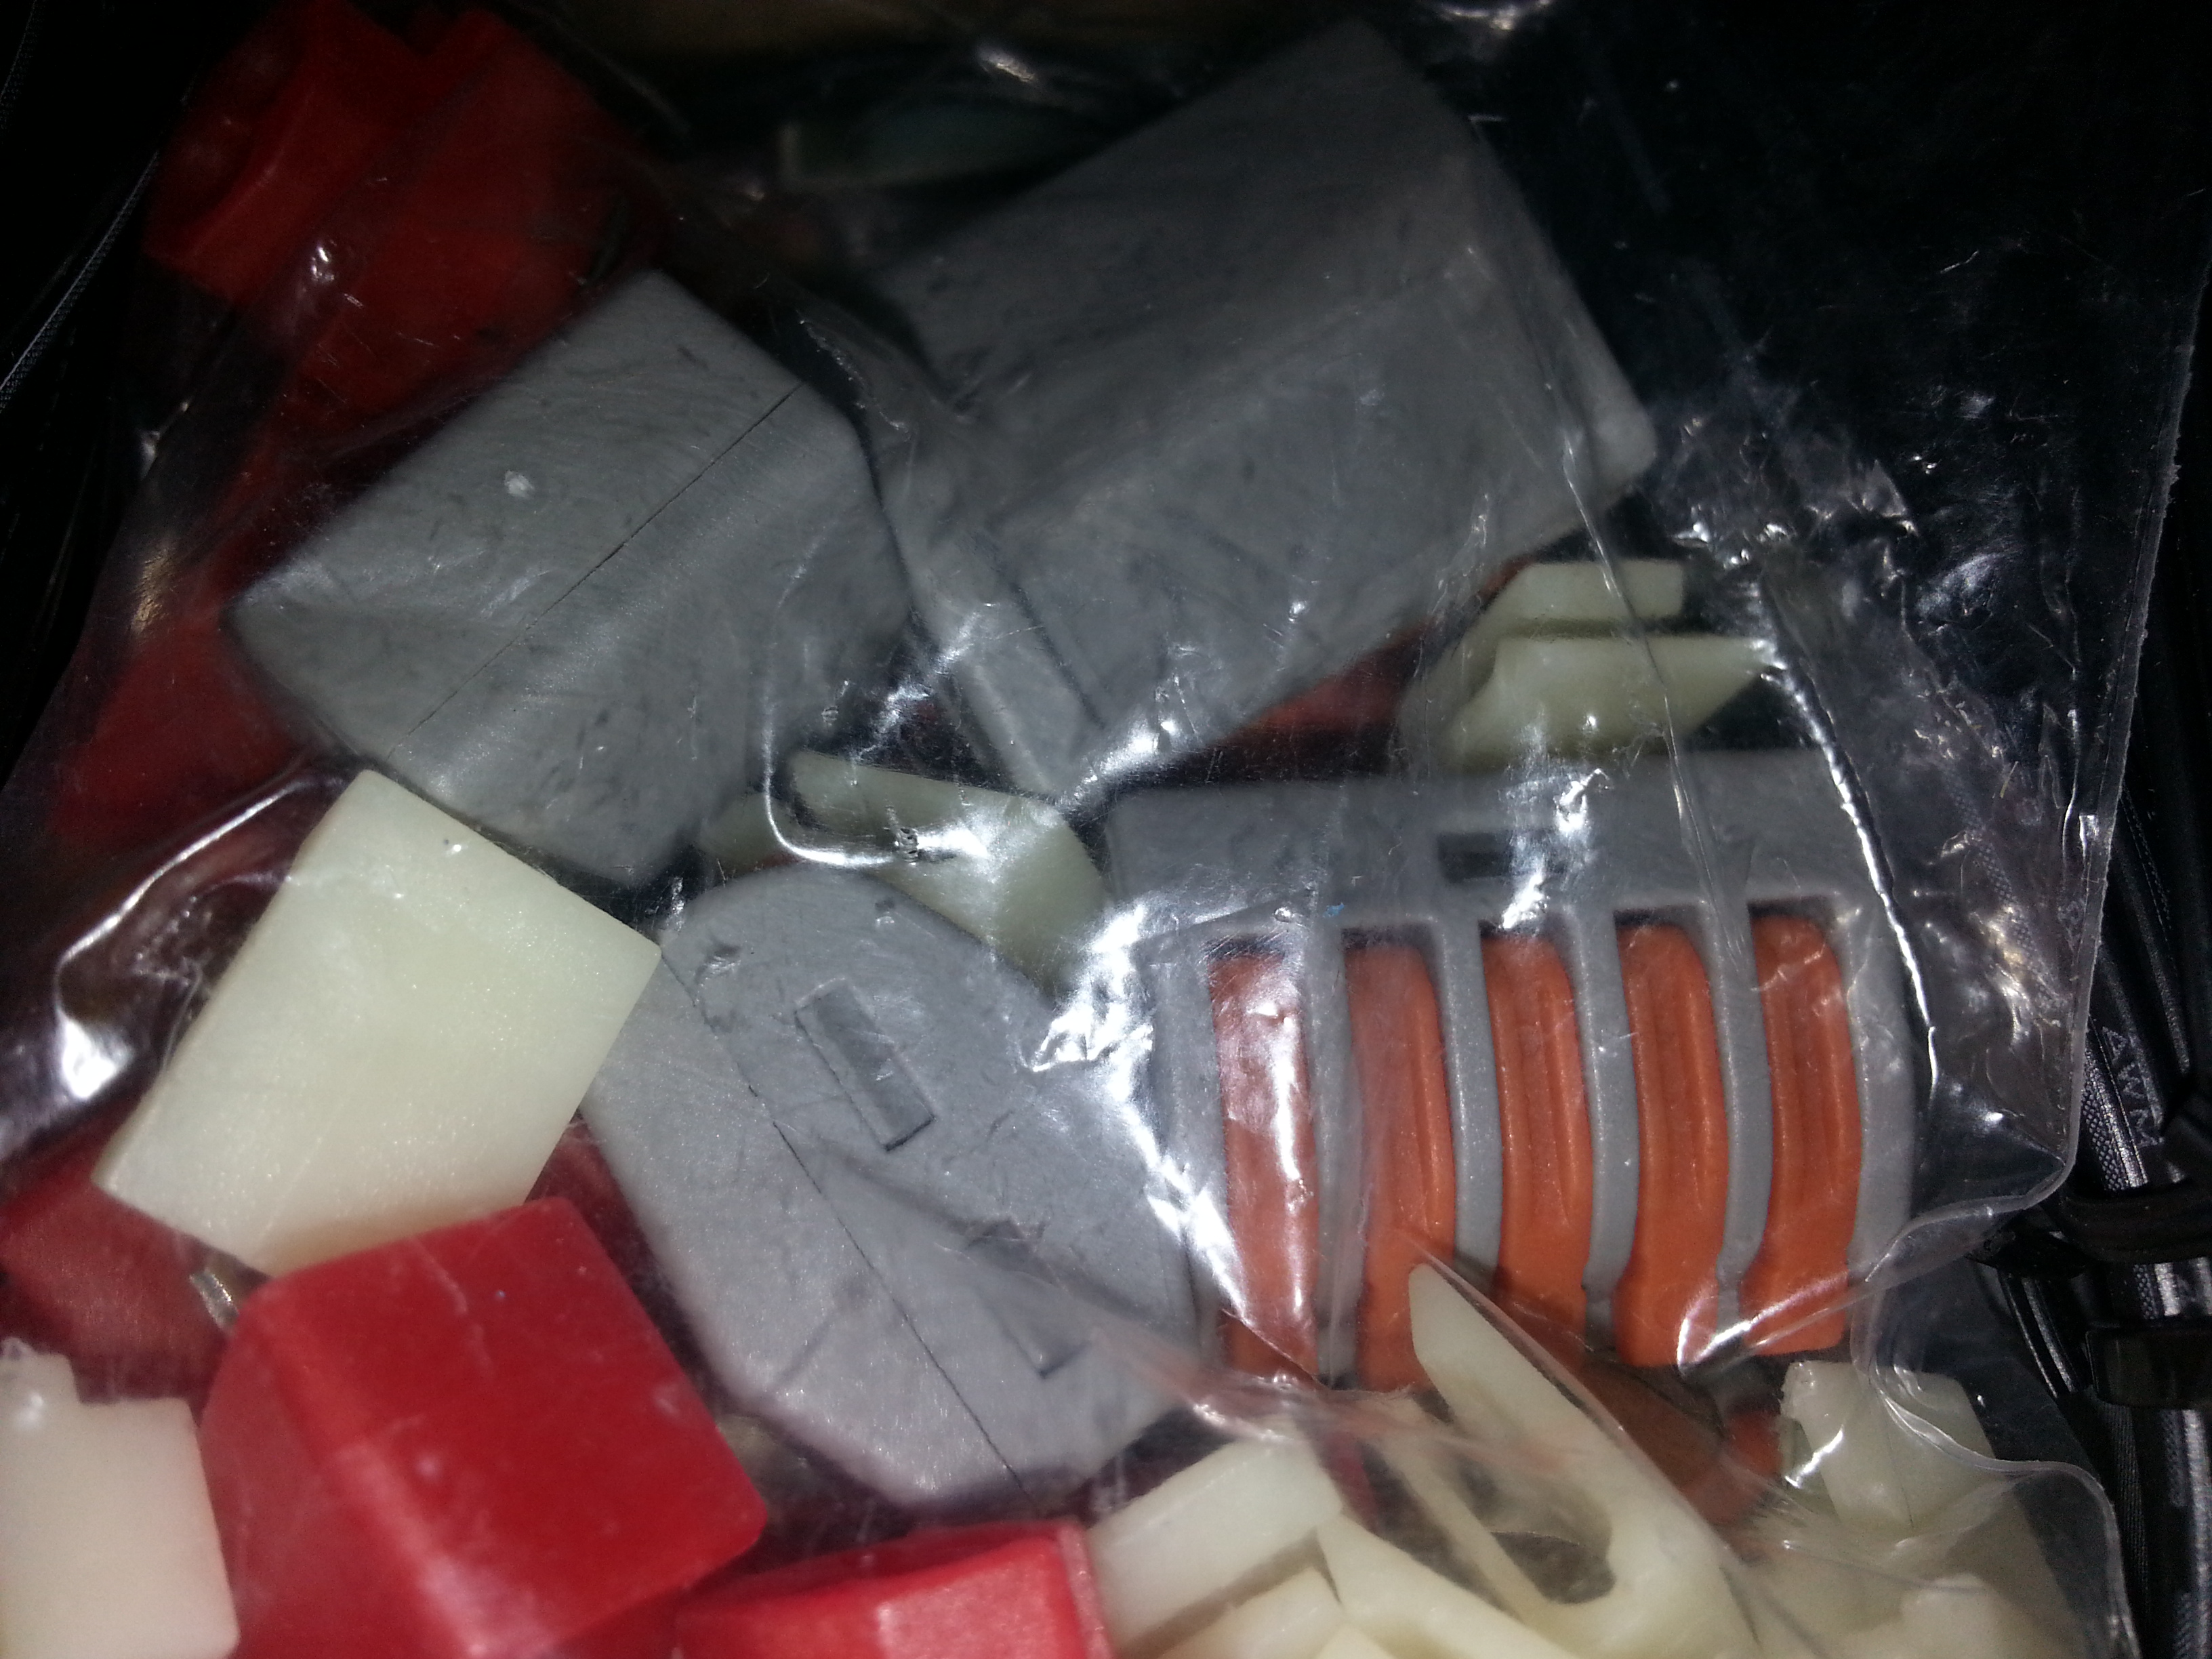
Connectors and wiring and mounting brackets. ......
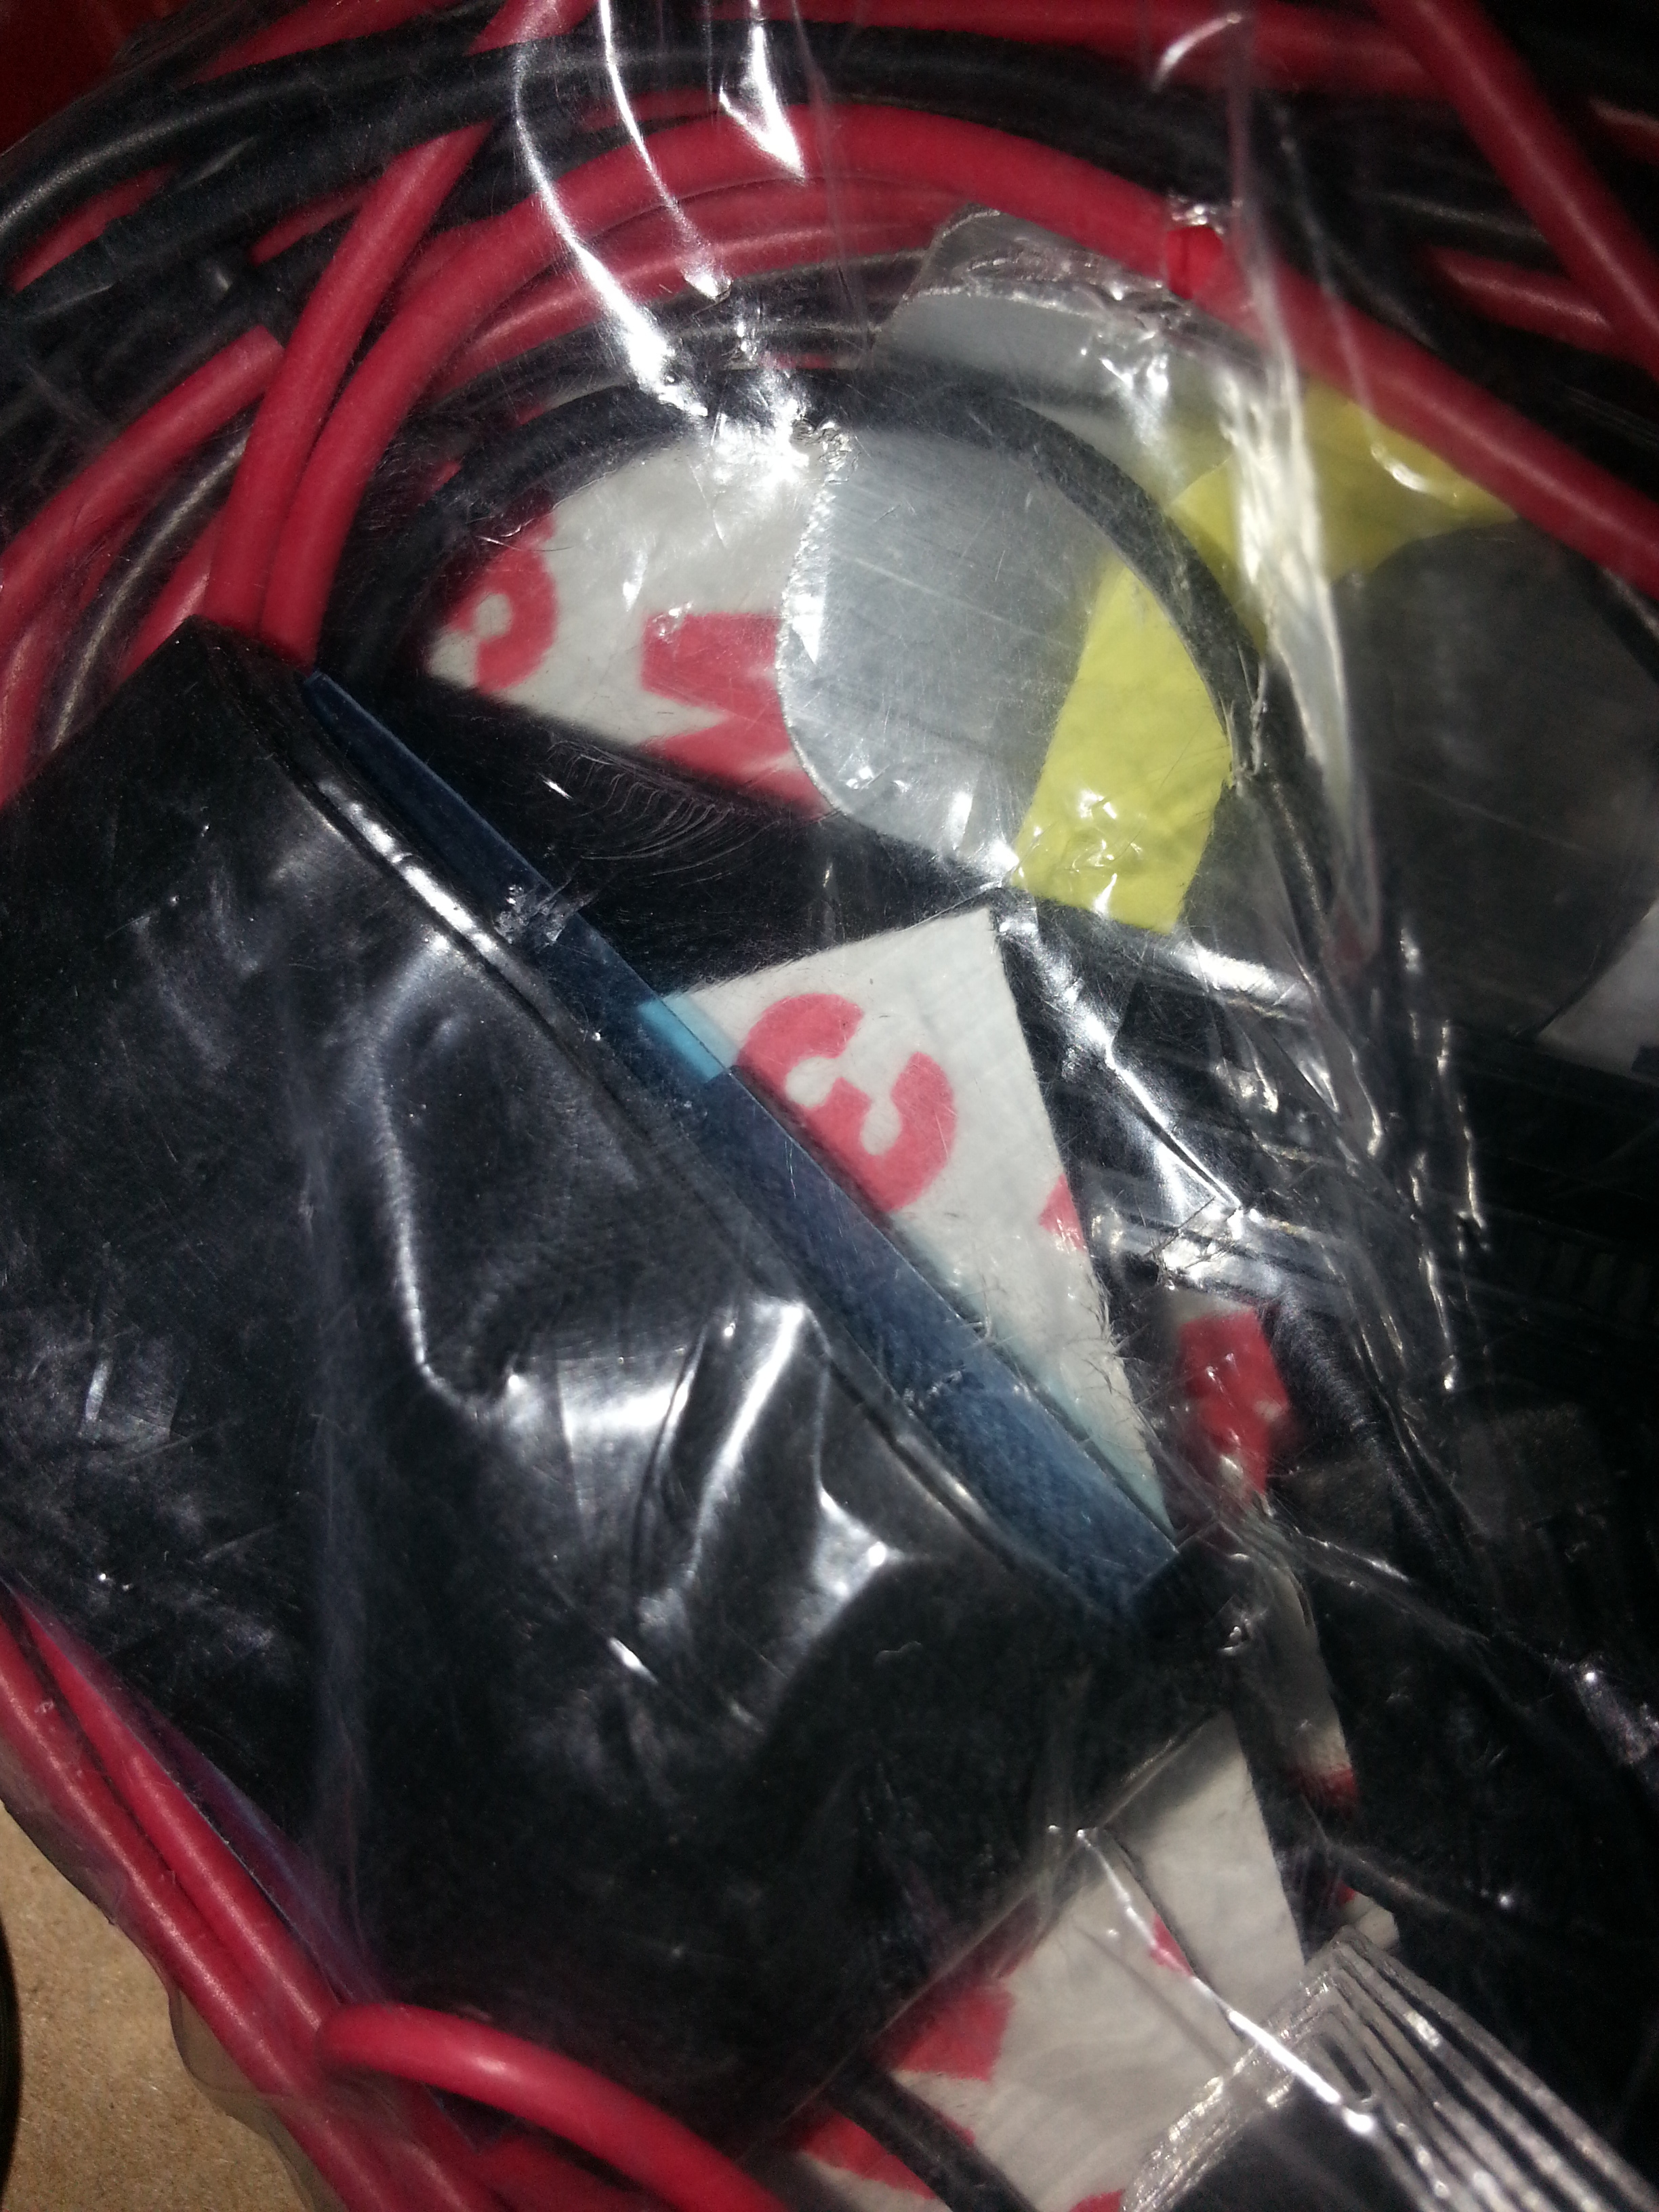
Fuse connector. ....(I'll be using the aux box, so no need for this)....
Ok, .... So here's the papers with instructions... And a copy of listed parts and so forth... If I'm using my auxiliary box and the control module relay and remote control... What is the square they're referring to?.......
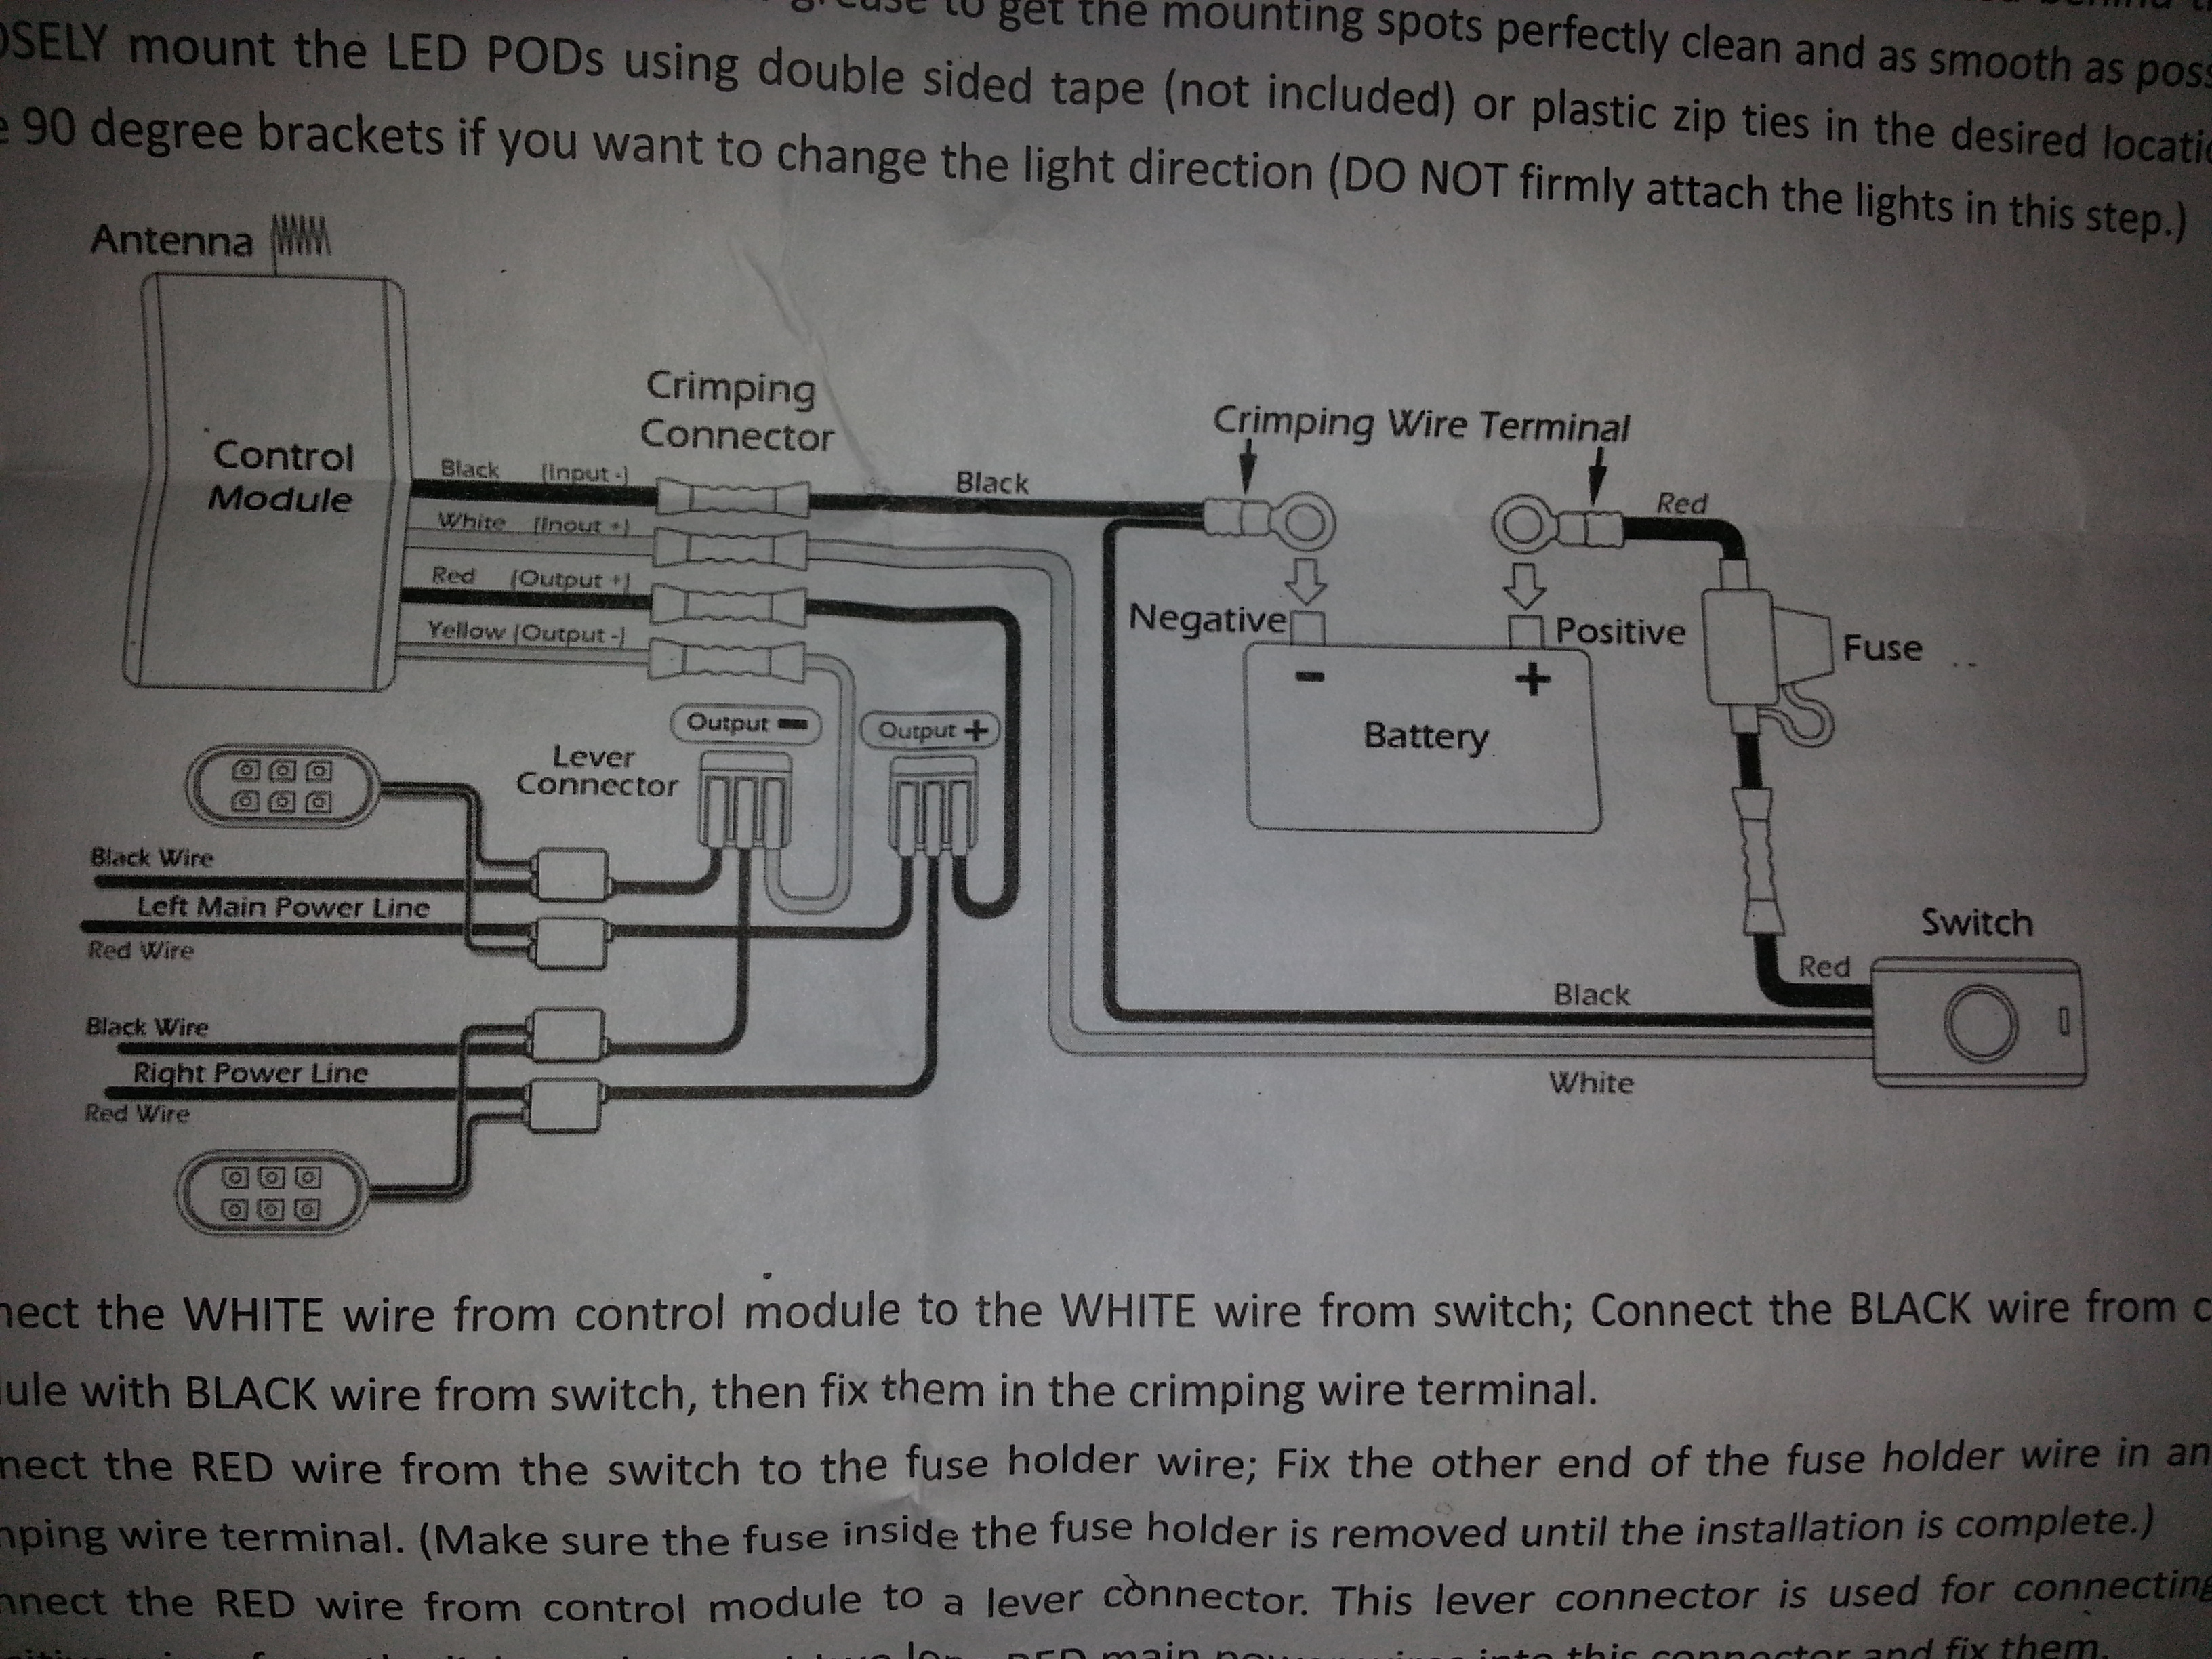
Guys????????????????????? Lol
I might have some time in the next few days, sporadically, to get on the remaining projects. ...
1. Button up the triple stick boot and cut to fit W56 metal bezel (basically cut in half as you may have seen in the videos?)...
Here's a pic of what I'm going to have to seal up (the passenger side is going to be the more difficult)......
^^^^^ I'm thinking I can build up ThermoShield around that corner to make it flat/to prevent hot air from rushing in, but I may have to actually build it up with something solid and then lay the ThermoShield on top of a level base........ ???
ANY INPUT ON THIS from any fabricatorily inclined people would be greatly appreciated!
2. XK Glow 18 fixture/108 SMD Bulbs total. ...
I looking at the instructions and I'm not sure I get it.....
The layout has a "switch" coming off the battery behind a fuse.... And, then lists the "control module w/antenna" separately... And on the paper it states, "The wireless remote control is available too & sold separately blah blah blah".... Something of the sort.....
This kit is supposed to be complete. .. And I'm sure it is..... But for some reason it's listing a switch that isn't here....
This is what I have....
Control module w/antenna. ...
Lights...
Remote....
Connectors and wiring and mounting brackets. ......
Fuse connector. ....(I'll be using the aux box, so no need for this)....
Ok, .... So here's the papers with instructions... And a copy of listed parts and so forth... If I'm using my auxiliary box and the control module relay and remote control... What is the square they're referring to?.......
Guys????????????????????? Lol
07-29-2013, 11:47 PM
#7255
Registered User
well to build up the edge you could take some L shape thin steel/aluminum some rivits then bend it so after its attached it makes a flat edge for sealing along the slope a bead of permatex under it to make water an gas tight (air)
as for the "switch" looks by their diagram to be a single pole single throw on off a 'master' disconnect which likely they leave to the owner to buy an install so youd push it on then use the remote to select the ligh mode you want when done wheeling push off so no CHP or other law enforcement types gripe about yer luminating the area better than hollywood
it has pos neg an then another pos on the diagram thus likely an illuminated switch as well
Last edited by Cyberhorn The Dragon; 07-29-2013 at 11:51 PM.
07-30-2013, 07:00 AM
#7256
Super Moderator
Staff
iTrader: (1)
Join Date: Aug 2008
Location: Anderson Missouri
Posts: 11,788
Likes: 0
Received 25 Likes
on
22 Posts
I might would try to get a section out of a junk truck that is some what formed and like dragon said, rivet and seal it.
I think I remember you upgrading your alternator. Is the present one goig to be able to keep up with what you have now? I know LEDs dont draw much but still the other things might could.
I think I remember you upgrading your alternator. Is the present one goig to be able to keep up with what you have now? I know LEDs dont draw much but still the other things might could.
07-30-2013, 11:55 AM
#7257
Registered User
Join Date: Apr 2013
Location: NC
Posts: 15
Likes: 0
Received 0 Likes
on
0 Posts
Chef digging the runner, its been a hell of a read and I'm sure I've skimmed over some post because of the length. I've notice that we have similar taste in certain things and not so much in others. Haha. You are driving me crazy, cause you are getting to do mods that are way in the future for me. Jokes aside, enjoying reading when I can, Keep it up..
07-30-2013, 02:09 PM
#7258
well to build up the edge you could take some L shape thin steel/aluminum some rivits then bend it so after its attached it makes a flat edge for sealing along the slope a bead of permatex under it to make water an gas tight (air)
as for the "switch" looks by their diagram to be a single pole single throw on off a 'master' disconnect which likely they leave to the owner to buy an install so youd push it on then use the remote to select the ligh mode you want when done wheeling push off so no CHP or other law enforcement types gripe about yer luminating the area better than hollywood
it has pos neg an then another pos on the diagram thus likely an illuminated switch as well
as for the "switch" looks by their diagram to be a single pole single throw on off a 'master' disconnect which likely they leave to the owner to buy an install so youd push it on then use the remote to select the ligh mode you want when done wheeling push off so no CHP or other law enforcement types gripe about yer luminating the area better than hollywood
it has pos neg an then another pos on the diagram thus likely an illuminated switch as well
So I will be leaving the 20" and the 2 forward facing 7" roof rack lights on that one single circuit of the auxiliary fuse block with a 30 amp fuse... The switch is already there. Then I will run 1 wire 2 split into 3 more on the three other switches that are push buttons LED, and then up through the headliner to the hole in the roof behind the moon roof, all he trunk up to the roof and then splitting each wire into two for the passenger and driver and rear facing lights. I want them all to be independent so that I don't blind everyone, because most often you just need to forward facing lights and probably off in while leaving certain sites you don't want to flash the side facing life both at the same time, and definitely want the reverse light independent. I might do the passenger and driver side on one switch and reverse and forward on to more switches, leaving the fourth switch for the rock lights. That will allow me to use my racing throw switch or whatever I put in its place for the air compressor.
Jason and I were under the truck looking at things and figured that I could probably mount a compressor and tank where the spare tire carrier was. I could then build a bracket to keep them from being stolen. This way they would have plenty of ventilation and while on the trip I could leave them on or just powers it up when needed and wait for it to charge up to full pressure? Anyway it's all in the works and I will figure it out with some help from you guys on the wiring. I would still like to put a single plug in the roof that fill that hole that would act as a quick disconnect. Something with 3 pins or something like that. It's a bit more complicated than it sounds even... But I didn't do too poorly on wiring up the two 8" lights and the relay and switch.
I might would try to get a section out of a junk truck that is some what formed and like dragon said, rivet and seal it.
I think I remember you upgrading your alternator. Is the present one goig to be able to keep up with what you have now? I know LEDs dont draw much but still the other things might could.
I think I remember you upgrading your alternator. Is the present one goig to be able to keep up with what you have now? I know LEDs dont draw much but still the other things might could.
Chef digging the runner, its been a hell of a read and I'm sure I've skimmed over some post because of the length. I've notice that we have similar taste in certain things and not so much in others. Haha. You are driving me crazy, cause you are getting to do mods that are way in the future for me. Jokes aside, enjoying reading when I can, Keep it up..
07-30-2013, 02:59 PM
#7259
Registered User
i only suggest pop rivets due to the fact you want the edge to be load bearing over time epoxy can break loose over such a large area
pre drill the holes slather the edge with epoxy then rivet = bulletproof seal an strong as possible just more expensive
pre drill the holes slather the edge with epoxy then rivet = bulletproof seal an strong as possible just more expensive
 lol
lol


