
ChefYota4x4's 1987 4Runner Build-Up Thread

 07-13-2013, 11:00 PM
#7062
Registered User

Awesome mark, love the new stance, makes me want to spend some money,
Flex pics soon please

 07-13-2013, 11:57 PM
#7064
Ok! PICSSSSSS! HAHA.......
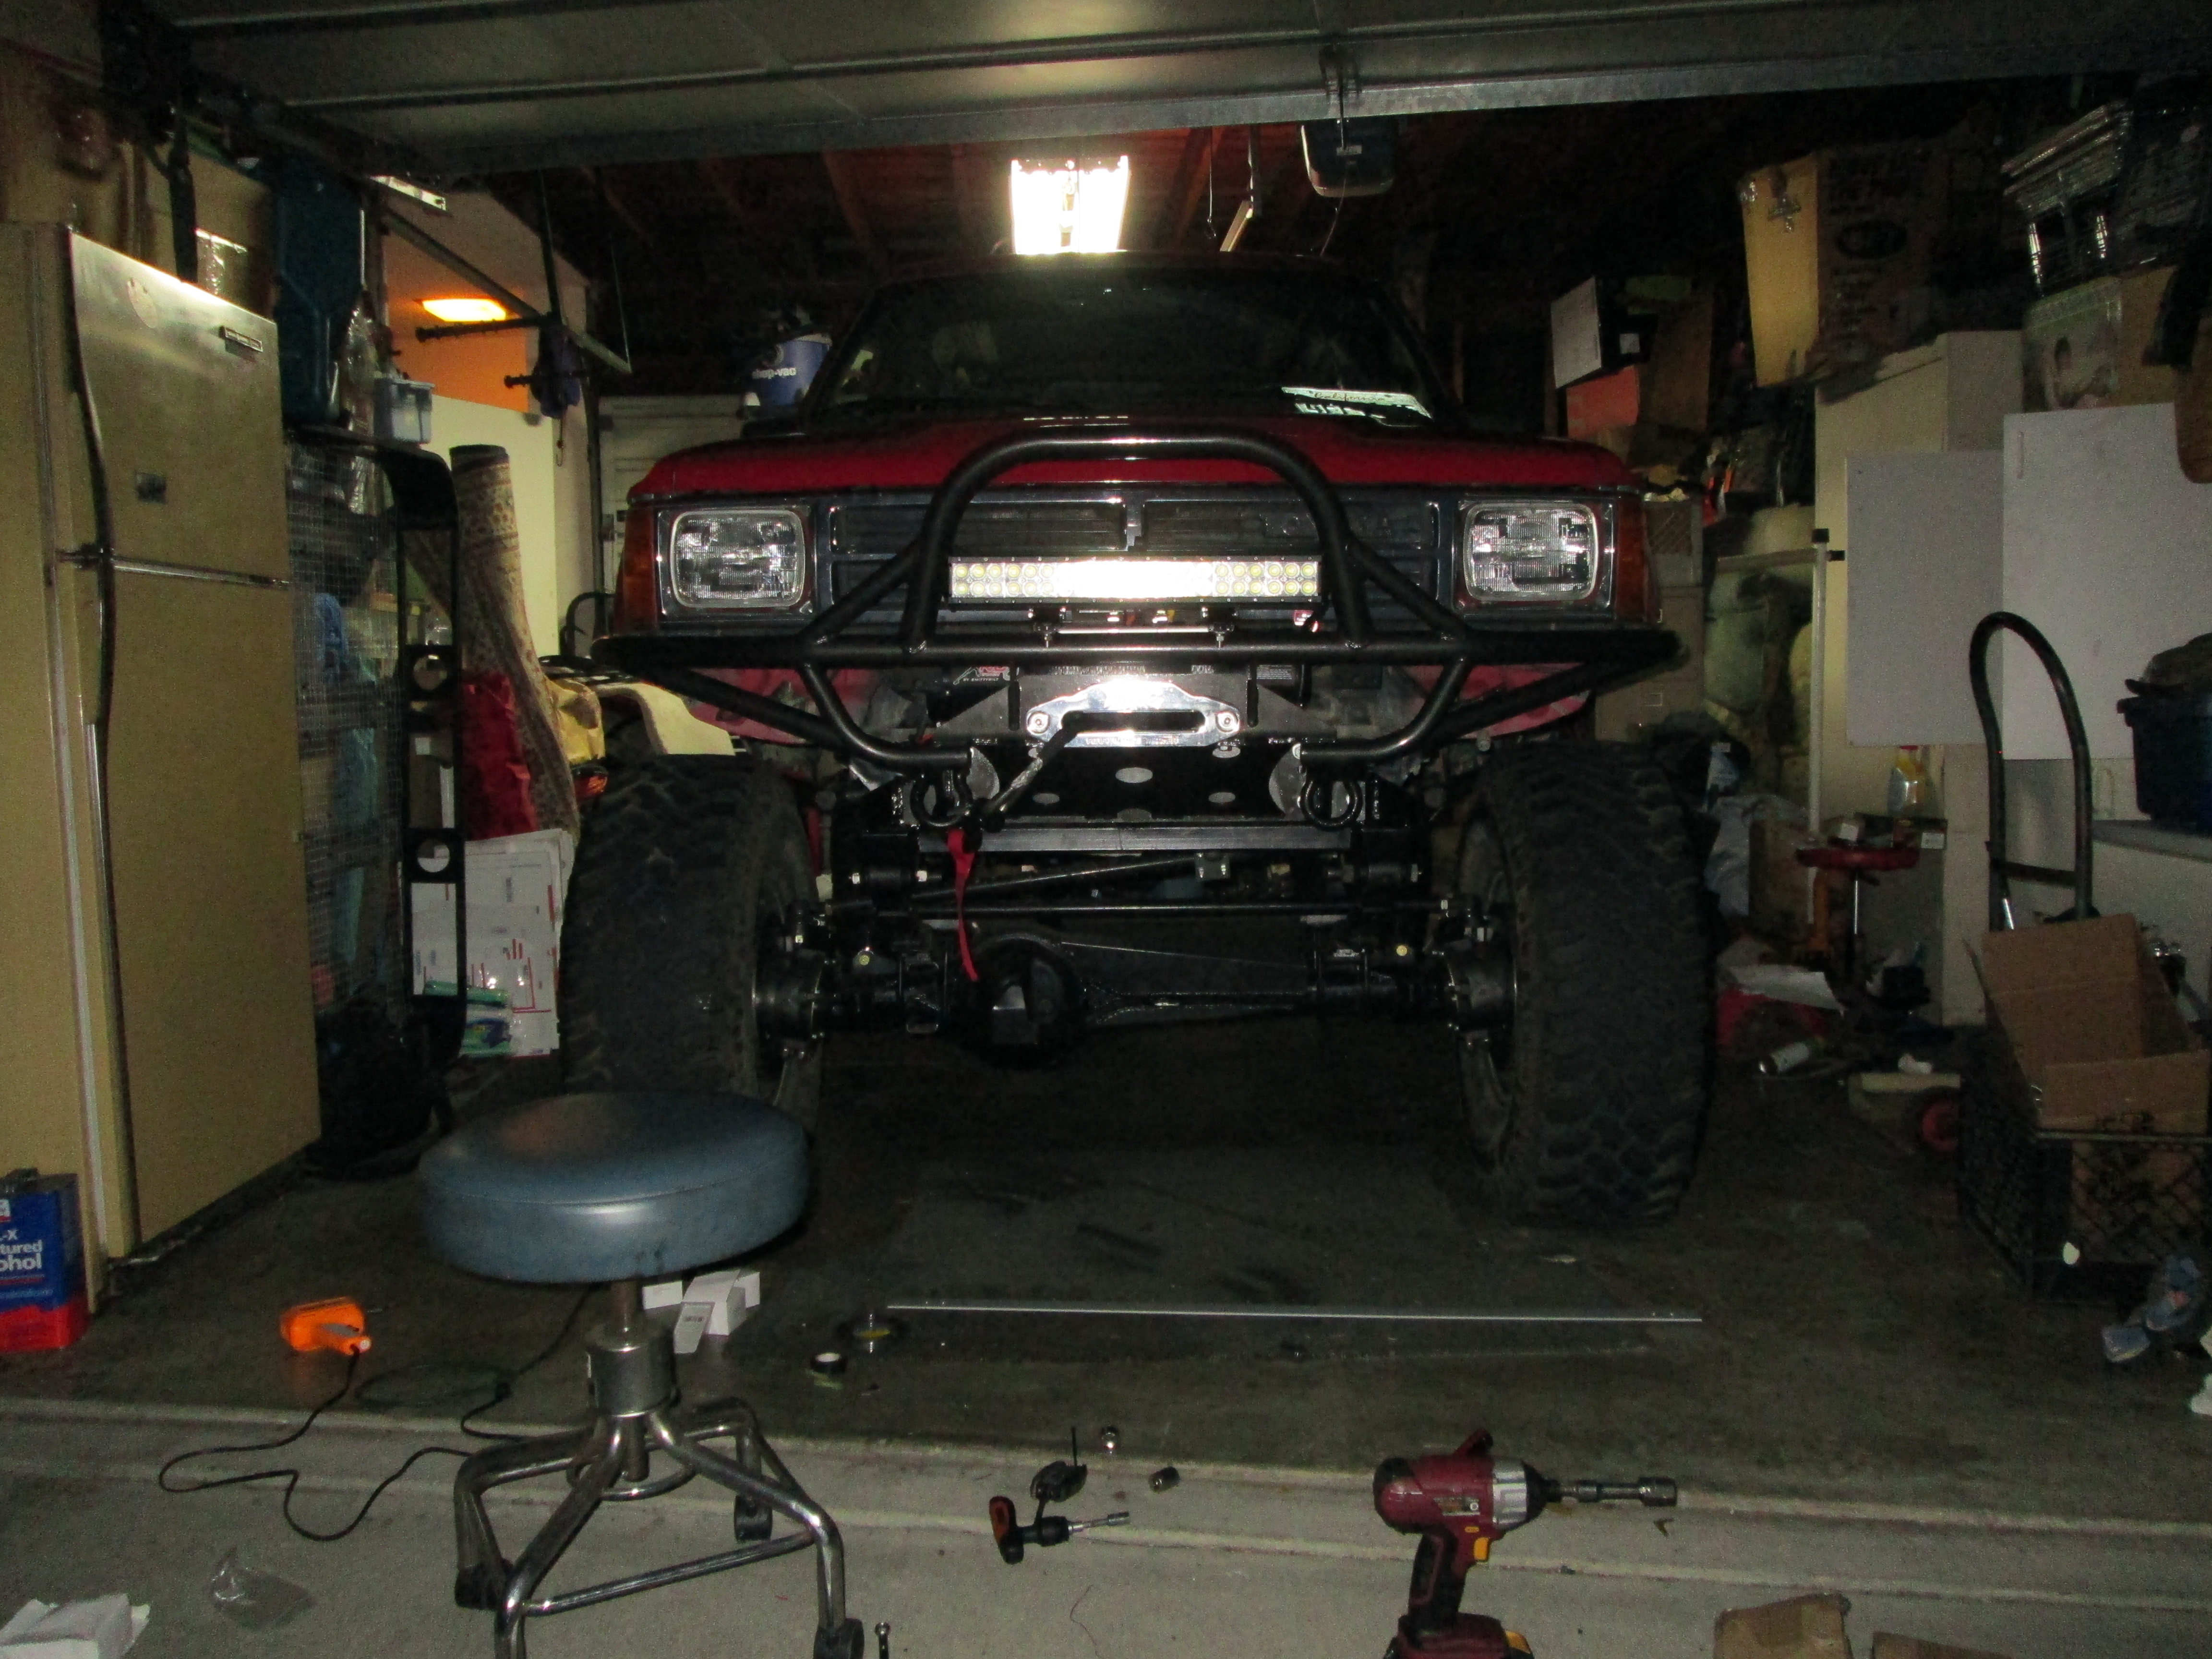
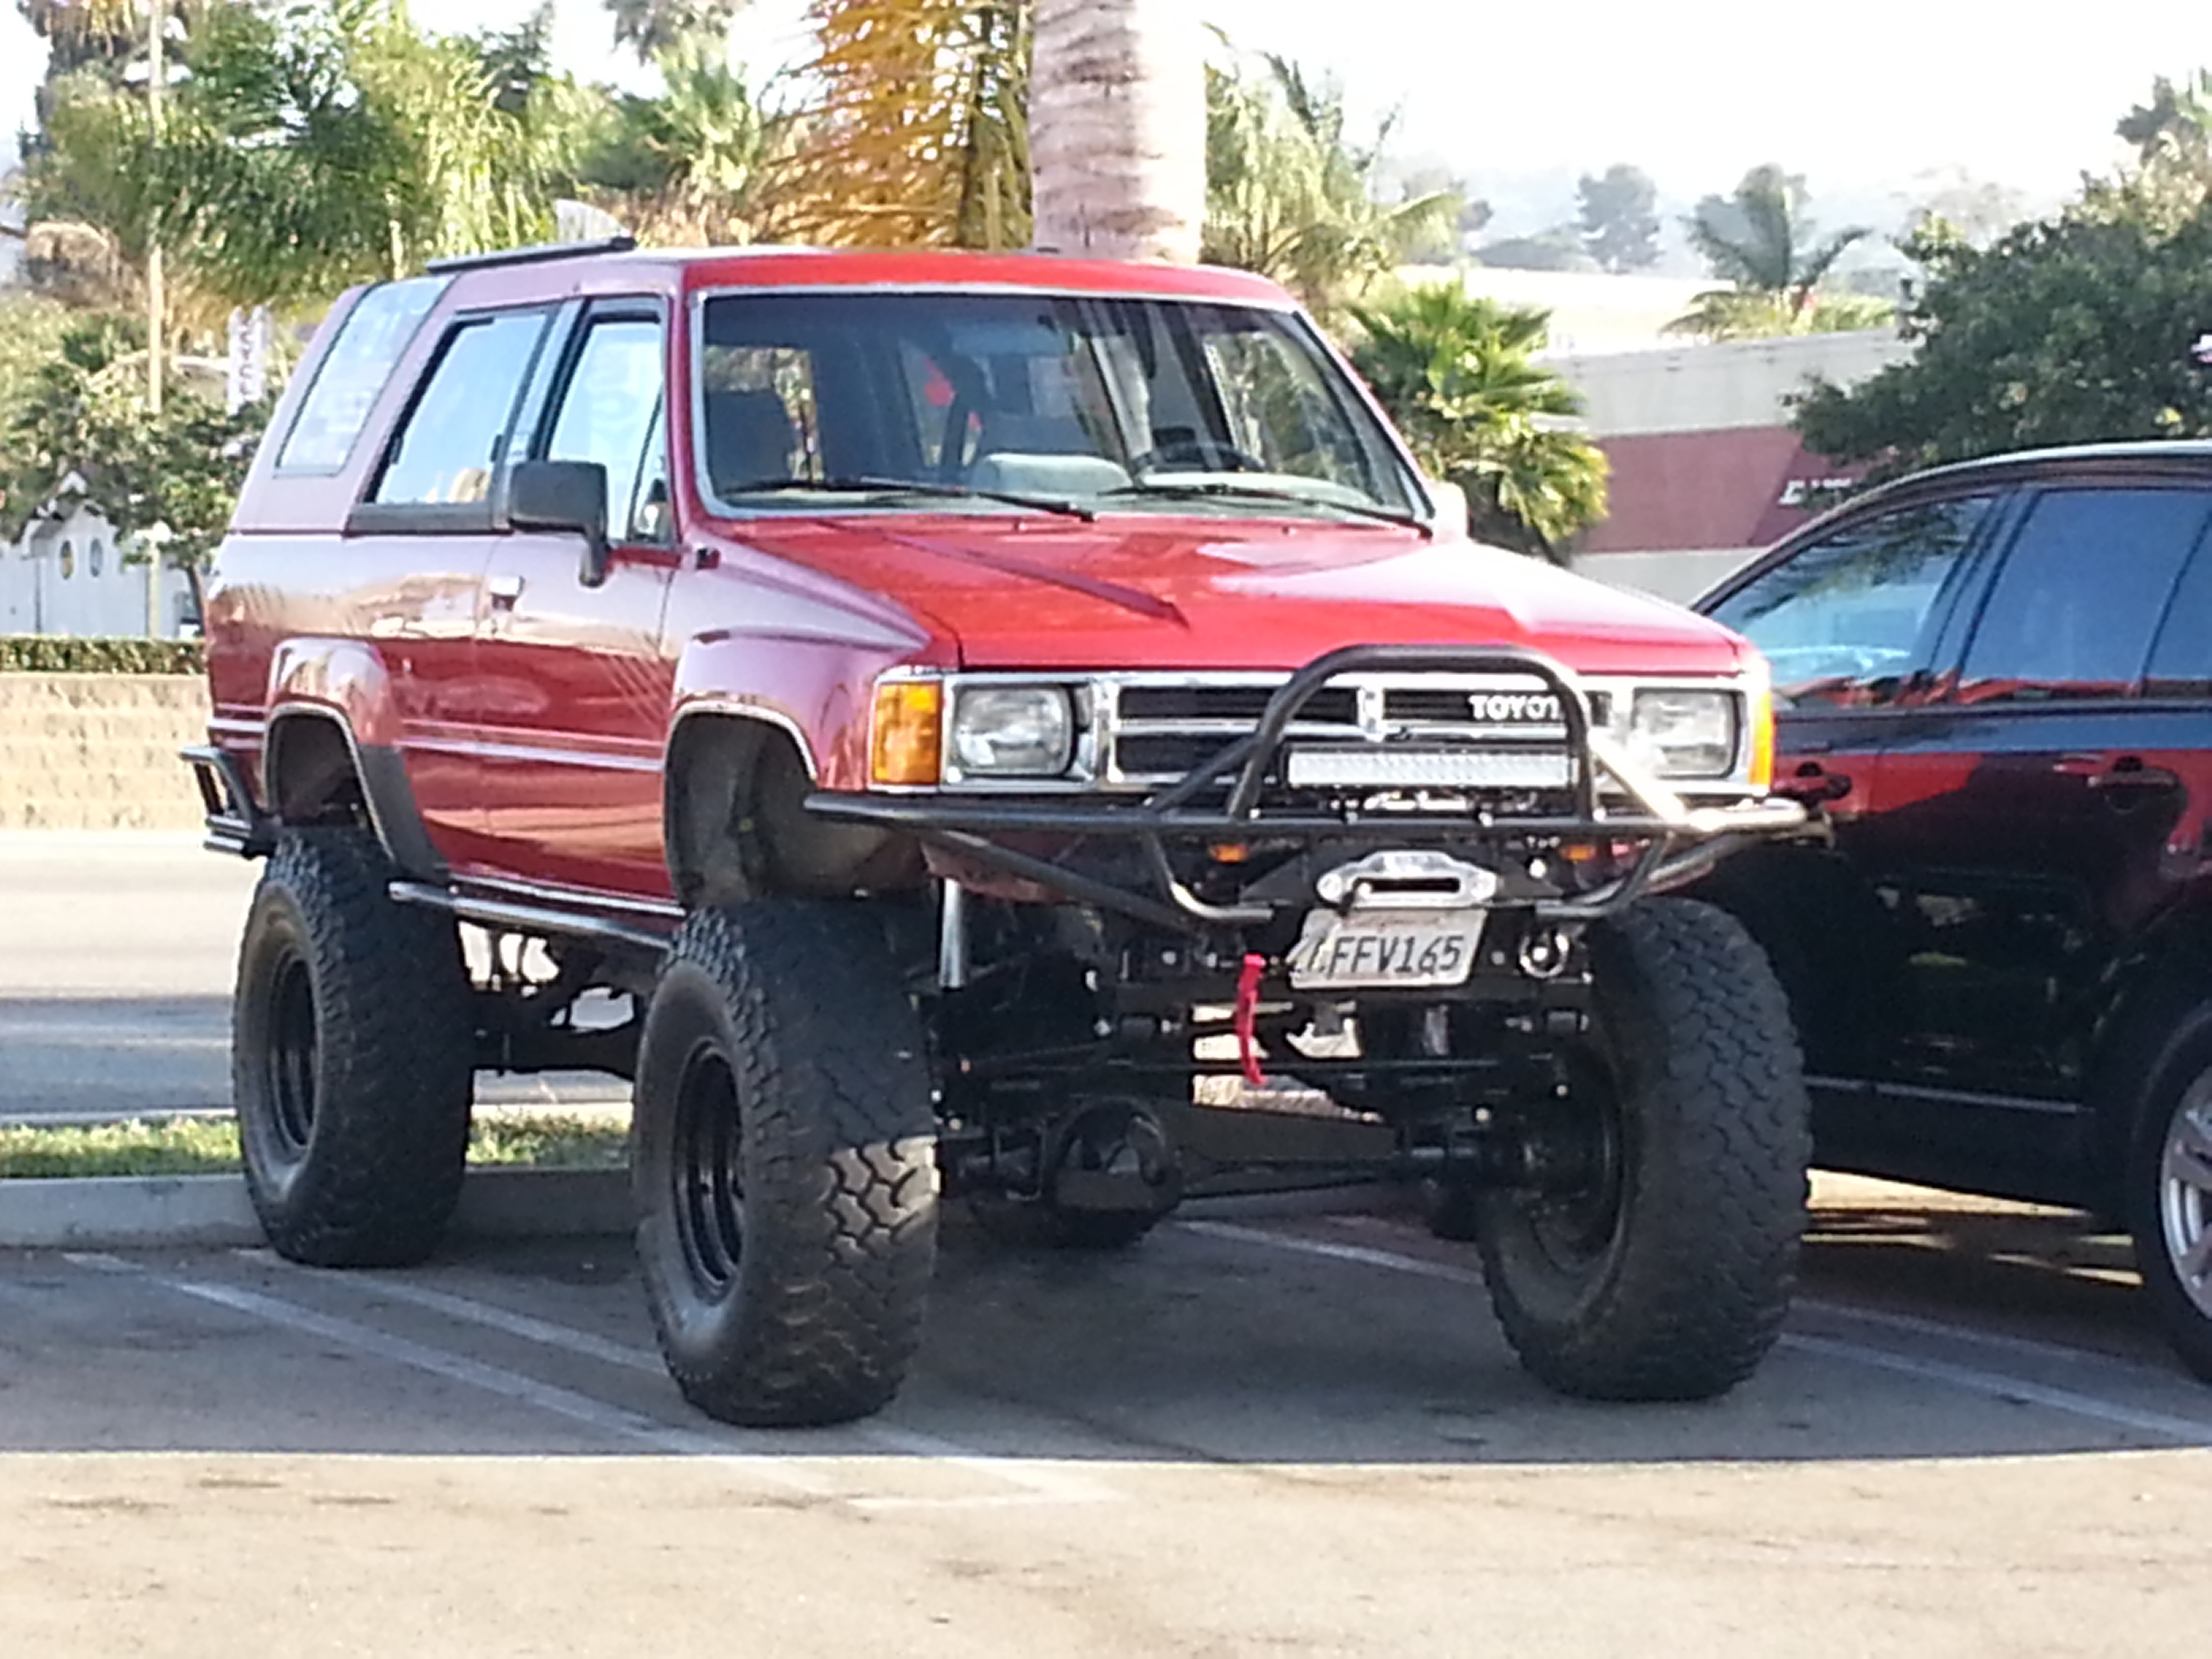
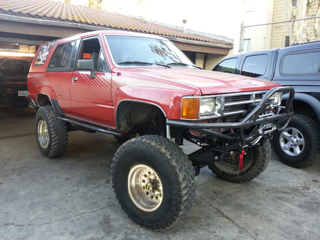
Some driveway shots from different angles....(after her first full bath in a month! Haha)
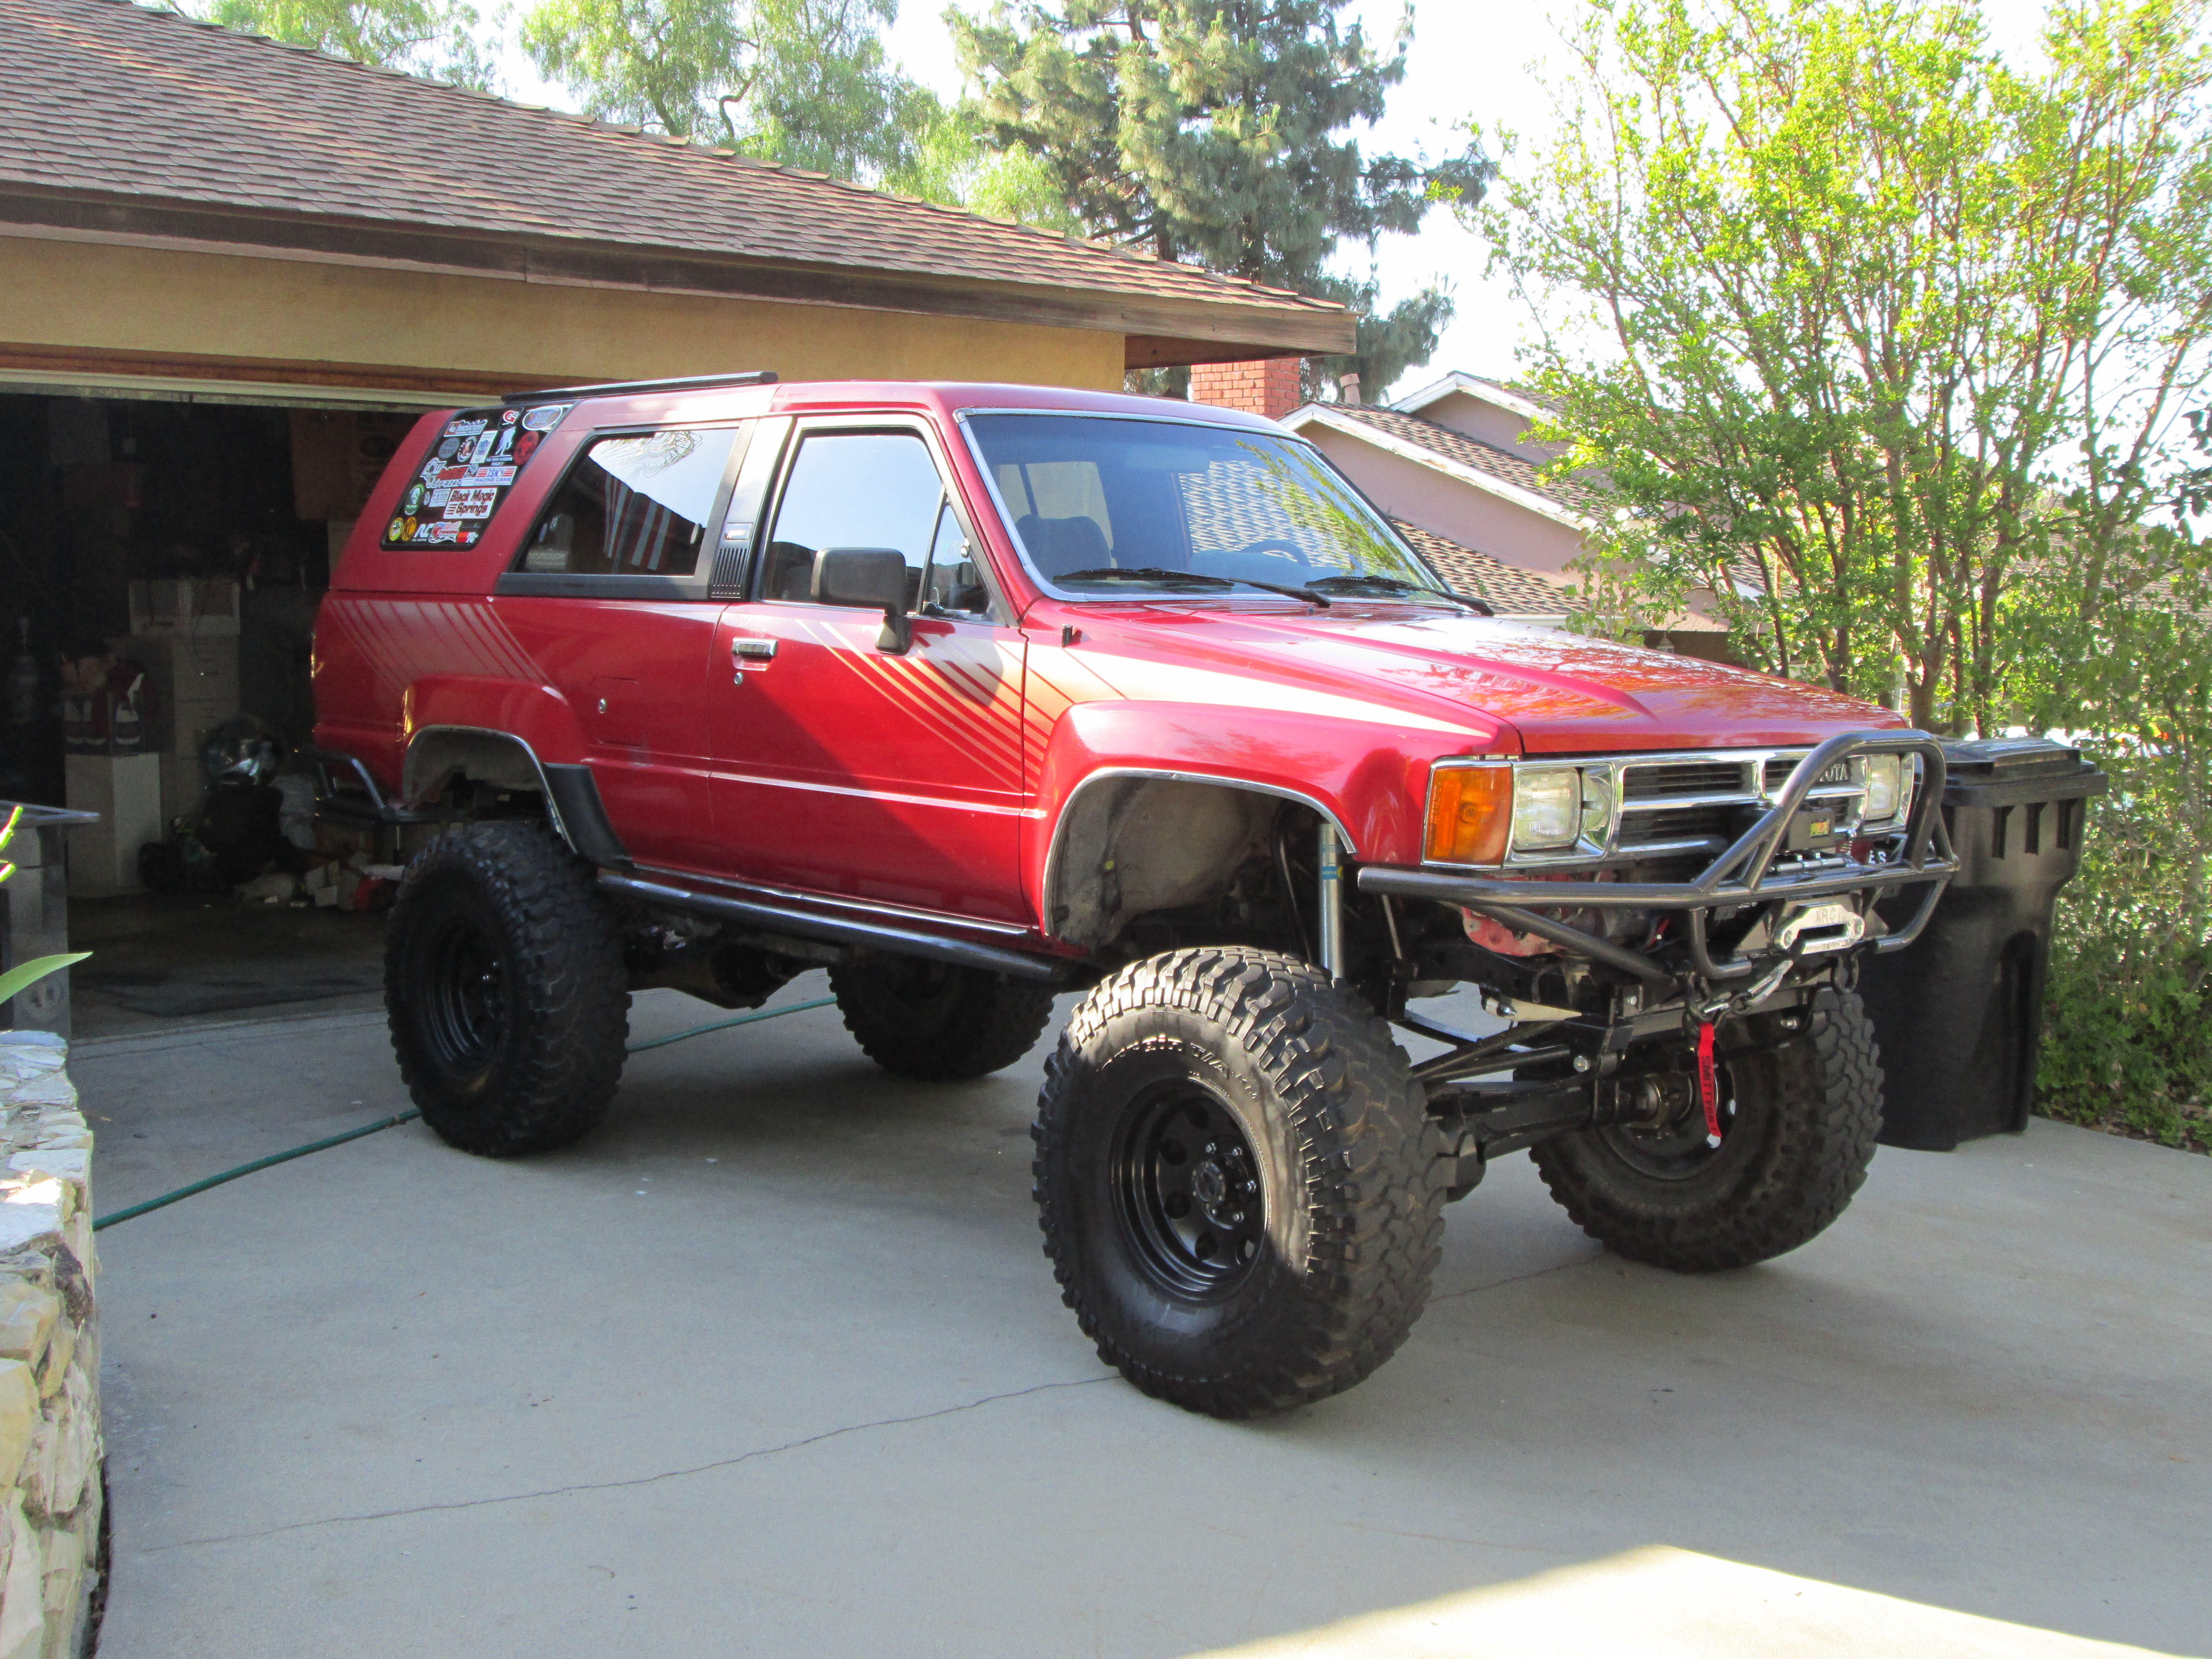
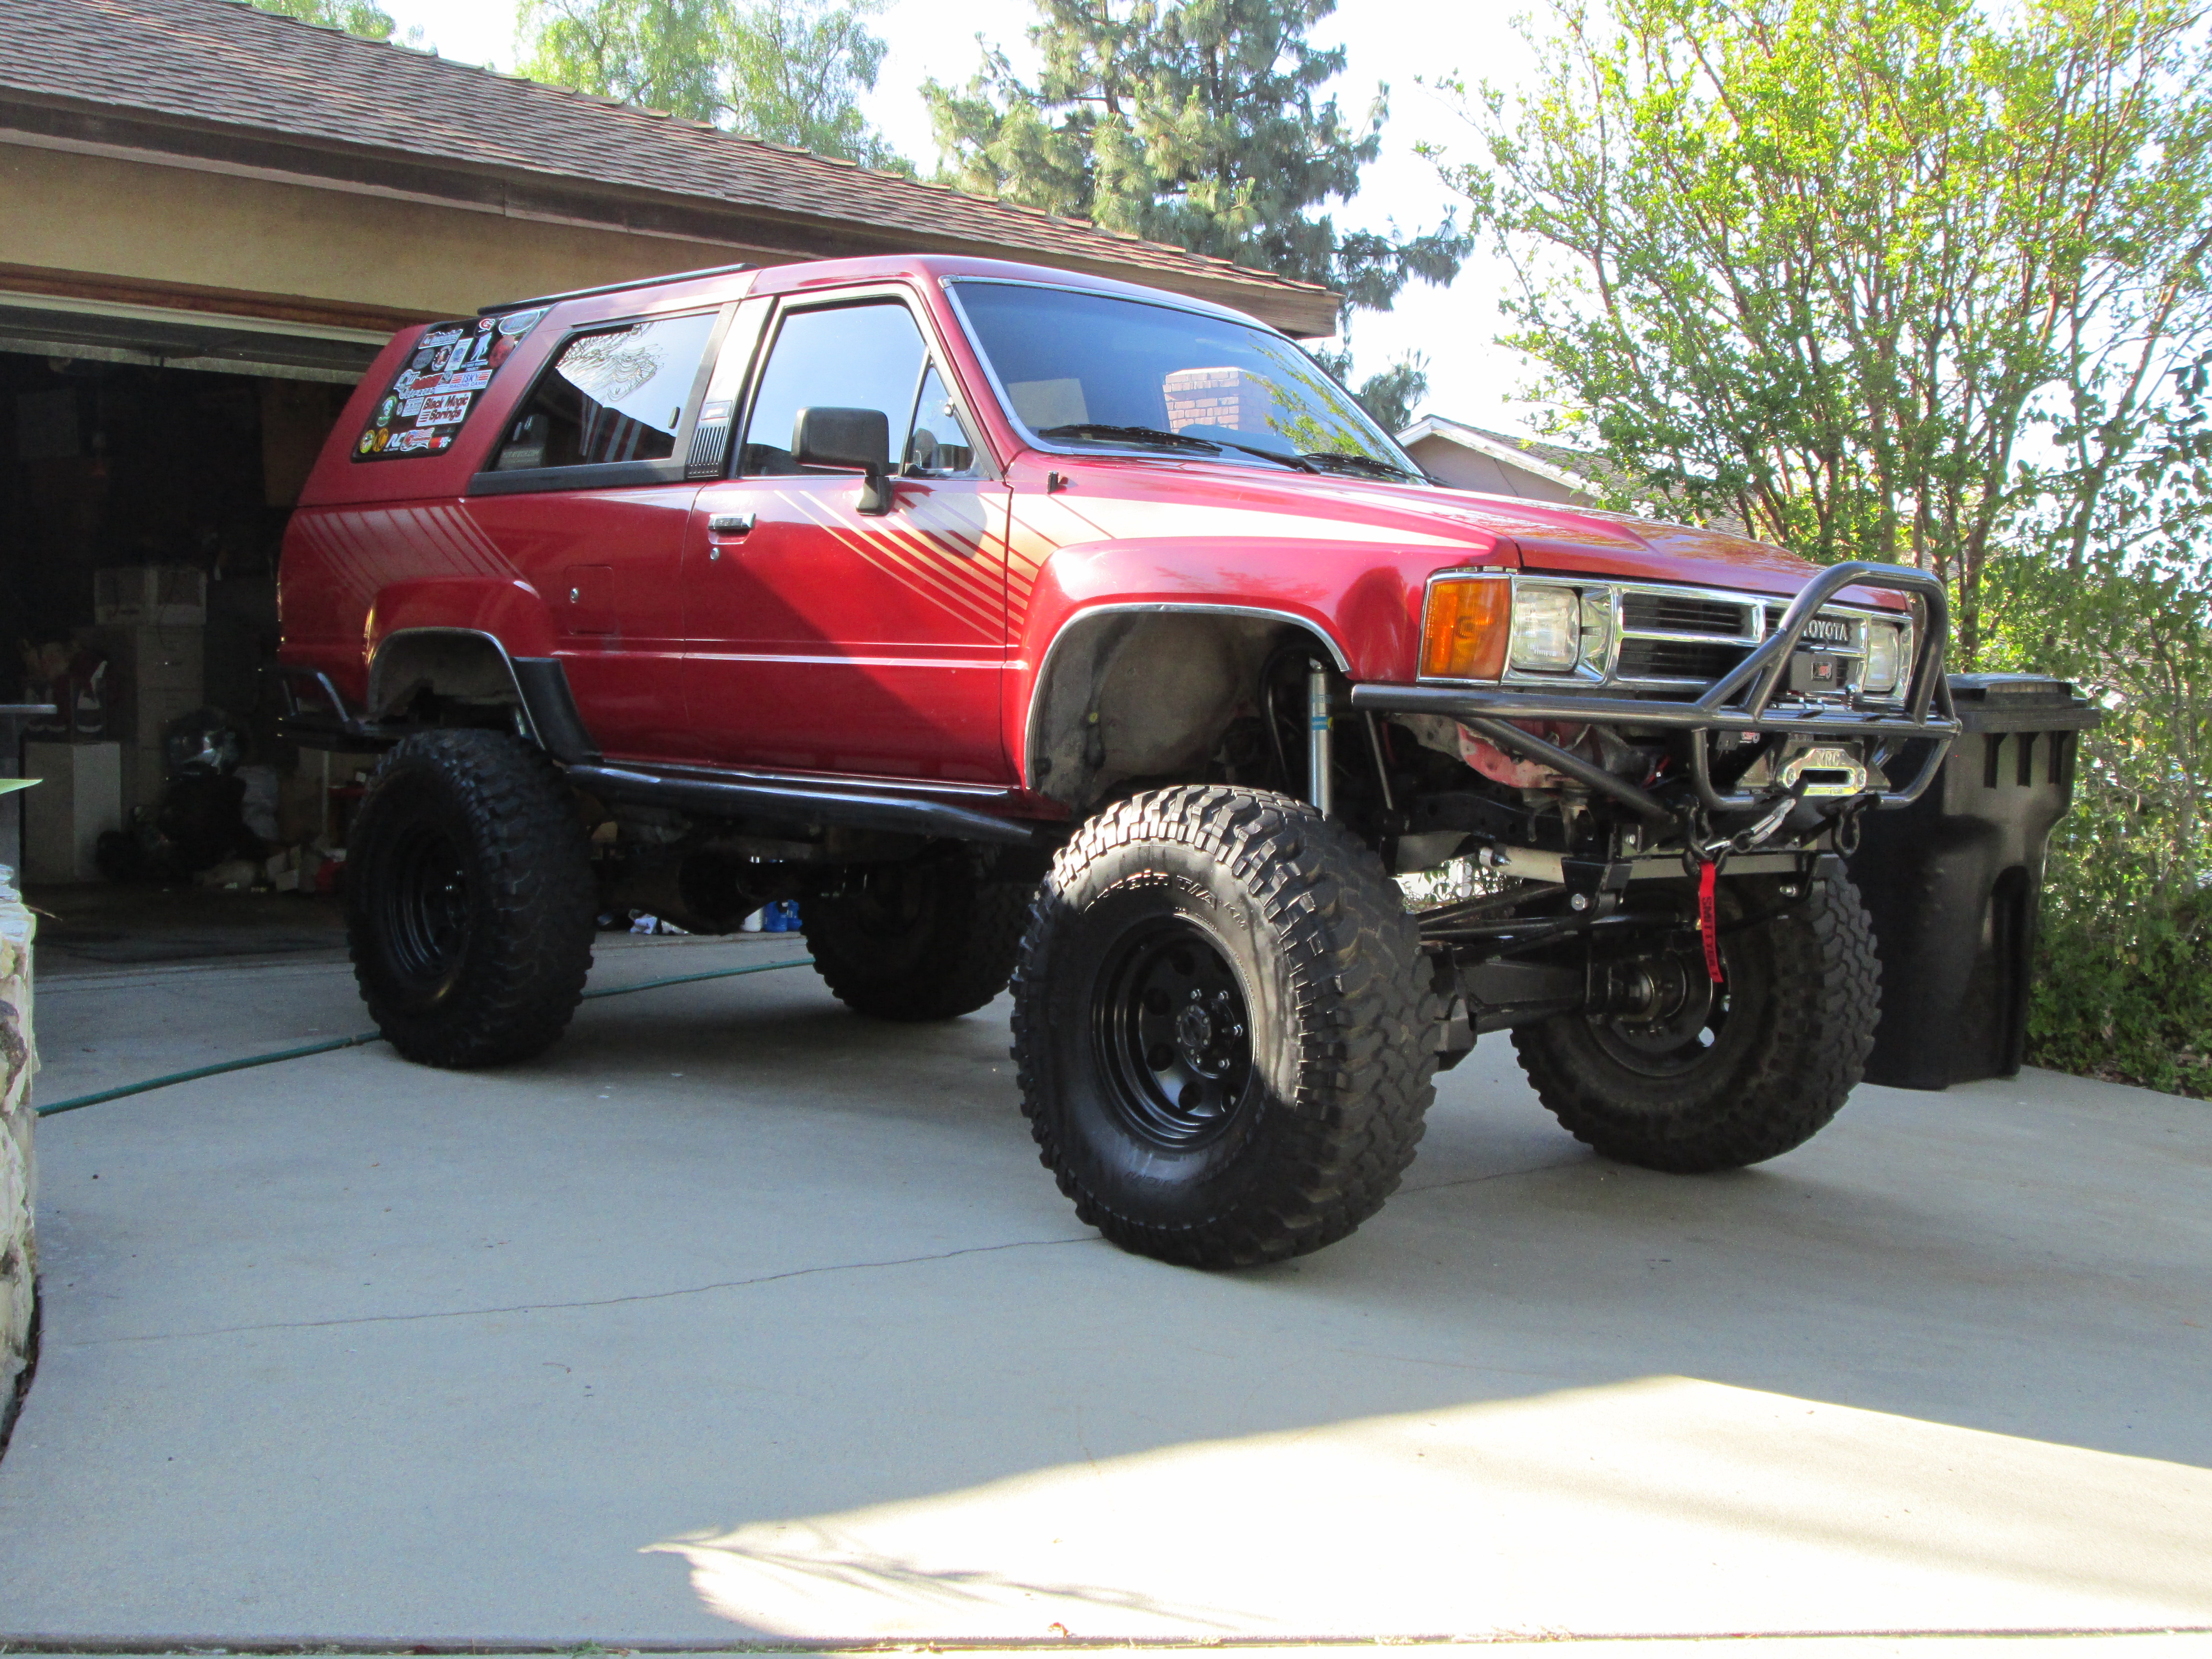
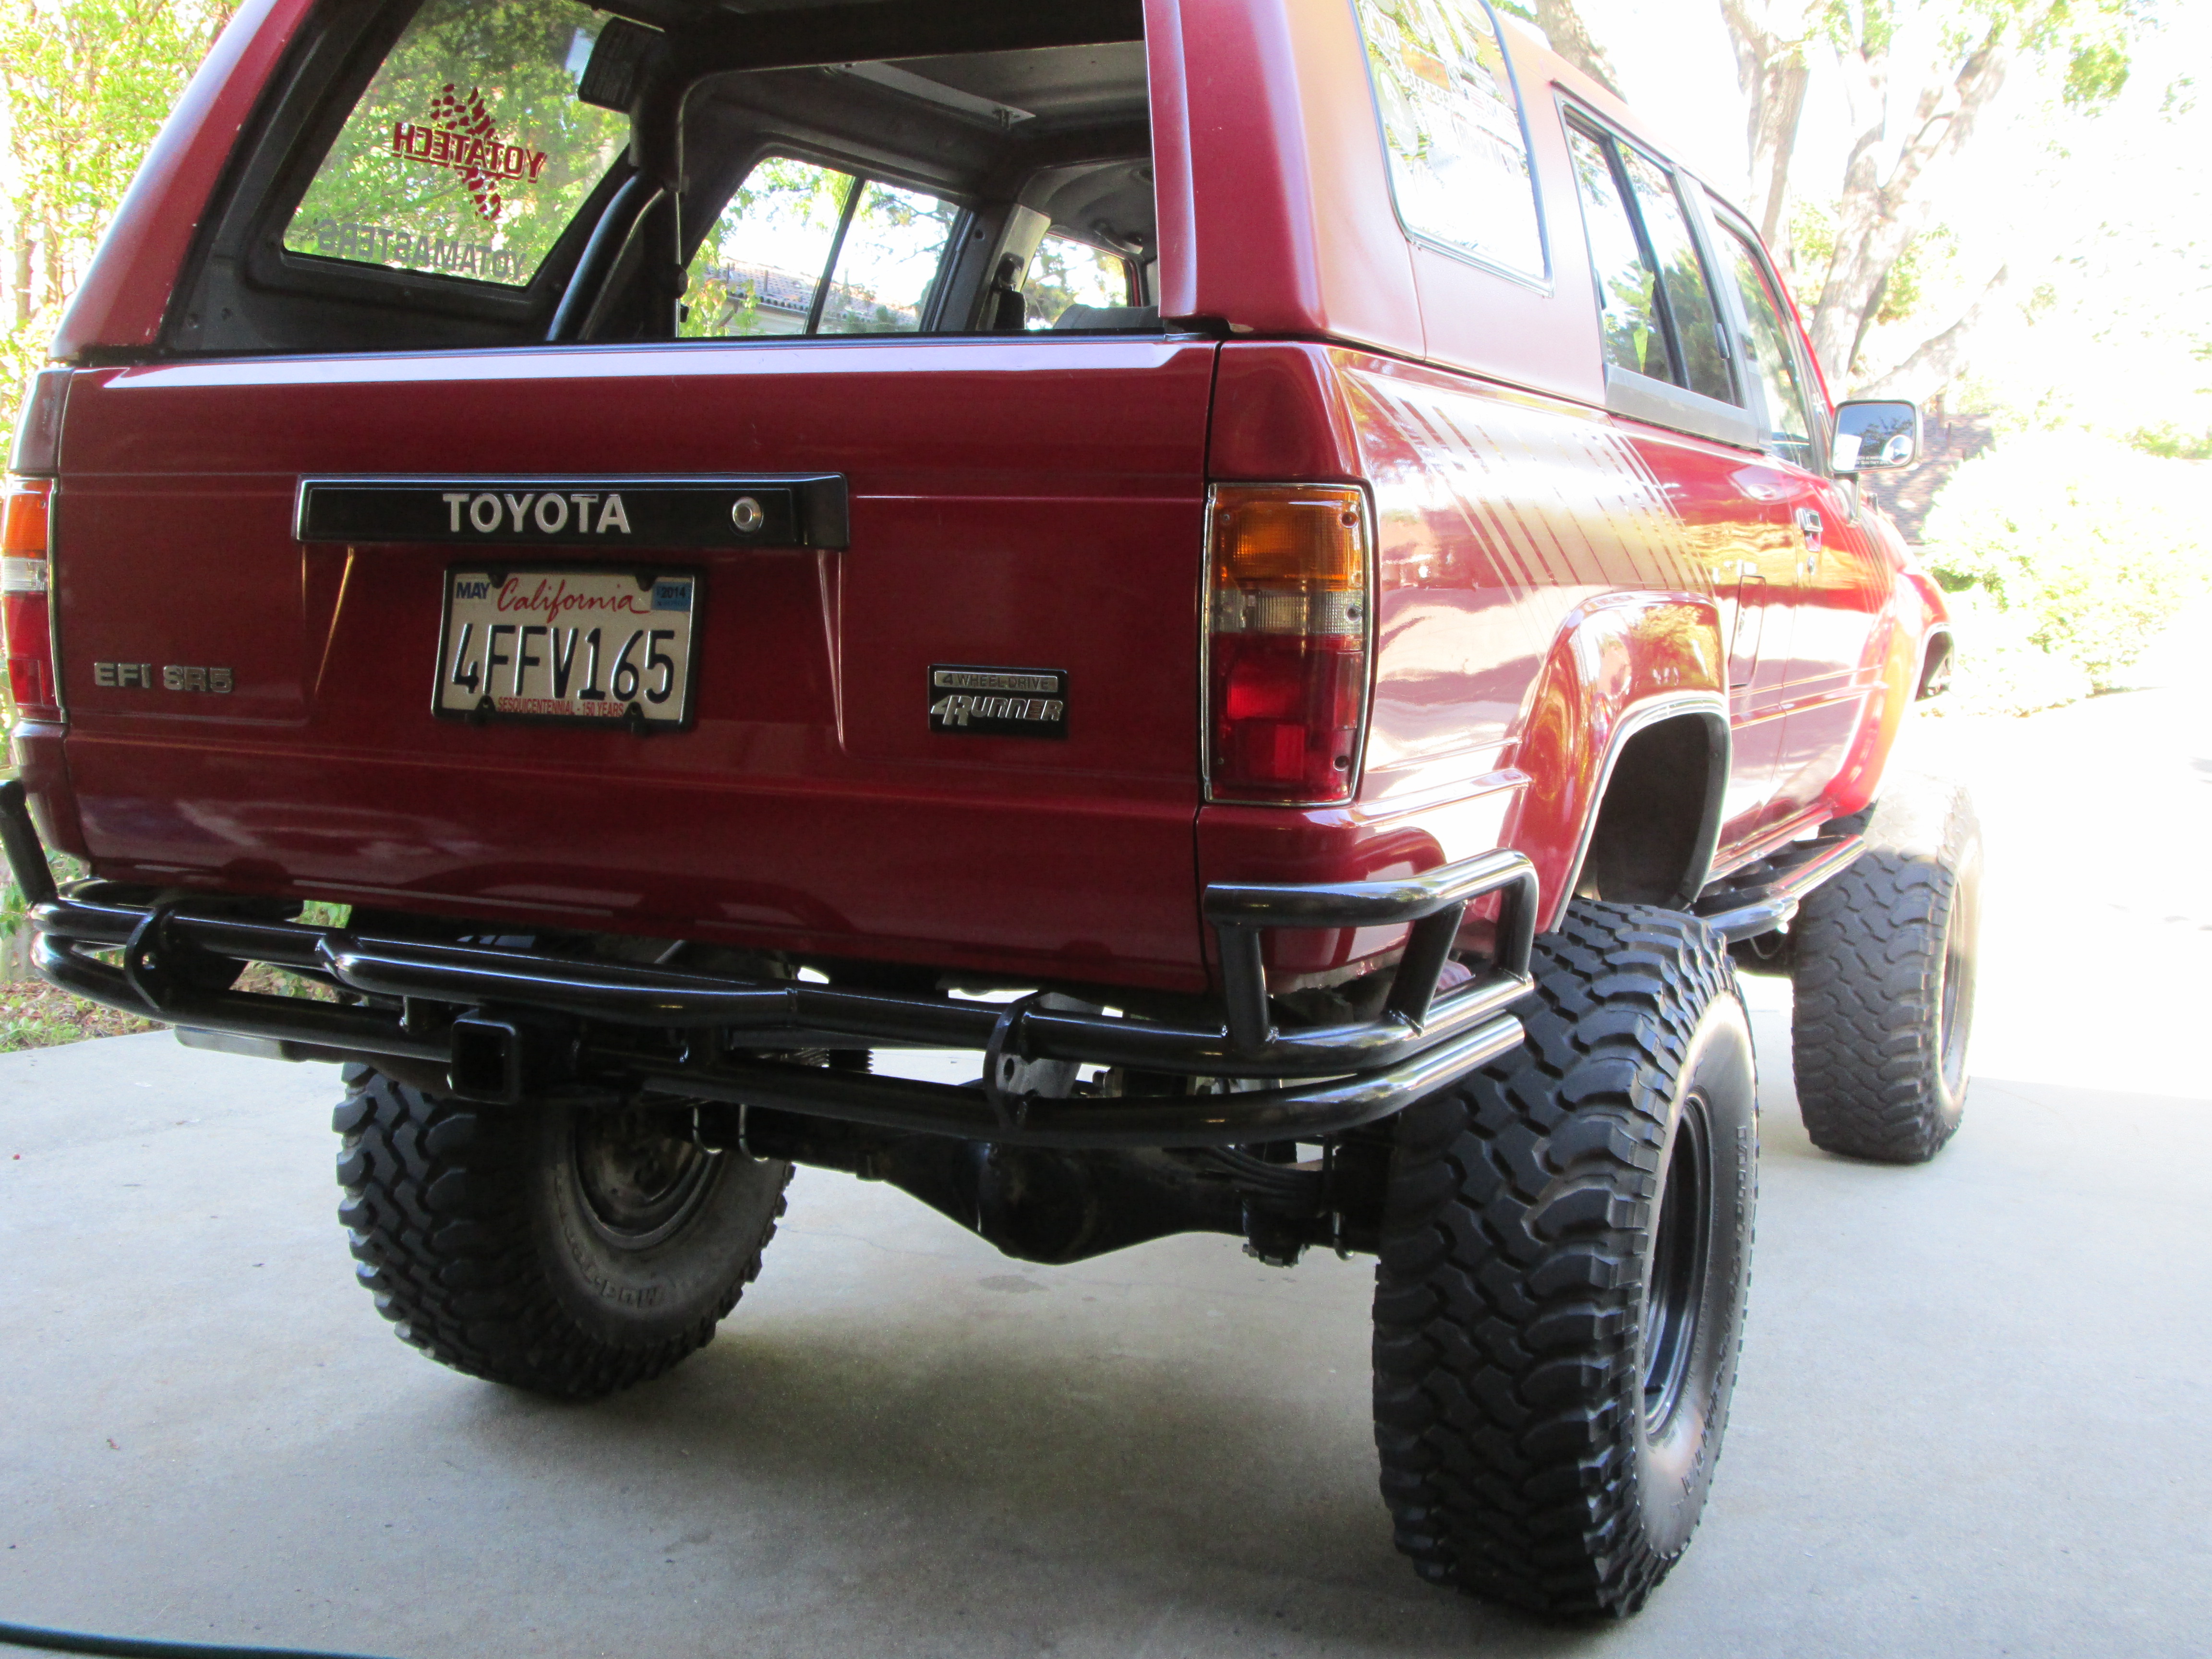
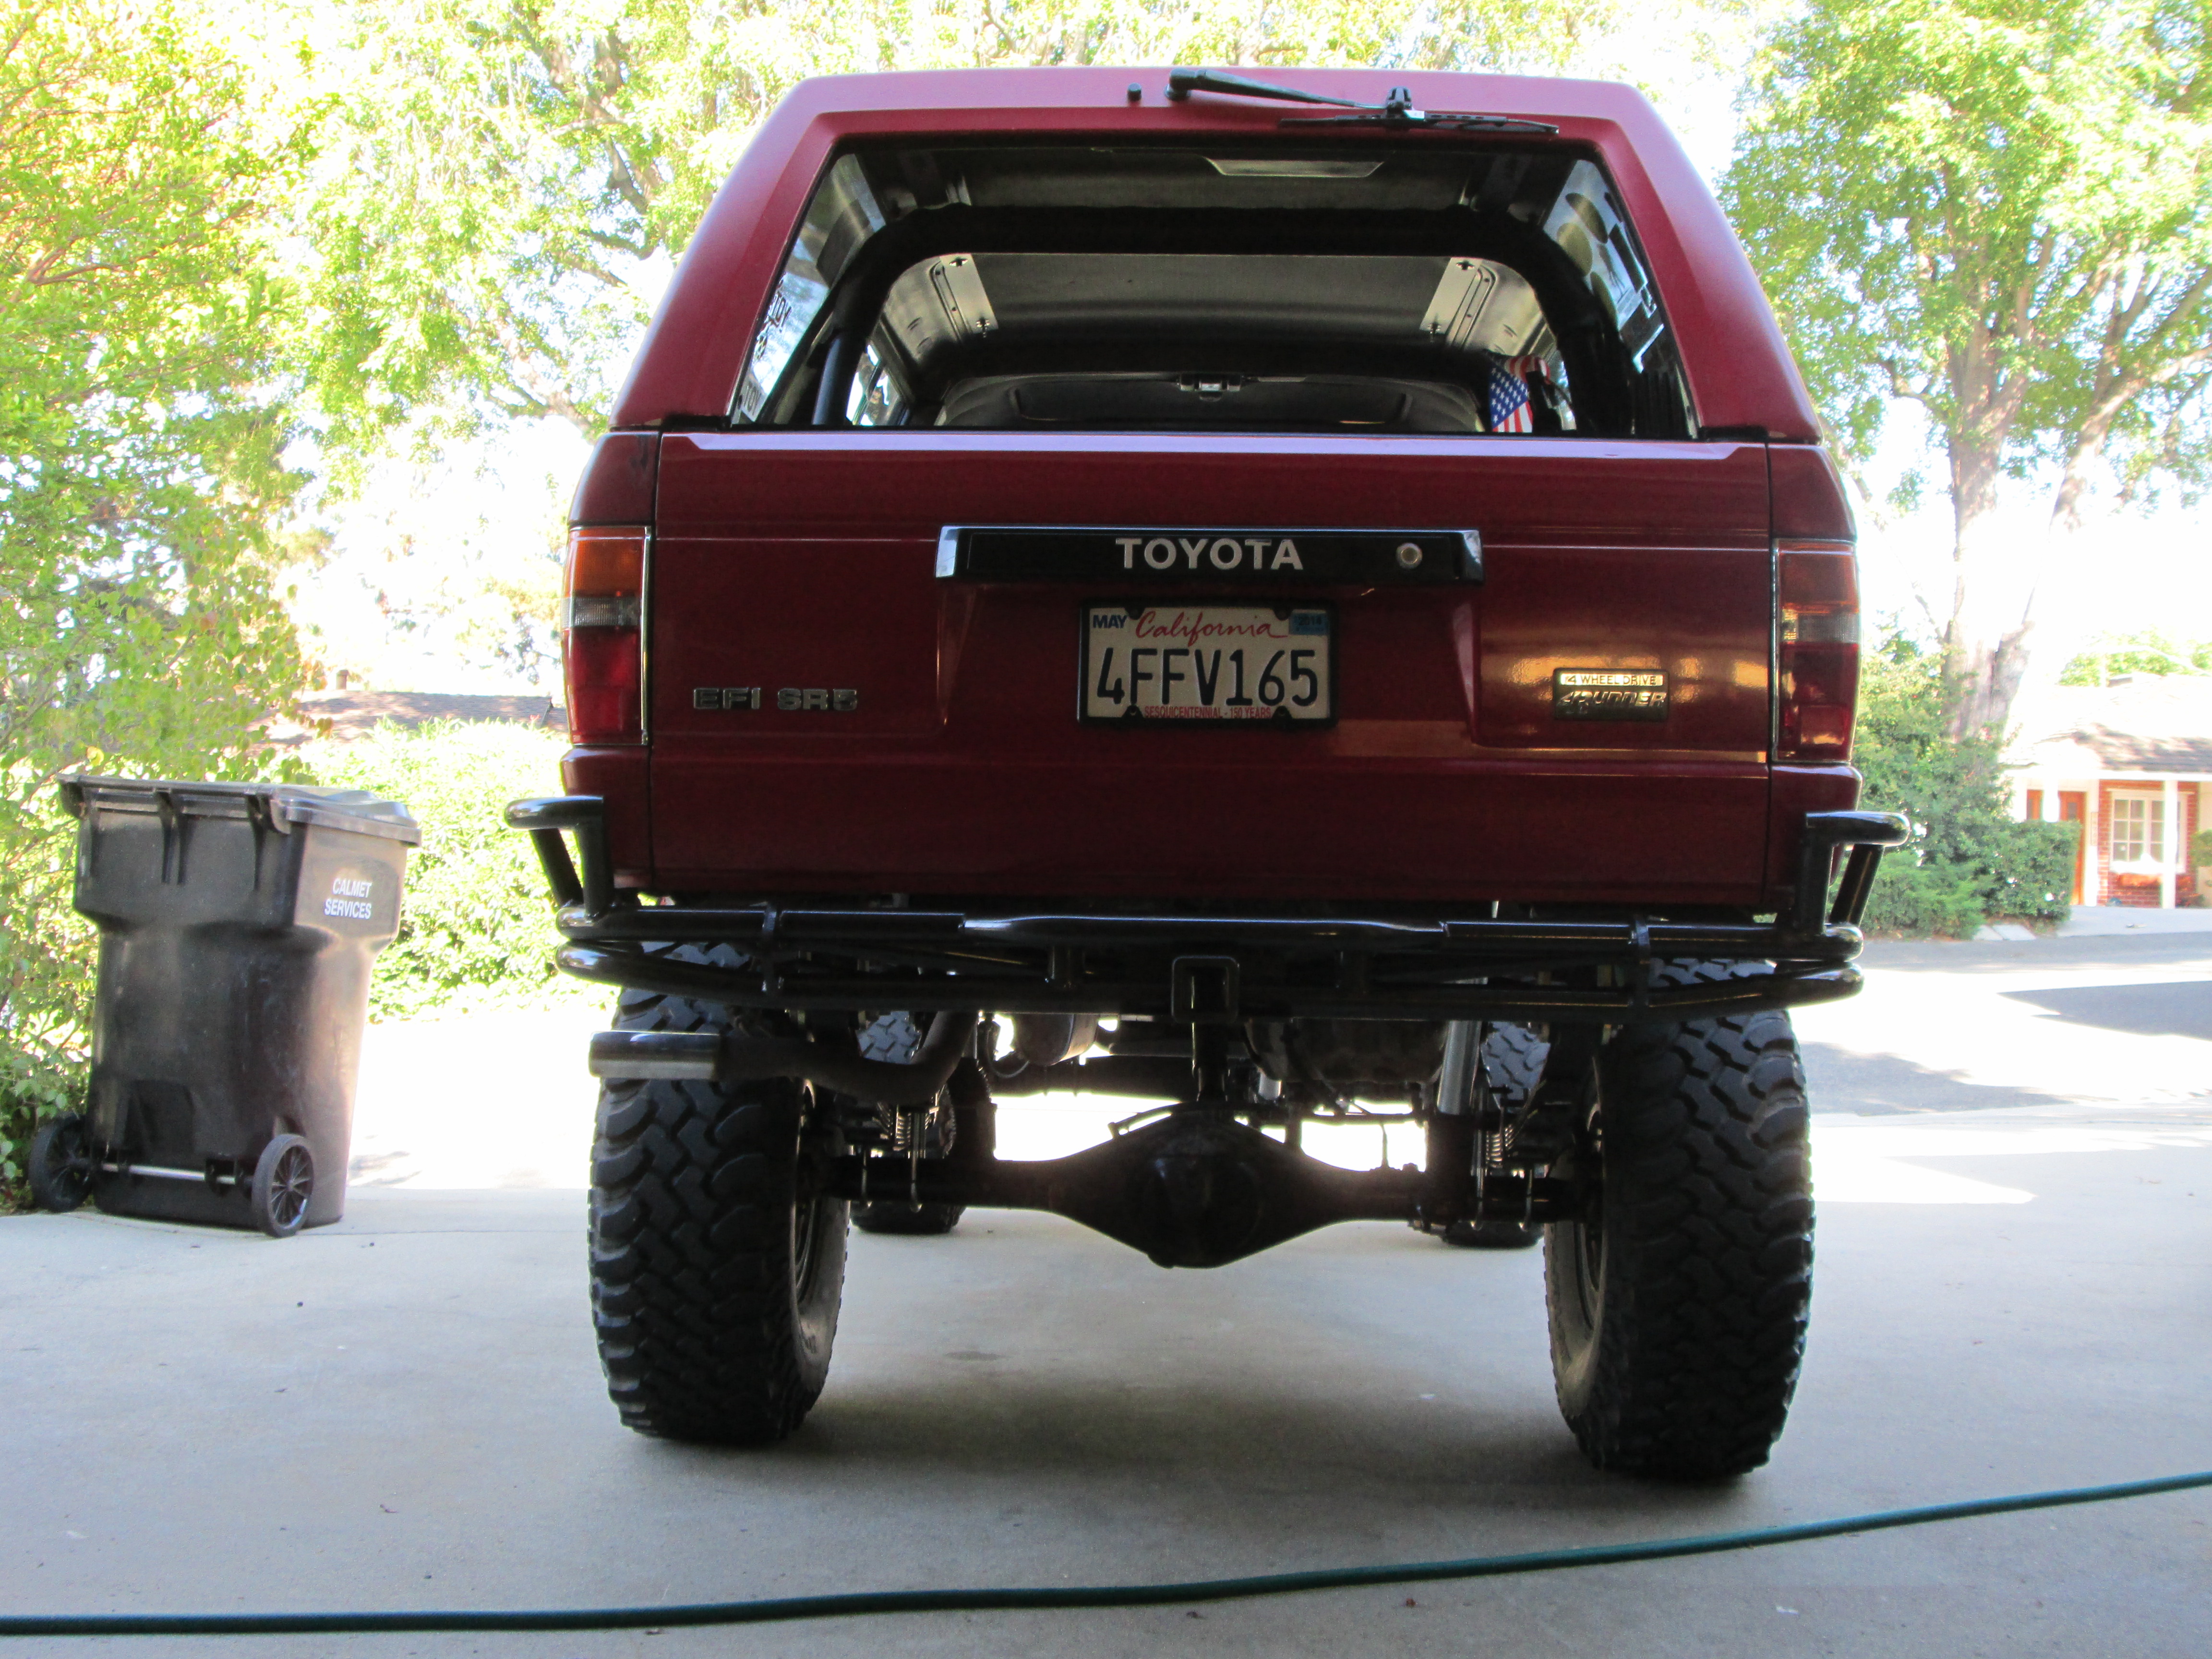

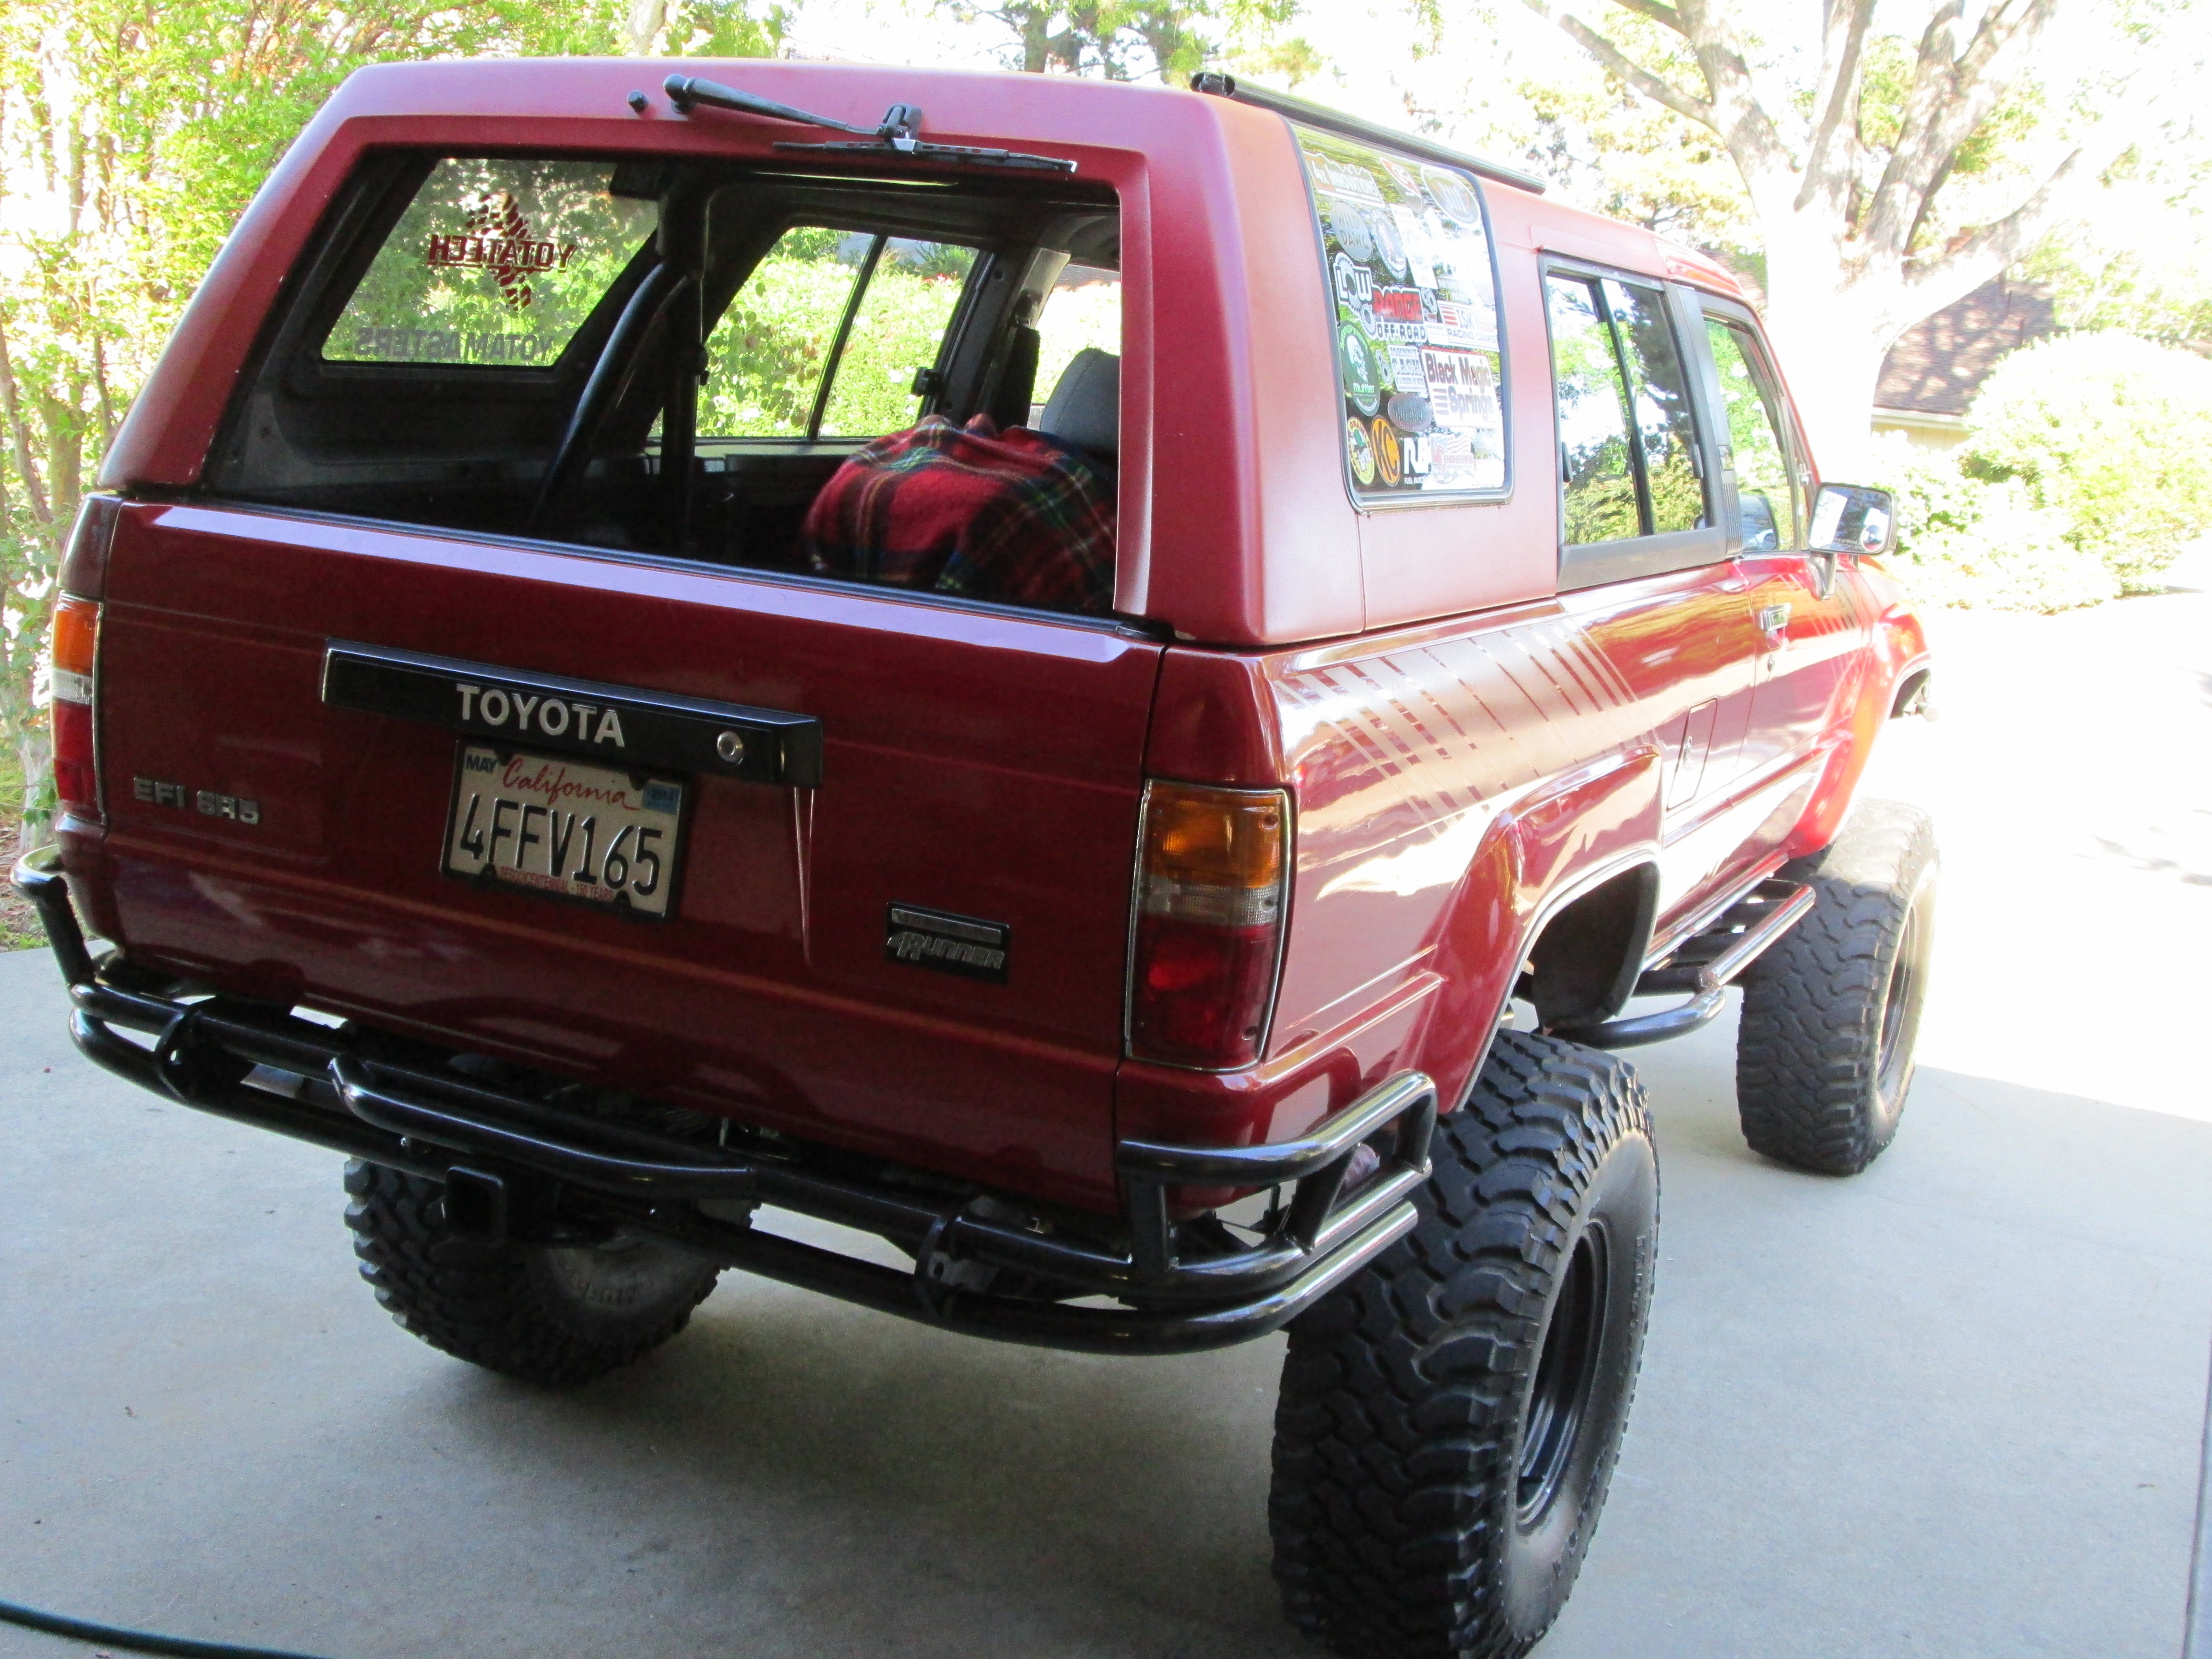
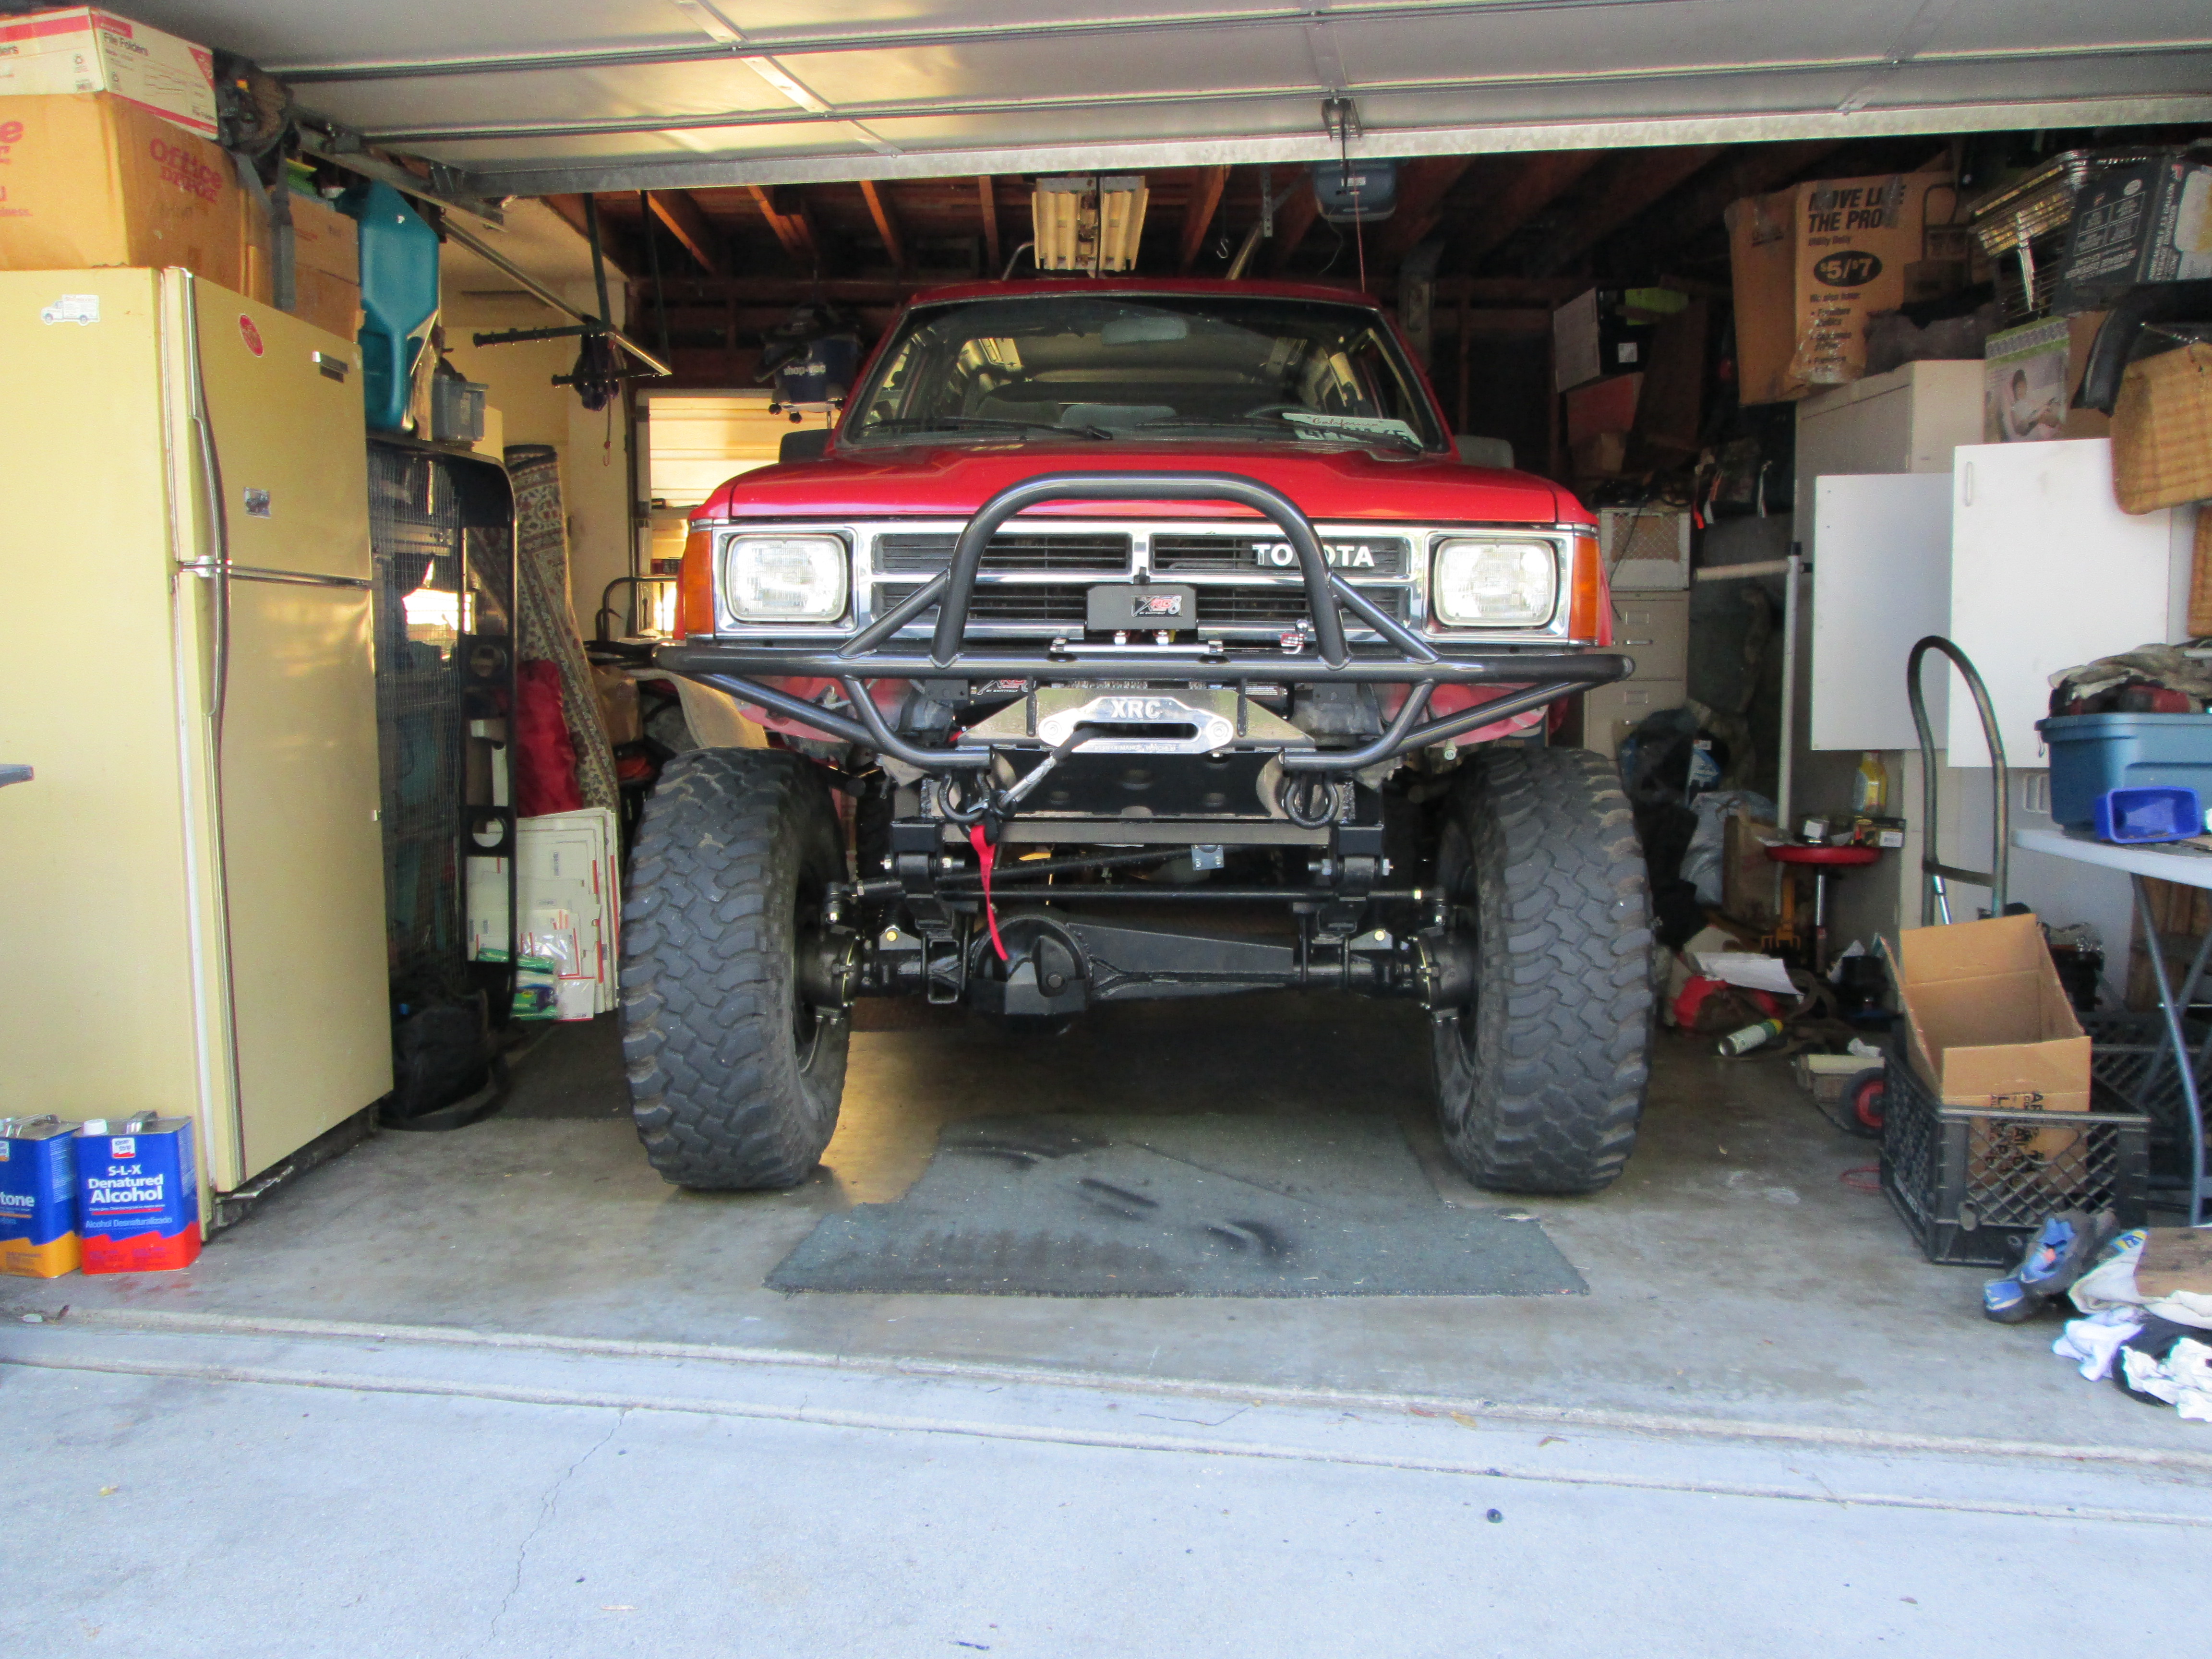
Back in her hole for the first add on since her surgery!........>>>>>>
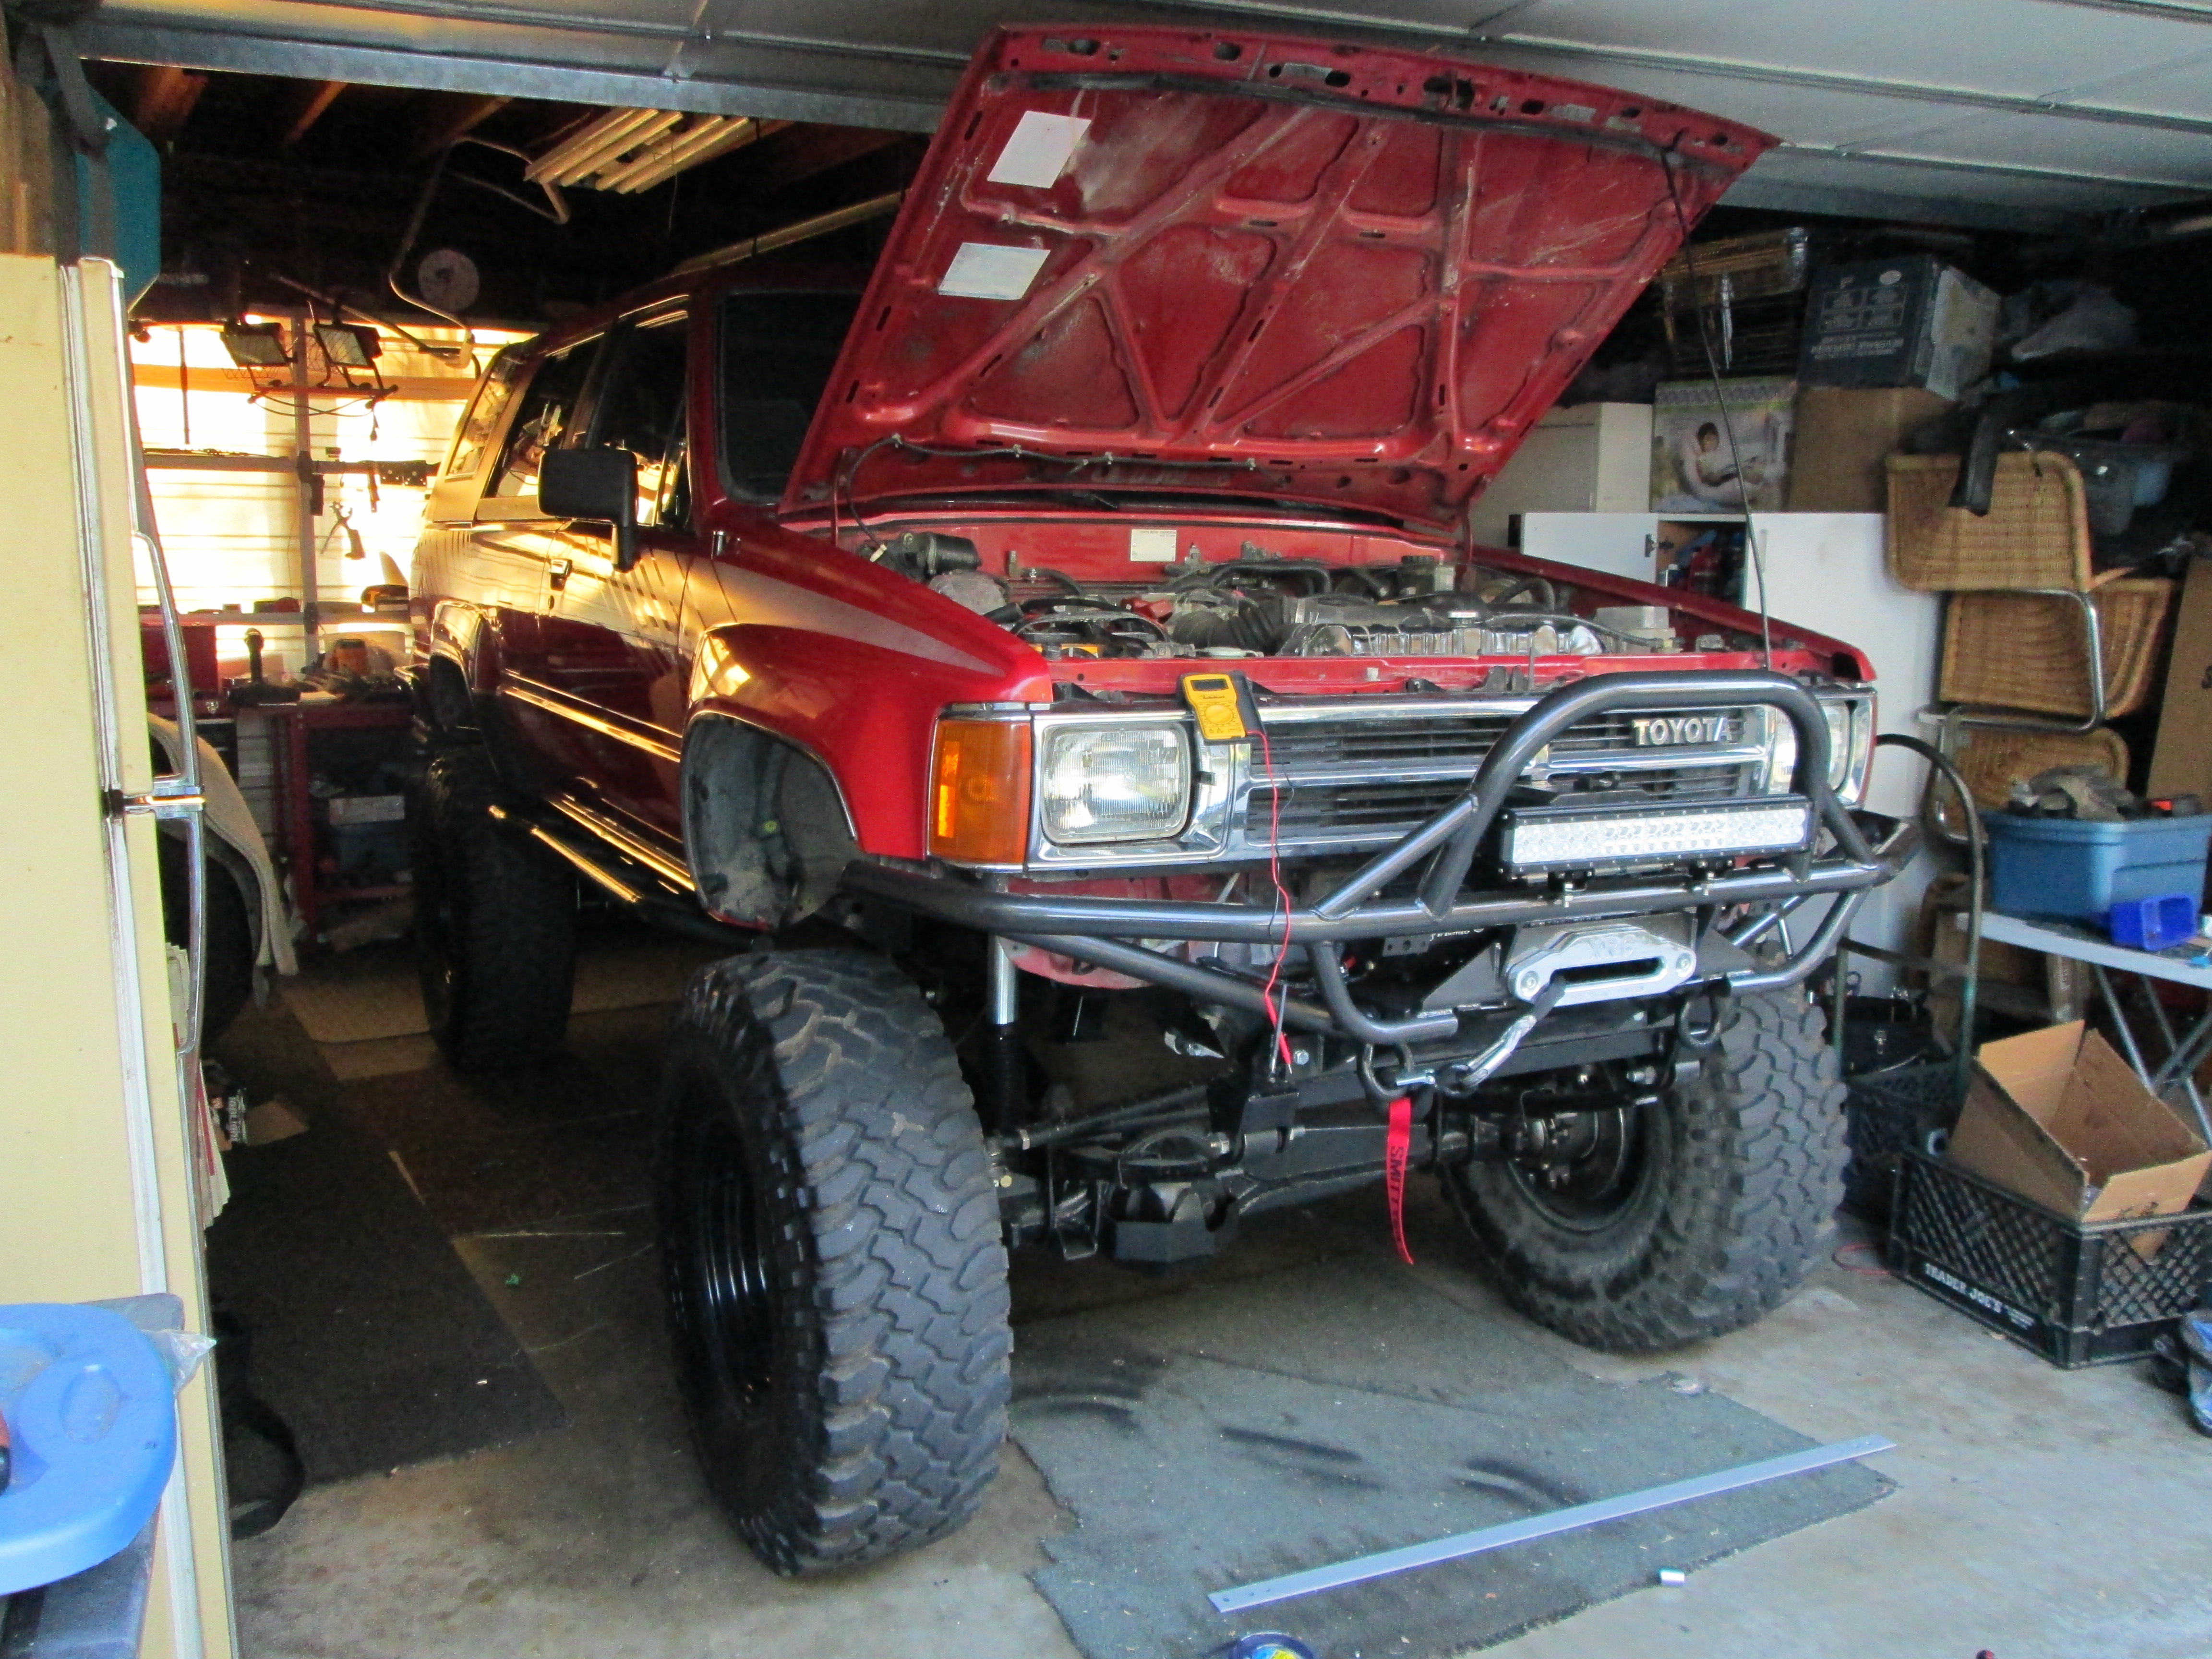
I decided to pull around/route the wiring for the 20" LED Cree Spot/Flood combo light bar...... I was all wired for it because of the Dick Cepek 8"ers .... So now I have an extra wire going to what will probably be for the two 7" spots that will be on the roof rack, facing forward.... combined, they are 72W... The front 20" is 126W... I think if I was ok with 300W of Halogens on the one switch and 30A fuse..... I should be fine with the 198W's of LEDS on the same......
Here, I'm getting it set up. ... And, I realized it was REALLY going to be close on the fit! hehe....
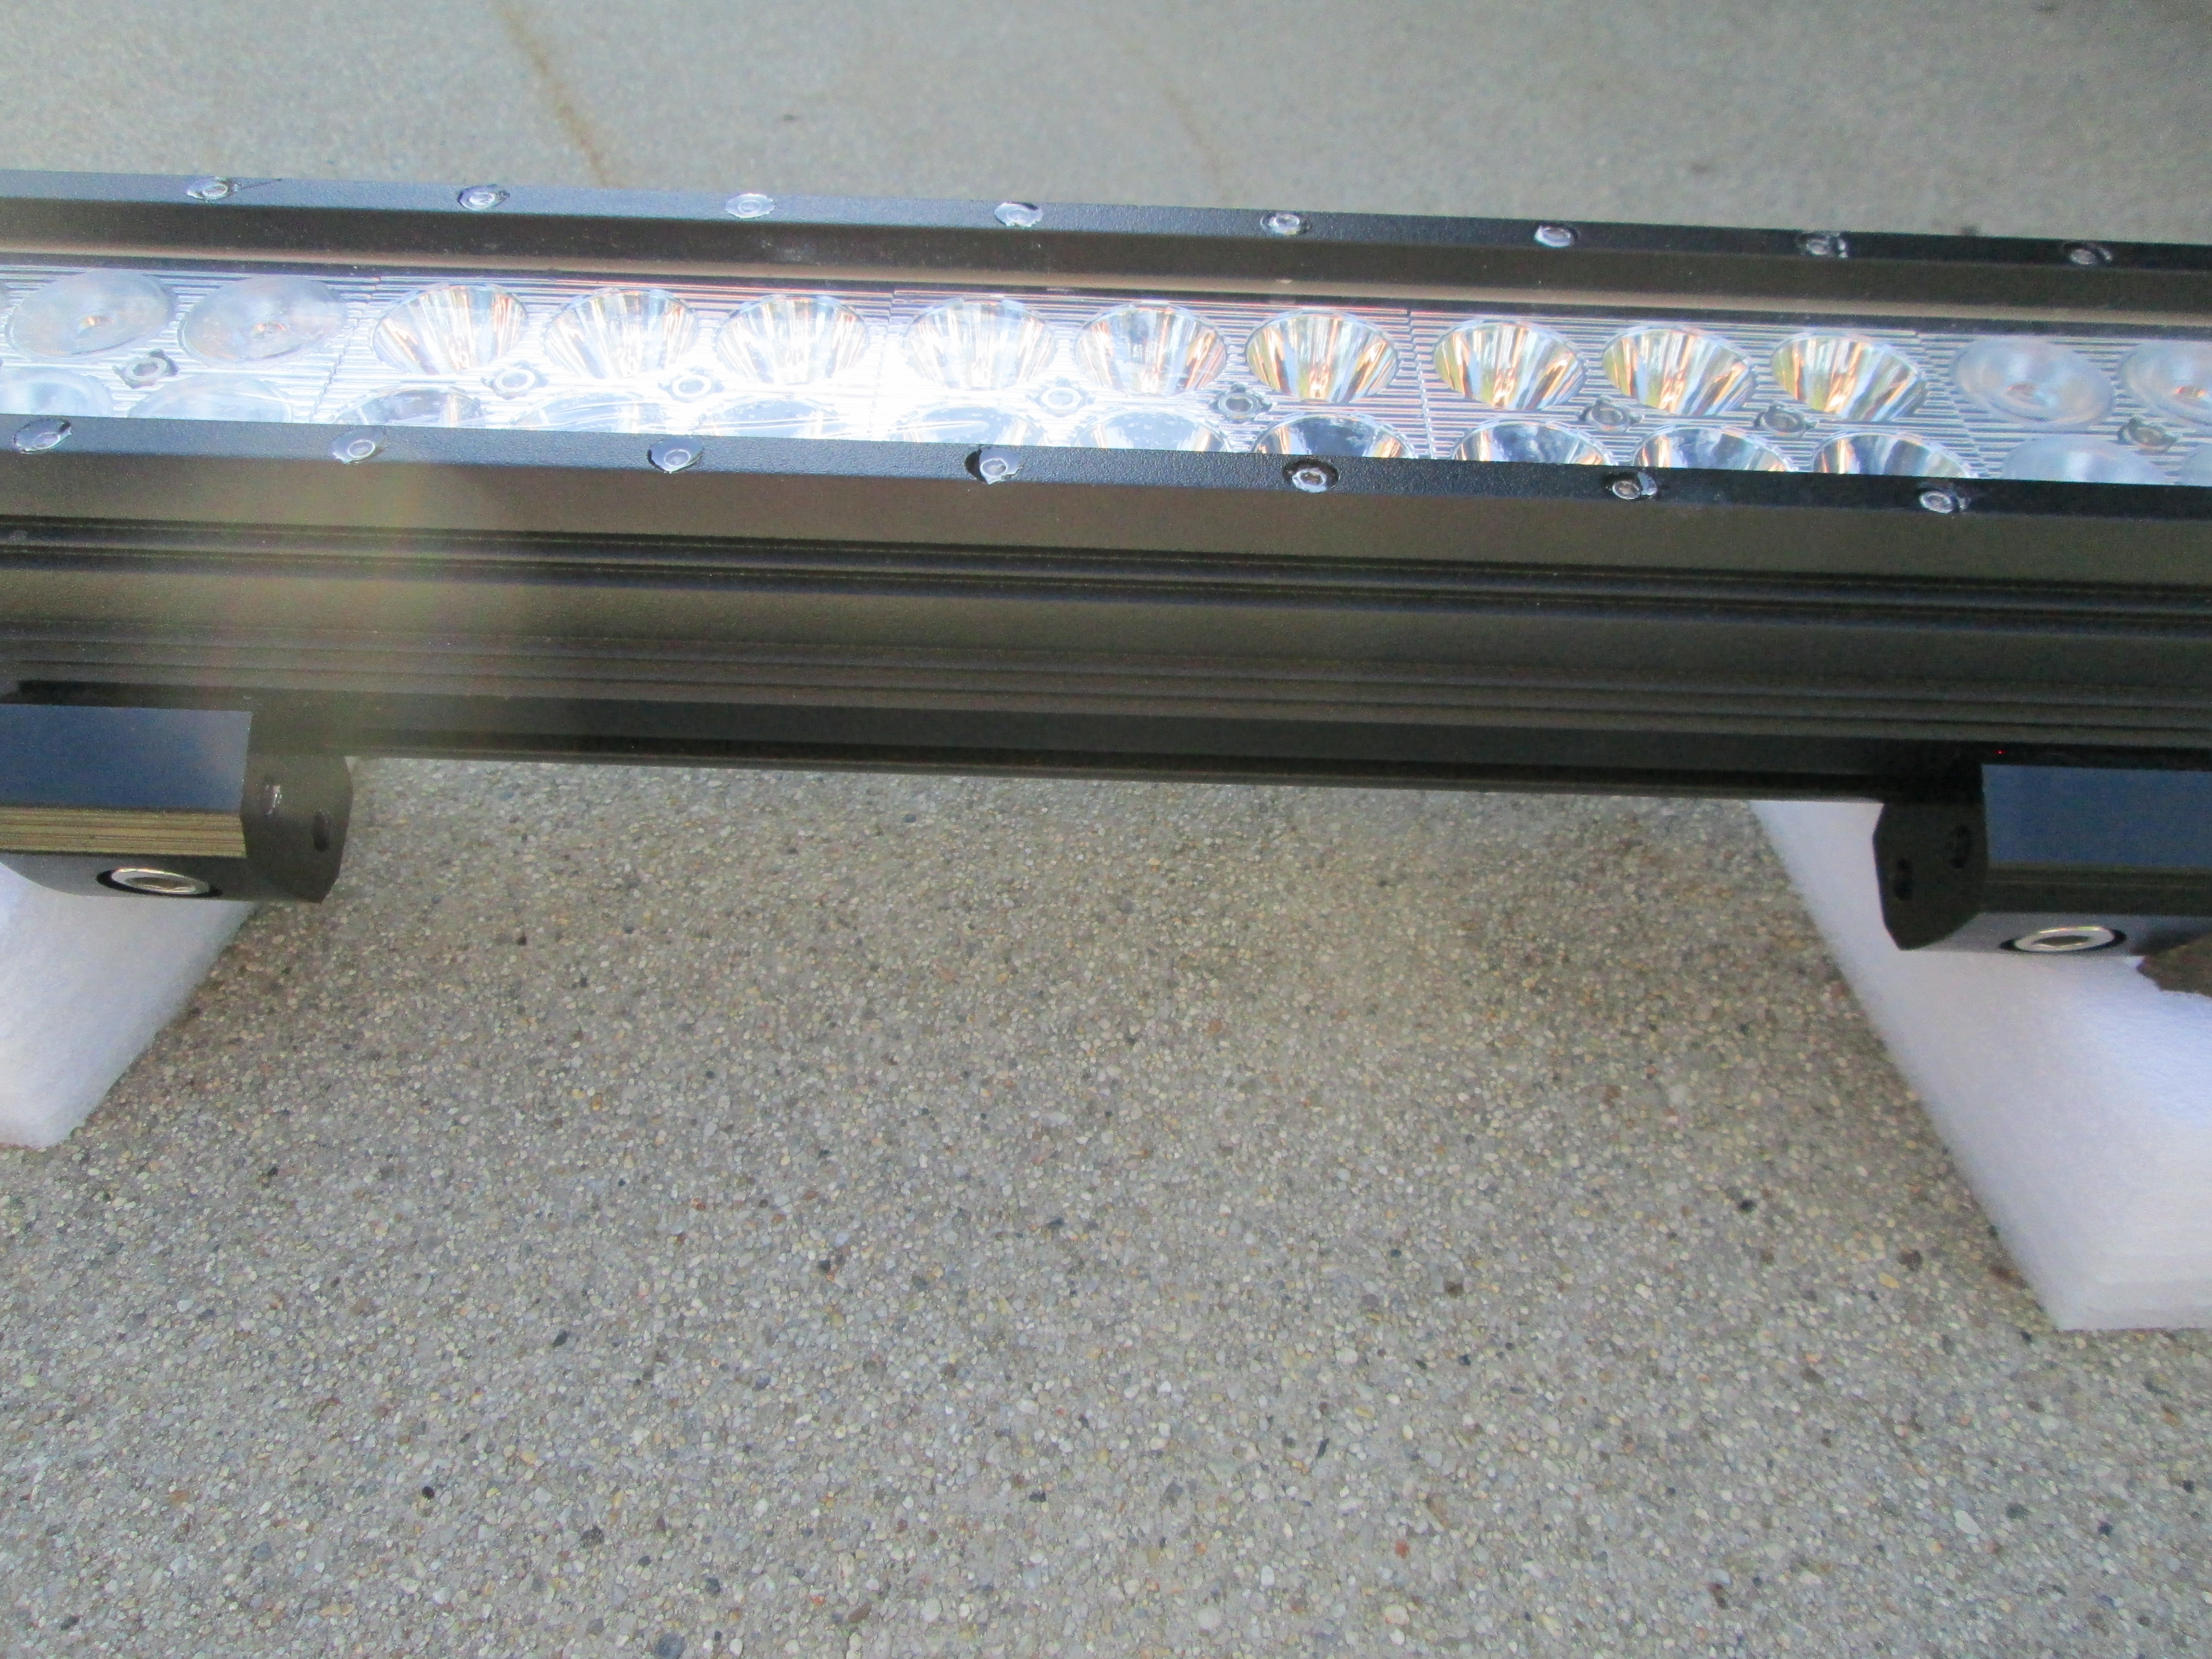
Soldering in everything clean....
DONE!.....

Some driveway shots from different angles....(after her first full bath in a month! Haha)
Back in her hole for the first add on since her surgery!........>>>>>>
I decided to pull around/route the wiring for the 20" LED Cree Spot/Flood combo light bar...... I was all wired for it because of the Dick Cepek 8"ers .... So now I have an extra wire going to what will probably be for the two 7" spots that will be on the roof rack, facing forward.... combined, they are 72W... The front 20" is 126W... I think if I was ok with 300W of Halogens on the one switch and 30A fuse..... I should be fine with the 198W's of LEDS on the same......
Here, I'm getting it set up. ... And, I realized it was REALLY going to be close on the fit!
hehe....Soldering in everything clean....
DONE!.....
Last edited by ChefYota4x4; 07-14-2013 at 09:02 AM.
07-14-2013, 01:02 AM
#7065
Registered User
well! you certainly dont have to lift her up to work under now!
awesome just flat beautiful awesome and excellent work love how clean the frame work ended up smooth an well treated
and the light bar, oh its still daylight so its kinda hard to AGggHHHHH!! break out the SPF 5K!!
vampires went running for their ray bans WHAT??
[YOUTUBE]
[/YOUTUBE]

awesome just flat beautiful awesome and excellent work love how clean the frame work ended up smooth an well treated
and the light bar, oh its still daylight so its kinda hard to AGggHHHHH!! break out the SPF 5K!!
vampires went running for their ray bans WHAT??
[YOUTUBE]
 07-14-2013, 10:38 AM
#7068
WOW! Ruby turned out SWWEEeeeettt! lol! Nice work Mark, man what a transformation! Man, now I have 35" BFG, Sliders, front and rear bumper/winch, dual case, triple stick envy!!! LMAO! Awesome says it all, you deserve it man! Now you get to enjoy the ride! Can't wait to see some wheeling pics!!!
07-14-2013, 05:45 PM
#7070
Contributing Member
Join Date: Mar 2003
Location: COTKU,Ontario,Canada
Posts: 11,334
Likes: 0
Received 0 Likes
on
0 Posts
Ruby looks really sweet and that LED was confusing the wildlife... what was that a toucan? howler monkey? in the background... they musta thunk it were sunrise ur somethin'... of course you realize now yer mom is going to need a stepladder to get into the runner now...
07-14-2013, 09:37 PM
#7071

Woohoo! I love it too, Mr Z! Lol
WOW! Ruby turned out SWWEEeeeettt! lol! Nice work Mark, man what a transformation! Man, now I have 35" BFG, Sliders, front and rear bumper/winch, dual case, triple stick envy!!! LMAO! Awesome says it all, you deserve it man! Now you get to enjoy the ride! Can't wait to see some wheeling pics!!!
Thanx RW!
HAHAHA! ... ppl can't believe how loud they can be in person. ... literally startling, ... .. the "Peacocks".
07-14-2013, 09:54 PM
#7073
Registered User
Jist watched the videos. Dang Mark. The truck looks great. I can't wait for you to get some scratches on it lol jk. I TOLD YA THEY DO CLEAN WORK! They did a great job man. I can't wait to see it in action dude. Btw I like uour front driveshaft. Thats sick man. 10" spline vs my 4". Dang. Thats nice. Don't let this get to your head but you officially have a better truck then Ruben now. Maybe not as much articulation as Chris. But yours can definitely handle a lot more. Hahahaha! Awesome man. Also nice job on the lights. I like it.
Last edited by Redeth005; 07-14-2013 at 09:58 PM.
07-14-2013, 10:04 PM
#7074
Registered User
Soooooo when is the official profile pic change gonna take place? You gonna leave it for ifs old time sake
Anyhoo I'm excited for ya, I can't imagine the kid like stomach feeling you get walking out and seeing such a wonderful piece of machinery
Anyhoo I'm excited for ya, I can't imagine the kid like stomach feeling you get walking out and seeing such a wonderful piece of machinery
07-14-2013, 10:07 PM
#7075
hehe... It is a great feeling...... I worked hard on it for years. ....and this time it just seemed inevitable the way everything was going that it would wind up somewhere... it did and I'm grateful. Profile pic? yeah I guess I should do that eventually... I got some good new pics...Jist watched the videos. Dang Mark. The truck looks great. I can't wait for you to get some scratches on it lol jk. I TOLD YA THEY DO CLEAN WORK! They did a great job man. I can't wait to see it in action dude. Btw I like uour front driveshaft. Thats sick man. 10" spline vs my 4". Dang. Thats nice. Don't let this get to your head but you officially have a better truck then Ruben now. Maybe not as much articulation as Chris. But yours can definitely handle a lot more. Hahahaha! Awesome man. Also nice job on the lights. I like it.
More vids and pics and STUFF next post!
haha
Last edited by ChefYota4x4; 07-14-2013 at 10:10 PM.
07-14-2013, 11:19 PM
#7076
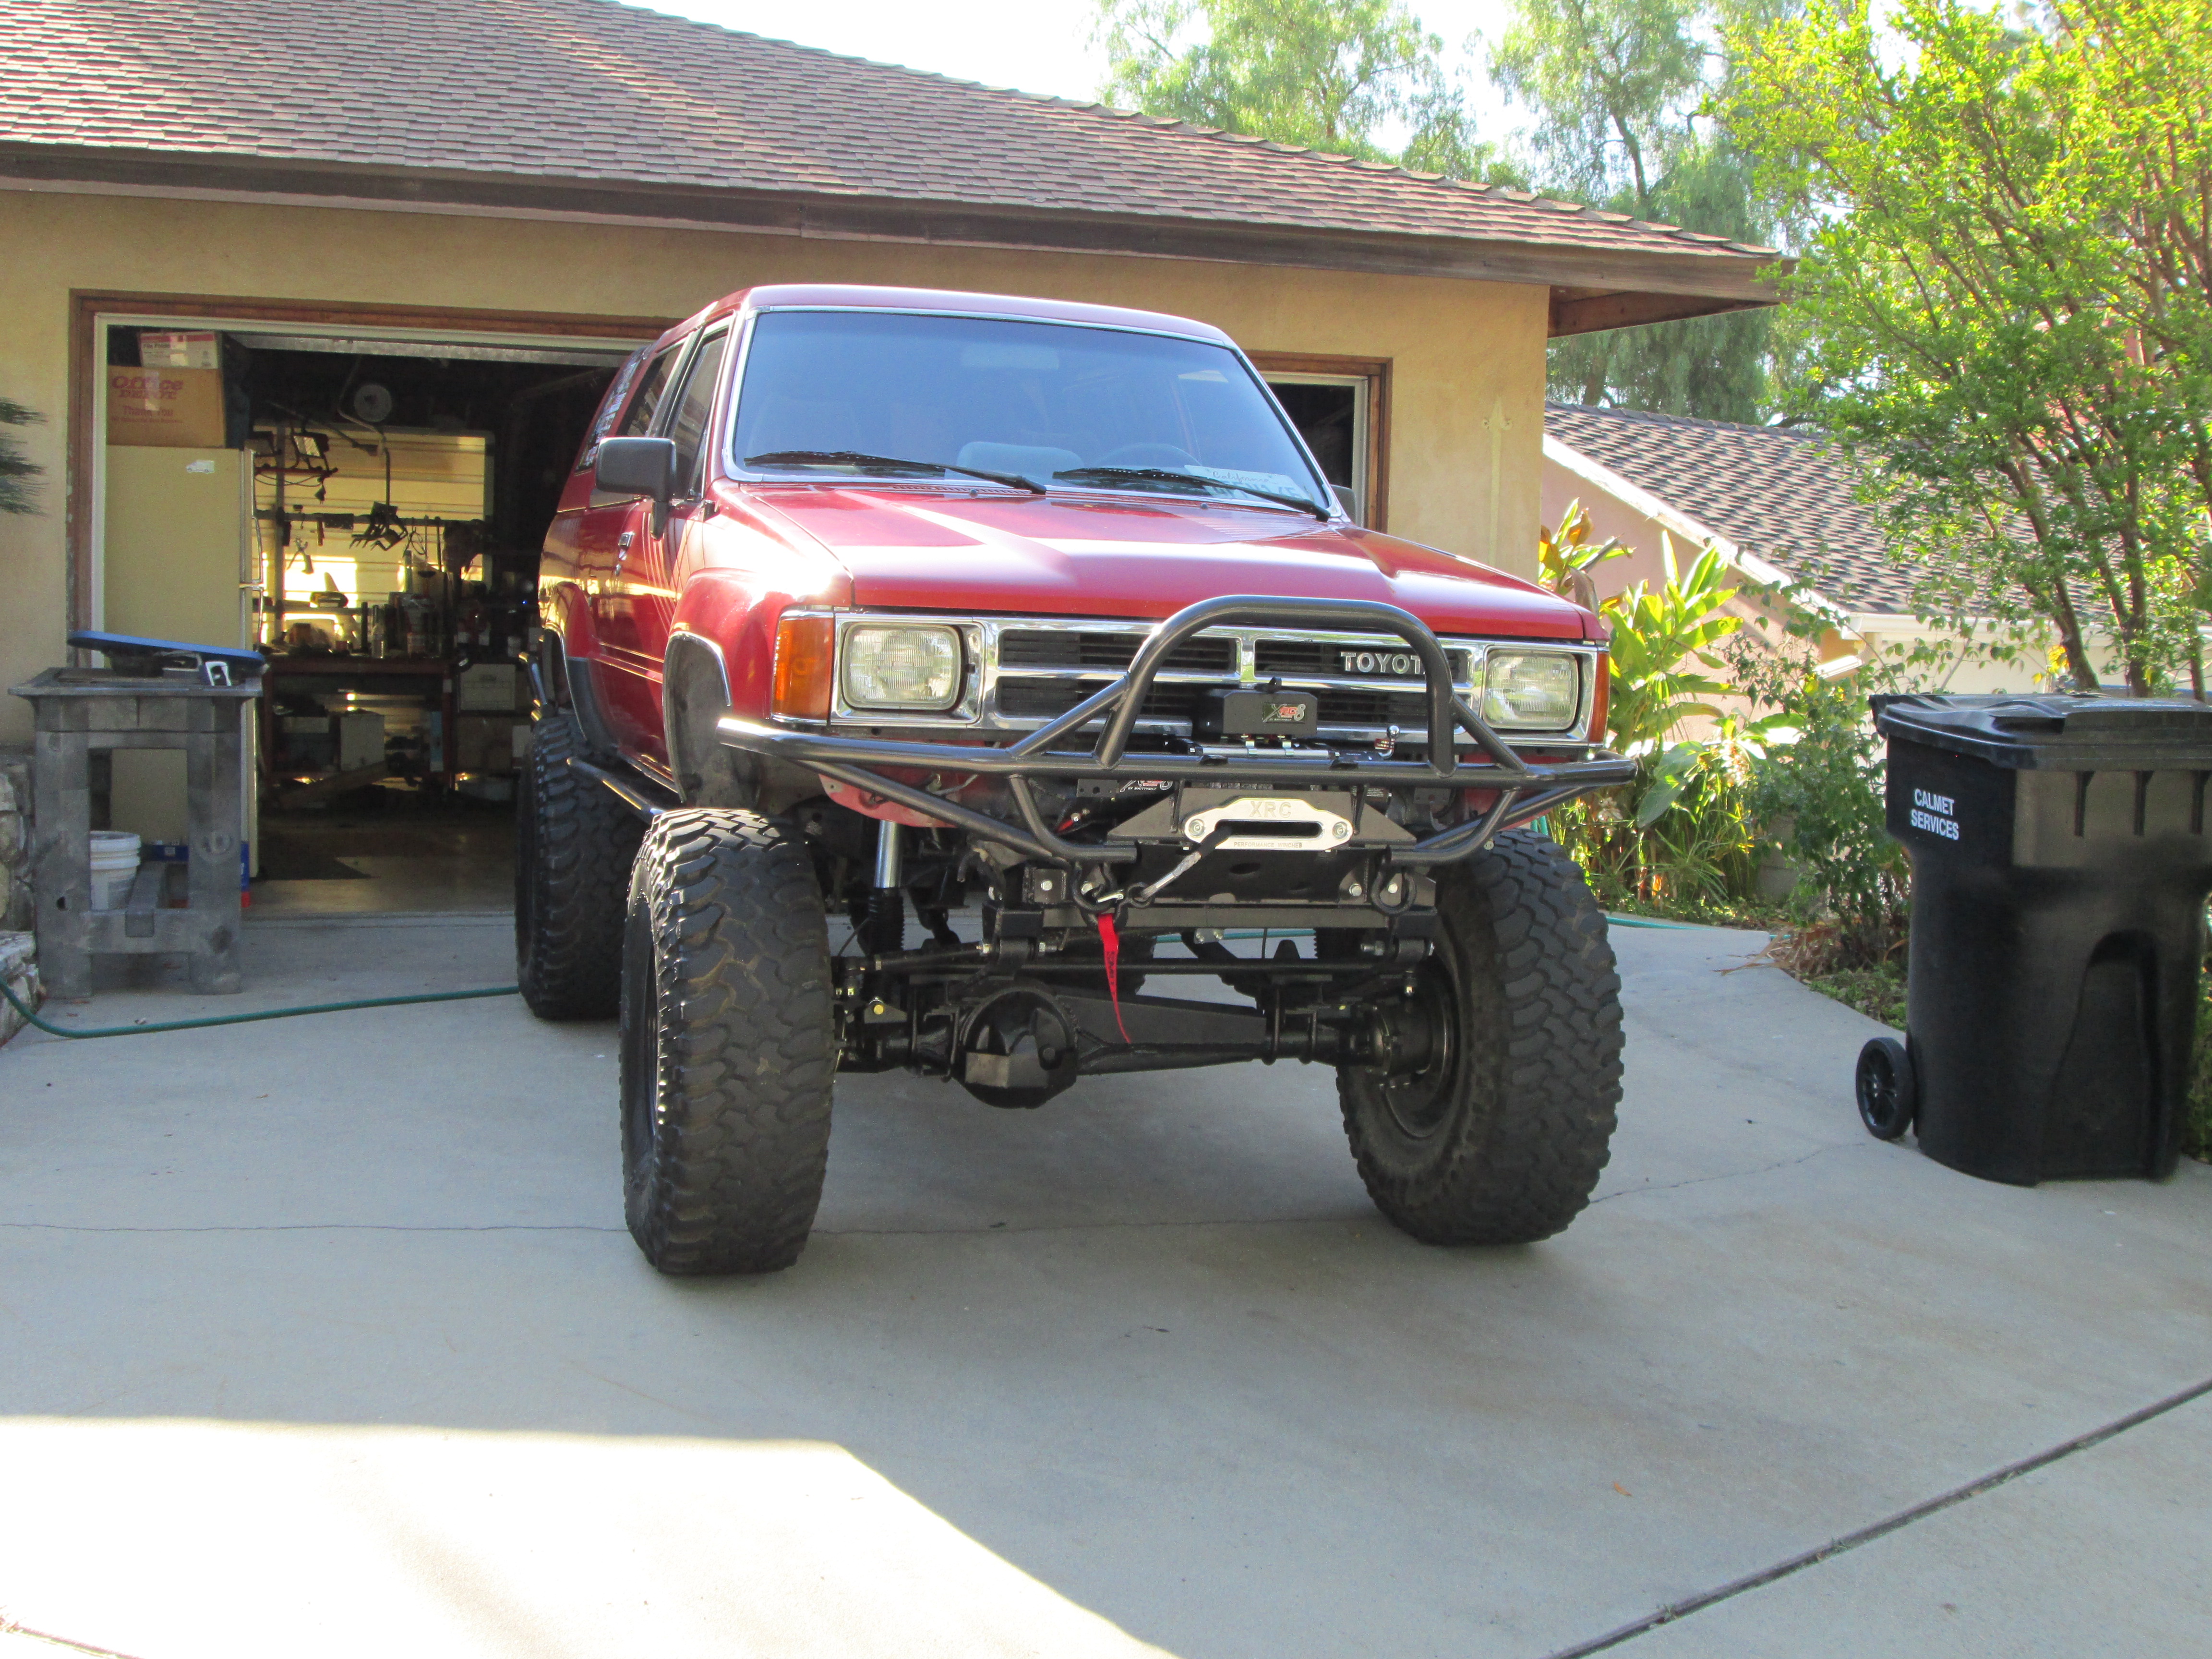
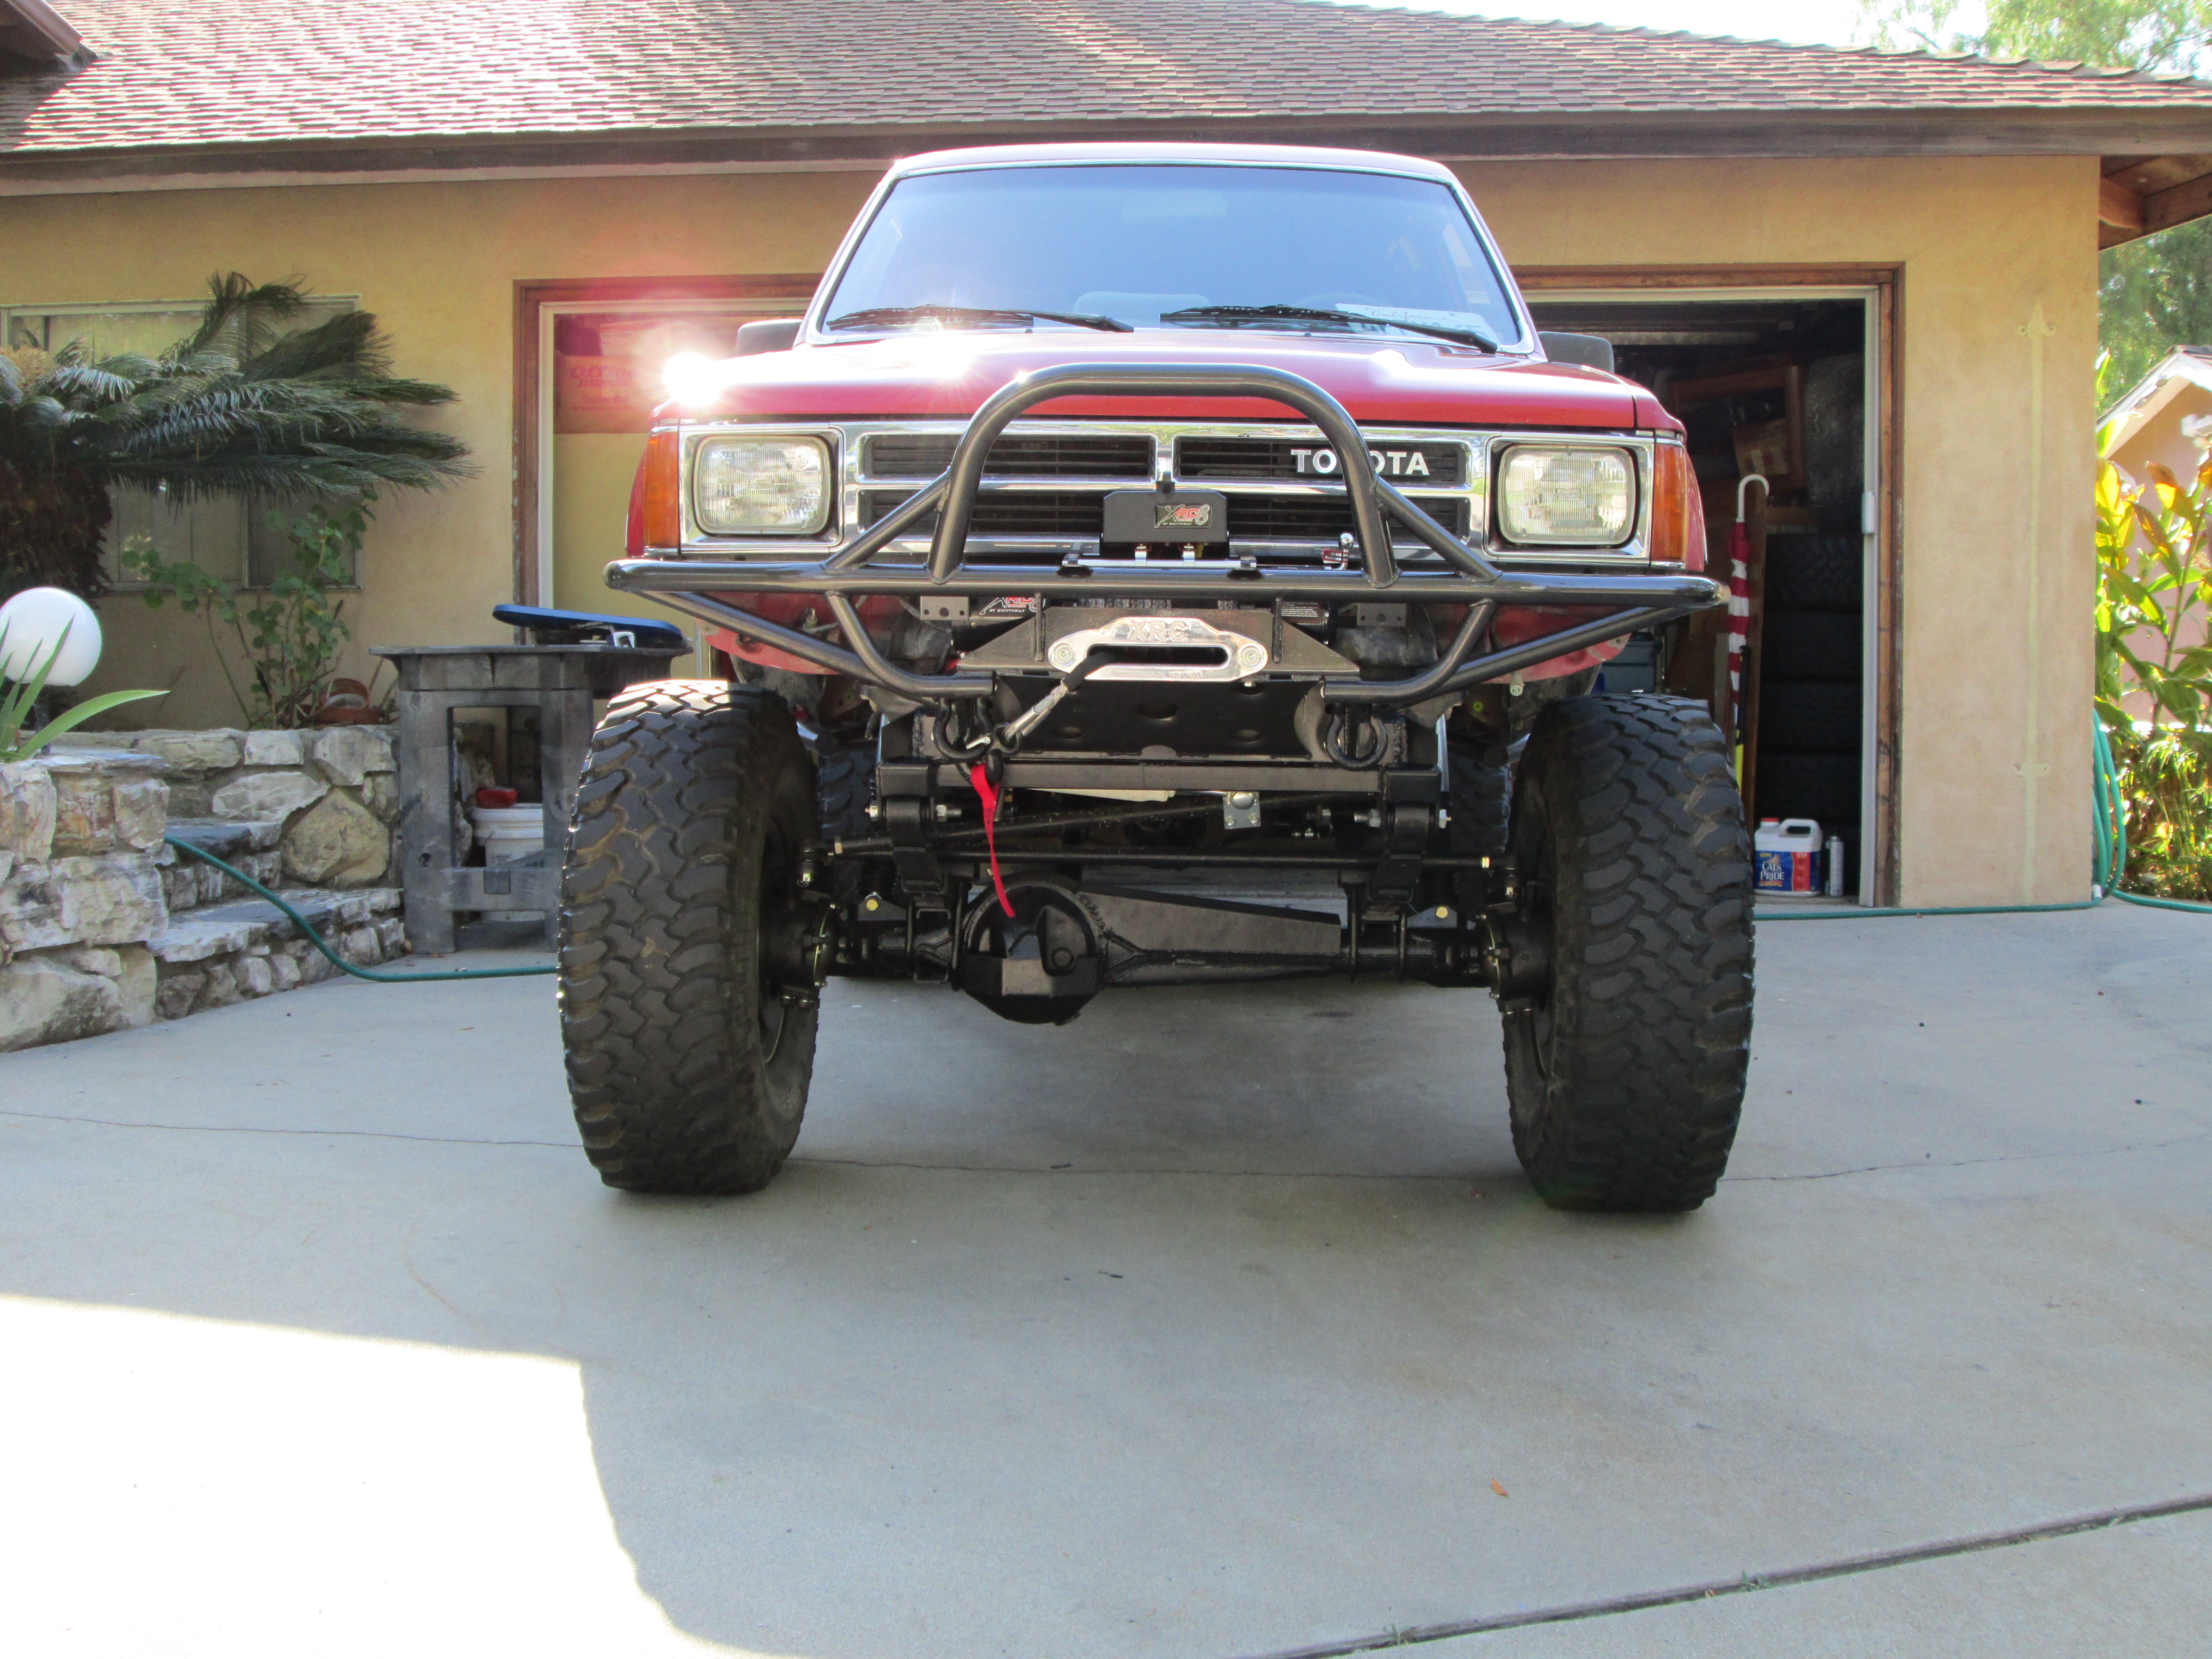
Well,.... got lots more done today. .... important stuff for "road legal purposes"! Lol ....
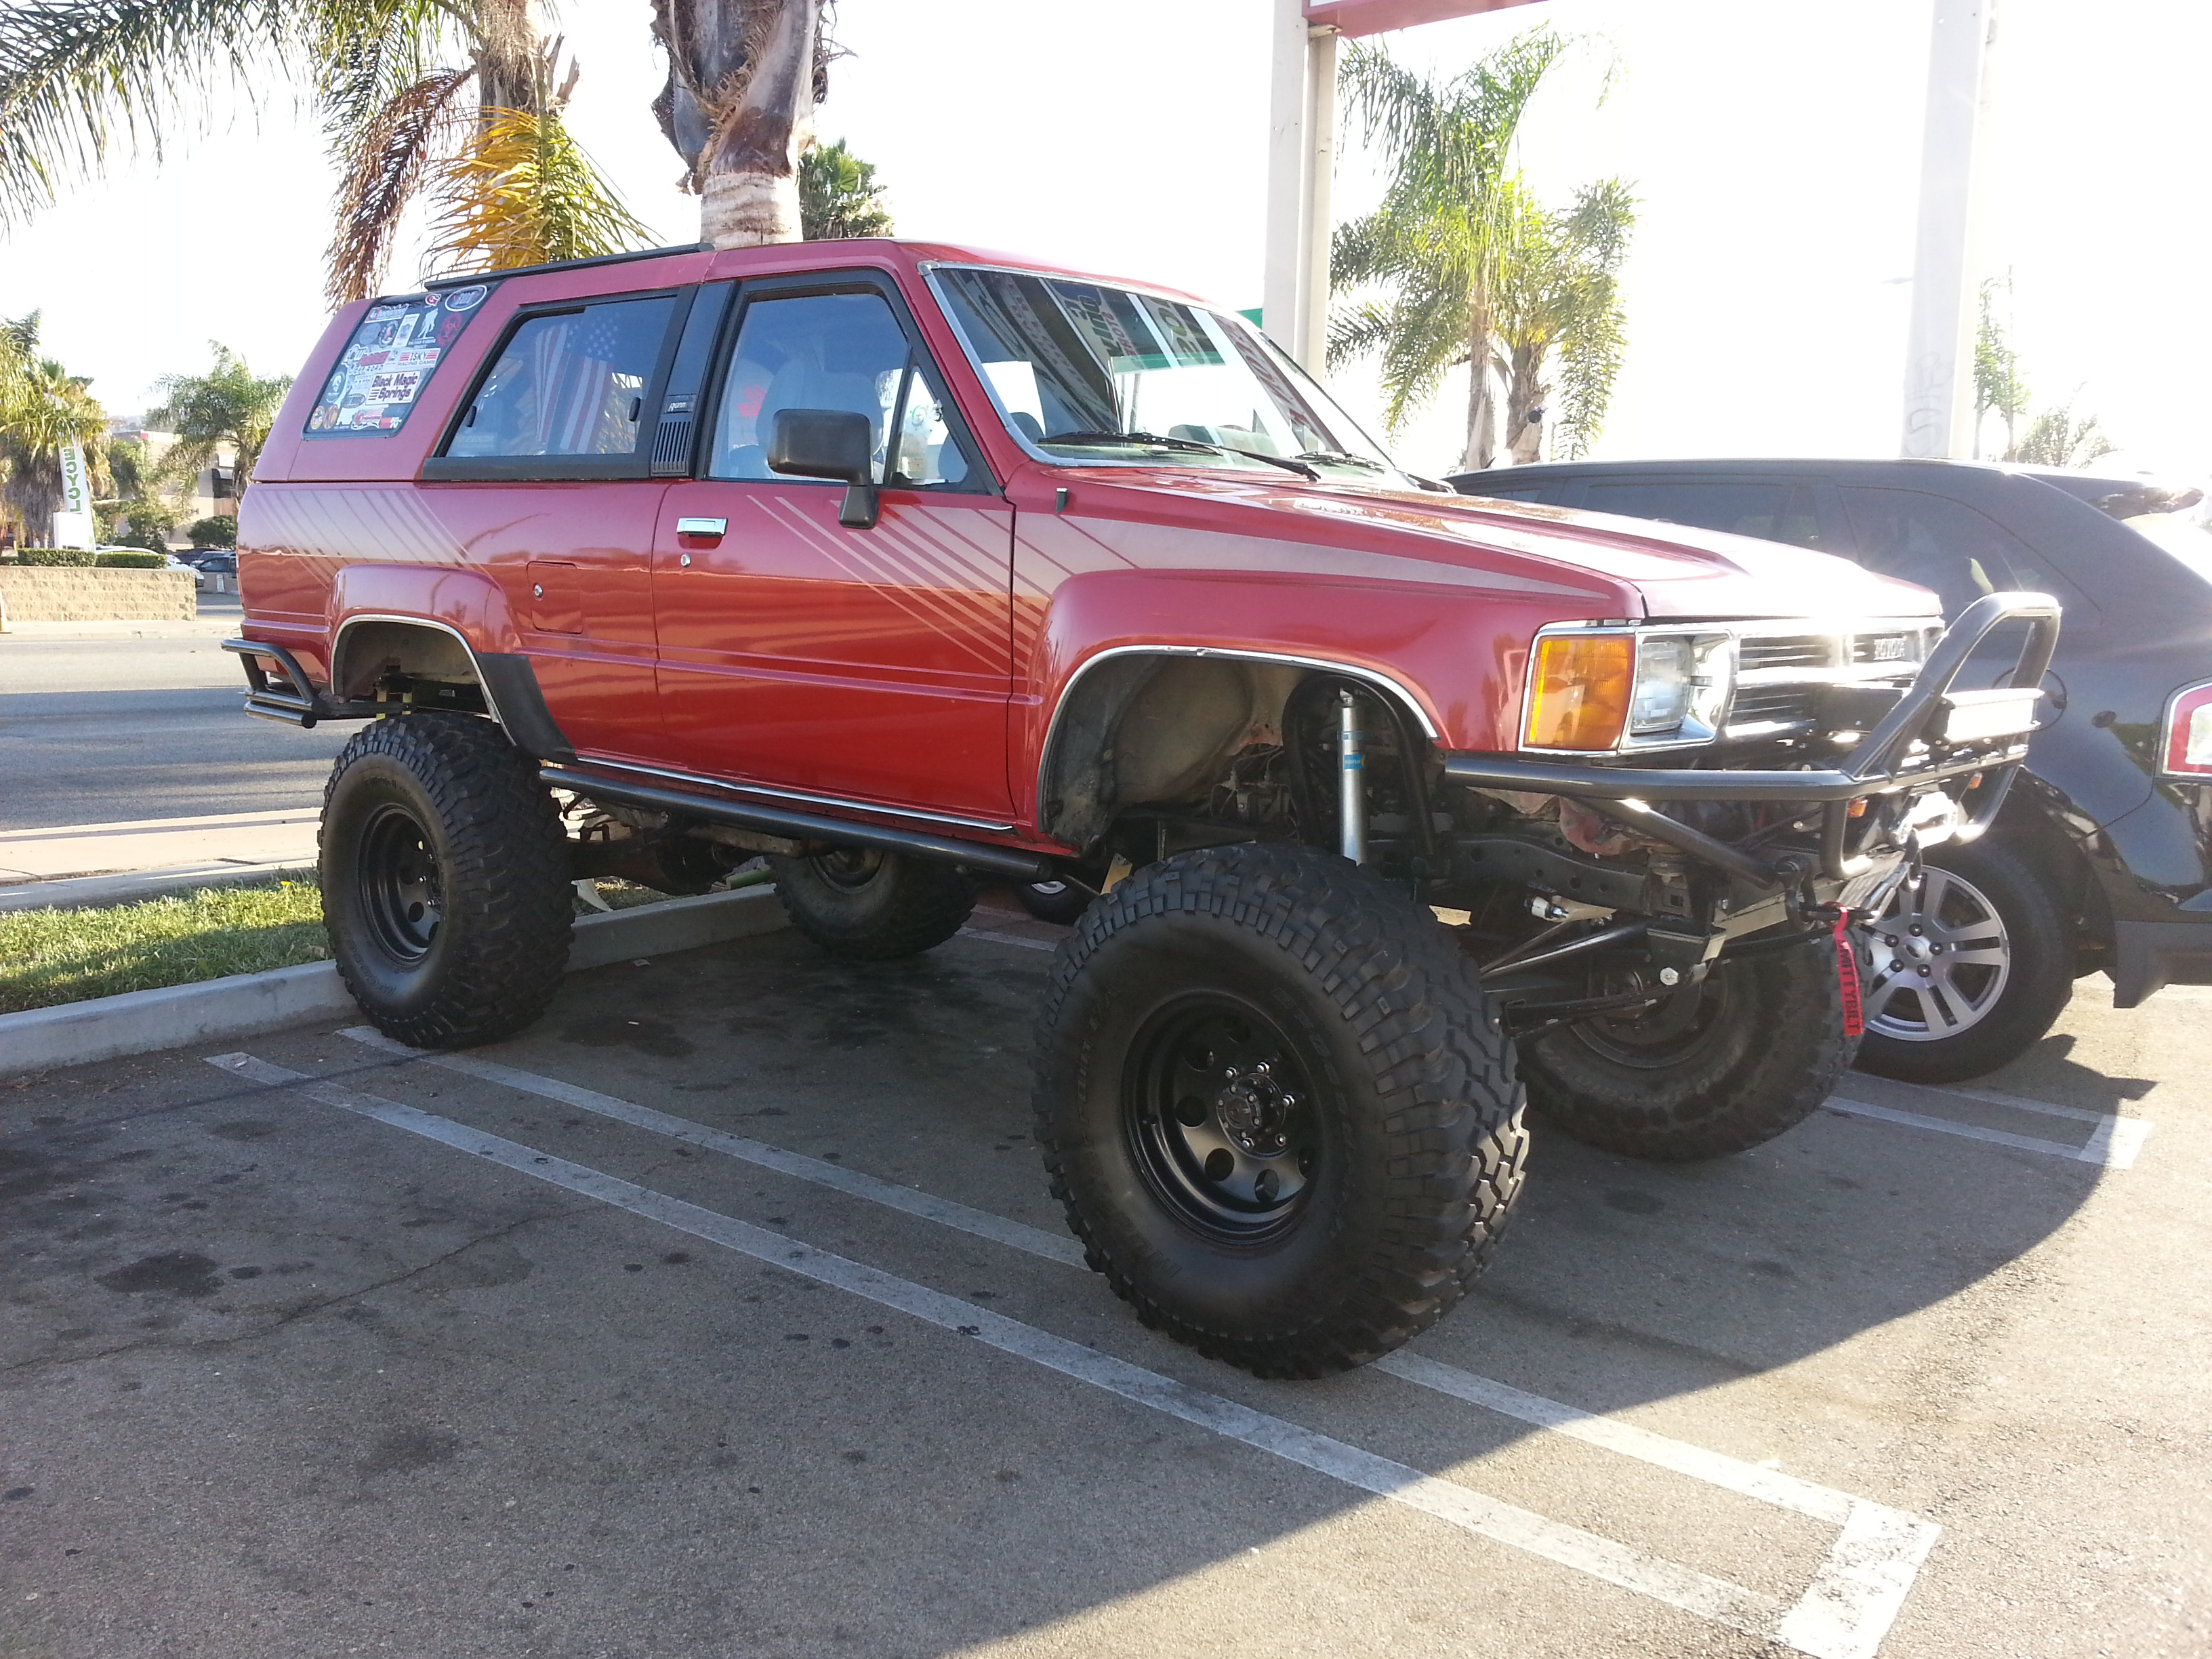
Installed the Trail Gear LED turn signals with resistor, front license plate and got a little bit laid out in my mind for the roof rack.... I'll share that latter part later....
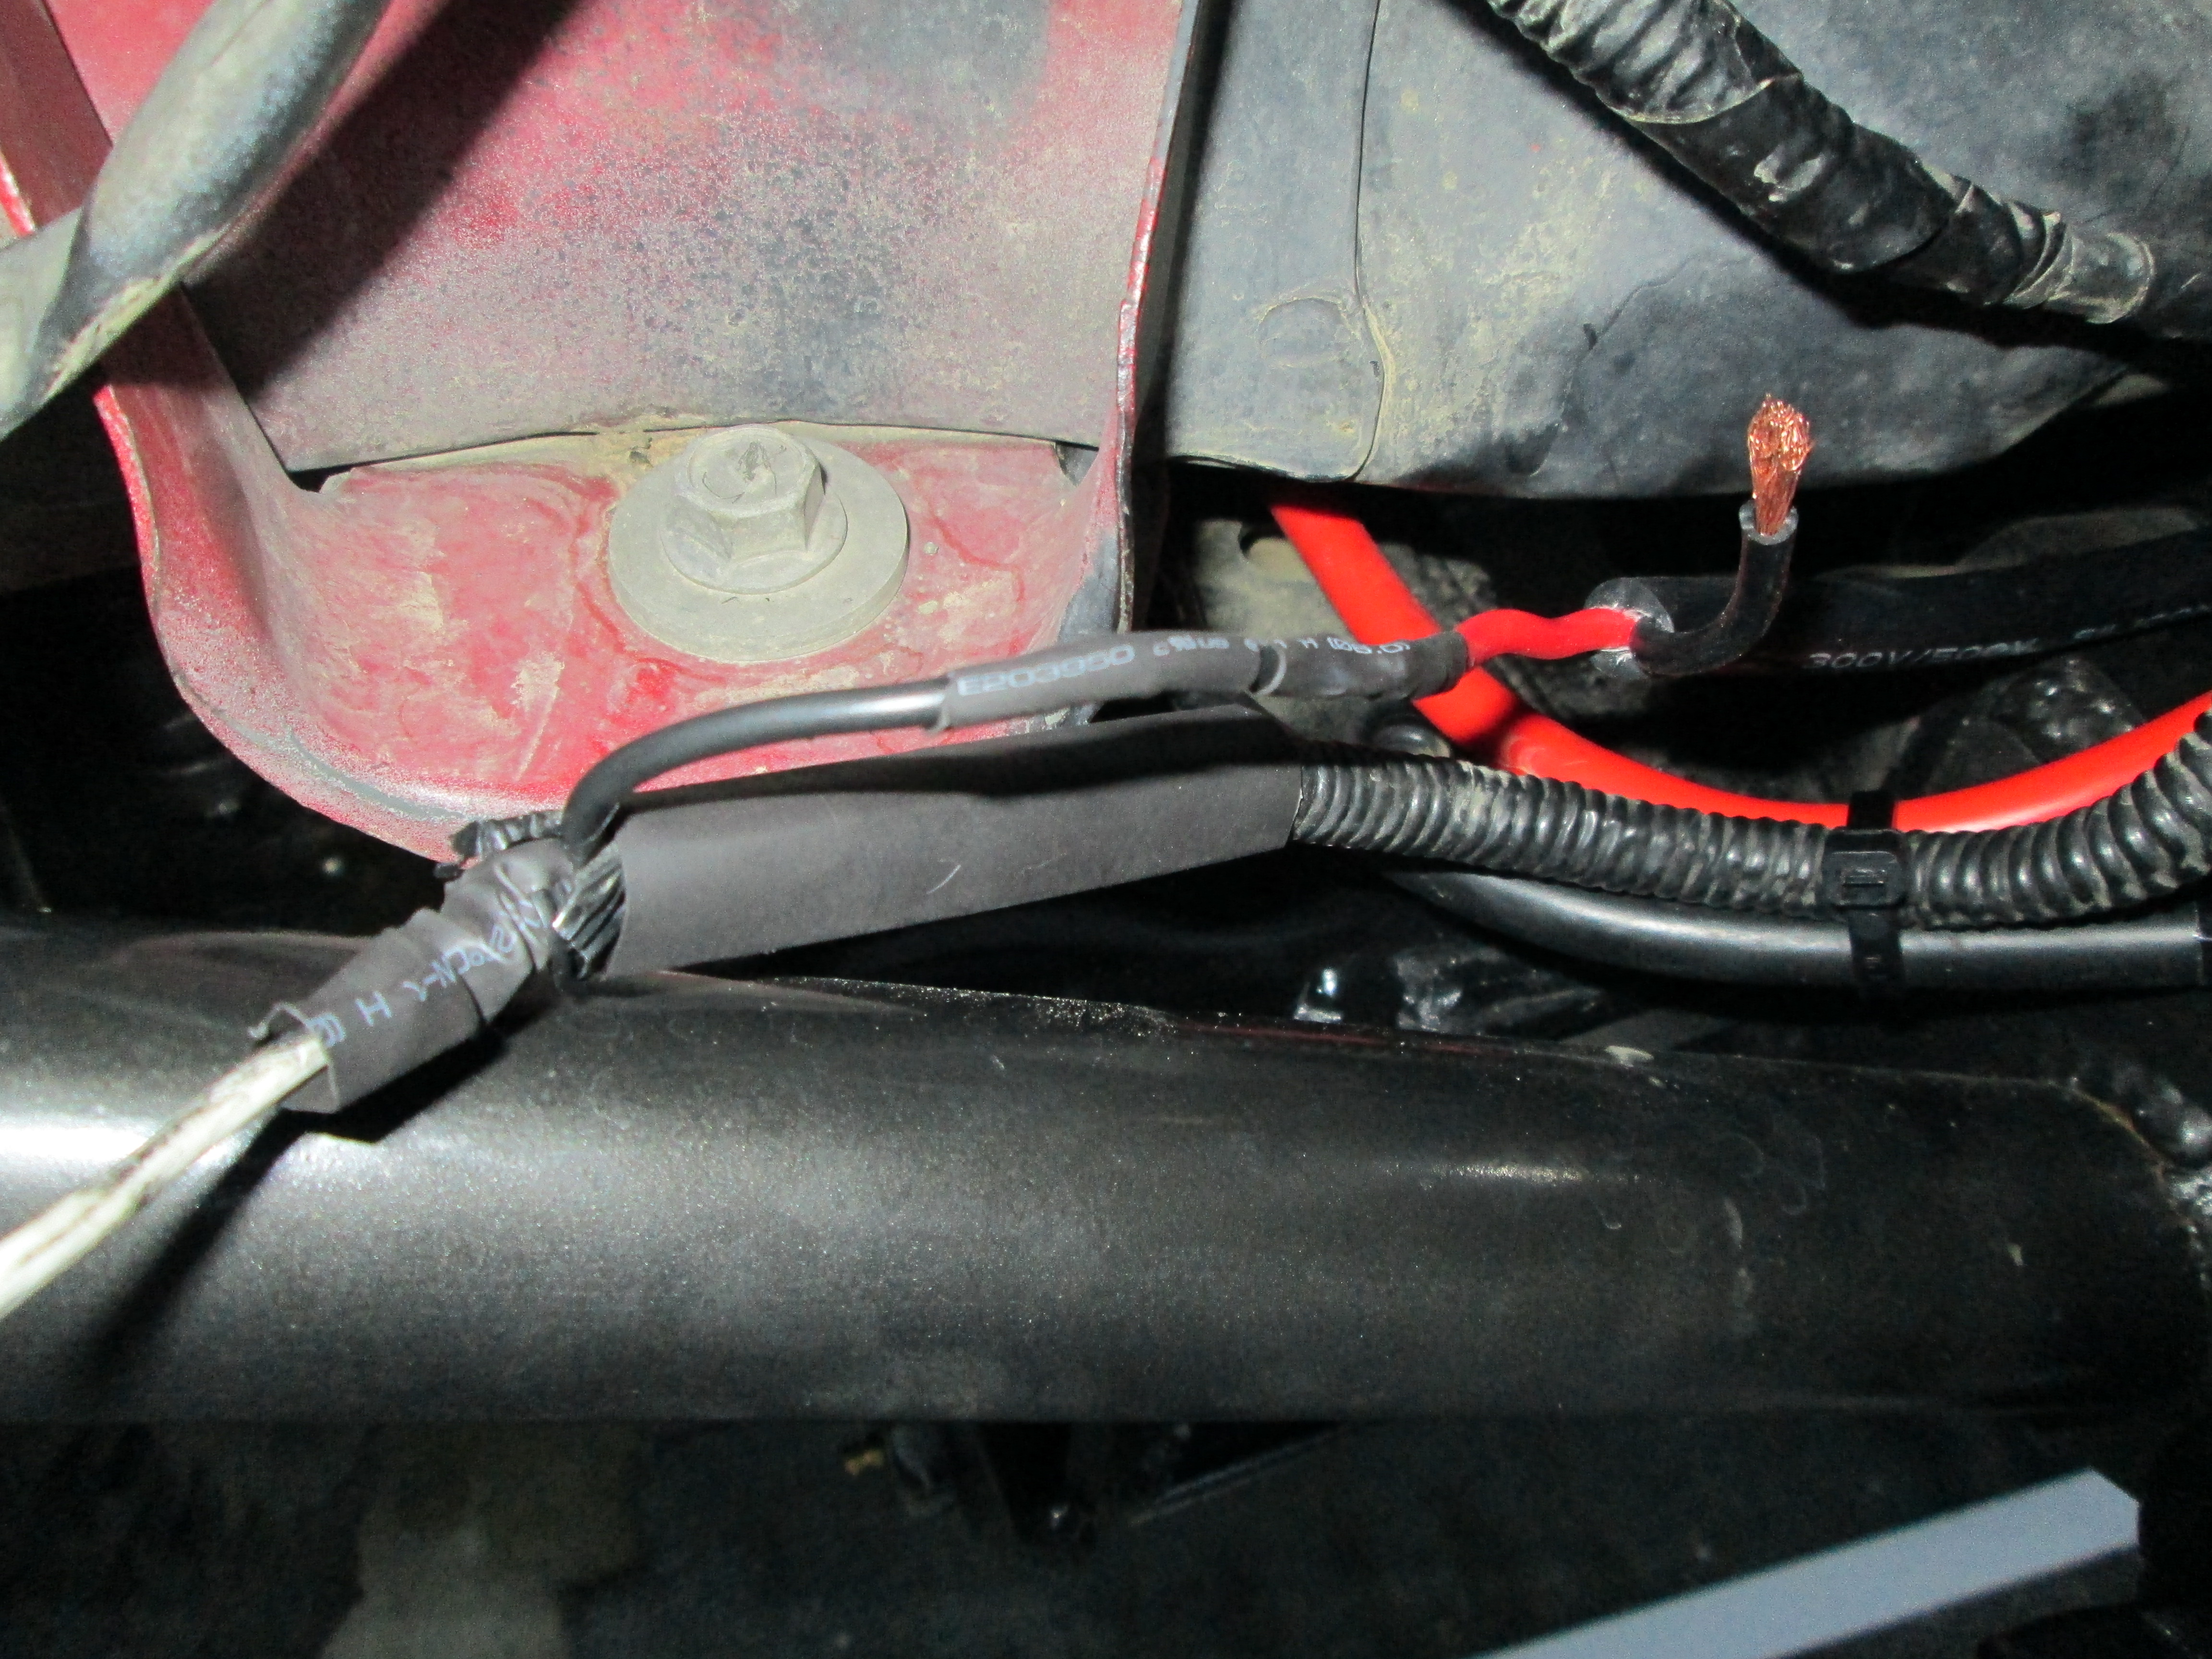
I heat shrunk each wire right up to the light because they seemed to be a little bit raw in that area... I'm fairly sure its just solder splatter or something like that... but they felt a little rough right at the end... so after heat shrinking each one individually I then did it around both tight to the end so that water can still run down the Bible that Trail Gear notched into the back so that water won't collect...
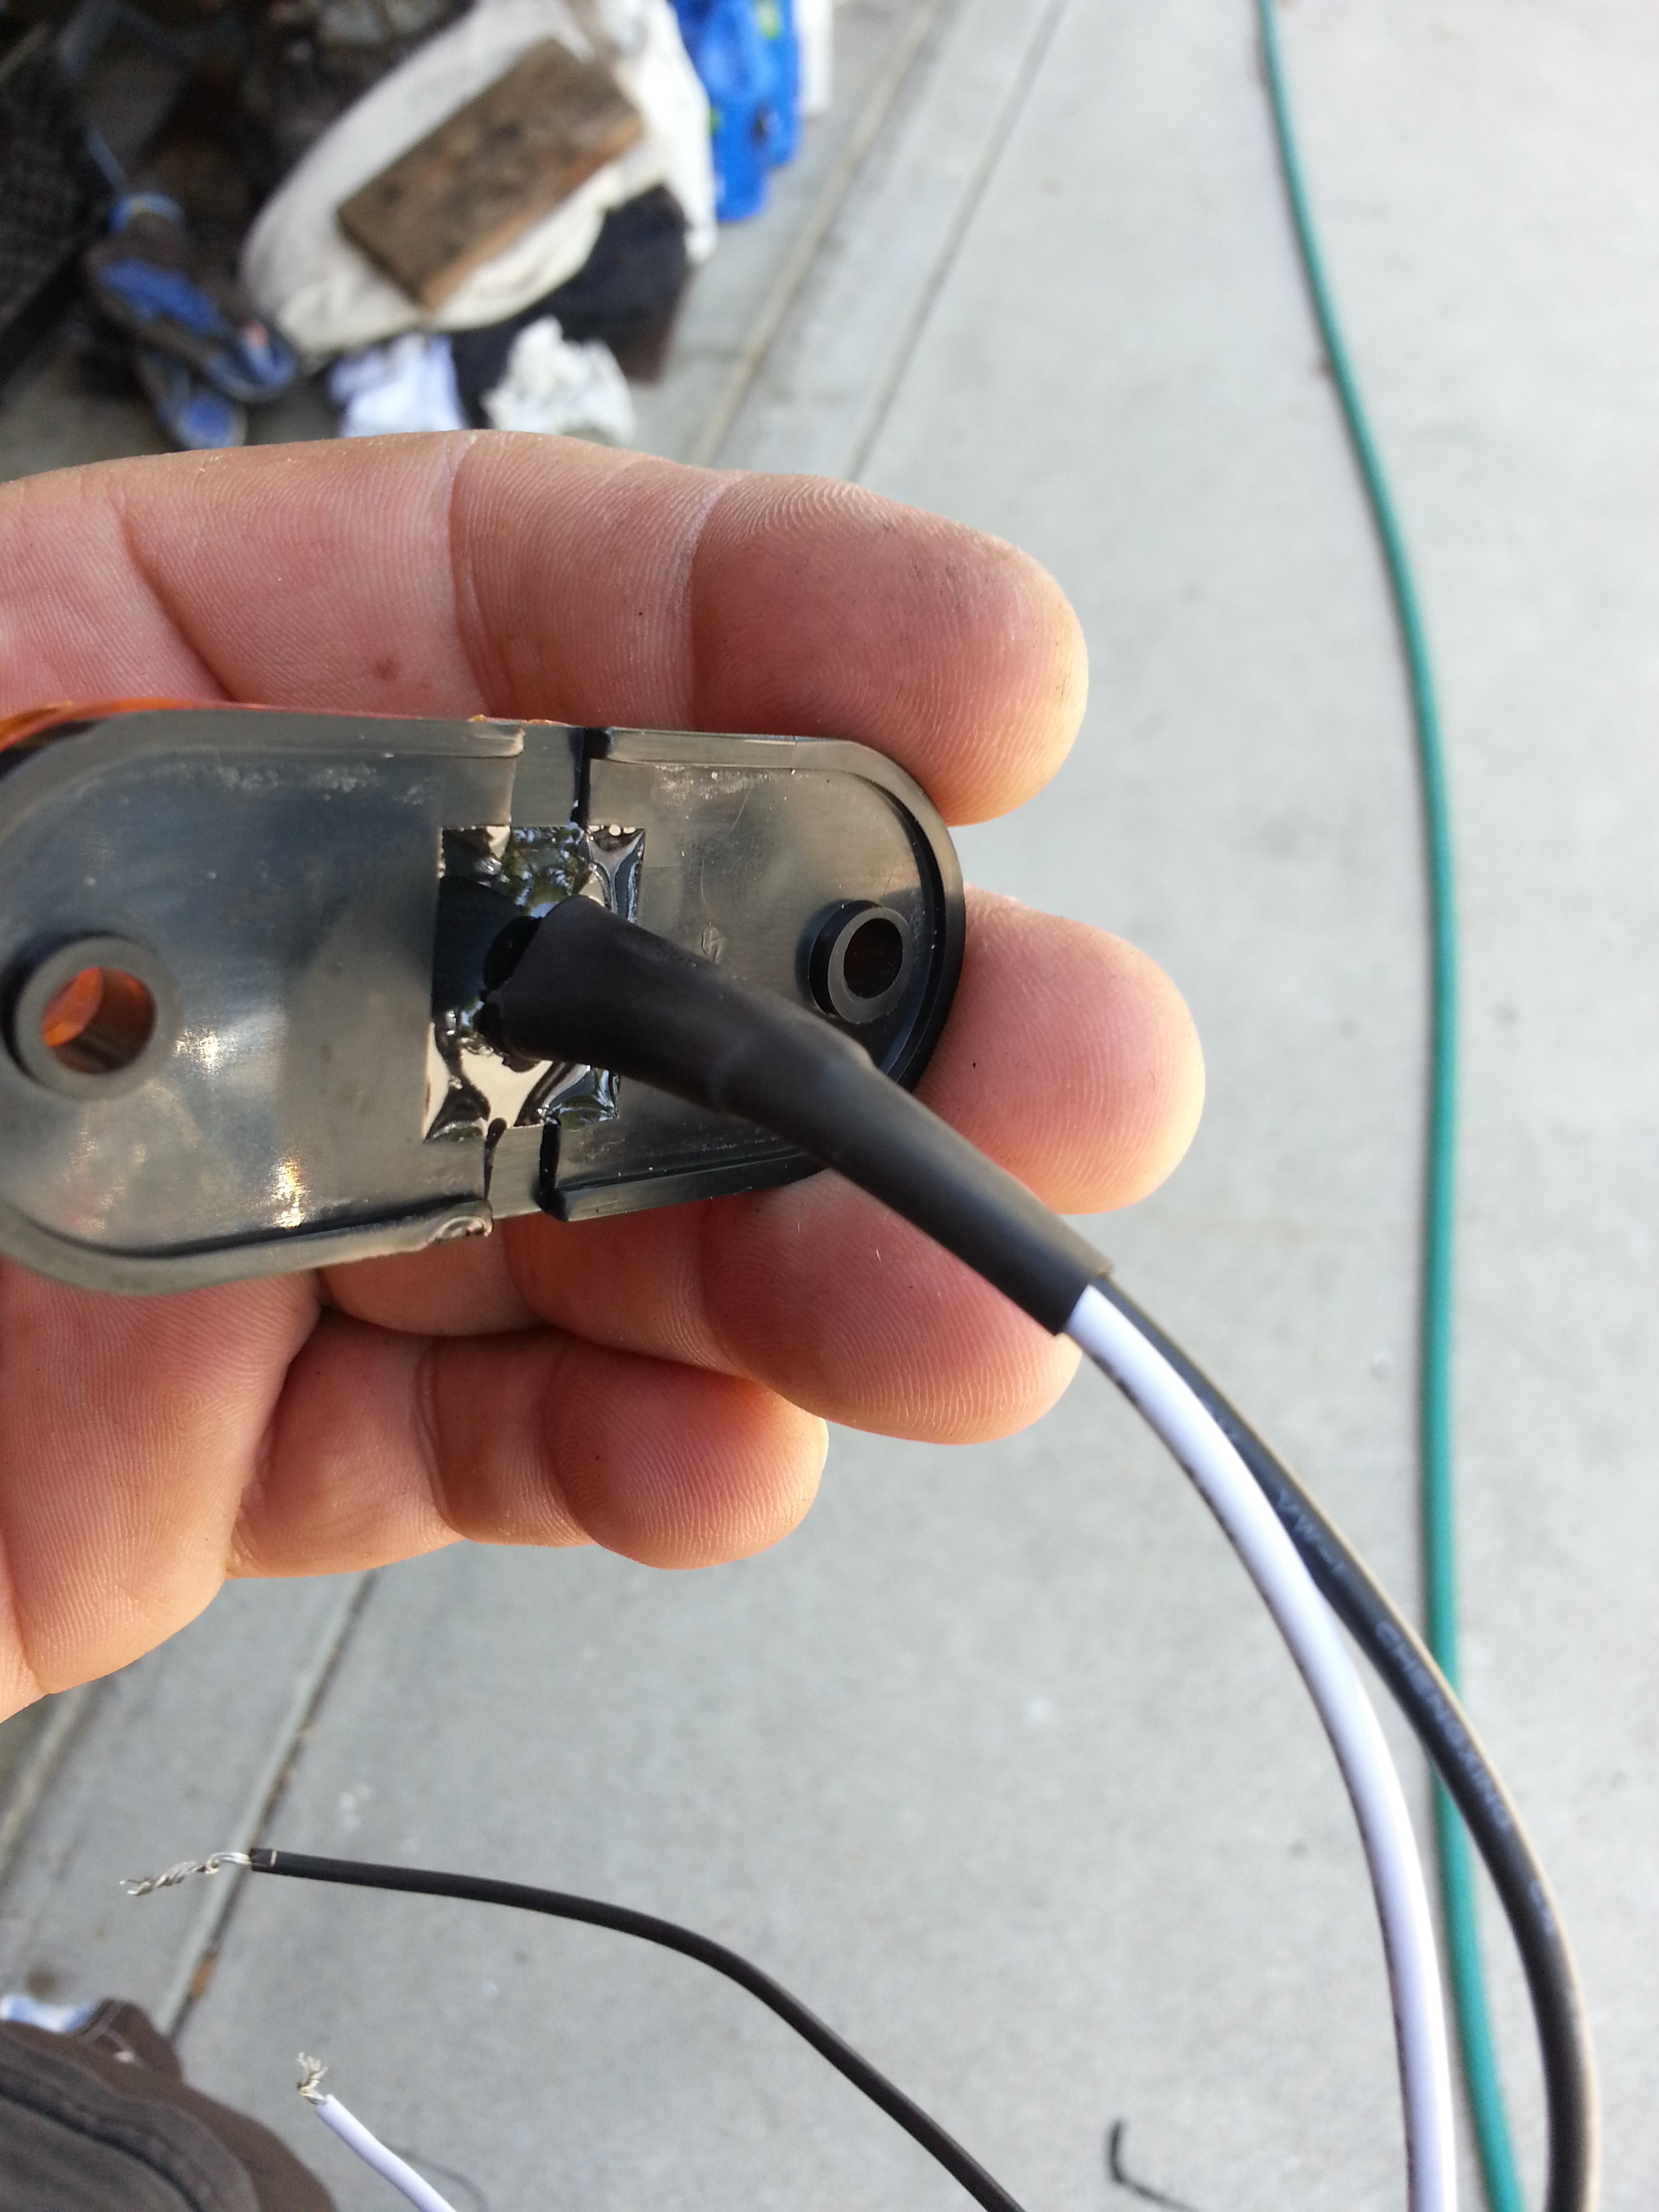
By then heat shrunk together the entire length of wire that they provided.....
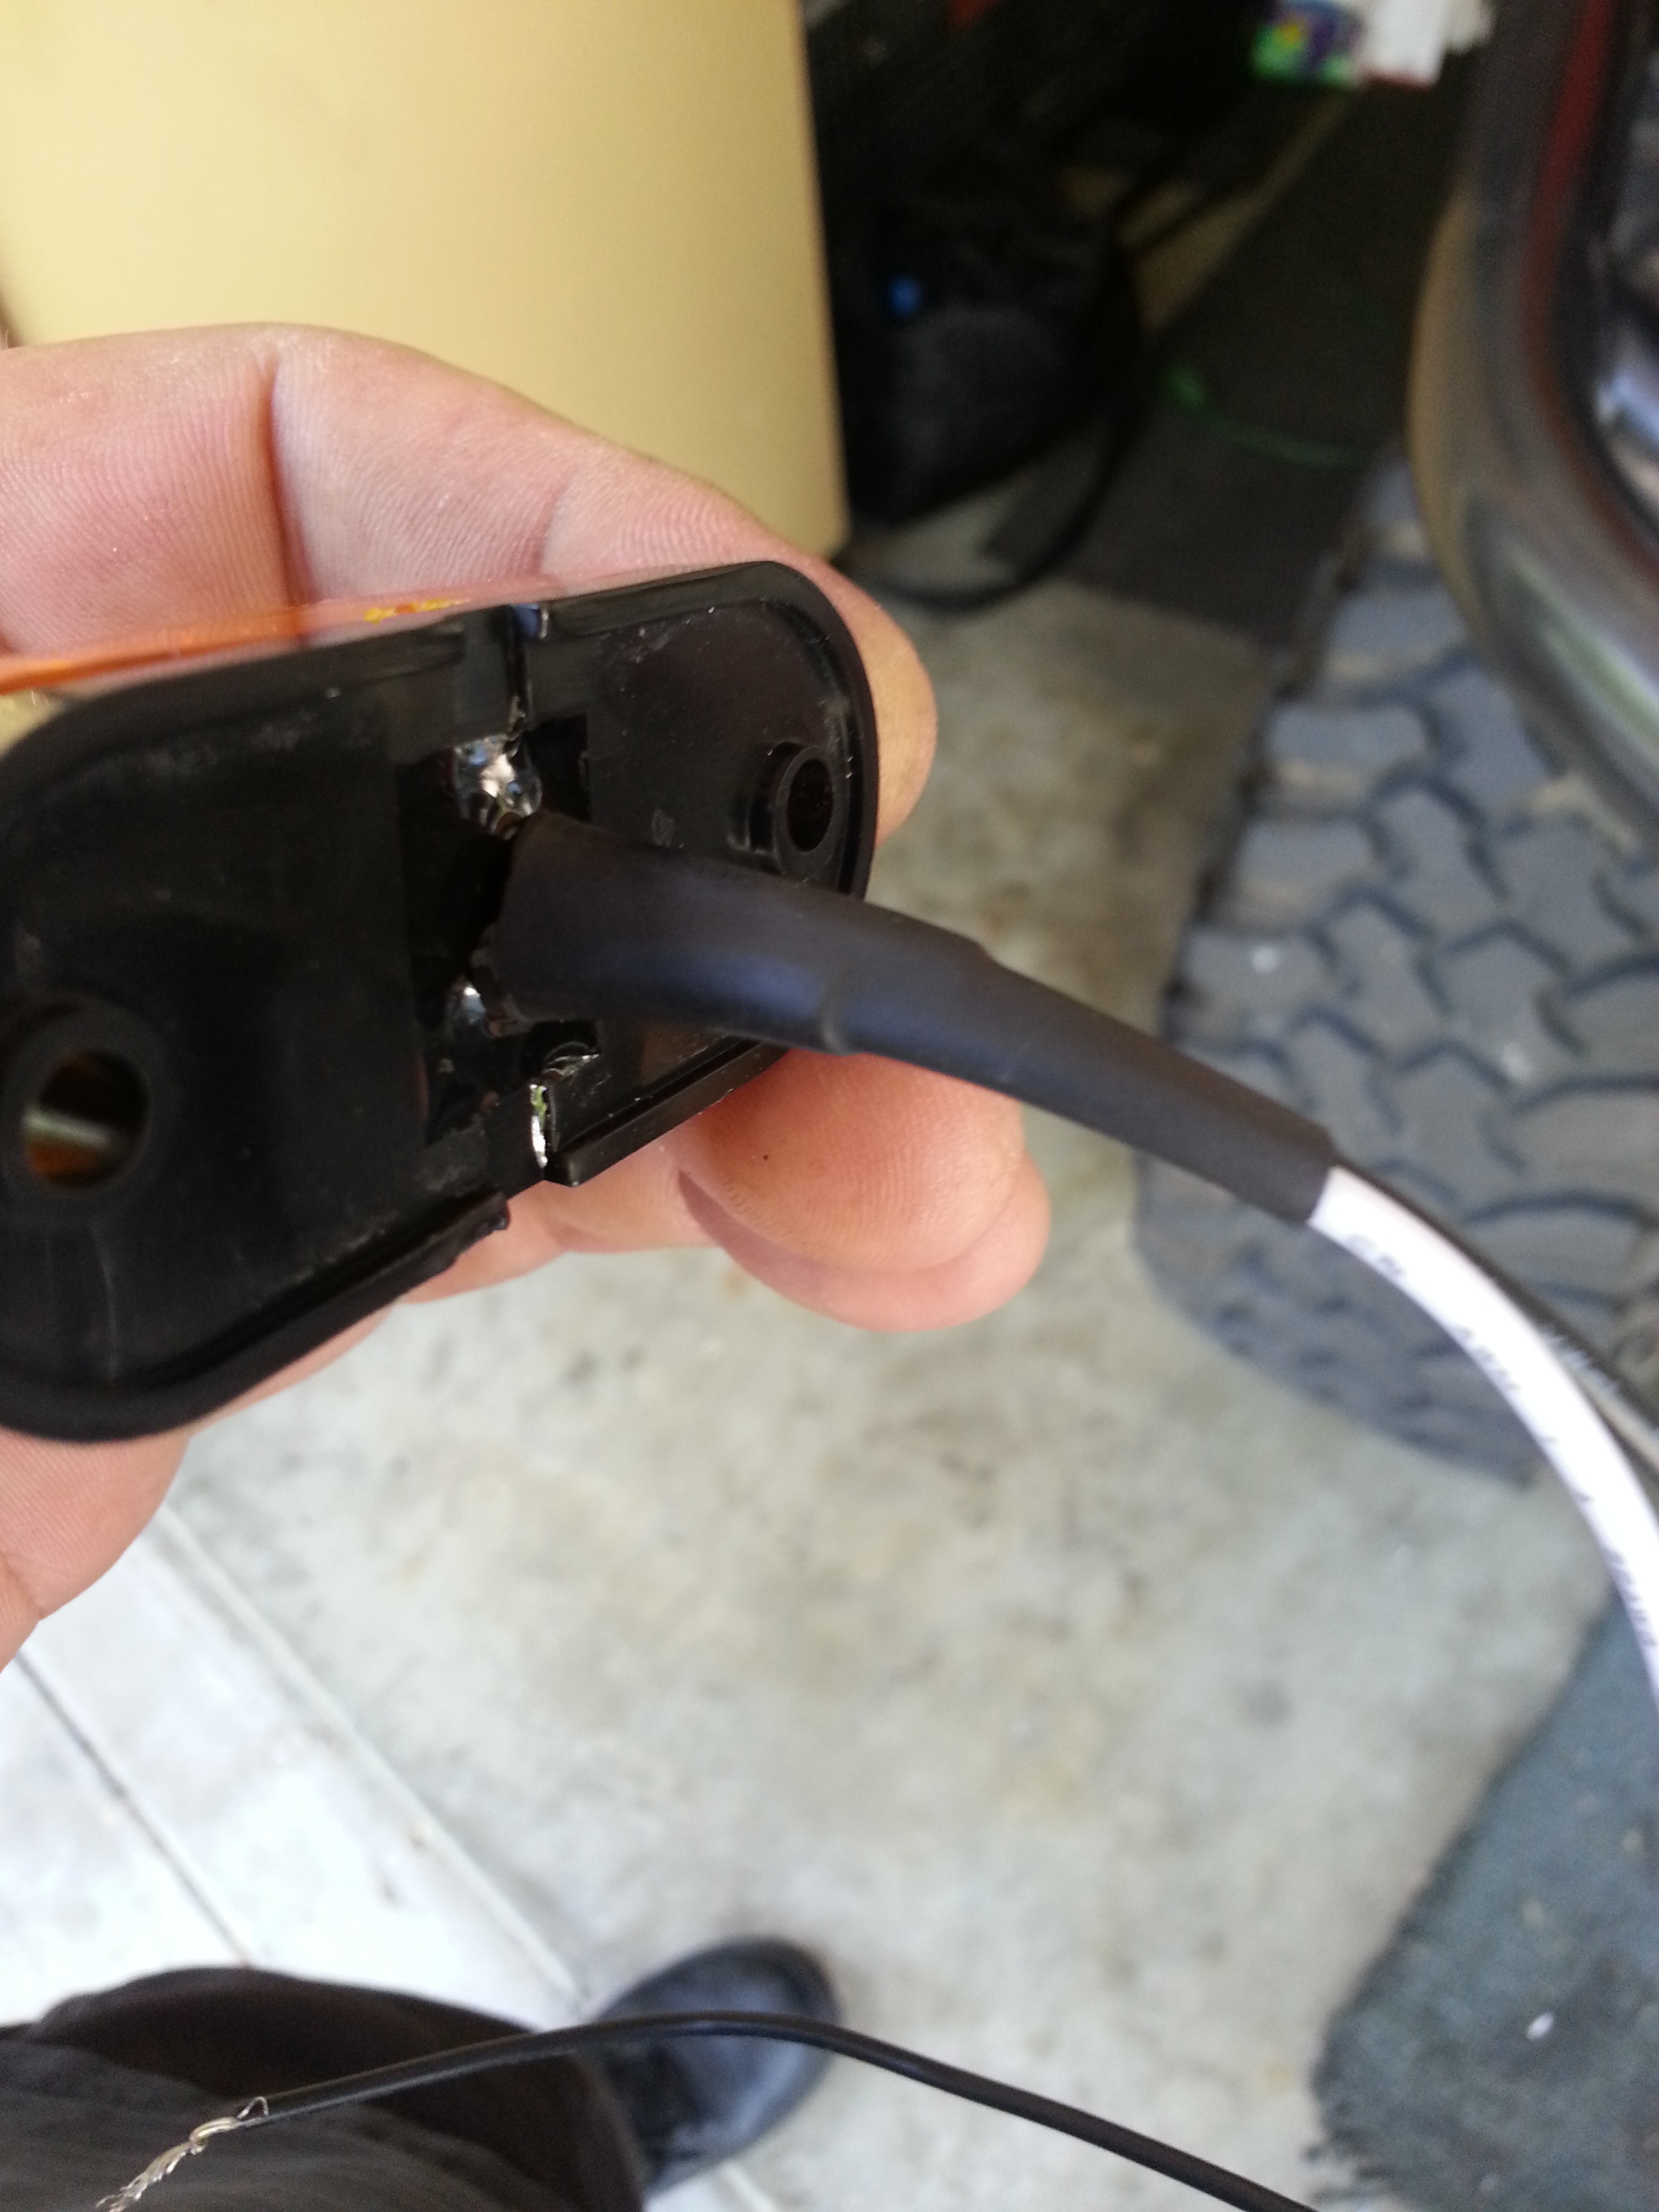
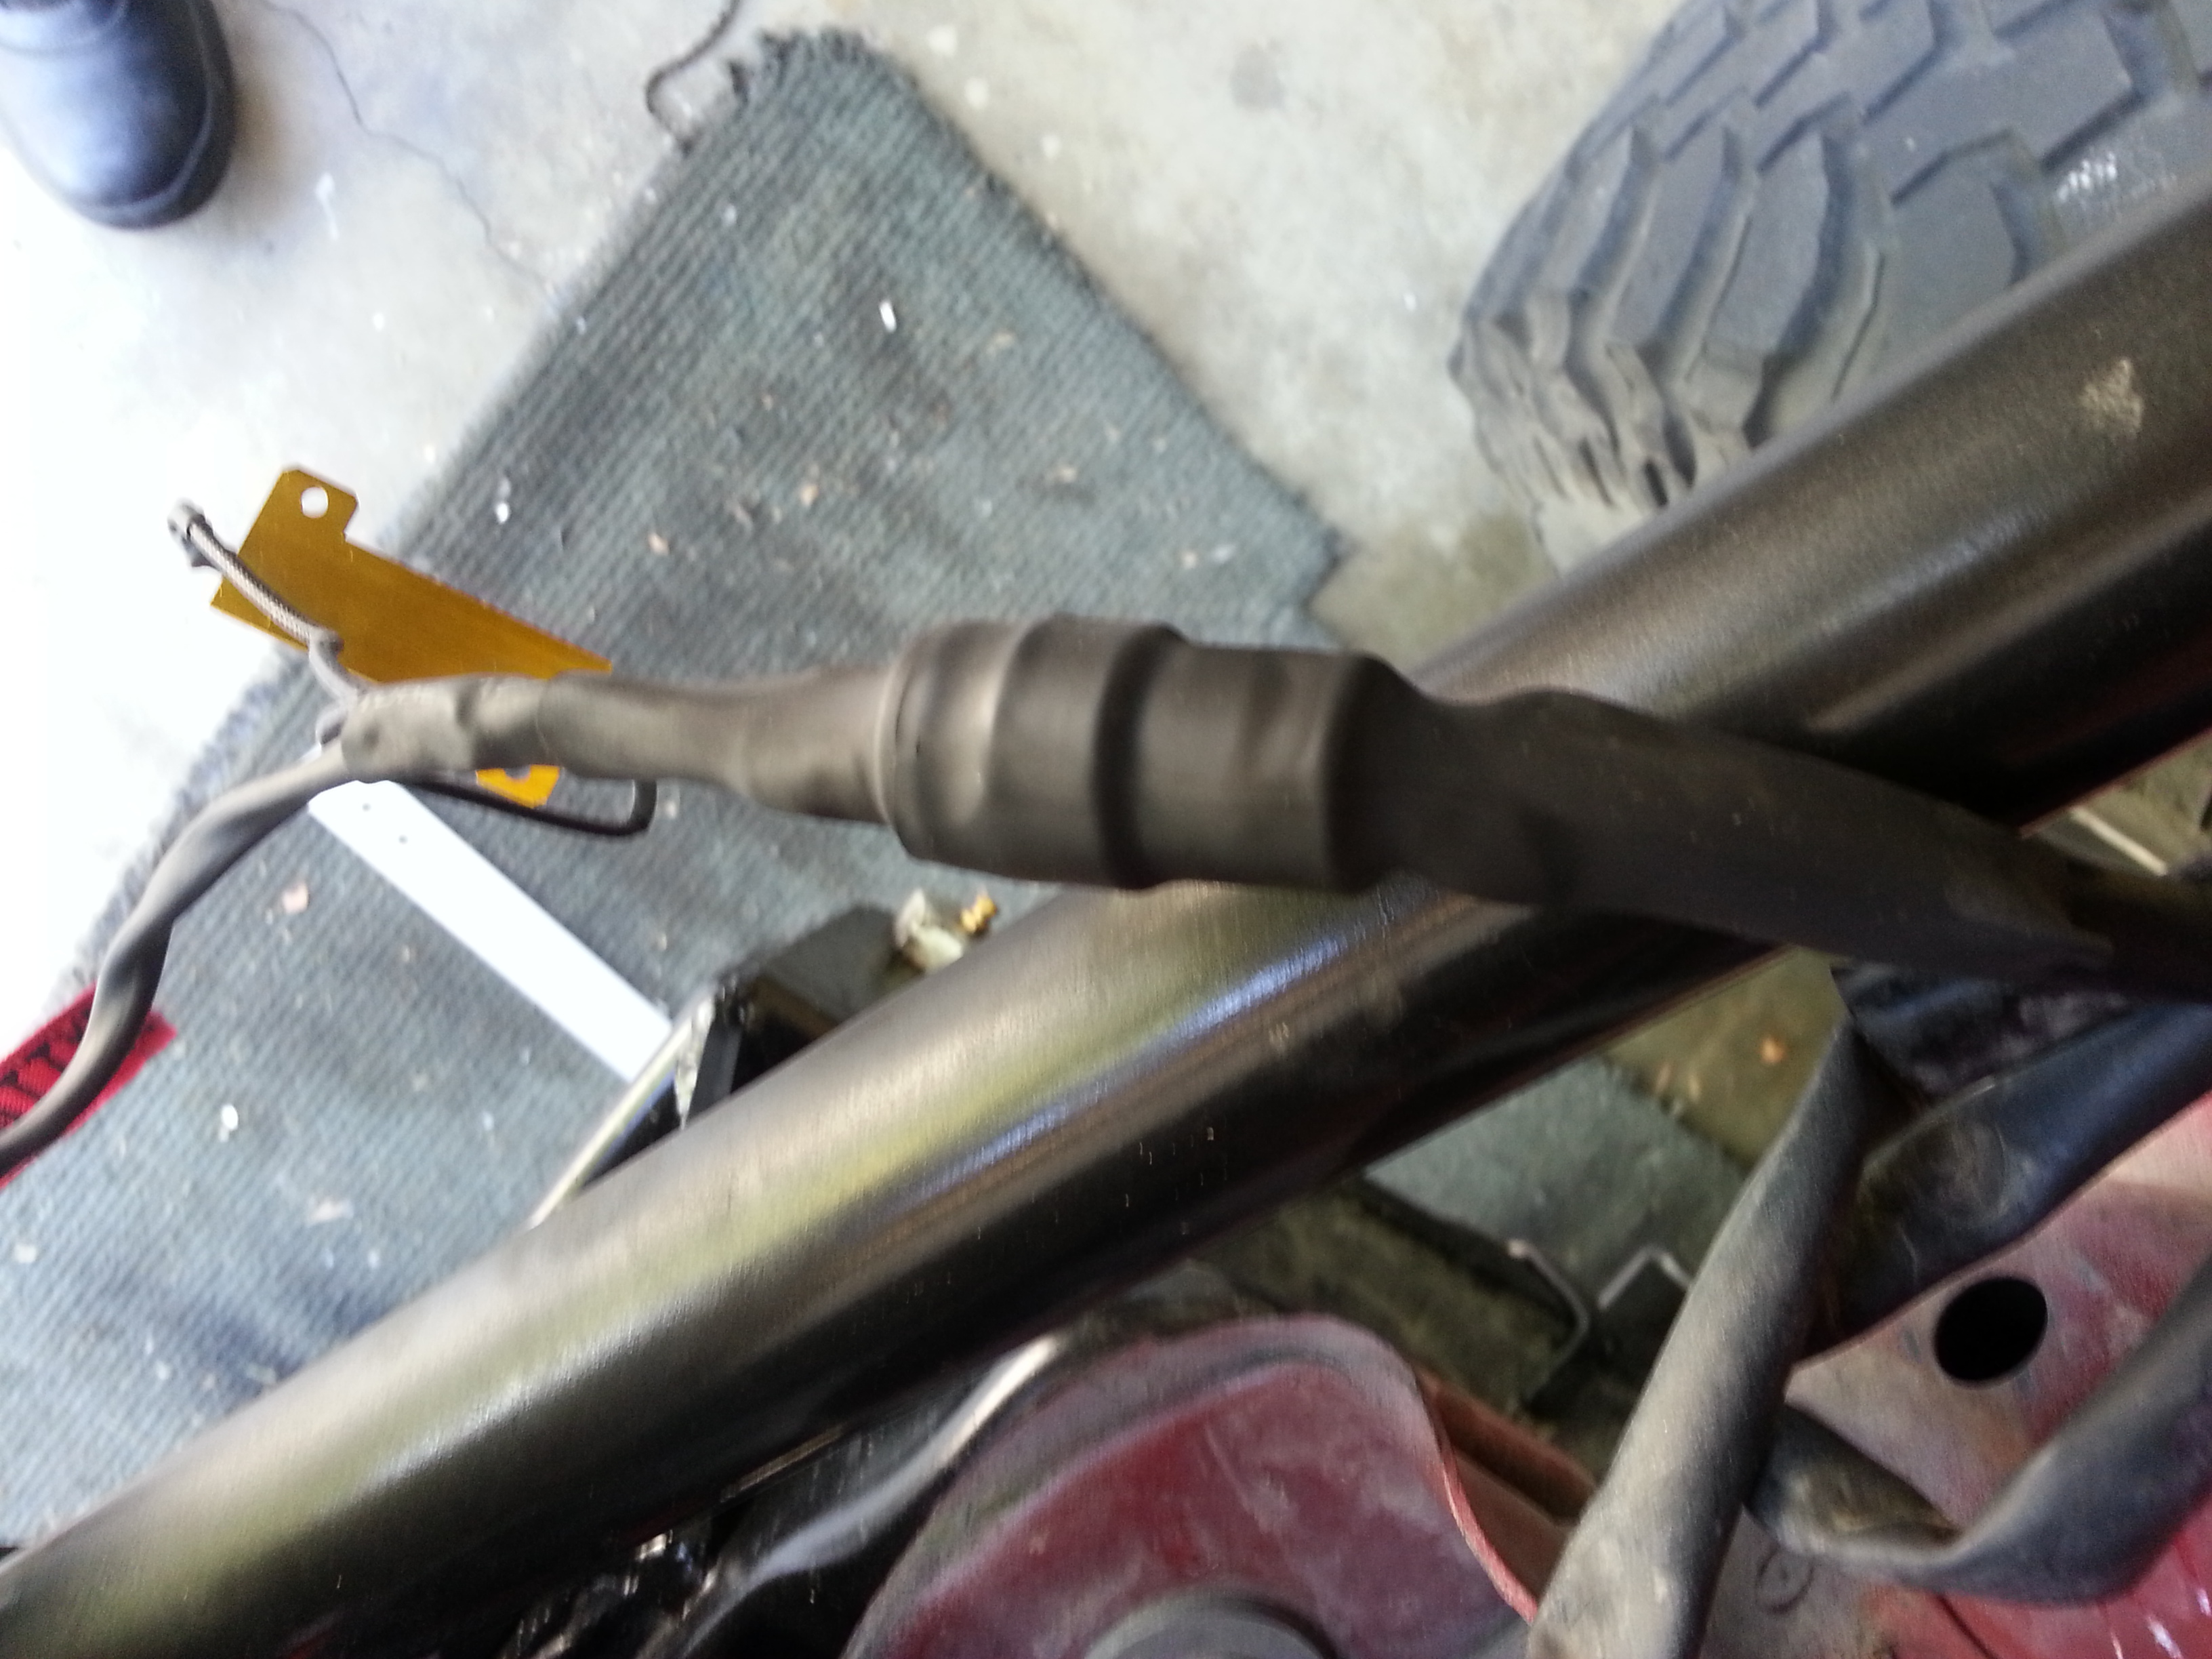
I've been used tight fitting spades that we're joined into the factory connector but separated right up to the connector with heat shrink..... Then put three-quarter heat shrink that I had slid previously over the wires toward the signal back over the connector and heat shrunk that tightly...
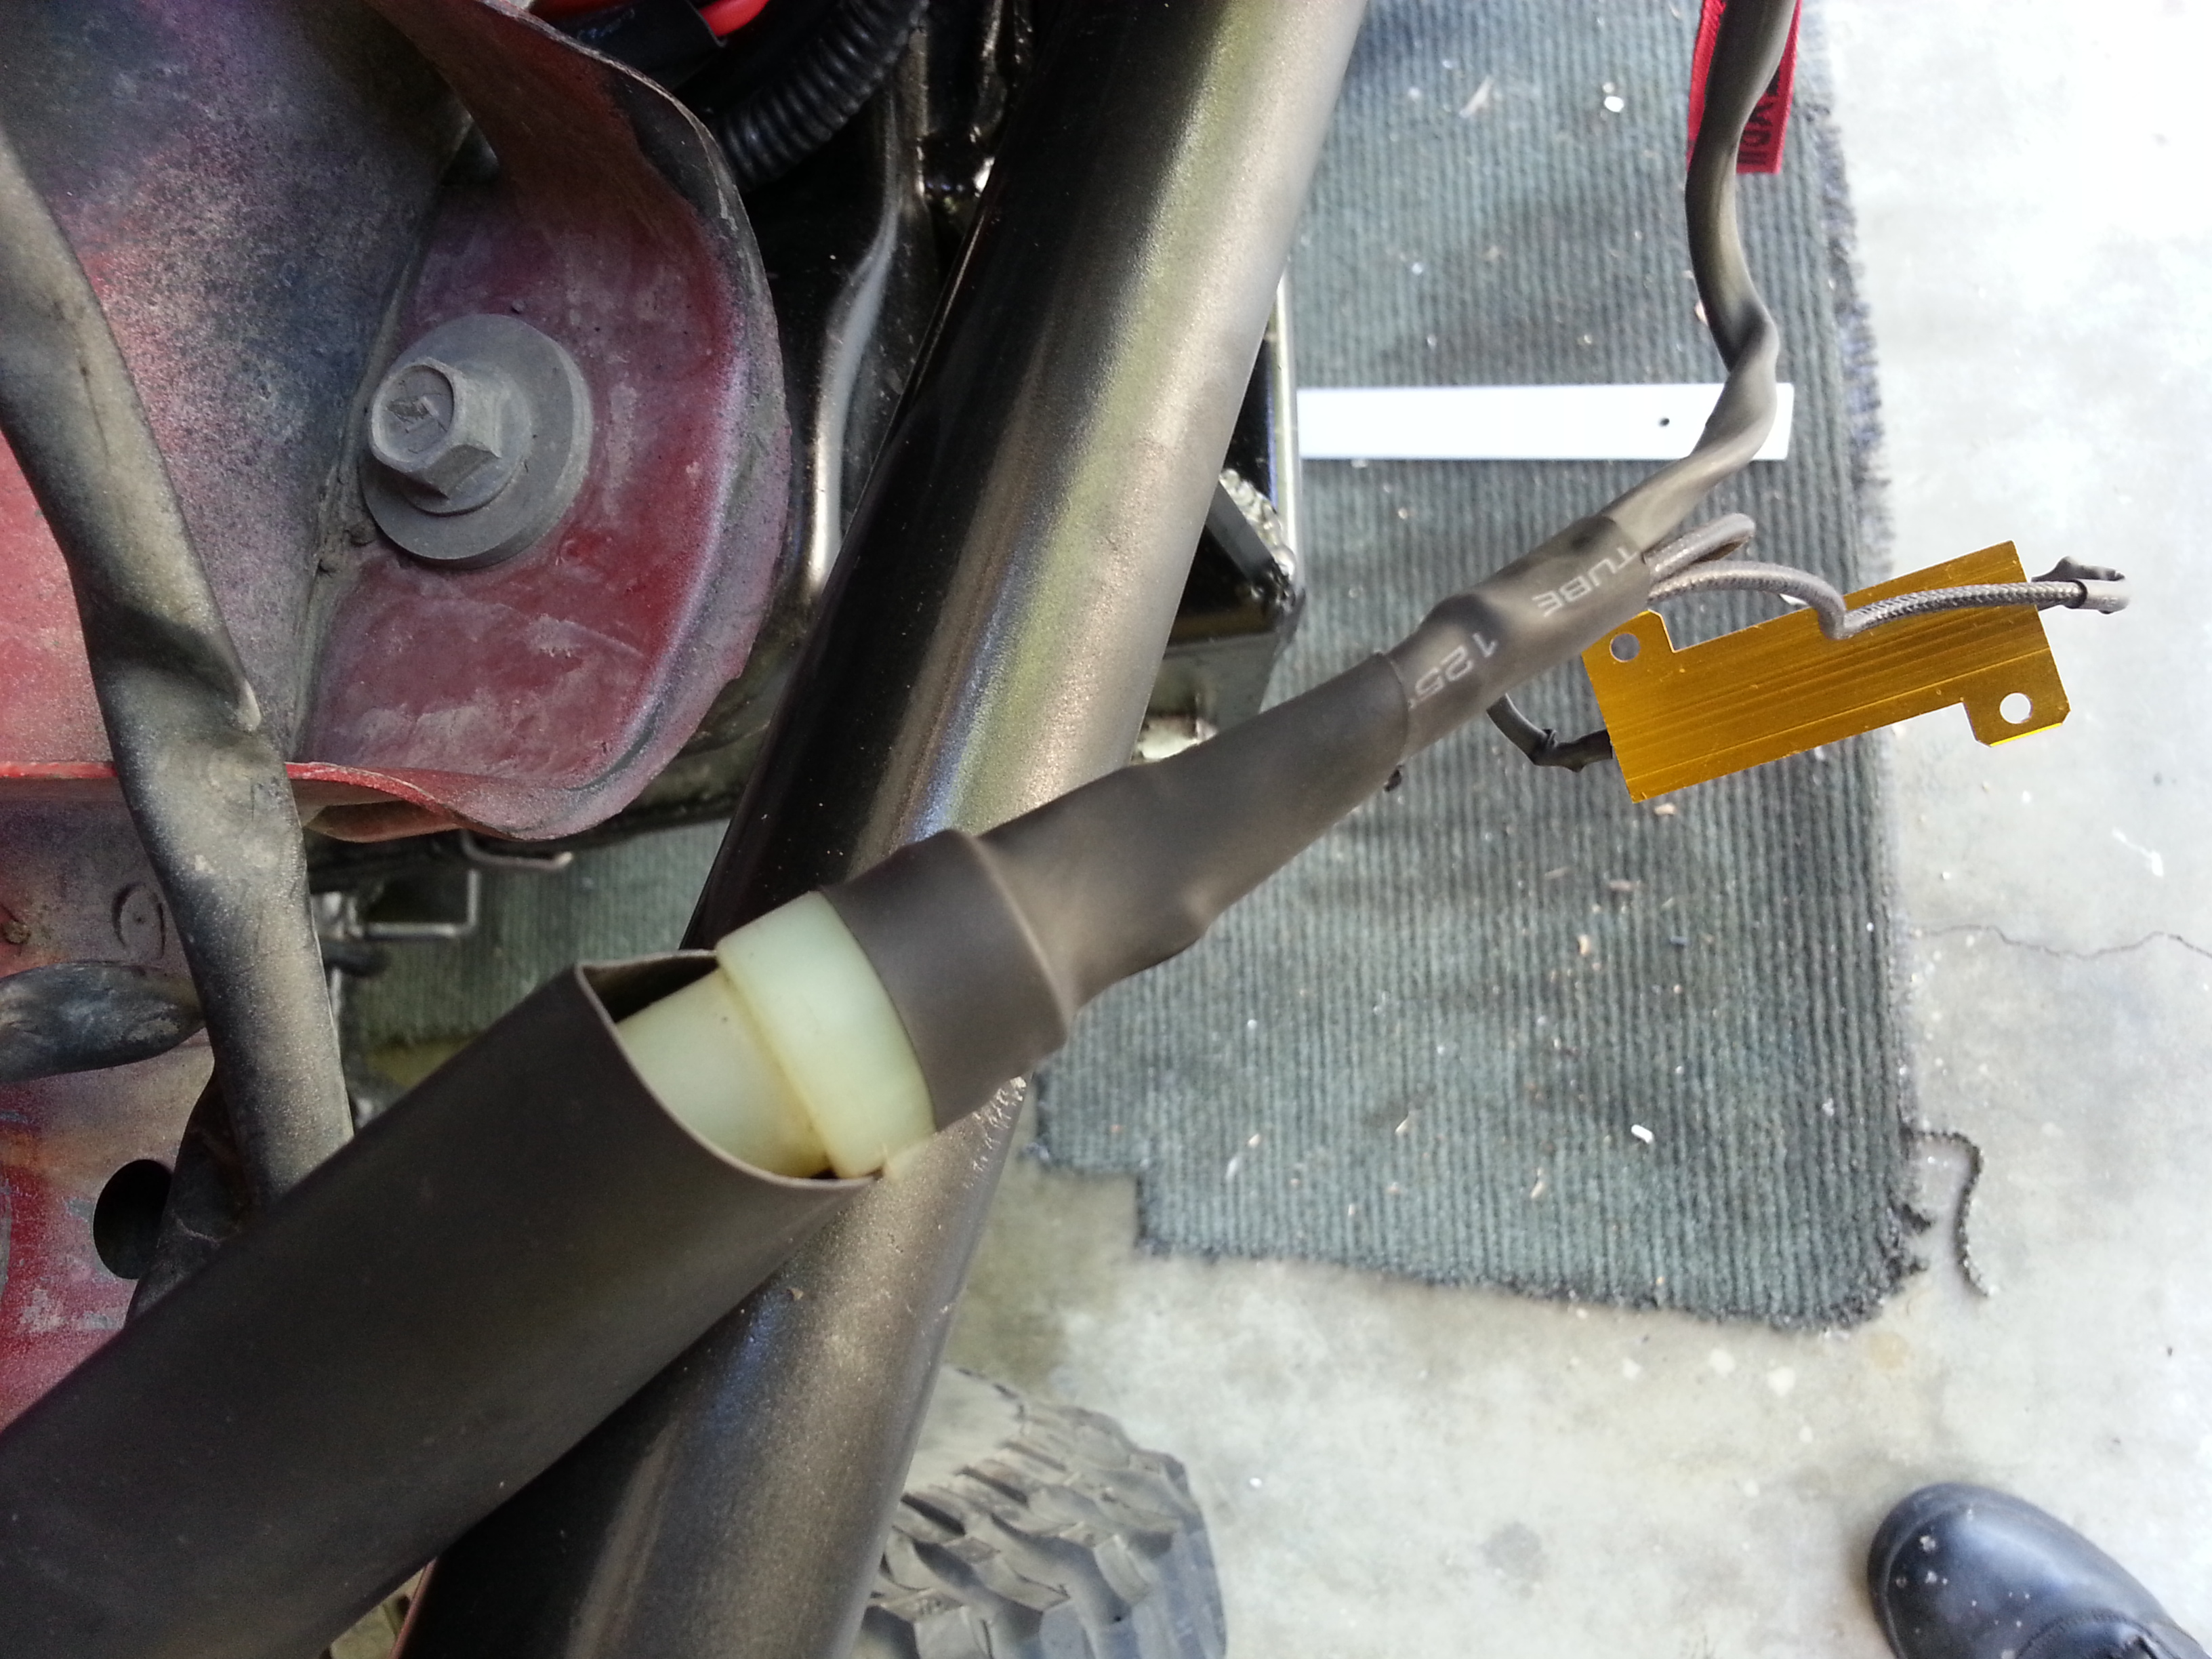
As you can see in the previous picture I already had one inch heat shrink pulled back over the other side of the connector and the original Toyota wiring from the harness... then pulled that over all of it and heat shrunk both sides til it was completely waterproof and well insulated.... I chose this route because I want to keep the original connector intact. I know that seems redundant at this point but there's always a method to my madness!..... Okay often or at least occasionally, right, hahahaha!....... Each wire gets one of the wires from each side of the resistor from super bright LEDs.com ... I ran each pair of wires through its own heat shrink and then heat shrunk all of them until I had nice clean set up... no cutting or suffering was required because both pairs of wires, 1 signal light wire and one resistor wire went into each spade connector... they are quality spades from Signal Electronics..... This way I can eventually remove spades all together, cut back and small amount of heat shrink tubing and solder in some donor connectors from the yard so that I don't have to cut my original signals up........
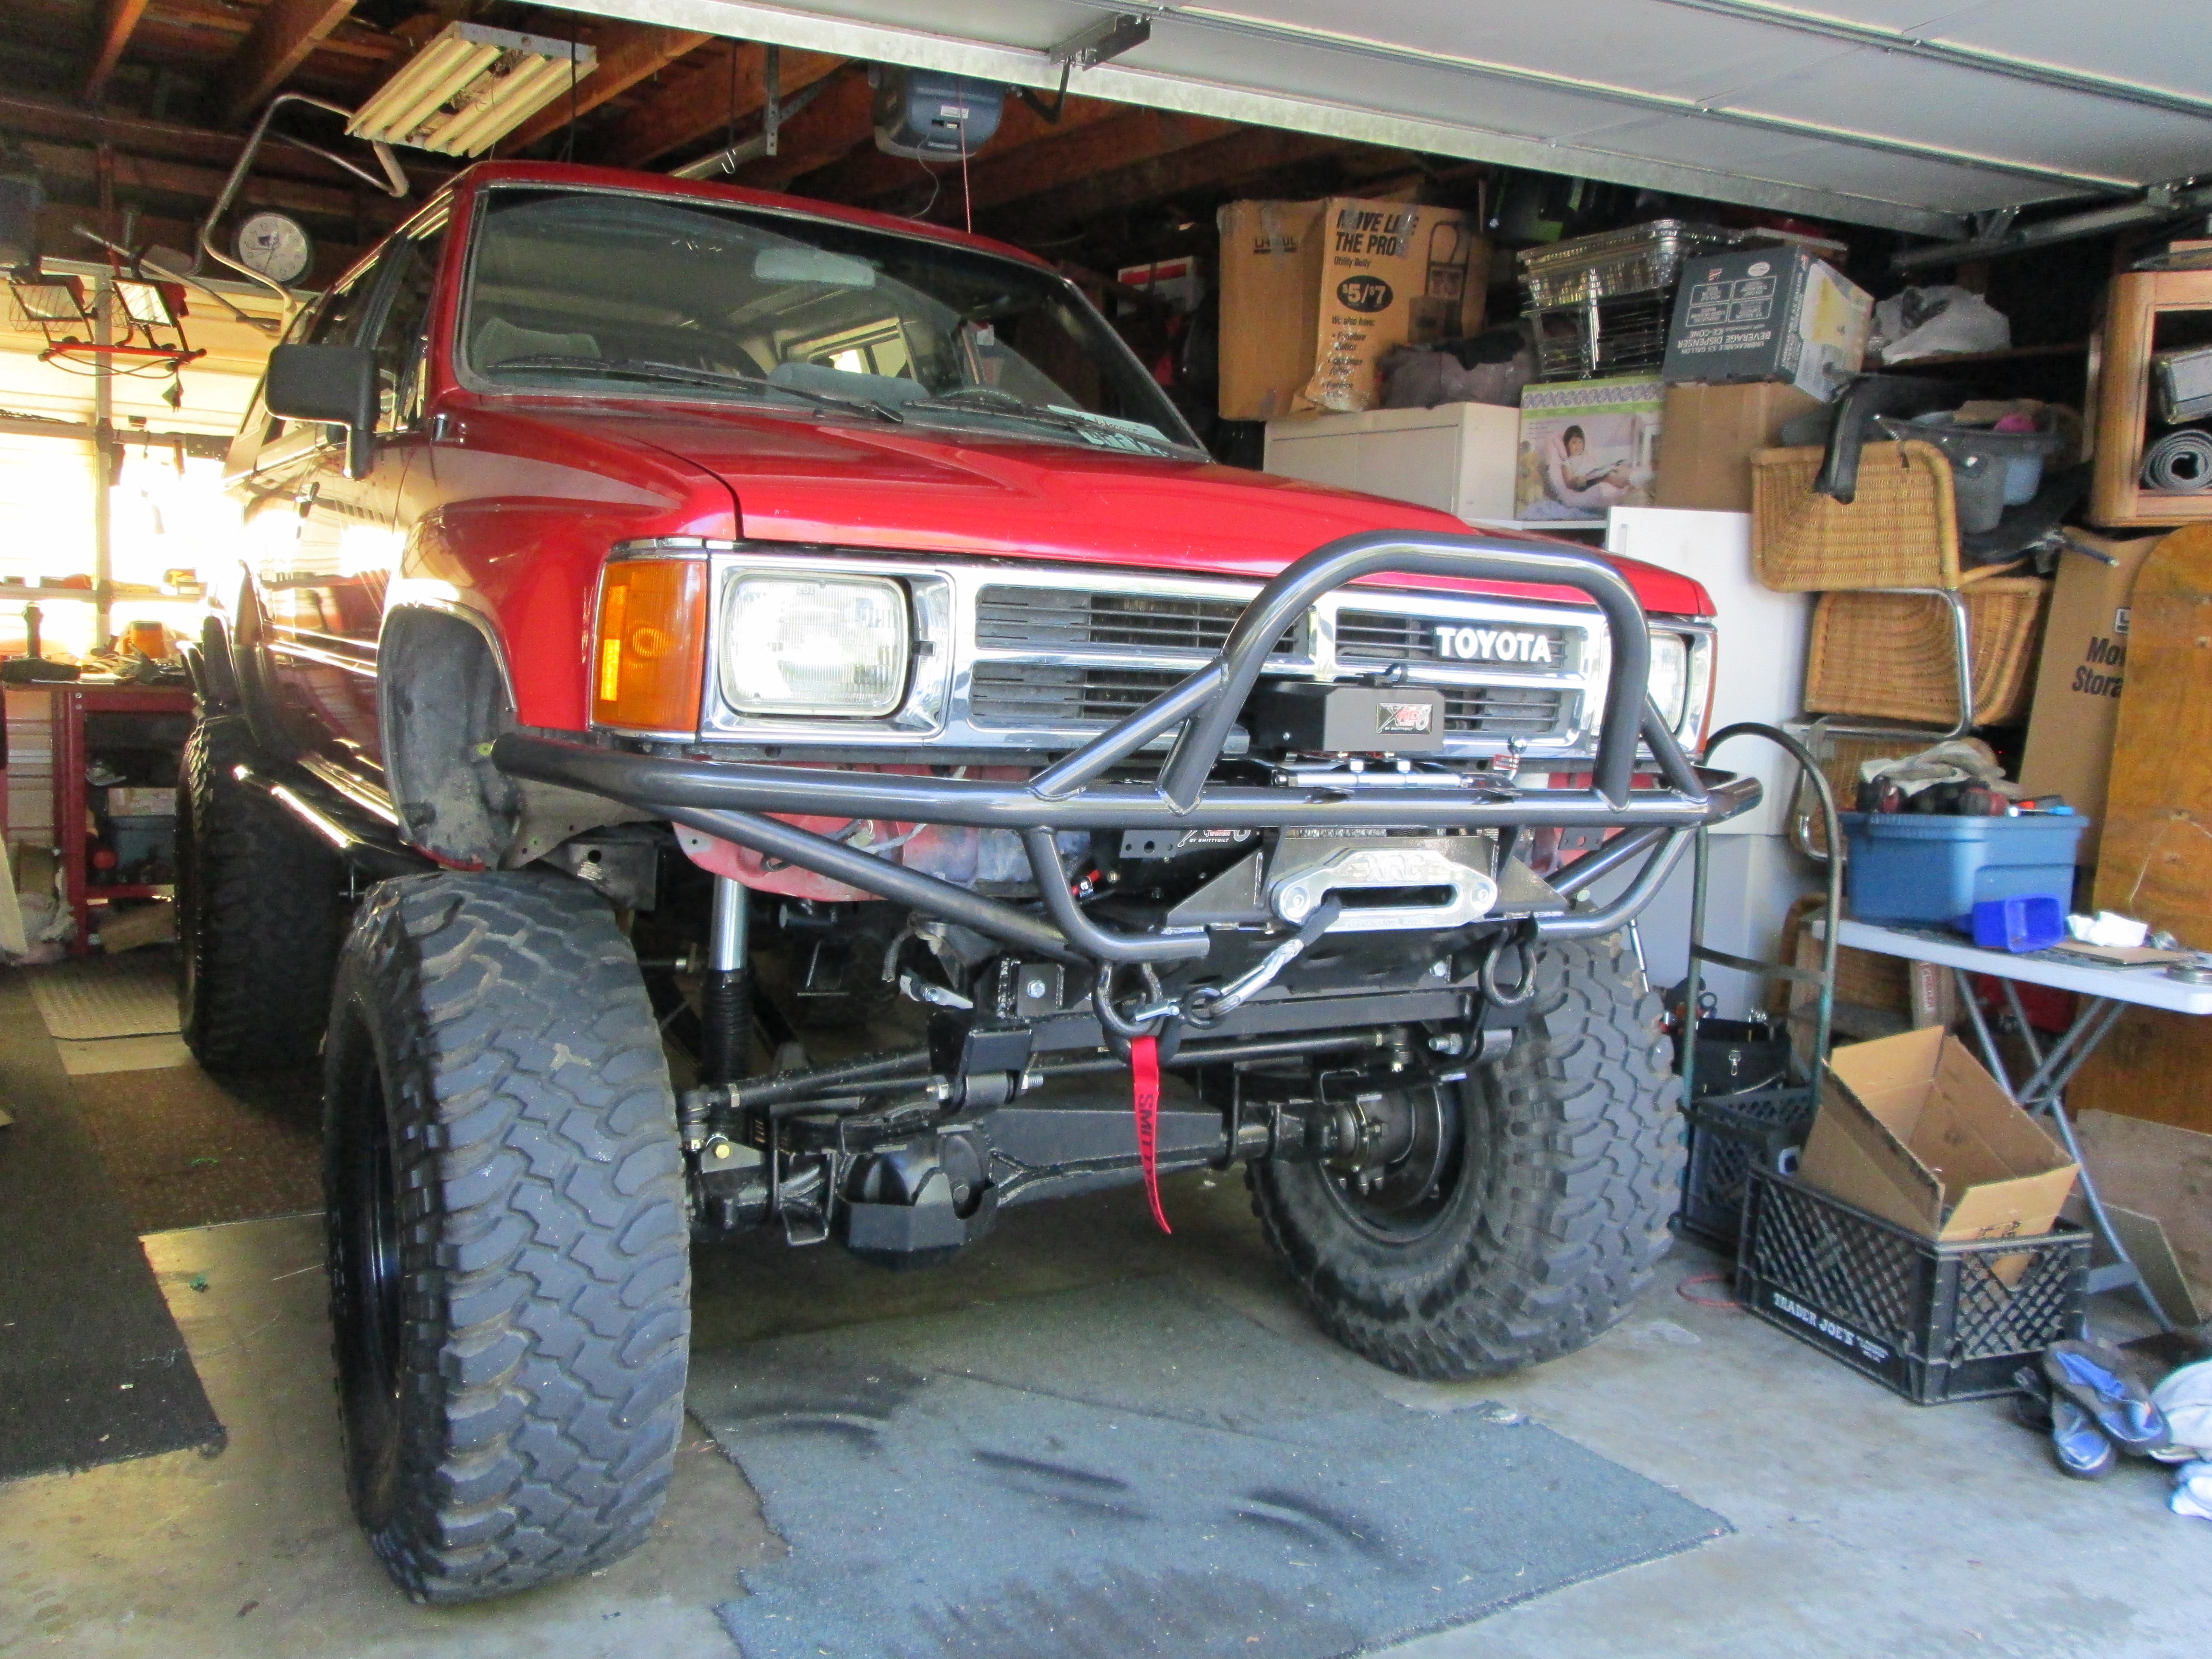
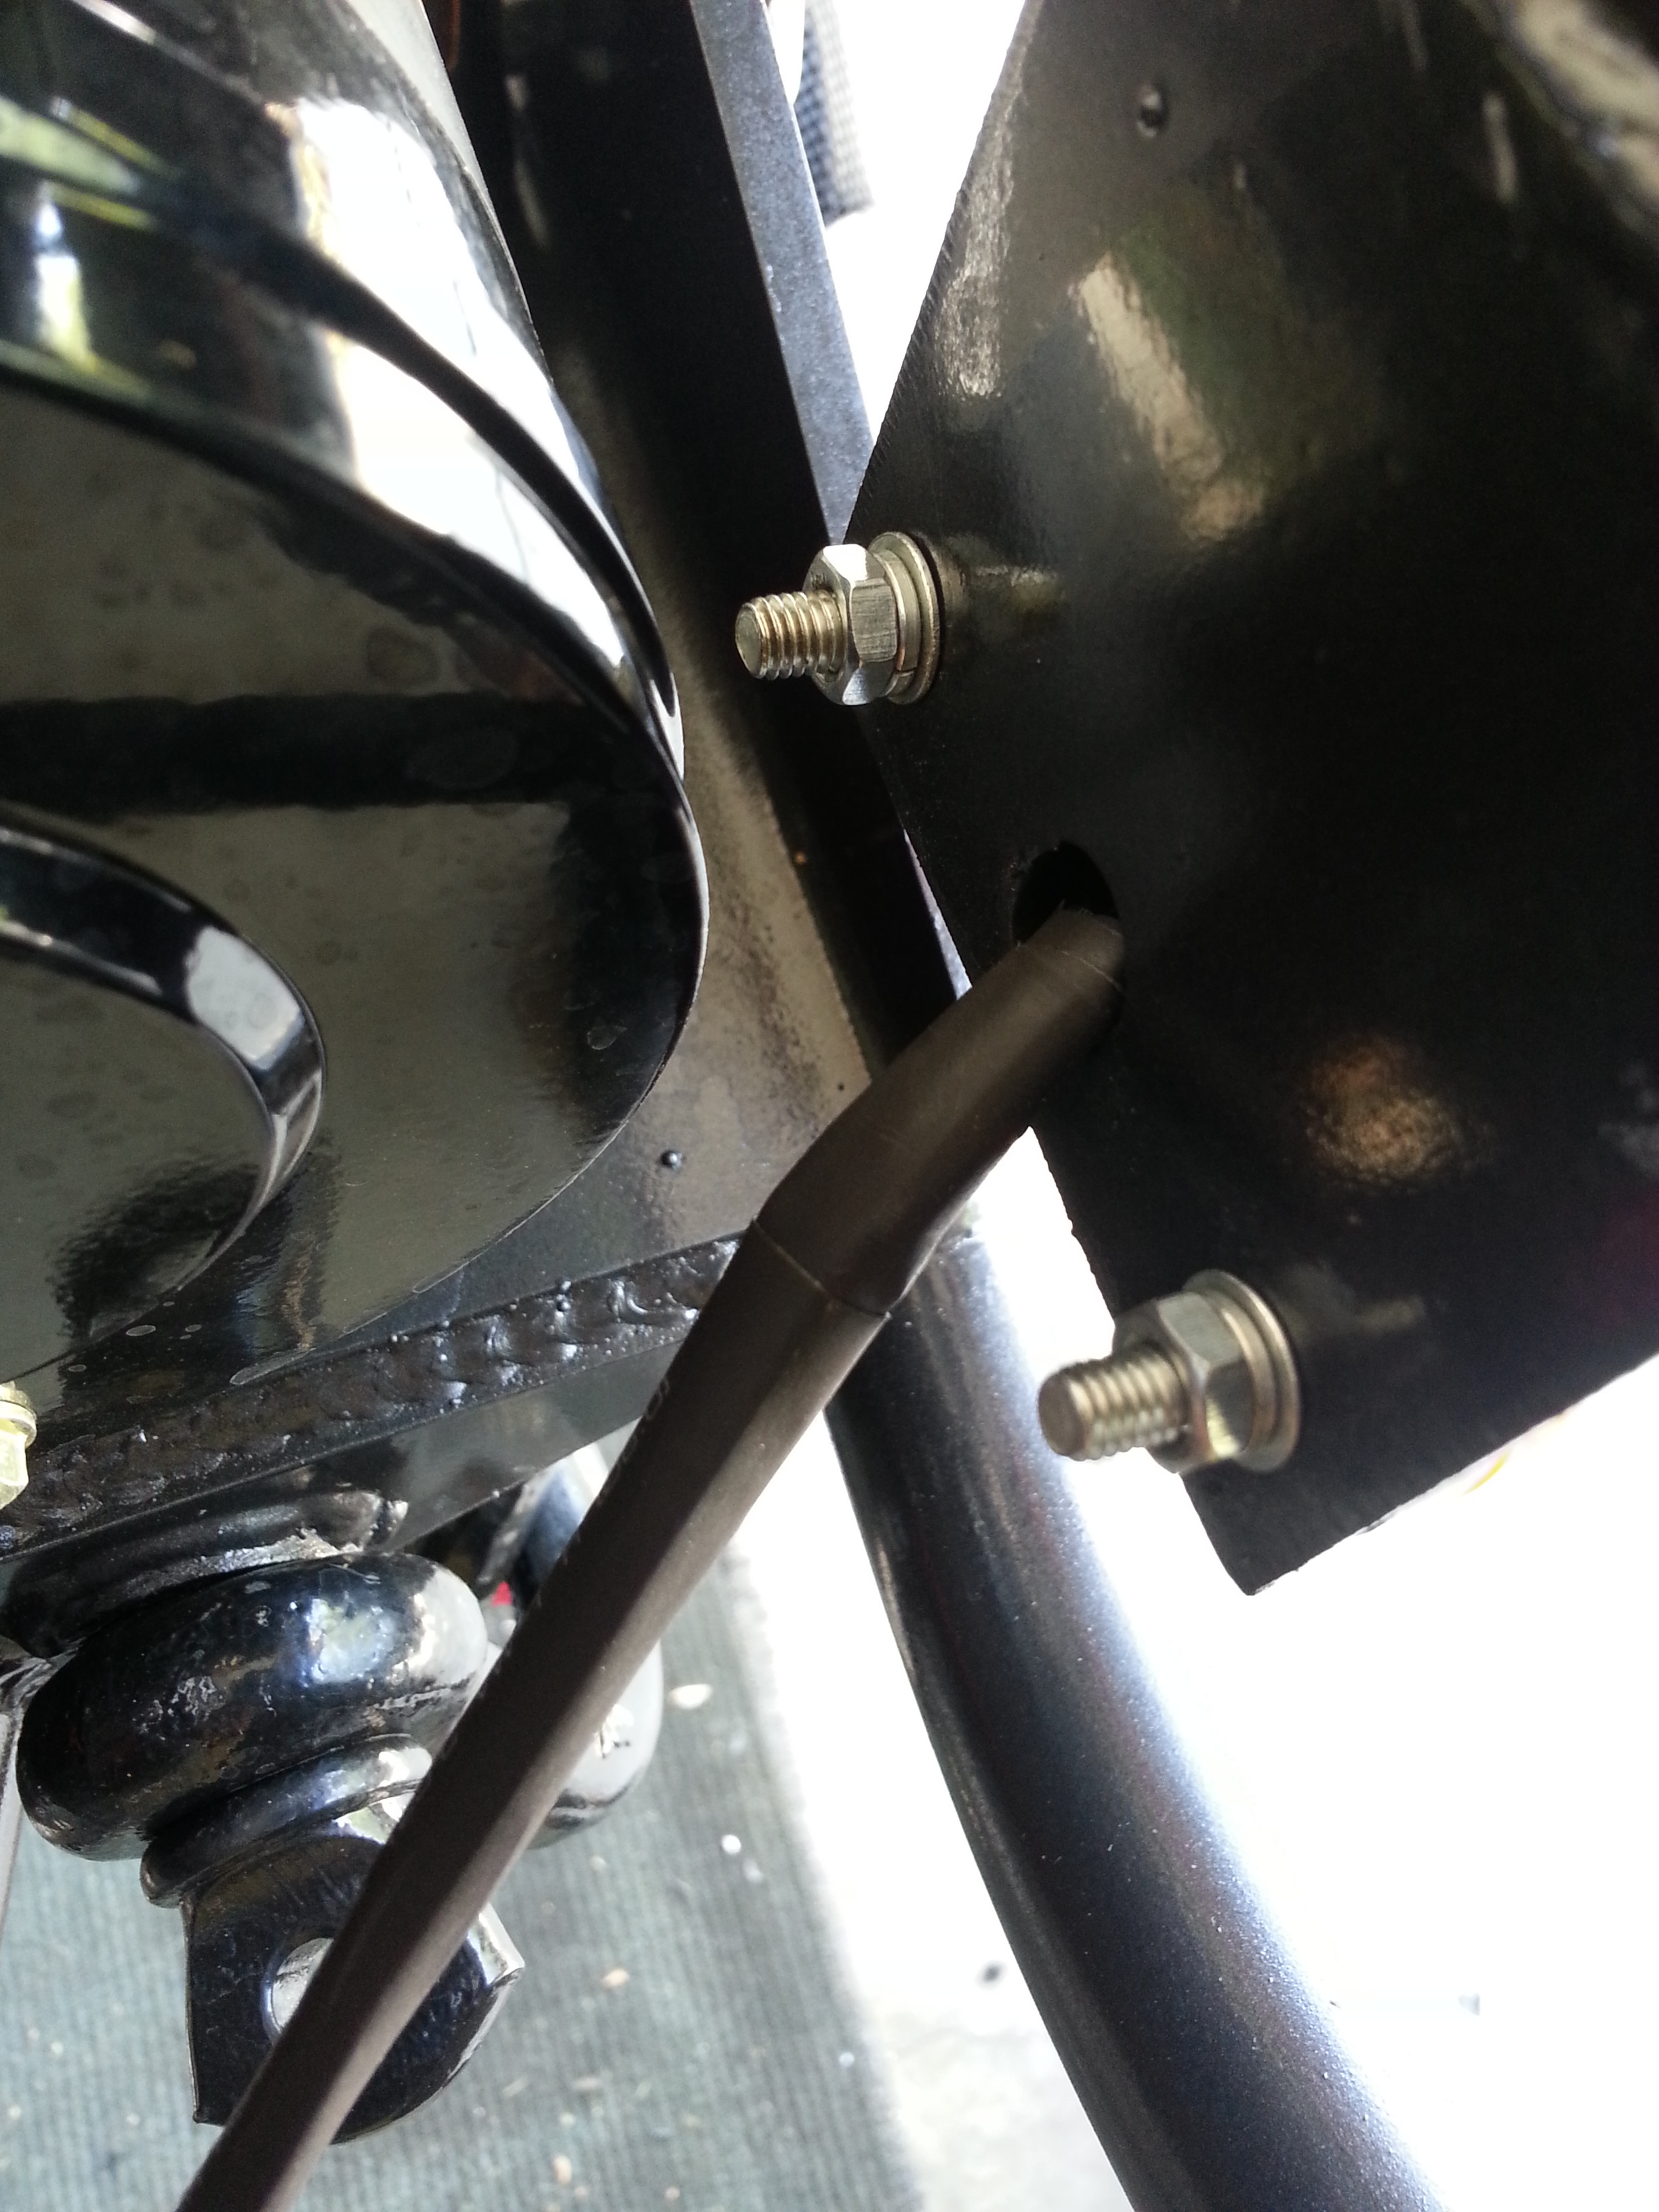
Obviously, before I connected any wiring I had to run the wiring through the tab slot in the tab welded to the addicted off road front bumper(I'm pretty sure you need to ask him for these if you're going to order a bumper and want an easy way to mount the LED turn signals)...... I used fine threaded stainless machine thread screws, staying with flat washers and lock washers and nuts... all of which you can see in these two pictures...
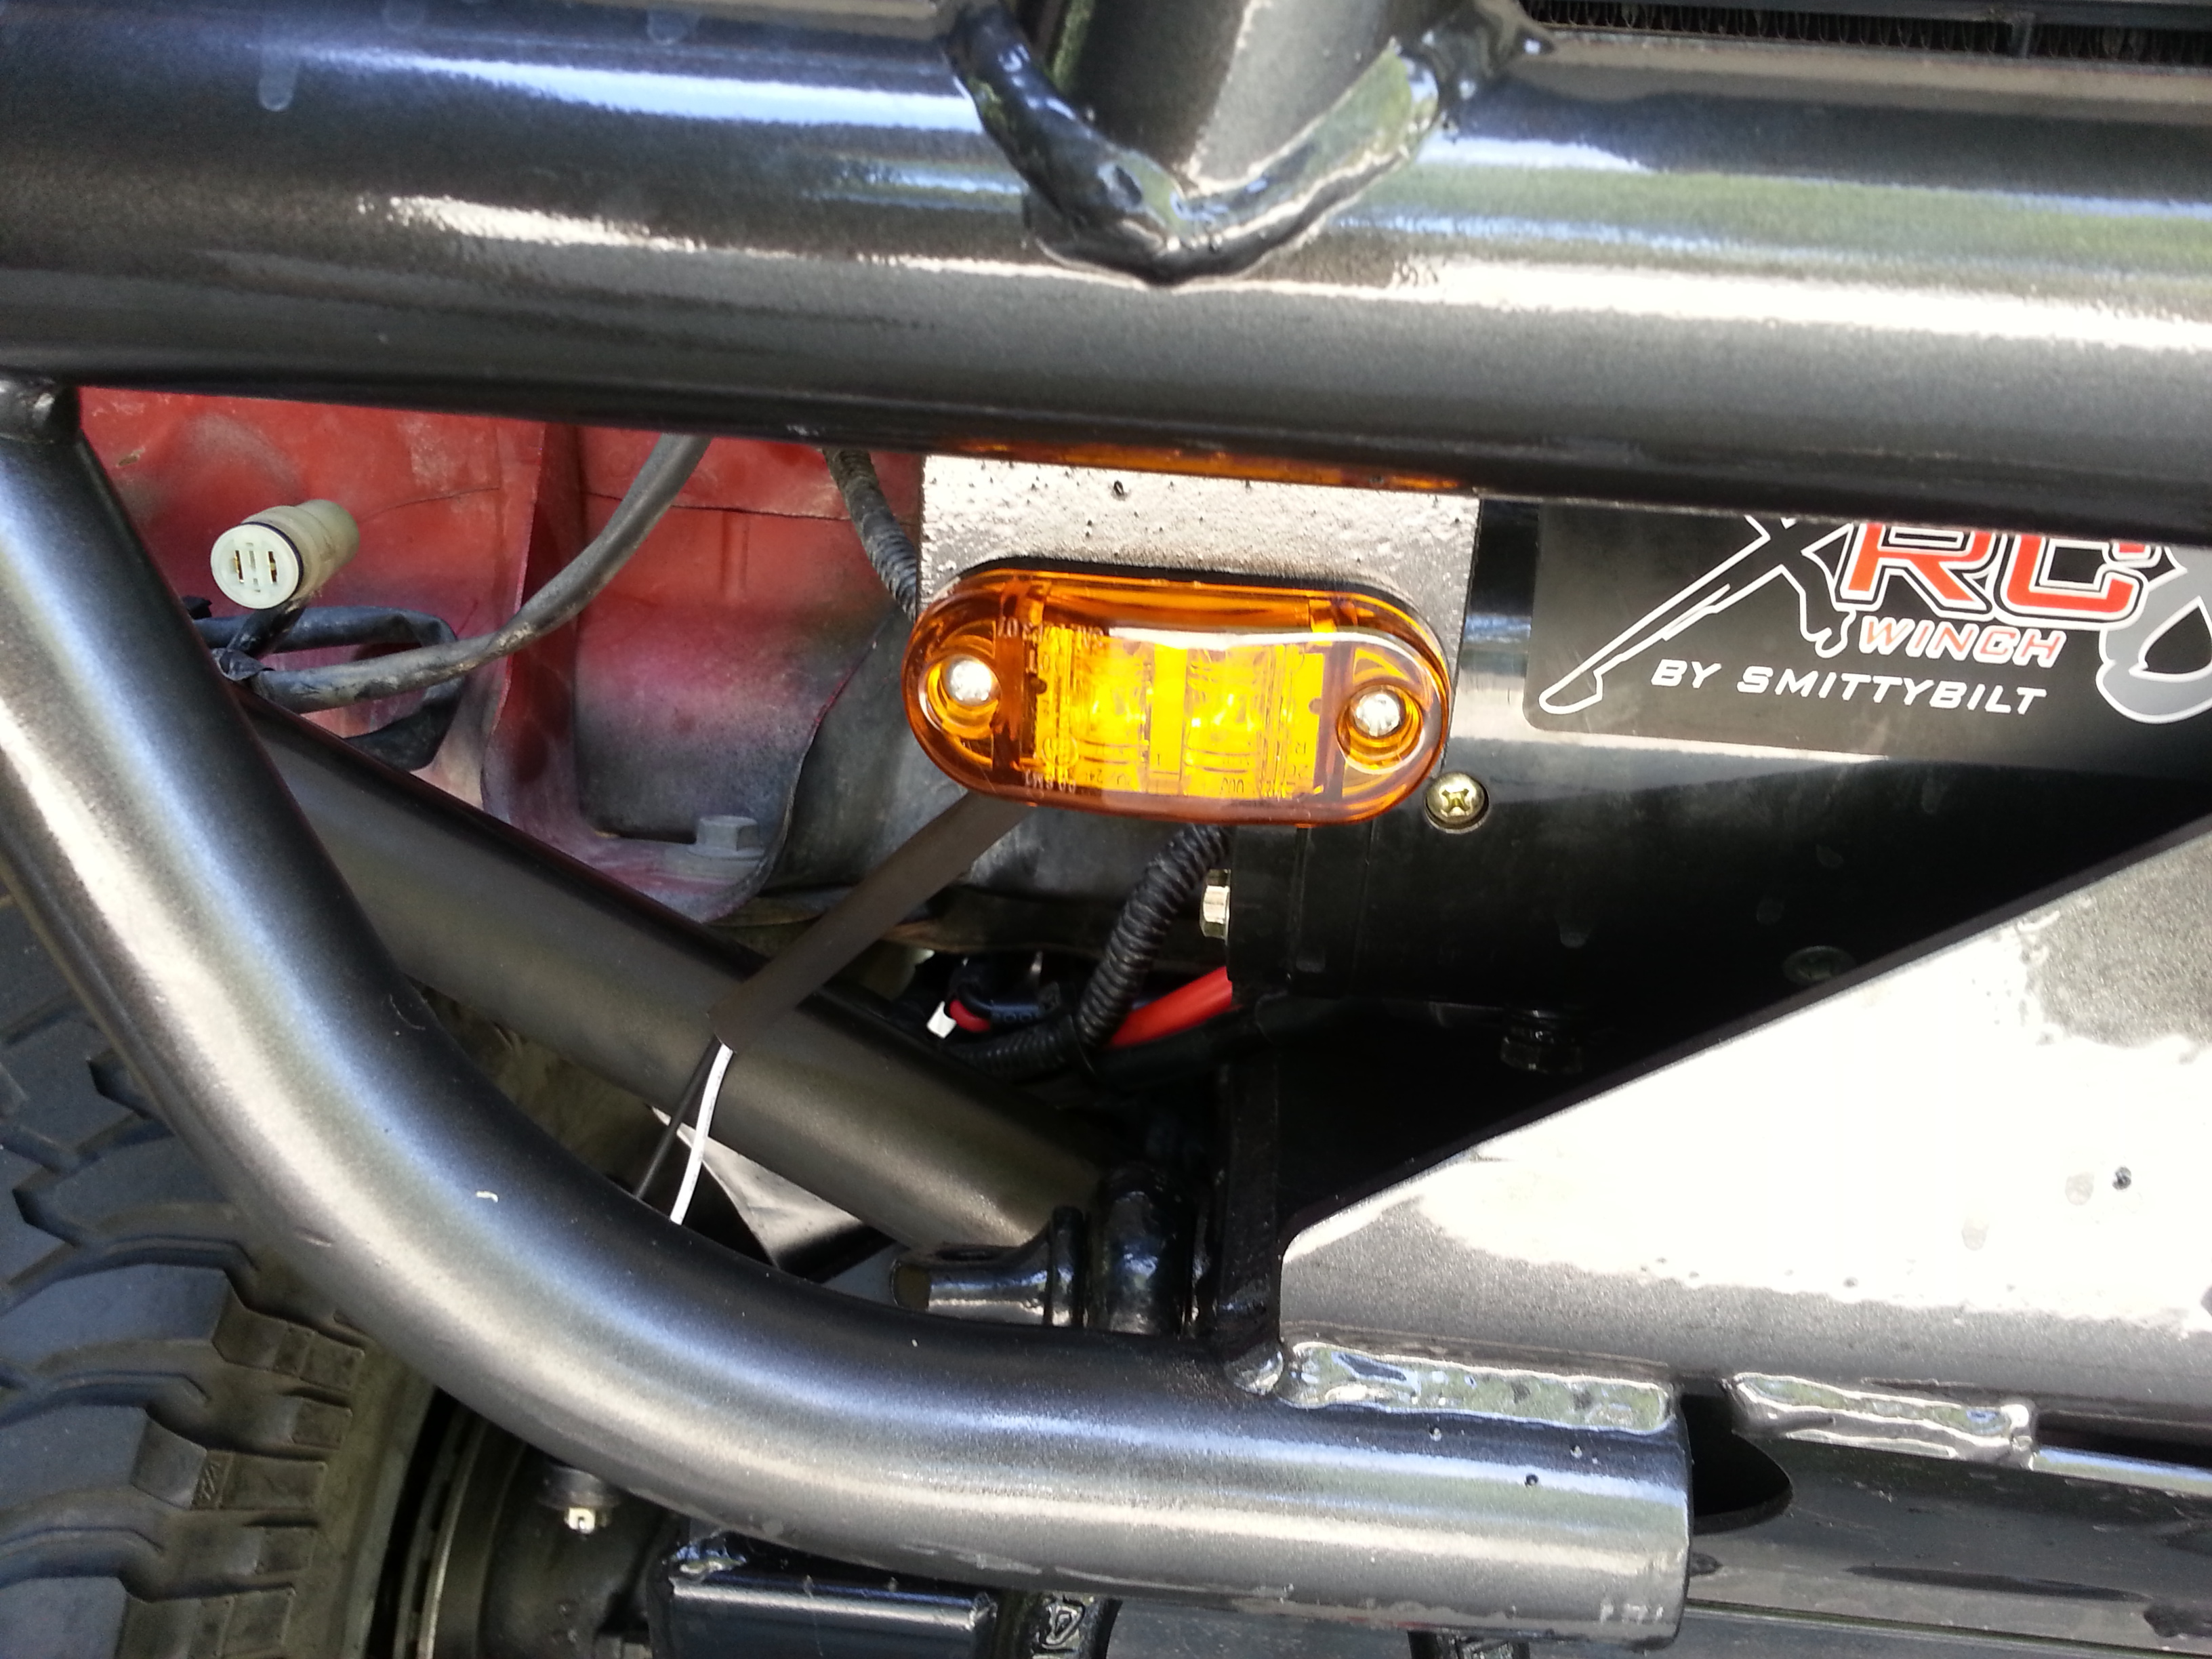
Here they are mounted and working in the videos...
I also explain in the videos how I'd totally missed the fact that studies bumper has holes already for mounting a license plate... I just about spat my coffee all over the place when I realized this.... I have terrible odds with the laws of Murphy when it comes to getting pulled over for the stupidest crap... So within the videos I explained how I meant it but I didn't mention how I got the thread screws from the backside into and through the license plate on front... I ended up taking needle nose pliers and reaching in, which isn't that easy for me as my hands are not tiny, and dropping them through the holes... I tried using a strong magnetic screwdriver that I have first but it just kept getting stuck to everything and was not practical... I didn't take my hand would fit in there while holding the pair of needle nose... but it did...
There is a picture of everything mounted... for those who don't really get to watch videos too often... the videos will follow...
****************************************
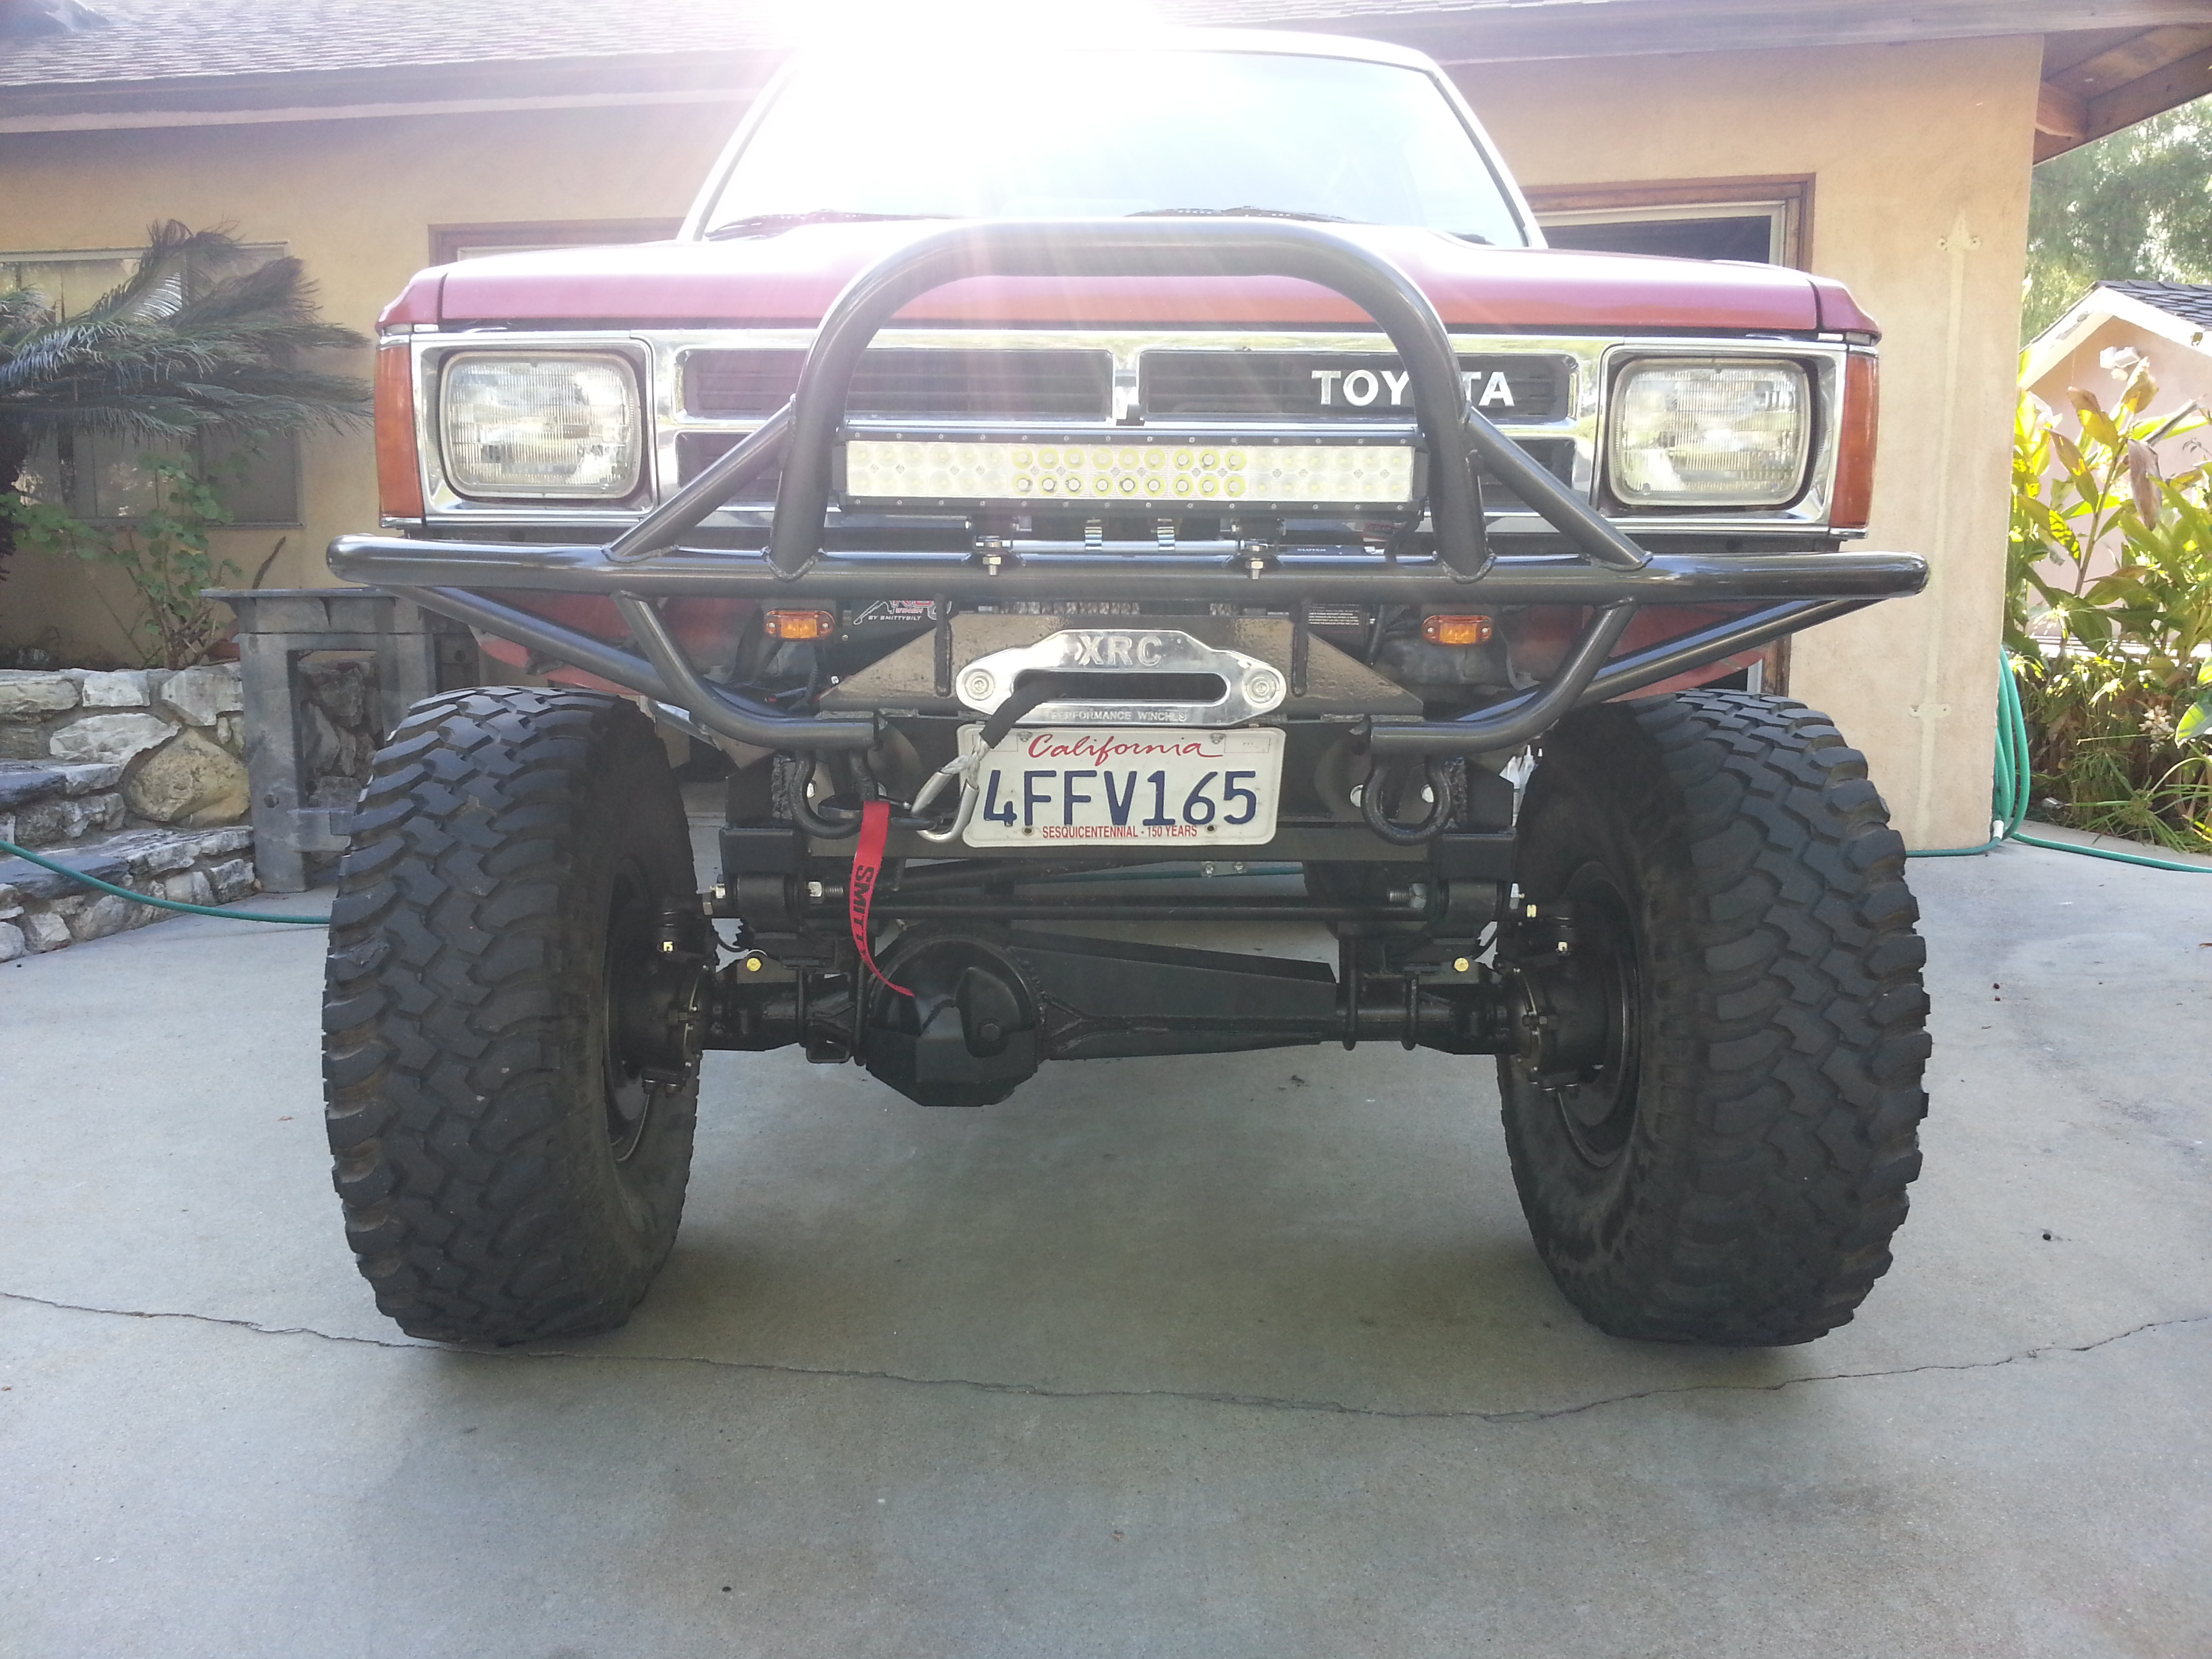
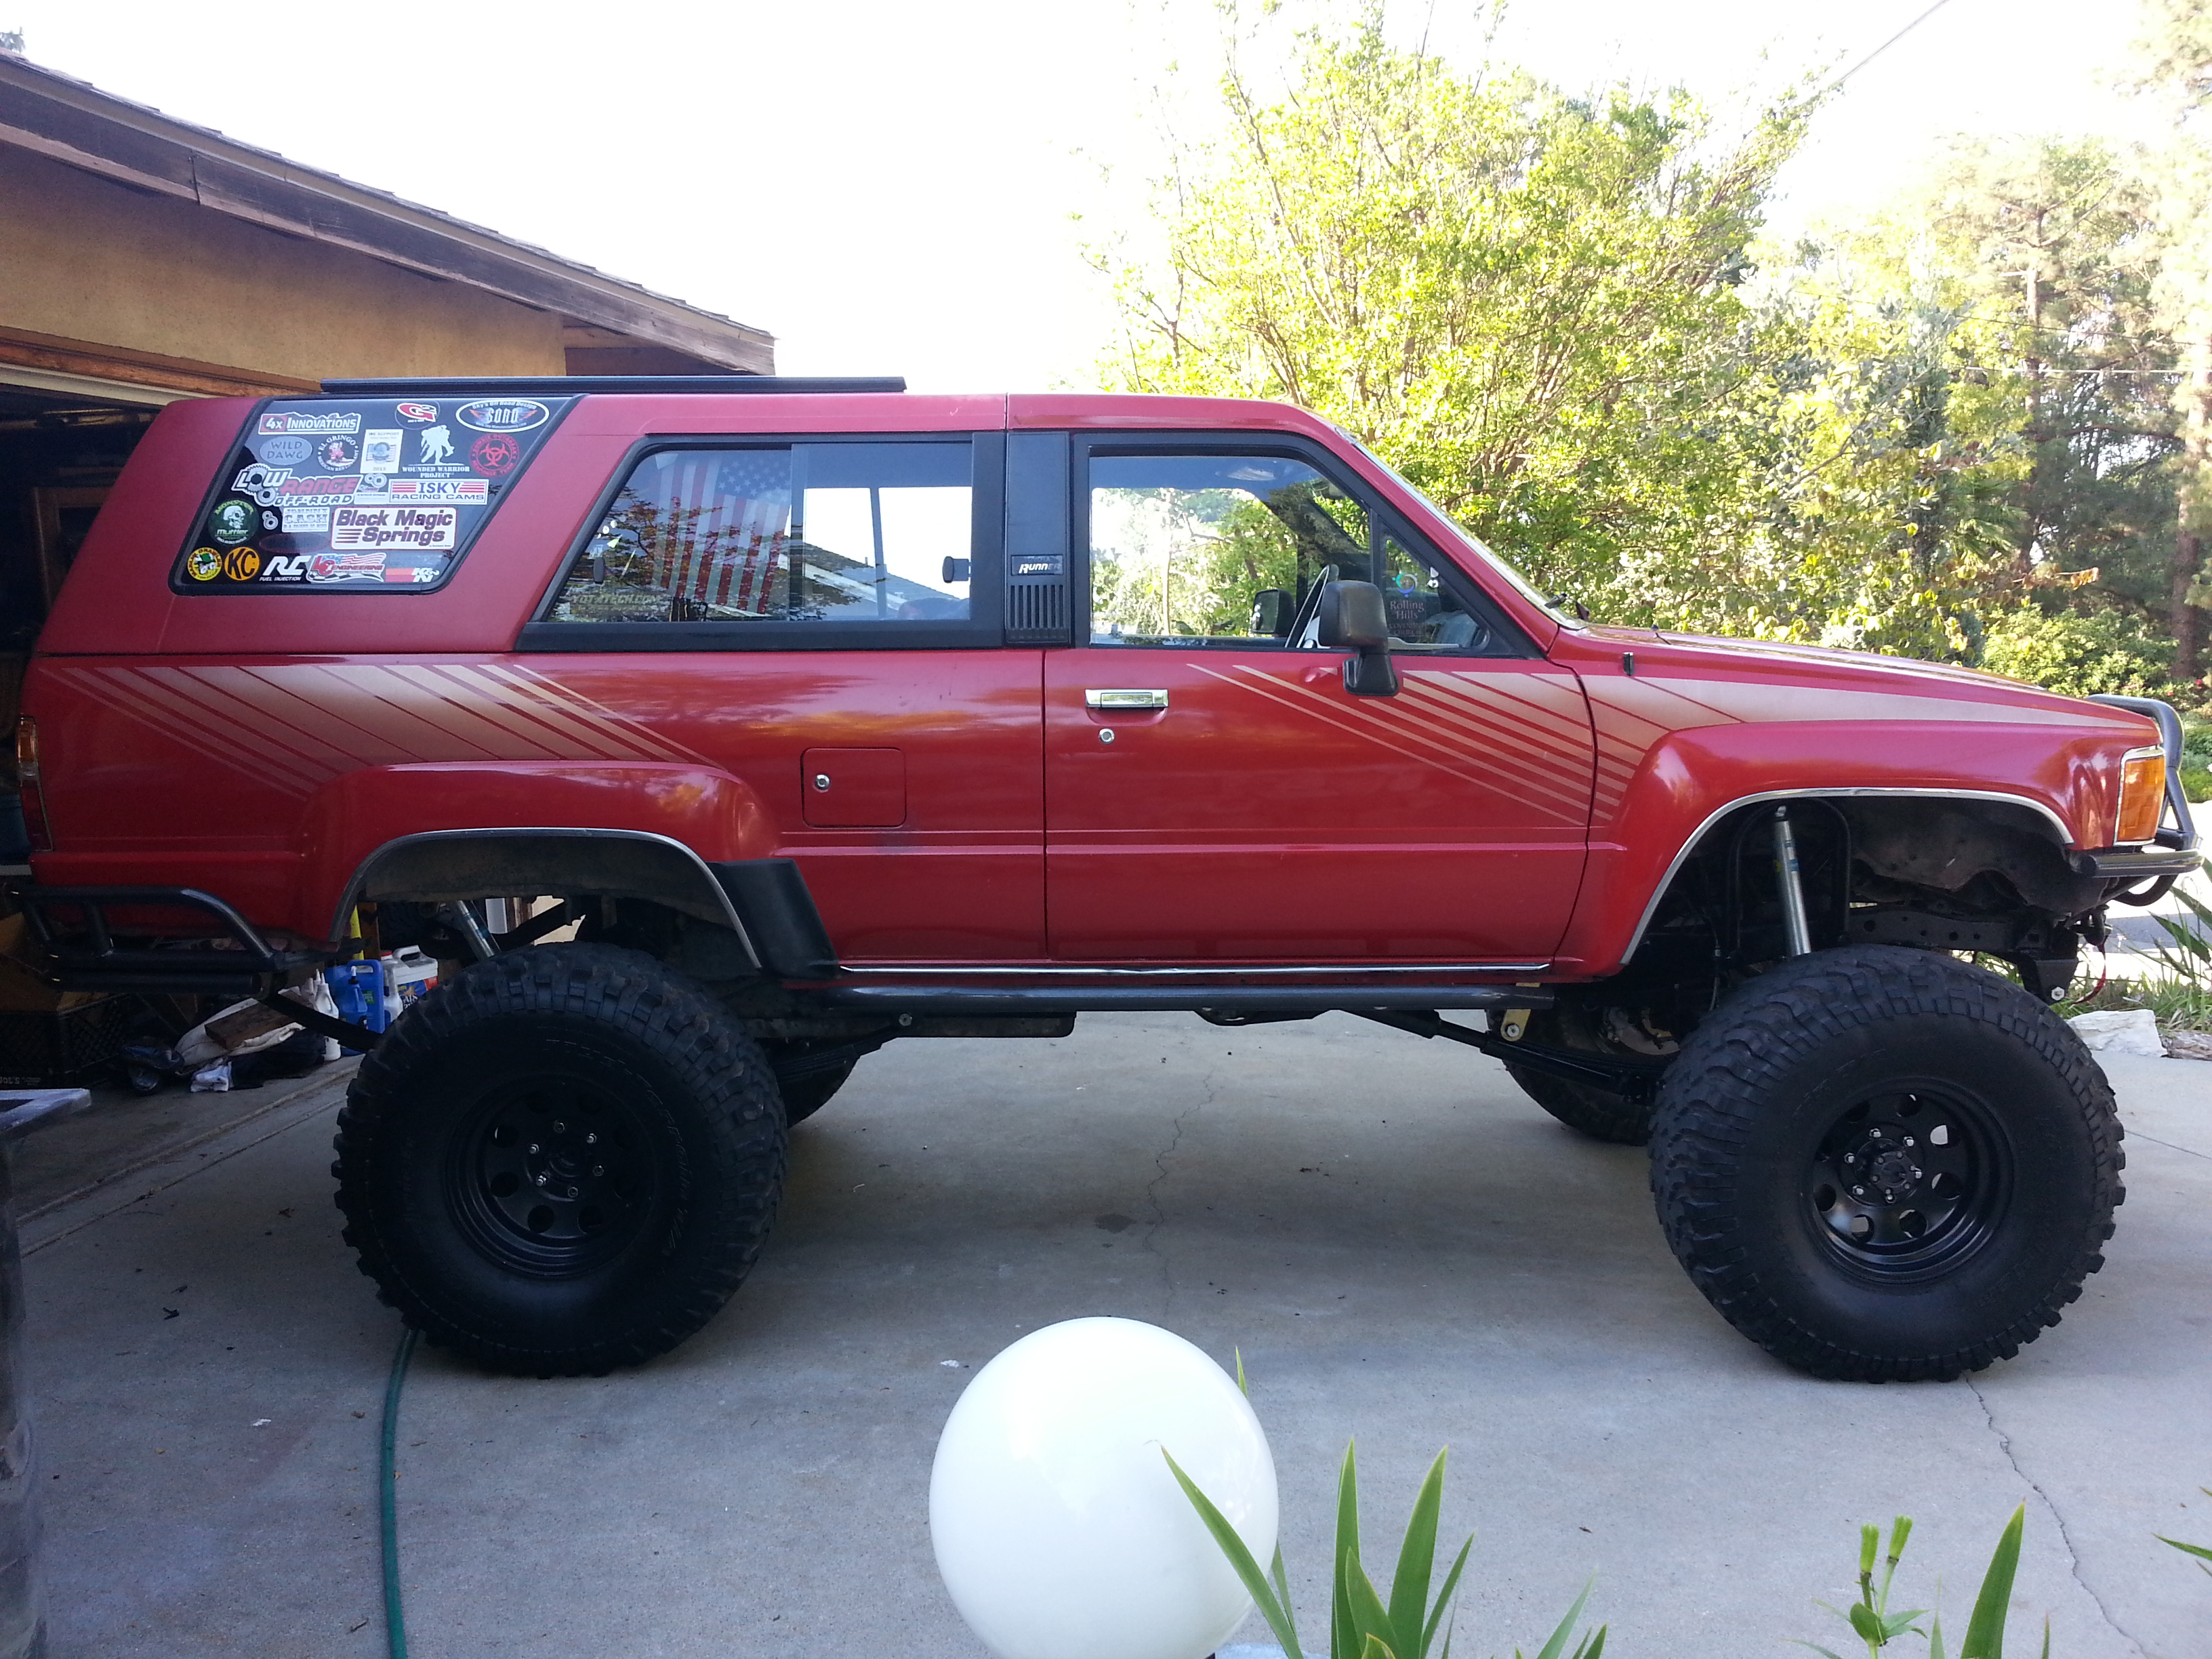
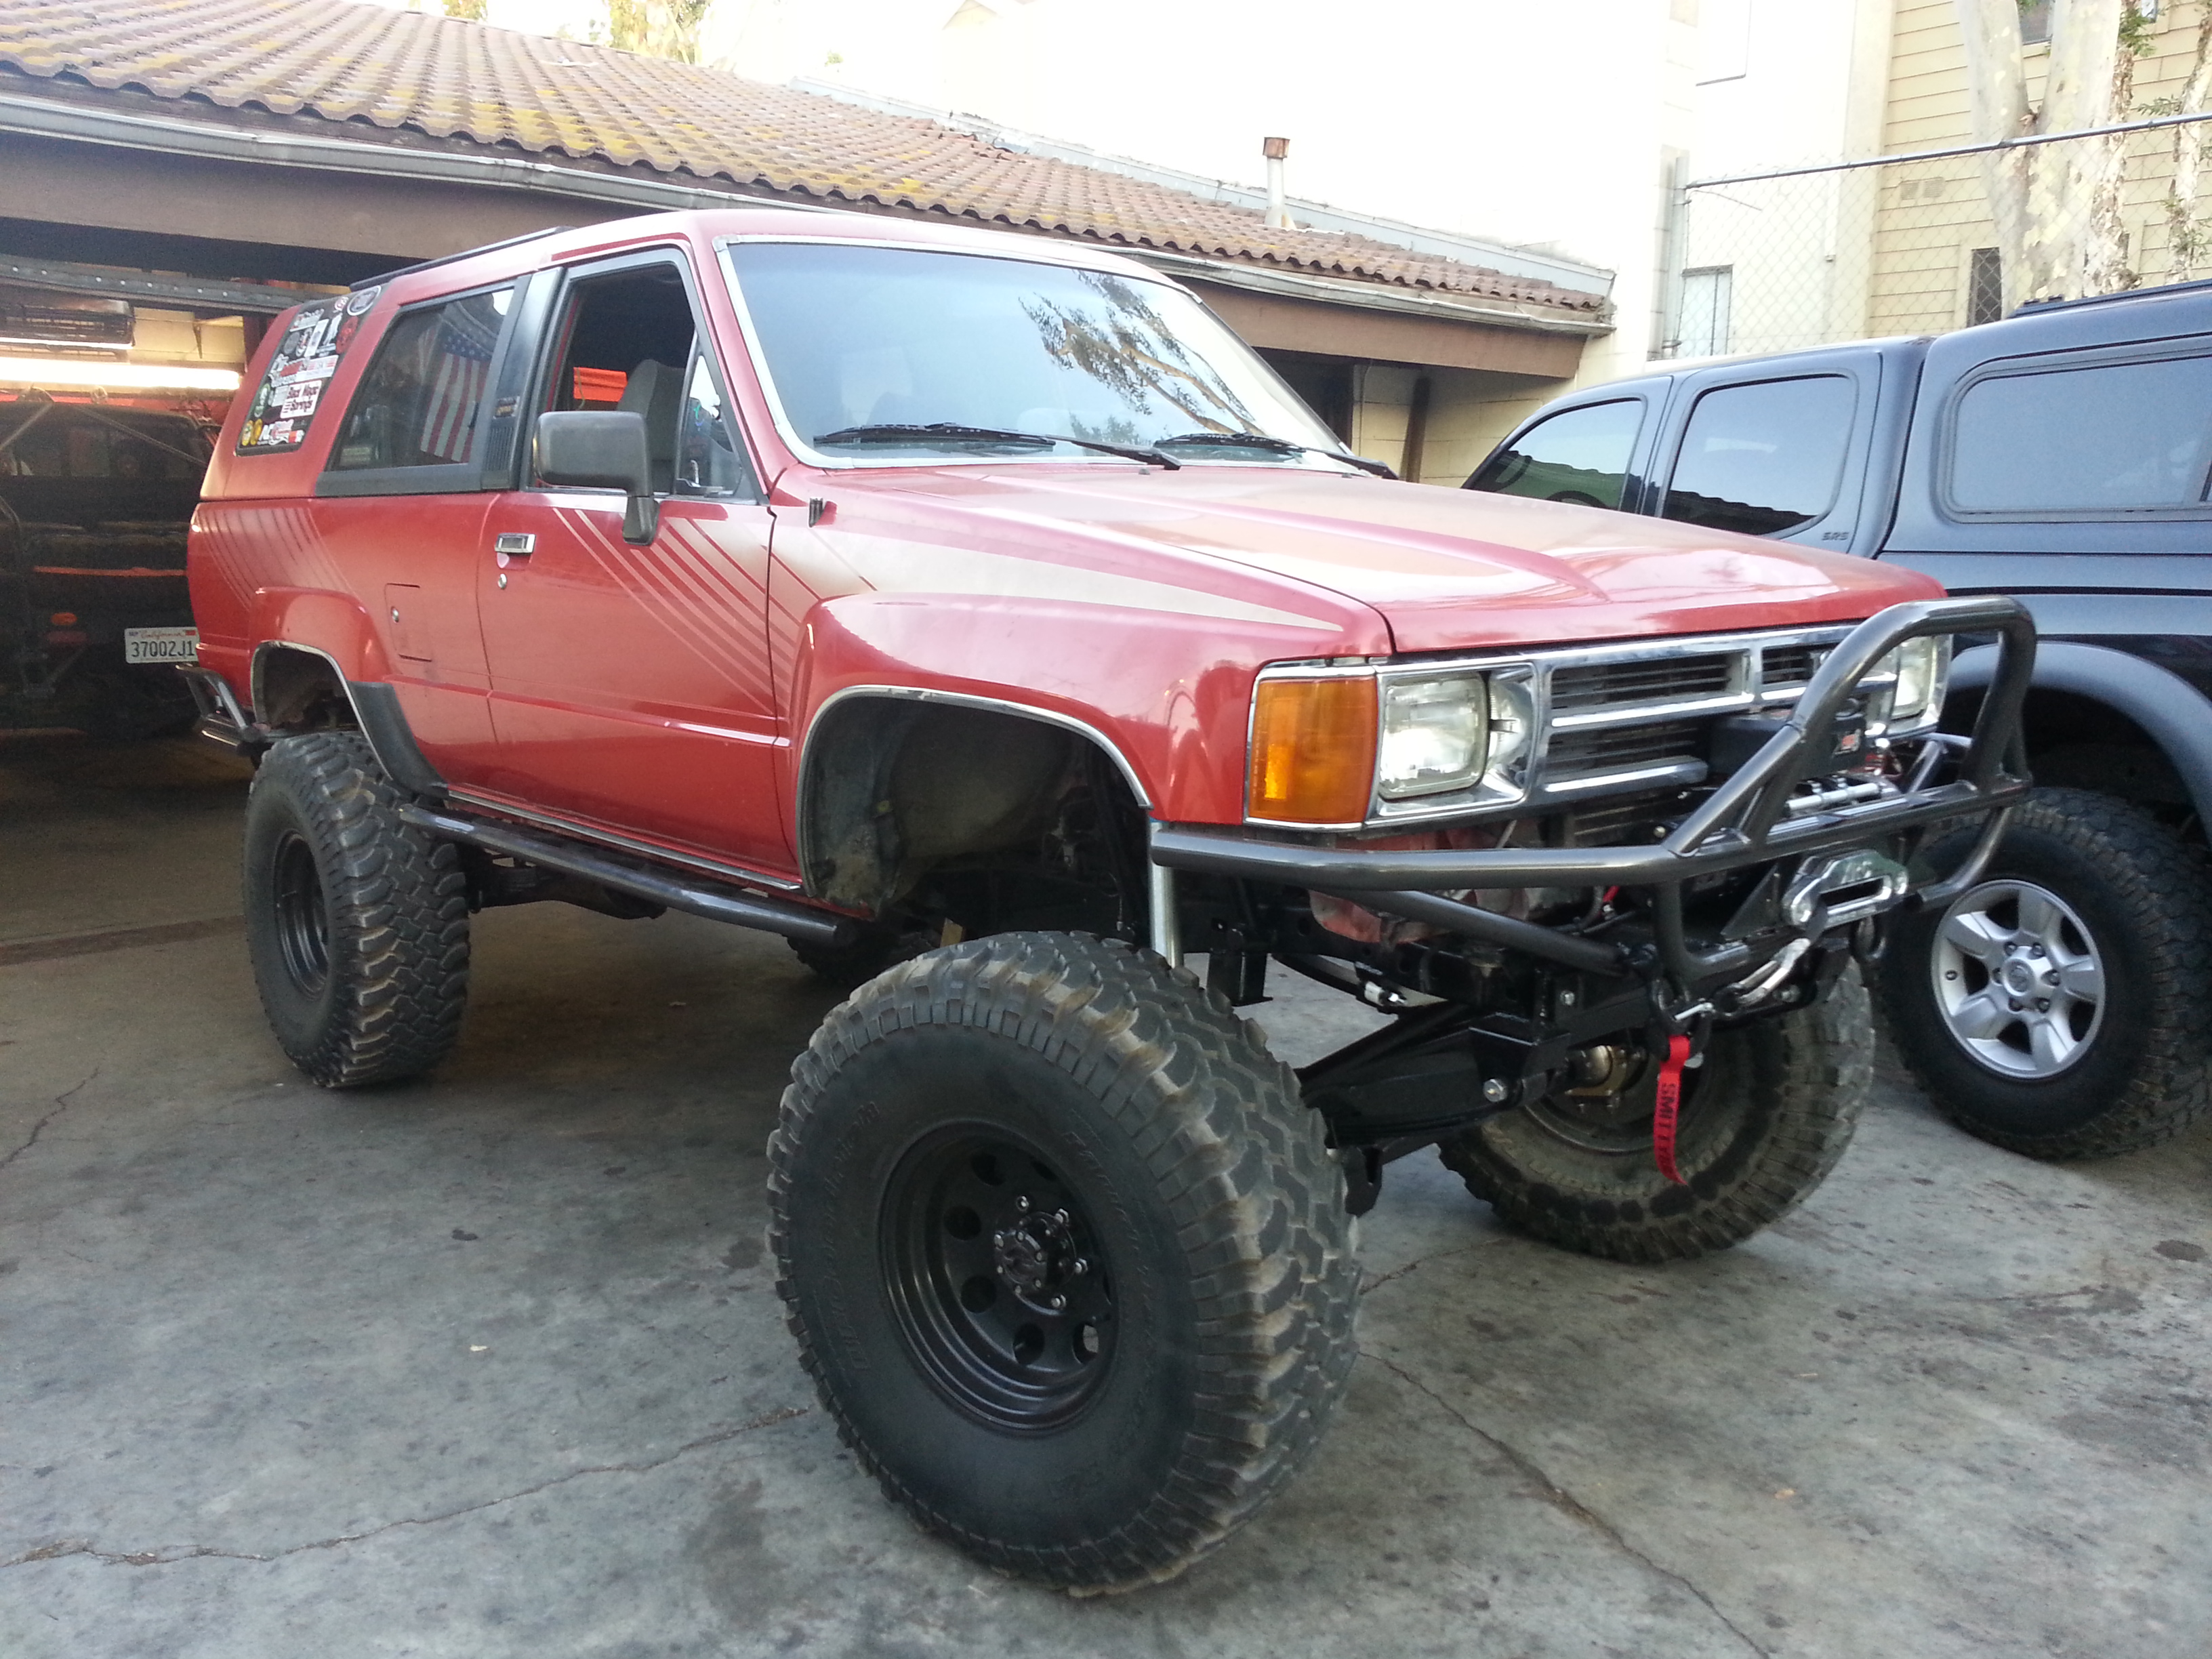
I also took a few shots while I was out and then one from directly from the side... but I was up on my steps and I can't seem to find a parking spot in the city ever where I can sit level and have no one park next to me within 10 seconds of turning off the key...... So I just took a few while I was out and when I got home....
*****************************************
I also gotta think dragon, a good dude, for taking some time to do some computer trickery and insert my outlaw 2's into the mix as a side by side... so I will post those pictures now... Please let me know what you think... it likely won't affect my decision, but I want you all to know that I do appreciate your thoughts and sometimes I see things a little differently when I get other perspectives that are not only personal preference but sometimes some logical reasons why you all come up with your personal preferences in the first place... I appreciate it!
I gotta tell you I am totally shocked how much I like the black wheels... but I do agree that they kinda disappear into a big ball of black including the 35 inch tires...
Always look forward to the commentary!... whether I agree or not, you know what I mean?
Installed the Trail Gear LED turn signals with resistor, front license plate and got a little bit laid out in my mind for the roof rack.... I'll share that latter part later....
I heat shrunk each wire right up to the light because they seemed to be a little bit raw in that area... I'm fairly sure its just solder splatter or something like that... but they felt a little rough right at the end... so after heat shrinking each one individually I then did it around both tight to the end so that water can still run down the Bible that Trail Gear notched into the back so that water won't collect...
By then heat shrunk together the entire length of wire that they provided.....
I've been used tight fitting spades that we're joined into the factory connector but separated right up to the connector with heat shrink..... Then put three-quarter heat shrink that I had slid previously over the wires toward the signal back over the connector and heat shrunk that tightly...
As you can see in the previous picture I already had one inch heat shrink pulled back over the other side of the connector and the original Toyota wiring from the harness... then pulled that over all of it and heat shrunk both sides til it was completely waterproof and well insulated.... I chose this route because I want to keep the original connector intact. I know that seems redundant at this point but there's always a method to my madness!..... Okay often or at least occasionally, right, hahahaha!....... Each wire gets one of the wires from each side of the resistor from super bright LEDs.com ... I ran each pair of wires through its own heat shrink and then heat shrunk all of them until I had nice clean set up... no cutting or suffering was required because both pairs of wires, 1 signal light wire and one resistor wire went into each spade connector... they are quality spades from Signal Electronics..... This way I can eventually remove spades all together, cut back and small amount of heat shrink tubing and solder in some donor connectors from the yard so that I don't have to cut my original signals up...
.....Obviously, before I connected any wiring I had to run the wiring through the tab slot in the tab welded to the addicted off road front bumper(I'm pretty sure you need to ask him for these if you're going to order a bumper and want an easy way to mount the LED turn signals)...... I used fine threaded stainless machine thread screws, staying with flat washers and lock washers and nuts... all of which you can see in these two pictures...
Here they are mounted and working in the videos...
I also explain in the videos how I'd totally missed the fact that studies bumper has holes already for mounting a license plate... I just about spat my coffee all over the place when I realized this.... I have terrible odds with the laws of Murphy when it comes to getting pulled over for the stupidest crap... So within the videos I explained how I meant it but I didn't mention how I got the thread screws from the backside into and through the license plate on front... I ended up taking needle nose pliers and reaching in, which isn't that easy for me as my hands are not tiny, and dropping them through the holes... I tried using a strong magnetic screwdriver that I have first but it just kept getting stuck to everything and was not practical... I didn't take my hand would fit in there while holding the pair of needle nose... but it did...
There is a picture of everything mounted... for those who don't really get to watch videos too often... the videos will follow...
****************************************
I also took a few shots while I was out and then one from directly from the side... but I was up on my steps and I can't seem to find a parking spot in the city ever where I can sit level and have no one park next to me within 10 seconds of turning off the key...... So I just took a few while I was out and when I got home....
*****************************************
I also gotta think dragon, a good dude, for taking some time to do some computer trickery and insert my outlaw 2's into the mix as a side by side... so I will post those pictures now... Please let me know what you think... it likely won't affect my decision, but I want you all to know that I do appreciate your thoughts and sometimes I see things a little differently when I get other perspectives that are not only personal preference but sometimes some logical reasons why you all come up with your personal preferences in the first place... I appreciate it!
I gotta tell you I am totally shocked how much I like the black wheels... but I do agree that they kinda disappear into a big ball of black including the 35 inch tires...
Always look forward to the commentary!... whether I agree or not, you know what I mean?
07-15-2013, 04:36 AM
#7077
Registered User
Join Date: Sep 2012
Location: iowa
Posts: 618
Likes: 0
Received 0 Likes
on
0 Posts
Wow this thing is awesome! And this thread is full of info. You've done a great job. I've got a suggestion for your tire and wheel dilemma....why not put the white letters out on the black wheels? Then the tires won't disappear as much.
07-15-2013, 06:15 AM
#7079
Registered User
Holy chit! diggin the light bar, bright even in the day time, would hate to accidentally blind someone on the way home at night haha. They did a really good job on your rig, can't wait to see action shots!


