
ChefYota4x4's 1987 4Runner Build-Up Thread
 05-24-2013, 08:40 PM
#6581
Registered User
Join Date: Feb 2013
Location: Central CA
Posts: 121
Likes: 0
Received 0 Likes
on
0 Posts
Lol wow I tip my hat to you sir for you did the impossible. I tried to read through his thread but I'm an extremely slow reader. And i only made it to about 200 pages in then just stopped. Lol but I'll admit I've learned tons off these guys and filled my brain with loads of information thanks to you all. Off the bat more or less the same people you named 
Diableri I'm just curious what exactly did you learn from me. I got everything I know off everyone else on this wonderful website. I mainly just copy ideas off everyone else hahaha.
Anyway thanks for pointing us out. glad I was able to help with some ideas for ya it makes me happy knowing I was able to give people some sort of inspiration to the few people such as yourself. Can't wait to see what kind of stuff you've got planned for your rig.
LET THE ADDICTION BEGIN!
Diableri I'm just curious what exactly did you learn from me. I got everything I know off everyone else on this wonderful website. I mainly just copy ideas off everyone else hahaha.
Anyway thanks for pointing us out. glad I was able to help with some ideas for ya it makes me happy knowing I was able to give people some sort of inspiration to the few people such as yourself.
Can't wait to see what kind of stuff you've got planned for your rig.LET THE ADDICTION BEGIN!
That list is getting huge with all the awesome stuff you guys do to these great little trucks. Addiction is right. Your and Chef's experience so far with machinists and mechanics has given me a lot of caution in choosing there as well. I contacted the guys at 22reperformance and they told me they'd do the V6 as well as the 22r's so I think when it's that time, I'll probably just go that route for peace of mind. Those guys truly seem to have it all lined out as well as anyone and my normal guys for street rods don't want to touch this thing.

I'm not convinced I'll ever truly use an SAS enough to consider that, but I am going to pay close attention. I'm not far enough into your thread to know how things have gone exactly, just the stuff I've read here so far (in your thread, you're currently trying to trouble shoot some engine noise and just replaced your steering box).
It's all great stuff for a newbie like me and I'm just trying to soak it all up as much as I can (and there's many threads to go). Makes planning MUCH easier and will save me a TON of money and headaches at some point. I hope I can pay it forward somehow in the future.
Last edited by diableri; 05-24-2013 at 08:55 PM.
 05-25-2013, 12:43 PM
#6583
Well, ..... as usual, my battle with the Law Firm of Murphy & Murphy has reared it's head! Lol....
I now have everything in the realm of gears to do my regear and lockers with master install kits and the lot..... but the gear guy I was going to use is on medical leave and his equip. is in his shop so he can't do it... I sure hope he is ok! Hate being forced to take leave, especially for a medical condition!
This will possibly put me in a position to be late with the gears b4 the SAS...... so we will see, I'm doing the best I can, ya know? Holiday weekend is the problem as well..... anyone available in the other guys place to do the gears... Well, let's just say it's not likely they would be ready until Tuesday to even start if that. But whatever comes it's okay kama because I know this will get done eventually. I might have another option but I'm not going to share on that just yet... I have no clue if that's available to me either... Not just yet anyway... So with that and also putting into the mix the fact that Murphy and his legion of gremlins are always lurking... I'll just hold off mentioning anything until I see what's going on! Lol
Last edited by ChefYota4x4; 05-25-2013 at 12:46 PM.
05-27-2013, 09:34 AM
#6584
I just wanted to do a little update...
JonnyBoy came down yesterday with the 83 axle and picked up the Old Man Emu leaf packs... Simply put, definitely glad to have met him and spent the day hanging out and wrenching! Definitely a class act!
Also, fairly knowledgeable guy, and I really appreciate the fact that you not only helped me, Jonny, but I really appreciate as well that you had lots of patience as we got into the 10 hours range... Lol... It's definitely making a lot more sense on some of the things that we discussed, and I really appreciate the tips on things that can be done to really insure a secure setup. I hope you can come down again soon and that you guys let me and Richard know when you are going to hit local mountains! I'm sure there are several others in LA and surrounding, like Blakefogt and such, whom would also love to go! I also plan to be up there soon as possible... Desperately needing a Sierras fix!
*************************************
Unfortunately, since I couldn't get my gears done in time we couldn't fully assembled my axle.... But, that's okay and I've learned to always be prepared for hang ups and setbacks.
Yesterday after pulling the Old Man Emu Springs we installed a set that Jonny had. They were set up for a pickup and I believe that's why they're pretty badly sagging... But it doesn't matter because they are only temporary and they will be coming off and going right back to Jonny. The only problem is that the Leaf strap is set up in a way that it protrudes like the Old Man Emu packs do... Just sitting on the ground with all the equipment I have in the back of the truck it is already around one quarter of an inch from hitting the tank pinch. This is a problem only because if I have to move it around before I completely tear it down, I will have to put in the ZUK coil again. It's not really a big deal but it's just time consuming, and so I will really have to figure some things out if I'm going to be ready to go this weekend.
My bumper for the rear from 4Xi should be here no later than Friday... This means that I will likely have to install it later... That's fine. I think it will be much easier to paint hanging then while hung on my truck! Lol.
PS: I was wondering if anyone in LA has a fish hook tension rating tool... Richard? I just want to get the bearings and the knuckleball done properly... I will look for one today but I had trouble finding one a few weeks ago.
I will at least be pulling my rack today, then possibly adding the coils back in because it looks like I will probably have to use my own truck to deliver my differential gears, set up kits and lockers... I will find out today, but as you can see things keep coming up which put me off
05-27-2013, 10:10 AM
#6585
Registered User

It was great to come down, I needed to get out of the Owens Valley for a bit to know there's still some places with green vegetation! Realized after I got back last night I never grabbed any of the produce you had hanging out back, so now I'll have to return soon.
Yeah, sucks about those springs, I really had better expectations for them. Looking at how much they sag, I'm also glad I'm not going to use them for my sas, though. I'll get those instructions to you shortly and run over to see if the guys are there.
Yeah, sucks about those springs, I really had better expectations for them. Looking at how much they sag, I'm also glad I'm not going to use them for my sas, though. I'll get those instructions to you shortly and run over to see if the guys are there.


 05-27-2013, 02:04 PM
#6587
Hey, TEUF! Hahahaha, I thought for sure you knew this already... In all seriousness, you want to come up here with your 220 and do some welding? I would really prefer doing 220 on most of this... And I know your attention to detail is incredible... Richards neighbor has been doing it for years as well but I don't think he has access 220 welder at the moment. Richards dad might possibly but I'm not sure he's available... We will see, but it looks like that is around a 50/50 odds situation at the moment. I actually could really use a plasma cutter as well! Hahaha
05-27-2013, 09:40 PM
#6588
Ok, while I can barely keep up with everything going on... I did manage to make a tiny bit of progress and thank you so much again to Jonny, a good cat with a good attitude!
First of all, before I get started on anything I've managed to accomplish which is barely anything trust me... I wound up decding that I needed to finally replace the compressor that I got stolen... I had 150 PSI compressor that I lent to someone...... and it never was returned... Its a long story but the bottom line is I was never going to get it back. I have a 100 PSI pancake compressor, a 90 PSI Campbell and Hausfeld that I have had for over 20 years which cell works perfectly to this day...

But I really was in need of something in the range of 200 pounds or at least another 150 PSI model... I was out with Johnny at Lowes and was talking with Ian, one of the very helpful employees there from South Africa that Richard knows pretty well from going with me... And he pointed out one that was actually on sale for Memorial Day weekend... So I picked this one up and man did it perform for us!..
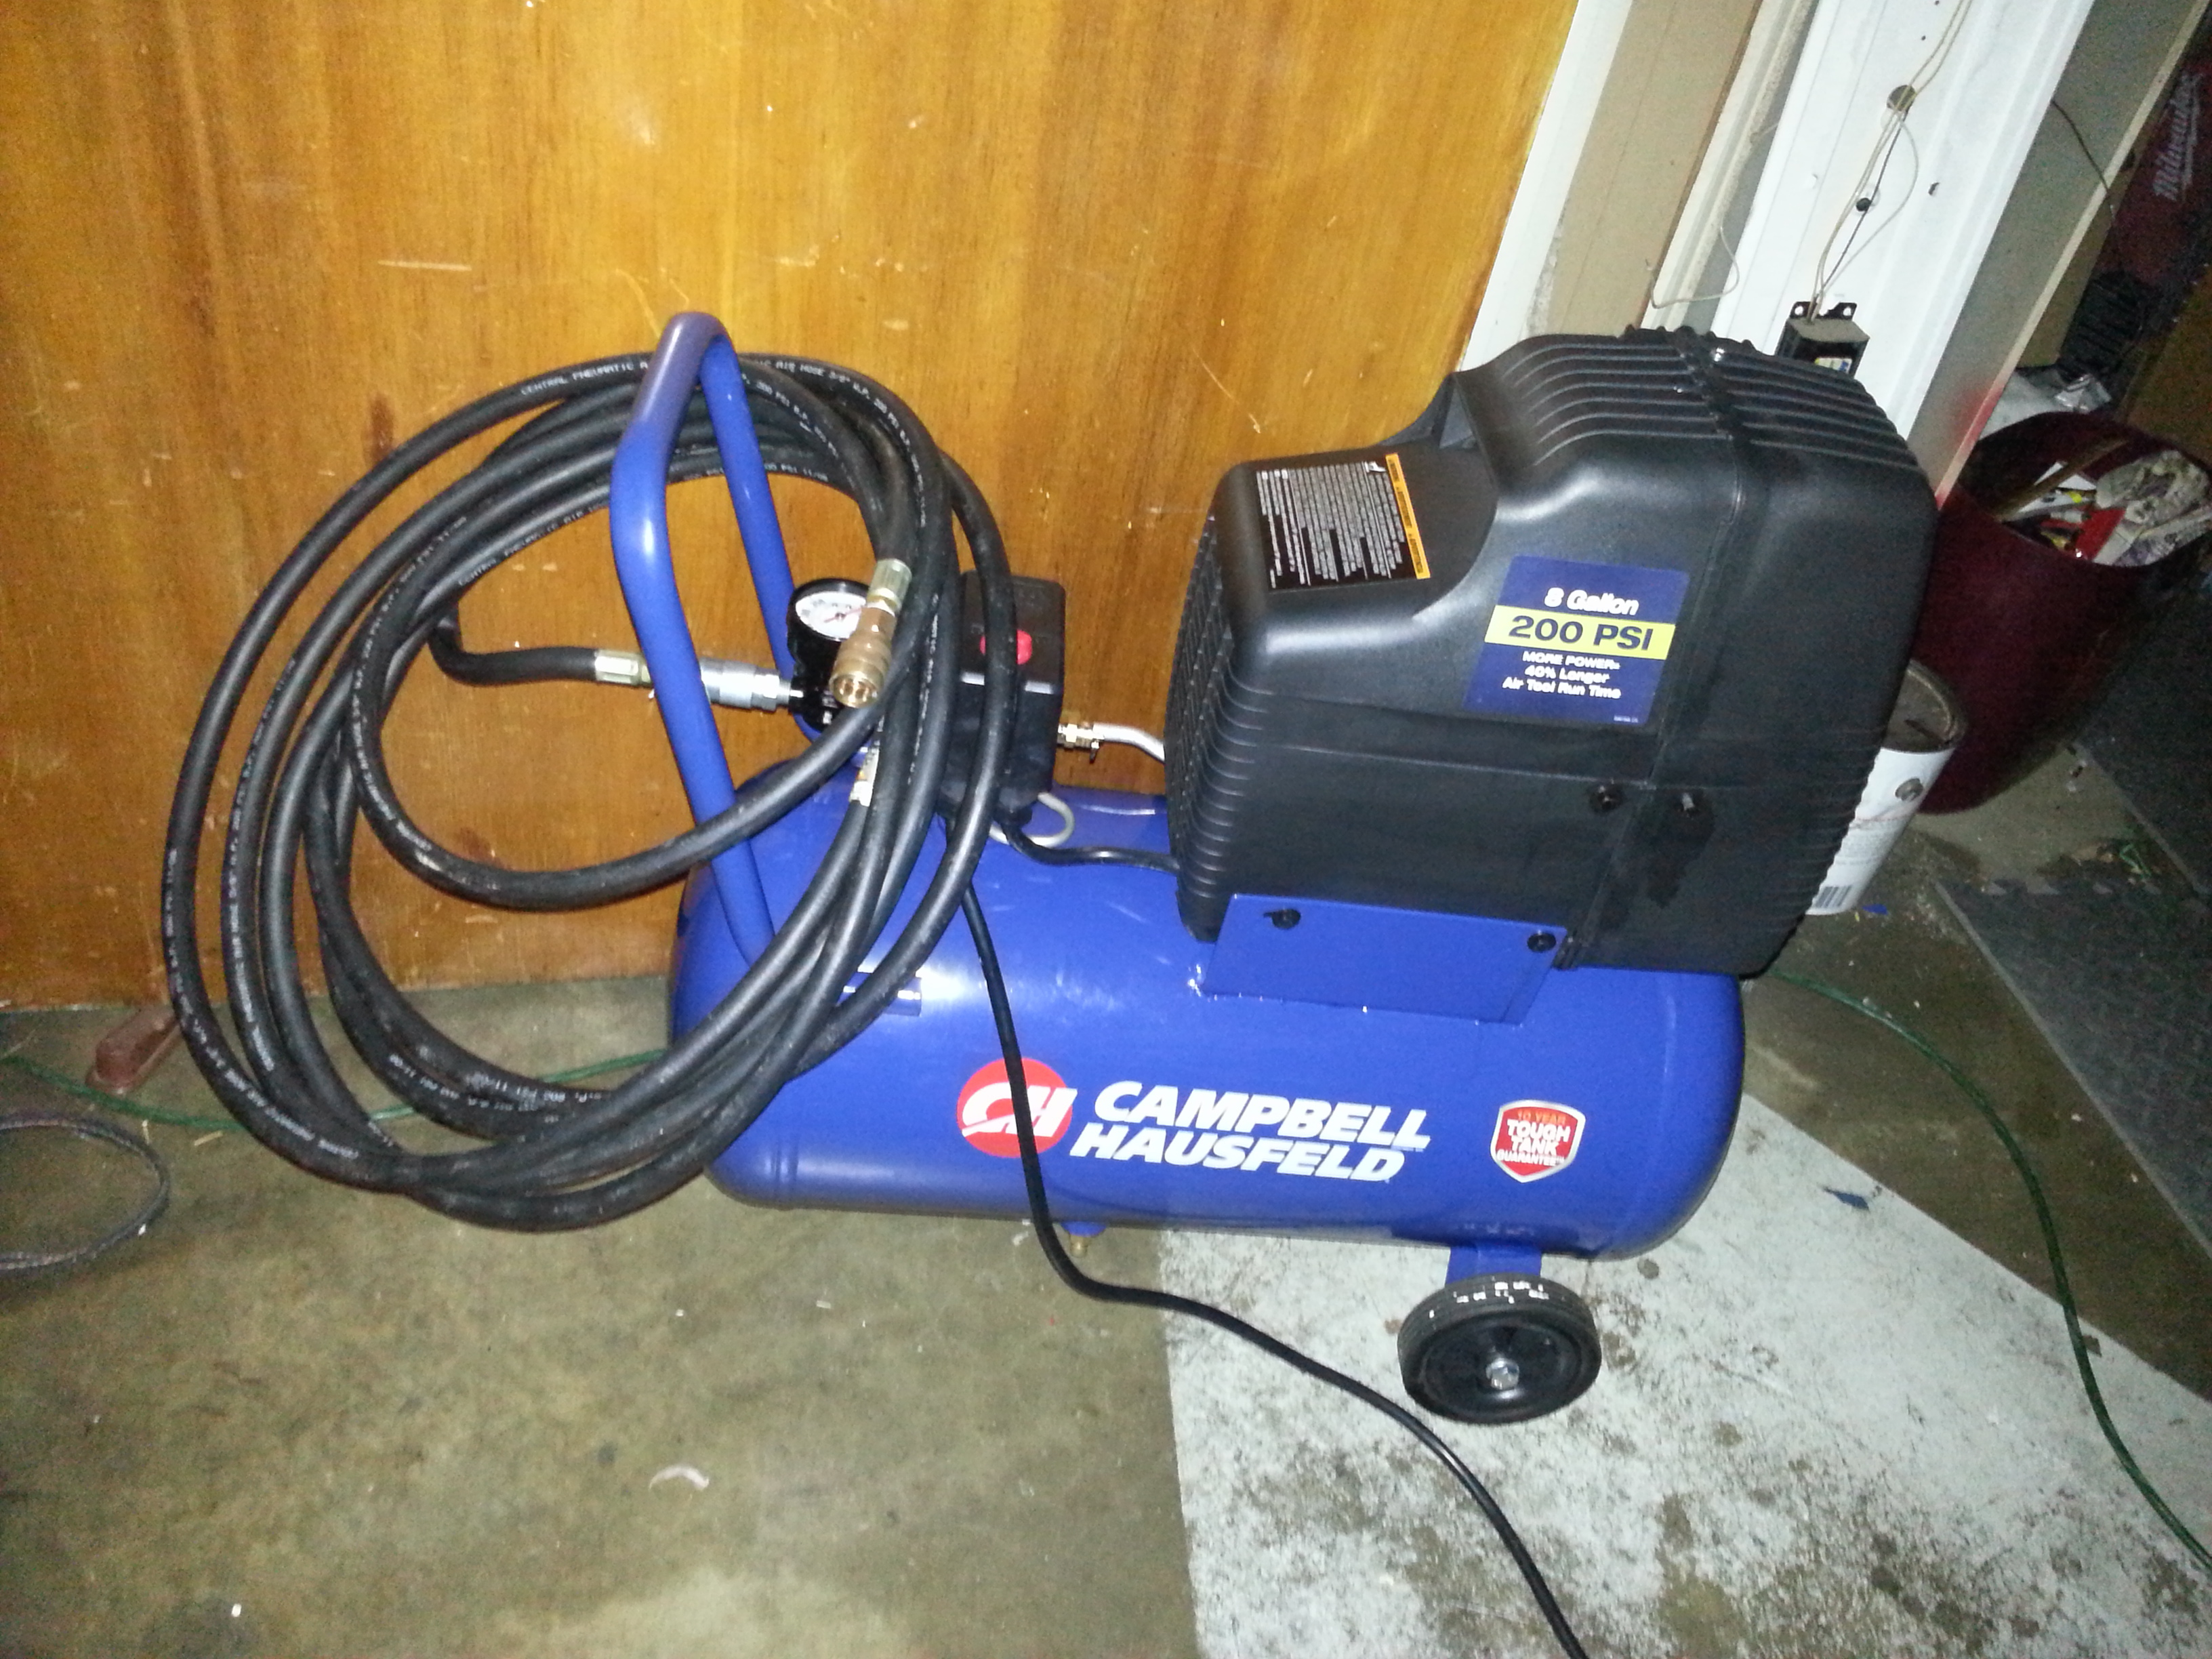
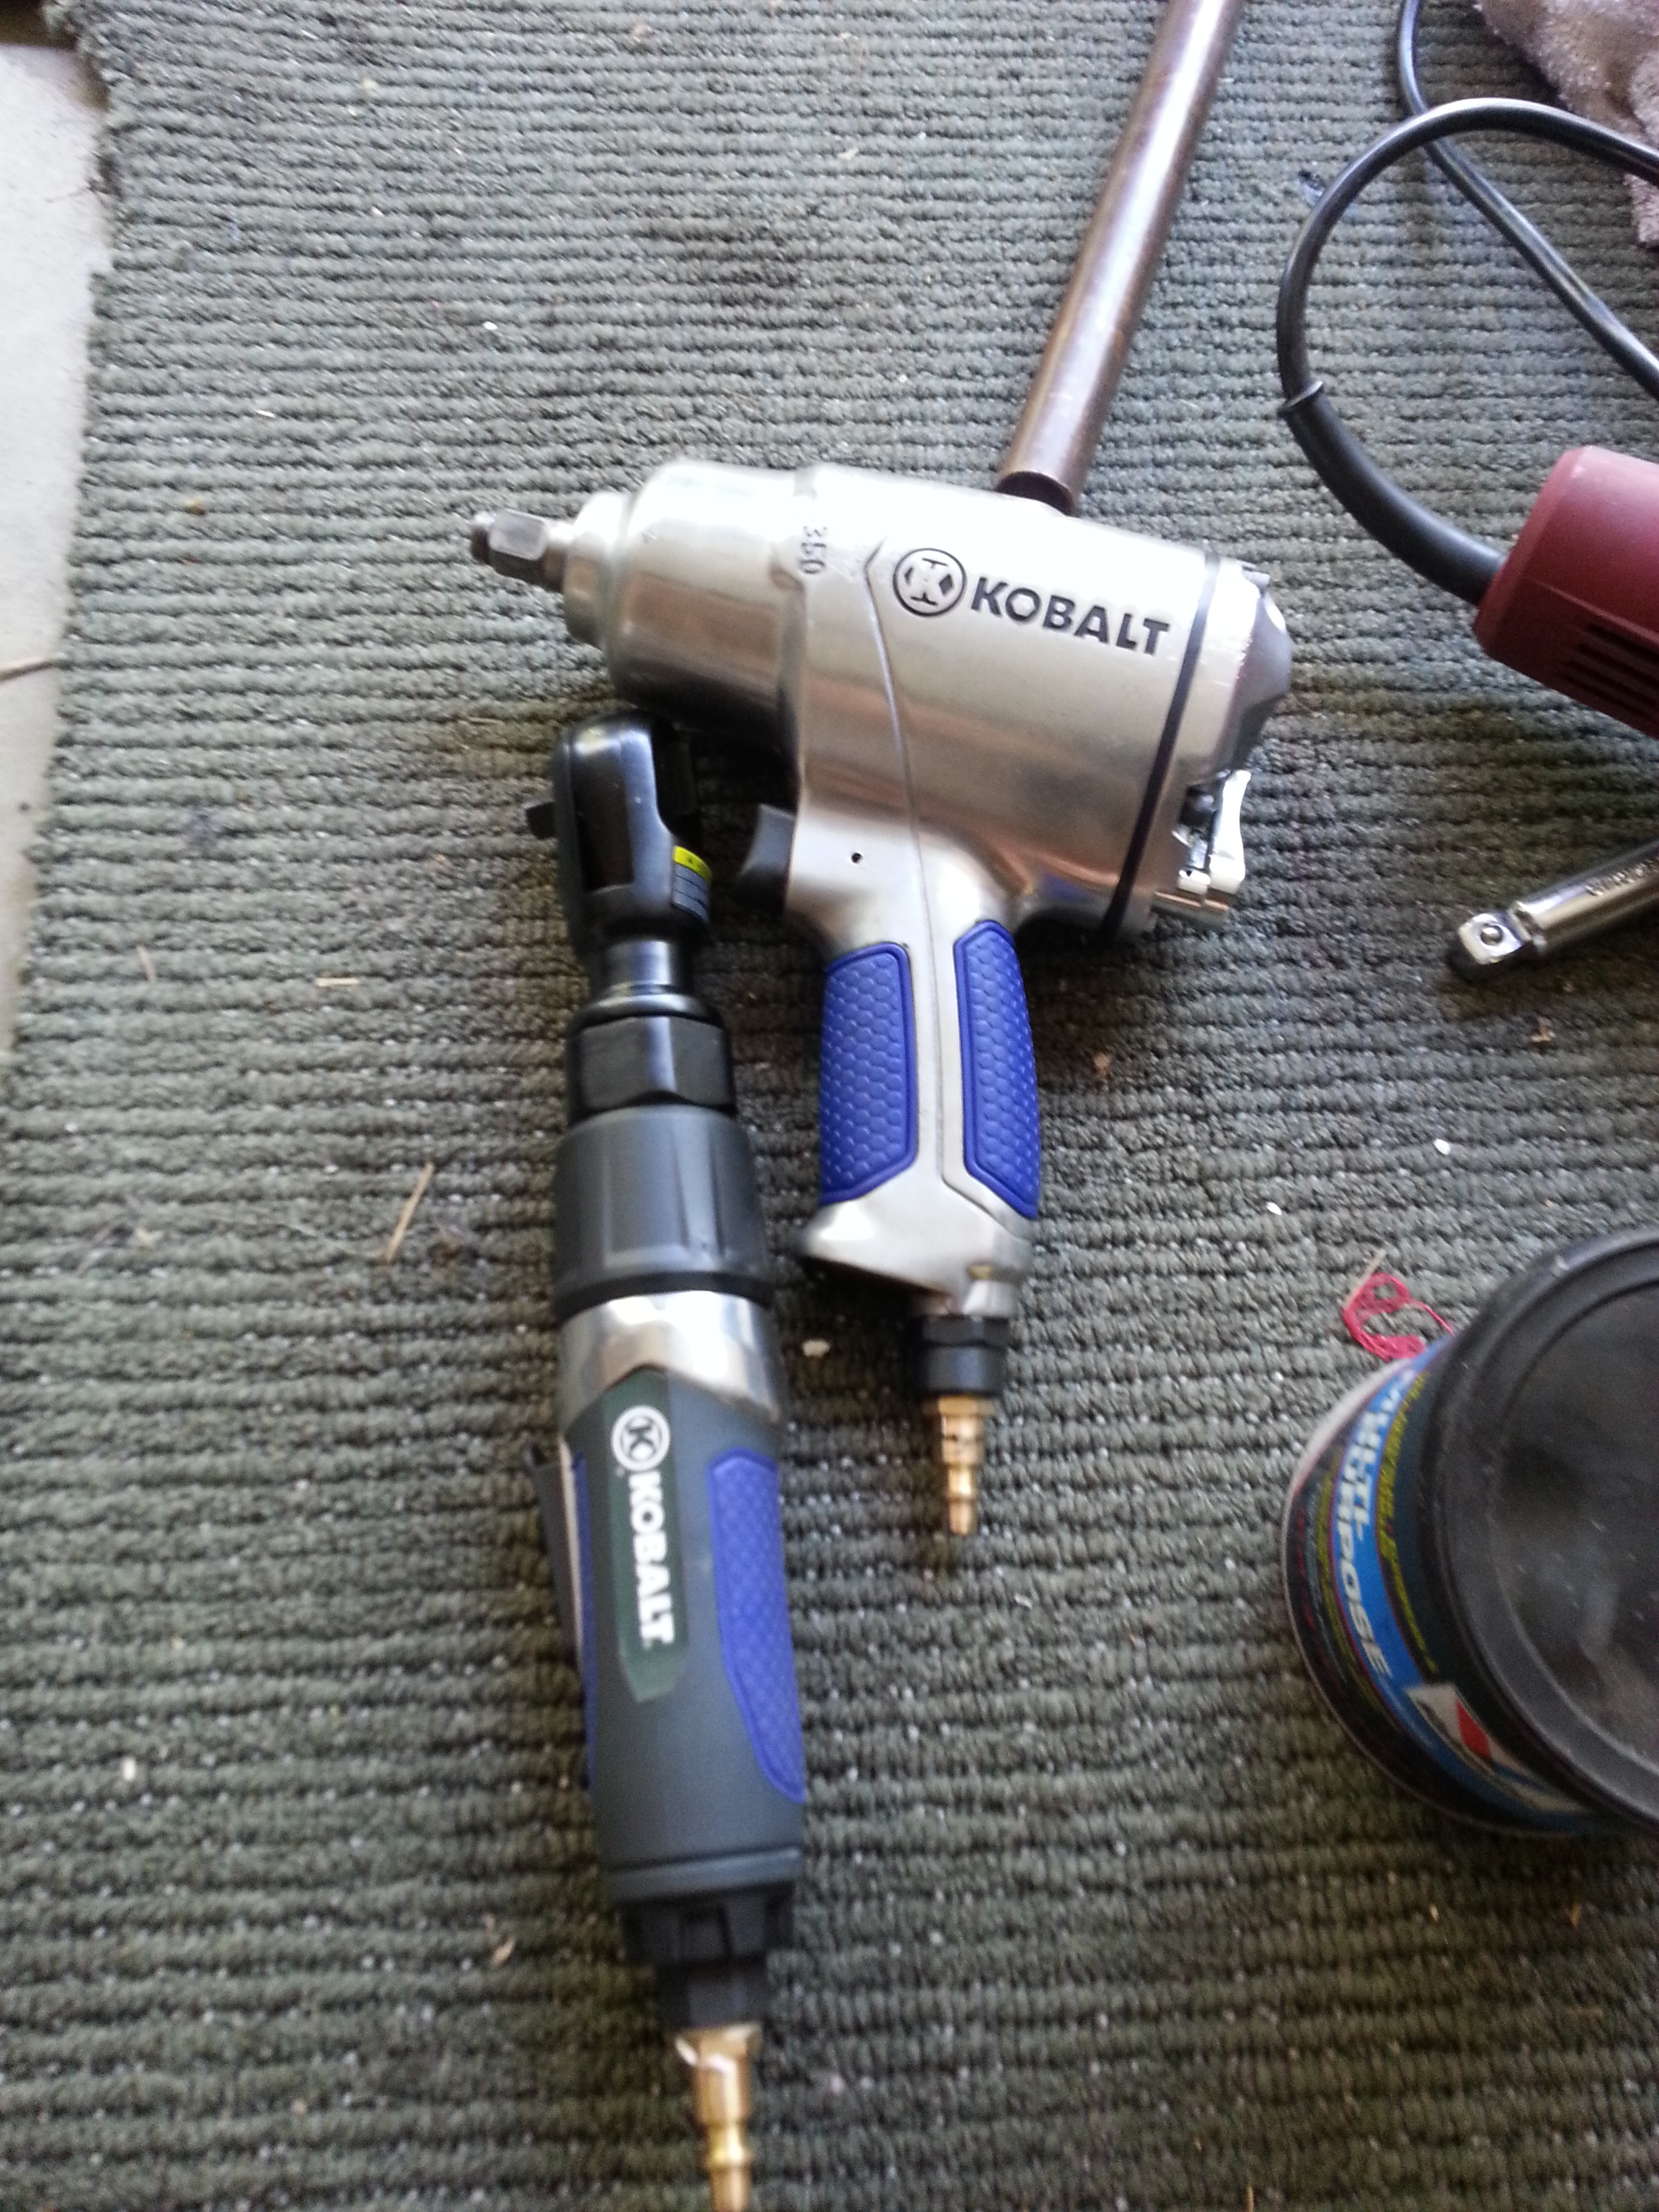
While there, I was actually looking in the first place for a good right angle air ratchet... They have Ingersol rated at 55 psi and I know people will laugh but I have had such good luck with Kobalt Tools, I figured why not give this set off two for under $80 a chance... I think John will verify when I say that this 350 PSI half inch drive air impact is unbelievable! didn't really have much use this time for the 3/8 inch right angle air ratchet... But I'm telling you its a great deal. For something like $4 more I get the warranty for 2 years... I plan to use the crap out of these so if something is going to go wrong it should go wrong within that time. The half inch impact does great having three forward speeds... Just ask John how quickly it takes off the u bolt which is at around 100 pounds! BUTTER!
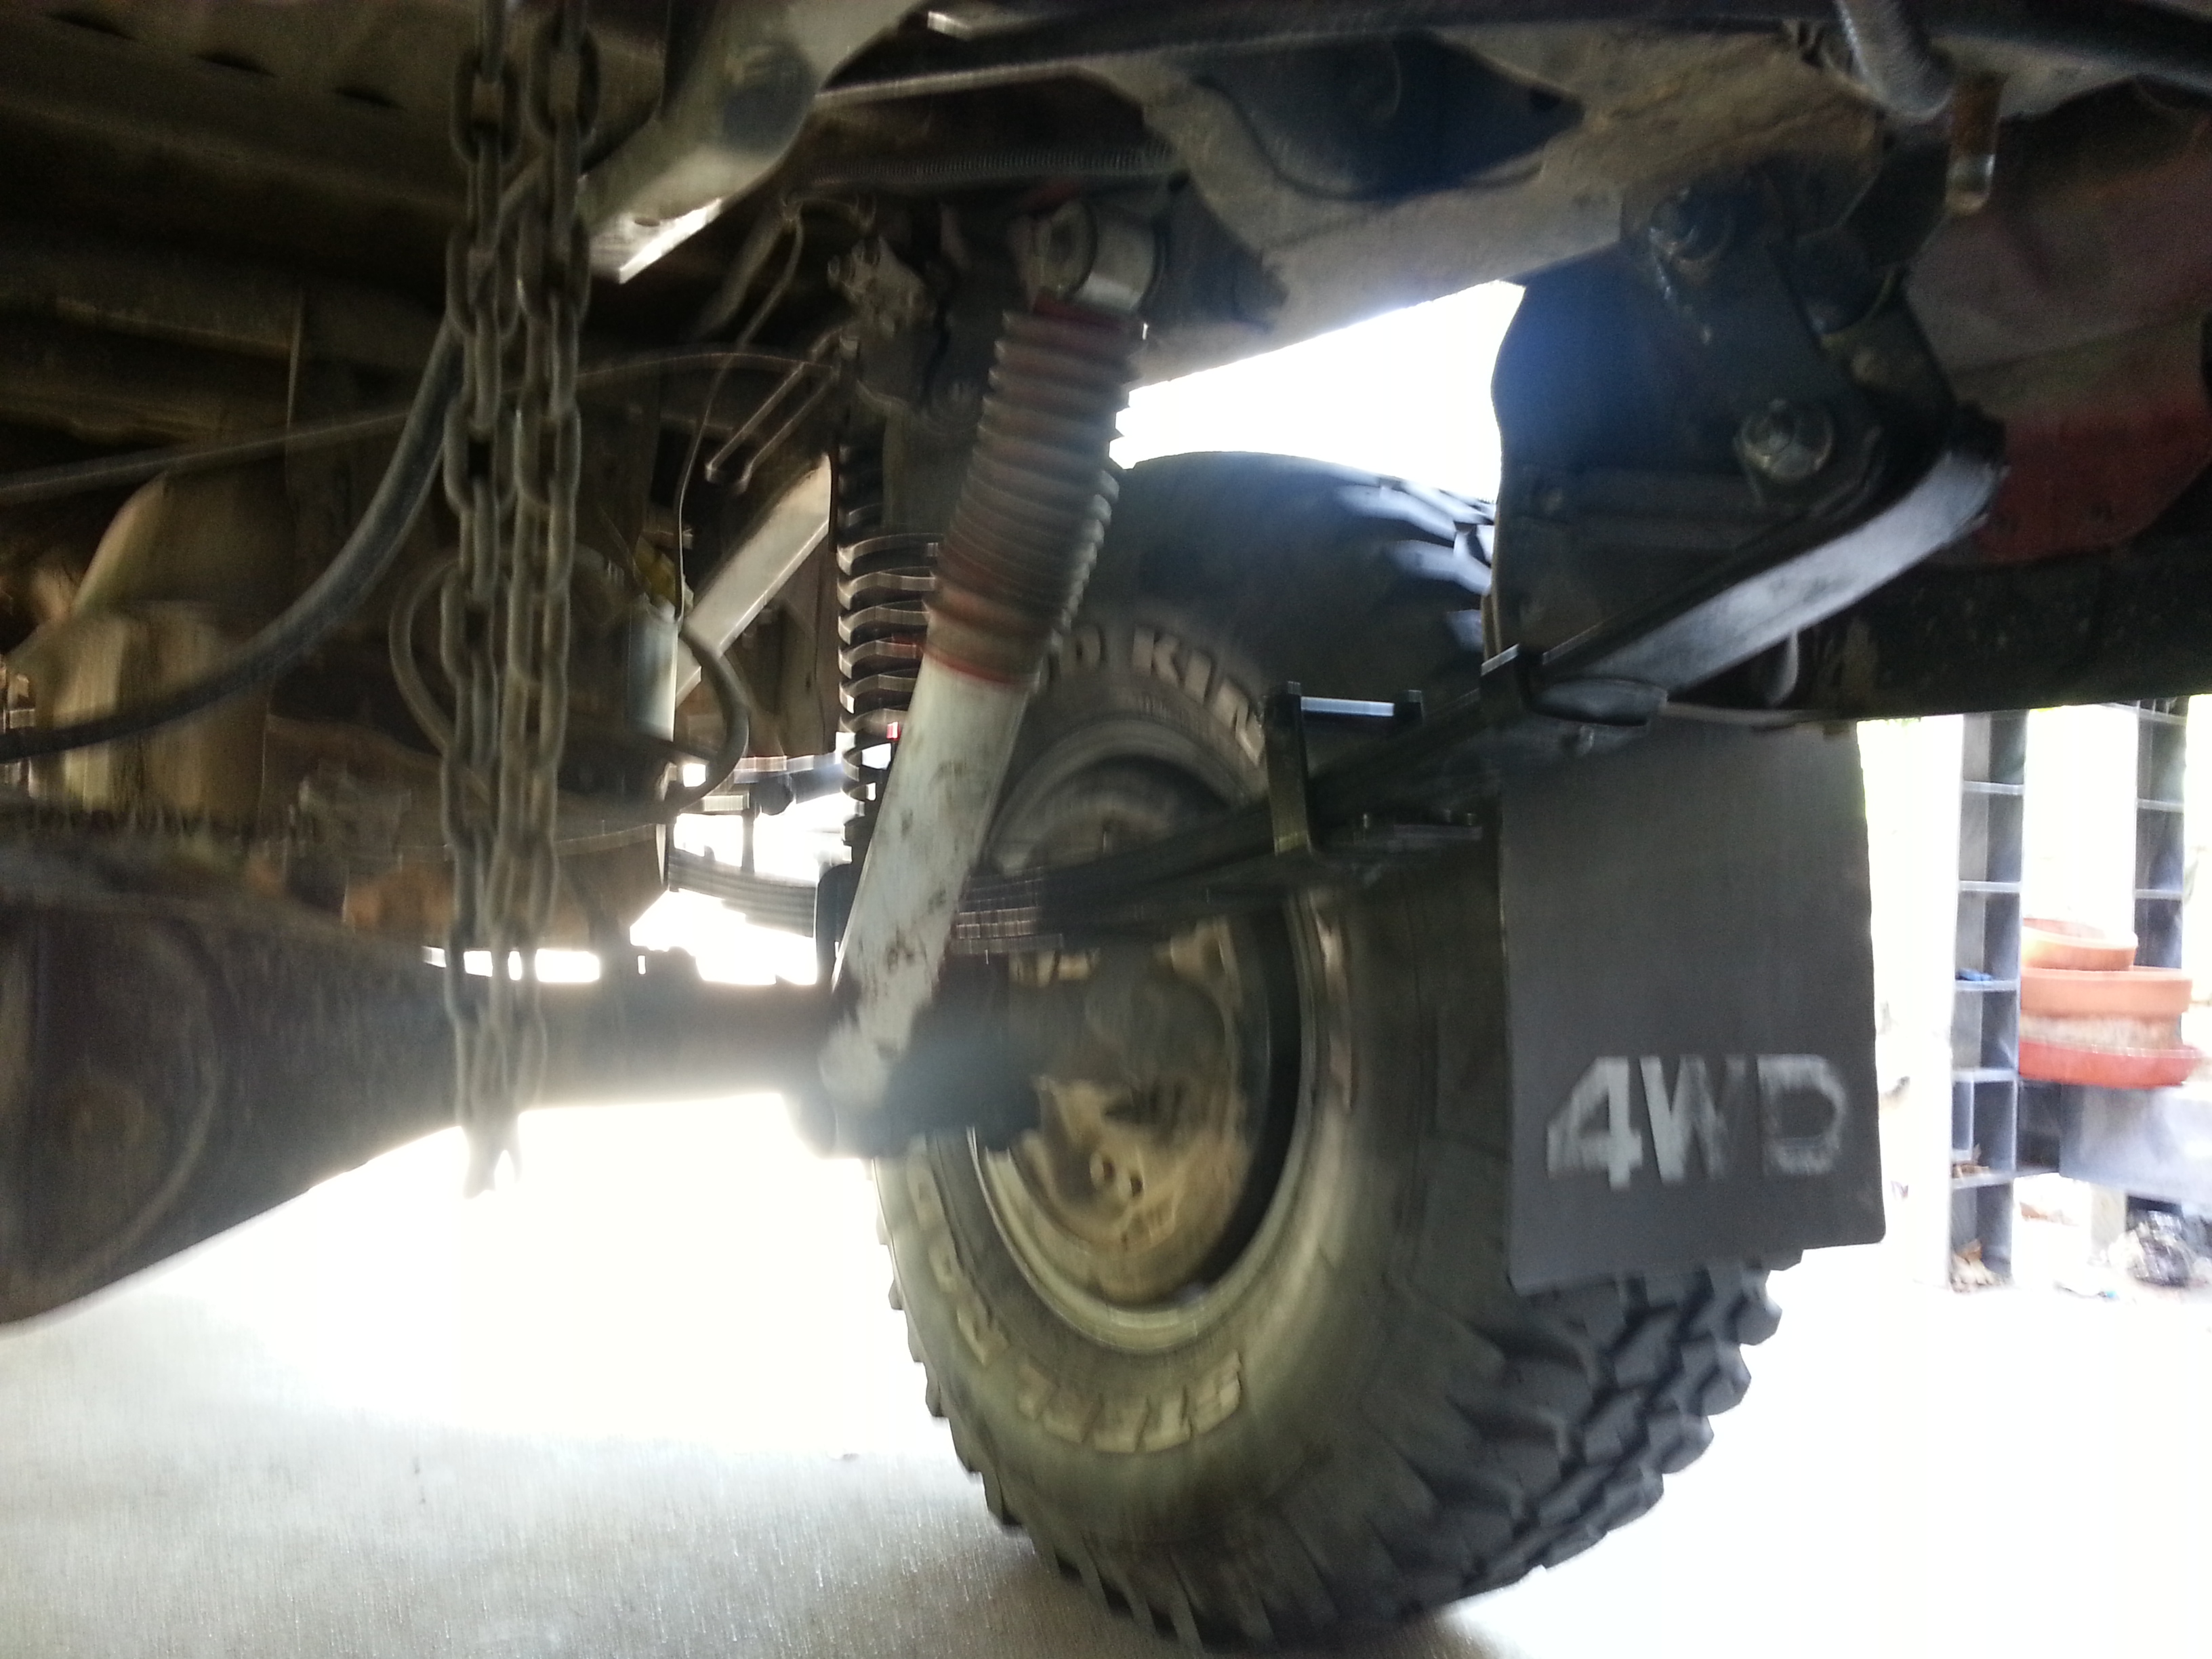
while John was here and as he mentioned he pulled out some Springs that he brought that I could use in place of my completely sagged original 4runner Springs... We were both kinda shocked when upon getting it back on the ground they were not quite flat but they were really compressed... The only reason I need them on there is and case I have to deliver the gears or something like that and I don't have the Honda. It seems to happen to me if it's going to happen so I want to be prepared. This is why we both had a pretty big concern with those springs as they sat...
They were actually so low that the leaf strap limiter bolt was not even a quarter inch from hitting the fuel tank lip.... haha. ... So this afternoon in around 20 minutes total I pulled both for tires one at a time after jacking up each side by the frame, slapped the ZUK Springs back in and put it back on the ground and instantly have plenty of clearance of the gas tank!....

As I said, I know that it seems stupid to put anything back in when I'm trying to get ready for hopefully this weekend... But I really have no choice as it looks like I might not have the Honda for at least two days for an appointment that I have to get to at Honda to get the airbag fixed for free before it runs out of warranty on the recall. grrrr! Lol... But man, do I ever love those coils and how convenient they have been. I also mention this because I have decided that I will figure out exactly how long I need a coil to be and we'll be adding it on top of my rear 4 inch lift as a load capacity convenience the take me only a few minutes to install . I might be getting 5 inch Springs for the rear or having the 4 inch rear Trail Gear Springs modified... But they're still not going to handle much load, at least not anywhere close to the kind of weight that I put in there on longer trips.... And on a longer trip, what's 15 minutes to change out those coils once I unload? Exactly! I haven't decided just yet if I'm going to use pipe to extend my existing coils to fit... But I think that's likely the most logical way to go. They even sell those coil spacers at Pep Boys & autozone... I'm pretty sure I can figure something out and I know how very happy I was with these coils at Tierra Del Sol and otherwise... I just know that I don't want to "S" these Trail Gear 4 inch lift packs out! That is where you begin to kill them quickly. I think it's a pretty darn good solution as a matter of having the best of both worlds when I need it without having to go to some ridiculous setup like air bags or something.
***********
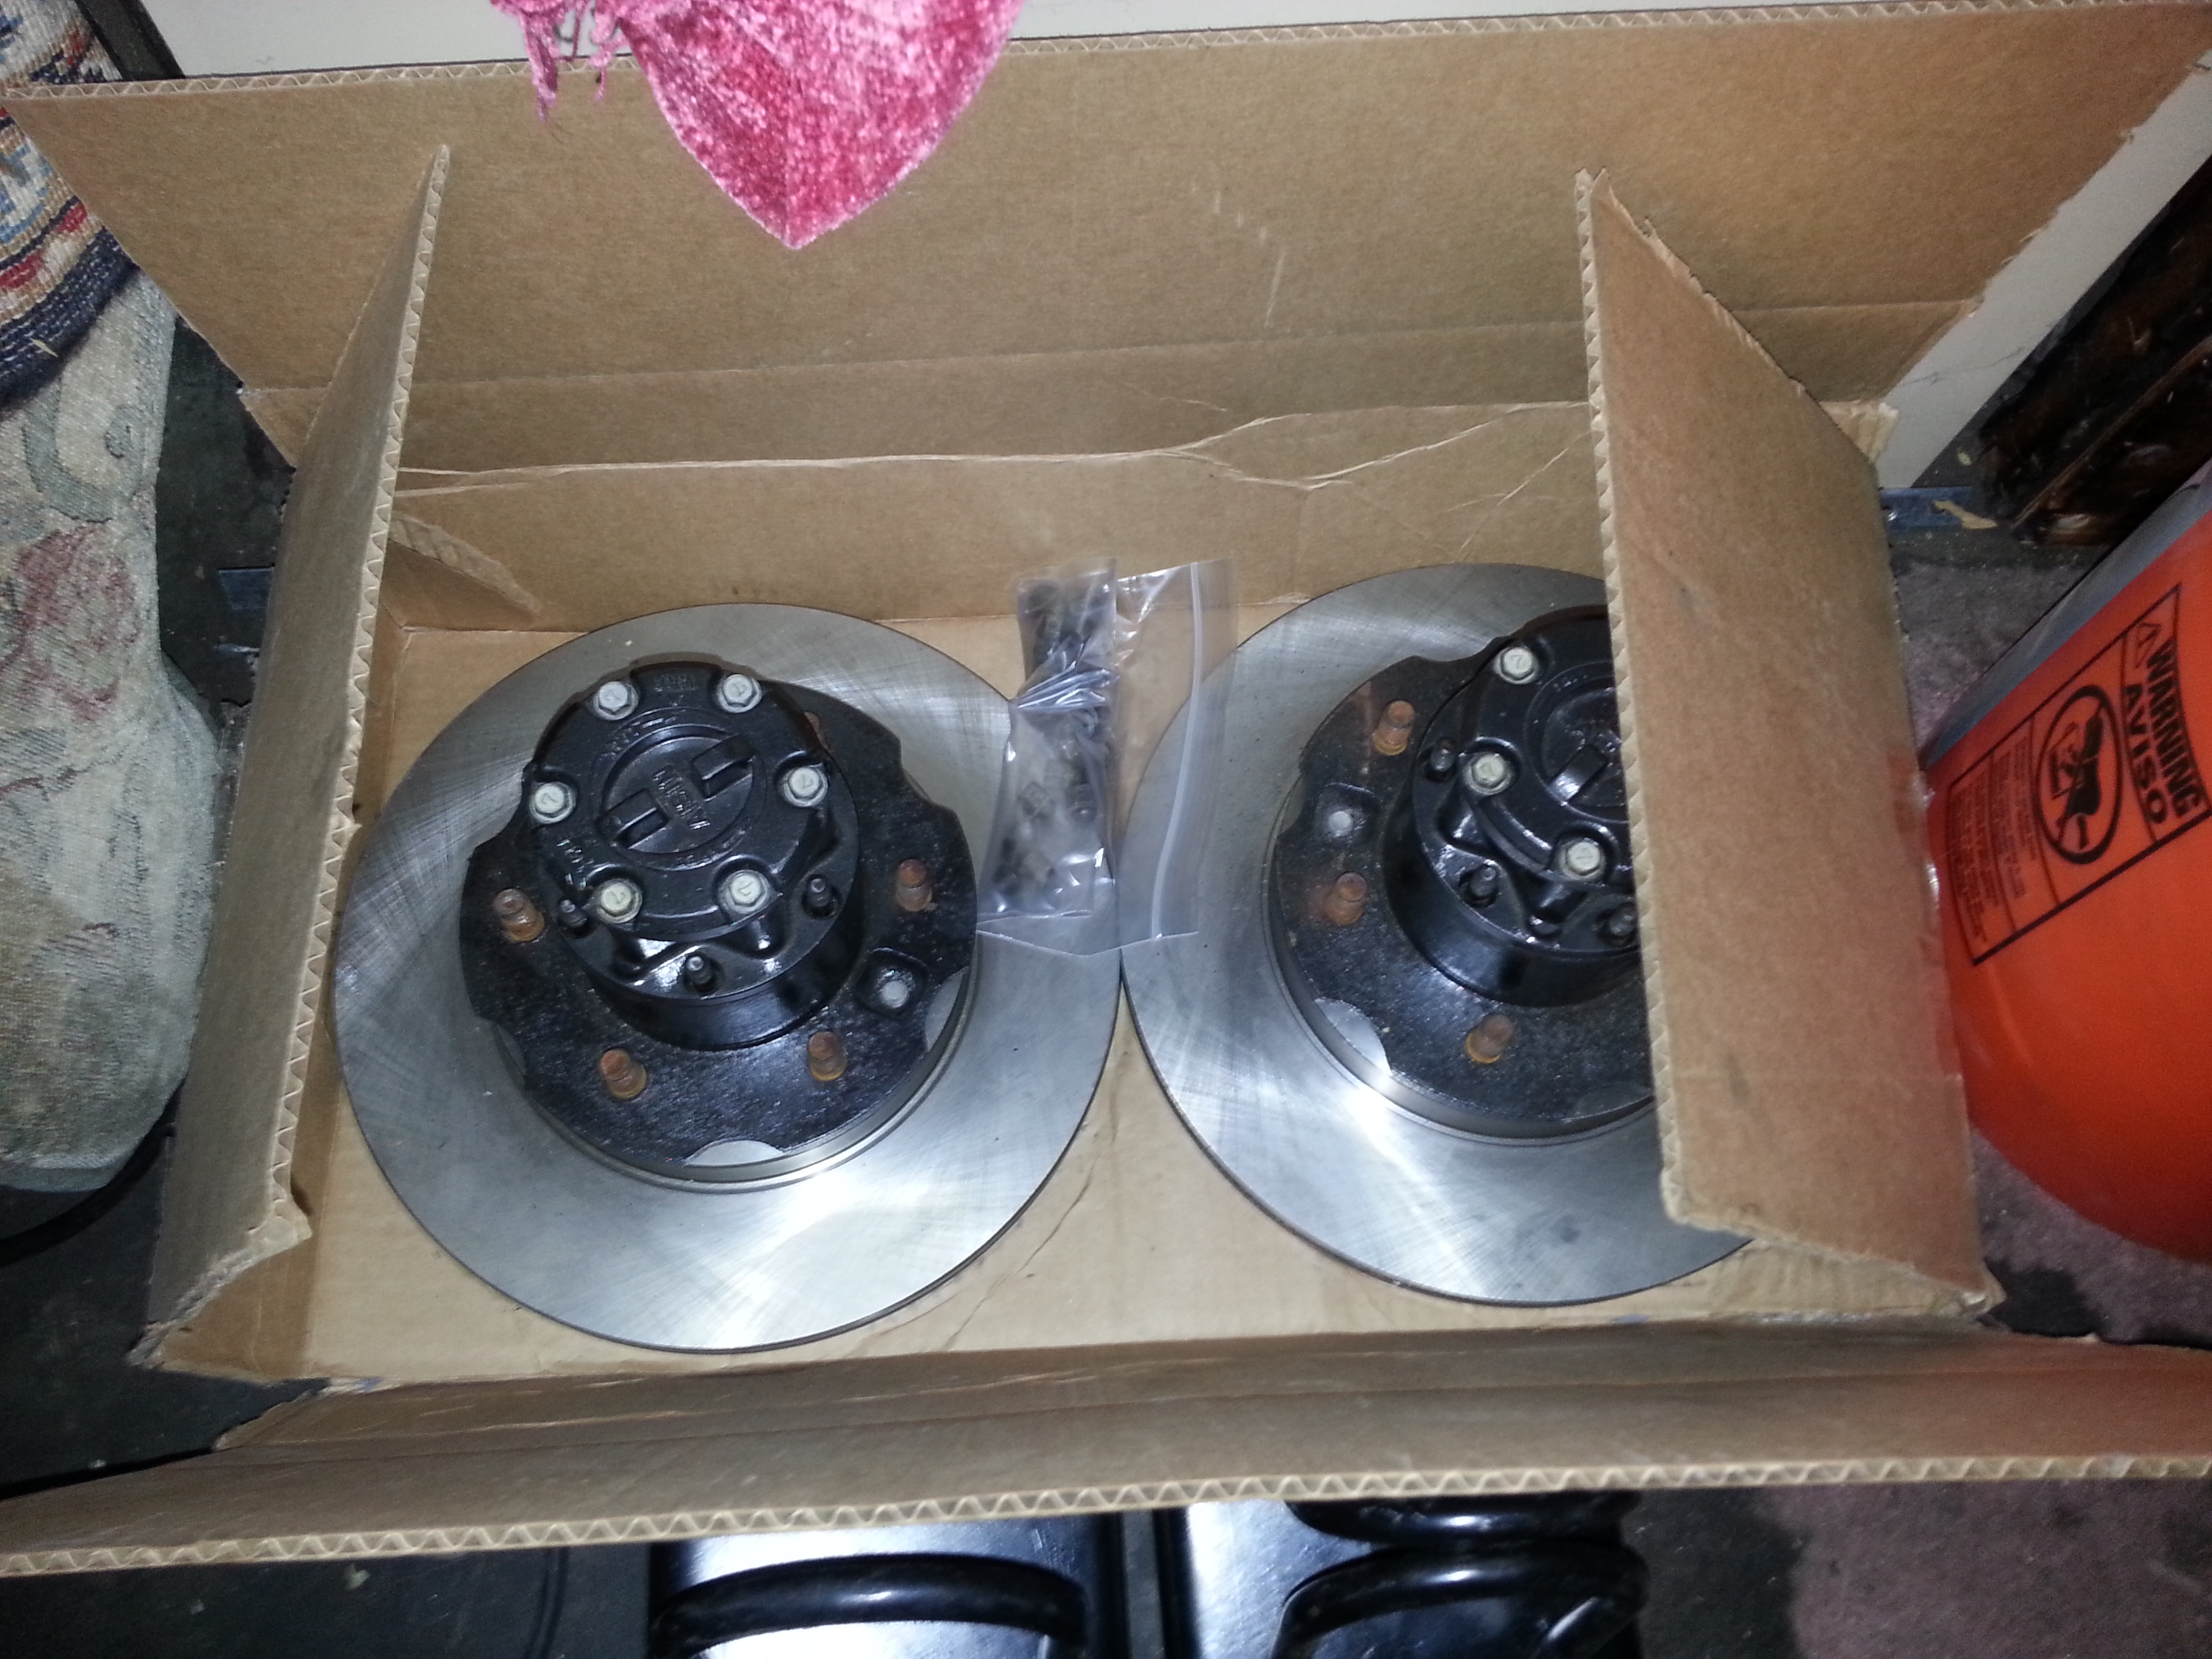
We went over a few other things like the straight axle and knuckle and spindle assembly and the Marlin kit and the larger new style of trail gear wiper that eliminates the felt and flimsy rubber wiper... Also checked over the Backing plate eliminator kit... and set everything in place for now.... Swapped some parts with him that were already in his former/my new axle like the full heavy duty Marlon axle rebuild kit... Knuckle guts, etc.... Basically the kit that I got from a member on here was upgraded to all those parts which John also did... And since Johns were already installed we just traded, such as the fj60 rotors, Yukon/KOYO bearings and so forth......
Skys Offroad diff armor and truss...
The new Trail Gear wiper that eliminates the felt and little rubber ring......
Birfs and associated hardware including the knuckles set to the side they will go... All the gaskets, heavy duty Marlin half moons and outer seal, backing plate eliminator, hi steer stuff and even bearings oriented to the side they will be and ready to be installed once I have my gears ready...
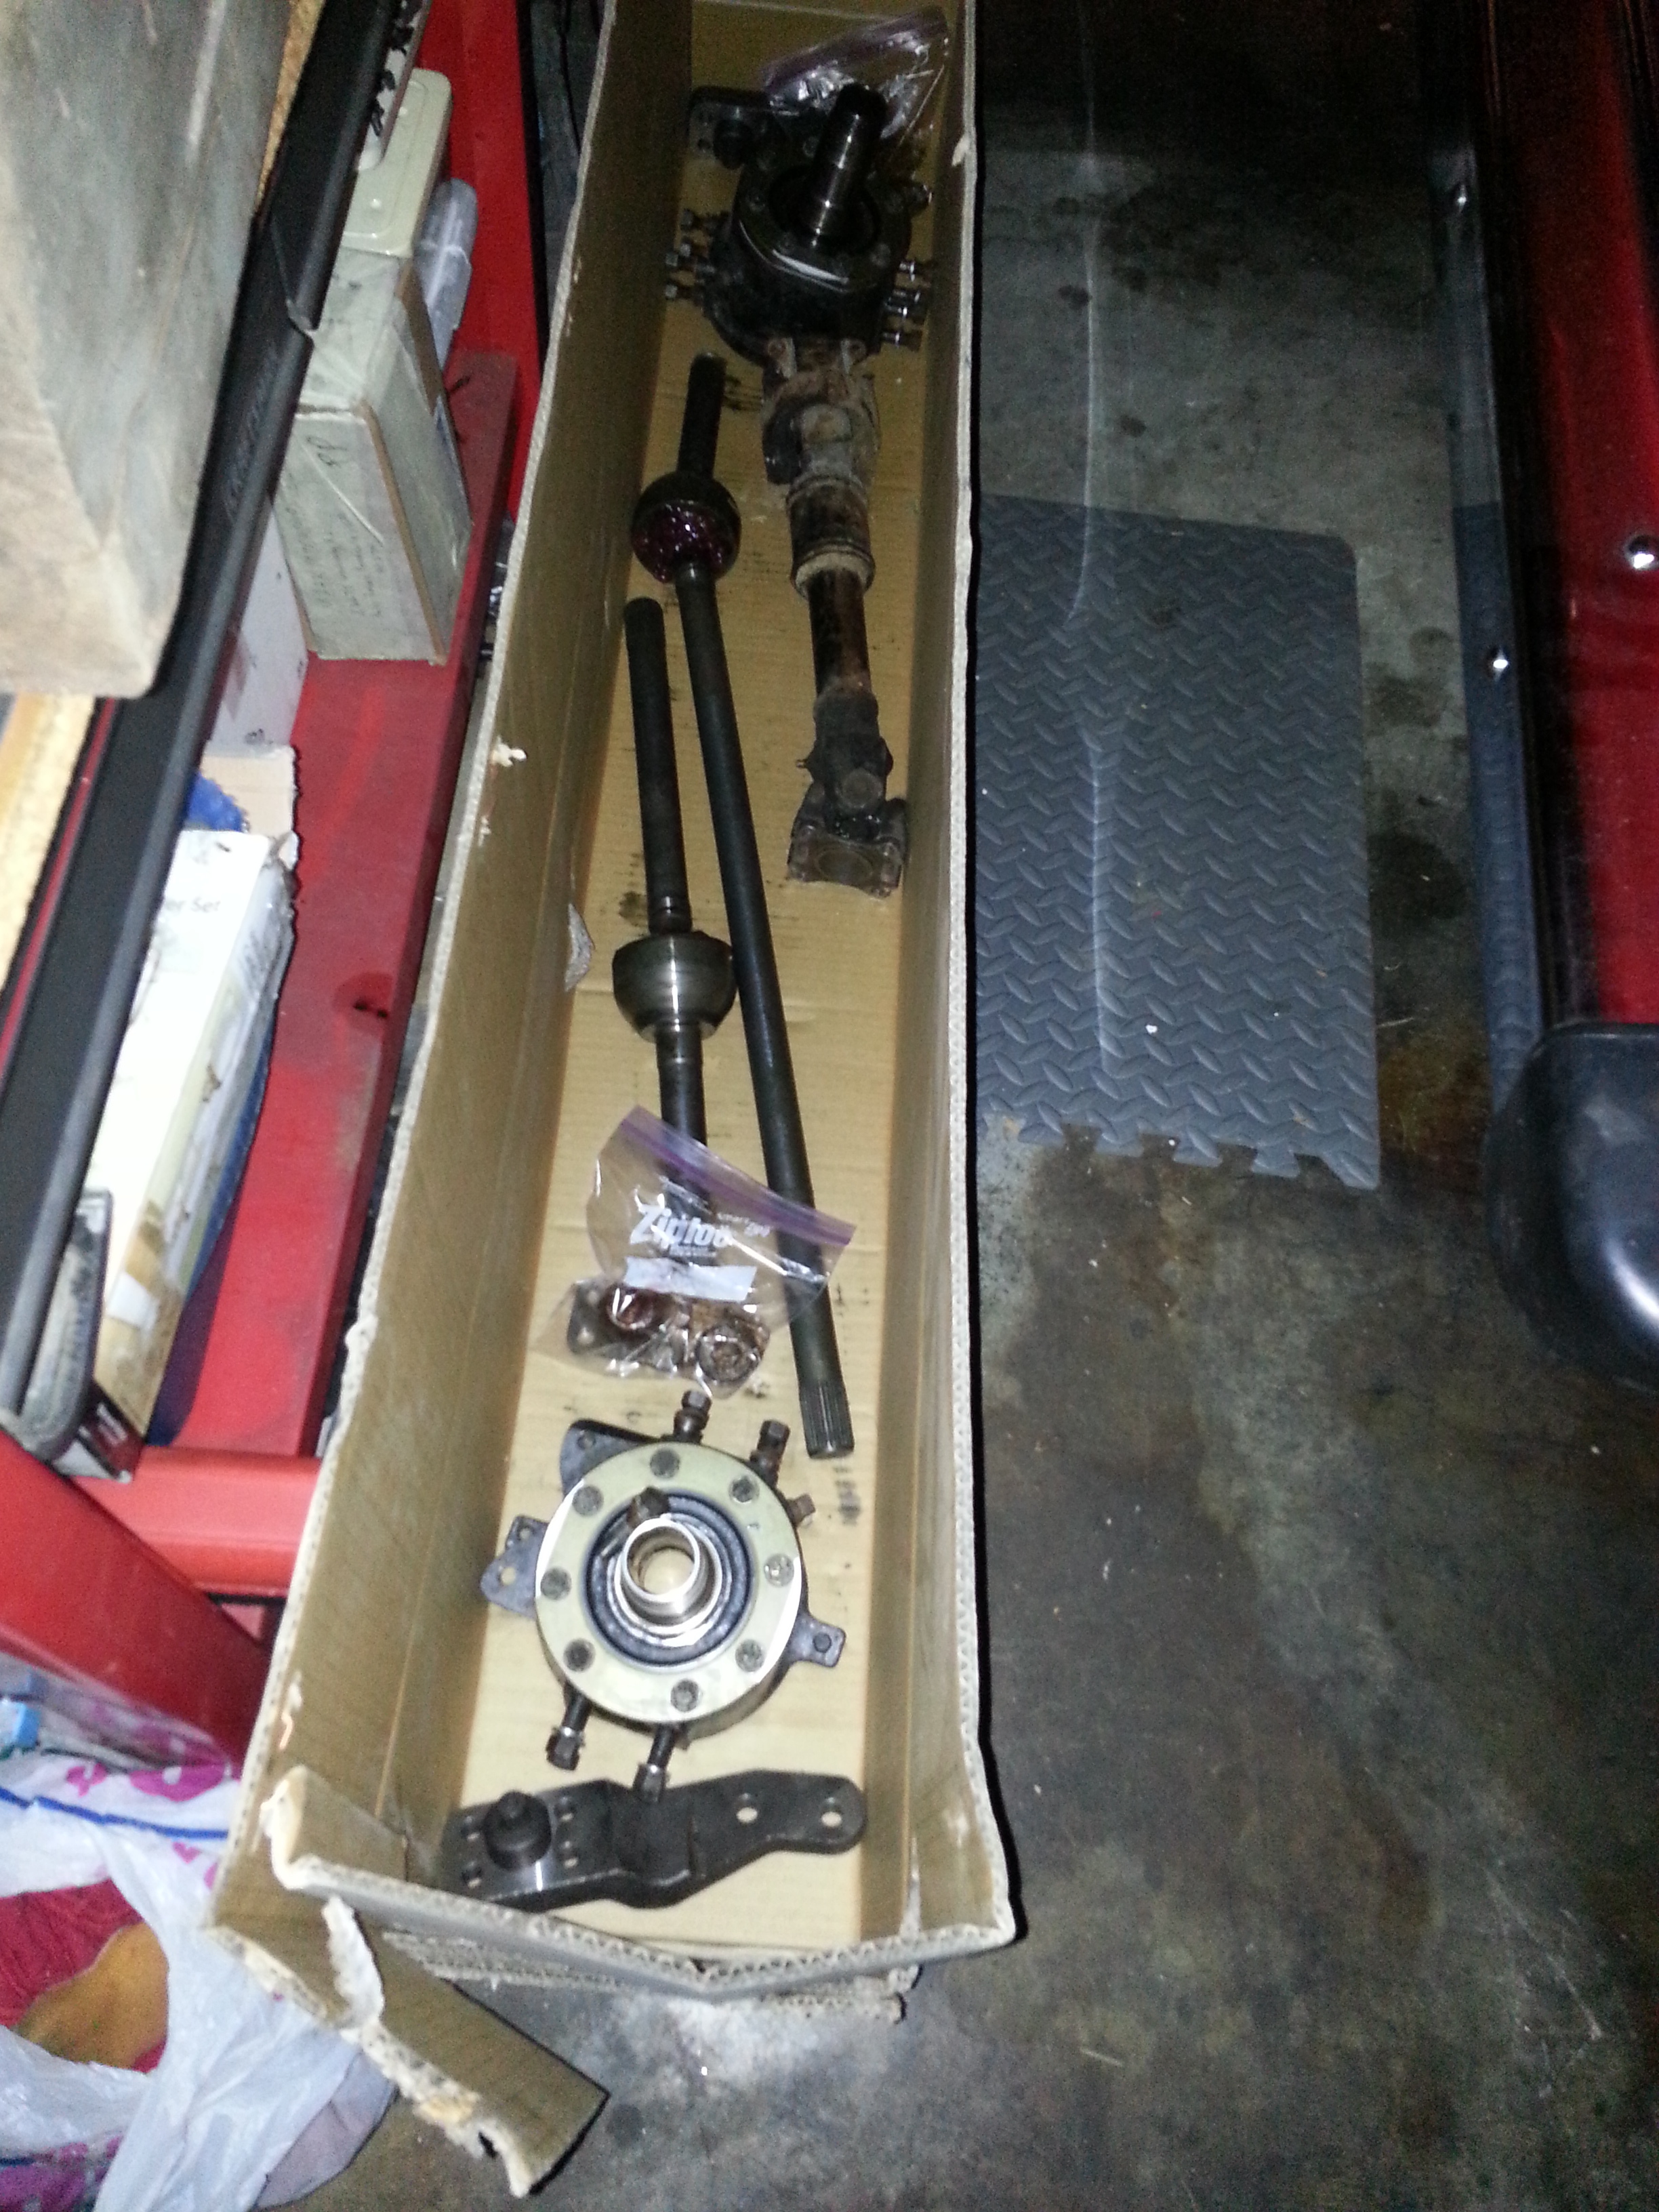
Fj60 rotors, straight axle hubs and free wheel hubs.......
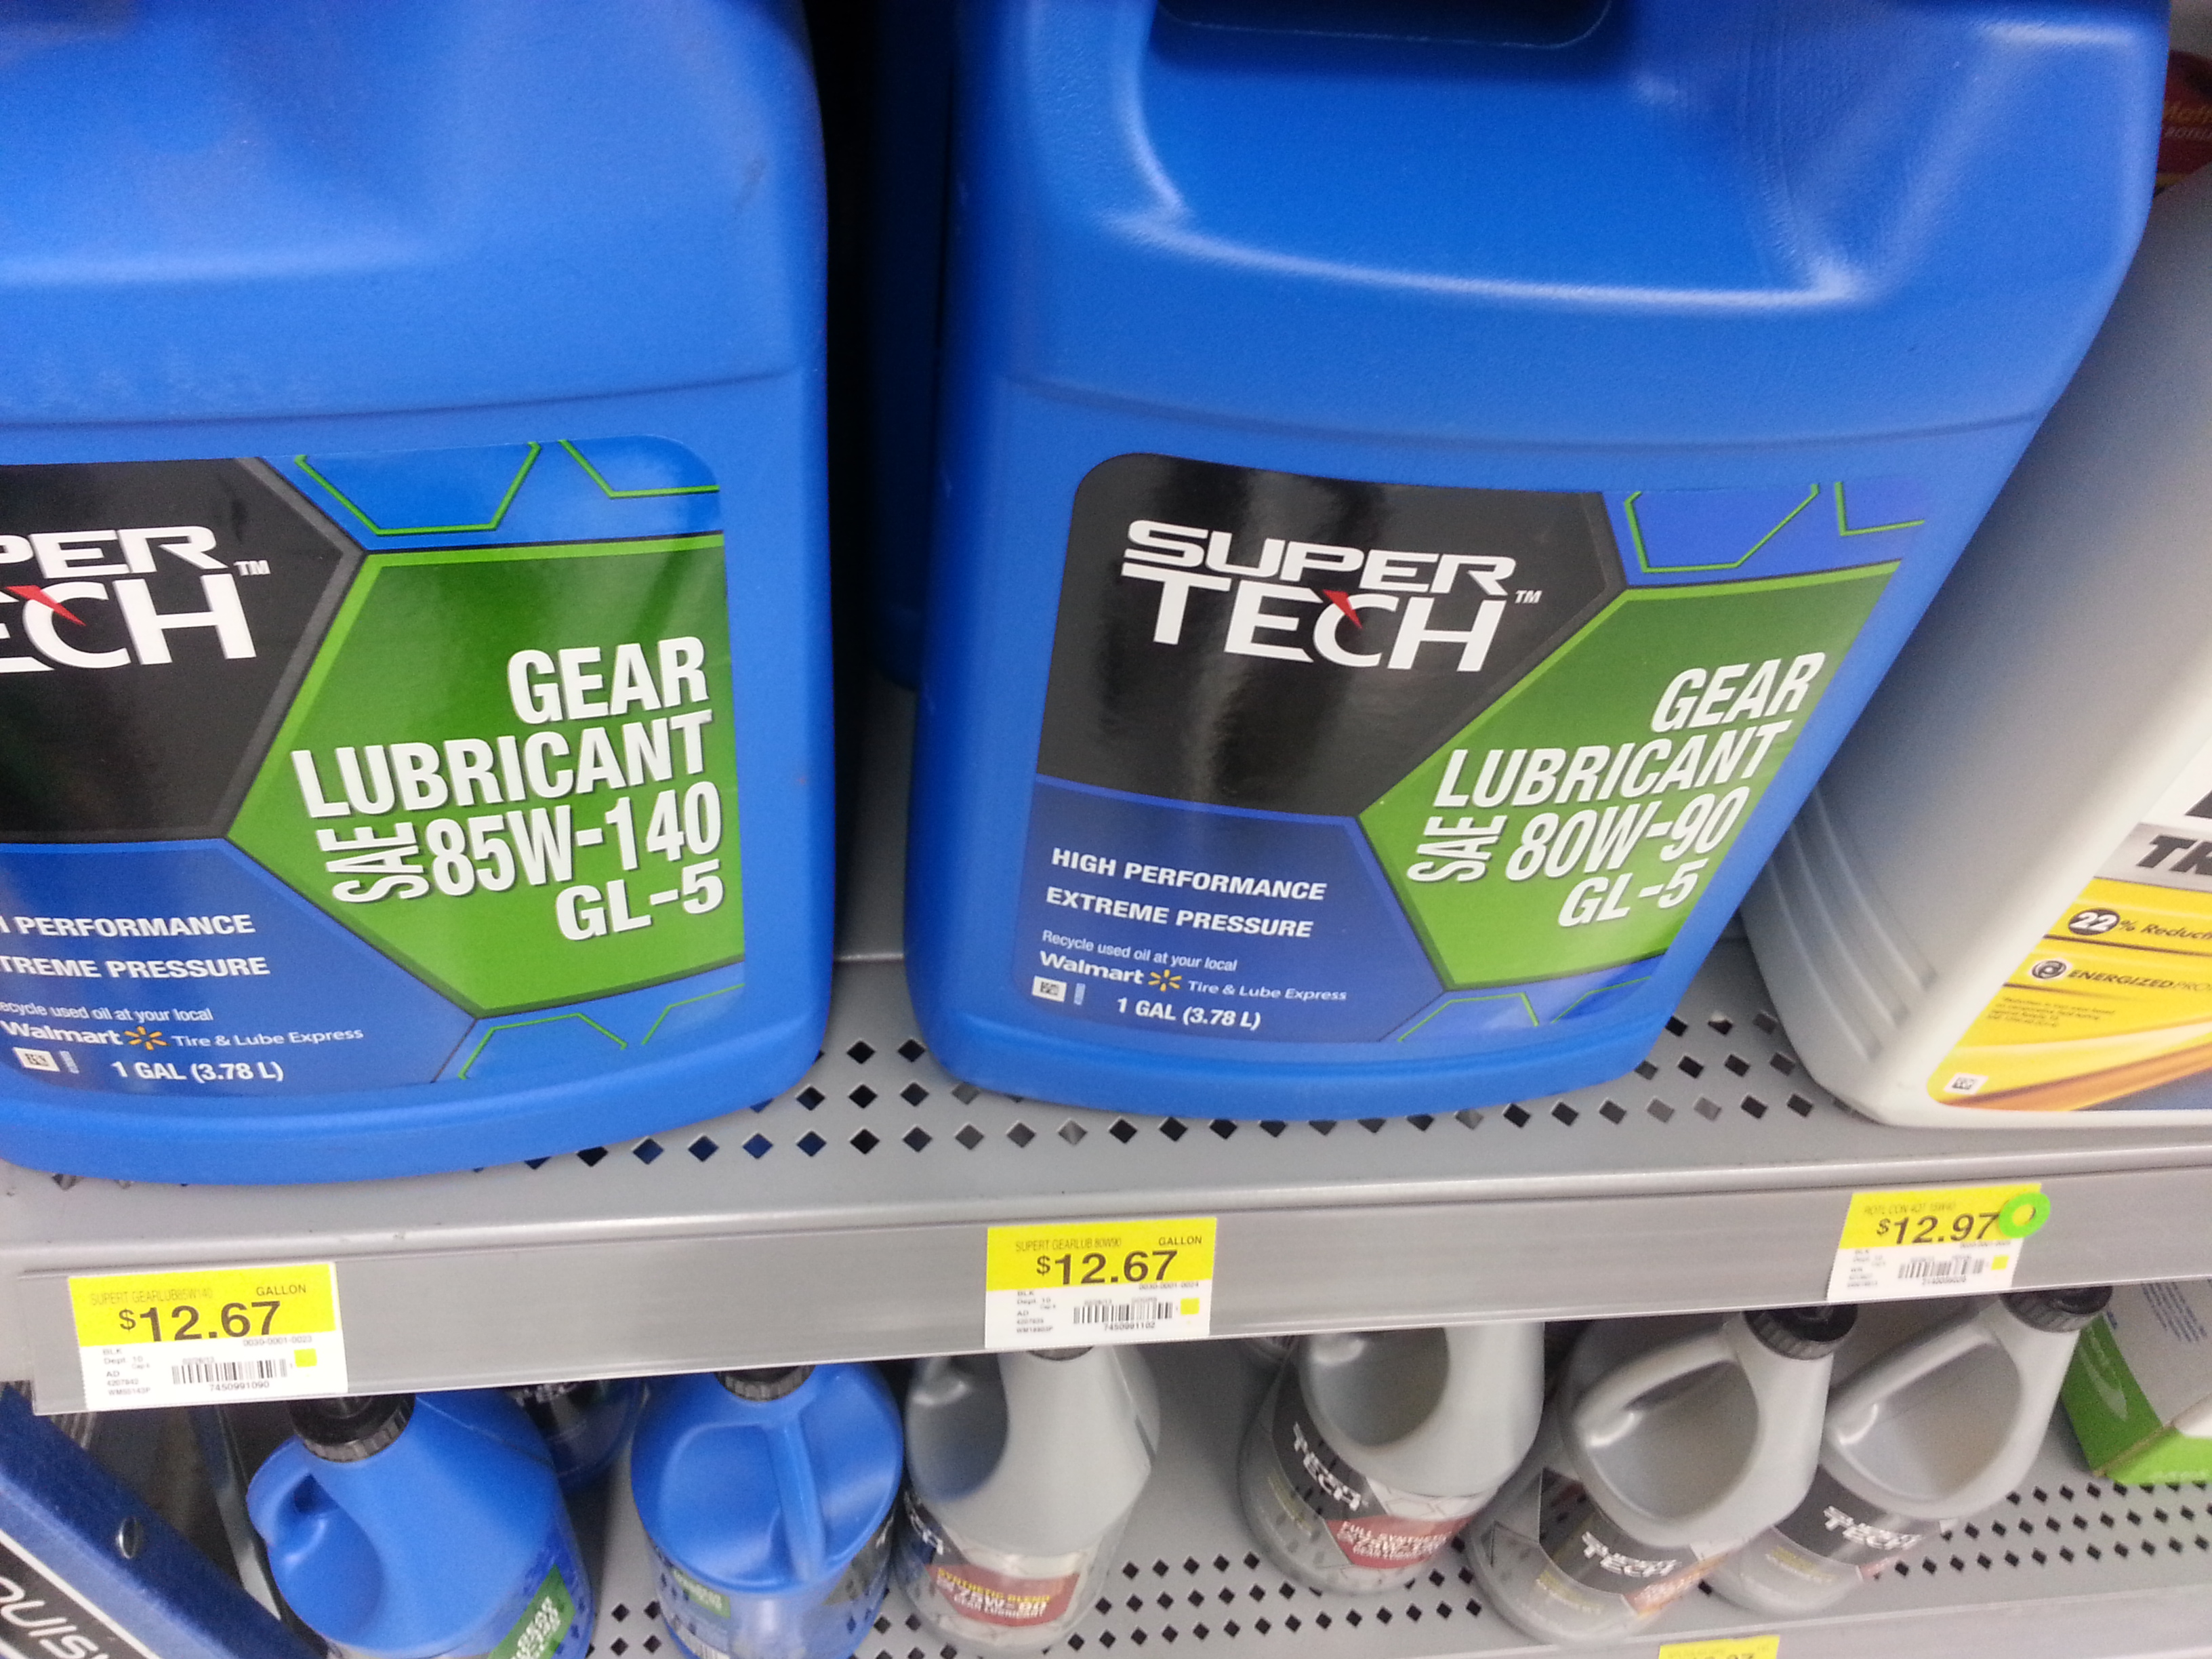
I made a little time today to hit Walmart and grab some gear oil that will simply be for the purpose of breaking in the g2 4.88 rings and pinions and Spartan lockers...
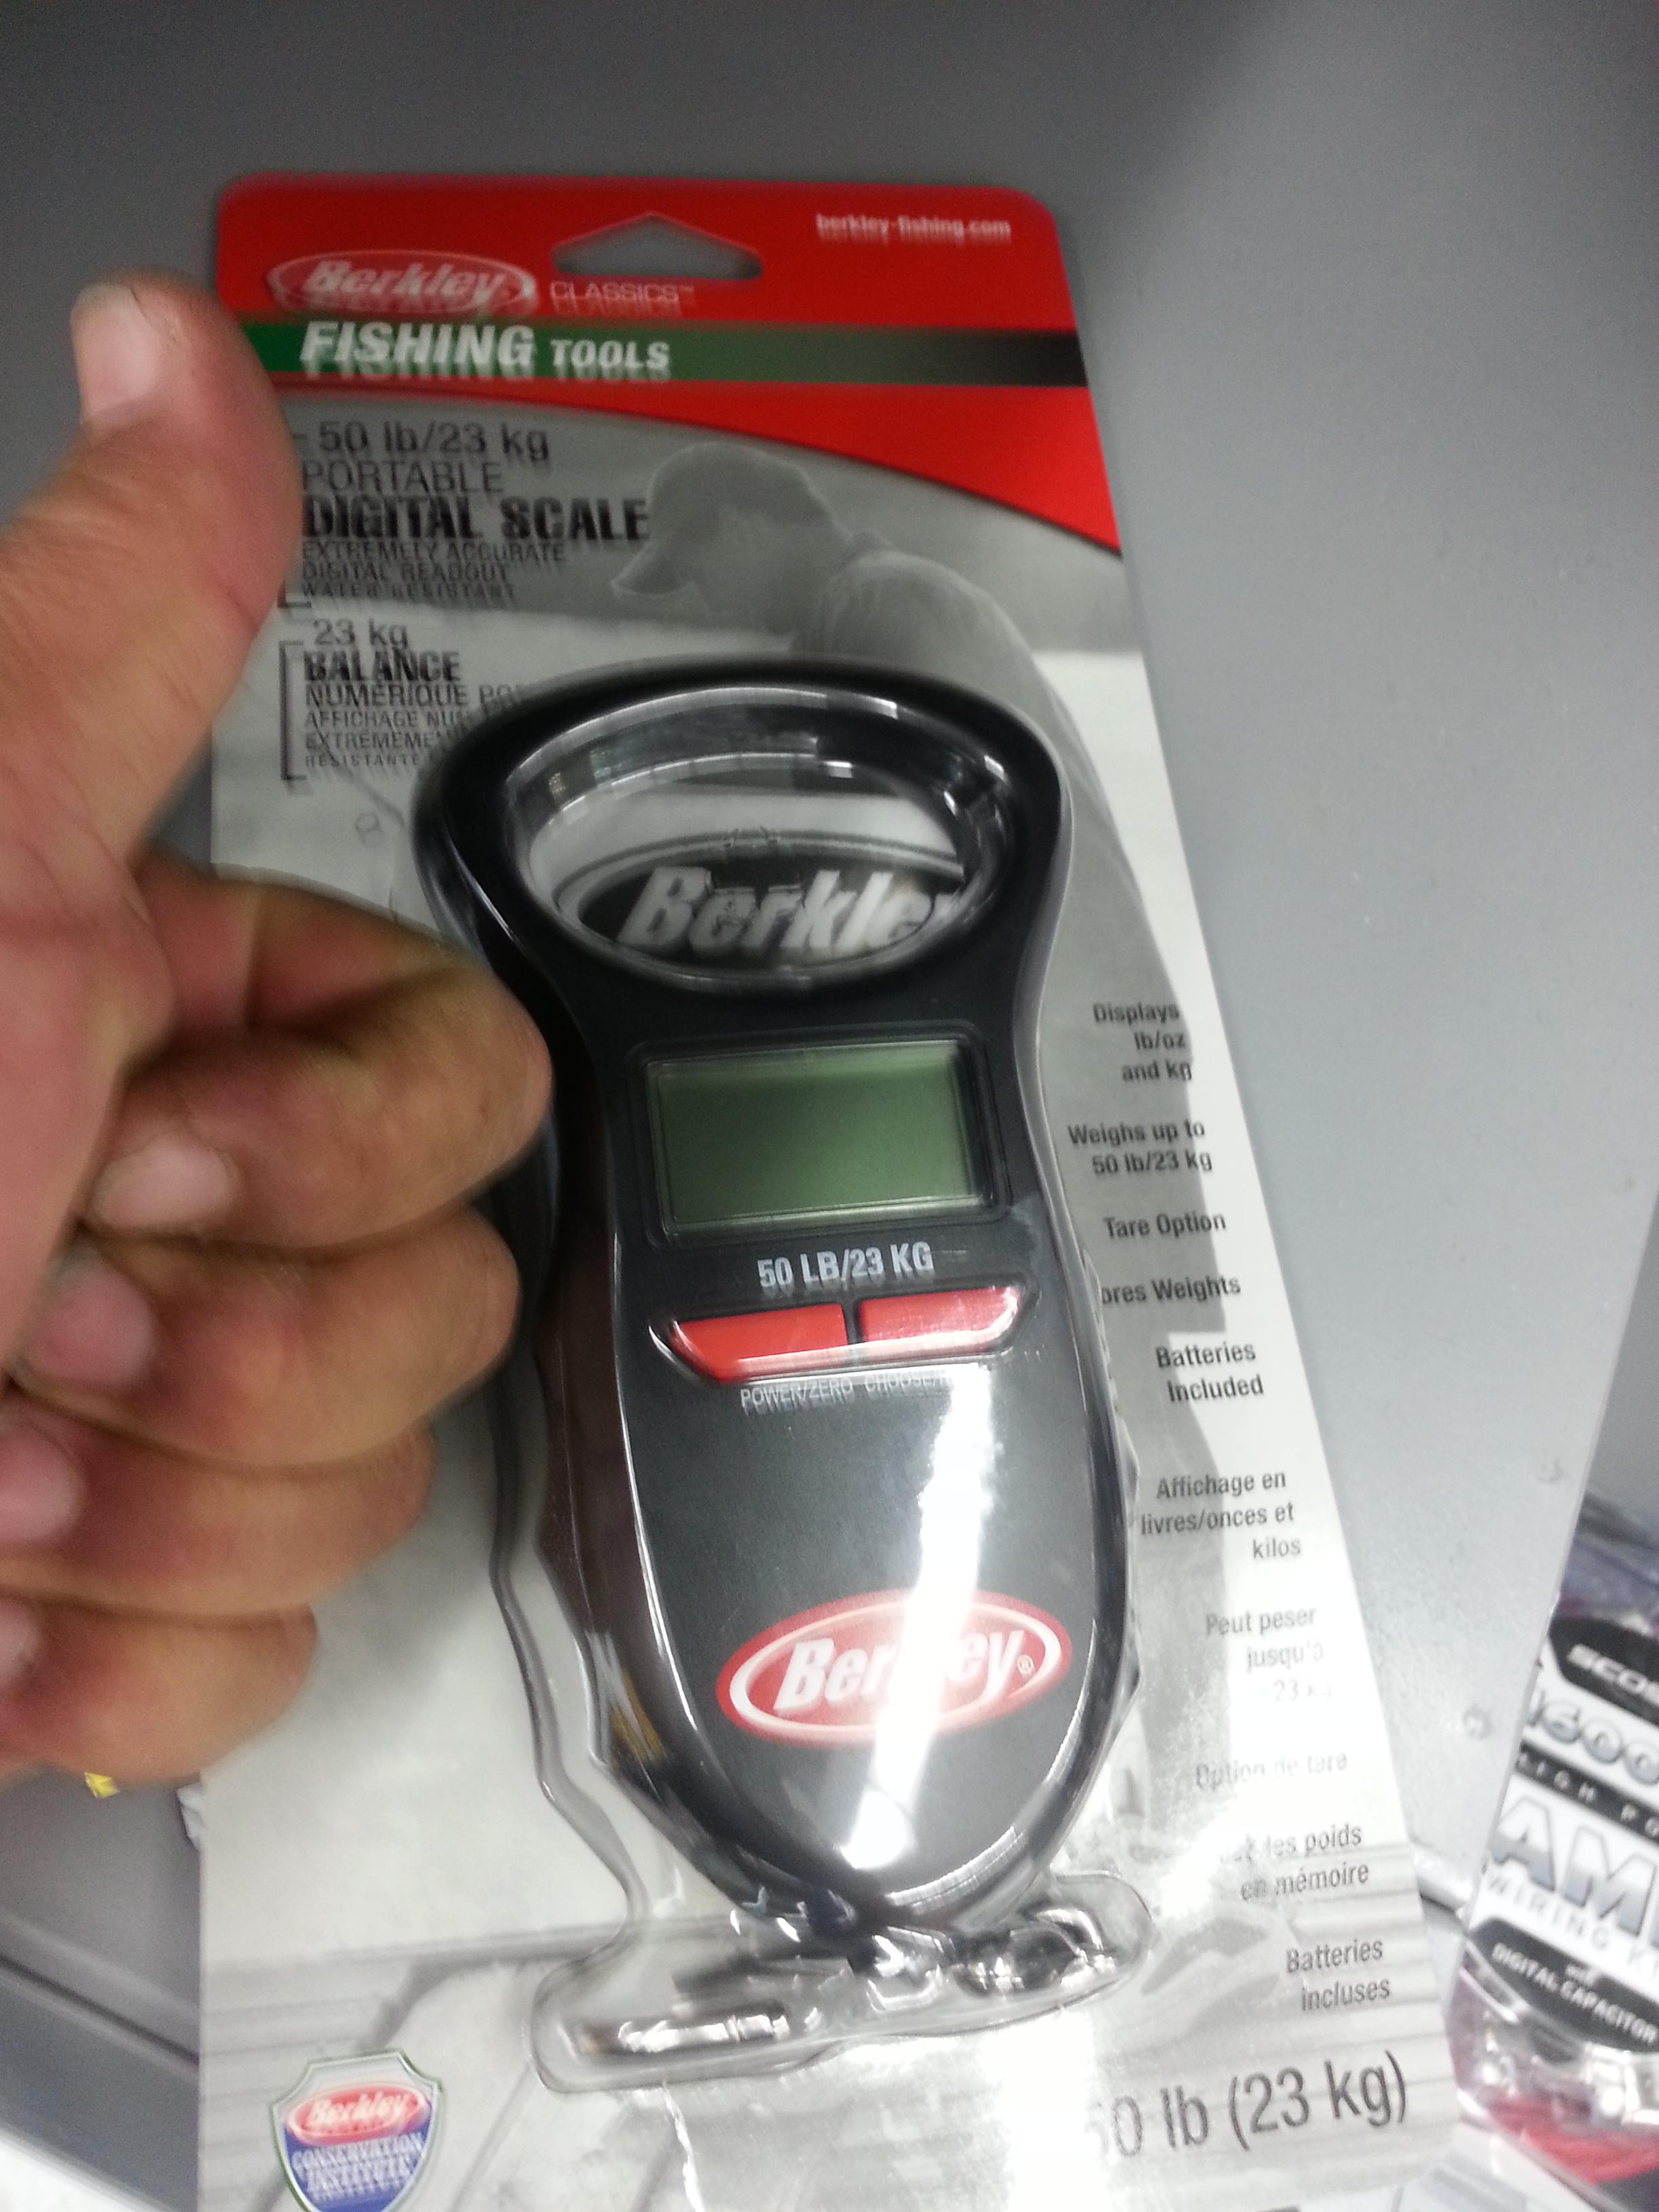
I actually went there in the first place to pick up a fish scale because not a freaking store in the South Bay seems to have one at the moment... 19 bucks for a 50 pound digital...
This will help me to get just the right shims when doing the trunion bearings on the knuckles... Which are all upgraded Marlin crawler/Yukon/KOYO... So I don't want to mess about and get that wrong ... I know that it's okay to do it by varying the shams and then to touch... I just figured I might as well go all out if I'm going to try and do this once and only once... You know? Lol.........
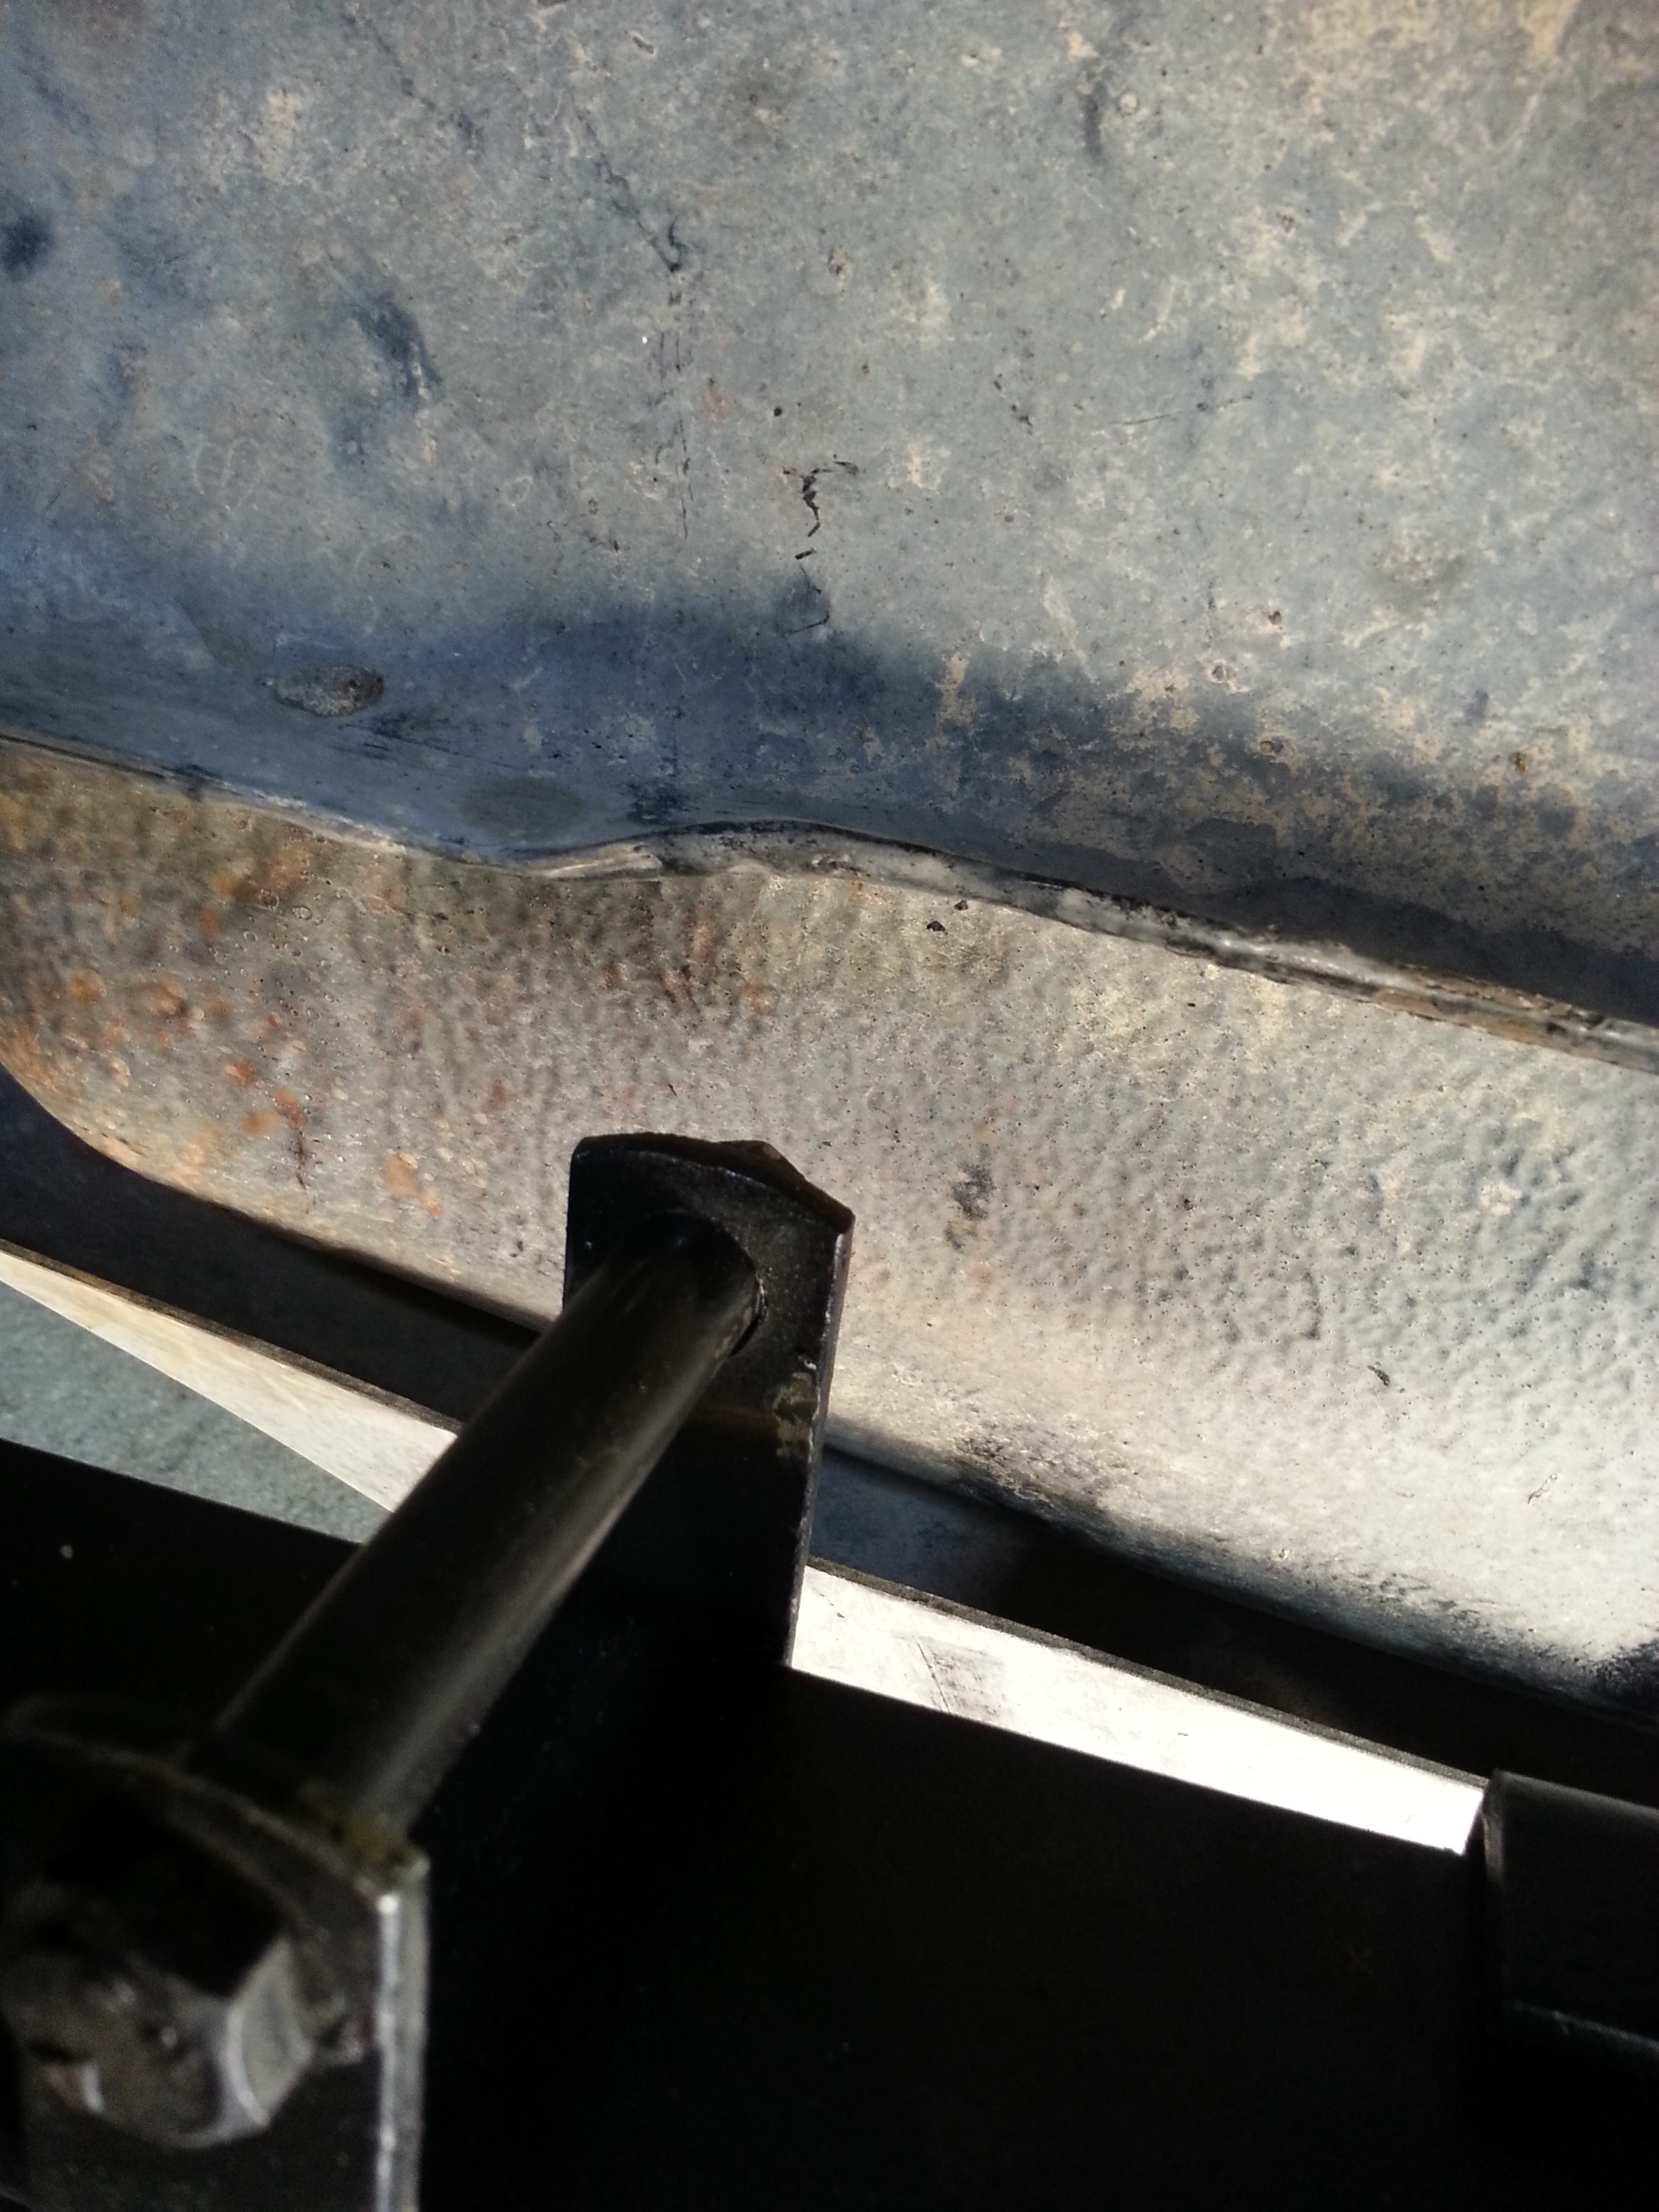
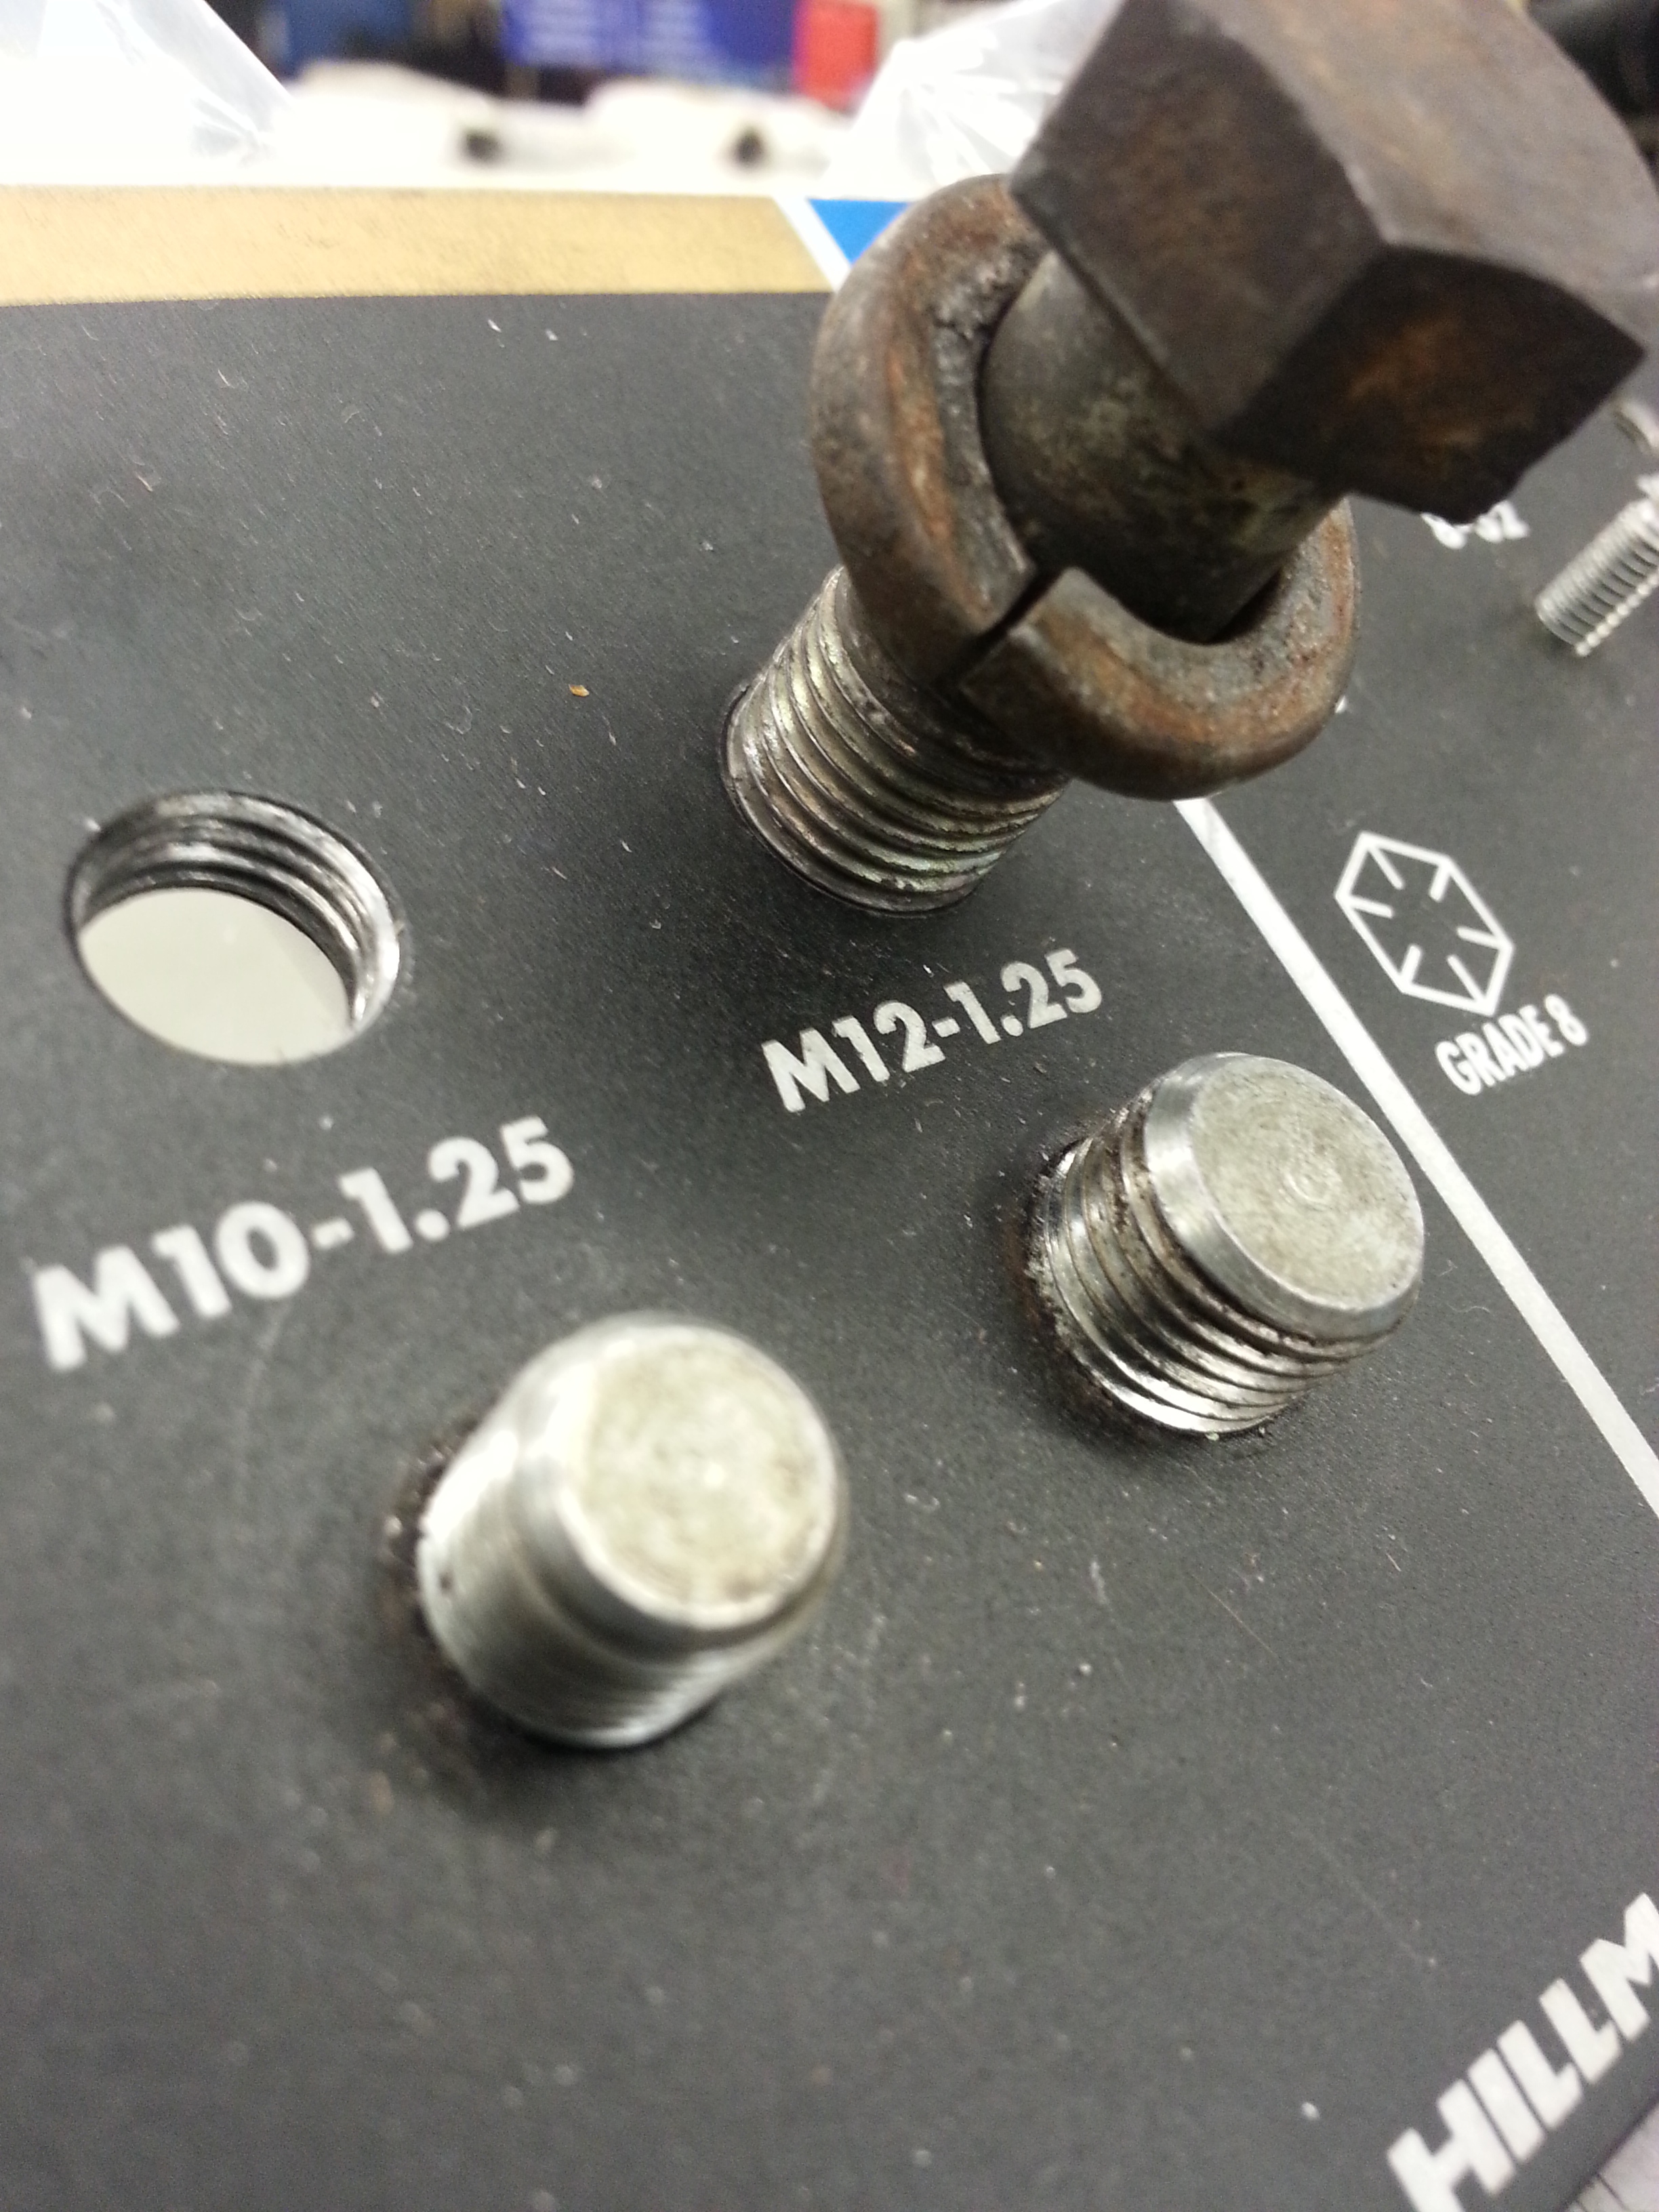
Another problem that I have to resolve is that one of the caliper mounting threads is fairly stripped..... Its not a blind hole obviously, but I figured I would still try to helicoil it with some red loctite as well and possibly even using a longer m12 x 1.25 bolt through the caliper and helicoil and then slap a nut and lock washer on the backside... I probably don't have to do the nut and lock washer but it is just a backup plan I want to have. It's yet another thing that isn't ideal but there is always a solution and it can be done right. I had a heavy-duty Heliocol and my 86 block that was holding my head on 140,000 mi! Never once had a problem with it , not once! Tomorrow I will ask my machinist what he thinks... he may even say to just run it over to him really quick... Not very likely but worth a shot..... This was at Pep Boys in their bolt finder.... Believe it or not they had almost every kit except for the one that I needed......
You might also notice that I removed the roof rack... Not too bad at all at around 10 minutes for 8 bolt setup... And it's very secure! I don't want to drive around with it in town anymore anyway, not just because its a waste of gas but because I have a feeling that one day someone's going to rip it off. I will also be putting lights in it... So I want to get that all setup with quick disconnects and everything, and I will also be building a new platform out of birch, most likely a little thinner than the one that was in there when I bought it. It makes for such a secure platform that I could literally curl up in there and go to sleep on top of my truck without any worries of the fiberglass being damaged or the rack. I like keeping it open with the wire, but its just not practical and its not secure. For once I get it mounted temporarily in the rack I will take my hole bit set and cut out holes right above the mounting bolts.... I will use all stainless to mount the platform and also use caps where I do the cutouts. The cutouts will enable me to remove the rack in around 5 minutes! I already picked up a set of 4 light mounting tabs from 4xinnovations in which I will be mounting my 4 side roof rack lights.
I was really hoping someone would give me any personal info they had, or even reading that they have done, in regards to the LED off road lights... There are so many options now and a couple of the eBay companies, like Sunyee, have pretty excellent ratings and are less than half the price... I just cannot see spending $500 on 1 Rigid LED light.....?????????????? Lol
First of all, before I get started on anything I've managed to accomplish which is barely anything trust me... I wound up decding that I needed to finally replace the compressor that I got stolen... I had 150 PSI compressor that I lent to someone...... and it never was returned... Its a long story but the bottom line is I was never going to get it back. I have a 100 PSI pancake compressor, a 90 PSI Campbell and Hausfeld that I have had for over 20 years which cell works perfectly to this day...
But I really was in need of something in the range of 200 pounds or at least another 150 PSI model... I was out with Johnny at Lowes and was talking with Ian, one of the very helpful employees there from South Africa that Richard knows pretty well from going with me... And he pointed out one that was actually on sale for Memorial Day weekend... So I picked this one up and man did it perform for us!..
While there, I was actually looking in the first place for a good right angle air ratchet... They have Ingersol rated at 55 psi and I know people will laugh but I have had such good luck with Kobalt Tools, I figured why not give this set off two for under $80 a chance... I think John will verify when I say that this 350 PSI half inch drive air impact is unbelievable! didn't really have much use this time for the 3/8 inch right angle air ratchet... But I'm telling you its a great deal. For something like $4 more I get the warranty for 2 years... I plan to use the crap out of these so if something is going to go wrong it should go wrong within that time. The half inch impact does great having three forward speeds... Just ask John how quickly it takes off the u bolt which is at around 100 pounds! BUTTER!
while John was here and as he mentioned he pulled out some Springs that he brought that I could use in place of my completely sagged original 4runner Springs... We were both kinda shocked when upon getting it back on the ground they were not quite flat but they were really compressed... The only reason I need them on there is and case I have to deliver the gears or something like that and I don't have the Honda. It seems to happen to me if it's going to happen so I want to be prepared. This is why we both had a pretty big concern with those springs as they sat...
They were actually so low that the leaf strap limiter bolt was not even a quarter inch from hitting the fuel tank lip....
haha. ... So this afternoon in around 20 minutes total I pulled both for tires one at a time after jacking up each side by the frame, slapped the ZUK Springs back in and put it back on the ground and instantly have plenty of clearance of the gas tank!....As I said, I know that it seems stupid to put anything back in when I'm trying to get ready for hopefully this weekend... But I really have no choice as it looks like I might not have the Honda for at least two days for an appointment that I have to get to at Honda to get the airbag fixed for free before it runs out of warranty on the recall. grrrr! Lol... But man, do I ever love those coils and how convenient they have been. I also mention this because I have decided that I will figure out exactly how long I need a coil to be and we'll be adding it on top of my rear 4 inch lift as a load capacity convenience the take me only a few minutes to install . I might be getting 5 inch Springs for the rear or having the 4 inch rear Trail Gear Springs modified... But they're still not going to handle much load, at least not anywhere close to the kind of weight that I put in there on longer trips.... And on a longer trip, what's 15 minutes to change out those coils once I unload? Exactly! I haven't decided just yet if I'm going to use pipe to extend my existing coils to fit... But I think that's likely the most logical way to go. They even sell those coil spacers at Pep Boys & autozone... I'm pretty sure I can figure something out and I know how very happy I was with these coils at Tierra Del Sol and otherwise... I just know that I don't want to "S" these Trail Gear 4 inch lift packs out! That is where you begin to kill them quickly. I think it's a pretty darn good solution as a matter of having the best of both worlds when I need it without having to go to some ridiculous setup like air bags or something.
***********
We went over a few other things like the straight axle and knuckle and spindle assembly and the Marlin kit and the larger new style of trail gear wiper that eliminates the felt and flimsy rubber wiper... Also checked over the Backing plate eliminator kit... and set everything in place for now.... Swapped some parts with him that were already in his former/my new axle like the full heavy duty Marlon axle rebuild kit... Knuckle guts, etc.... Basically the kit that I got from a member on here was upgraded to all those parts which John also did... And since Johns were already installed we just traded, such as the fj60 rotors, Yukon/KOYO bearings and so forth......
Skys Offroad diff armor and truss...
The new Trail Gear wiper that eliminates the felt and little rubber ring......
Birfs and associated hardware including the knuckles set to the side they will go... All the gaskets, heavy duty Marlin half moons and outer seal, backing plate eliminator, hi steer stuff and even bearings oriented to the side they will be and ready to be installed once I have my gears ready...
Fj60 rotors, straight axle hubs and free wheel hubs.......
I made a little time today to hit Walmart and grab some gear oil that will simply be for the purpose of breaking in the g2 4.88 rings and pinions and Spartan lockers...
I actually went there in the first place to pick up a fish scale because not a freaking store in the South Bay seems to have one at the moment... 19 bucks for a 50 pound digital...
This will help me to get just the right shims when doing the trunion bearings on the knuckles... Which are all upgraded Marlin crawler/Yukon/KOYO... So I don't want to mess about and get that wrong ... I know that it's okay to do it by varying the shams and then to touch... I just figured I might as well go all out if I'm going to try and do this once and only once... You know? Lol.........
Another problem that I have to resolve is that one of the caliper mounting threads is fairly stripped..... Its not a blind hole obviously, but I figured I would still try to helicoil it with some red loctite as well and possibly even using a longer m12 x 1.25 bolt through the caliper and helicoil and then slap a nut and lock washer on the backside... I probably don't have to do the nut and lock washer but it is just a backup plan I want to have. It's yet another thing that isn't ideal but there is always a solution and it can be done right. I had a heavy-duty Heliocol and my 86 block that was holding my head on 140,000 mi! Never once had a problem with it , not once! Tomorrow I will ask my machinist what he thinks... he may even say to just run it over to him really quick... Not very likely but worth a shot..... This was at Pep Boys in their bolt finder.... Believe it or not they had almost every kit except for the one that I needed......
You might also notice that I removed the roof rack... Not too bad at all at around 10 minutes for 8 bolt setup... And it's very secure! I don't want to drive around with it in town anymore anyway, not just because its a waste of gas but because I have a feeling that one day someone's going to rip it off. I will also be putting lights in it... So I want to get that all setup with quick disconnects and everything, and I will also be building a new platform out of birch, most likely a little thinner than the one that was in there when I bought it. It makes for such a secure platform that I could literally curl up in there and go to sleep on top of my truck without any worries of the fiberglass being damaged or the rack. I like keeping it open with the wire, but its just not practical and its not secure. For once I get it mounted temporarily in the rack I will take my hole bit set and cut out holes right above the mounting bolts.... I will use all stainless to mount the platform and also use caps where I do the cutouts. The cutouts will enable me to remove the rack in around 5 minutes! I already picked up a set of 4 light mounting tabs from 4xinnovations in which I will be mounting my 4 side roof rack lights.
I was really hoping someone would give me any personal info they had, or even reading that they have done, in regards to the LED off road lights... There are so many options now and a couple of the eBay companies, like Sunyee, have pretty excellent ratings and are less than half the price... I just cannot see spending $500 on 1 Rigid LED light.....?????????????? Lol
Last edited by ChefYota4x4; 05-27-2013 at 09:45 PM.
05-27-2013, 11:29 PM
#6589
Registered User
hey mark wow on all the work an too cool on the parts ready an lined up to march in! the chef has got it cookin 
for a quick disconnect idea i have a waterproof flush mount trailer plug on my other truck the male part has a clip lock to hold it in, unplug the cover snaps shut tis an ideeer
for a quick disconnect idea i have a waterproof flush mount trailer plug on my other truck the male part has a clip lock to hold it in, unplug the cover snaps shut tis an ideeer
 05-28-2013, 06:42 AM
#6591
Registered User
Your a busy guy buddy, seems like your getting a lot done. We were just talking about LED off road lights at the rally I was just at, a buddy of mine picked up a bar similar to the rigid bar for less than half the price and something like a 5 year warranty, but I don't remember where he said he got it I will try and find out for you. Good luck with everything else you have going on.
05-29-2013, 12:56 AM
#6592
Glug-glug.....
Air wrench 2 min later...
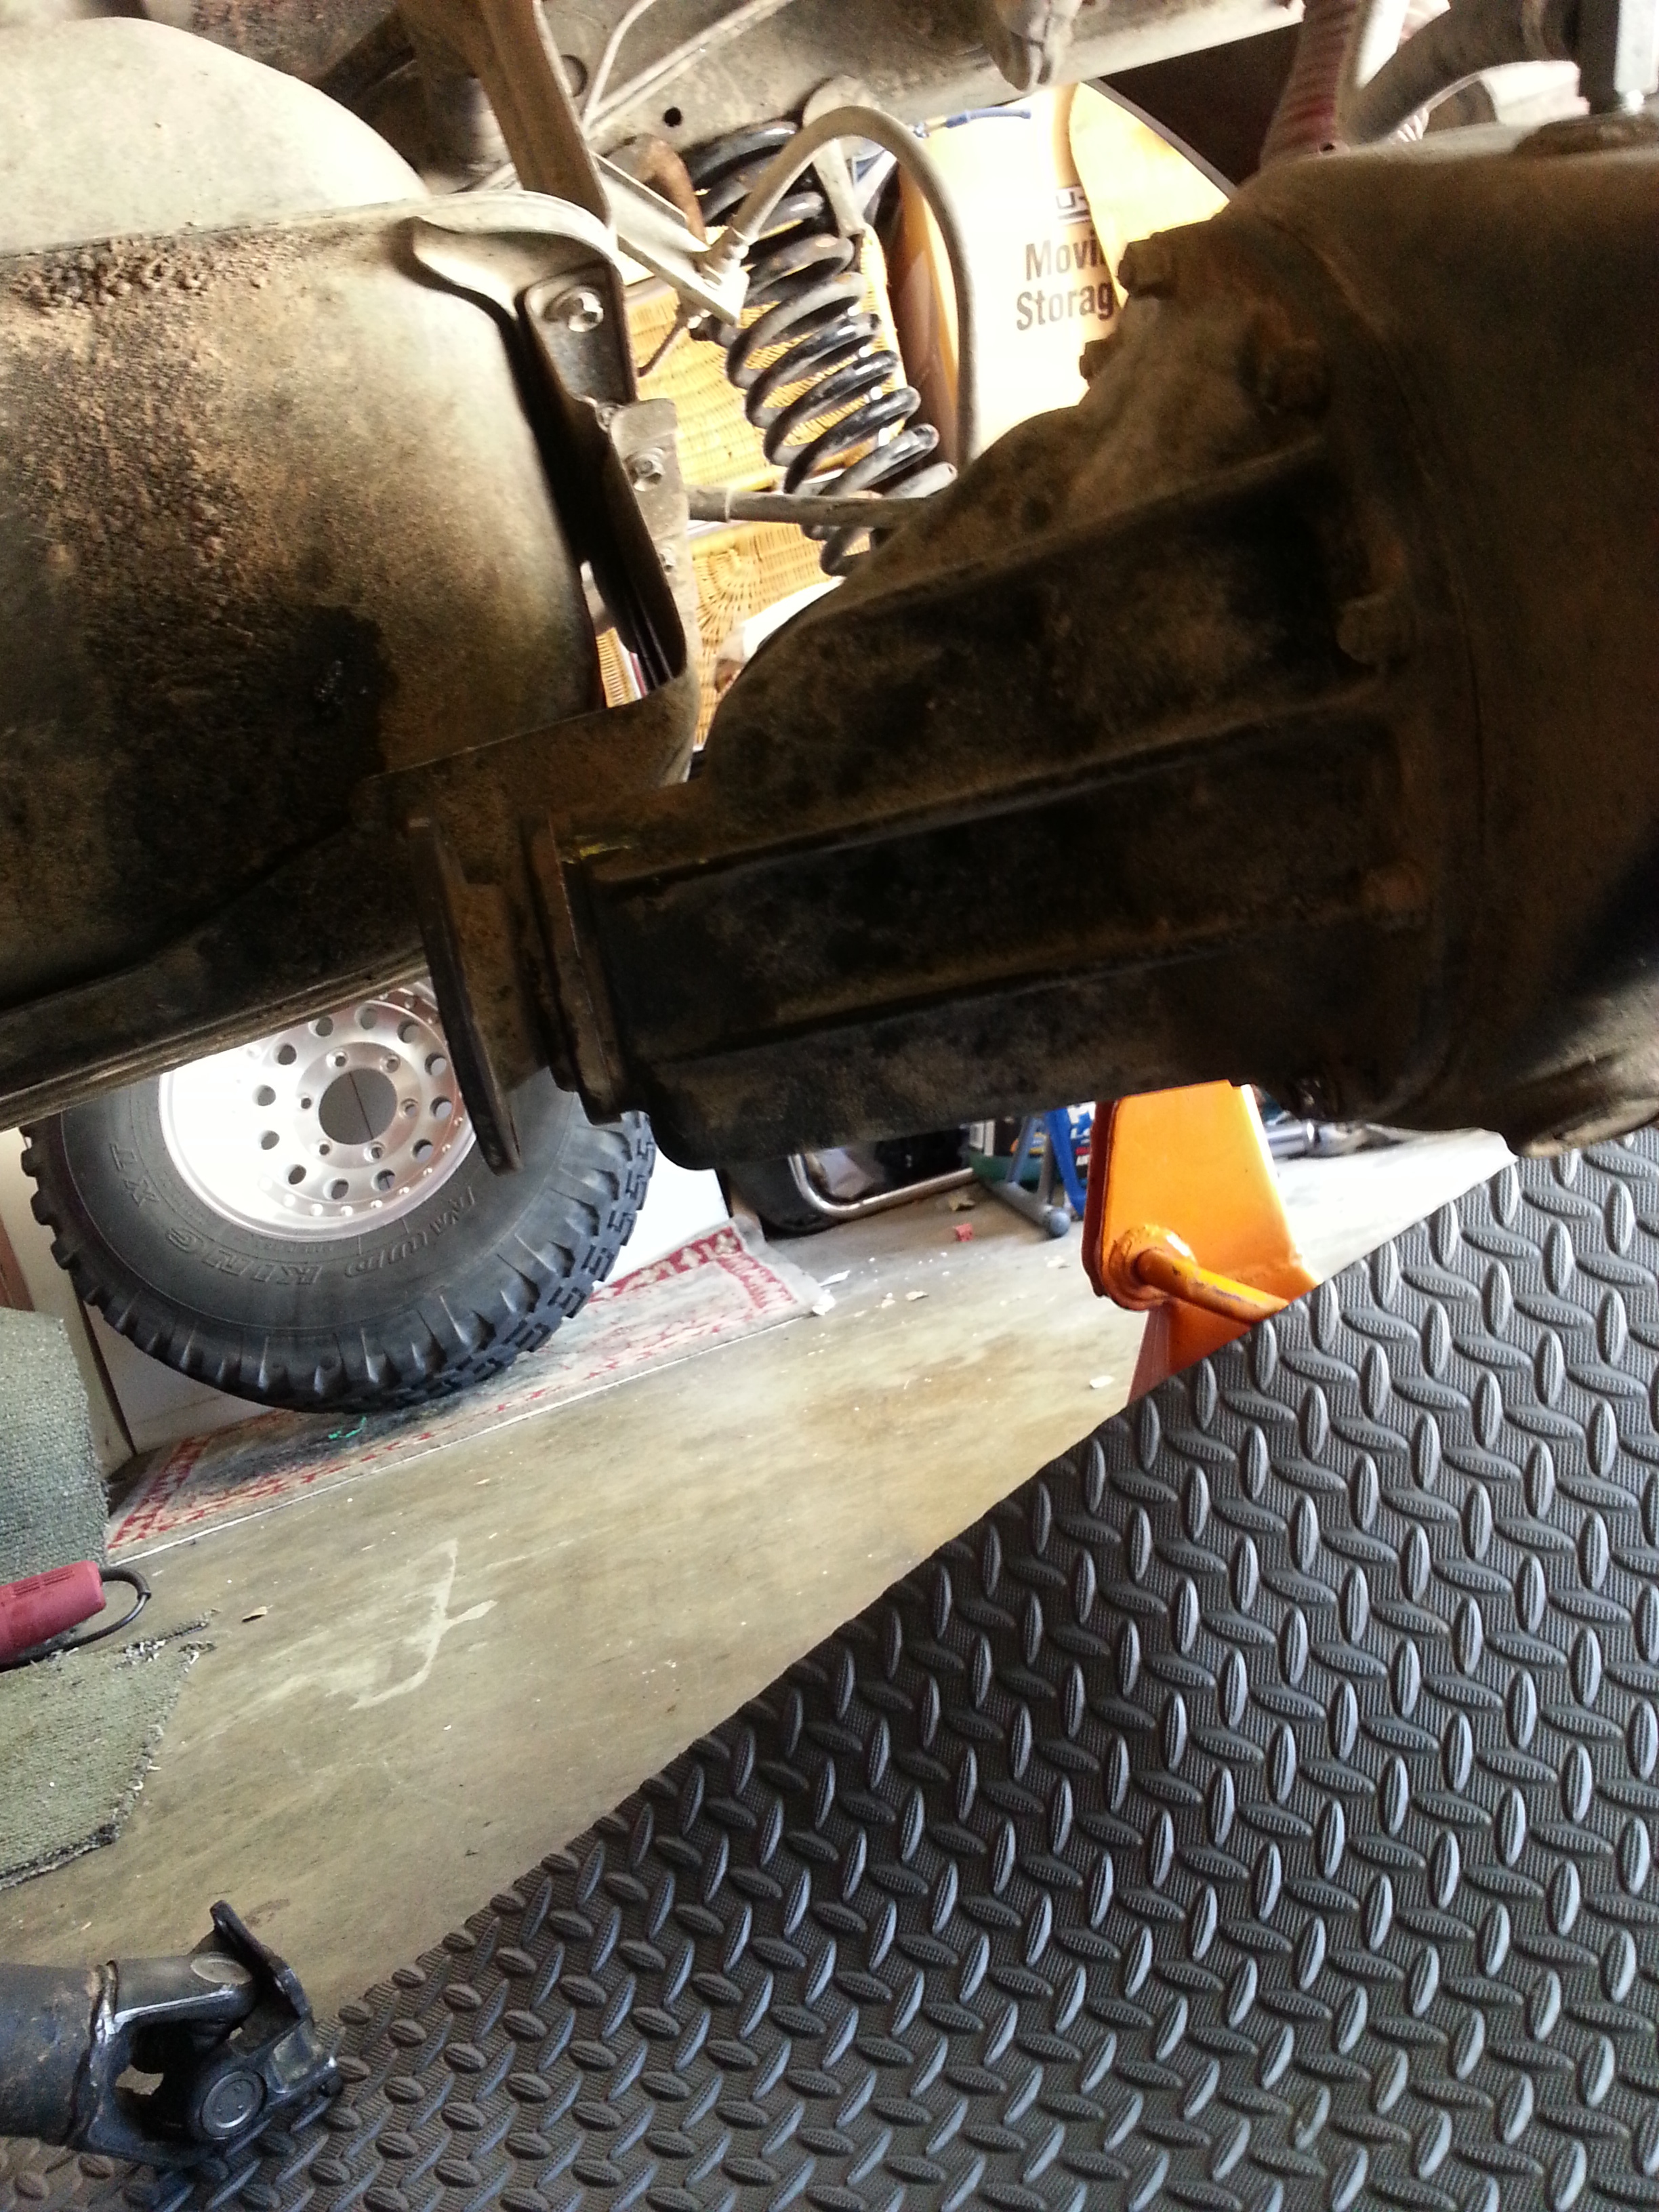
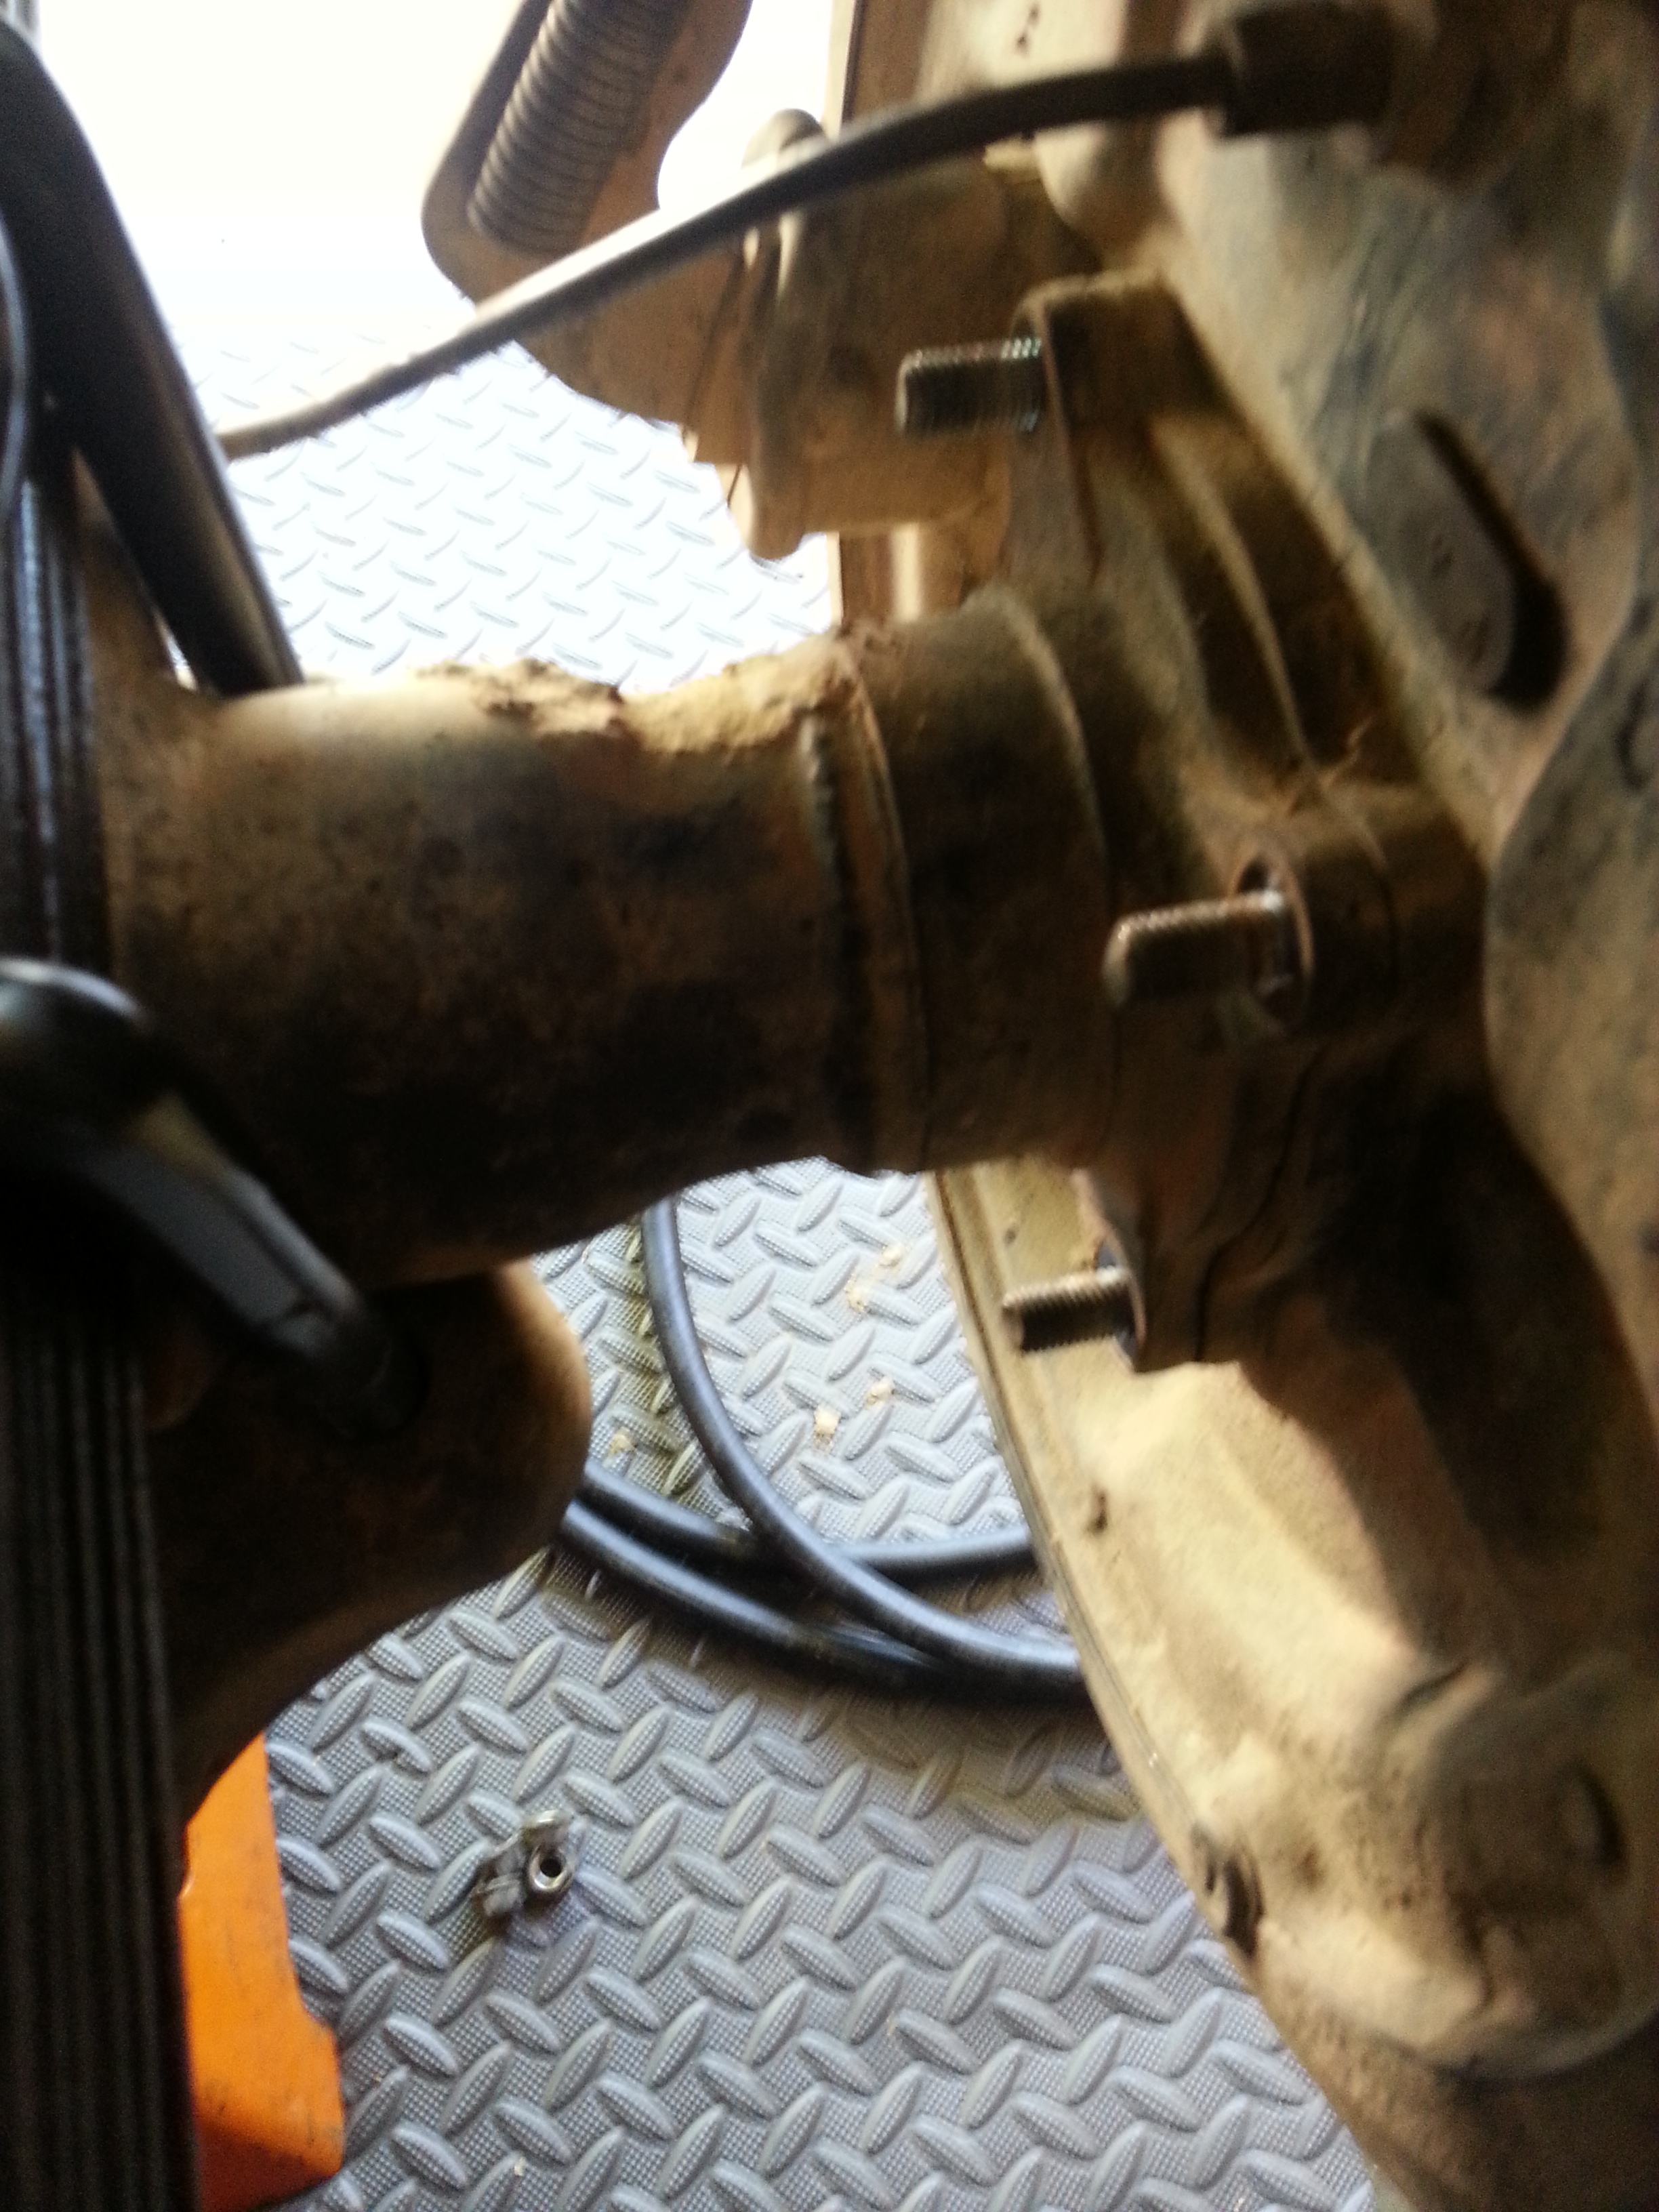
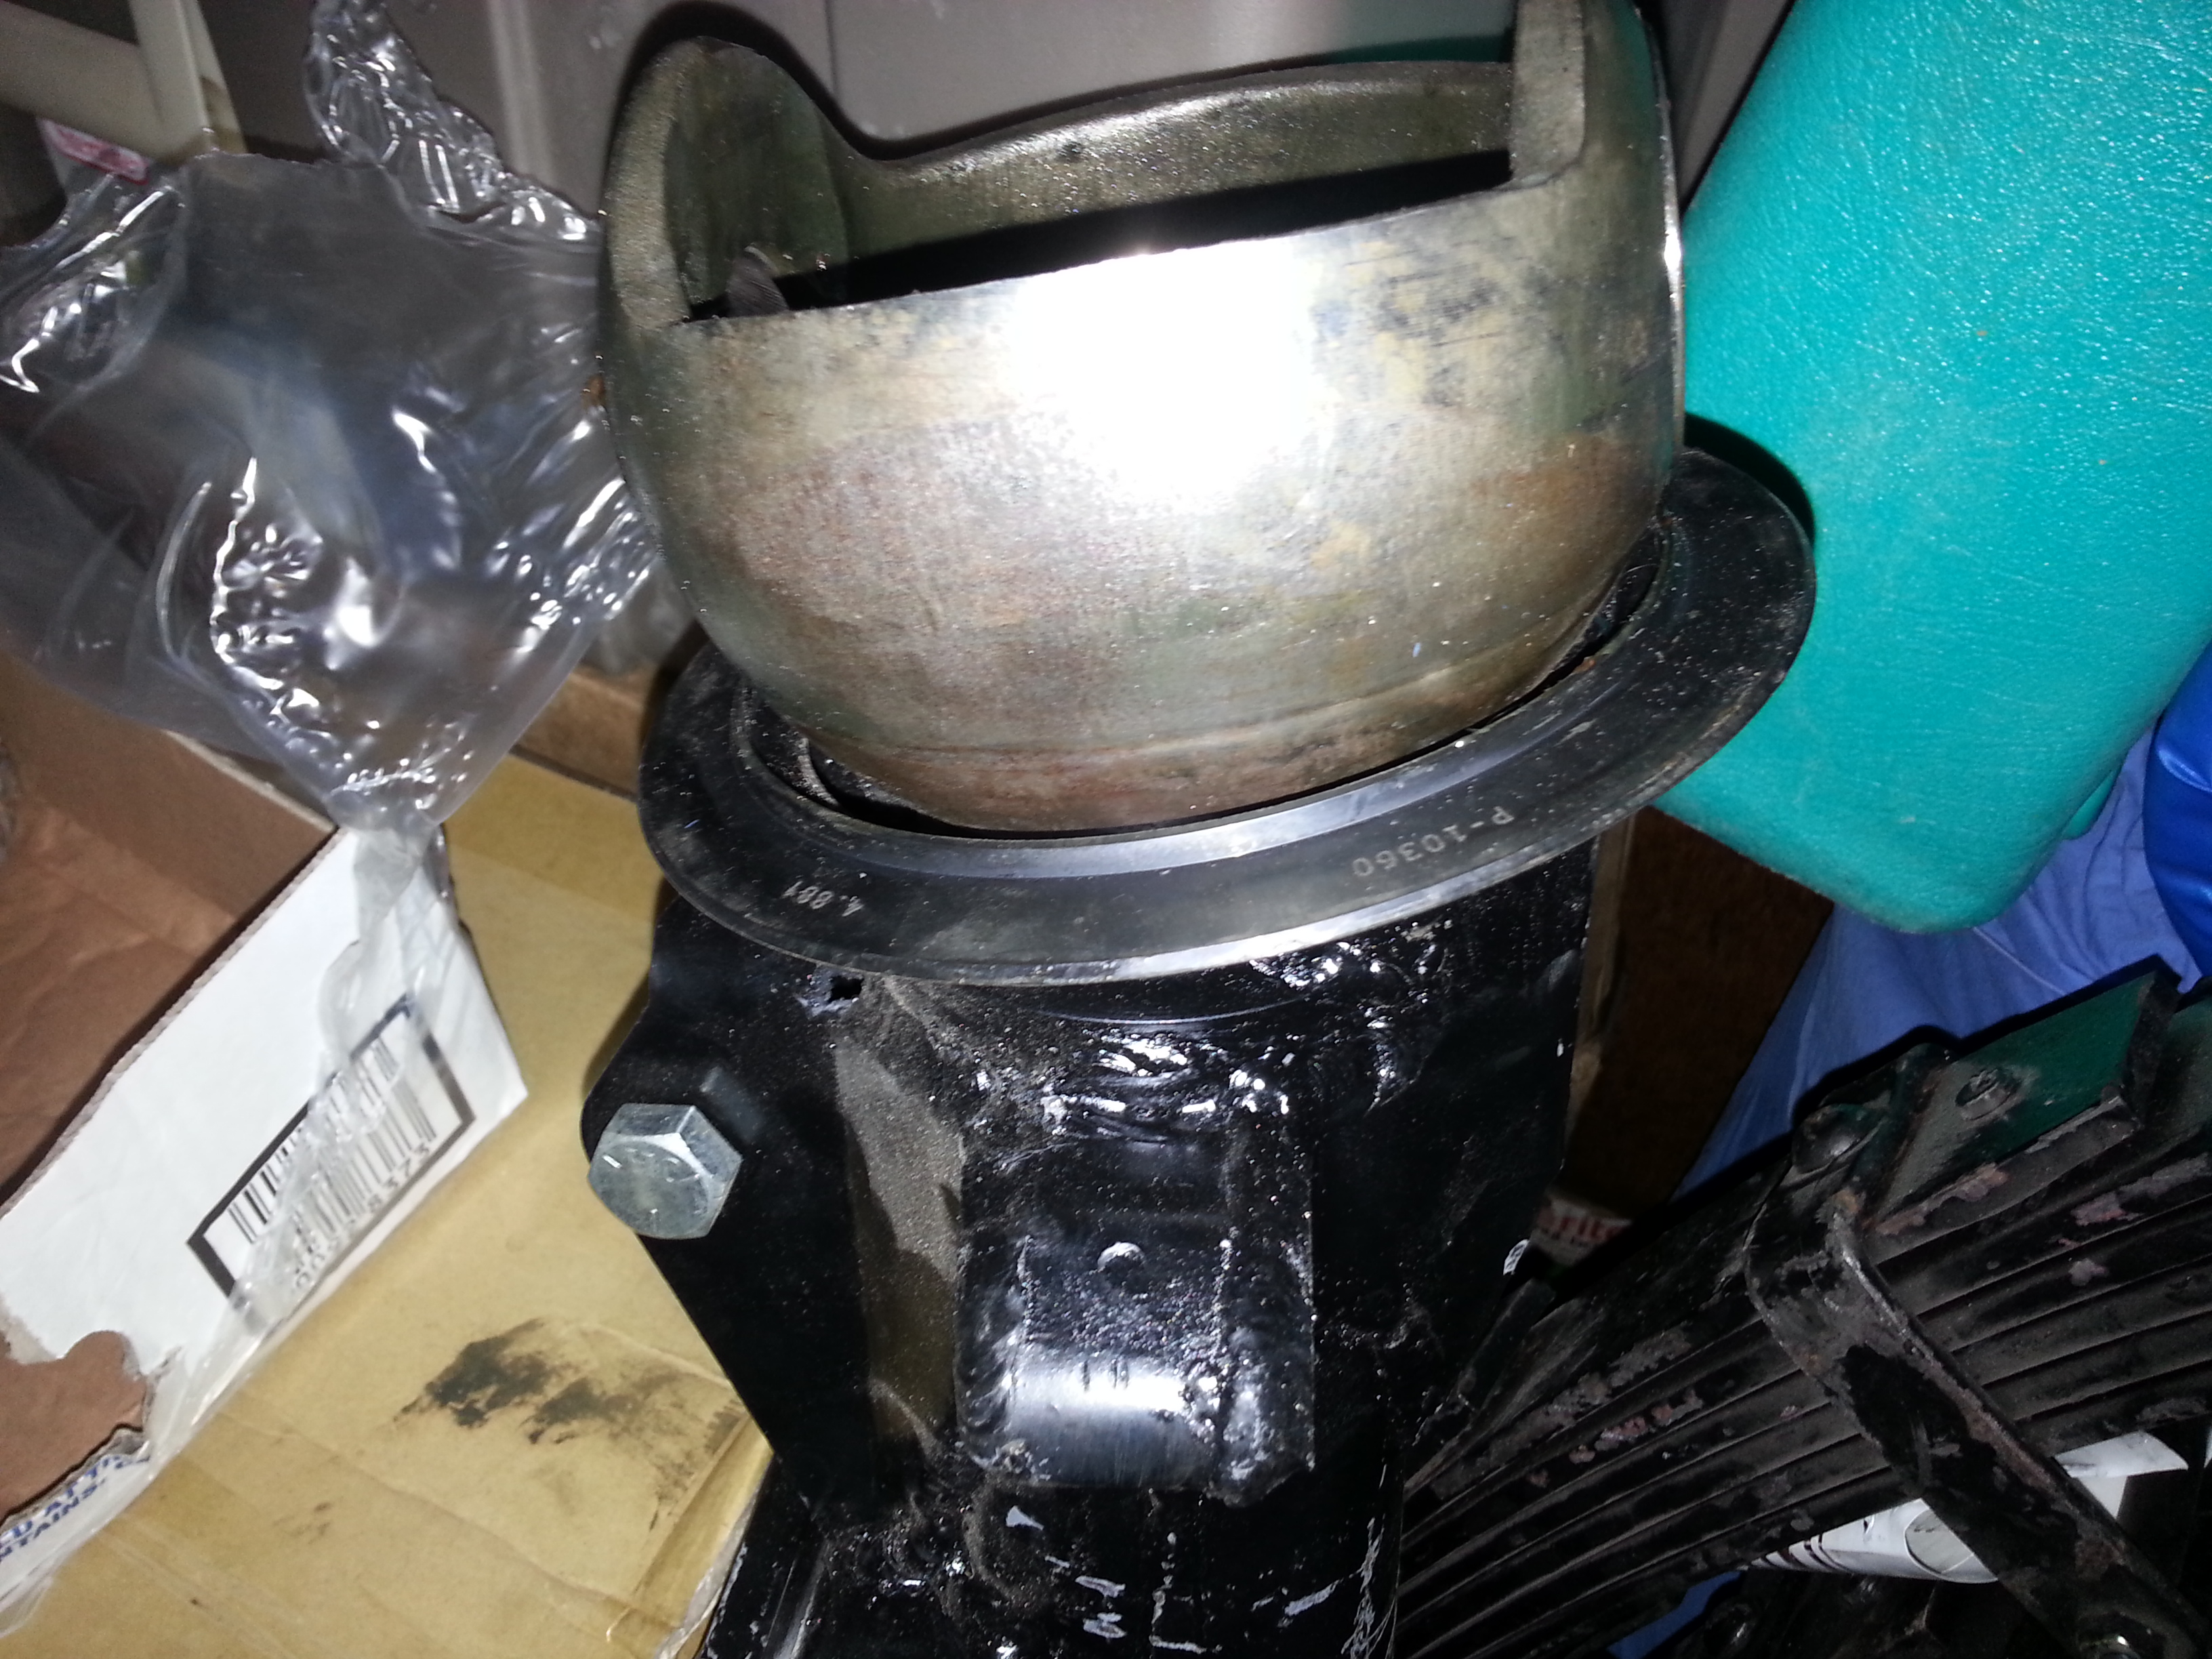
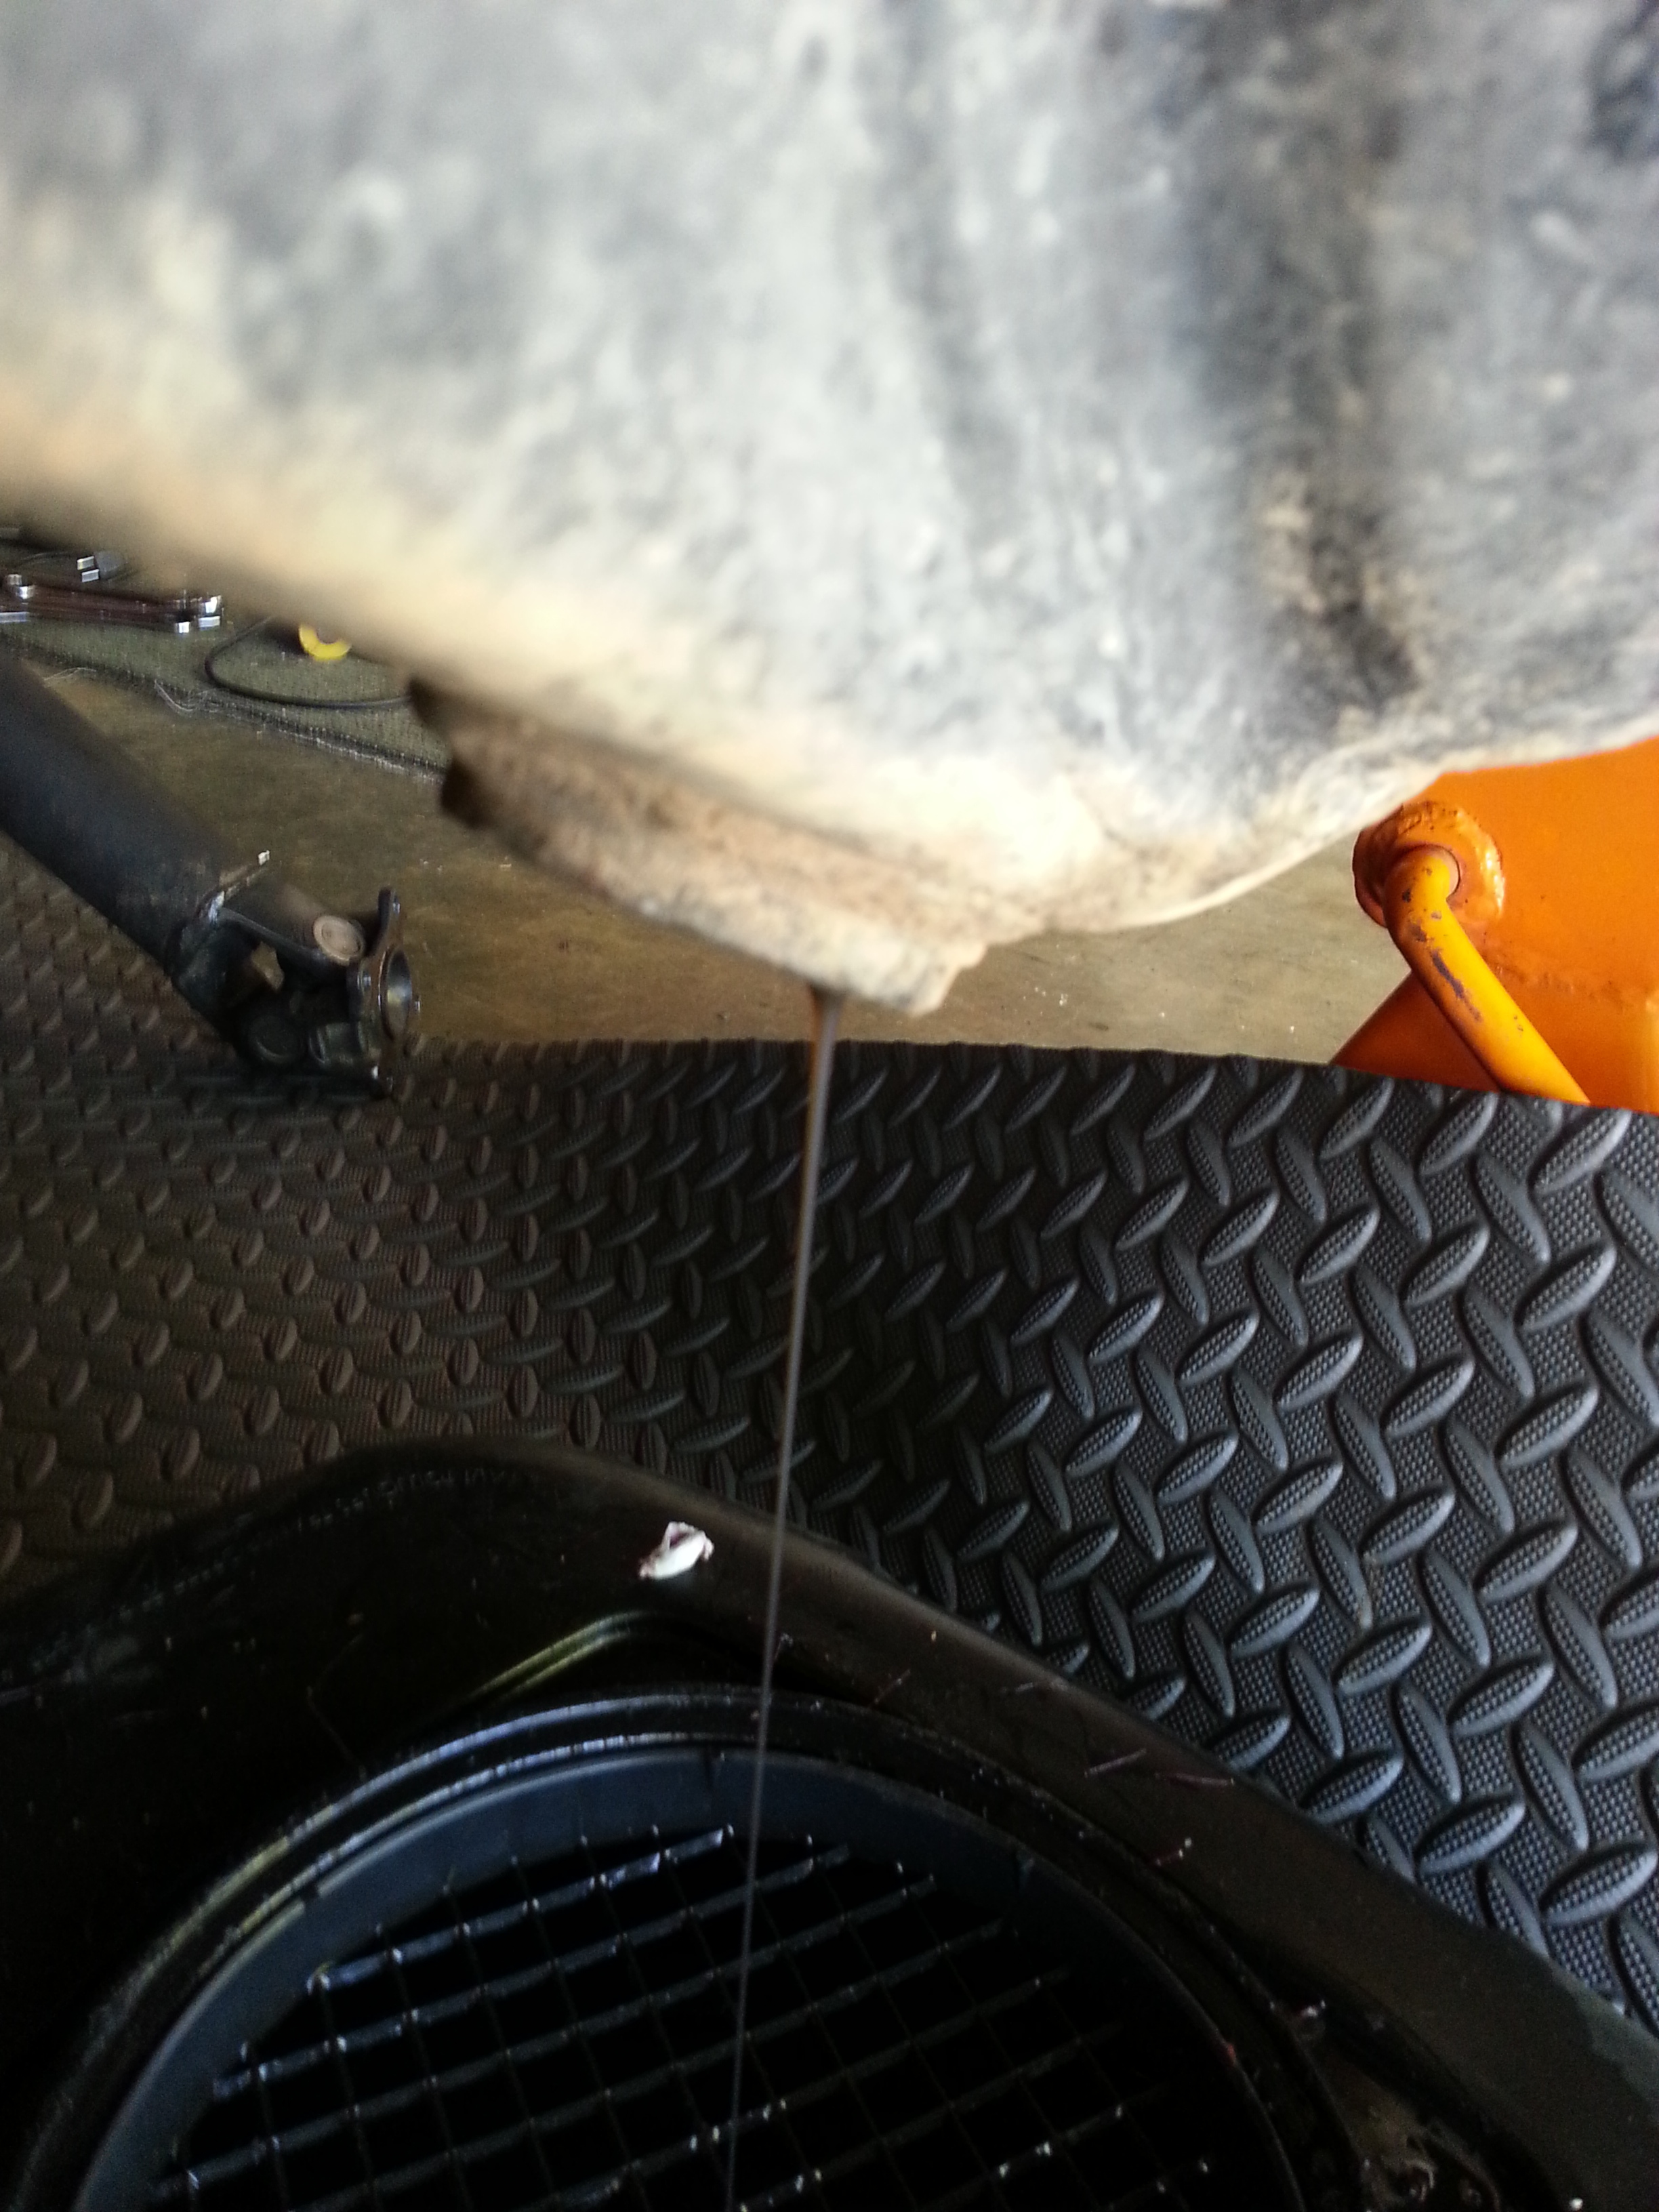
Now remove the brake line and E brake cable pin ( careful not to lose the arched washer) .... Then place your jack stands under the drum bottom and Paul out the axle a little bit and leave it still resting on the studs... You basically do not want the actual to rest on the outer seal at all... So what you are going to do is likely jacked up the pumpkin a little further and lift the Jack stand arm and tell it literally makes contact with the drum . Then you want to slowly and carefully lift up a little higher but not until it pushes on the upper part of the seal, then place a towel or cardboard or some type of spacer once you are clear of the studs kama pretty much anything that you can in order to make sure that the axel never rests on the seal... Do the same on the other side before you attempt to remove the differential. You basically need to pull the actual out at least 6 inches or so past the studs in order to clear the differential carrier...
Next remove the nuts to the differential and take it two by four and BFH and basically rap at 4 and 8 o'clock back and forth against the wood until you see the seal break... Once you break the seal it's just a matter of supporting it towards the rear by the stud holes and then slowly guiding it out instead of dragging it over the studs.... I am going to be replacing the studs as well with the identical thread bolt from the backside just as the front axle was done... You can find them at any decent hardware store, the reason you want to do this would be because of bolt cannot ever back out like a stud can.... Use grade 8 at least. Anytime I'm dealing with the differential I always make sure but I have a large stack of cardboard or at least a piece of plywood or something of the sort down below in case I lose control and drop it...... Voila!.....
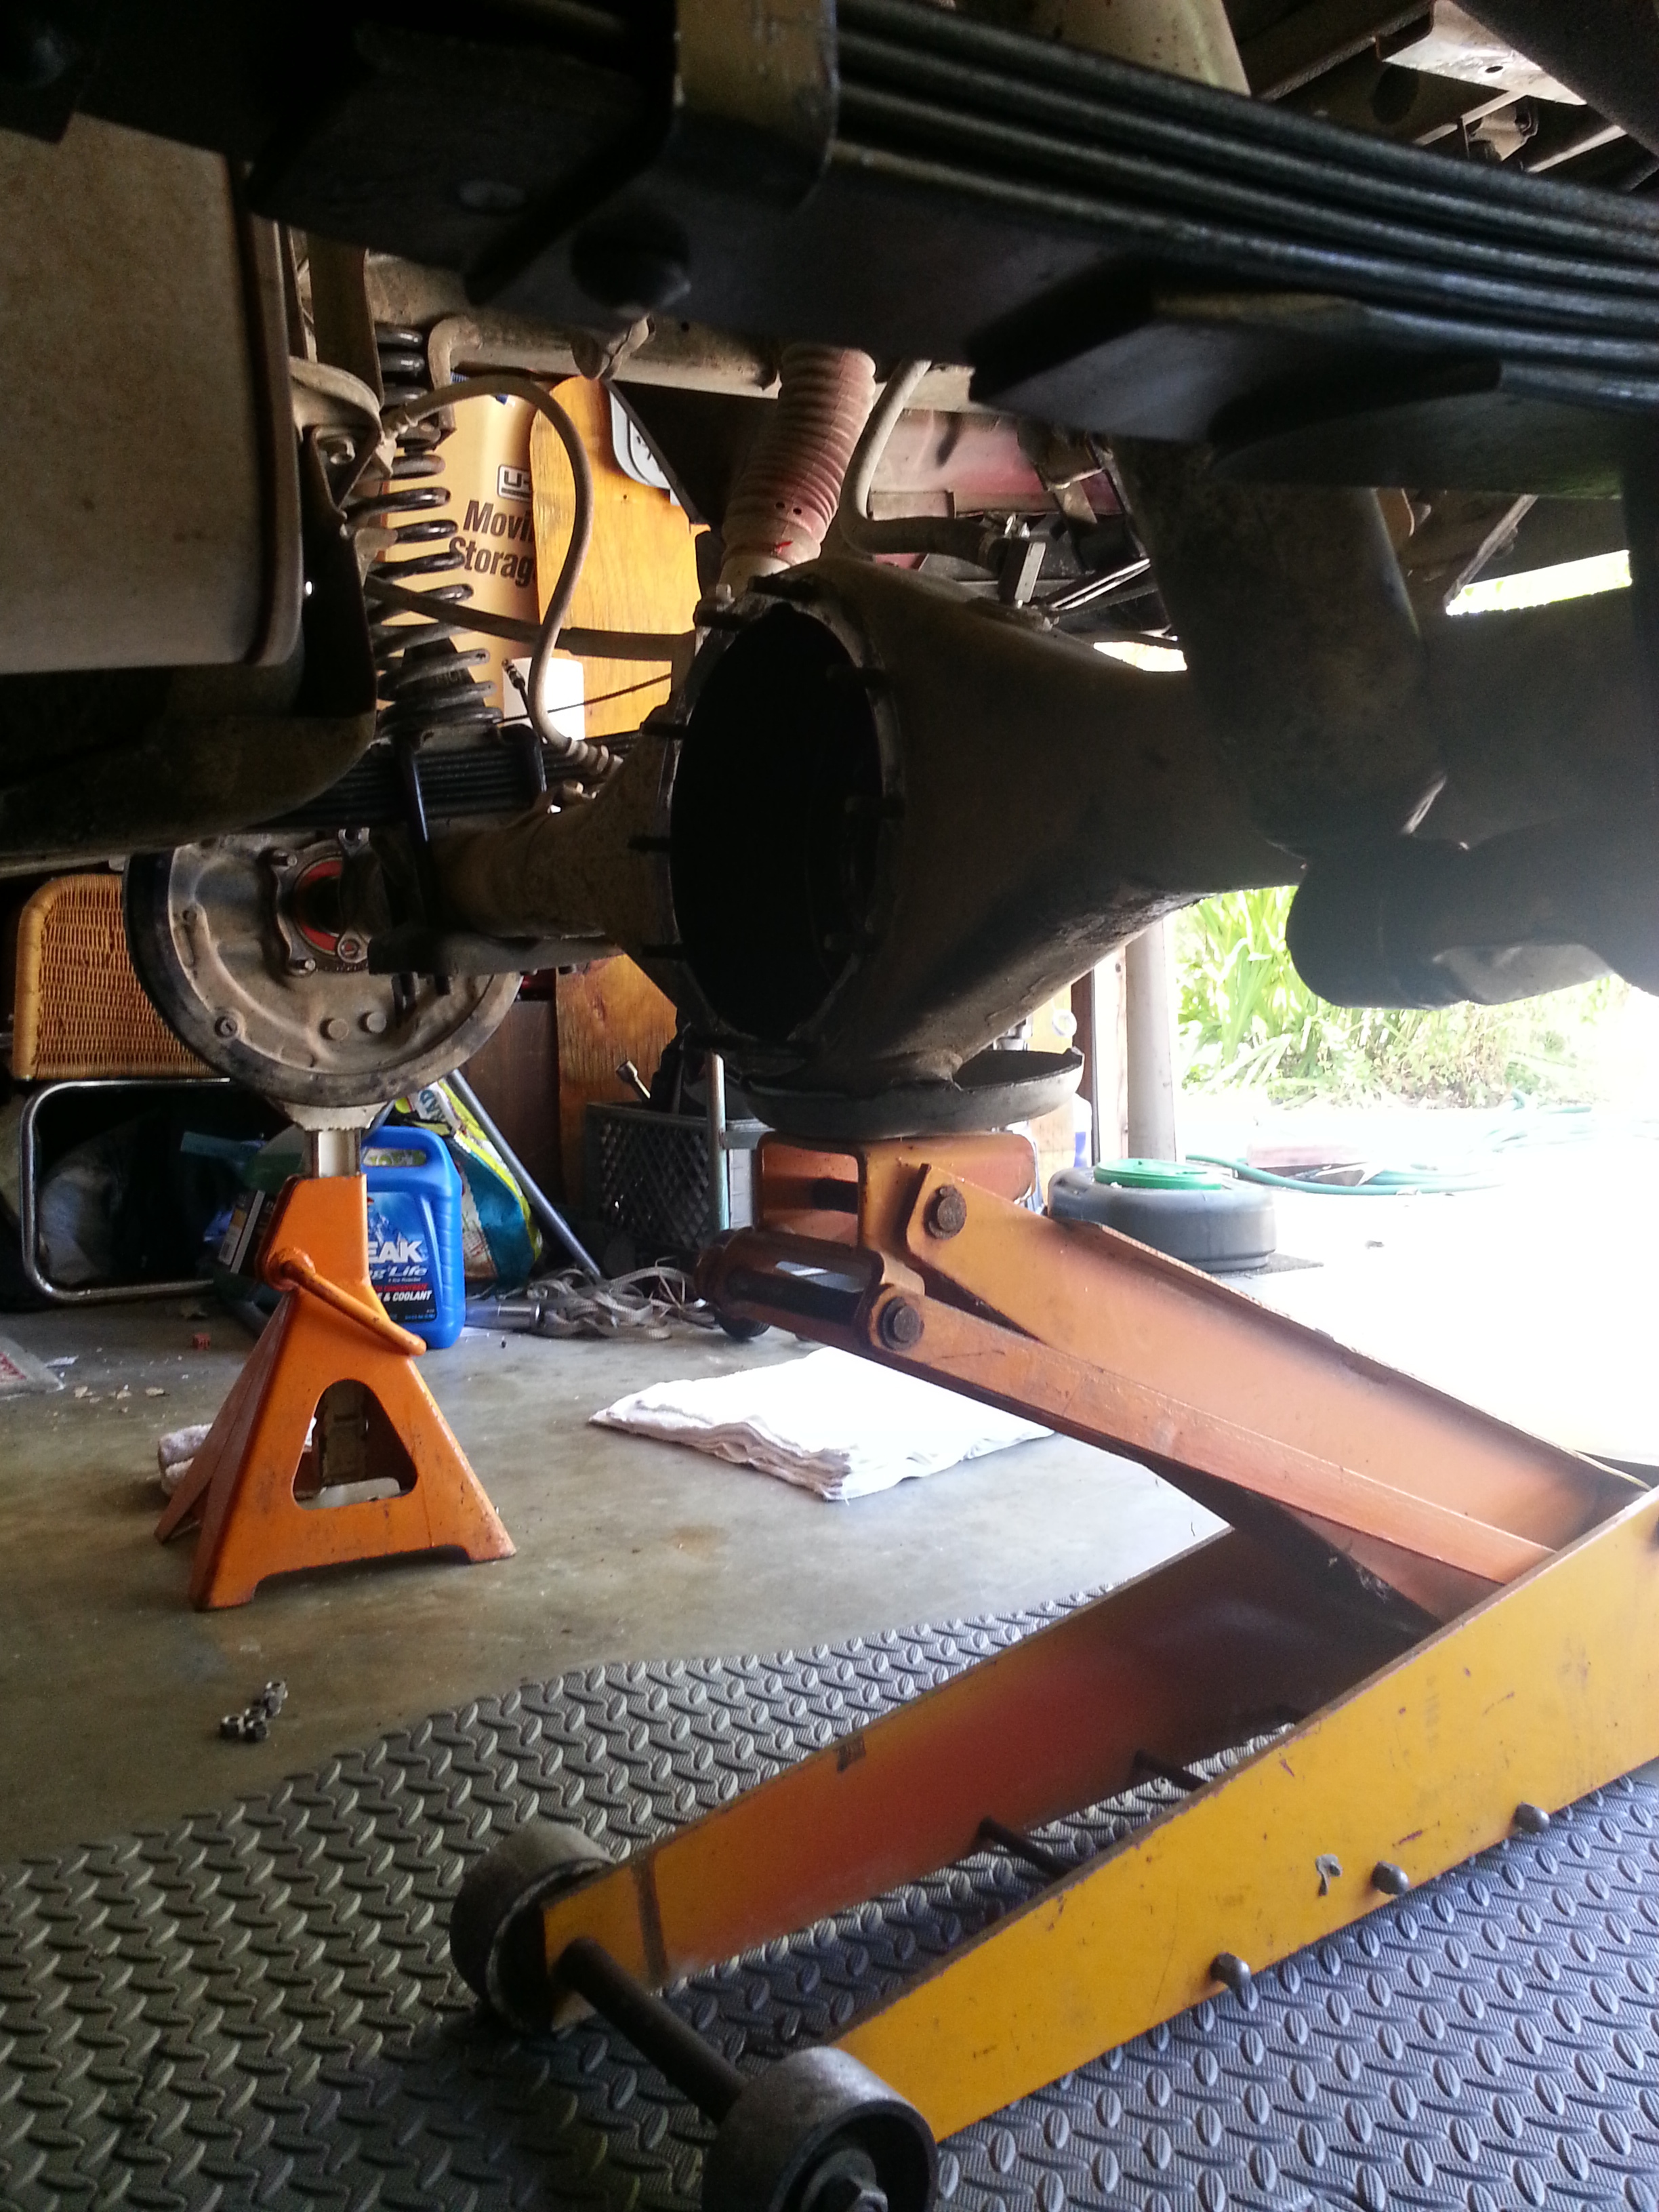
Once the different religious removed carefully glide the axles back and to the carrier housing so that the backing plate flange is flush and journal is in the outer seal.
Now you can load all of the crap and your car and drive to your local gear installer if you're not going to do them yourself which I absolutely do not have time to start as a hobby as of this moment... Hahahaha.
Gear squad that does all of 4 Wheel Parts gears installs for their product was going to give me a pretty screaming deal... Until I told them that one of the carriers has a Spartan locker in it and the other one needs to... Immediately cut me off apologize and then told me that their insurance will not allow them to install any parts that they do not carry....
Yeah, I know... So I was off to the city of Corona California to your the Masters after speaking with the owner Eric. I got a very decent price and actually got in on the tail end of a sale on some products... I have long been concerned that if I do eventually go to 35's that I would not want to tear this axle apart sooner that I need to... So I will now be running dirty thirties and also hey pretty sick setup on the front drive shaft with the Trail Gear heavy duty 10 inch spline drive shaft kit to my r1f a transfer case... what are the differences aside I will be running A later model Tacoma flange and end joint... This joint is about as much flex as you can get on a front set up... I highly recommend anyone running a crawler type setup consider getting longer spline shafts.... You also need to either run an 84 85 Kardon or go the route I am and eliminate the card and in front and put one in the rear when the drive shaft is extended... Is Johnny was saying to me it never really made sense to me that they put a carton in the front and not in the rear... Its not like I will ever be doing 70 miles an hour and I will have a very heavy duty drive shaft up front with a more flexible joint... So I'm pretty good to go. Inland Empire Driveshaft will be doing at least the front custom setup... Considering I'm providing the taco joint and Trail Gear drive shaft kit it should be fairly reasonable from what I was told to get it custom length. .....
While I was there I brought my wonderful with a stripped out caliper mounting thread and they will be doing a factory size time-sert of M12 X 1.25 .... I feel much better about that then doing a Helicoil.....
I also ordered ARP steering knuckle studs..... After speaking with Scotty at addicted offroad and reading several times of horror stories where the factory studs literally sheared off or otherwise failed( in which case you are screwed because you cannot steer) ... I decided I do not want to be stranded for any reason including on the other end the dirty thirties.... And not forgetting to mention again the 10 inch spline drive shaft kit... These are all things the often do happen that I just simply do not want to happen to me, plain and simple. They are also things that will likely last me through the life of this truck... I also picked up 2 new Marlin transfer case pinion seals.... And on the front especially it allows you to eliminate the felt dust shield.... They really have some nice seals and I'm ecstatic that I will be running the full upgrade Marlin knuckle and axle rebuild kits... That along with the really nice stuff from Skys like the axle and differential armor, felt and rubber wiper eliminator - type of wiper from Trail Gear.... Backing plate eliminator kit and heavy duty knuckle plates and half moons... Just trying to do this as bulletproof as possible.
I have more to add but I just wanted to catch up for now ..... I have to crash. I can't thank Eric @ yotamasters enough for spending over 3 hours talking with me and educating me and never once trying to sell me anything... I brought him the info that I had pretty much found to be a general consensus... He busted a couple myths and added a couple things that have happened to him over the hundreds of gear installs and solid axle swaps and and and and and... Exactly, this is why if these guys are willing to give me the time I will always sit there like a sponge and ask every question I can think.
I will pick up the gears, locked and with solid pinion spacers installed ready to go on a break in Adventure around here on Thursday... I will do the 20 minute and then full cool down to the hand and then start adding up the 500 mile breakin... As I said I will have lots more info to share and do my best to share all that I am learning... But I just have to crash as I have to do my sister a favor early in the morning. Gotta take care of your peeps right?
Air wrench 2 min later...
Now remove the brake line and E brake cable pin ( careful not to lose the arched washer) .... Then place your jack stands under the drum bottom and Paul out the axle a little bit and leave it still resting on the studs... You basically do not want the actual to rest on the outer seal at all... So what you are going to do is likely jacked up the pumpkin a little further and lift the Jack stand arm and tell it literally makes contact with the drum . Then you want to slowly and carefully lift up a little higher but not until it pushes on the upper part of the seal, then place a towel or cardboard or some type of spacer once you are clear of the studs kama pretty much anything that you can in order to make sure that the axel never rests on the seal... Do the same on the other side before you attempt to remove the differential. You basically need to pull the actual out at least 6 inches or so past the studs in order to clear the differential carrier...
Next remove the nuts to the differential and take it two by four and BFH and basically rap at 4 and 8 o'clock back and forth against the wood until you see the seal break... Once you break the seal it's just a matter of supporting it towards the rear by the stud holes and then slowly guiding it out instead of dragging it over the studs.... I am going to be replacing the studs as well with the identical thread bolt from the backside just as the front axle was done... You can find them at any decent hardware store, the reason you want to do this would be because of bolt cannot ever back out like a stud can.... Use grade 8 at least. Anytime I'm dealing with the differential I always make sure but I have a large stack of cardboard or at least a piece of plywood or something of the sort down below in case I lose control and drop it...... Voila!.....
Once the different religious removed carefully glide the axles back and to the carrier housing so that the backing plate flange is flush and journal is in the outer seal.
Now you can load all of the crap and your car and drive to your local gear installer if you're not going to do them yourself which I absolutely do not have time to start as a hobby as of this moment... Hahahaha.
Gear squad that does all of 4 Wheel Parts gears installs for their product was going to give me a pretty screaming deal... Until I told them that one of the carriers has a Spartan locker in it and the other one needs to... Immediately cut me off apologize and then told me that their insurance will not allow them to install any parts that they do not carry....
Yeah, I know... So I was off to the city of Corona California to your the Masters after speaking with the owner Eric. I got a very decent price and actually got in on the tail end of a sale on some products... I have long been concerned that if I do eventually go to 35's that I would not want to tear this axle apart sooner that I need to... So I will now be running dirty thirties and also hey pretty sick setup on the front drive shaft with the Trail Gear heavy duty 10 inch spline drive shaft kit to my r1f a transfer case... what are the differences aside I will be running A later model Tacoma flange and end joint... This joint is about as much flex as you can get on a front set up... I highly recommend anyone running a crawler type setup consider getting longer spline shafts.... You also need to either run an 84 85 Kardon or go the route I am and eliminate the card and in front and put one in the rear when the drive shaft is extended... Is Johnny was saying to me it never really made sense to me that they put a carton in the front and not in the rear... Its not like I will ever be doing 70 miles an hour and I will have a very heavy duty drive shaft up front with a more flexible joint... So I'm pretty good to go. Inland Empire Driveshaft will be doing at least the front custom setup... Considering I'm providing the taco joint and Trail Gear drive shaft kit it should be fairly reasonable from what I was told to get it custom length. .....
While I was there I brought my wonderful with a stripped out caliper mounting thread and they will be doing a factory size time-sert of M12 X 1.25 .... I feel much better about that then doing a Helicoil.....
I also ordered ARP steering knuckle studs..... After speaking with Scotty at addicted offroad and reading several times of horror stories where the factory studs literally sheared off or otherwise failed( in which case you are screwed because you cannot steer) ... I decided I do not want to be stranded for any reason including on the other end the dirty thirties.... And not forgetting to mention again the 10 inch spline drive shaft kit... These are all things the often do happen that I just simply do not want to happen to me, plain and simple. They are also things that will likely last me through the life of this truck... I also picked up 2 new Marlin transfer case pinion seals.... And on the front especially it allows you to eliminate the felt dust shield.... They really have some nice seals and I'm ecstatic that I will be running the full upgrade Marlin knuckle and axle rebuild kits... That along with the really nice stuff from Skys like the axle and differential armor, felt and rubber wiper eliminator - type of wiper from Trail Gear.... Backing plate eliminator kit and heavy duty knuckle plates and half moons... Just trying to do this as bulletproof as possible.
I have more to add but I just wanted to catch up for now ..... I have to crash. I can't thank Eric @ yotamasters enough for spending over 3 hours talking with me and educating me and never once trying to sell me anything... I brought him the info that I had pretty much found to be a general consensus... He busted a couple myths and added a couple things that have happened to him over the hundreds of gear installs and solid axle swaps and and and and and... Exactly, this is why if these guys are willing to give me the time I will always sit there like a sponge and ask every question I can think.
I will pick up the gears, locked and with solid pinion spacers installed ready to go on a break in Adventure around here on Thursday... I will do the 20 minute and then full cool down to the hand and then start adding up the 500 mile breakin... As I said I will have lots more info to share and do my best to share all that I am learning... But I just have to crash as I have to do my sister a favor early in the morning. Gotta take care of your peeps right?
Last edited by ChefYota4x4; 05-29-2013 at 01:37 AM.
05-29-2013, 07:17 AM
#6595
Registered User
Nice mark. I'm glad you ended up going to Toyota masters. Eric is a cool guy and he knows his stuff really well. Ruben, chris, their brother in law and I have all got our stuff done with them. And they have yet to give those guys any problems with their work in 3rd members.
I laughed when you said you spent about 3 hours talking to him soaking all their info up like a sponge. Hahaha I was the same exact way when I went to the shop too lol glad you're getting some progress. Cant wait to get to work on your truck this weekend.
I laughed when you said you spent about 3 hours talking to him soaking all their info up like a sponge.
Hahaha I was the same exact way when I went to the shop too lol glad you're getting some progress. Cant wait to get to work on your truck this weekend.
 ....
....
 05-29-2013, 10:50 AM
#6599
Registered User
Oh yea that is nice! I seen 3 rigs that they were working on and they were all tremendously amazing. They dovgreat SAS, lift, gearing and locker install jobs. Their work always looks super clean and make rhe rigs they work on look like they came off rhe factory like that. Good stuff. That 4Runner is cherry!
05-29-2013, 12:53 PM
#6600
Oh yeah, and you should have seen this fjz 80 that was around a 94 or something like that with front and rear E lockers and 6 inch lift on 35's with the most sick 4x Labs rear bumper! Good God I would love one of those but they're like 250 pounds and 2000 dollars minimum! lol. ..
That red one had a5 inch lift with 6 inch shackles, dual cases with a triple stick, the same 10 inch spline Teflon coated drive shaft that I'm getting, trailgear Rock assault axles, 200 something horsepower stroker 22 r... , and it had much more and was just a freaking beast! Little bit too much for me over eight feet tall but certainly effective!
His trugee was there too... The red one... Just totally sick!
lol. ..That red one had a5 inch lift with 6 inch shackles, dual cases with a triple stick, the same 10 inch spline Teflon coated drive shaft that I'm getting, trailgear Rock assault axles, 200 something horsepower stroker 22 r... , and it had much more and was just a freaking beast! Little bit too much for me over eight feet tall but certainly effective!
His trugee was there too... The red one... Just totally sick!


