
ChefYota4x4's 1987 4Runner Build-Up Thread
 04-05-2013, 08:41 PM
#6261

Sorry didn't give a nice step by step directions for the wiring and stuff. I can't really tell you how to get the pins out of the plugs with out haveing them in front of me. You'll figure it out I'm sure. I probably should 'a re did the drawing, but just move the red and green over to the switch to the left (Pin 5 to 12, pin 4 to 11,in plug B which is the rear window relay).
----------------
Capacitor isn't bulged, could still be dry however (They're filled with "goo"). Resistors that large tend to explode when they die. That is the frequency filters, you can remove em and she'll never even notice.. Maybe
Just run some wire to the plugs on each speaker and see if they move when you apply power from a battery or tunes.
The usual failure point is the wire between the body and cone (Pic #2), some times just moving them around will create a connection again. My 4runner donor speakers had intermitten connections, just poked those braided cables to the side and they're 100% again.
In theory they're repairable as long as the winding in the cone is still intact but it's a PITA and prone to being fubard. The center paper on the speaker cone covers up the connection between the wires you see in #2 and the coil windings, if you can get the glue off without losing all the coil wire you can solder them back together.
Just try slaping em around some, great granny chef isn't going to be bassing out so once they make a connection they'll probably do just fine.
 04-05-2013, 09:37 PM
#6263
...Capacitor isn't bulged, could still be dry however (They're filled with "goo"). Resistors that large tend to explode when they die. That is the frequency filters, you can remove em and she'll never even notice.. Maybe
Just run some wire to the plugs on each speaker and see if they move when you apply power from a battery or tunes.
The usual failure point is the wire between the body and cone (Pic #2), some times just moving them around will create a connection again. My 4runner donor speakers had intermitten connections, just poked those braided cables to the side and they're 100% again.
Also, could be weak solder on terminals where the braided wires connect to speaker wires, or corrosion on the spade connectors. here:
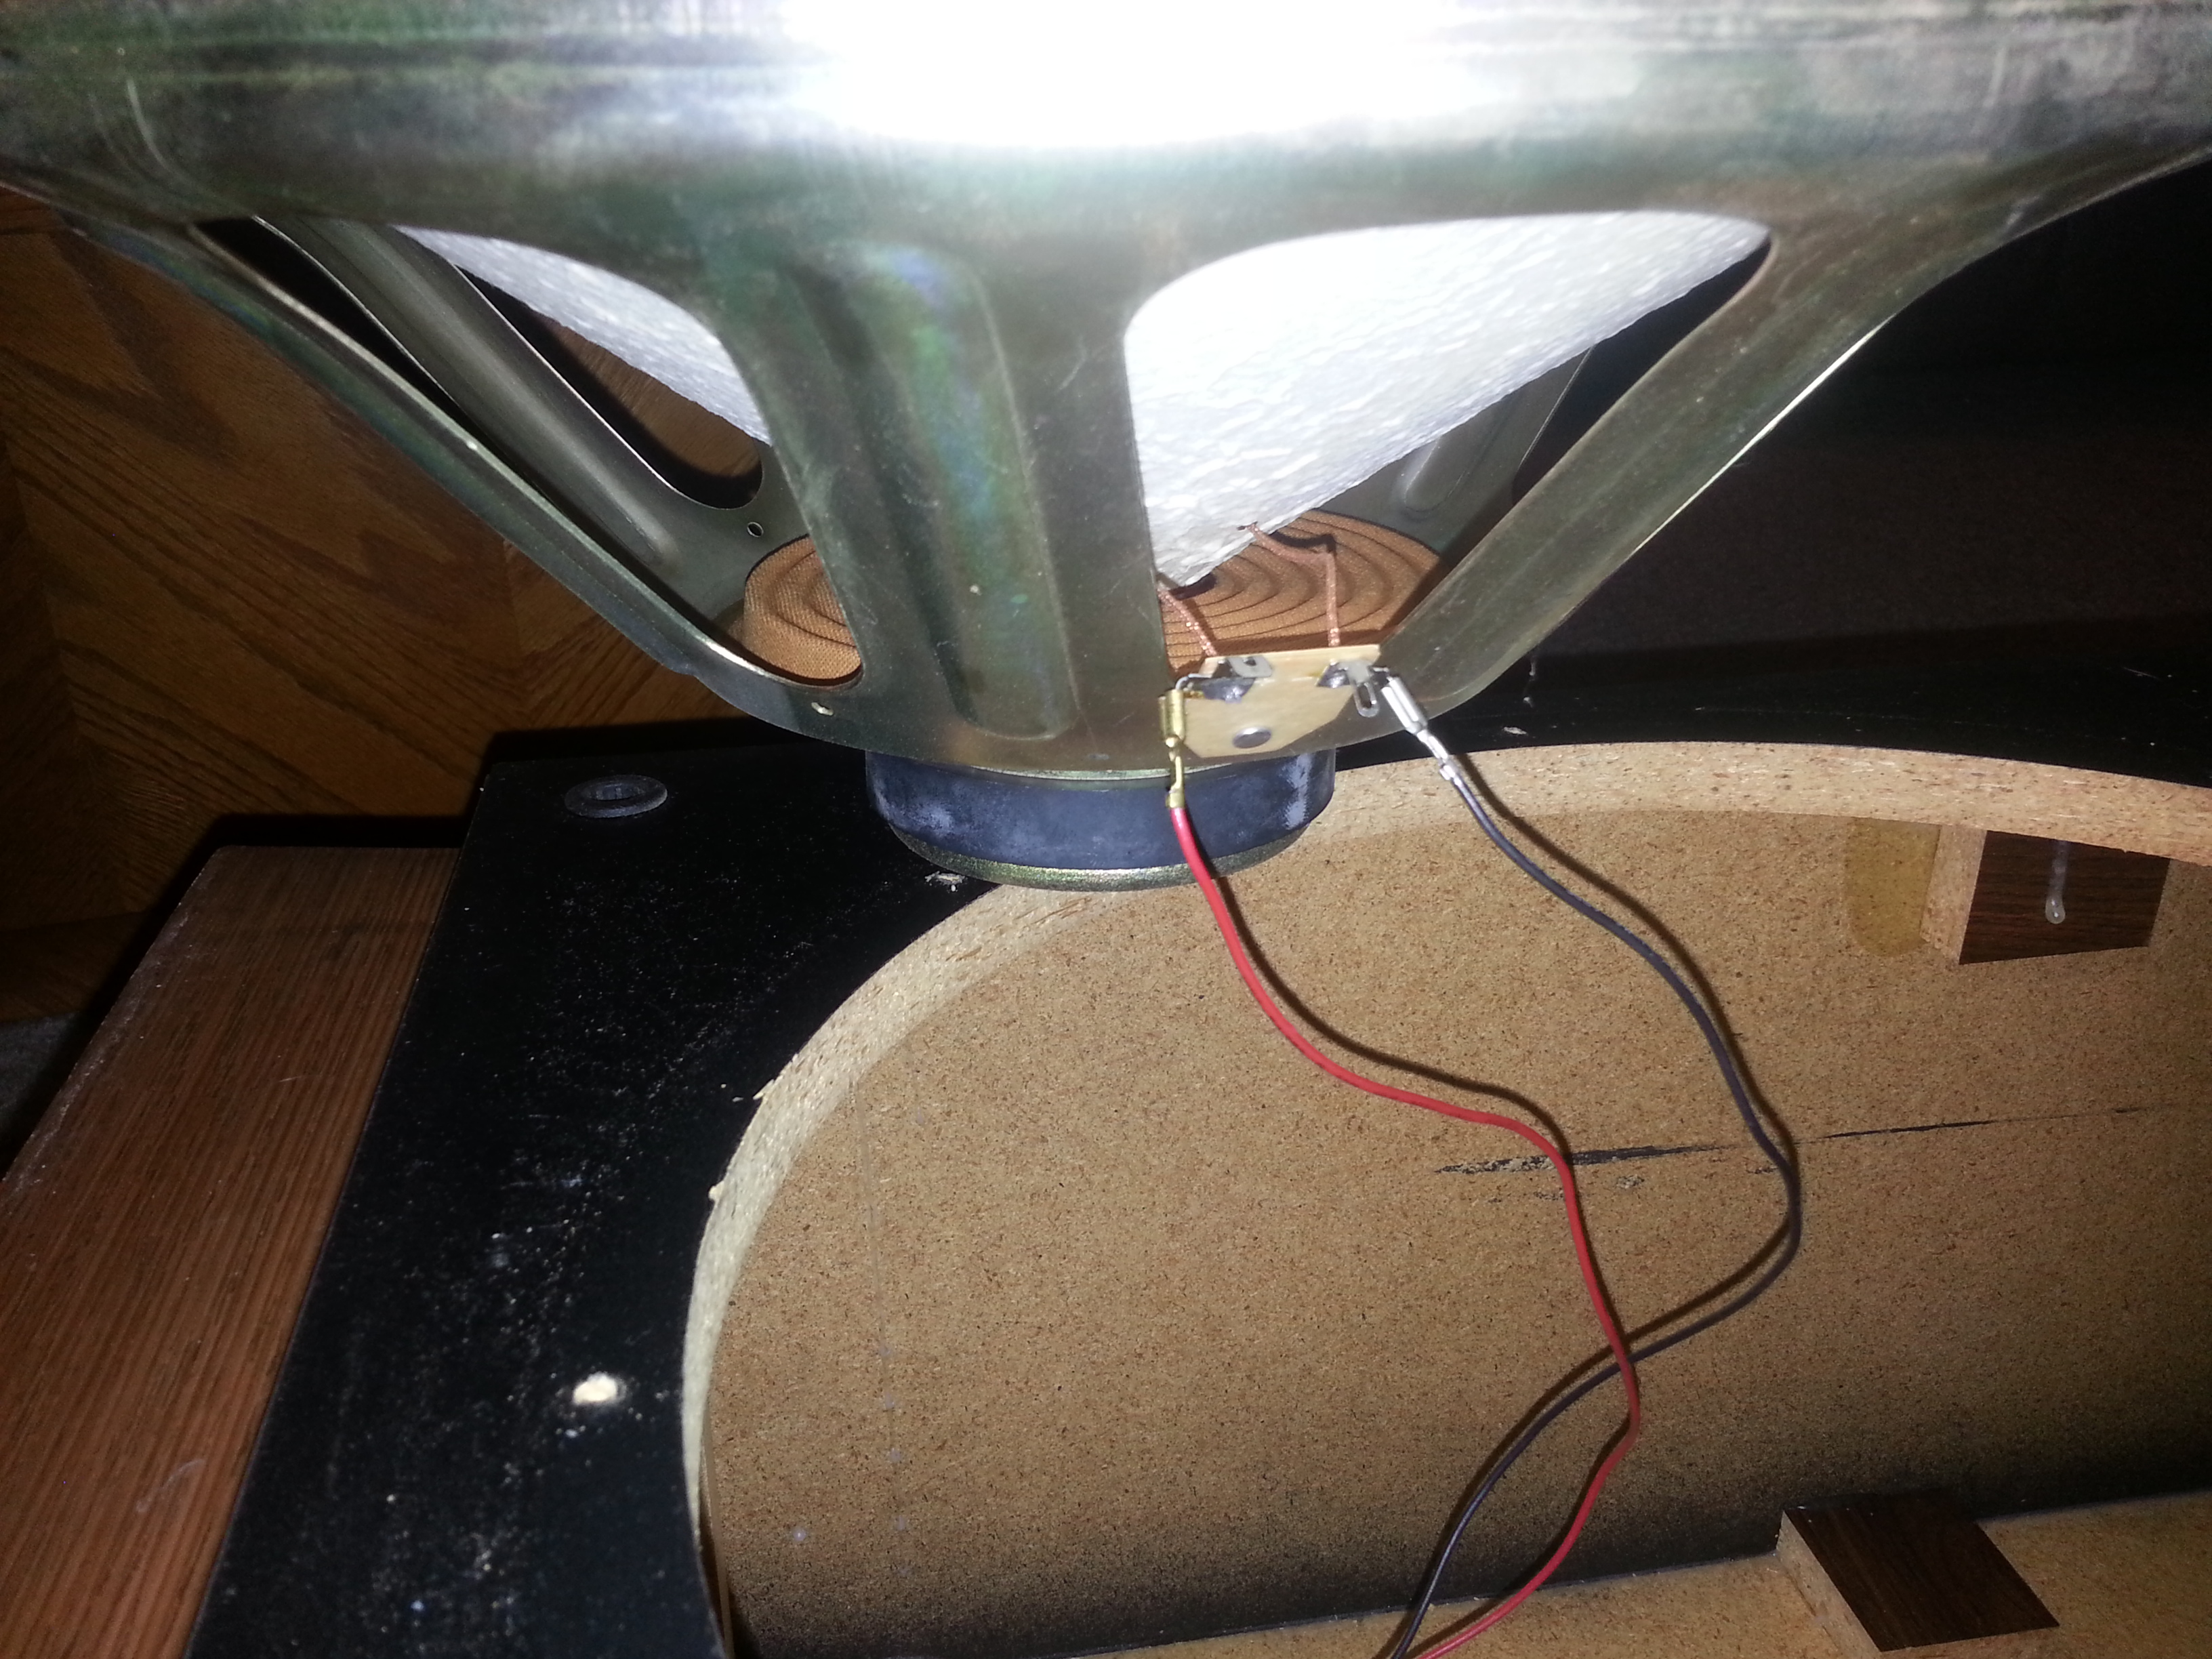
Just inspect closely for cracks in solder, or just go ahead re-solder the braided wires.
04-05-2013, 09:55 PM
#6264
Going to assume all the switches are good and the ground inside the tailgate is clean etc. The issue with the intermitten, jiggle the tailgate and it works, is that it is grounding thru the hinge. You can add a ground strap from the gate to the rest of the body but thats ugly.
Mark, this is a simple thing to verify, and definitely worth the try. Connect a temporary ground strap between body and tailgate for a period of time and see if problem disappears. Connect ground point (where the "top off" switch connects to) in left panel to a screw that screws into bare metal on the tailgate.
04-05-2013, 11:05 PM
#6265
Thank you so much, guys! Wow, I think I need to take an online electronics course. I mean, once I dig in, I do fine, but just getting started is the trouble sometimes.
I'm gonna replace the motor maybe tomorrow, for starters (after trying the ground strap out just to pin down a lil more specifically whatever my problem is. Lil bit of a PITA to remove the panel, only cuz of the speakers. So I'll remove the Jack and them go in for the front pay at the front-most rear panel. Can also get to the relay module from there, if necessary.
I still think those latches are somehow part of the inadequate ground/current......, is that possible? I cleaned and greased them properly when installing the 2nd gen 4runner latch cables.
I did a separate video I have to upload of something else. The bar that goes across the tailgate amd then up and in on both sides? Is really loose when the gate is closed (loose on the half moon it glides over when opening).
Gotcha on the speaker bypass trick. I have access to all those capacitors I need if that's the trick. I have RSL Speakers that are 30yrs old and work flawlessly..... wth? No rust or corrosion on anything on these, RAD, they're pristine. I will try some stuff, thanx, guys!
Toyo, sup bud? Well, good idea,..... but I'm not surei want any more whoring than needed in there. .... Not sure how to wire the twin of the console switch to the keyed switch. ... Would have to figure out the colors. I think Bryan89 or his buddy put his switch in the handle cup in the inside of the tailgate. VERY interesting idea, would certainly be RIGHT THERE ALL IN ONE FACTOR FRIENDLY, RIGHT??? Hahaha......
04-05-2013, 11:10 PM
#6266
Got lots cleaned up and organized in my garage and shop, and MANNNNNN is/was it badly out of whack!.... much better. ...
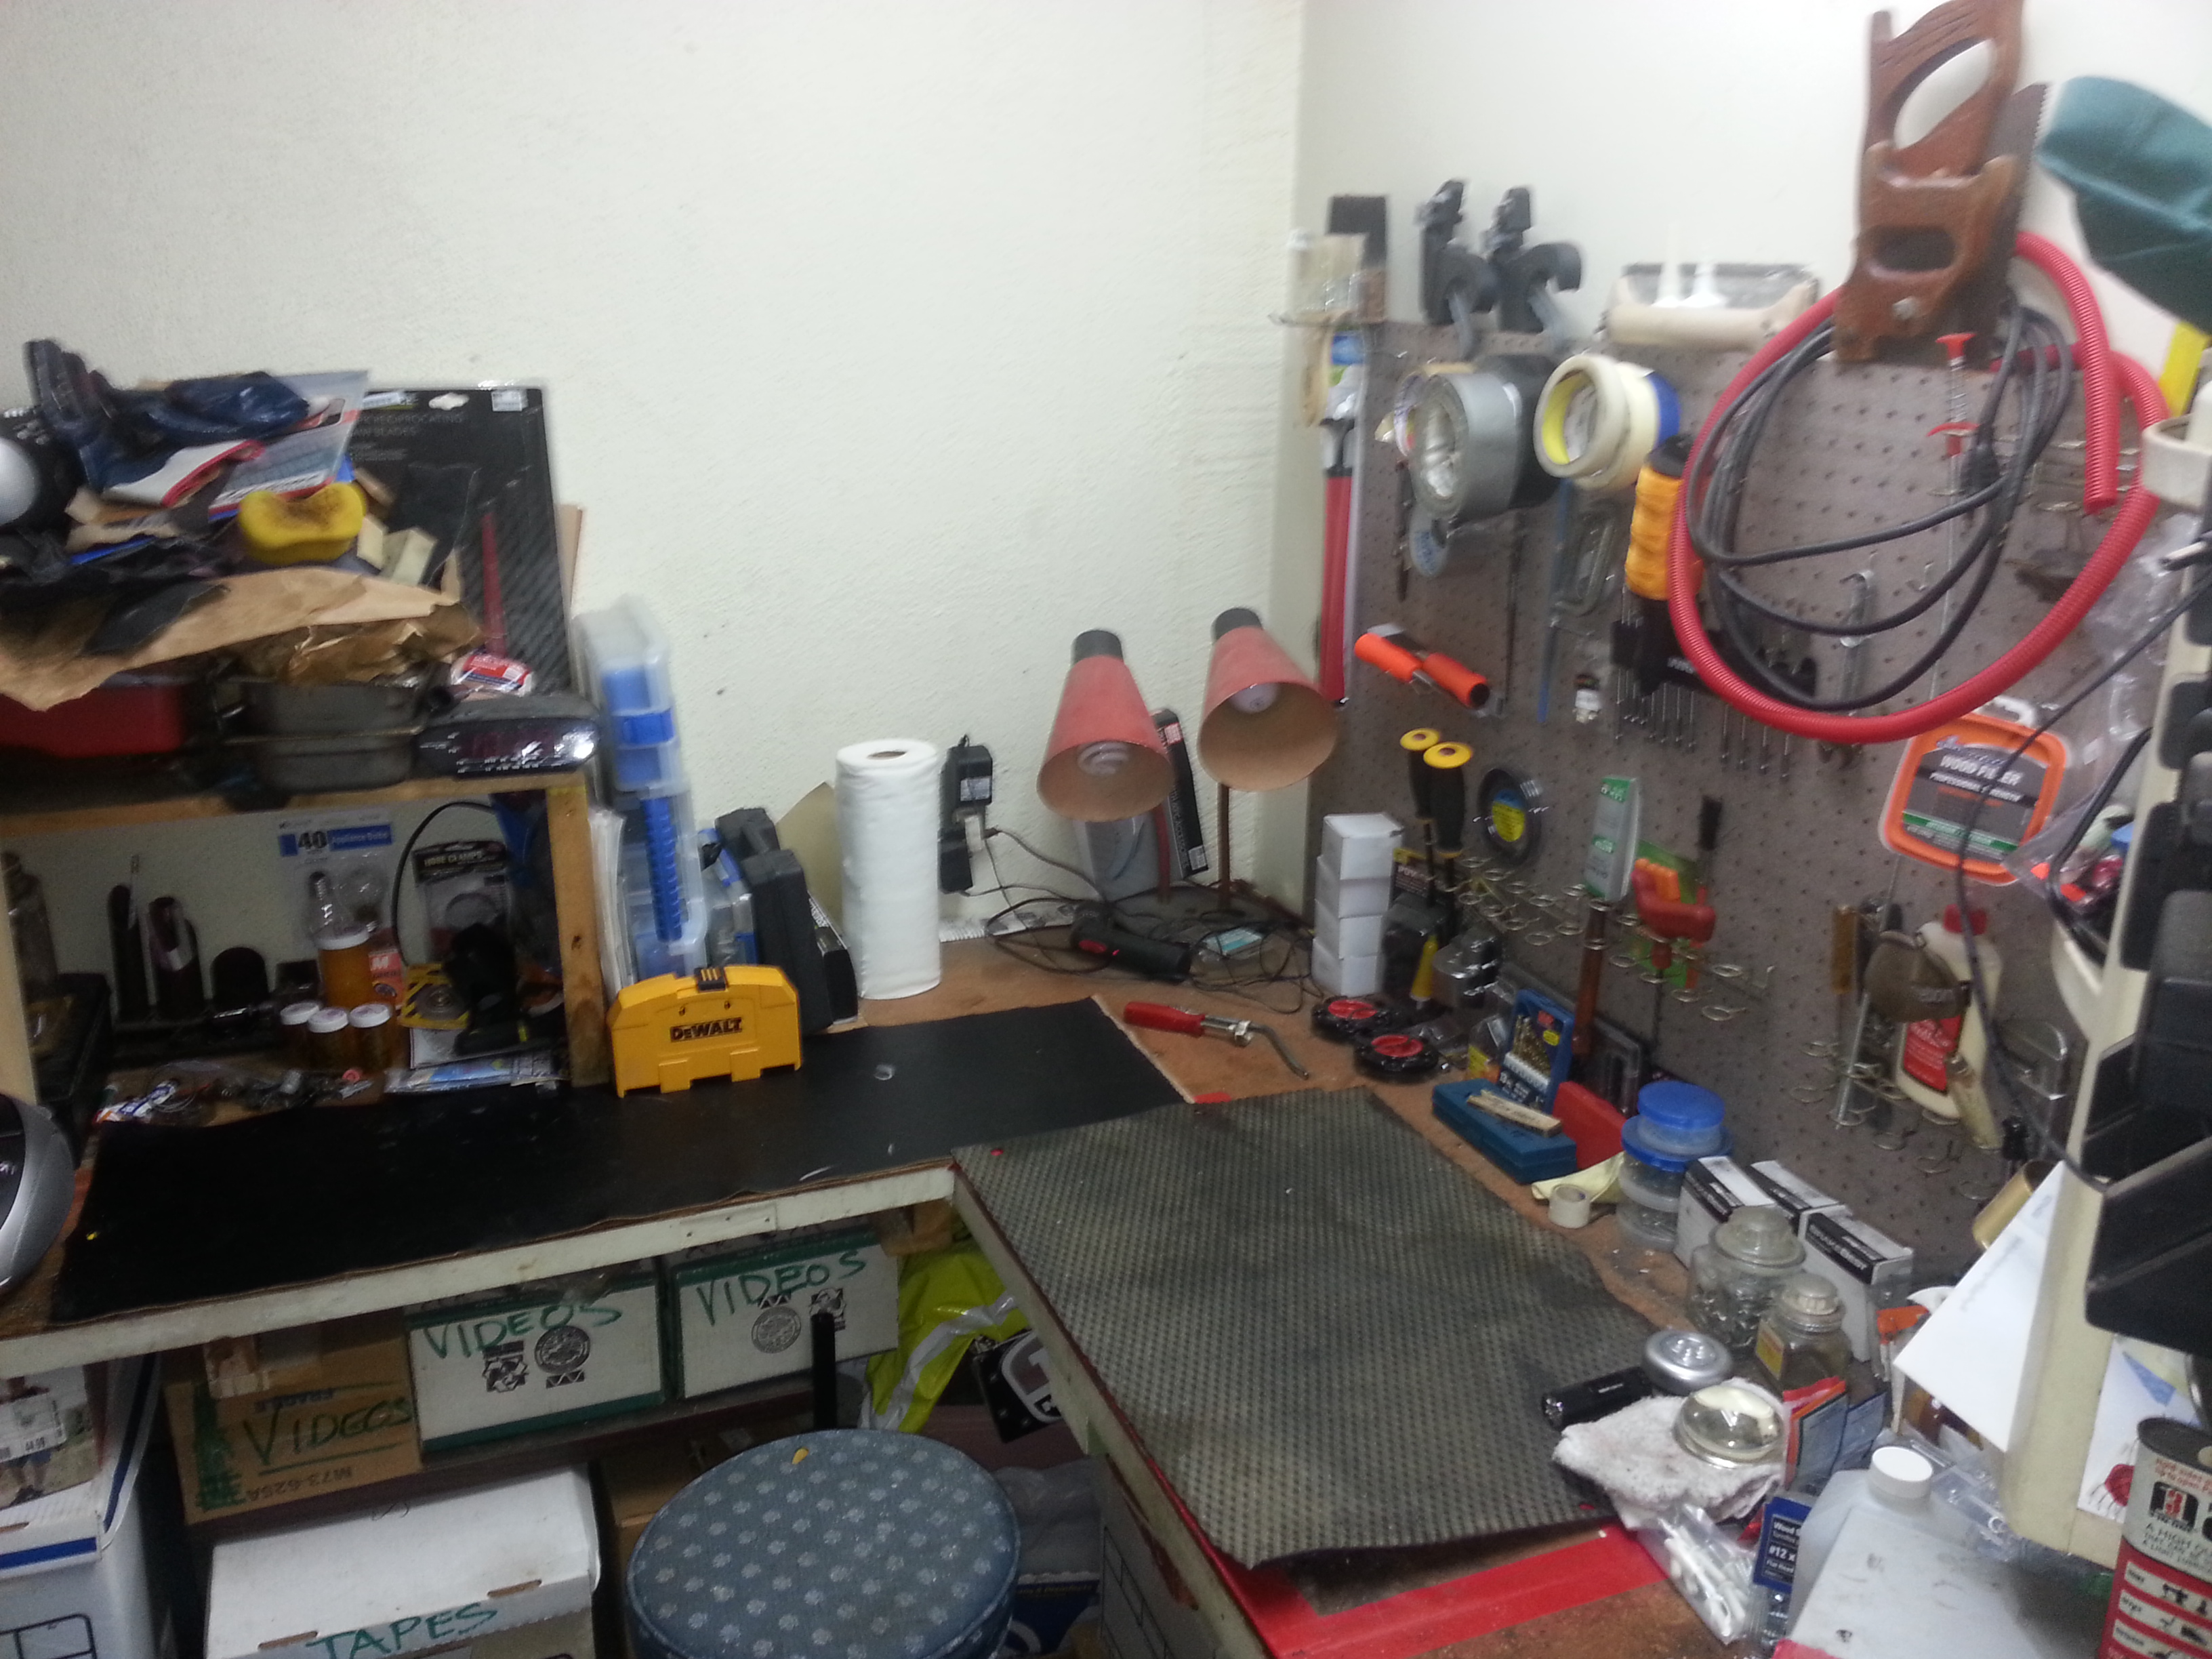
Will get more tomorrow and onward of my cleanup and organizing. ..... gonna be so nice to have more room again. ....
Also set up a box of "to do" projects... like the lighted dome/rear view mirror, plus more.
Will get more tomorrow and onward of my cleanup and organizing. ..... gonna be so nice to have more room again. ....
Also set up a box of "to do" projects... like the lighted dome/rear view mirror, plus more.

 04-05-2013, 11:19 PM
#6268
Registered User
ahh iris
i have some i rustled from a farmers field couple years ago
yes i said rustled they were growing wild along the irrigation canal we went over an helped them to a better place
yellow black an rootbeer browns they bloom every year i have some blues but they came from calif up near solvang they dont bloom but once every 2-3 years me an the little dragoness were out there yesterday weeding the beds ^..^
04-05-2013, 11:29 PM
#6269
Contributing Member
Join Date: Mar 2003
Location: COTKU,Ontario,Canada
Posts: 11,334
Likes: 0
Received 0 Likes
on
0 Posts
Ya mark side to side... front to back I could get at the scrap yard... see if I can find a link to what I'm talking about on an aussie web site.
My pop would totally hate you now if he saw your Irises... he's a big time gardener even volunteers at the city botanical garden... we had snow flurries today... again... just listening to the Corrs Ruby Tuesday cover w/Ron Wood... very good version of this song ... celtic lovelies add something to this song that mick's voice just never could... but that's just my single dude heart talking... lol... Stones are still the bomb...
My pop would totally hate you now if he saw your Irises... he's a big time gardener even volunteers at the city botanical garden... we had snow flurries today... again... just listening to the Corrs Ruby Tuesday cover w/Ron Wood... very good version of this song ... celtic lovelies add something to this song that mick's voice just never could... but that's just my single dude heart talking... lol... Stones are still the bomb...
Last edited by aviator; 04-05-2013 at 11:38 PM.
04-05-2013, 11:51 PM
#6270
Iris are easily my favorite flowers, Thanks for the photo!
Here is a home in Denver owned by an iris breeder. Spec freaking tacular!


Niether of these is my favortie shot but I can't find that one right now
www.iris4u.com is his website. And in retro spect' thats probably not the one I was looking for, prices weren't that high, they're really popular up here.
Ours are just barely breaking soil level, grass hoppers took thier toll last year, but they bloom well like clock work! We had over 1k sq/ft of them when I was a kid. I'd seriously consider trading labor for tubers
Gimme a bit to poke around for the internal schematic of the relay unit and I'll throw some more electronics voodoo at ya in another post.
Here is a home in Denver owned by an iris breeder. Spec freaking tacular!
Niether of these is my favortie shot but I can't find that one right now
www.iris4u.com is his website. And in retro spect' thats probably not the one I was looking for, prices weren't that high, they're really popular up here.
Ours are just barely breaking soil level, grass hoppers took thier toll last year, but they bloom well like clock work! We had over 1k sq/ft of them when I was a kid. I'd seriously consider trading labor for tubers
Gimme a bit to poke around for the internal schematic of the relay unit and I'll throw some more electronics voodoo at ya in another post.
04-06-2013, 12:13 AM
#6271
The rest of your switches looks pretty solid from what I remember from the older posts.
Don't you have the mod to run the window when the gate is open done already? That eliminates one more switch which just leaves the top detection switch and the limit switch. The limit switch might of vibrated loose, 20 year old flat lockwasher(?), but it still uses the gate hinge to provide ground.
The only culprit left is the harness plug "S1", loose or dirty connections maybe, but I doubt it's been removed (Of course I haven't read all 250 whatever sum pages of this book you call a build thread).
Thats essentially what I said he just got it out faster and clearer.
Really easy honest, just toss a spare window switch in.
Plug H Pin 2 constant ground.
Plug H Pin 5 to relay B-plug pin 12, window UP
Plug H Pin 2 to relay B-plug pin 11, window DOWN
And done.
Re: lessons http://www.allaboutcircuits.com/vol_1/index.html
Last edited by Co_94_PU; 04-06-2013 at 12:16 AM.
04-07-2013, 02:04 AM
#6273
Tailgate day! Lol. ........
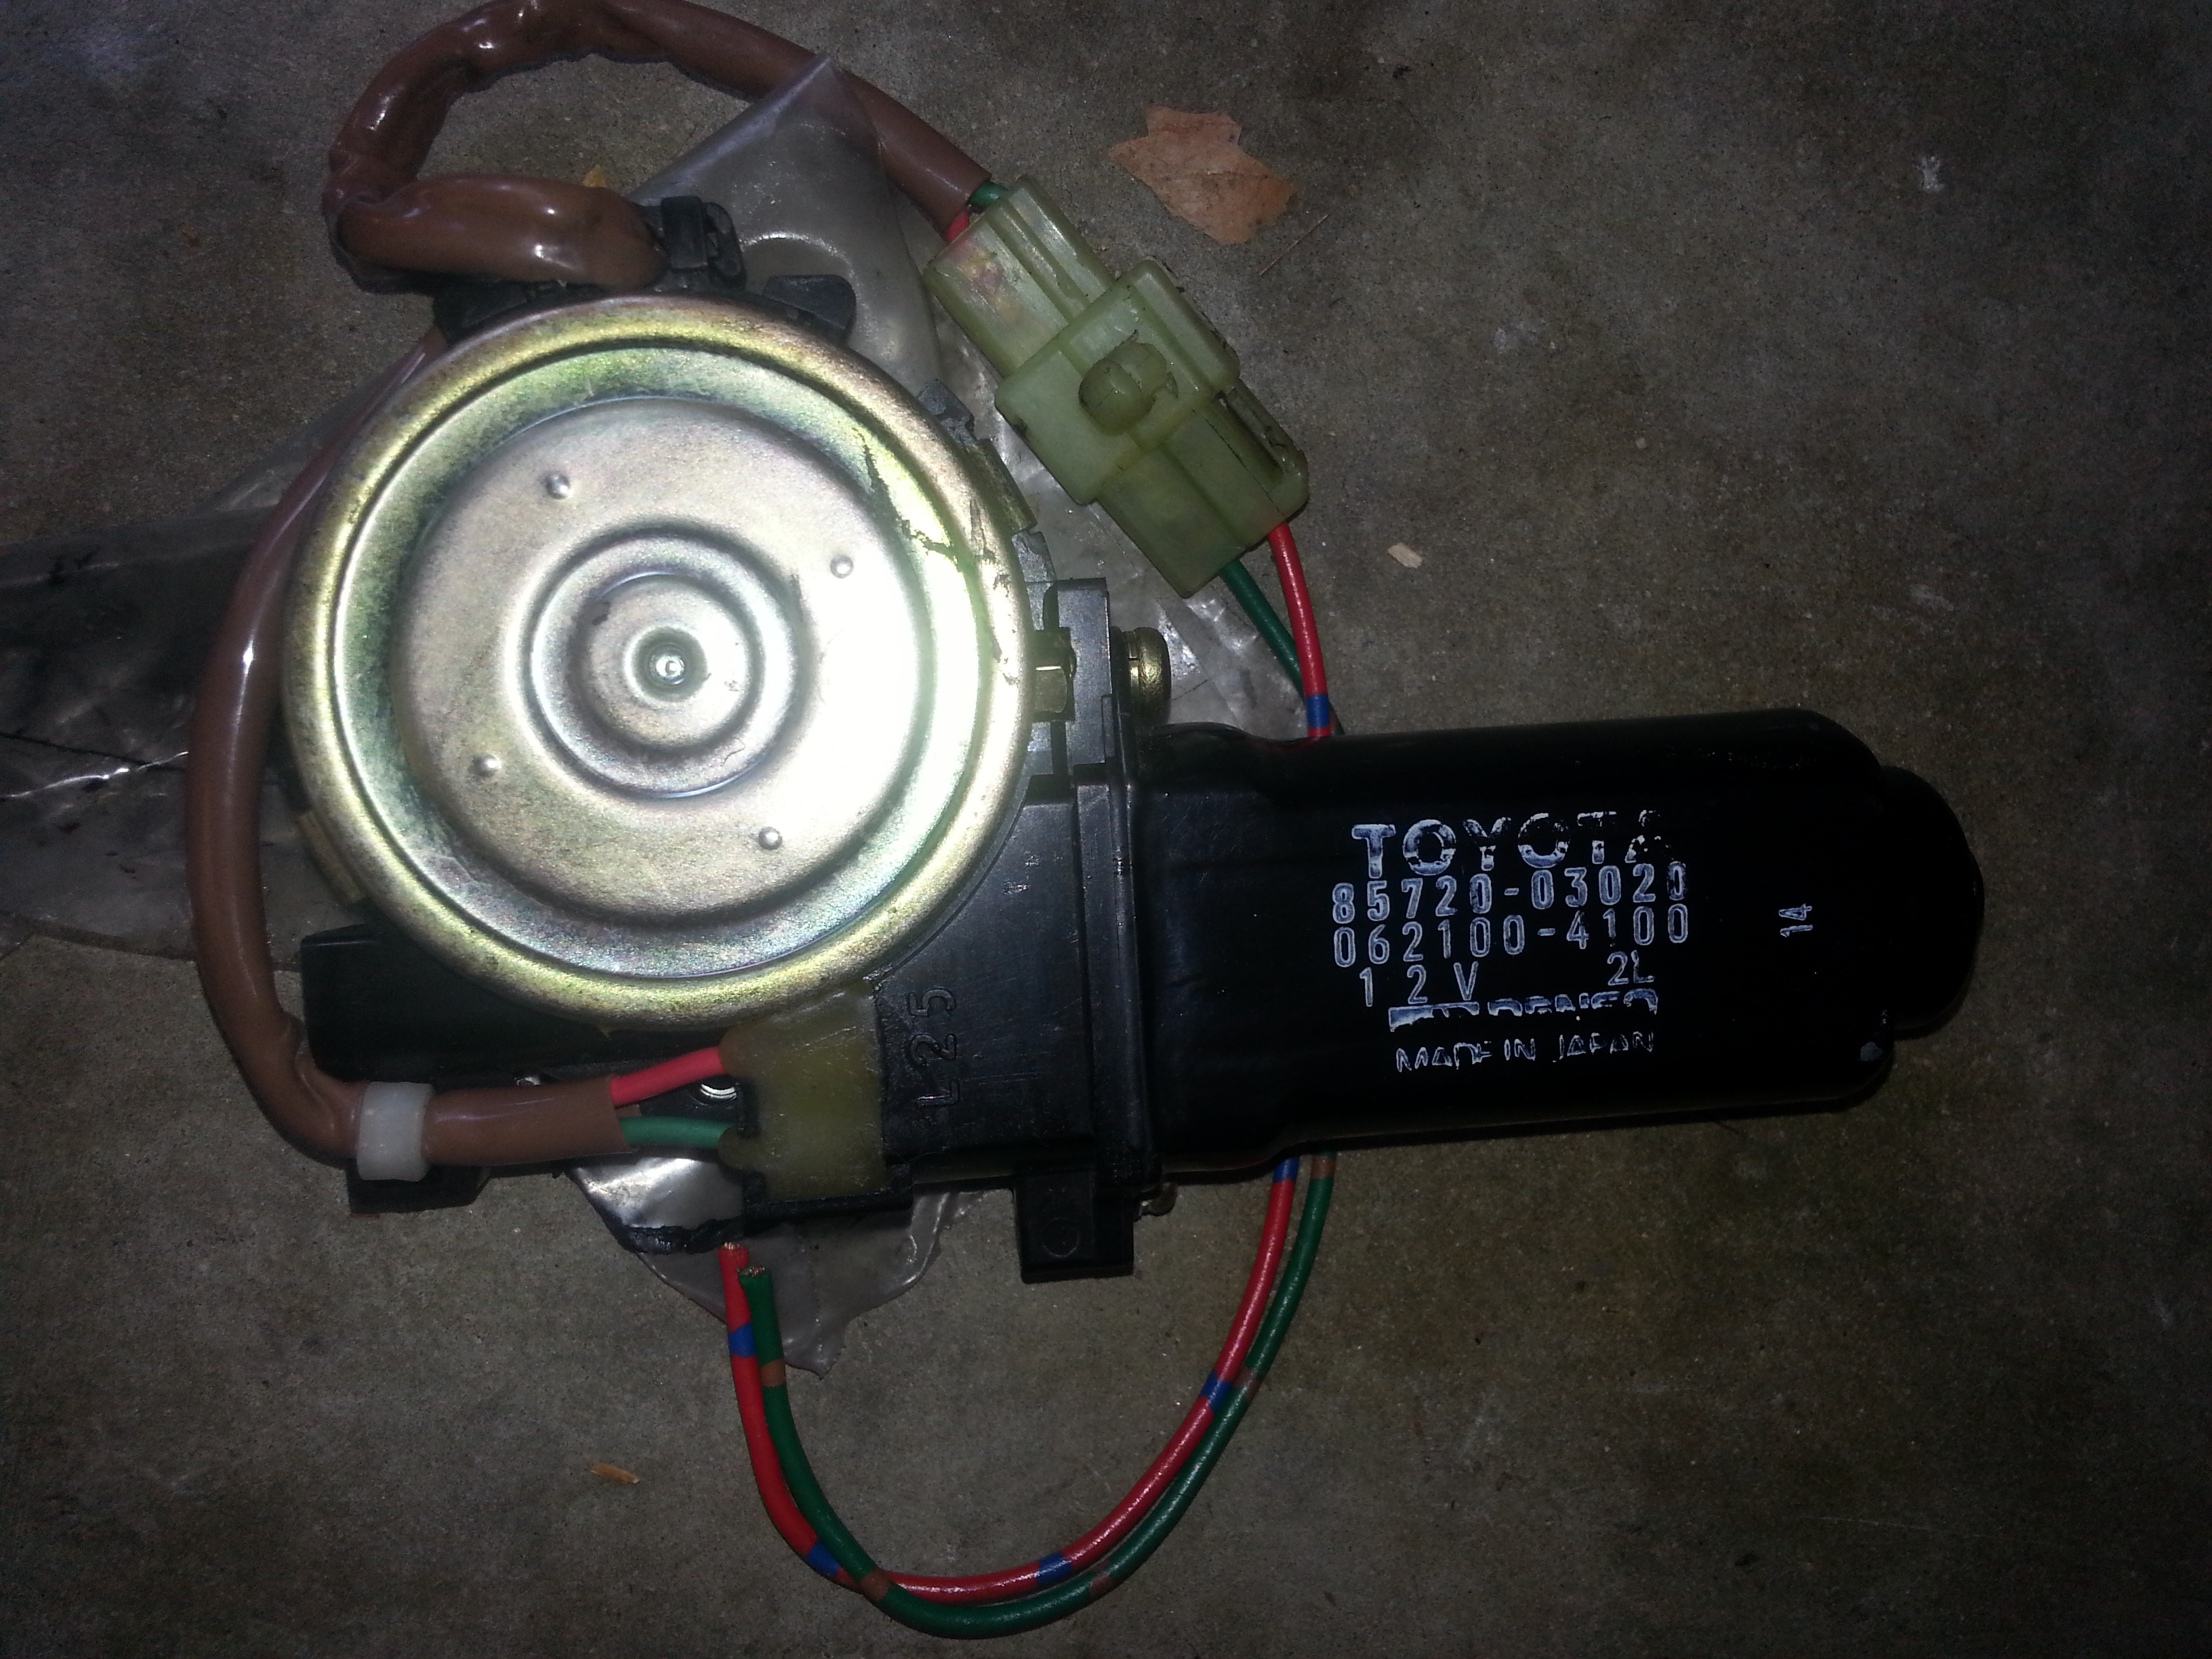
I swapped in the 91 Camry window motor, today, into my tailgate. CAKE! But, if ur in harsh climate, I totally feel for ya on the rust and "brittle bits" stuff... Lots of respect to all of you Corrosion Warriors!
Lil video on the clips, etc, etc. ... kinda all over the place. .... but I lil informative. ....
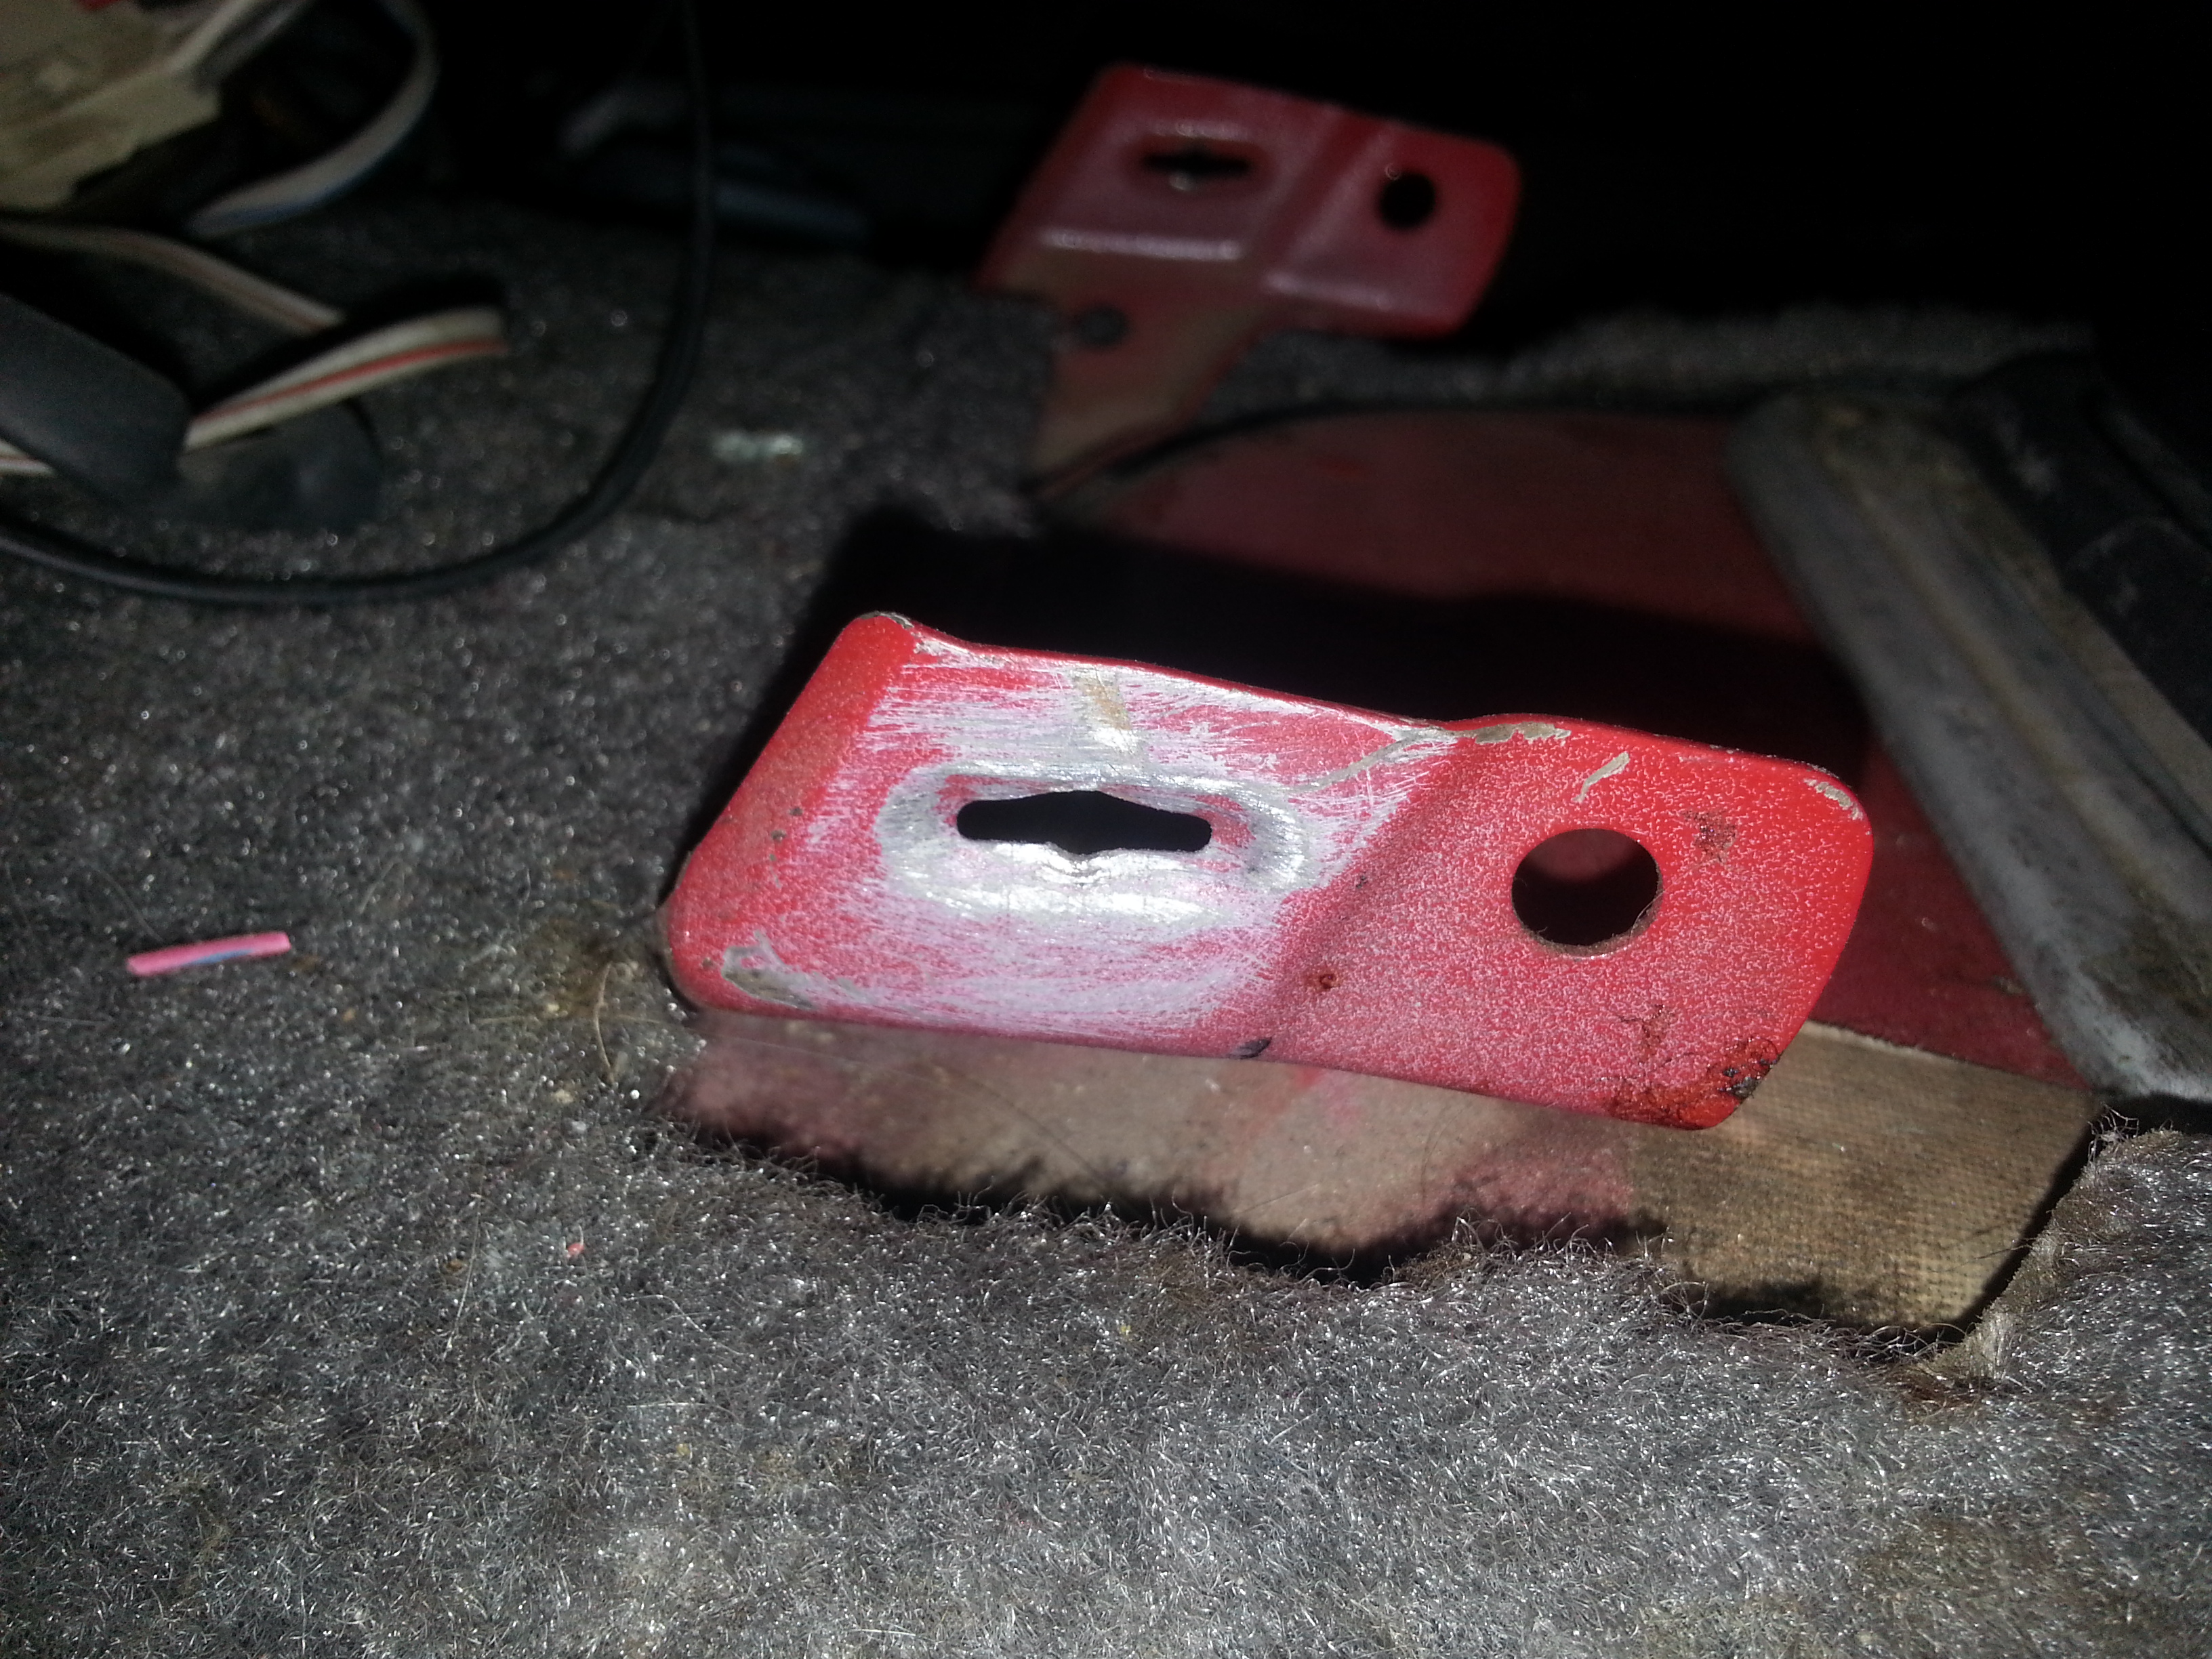
Next, I got the clips back in with the outer seal trimmed, grounded out the blue wire/red stripe at the window switch in the console>>>
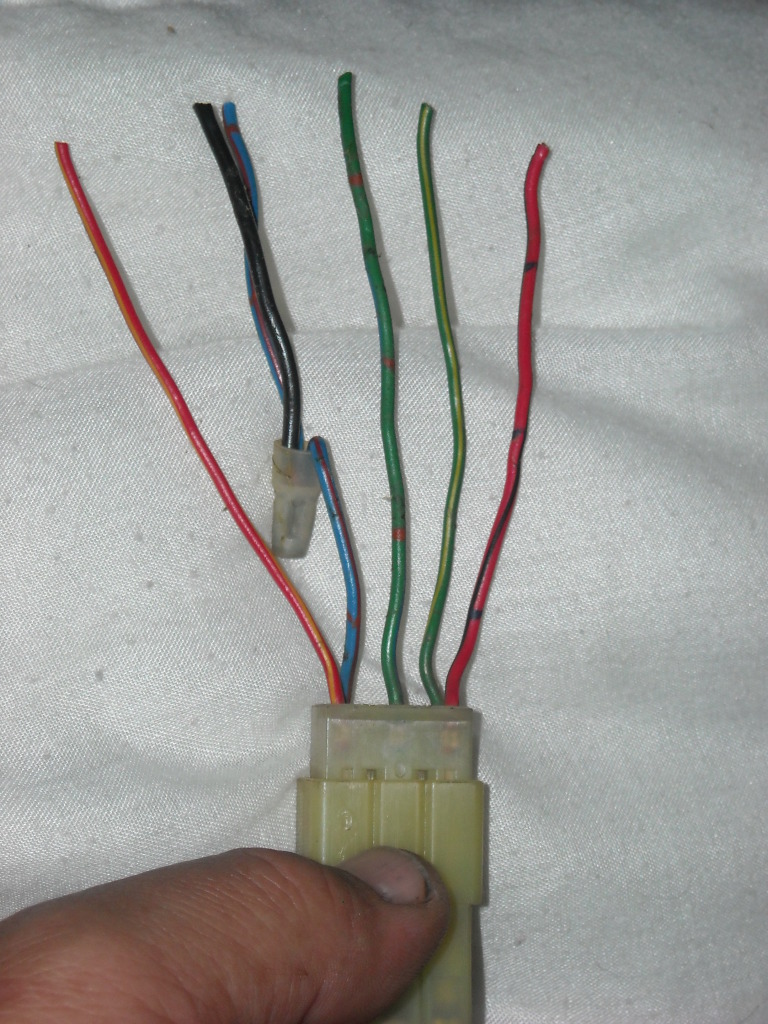
I used the black wire you see in this pic >>>

..... then screw through this prob of the shifter bezel mounting base. ....>>>
Lil video of the window working, etc.......
Here is a lil flashback to how I was planning/and now will/ white on my second rear window switch. ......

Curious if this will still require the ign key to be in the STA position in order to have 12v.
I used Terrys87's method to ground out the blue wire, as I said.... which allowed me to roll down the rear window with the tailgate open. However, for some reason thank you and my electronic magnificence, haha, I never realize this would not make the switch constant hot. Now that I think about it, it makes much more sense that it doesn't... , especially after looking over the wiring diagram....
I'm fairly certain that RAD put a constant hot switch in the back... Can you confirm this for me RAD?
I know you have probably gone over this already for me, CO, just a lil overwhelmed today/have to read back. I'm just learning to make sense of these Toyota Diagrams, so I still have a lil trouble without the color indication and layout like they do it.... BUT I WANNA GET IT, TRUST ME! Hahaha. Thanx again for ur help and patience, all of ya!
Couple dealer printouts to share. .....
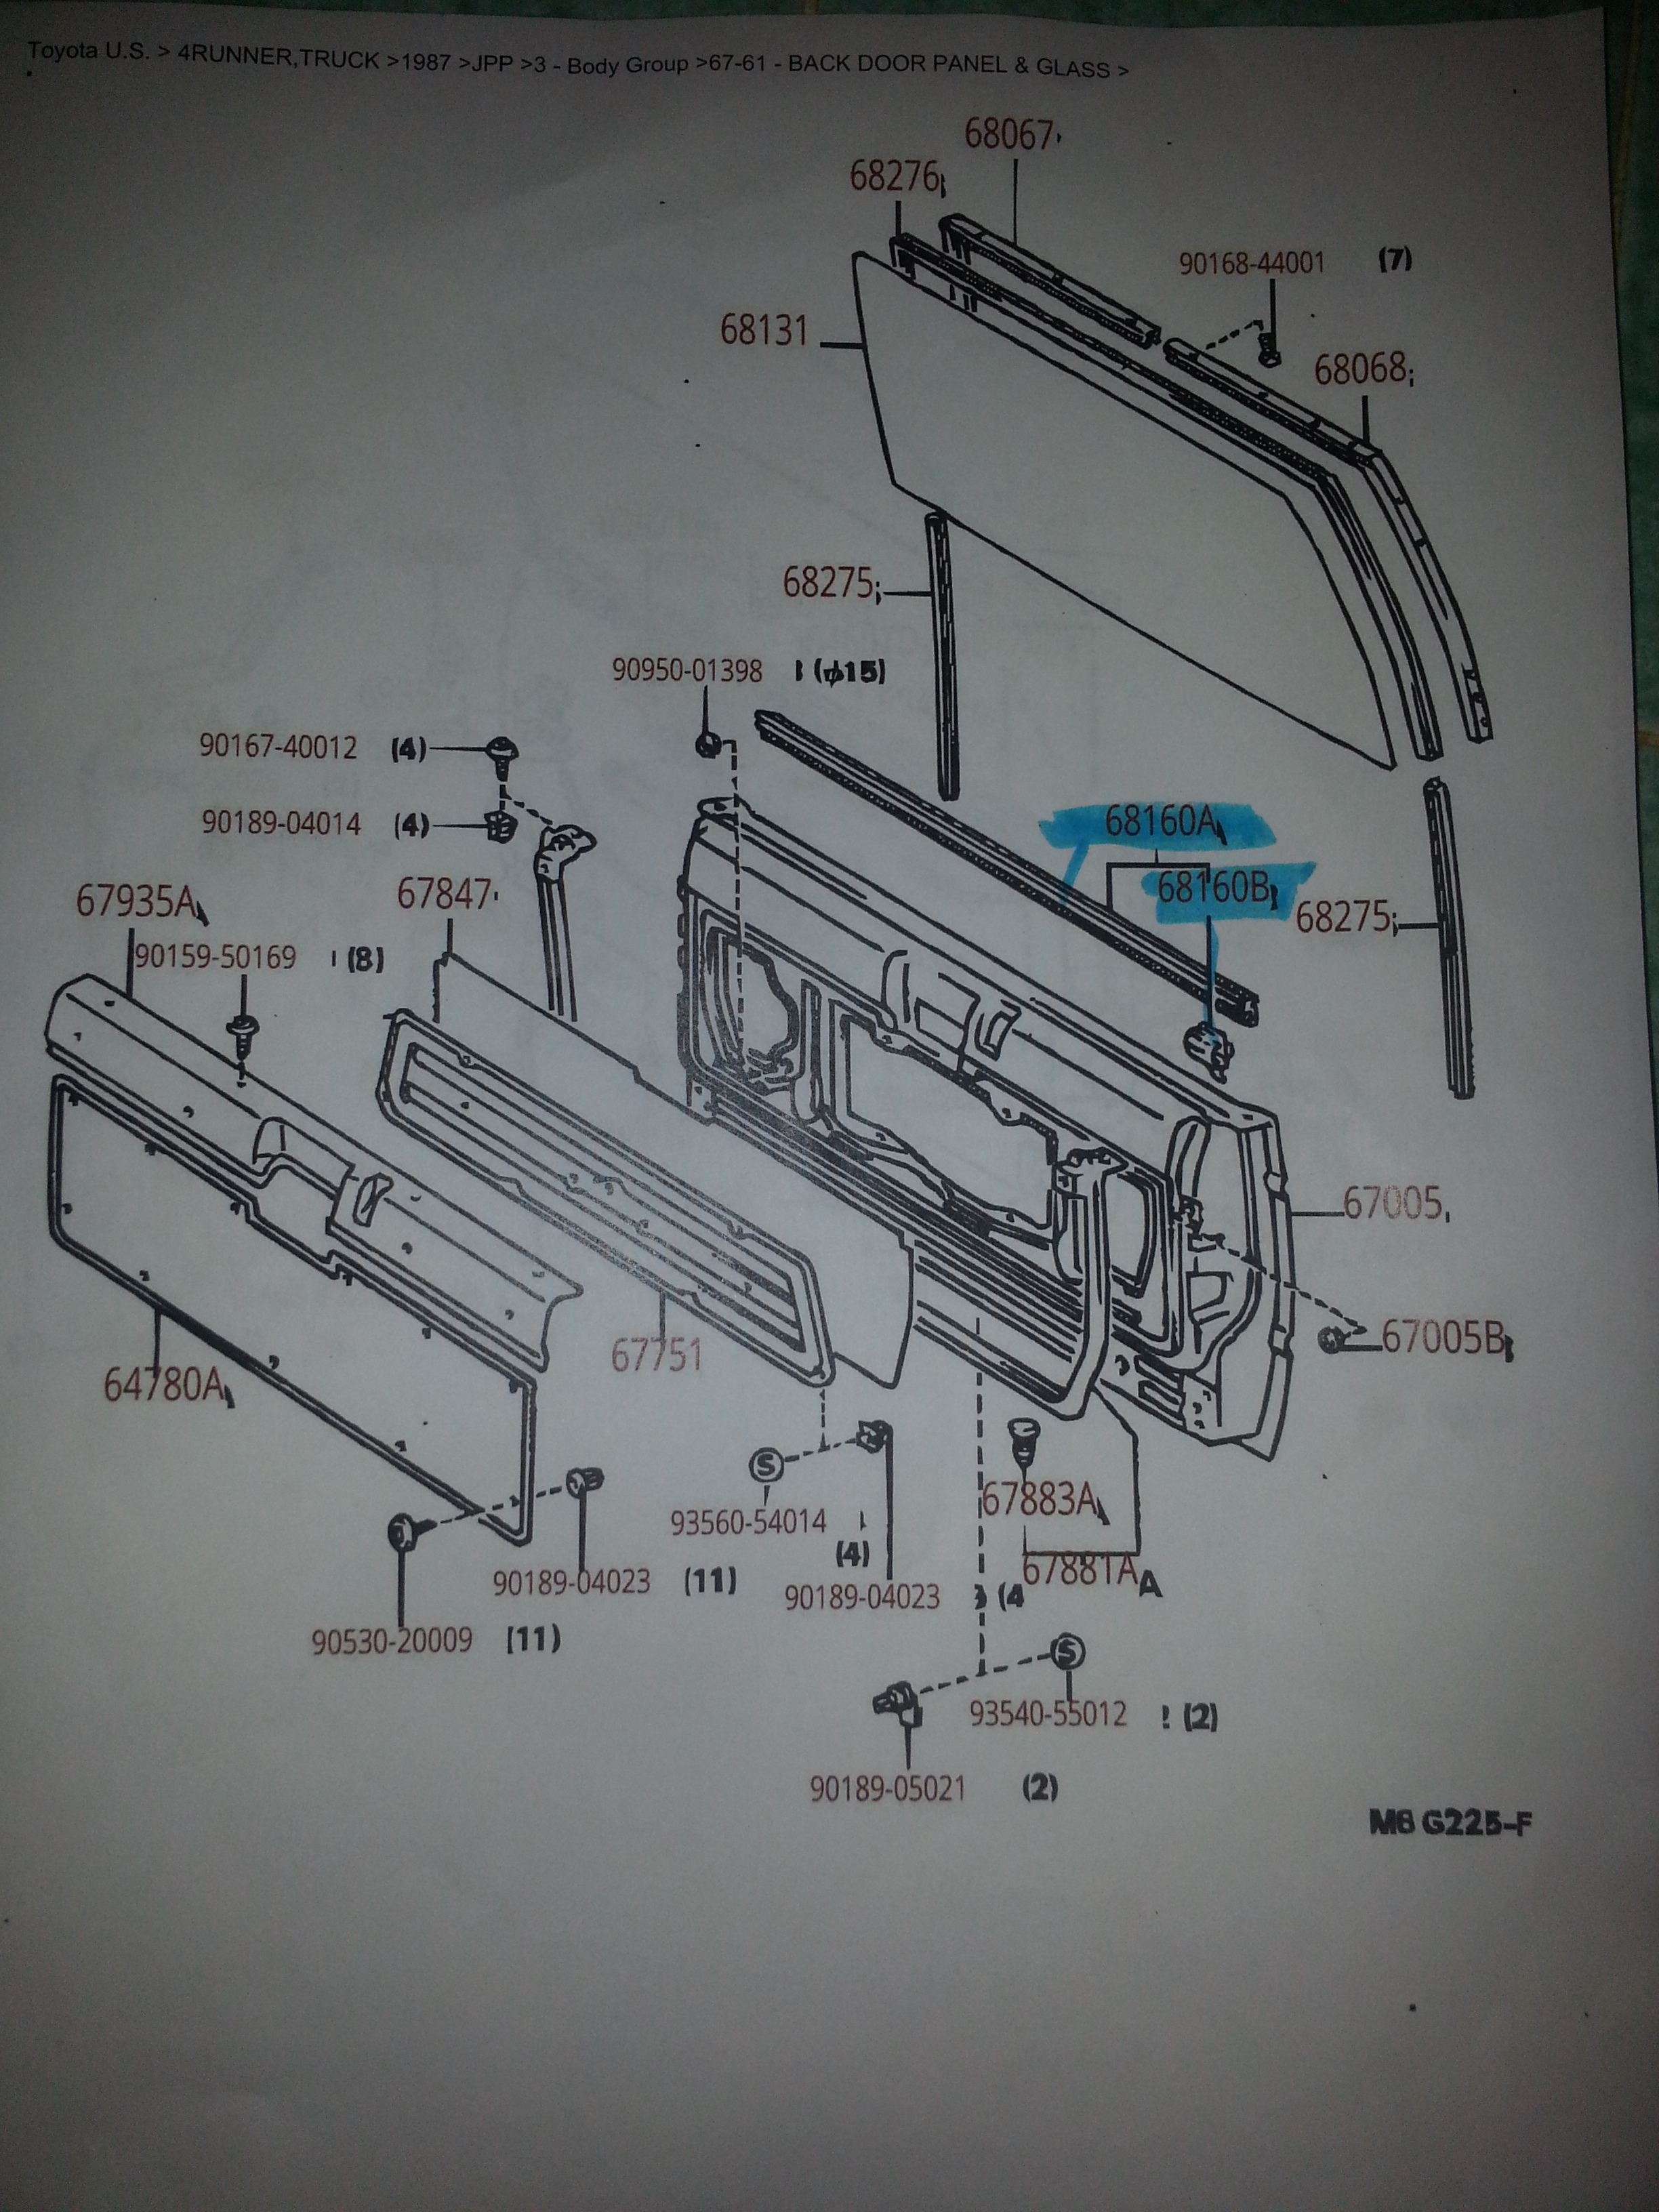
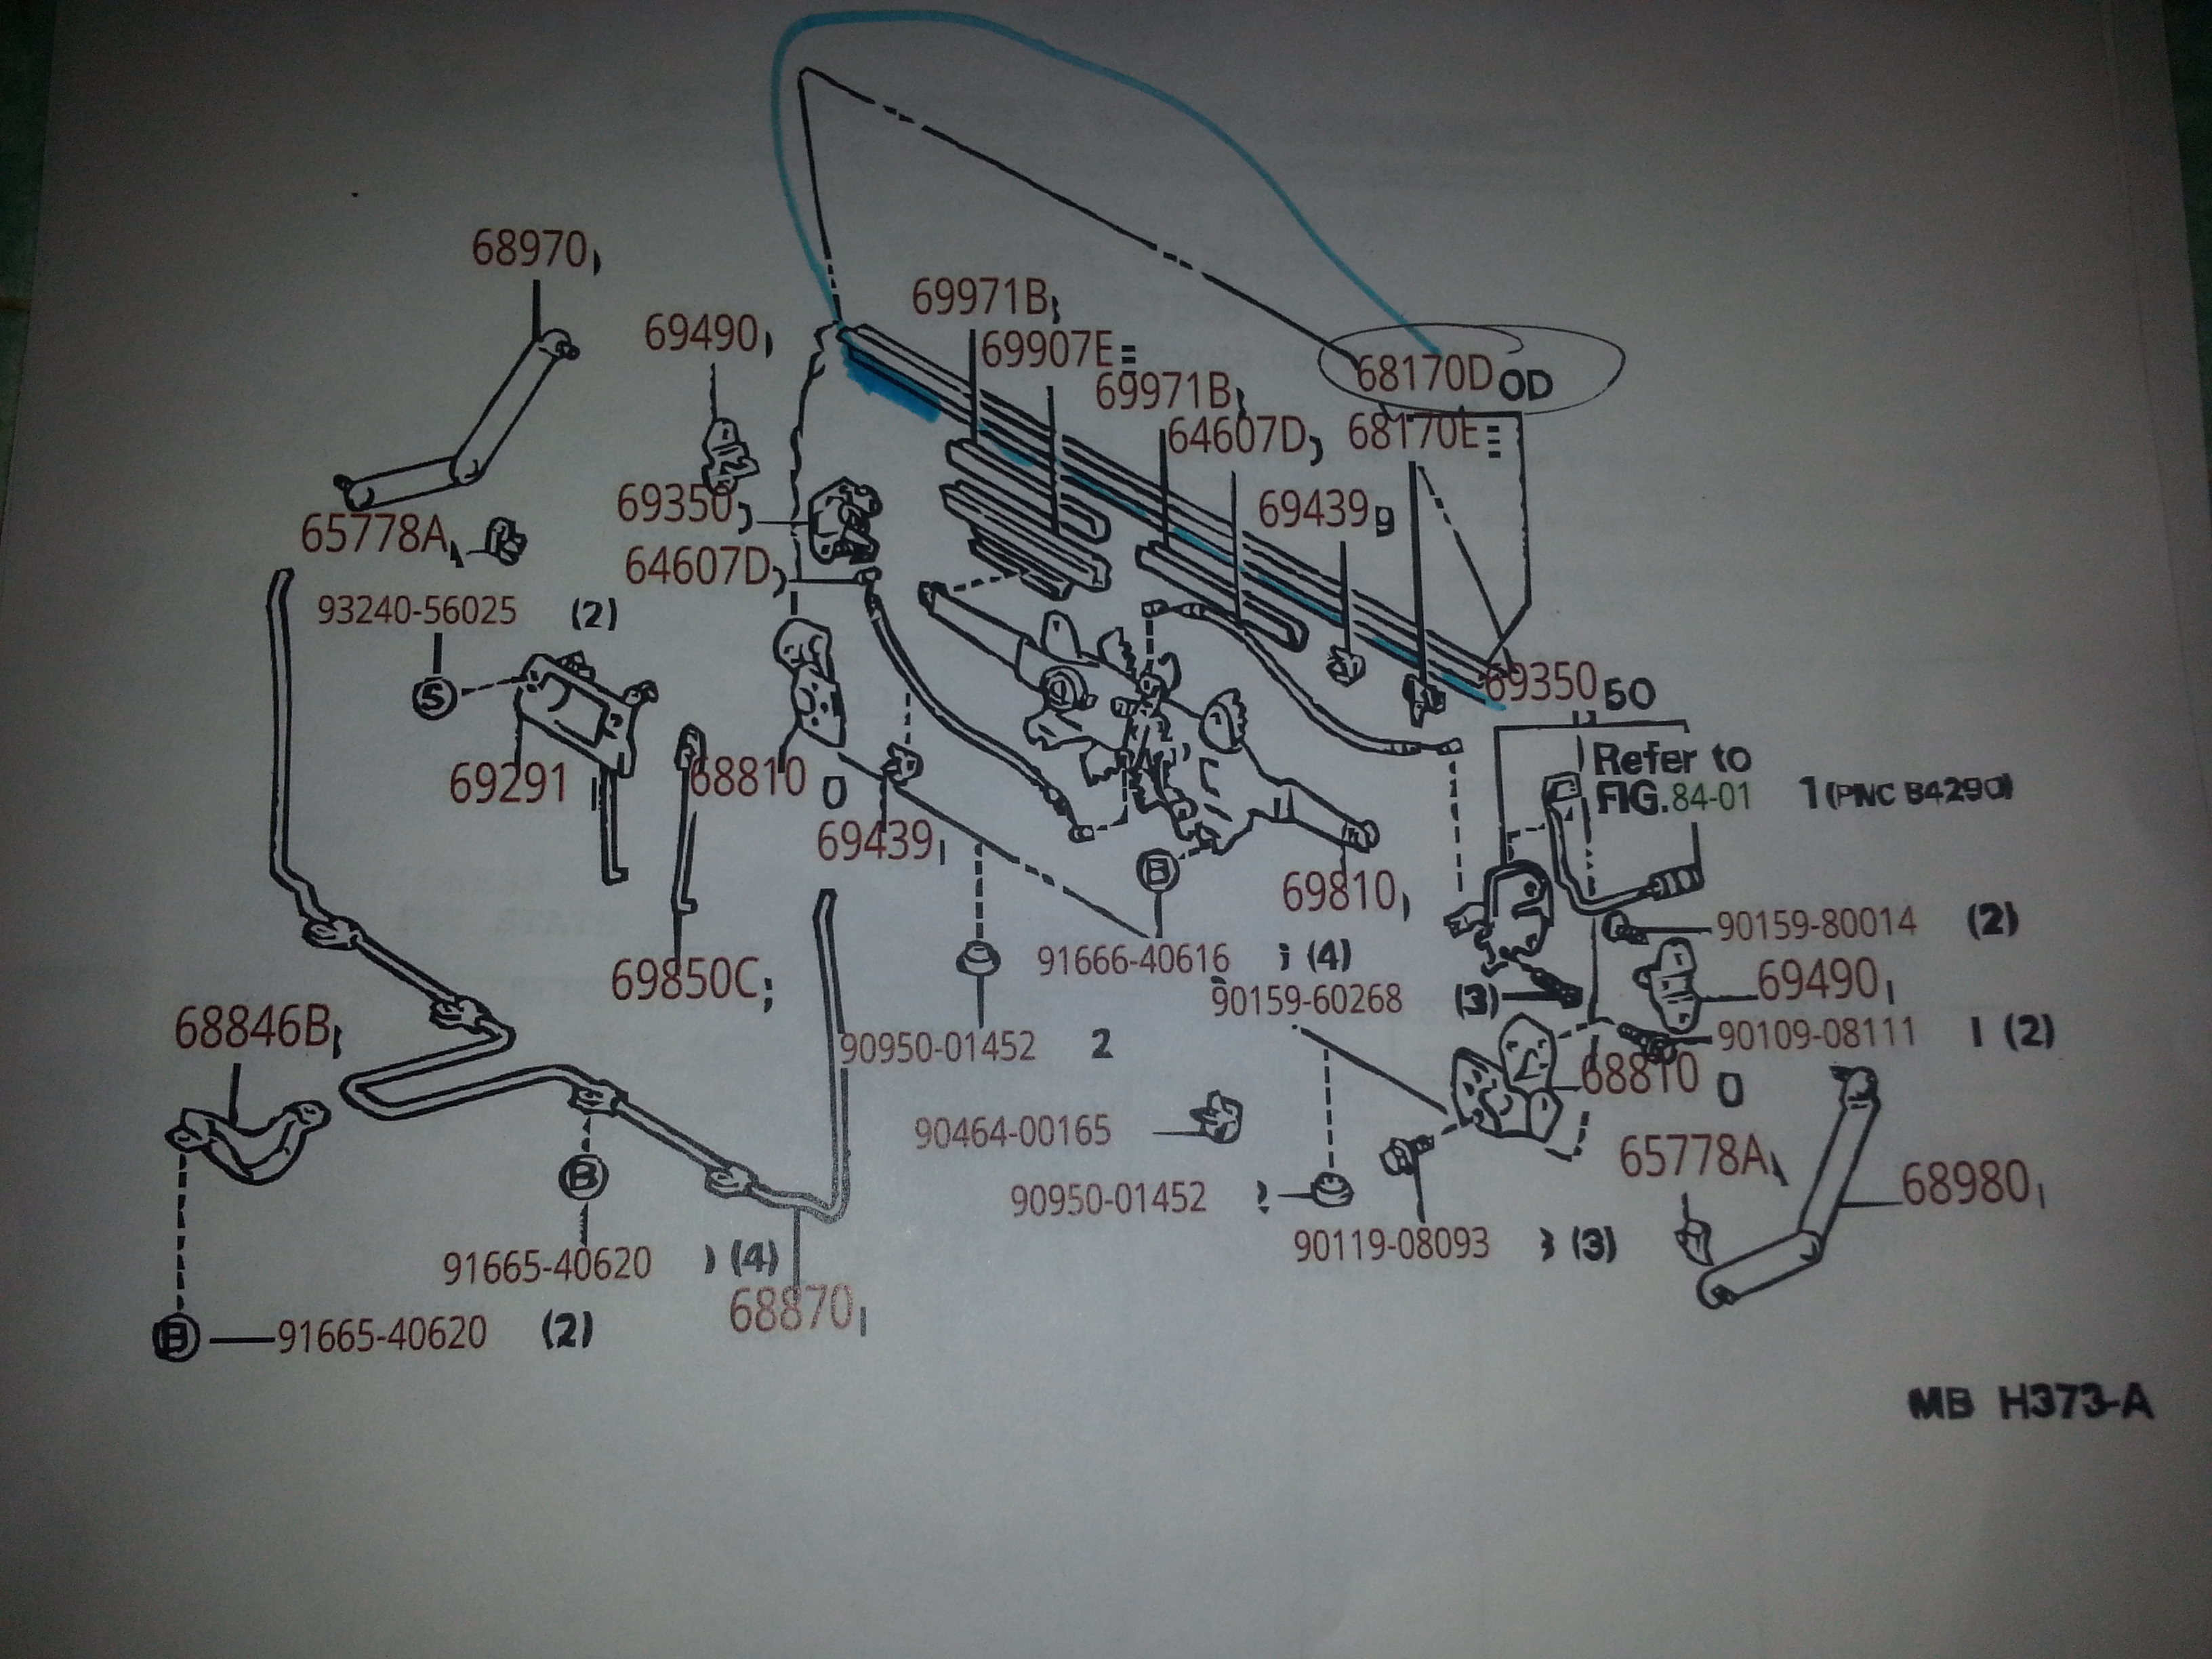
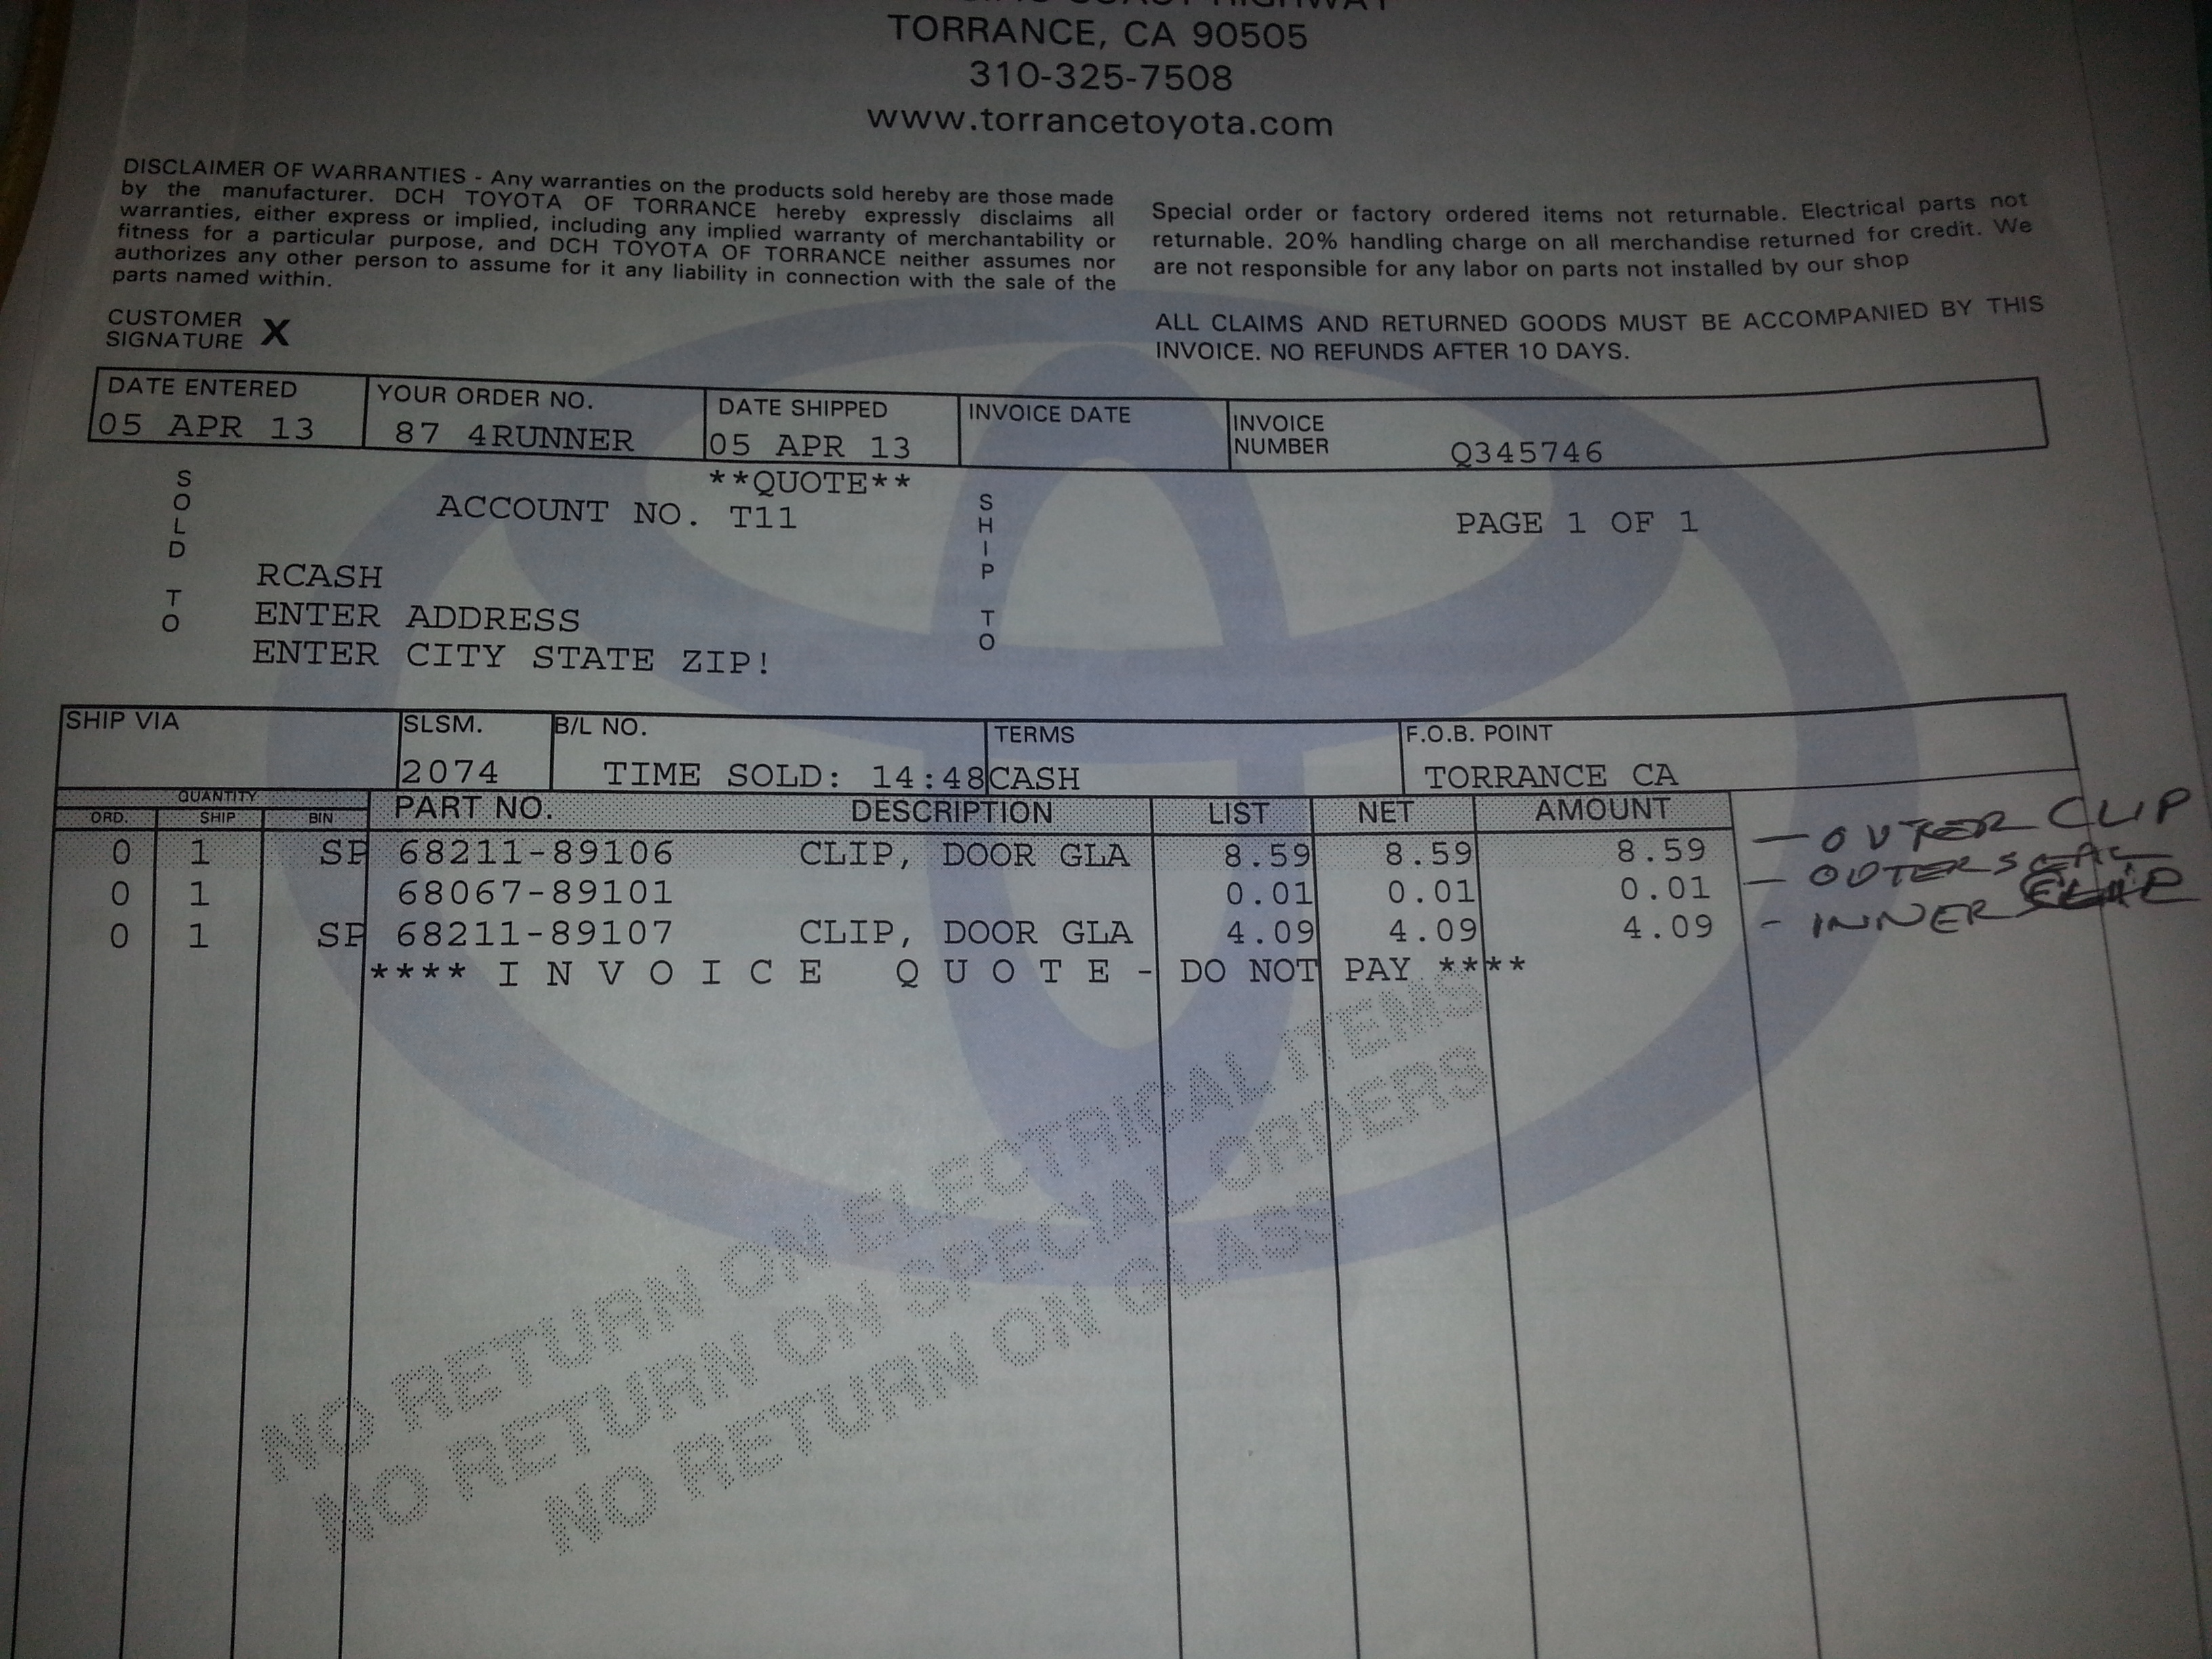
(No inner seal listed, ^^^^^ but it can be found by the dealer via the reference# it does list..... UNFORTUNATELY, as I mentioned in the video. ... "No Longer Available".
I swapped in the 91 Camry window motor, today, into my tailgate. CAKE! But, if ur in harsh climate, I totally feel for ya on the rust and "brittle bits" stuff... Lots of respect to all of you Corrosion Warriors!
Lil video on the clips, etc, etc. ... kinda all over the place. .... but I lil informative. ....
Next, I got the clips back in with the outer seal trimmed, grounded out the blue wire/red stripe at the window switch in the console>>>
I used the black wire you see in this pic >>>
..... then screw through this prob of the shifter bezel mounting base. ....>>>
Lil video of the window working, etc.......
Here is a lil flashback to how I was planning/and now will/ white on my second rear window switch. ......
Curious if this will still require the ign key to be in the STA position in order to have 12v.
I used Terrys87's method to ground out the blue wire, as I said.... which allowed me to roll down the rear window with the tailgate open. However, for some reason thank you and my electronic magnificence, haha, I never realize this would not make the switch constant hot. Now that I think about it, it makes much more sense that it doesn't... , especially after looking over the wiring diagram....
I'm fairly certain that RAD put a constant hot switch in the back... Can you confirm this for me RAD?
I know you have probably gone over this already for me, CO, just a lil overwhelmed today/have to read back. I'm just learning to make sense of these Toyota Diagrams, so I still have a lil trouble without the color indication and layout like they do it.... BUT I WANNA GET IT, TRUST ME! Hahaha. Thanx again for ur help and patience, all of ya!
Couple dealer printouts to share. .....
(No inner seal listed, ^^^^^ but it can be found by the dealer via the reference# it does list..... UNFORTUNATELY, as I mentioned in the video. ... "No Longer Available".
04-07-2013, 10:32 AM
#6274
Tailgate day!
..... then screw through this prob of the shifter bezel mounting base. ....>>>
Curious if this will still require the ign key to be in the STA position in order to have 12v.
I used Terrys87's method to ground out the blue wire, as I said.... which allowed me to roll down the rear window with the tailgate open. However, for some reason thank you and my electronic magnificence, haha, I never realize this would not make the switch constant hot. Now that I think about it, it makes much more sense that it doesn't... , especially after looking over the wiring diagram....
I'm fairly certain that RAD put a constant hot switch in the back... Can you confirm this for me RAD?
Logic for console switches requires Ign ON to work. Logic for tailgate key switch does not - No need for ways to make window control relay "hot". I do not recommend grounding to chassis because that by-passes top-off switch (only bypass safety interlocks for troubleshooting purposes). So... the clean, robust, safe way with only essential parts added would be to parallel the circuit of tailgate key switch, and ADD a window lock switch. That would be:

Tap off terminals 11 (down) and 12 (up) of rear window control relay,

Wire up down switch, insert window lock switch for safety
Finally, connect to splice, on positive side of top-off switch.
Why add window lock switch? Remember tailgate control is always "hot/active" but requires key to be in in order to actuate up-dn switch) If you do not have a window lock switch in rear-deck/rear seat, there is risk that something may press on down switch and open the window when no one's around. Also a stuck dn switch would do it.
04-07-2013, 11:58 AM
#6276
Thanx William! And man I hope u can find em for us! (The outer seal for me?  ) haha
RAD......ur rad! Hehe....
All just came flooding back to me seeing that last night where u posted it before. Hear ya on the lock switch... Have those too. Hmmmmm, lock switch jumpers off the wiring before the added switch? Or at the post relay wiring location as well?
I also wanna rewire my trailer wiring too, as the PO removed it/cut it the rear brake and signal plug is all there (hung it up on the spare tire mounting bracket portion of the frame).
Thanx, TOYO! I am guessing what RAD said is what u meant, before. Just needed that visual reminder/refresher to realize u probably were not referring to wiring it right into the actual wiring near the rear gate key... dohhh! Haha.
) hahaRAD......ur rad! Hehe....
All just came flooding back to me seeing that last night where u posted it before. Hear ya on the lock switch... Have those too. Hmmmmm, lock switch jumpers off the wiring before the added switch? Or at the post relay wiring location as well?
I also wanna rewire my trailer wiring too, as the PO removed it/cut it
the rear brake and signal plug is all there (hung it up on the spare tire mounting bracket portion of the frame). Thanx, TOYO! I am guessing what RAD said is what u meant, before. Just needed that visual reminder/refresher to realize u probably were not referring to wiring it right into the actual wiring near the rear gate key... dohhh! Haha.
Last edited by ChefYota4x4; 04-07-2013 at 11:59 AM.
04-07-2013, 12:14 PM
#6277
PS> CO: thanks a bunch for all the chiming in. ANDDDDD, I remember u sharing the welding/duck bill vice grips. Have that and the jaw type ("box"?) Grip vice grip wrenches now. I really wanna be done with each thing as I'm going(like the OMEmu leafs), but often, when opportunity arises, I jump into something else I'm working on.
**************************************
Guys, I think the window wiper has a hiccup in the wiring/or sensor magnet? I hit it on accident last night, then put it up, but it didnt go up but maybe 90%?..... window flickered again, but much less drama. I pushed up the semi-stuck wiper and I couldnt get it to do it again, even when pulling down the wiper arm a lil. Then did the window ip and down 10 more times and it wouldnt hesitate.
Also, a weird thing fom before I didnt remention on my list at the latter part before difging into this.... * When I would turn the key to on at times......it could hold down the switch and NOTHING..... then suddenly, after 10 seconds or so (seemingly repetitive waiting time) it would just go right up. It would still hiccup and be intermittent thereafter... but just thought j should mention it? And, still not sure where the "limit switch" is? Ima look at my wiring diagram again.
04-07-2013, 01:59 PM
#6278
Couple blips, as my memory lately? WOW! Lol. .....
The V6 brake upgrade? (With the parts I chose) ..........FAN-YOTALICIOUS-TASTICAL! Lol. ....
* Just a quick reminder:
..... Whether you are simply changing pads, master cylinder, upgrading or not, I highly recommend that people remember to adjust the rear brakes on occasion. simply adjusting my rear brakes recently has drastically improved my breaking in reverse and I'm fairly certain that it is taking some of the load off of the front as well. I know they are supposed to be self adjusting as you back up and slam on the brakes, but for some reason, even though my equipment is all in great shape and rust free, I still had to adjust them by the manual method. If you're going to put on new pads, especially higher and more expensive ones? Well, that I would recommend, as I said, too also adjust the rears while you're at it. Might as well get the most out of your investment investment, correct? Not to mention,... It's a little safer?
* the Old Man Emu Springs, so far, have not left me feeling like I wasted my hard earned money. Simply put, they are great quality, handle a very decent load, and seem to have improved the tightness in the turns. They are a little stiff, but nothing I can't bear. Also, as many who have installed this leaf pack lift have noted. .... I am really glad that I did not go with the heavy duty leaf pack kit. As I said, these are not overly firm to the point that I can't deal with it, but they are quite firm. I can't imagine having a set up the even more tight/stiff.
..... I'm going to be adding some different shocks, most likely, because after reading Old Man Emu news specification information, I noticed that there shocks allow for two inches further up travel and at least 2&a half inches further droop. I'm not sure if I'm going to go with the Old Man Emu shocks, I may just go for something on the cheaper and as I have other things coming up in the future that I want to save my money for... We'll see....
04-07-2013, 03:05 PM
#6280
Registered User
http://www.ebay.com/sch/i.html?_trks...at=0&_from=R40
toyota kits
http://www.ebay.com/sch/i.html?_odkw...e+kit&_sacat=0
Last edited by Cyberhorn The Dragon; 04-07-2013 at 03:07 PM.


