
ChefYota4x4's 1987 4Runner Build-Up Thread
 03-16-2013, 11:34 AM
#6101
Oh hey, William! Lol. .. Yeah, that is always an option if flipping them doesn't do the trick. ... BUT IT WILL, DANGIT!! 
I also just thought about it, and if the tank is mounted through oval holes, is it possible that that guys friend had maybe loosened it before and got it over towards the frame too much? That's really got me curious, so I'm going to go look.
I also just thought about it, and if the tank is mounted through oval holes, is it possible that that guys friend had maybe loosened it before and got it over towards the frame too much? That's really got me curious, so I'm going to go look.
Last edited by ChefYota4x4; 03-16-2013 at 11:50 AM.
 03-16-2013, 11:45 AM
#6102
I'm not positive, but I think the tank can in fact be moved very minimally. The tank skid plate mounts to the tank which mounts 2 fix nuts on a mounting bracket which the tank is also mounted to. That mounting tab, or should I say bracket, then mounts to the frame. From the look at where I got to it before, all of the bolts are in a different spot. In other words, I can see where the washers under the bolt heads had left a ring over an eighth of an inch in the other direction... The direction that I need to move it as a matter of fact. In all actuality I shouldn't say that I HAVE to move it, I don't know that yet, but it won't be difficult to do even once I have the springs already mounted. So, that's that, just wanted to let you know.
Last edited by ChefYota4x4; 03-16-2013 at 11:49 AM.
03-16-2013, 02:37 PM
#6103
Well, the very first bolt, the 1 that bolts the hanger and shackle together ,... It's totally frozen. The nut came right off and I've jacked up the tube to try and take some pressure off of the bolt, or should I say fixed stud, hahahaha... And, well, nothing. It's almost as if it's welded in there. As a matter of fact, it looks almost as if it's bending the hanger. Dang it!
03-16-2013, 03:03 PM
#6104
Got it! Now, how I got it, that is going to impress and crack you all up at the same time! Haha. I don't even want to share it without a picture, the only thing I could grab near me with my point and shoot Canon, so I will upload that in a little bit to share. thanks anyway, guys, I know someone would have come through with a good idea!
03-16-2013, 06:36 PM
#6105
Registered User
well im just glad to hear flipping the bolt an shoving the tank will keep them peaceful!
i hate bolts an nuts that move an your working an being gentle ..Pink.. NOOOOO aghhhh it broke!! thunks head on fender
i hate bolts an nuts that move an your working an being gentle ..Pink.. NOOOOO aghhhh it broke!! thunks head on fender
03-16-2013, 07:36 PM
#6106
Contributing Member
Join Date: Mar 2003
Location: COTKU,Ontario,Canada
Posts: 11,334
Likes: 0
Received 0 Likes
on
0 Posts
If you got yerself a seized spring hanger bolt you could try a tie rod press thingy to press it out... I have one I use for that purpose with two adjustable jaws...
on the other carriage bolt issue you can get pan head hardware with a large Phillips head or Standard (flat) head but IDK if you can get them in grade 8/10, grade 5 for sure... you could take a normal carriage bolt and cut a flat head into it with a cut off wheel if you were careful... I've done that before.
that being said if you combined moving the tank over with flipping the bolts so the fixed side was towards the tank it should give you enough room to clear the pinch weld... albeit barely.
Last edited by aviator; 03-16-2013 at 07:38 PM.
03-16-2013, 07:53 PM
#6107

Hey mark didn't you get the heavy springs? These guys are talking about the medium ones. Might not ever be an issue for you?
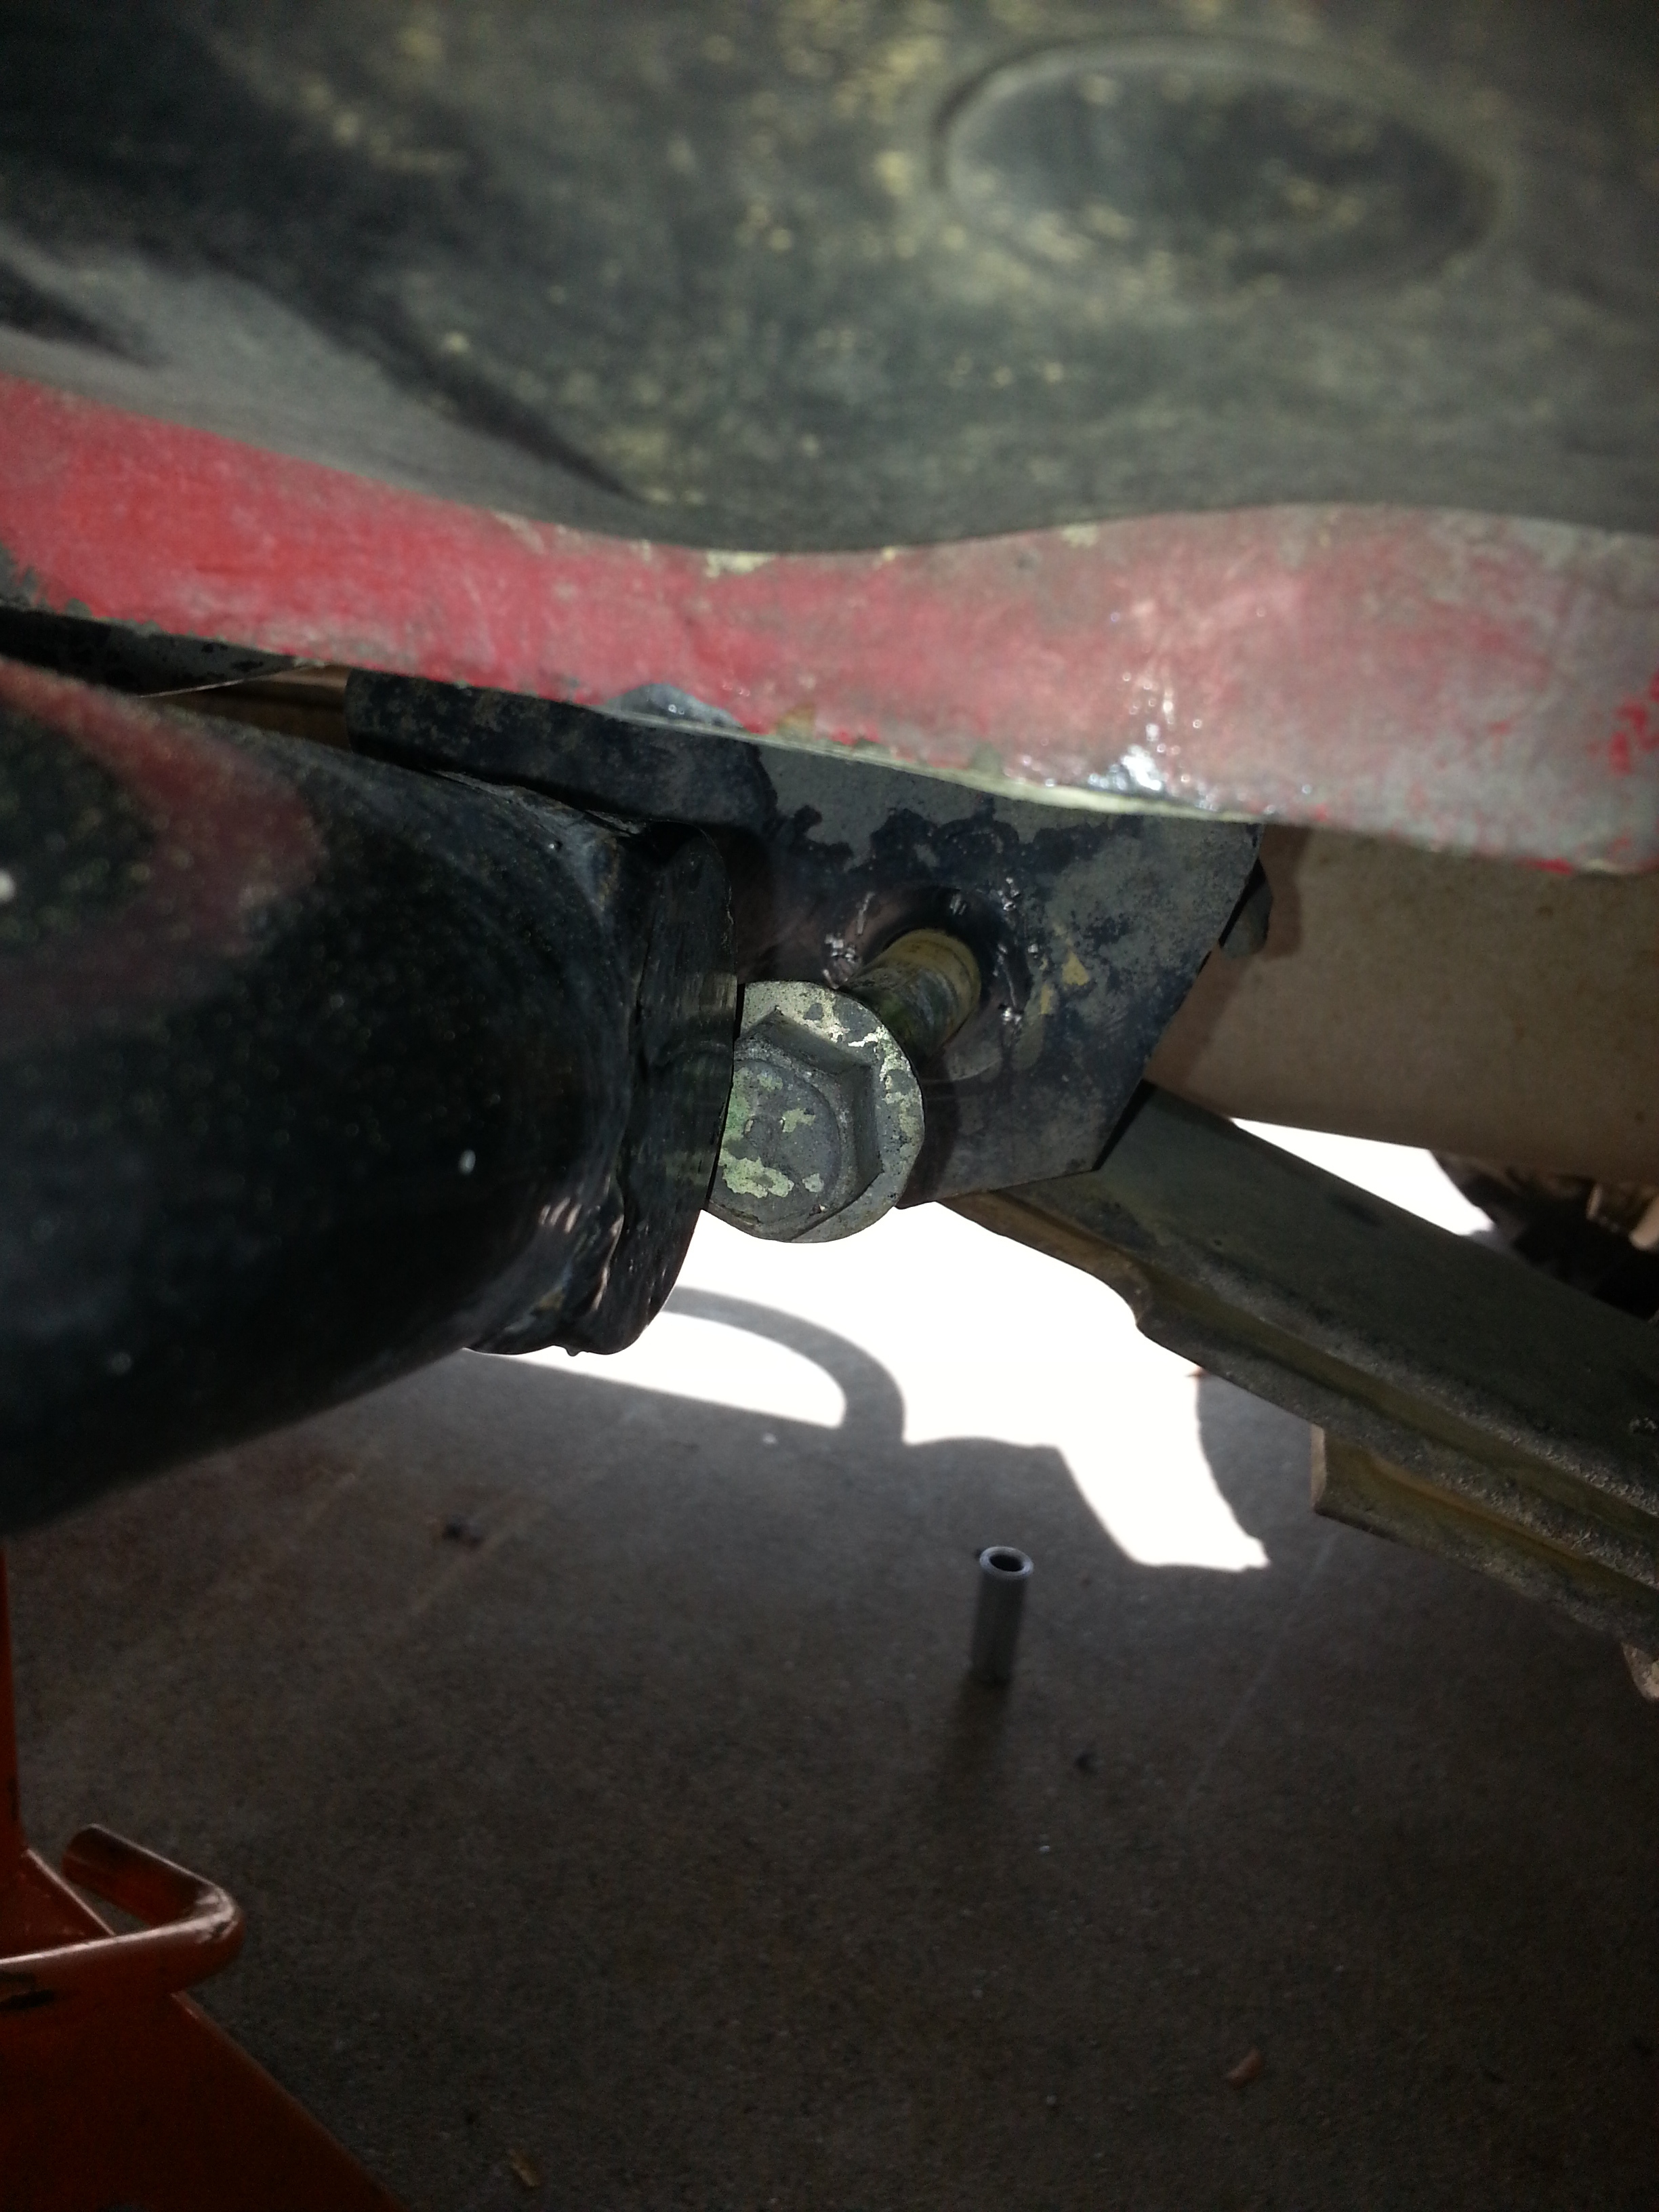
Looking at this pic, it doesn't seem just flipping the bolt around will do. You'd have to shift or modify the tank.
Plumbob and hammer or sheetmetal pliers, but I've got ID ten T problems maybe
Oh the pics, whats up with that drivers side looks like they performed an "update" and swaped the wrong bolt around
03-16-2013, 11:52 PM
#6108
Hey y'all.....
I will post pics of the "so far", tomorrow. That's right, "SO FAR".....
You know, I would like to think of myself as a pretty slow to anger kind of man. I also hate to whine..... I'd really always rather persevere through things and keep a positive attitude.... But, I'm so freakin furious right now, I am having trouble getting the fingers to type out the words without almost losing it! ......
Its one thing when I screw something up, break something, etc. But, when I put my hard earned money up to order parts, then I wait nearly a month,.... never get impatient about it even once.... Then I go pick it up, listen to the counter guy complain about everything, smart 5 calls ayer he has already engaged me, keeping me waiting ANOTHER 30 MINUTES,..... still keeping a good attitude and just grateful to have everything. .... Then, FINALLY get a small window of time to do the job, not a huge one but surely not a teeny one. .... AND... After having a couple small hiccups, nothing major, I finally get the zuk out, orig pack out on passenger side, the OMEmu's maneuvered up into position, front eye of the OMEmu springs up in the hanger, u bolts in and torqued....I then get moving back to the greaseable shackles, which I've only set straight with the bolt , then moved up to hang, when I suddenly noticed, the box is the right one, BUT THE FREAKIN SHACKLES, HARDWARE, ALLLLLL WRONGGGGG!!! THEY PUT 3" WIDE shackles with at least 2" lift and 27mm headed bolts and lock nuts!!!!!!!!!!! FUUUUUUUUUU MAN CHU!!!!! At this point, I realize, I'm screwed, as far as time and just undoing things, because I NEED MY TRUCK FOR AN IMPORTANT JOB ON MONDAY! Why is this FUGGLES UP CRAP? ....Because, this meant I now had to remove the orig hangers from the splined stud/bolt and eye, then install them in the brand new spring bushings and hanger bushings! Oh it's not over yet! Hahaha.... SO, I then begin to remove the daystar greaseable bolts, and kept having to mess with the angle, unbolt the shock again, and it was really giving me trouble and wanting to go sideways on me, making it a PITA to remove them! Remember, the u-bolts are in, front is hung, its up on stands and I have one jack here, the bottle jack there..... PISSED!
Not sure what they gave me, but OF COURSE, the entire kit is wrong sized, and the sleeves that I guess are supposed to be in there? NOPE! Being 3", my guess is they are for a F150 or Bronco, or maybe they are for a Suburban or something?
I'm also ticked at myself, as I always try to count out every piece and double check everything.... But they gave me NOTHING but the parts in an already opened bag, etc. The bushings actually fit, but online, u can clearly see the nut/bolt heads are 18mm, w/shims, 2.25" shackles w/1.5" added lift... I just should have guessed right off, with a 27mm hwad, ......yeah, I know, BUT I WAS LOSING LIGHT AND RRUCKING ALONG! And thwy put it in that box that said 84-88 4runner and PU!
Heres what was supposed to be in the box....
http://www.jegs.com/i/Daystar/319/KT...rentProductId=
U can see the same # on the box I have in the video, just jump to 1:10 and you will see the part #....
*****************
As I said,...... I take some blame,.....maybe 1% on this one, but WHAT THE HECK COULD I DO EVEN IF I NOTICED YESTERDAY?? .....Took them 26 days to get them to me!
Sorry to rant, but not sorry for being totally TICKED! Ya know
PLEEEEEASE, if anyone knows where I could get some on a "walk in", lemme know? If I cant exchange them within 72 hours of Monday at 4wheelparts, I might order from jegs or ARB... is sitting pretty high as it is/maybe an inch over what I had with the 12"x125# zuk. The guy in the article I posted was using 17" front jeep coils, before he went to the medium duty OMEmu packs.
CO, yes, they are the medium duty I got as well... I've heard wayyy too many stories of "HOLY CRAP wut a bone jarring ride!"... AND, RBX, someone I trust the opinion of very much, he's actually running the medium duty packs as well, and he seems to be very pleased with them, so that's what I decided. Not only that, but it's not very difficult at all to add that particular leaf that makes the other 1 a heavy duty leaf pack. All that combined with the fact that this is my daily driver, which see's heavy, heavy loads around 1 percent of the time that it's on the road. I'd rather be sagging a little bit on the way to an adventure then to have a bone jarring ride around town , on the freeways, over speed bumps, et cetera.
Last edited by ChefYota4x4; 03-17-2013 at 12:35 AM.
03-17-2013, 12:13 AM
#6109
Old man syndrome on my part I guess.
My condolences on the parts. It alwasy seems to happen "wrong parts in the right box" the one time you don't tripple check every thing right

Here is hoping, someone in the crew/peanutgallery can get you sorted tomarrow.
My condolences on the parts. It alwasy seems to happen "wrong parts in the right box" the one time you don't tripple check every thing right
Here is hoping, someone in the crew/peanutgallery can get you sorted tomarrow.
03-17-2013, 12:31 AM
#6110
Hey man, thanks. I really hope so, but Sunday,.... not sure. They get orders every monday, so I'm going to likely just return them for refund. I just picked them up, maybe I'll just order some greaseable bolts from 4crawler, ....keep it in the family so to speak? Haha. The daystars seem tto be really solidly built, with the center support, etc..... but I'm sure ARB would have as good or better, and meh,.... I bet they would have at least shipped the right ones! Wasnt the person taking the orders fault,....but they could have at leas t looked it up in store and made sure the mutilated box had the right stuff in it?
Of well.... forward from here onward!
Btw, I'm not a shackle expert, or even novice.... so I wouldnt have known for sure in store without a full parts list with pics and dimensions. And, when I ordered on the phone from 4wheelparts, they immediately went to those Daystars, as the guy didnt know how to navigate ARB-USA Order catalog-pdf..... and I wasnt going to do them when I called ARB to get all the right part #'s, ....... so I didnt have them when calling 4wheelparts. Ugh! Lol
Last edited by ChefYota4x4; 03-17-2013 at 12:33 AM.
03-17-2013, 07:15 AM
#6111
Nice!!!

 03-17-2013, 06:46 PM
#6113
Contributing Member
Join Date: Mar 2003
Location: COTKU,Ontario,Canada
Posts: 11,334
Likes: 0
Received 0 Likes
on
0 Posts
Sorry to hear about your "Pandora's Open Box o' Parts" nightmare Mark...
hope they straighten it out for you... I'd drop a dime on that shop with OME Head Office as well let them know the kind of "quality" customer service their agents are providing.
hope they straighten it out for you... I'd drop a dime on that shop with OME Head Office as well let them know the kind of "quality" customer service their agents are providing.
03-19-2013, 01:10 AM
#6114
I would love to say I have a great write up for this...., but that's simply not the case. I have some info and input I'd like to share... However, let's just say that YET AGAIN, .... just about every freakish happenstance that could have befallen me, ....it did, hahaa.
I AM NOT gonna bitch.... it's useless. I'm also going to just share, .... I put this off for a day or so(Doing this 'kind of a write up', lol).. as I was just SOOOOOO ticked about the shackles... And YET, I have to take some blame for even leaving there with them in the first place. On the instructions, in tiny print, it says "This kit should have".... And it listed "18mm bolts, 18mm nuts, bushing sleeves and 2.25"/1.5" lift shackles.... AND, it turns out.... Even as these settle... I'm already, for some reason, another 1.5-2" over what I had with the Zuk(12"x125# Coils).... Soooo, ..... all worked out for the best, for now. I will still have to, later, install some greaseable shackles... Just haven't decided which route to go. I might just leave the stockers and buy some grease-nipple fitted bolts from 4Crawler, HERE
************************************************** *****
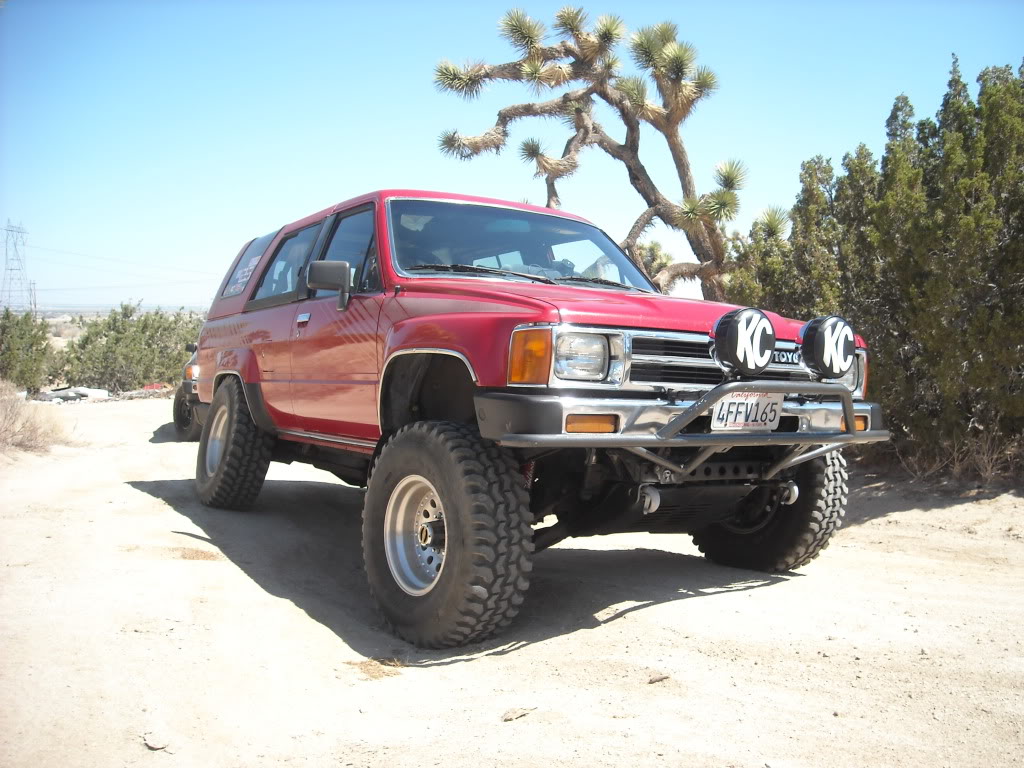
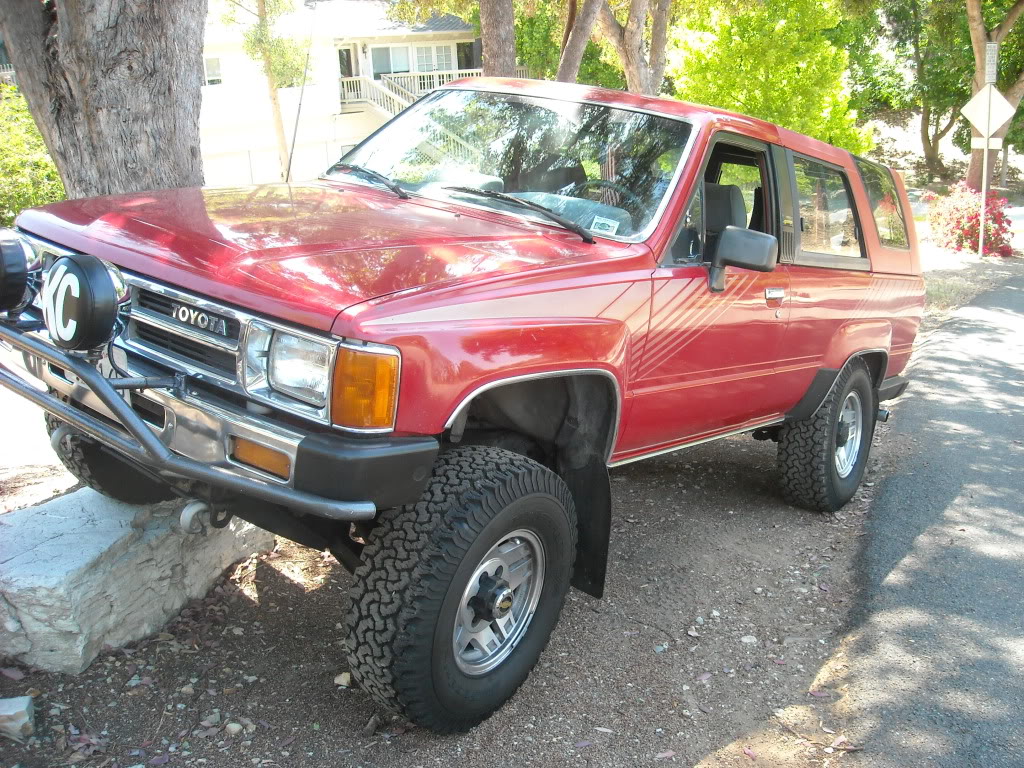
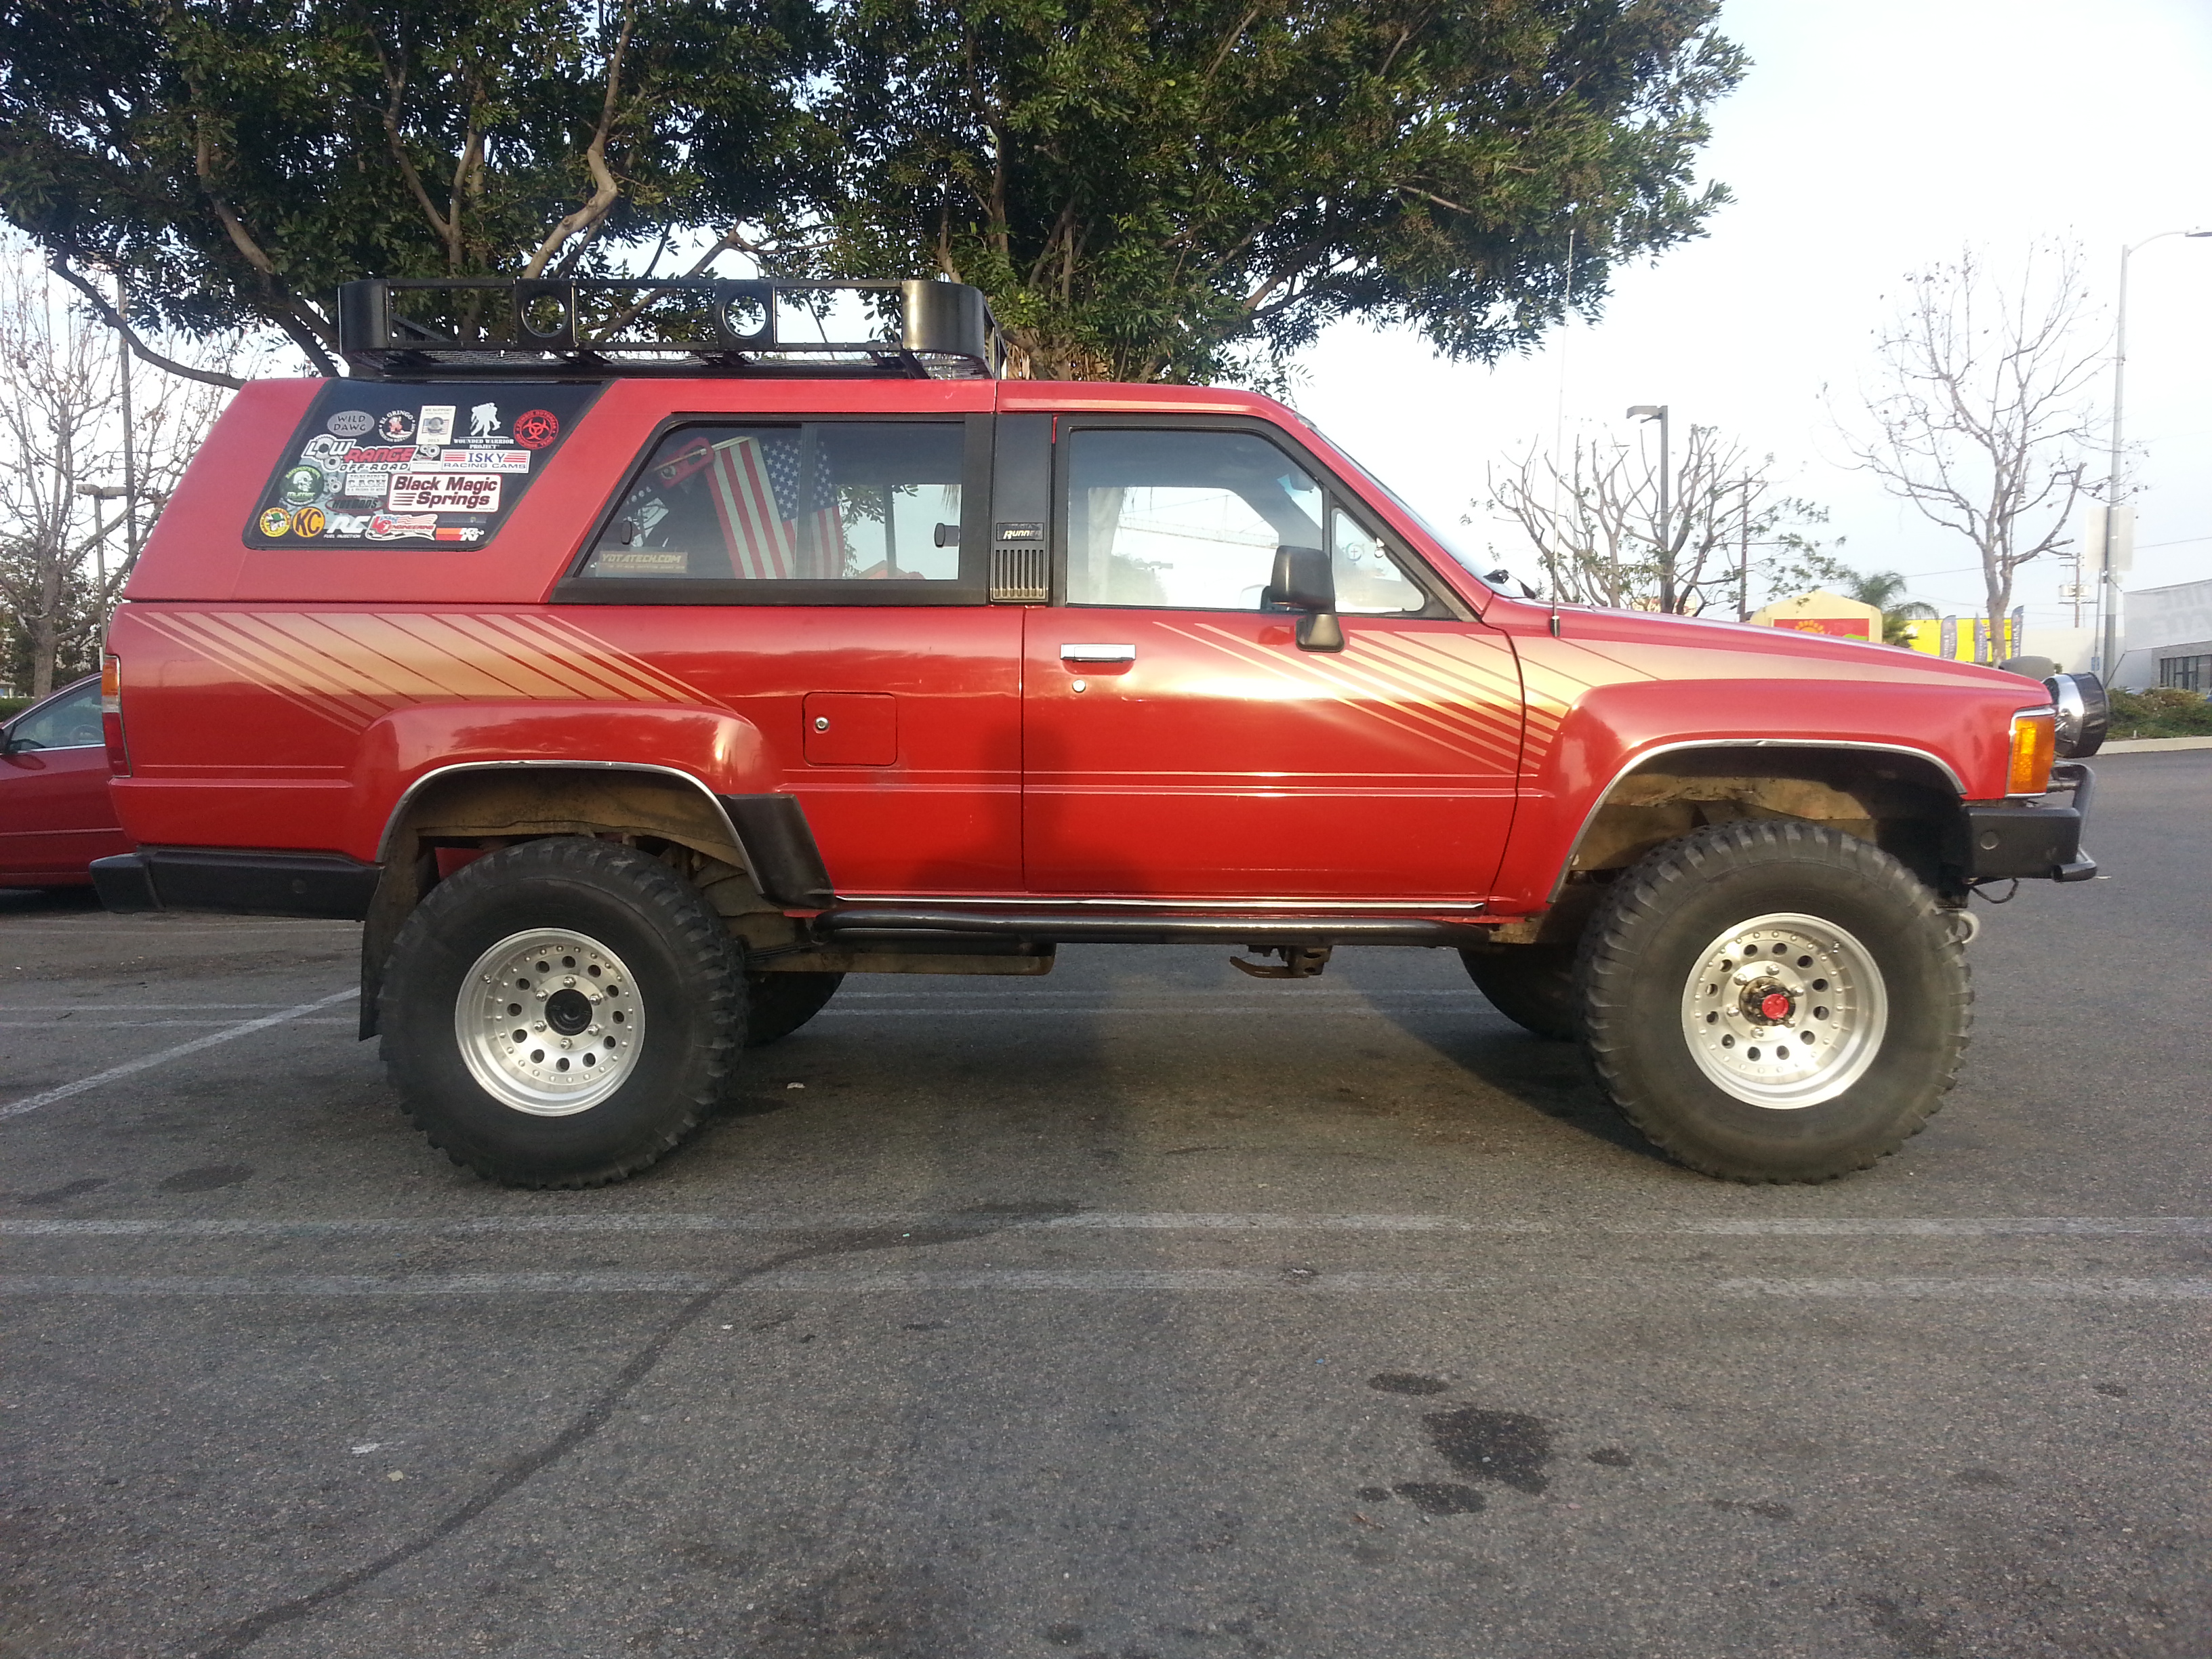
First, I thought A pic with the 12"x125# Zuk Mod/Cut Method, would be appropriate, ... just showing the ride height on level ground.....

*********************************
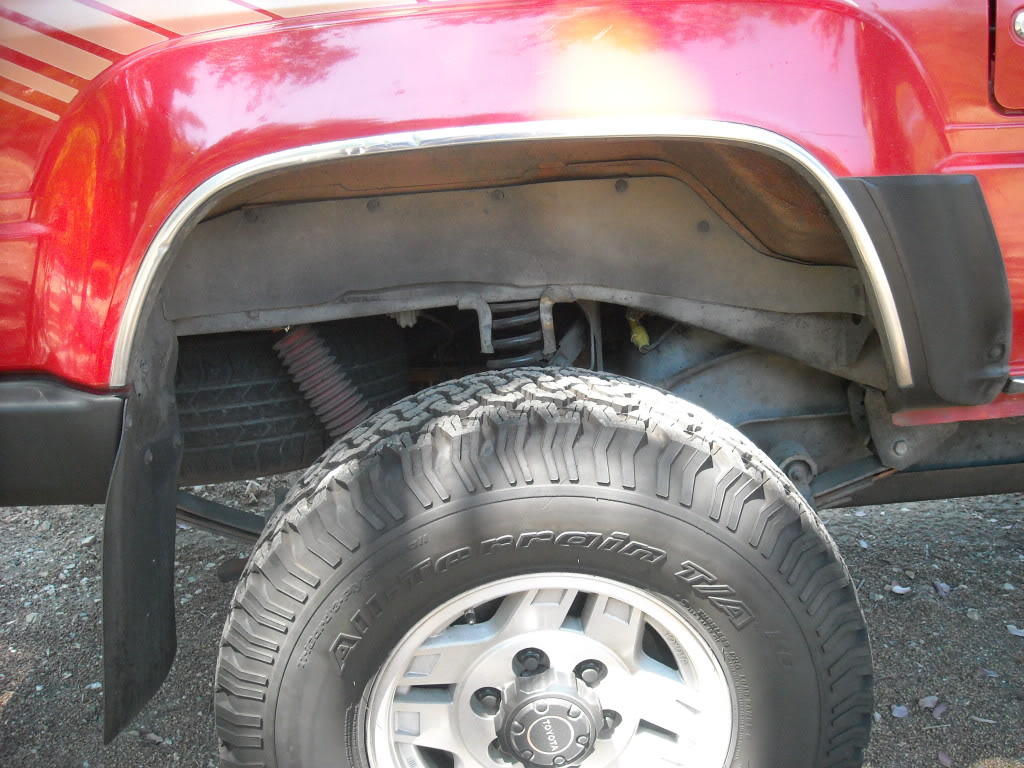
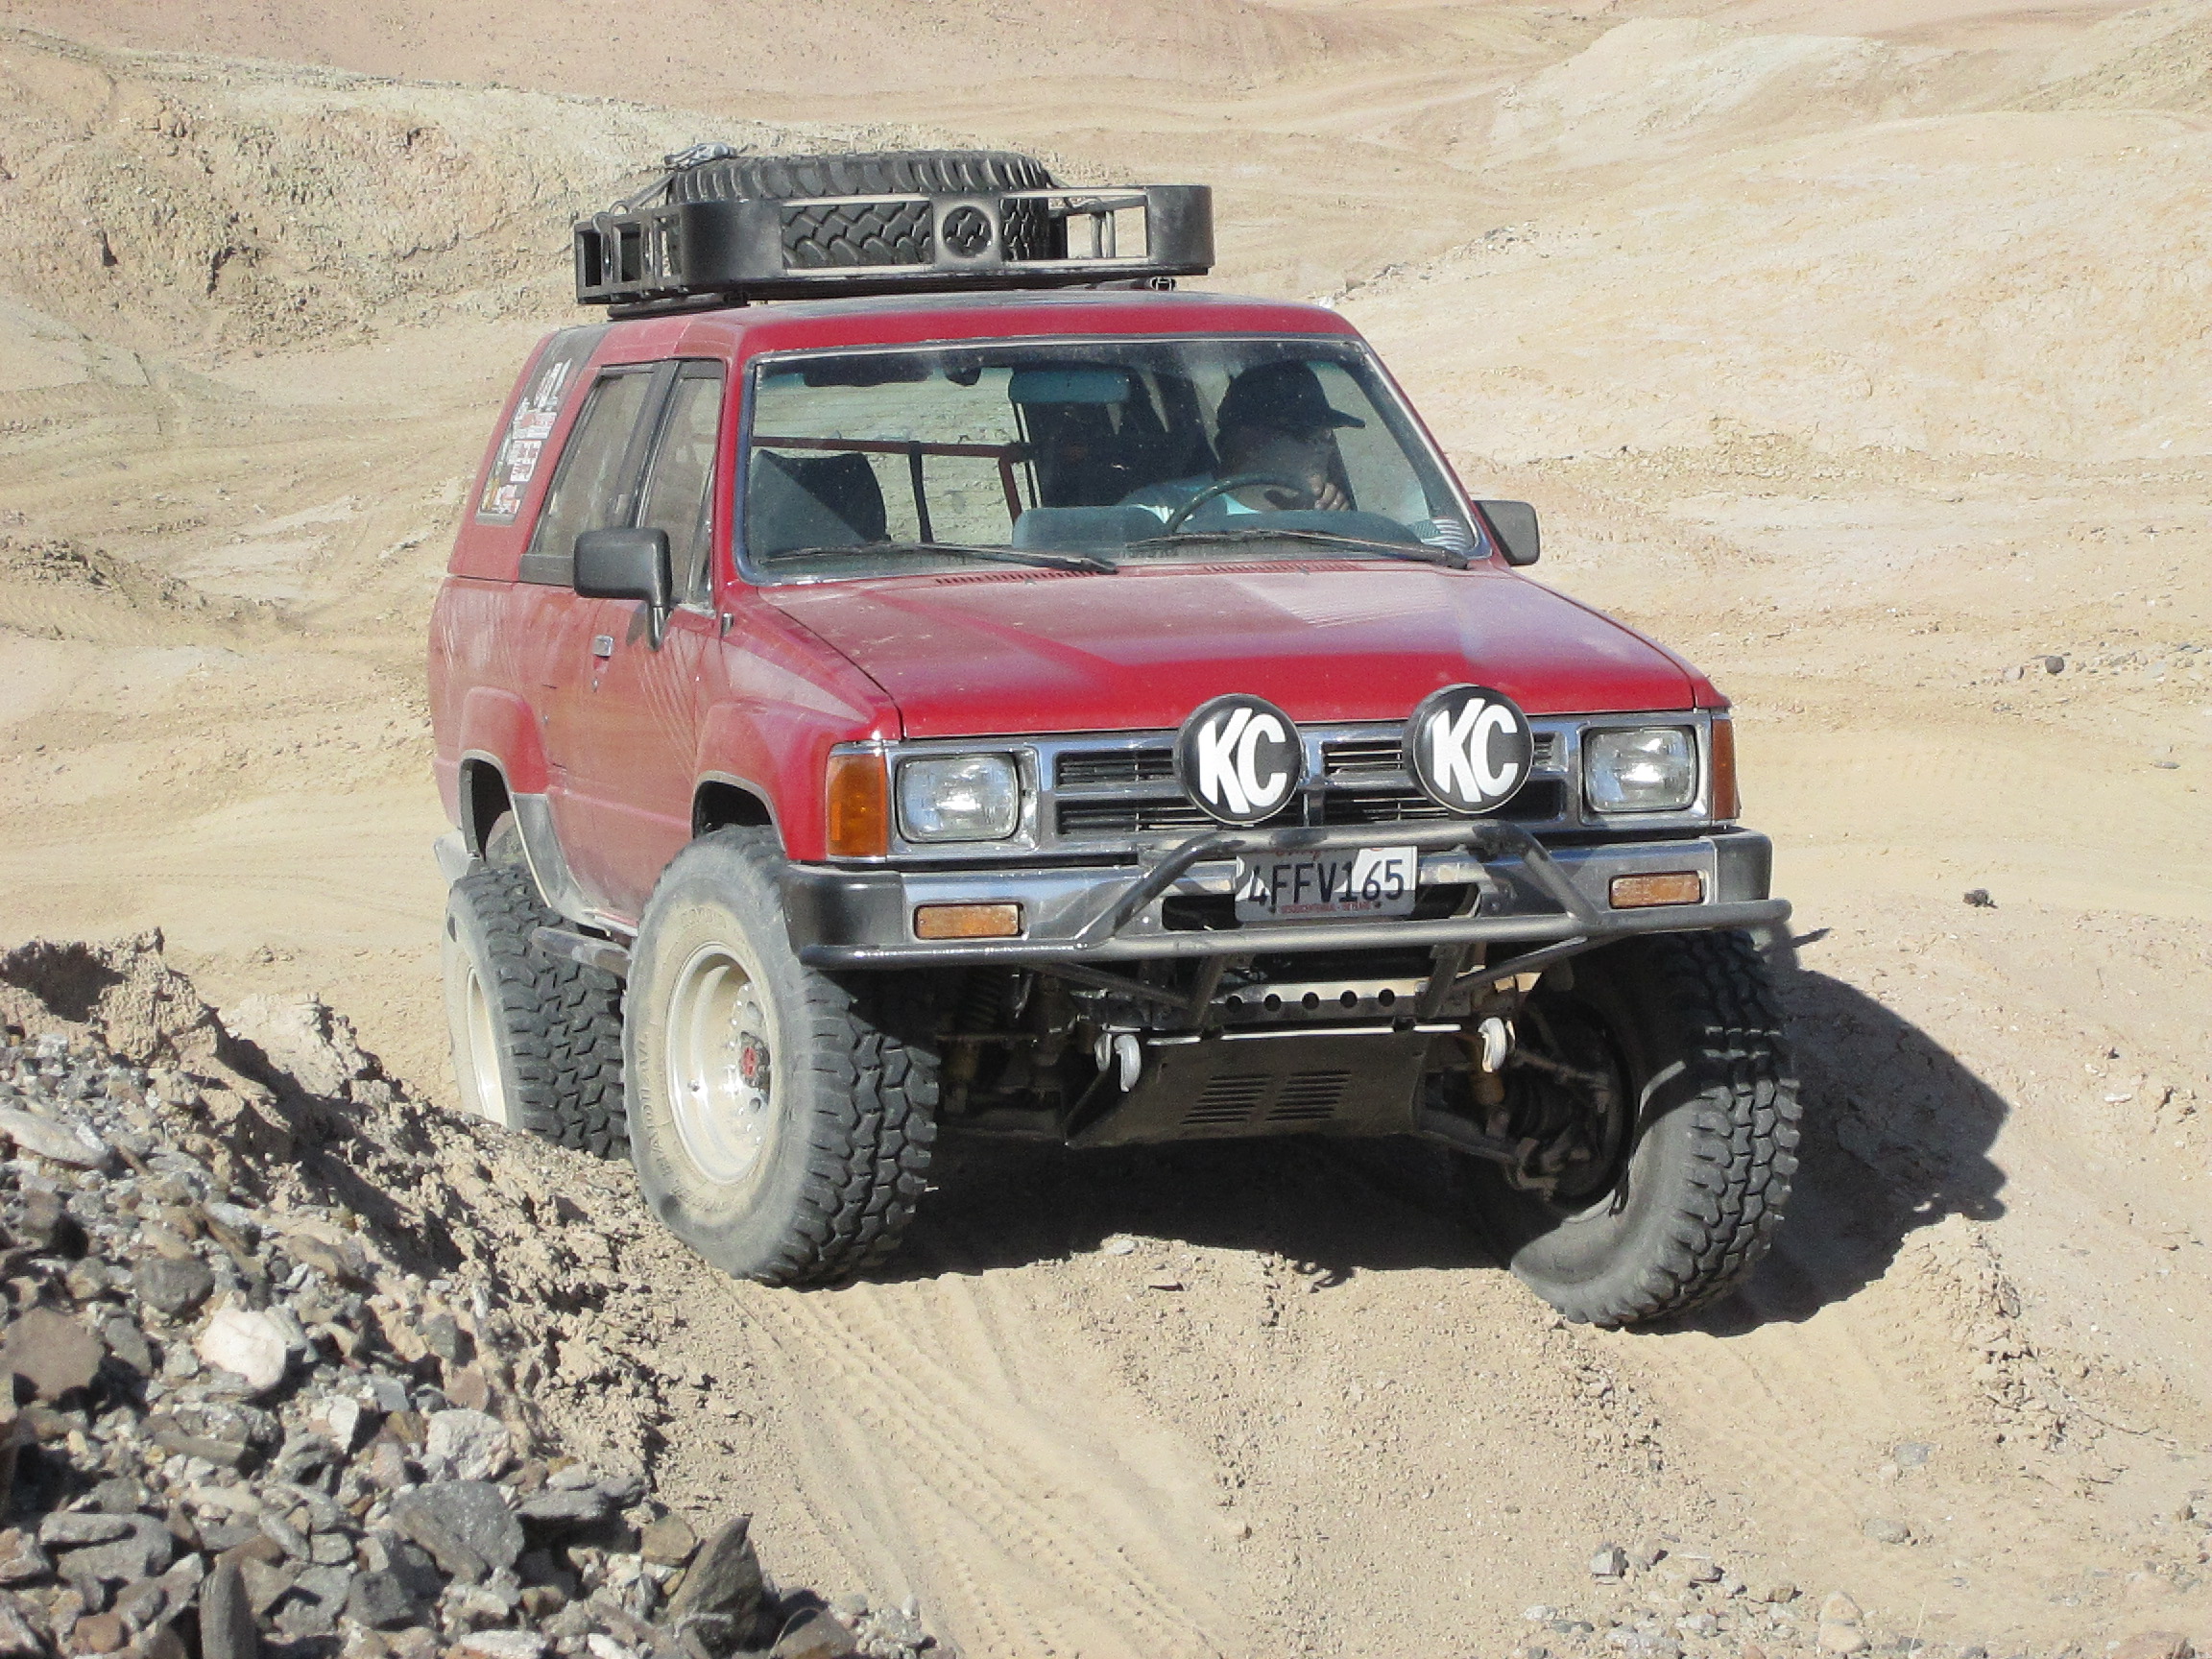
And a lil bit of the flex of the rear with the Zuk........


********************************************
The Flex with the OMEmu CS009 Pack will go here, later>>>
********************************************
OK, to begin;
When swapping in OMEmu or any leaf packs, where you're pulling out your Original Leafs AND A ZUK, .... There are additional steps, obviously. Even if you still plan to run the Zuk, as Ruined Adventures did, in the thread I previously posted(he did the same swap, but from Jeep Front Coils/No Cut Method)... You still have to remove the Zuk to add the new Pack. Here is his thread, "Weldless Zuk Mod to Old Man Emu" I CAN'T THANK YOU ENOUGH, RUINED ADVENTURES! Your thread helped me a great deal to work through problems, etc.
**************************
So, to begin;
1.) Jack up the Truck by the Frame, letting the rear axle sag as much as possible, until the springs/shocks hit their limit(I chose to use a Big Block and jack up at the Hitch)>>>>

(I then also supported the frame on both sides with Stands)>>>>
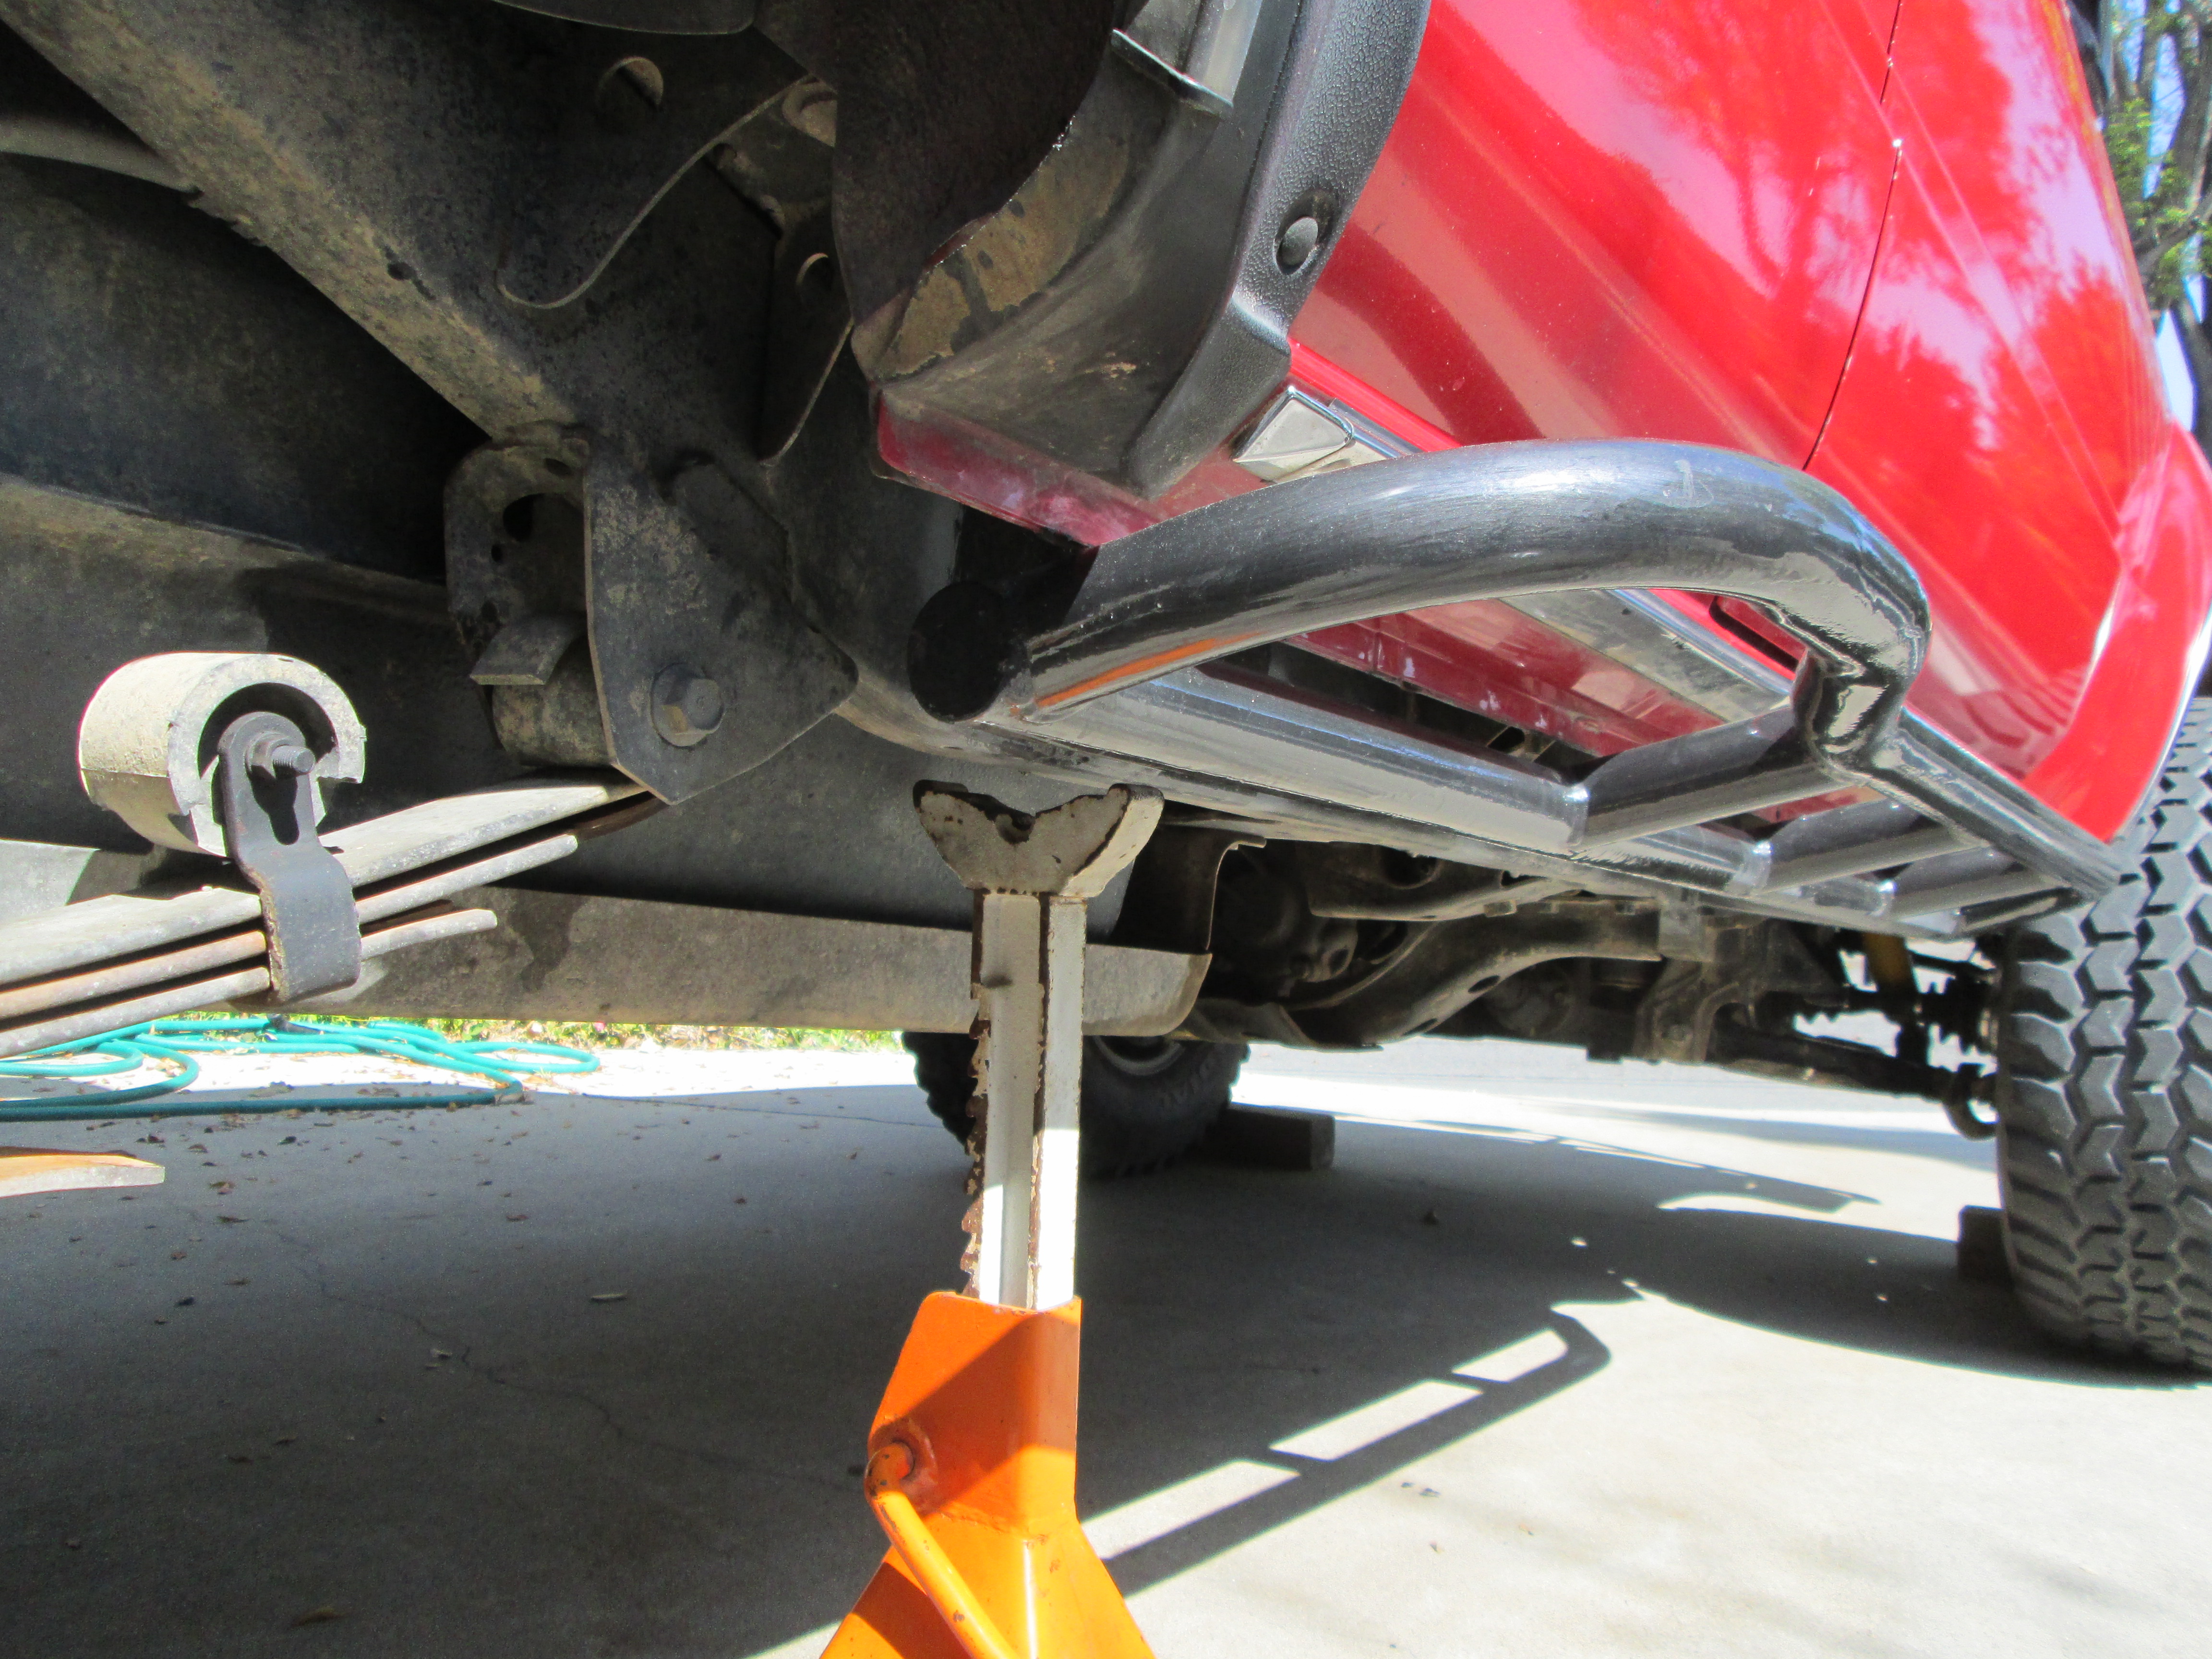
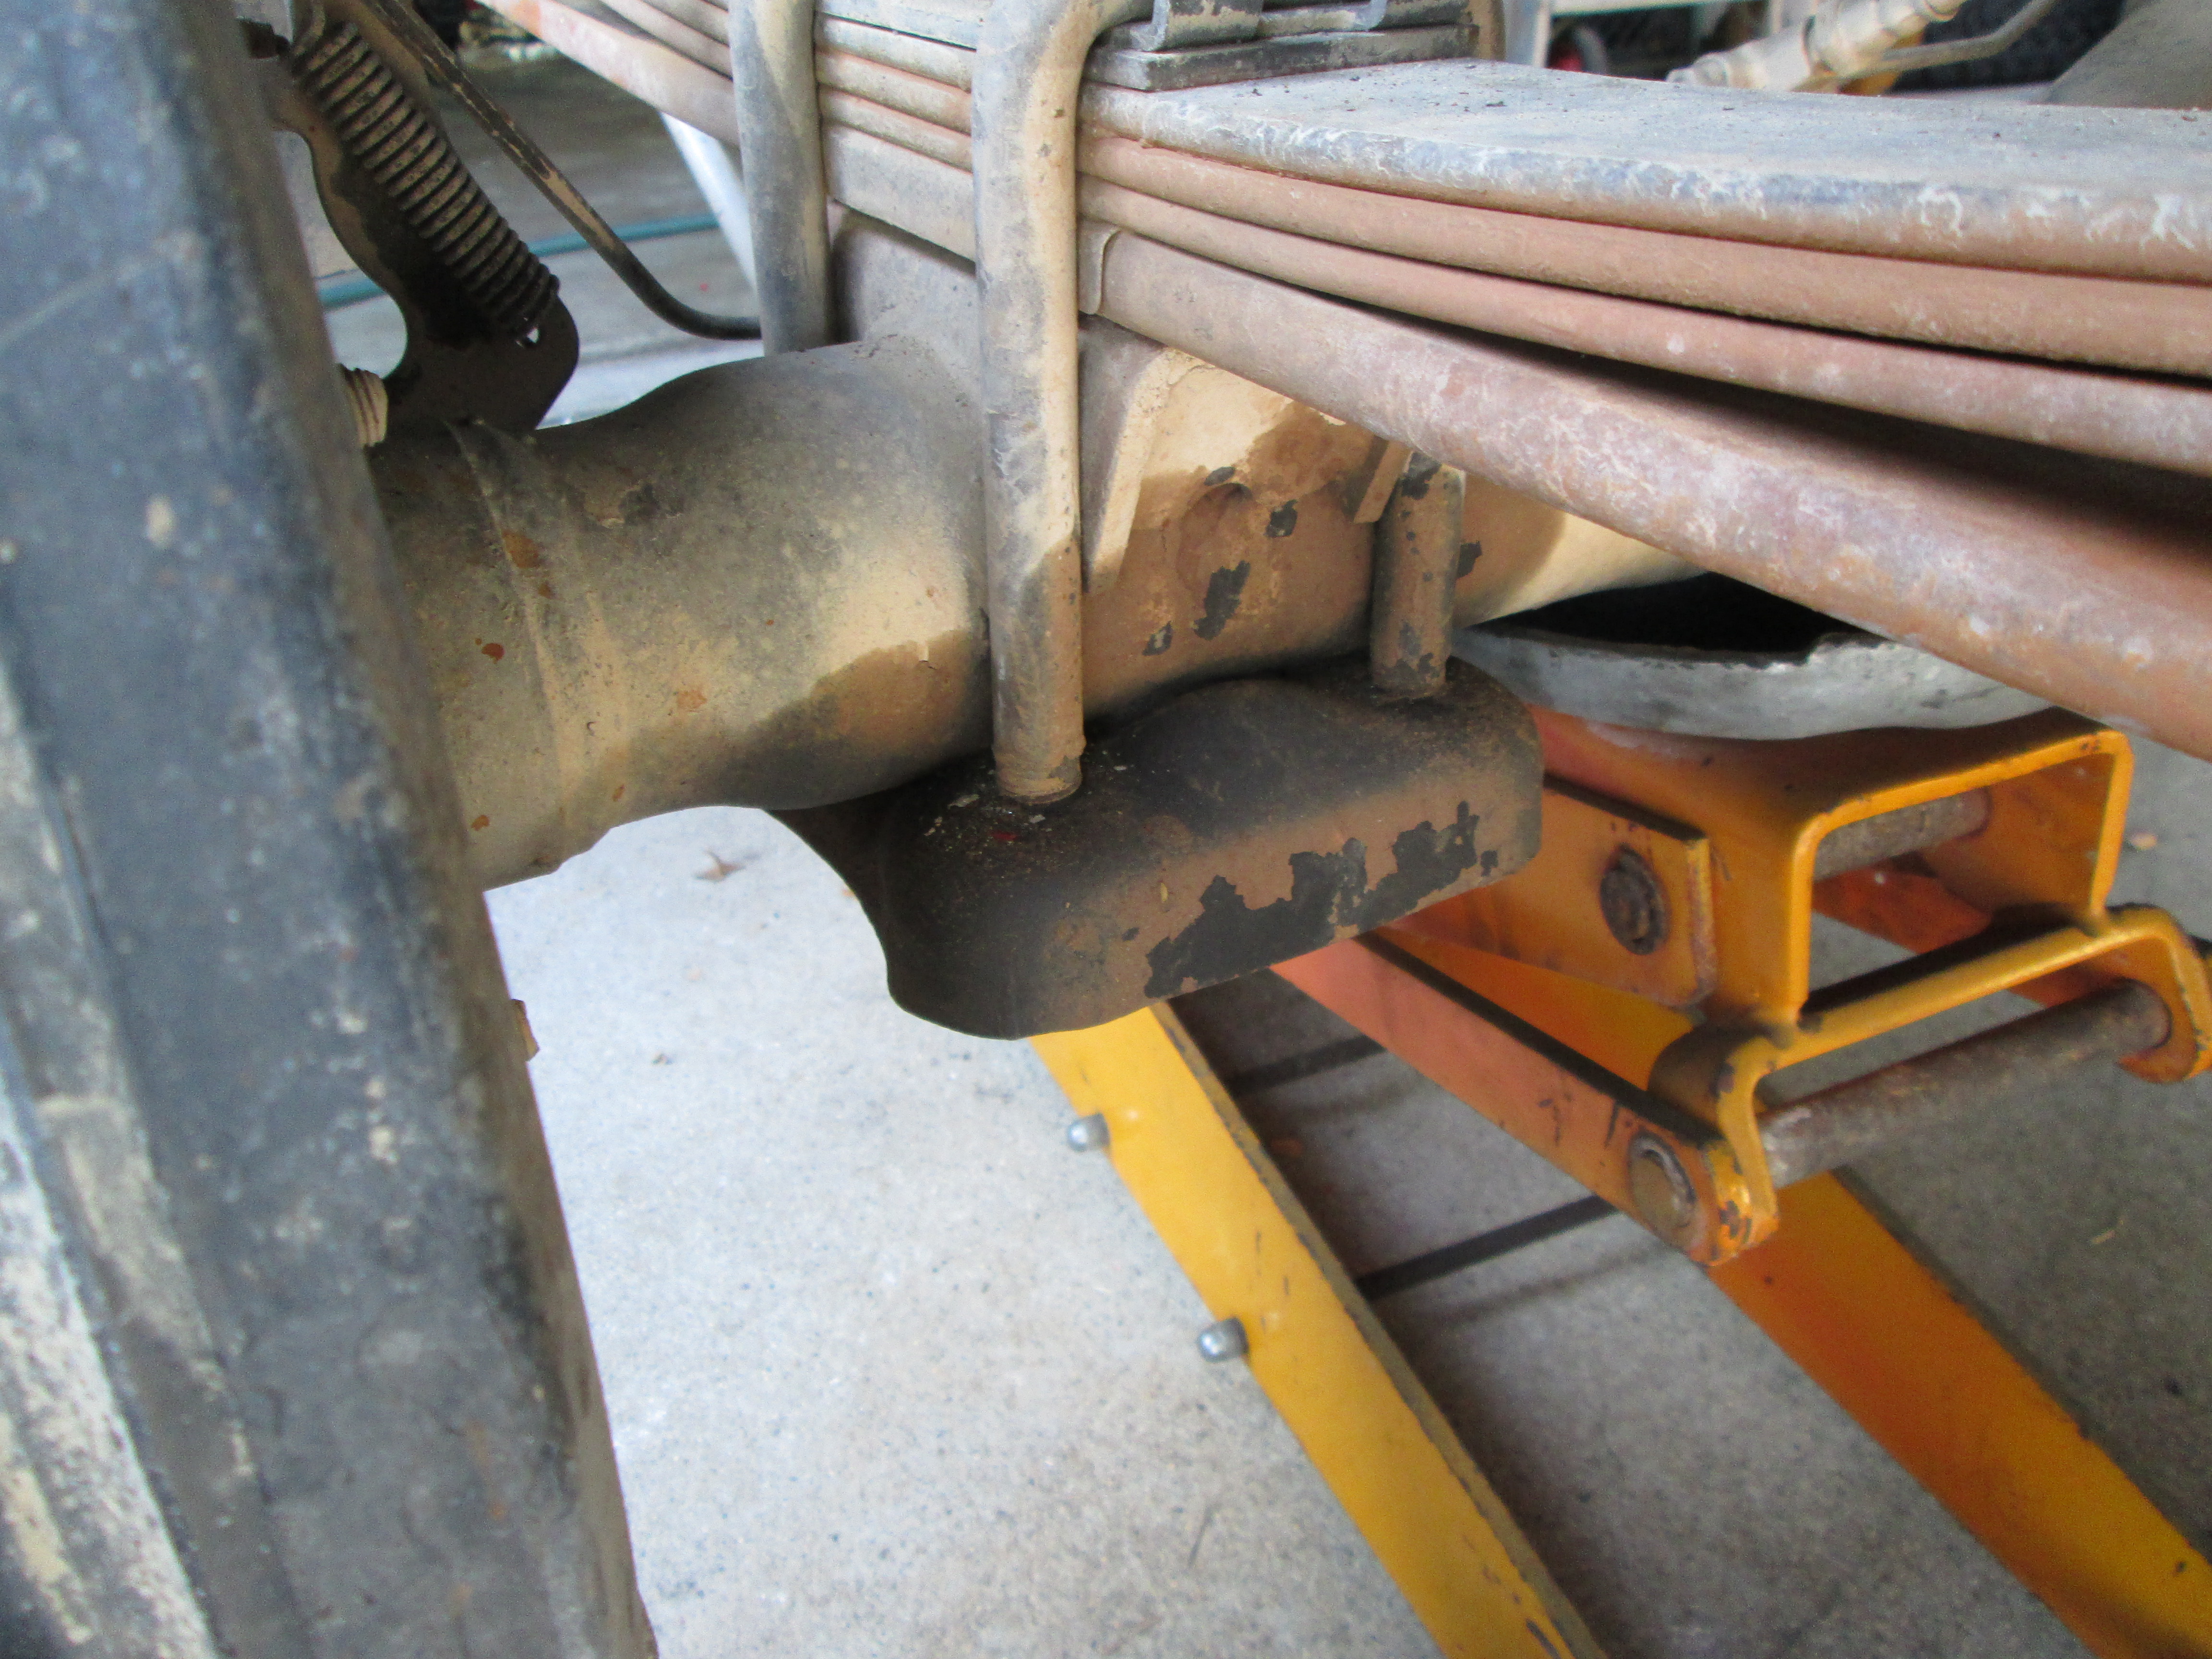
2. Using a Bottle Jack, I raised the axle tube on the passenger side, first(doesn't matter which side you start on), taking pressure off the rear hanger/shackle. Remove the "19MM" Nut ON THE UPPER BOLT/HANGER, FIRST!(LEAVE THE LOWER ONE ALONE FOR NOW).....
THIS NUT>>>
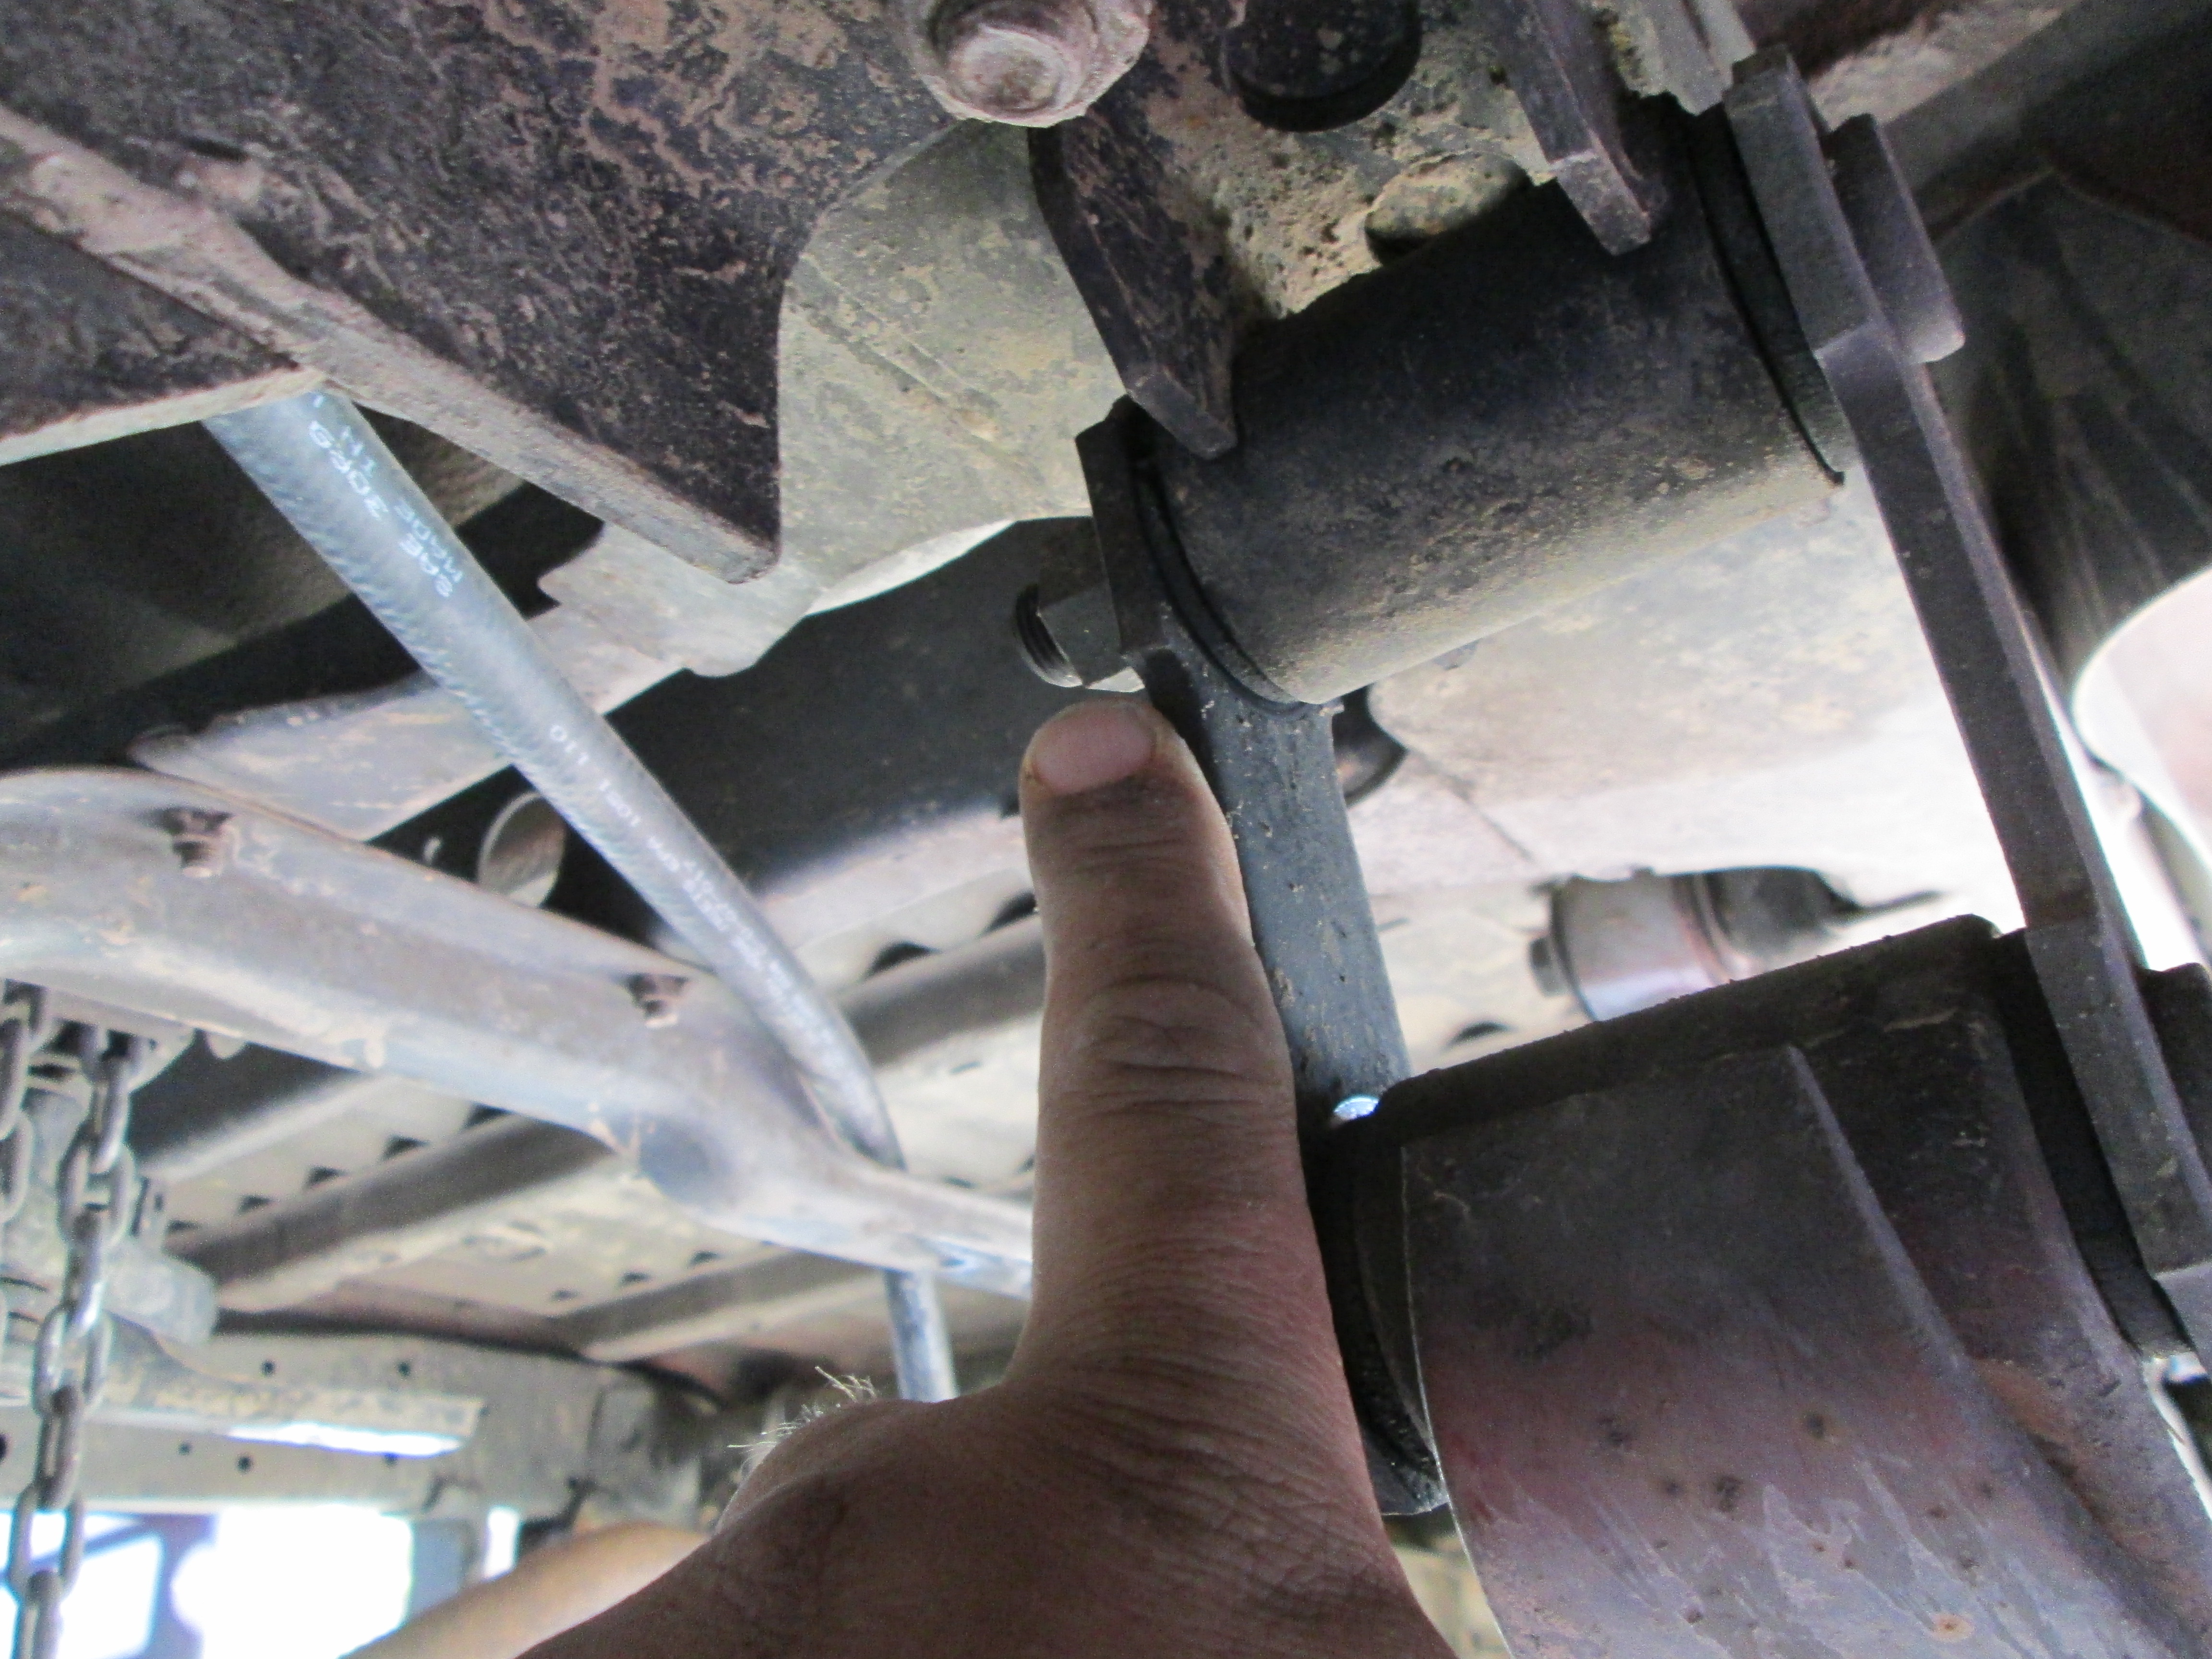
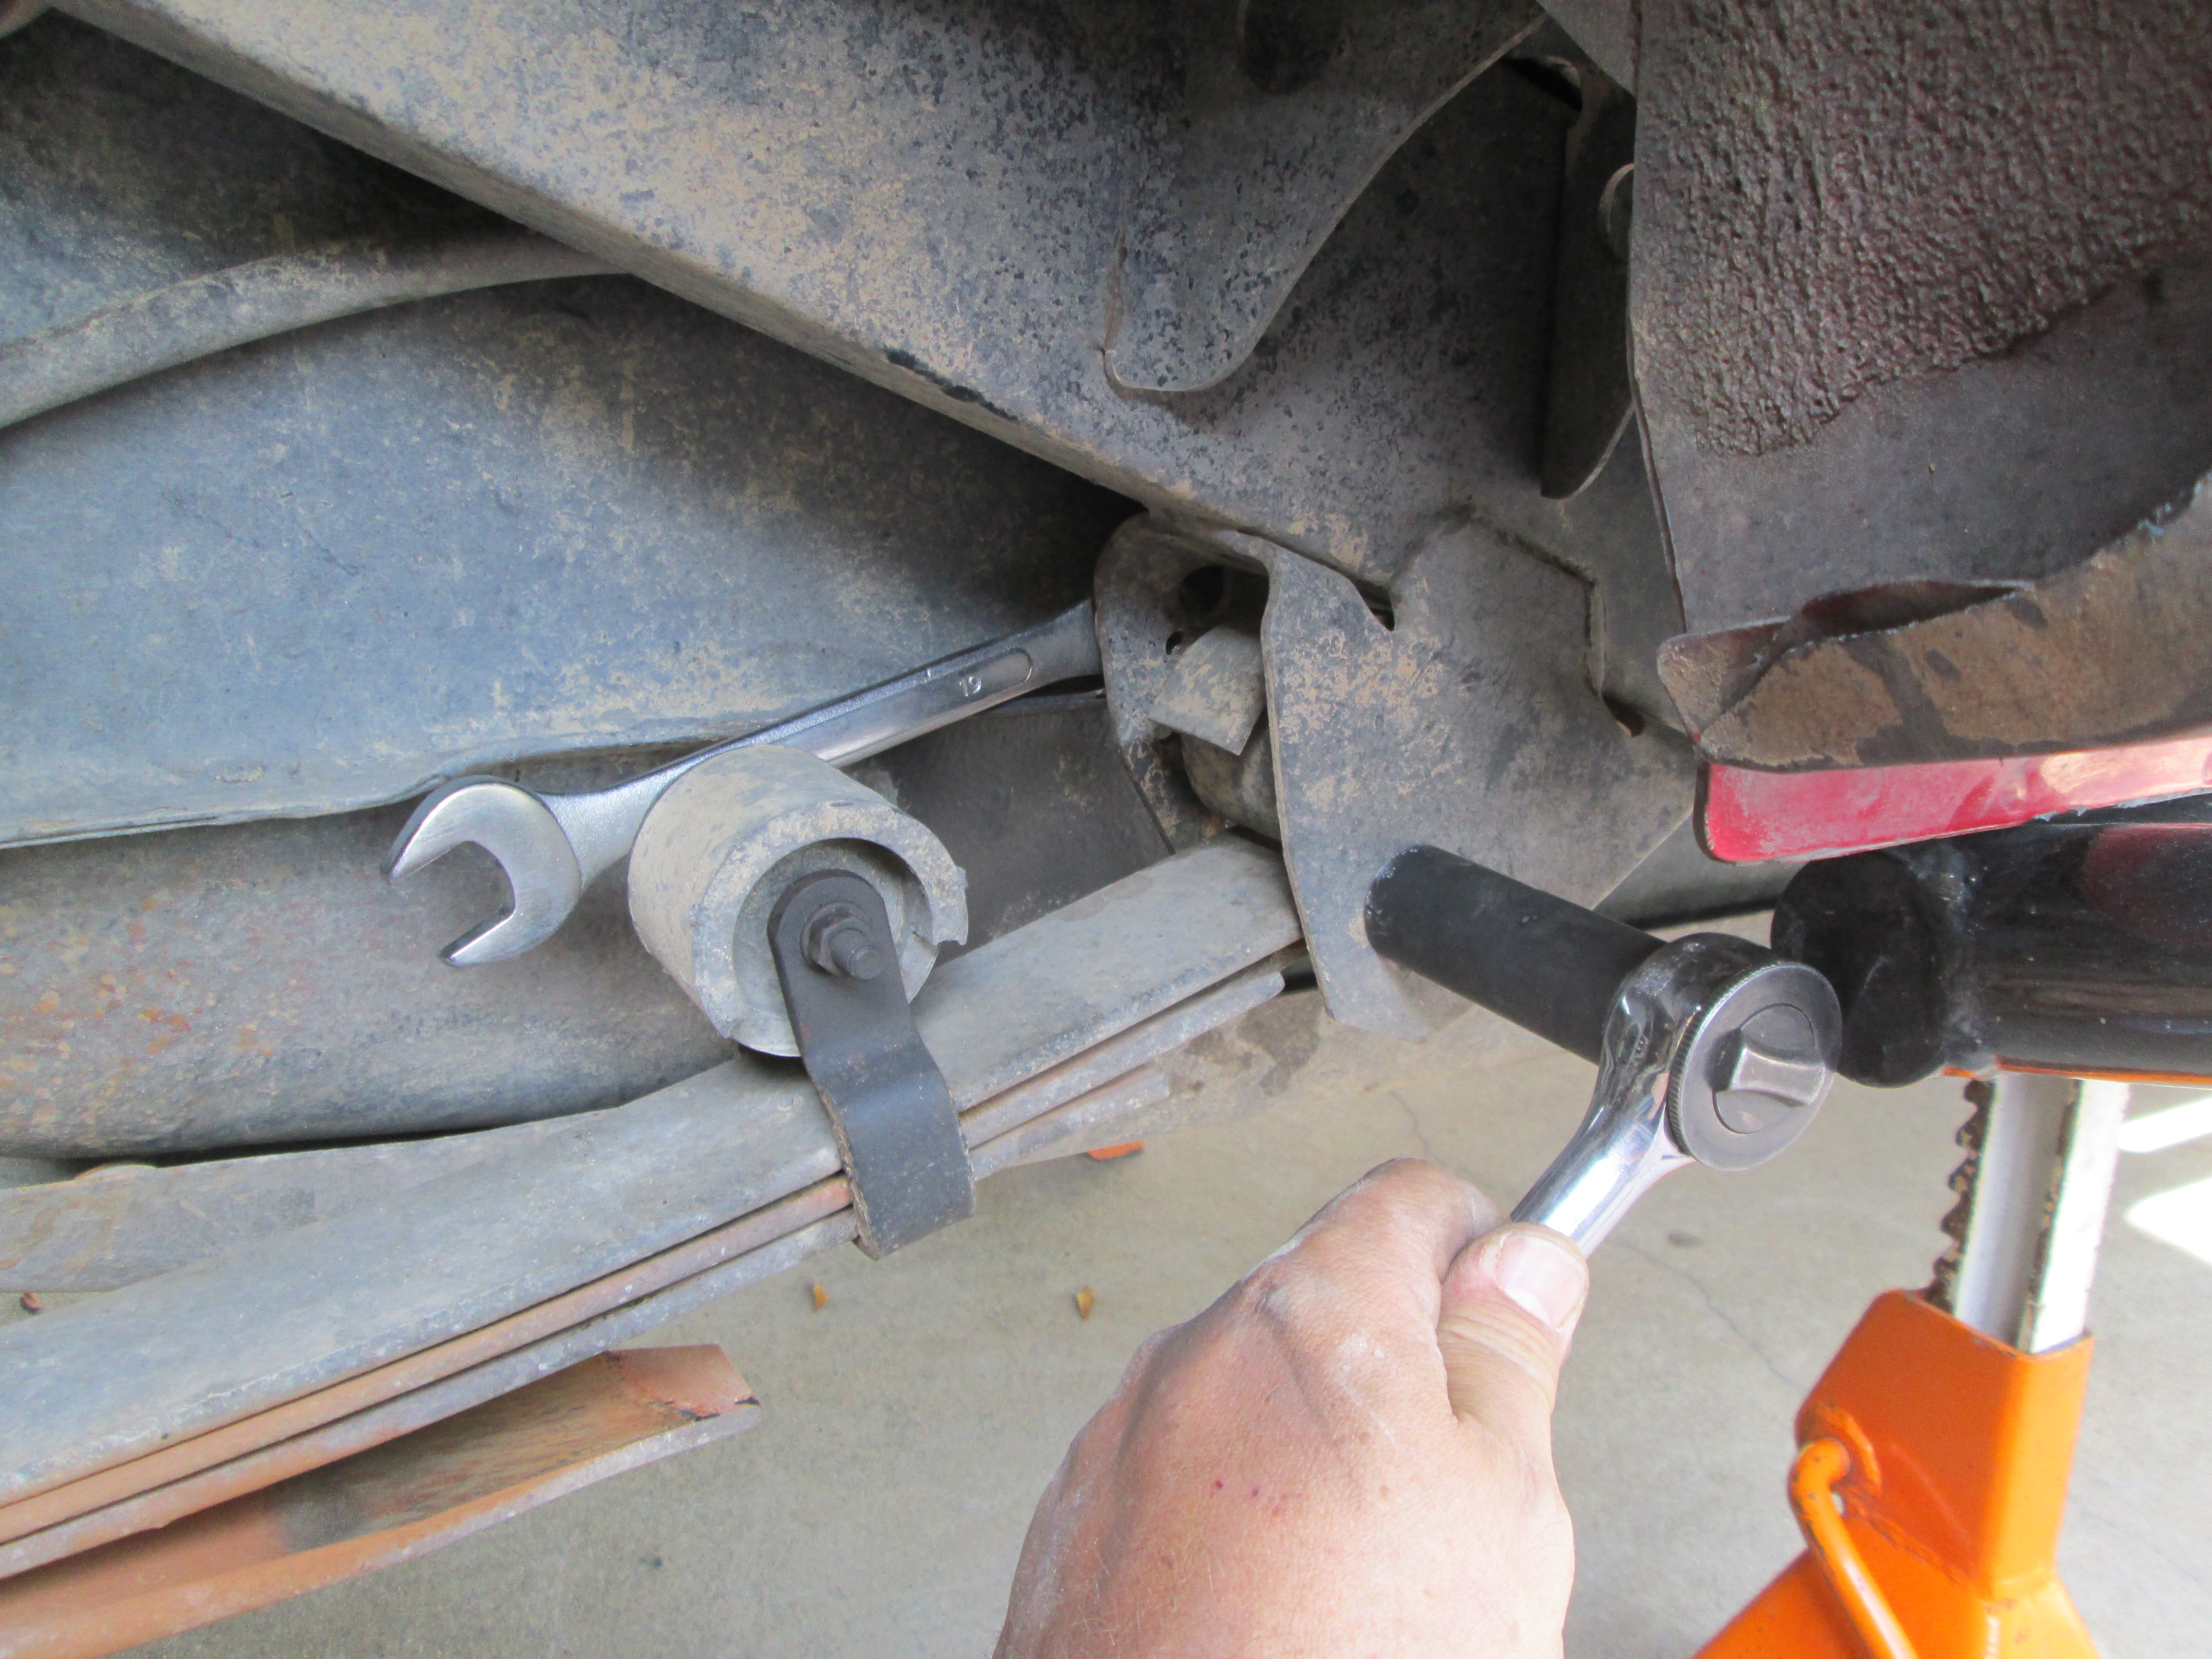
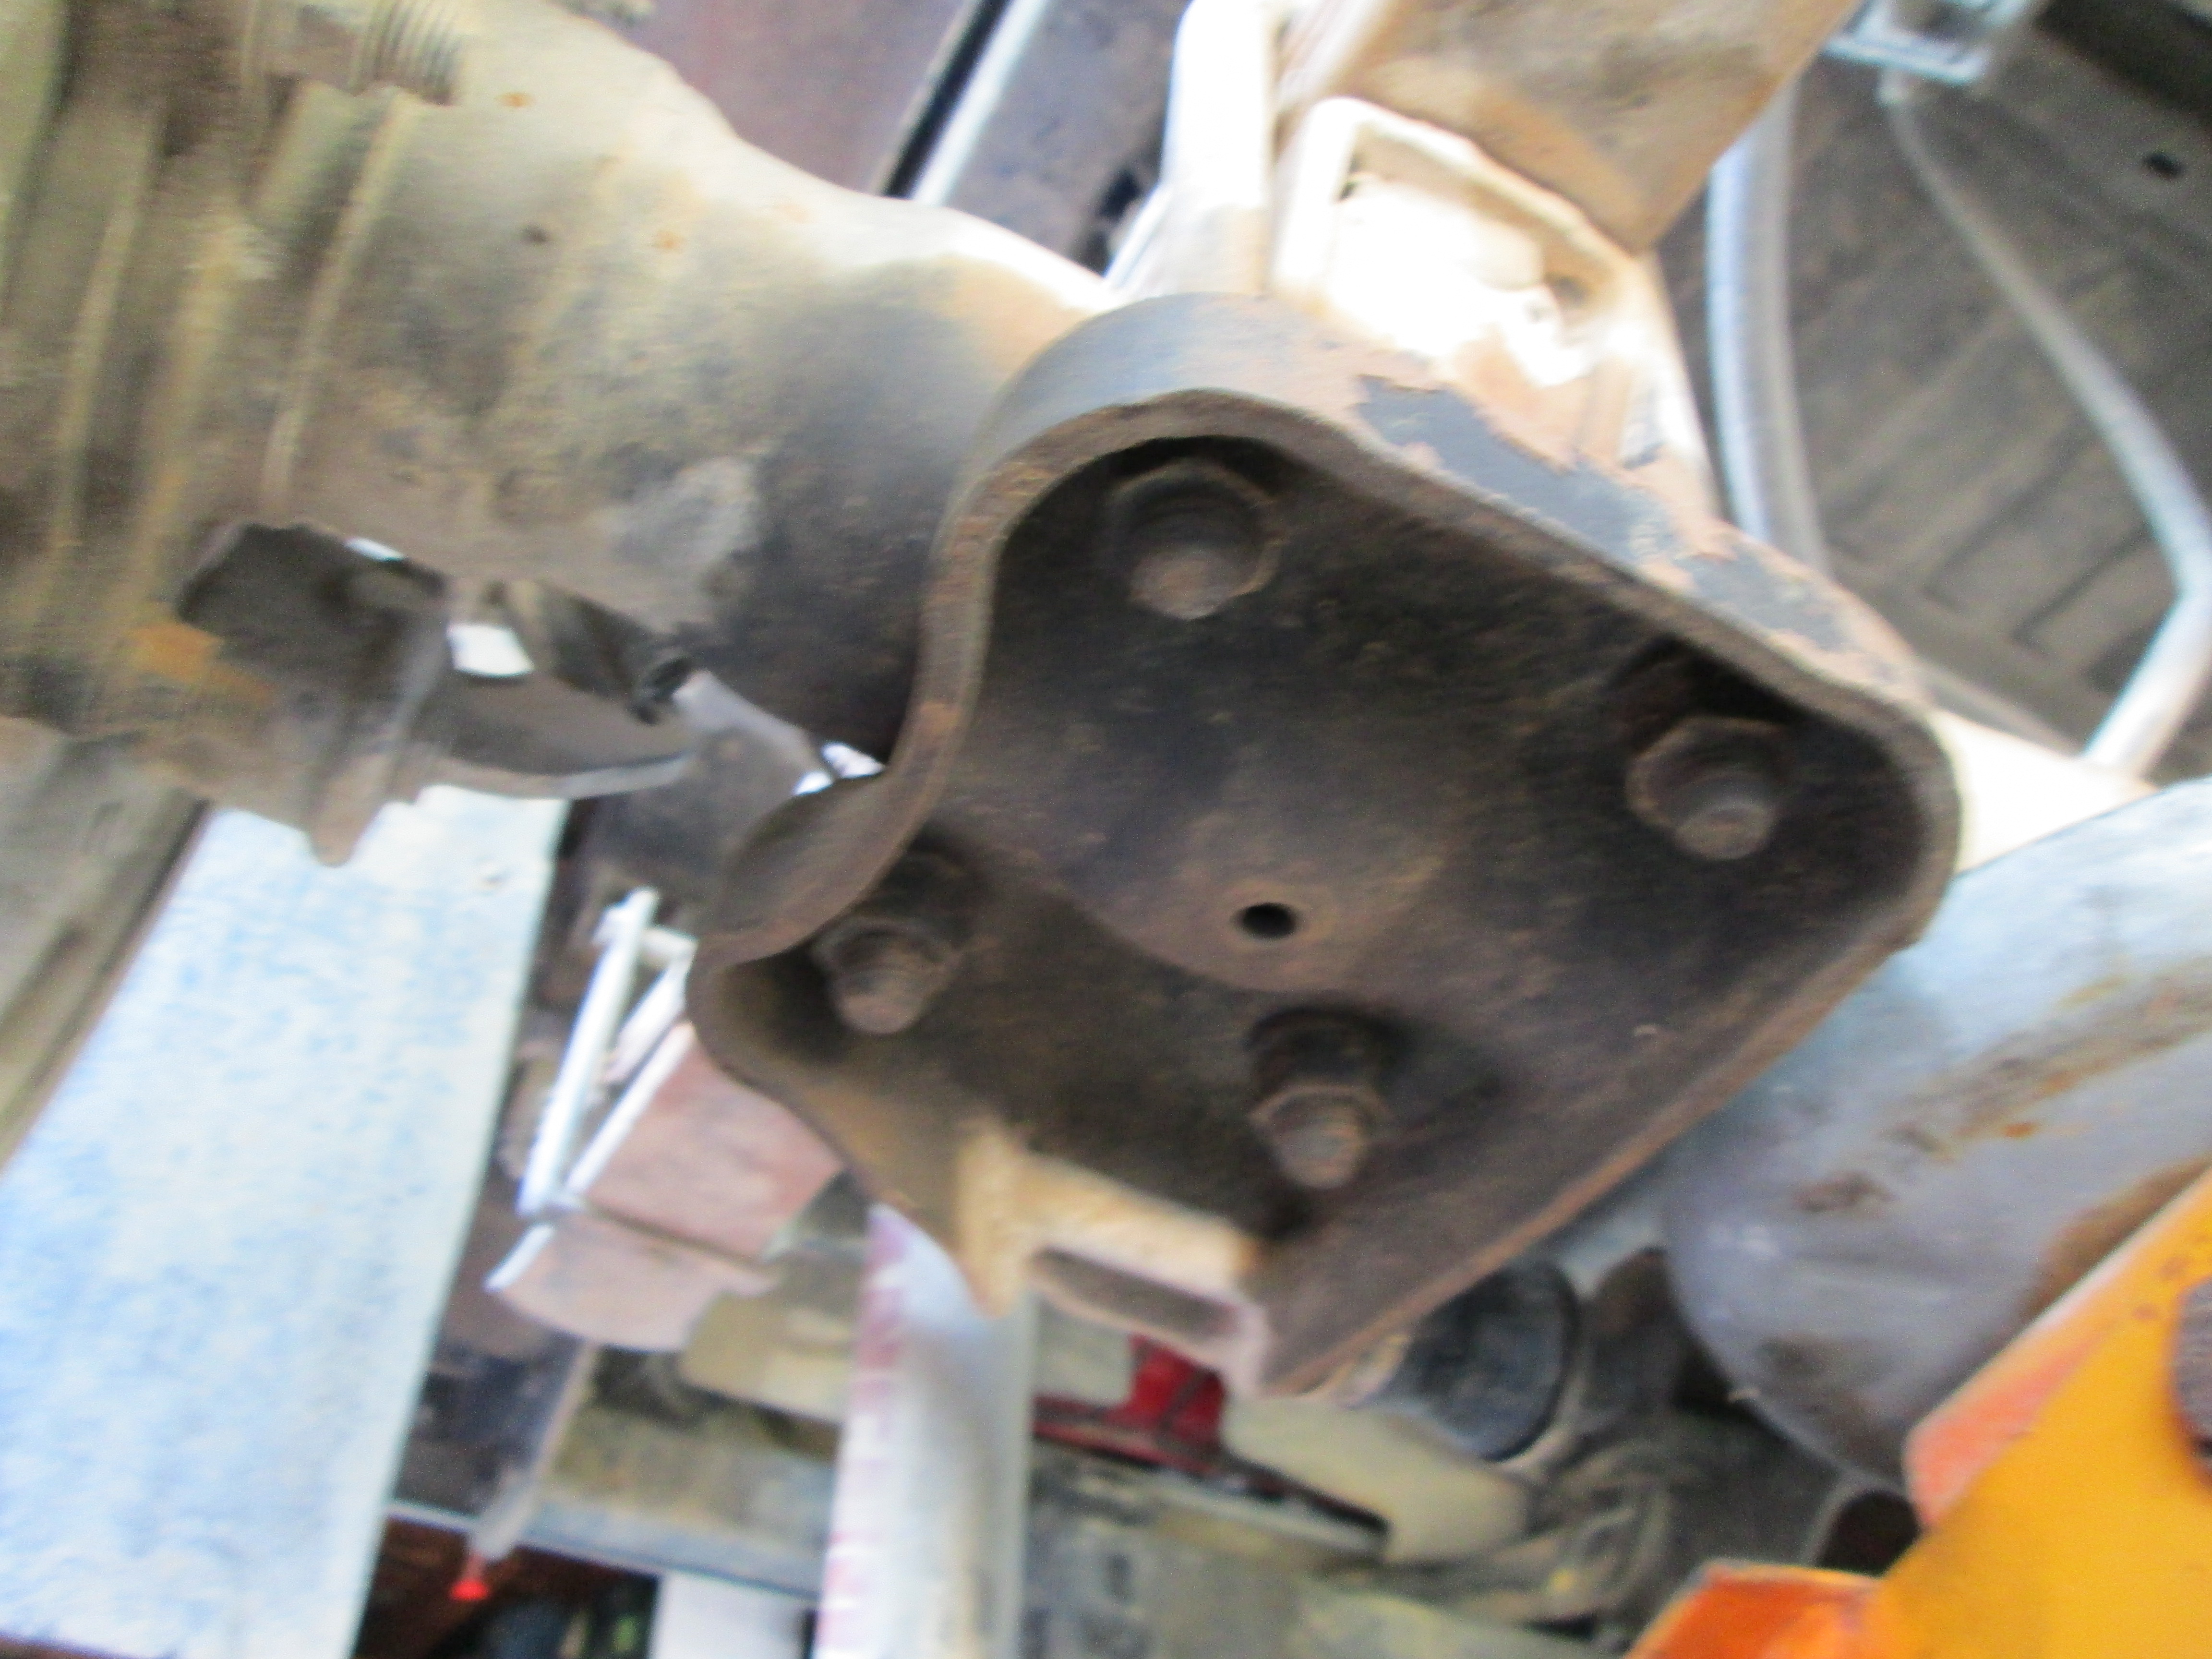
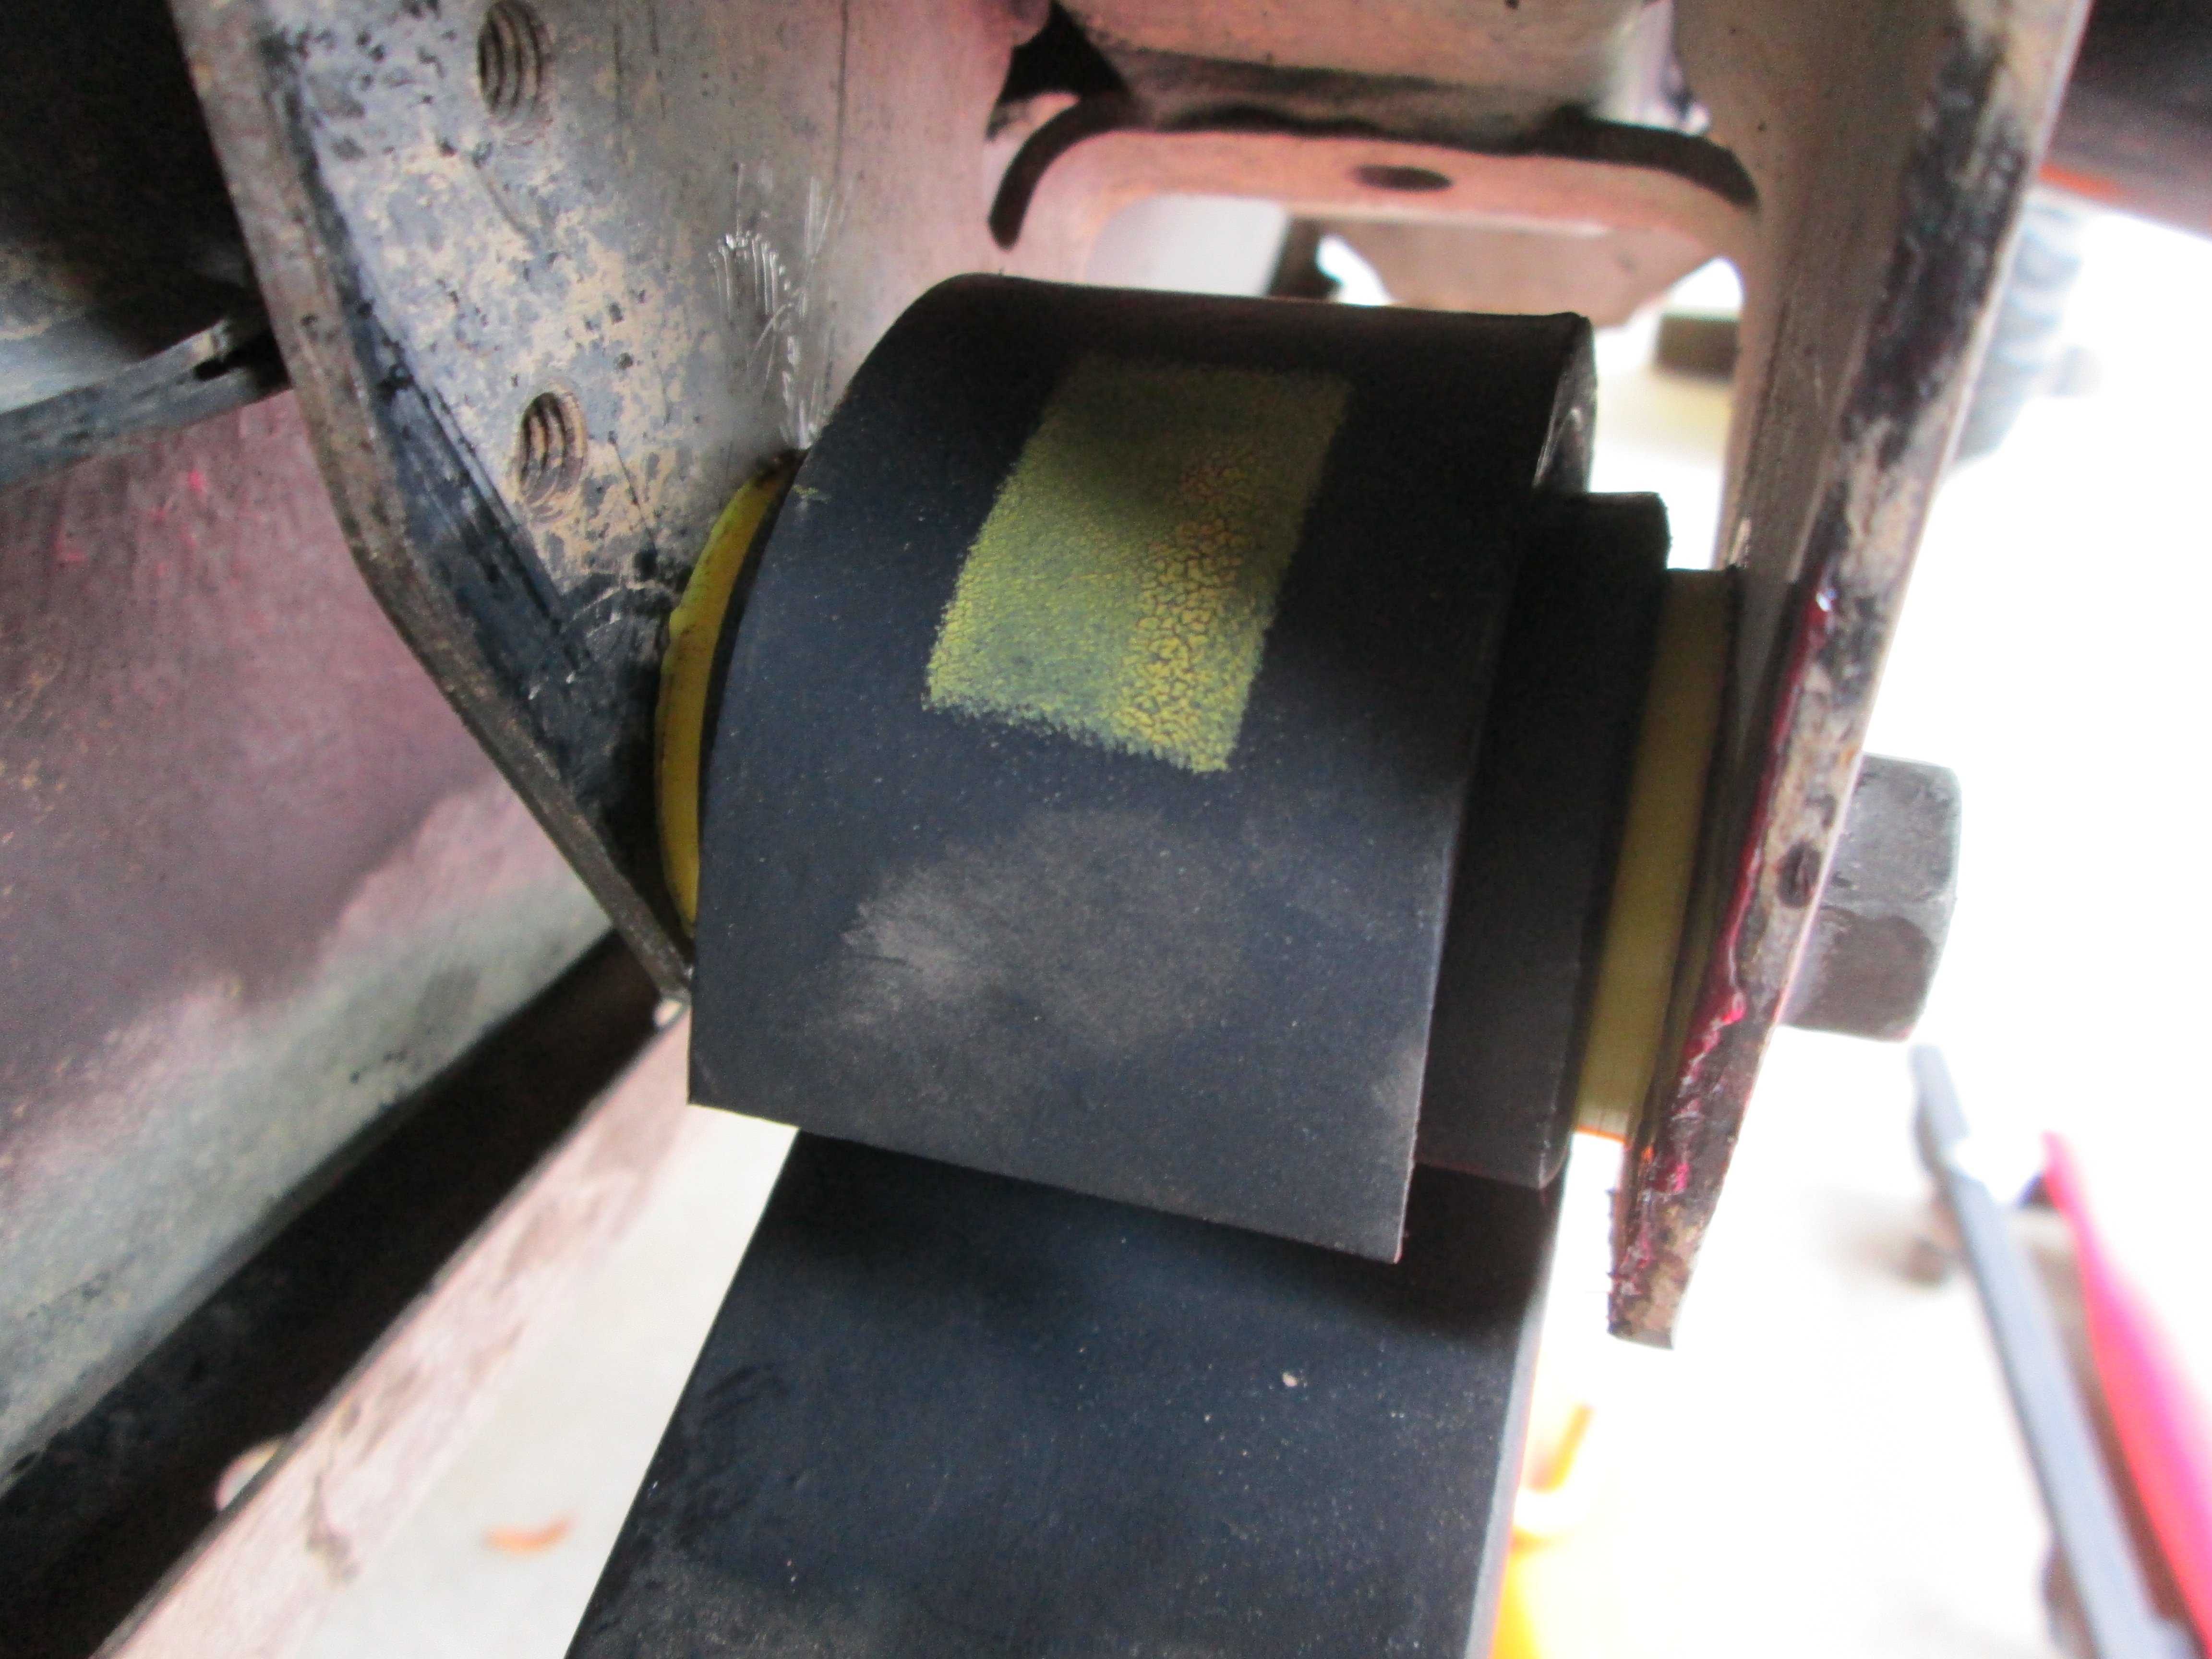
3. Knock the fixed bolt/round headed stud out using a rubber mallet and large screwdriver you could care less about.(This did NOT work for me, as the stud was completely frozen in the hanger/splines would NOT budge loose, even though I'd soaked it for 3 tries and have a fairly rust free rig... SOOOO, I did what anyone with a loaned out pitman arm puller would do... GRABBED MY VICE! haha.... a full turn or so, using the method in the picture, below, ...and POPPPPPPPP! MAN was that stuck! lol)>>>

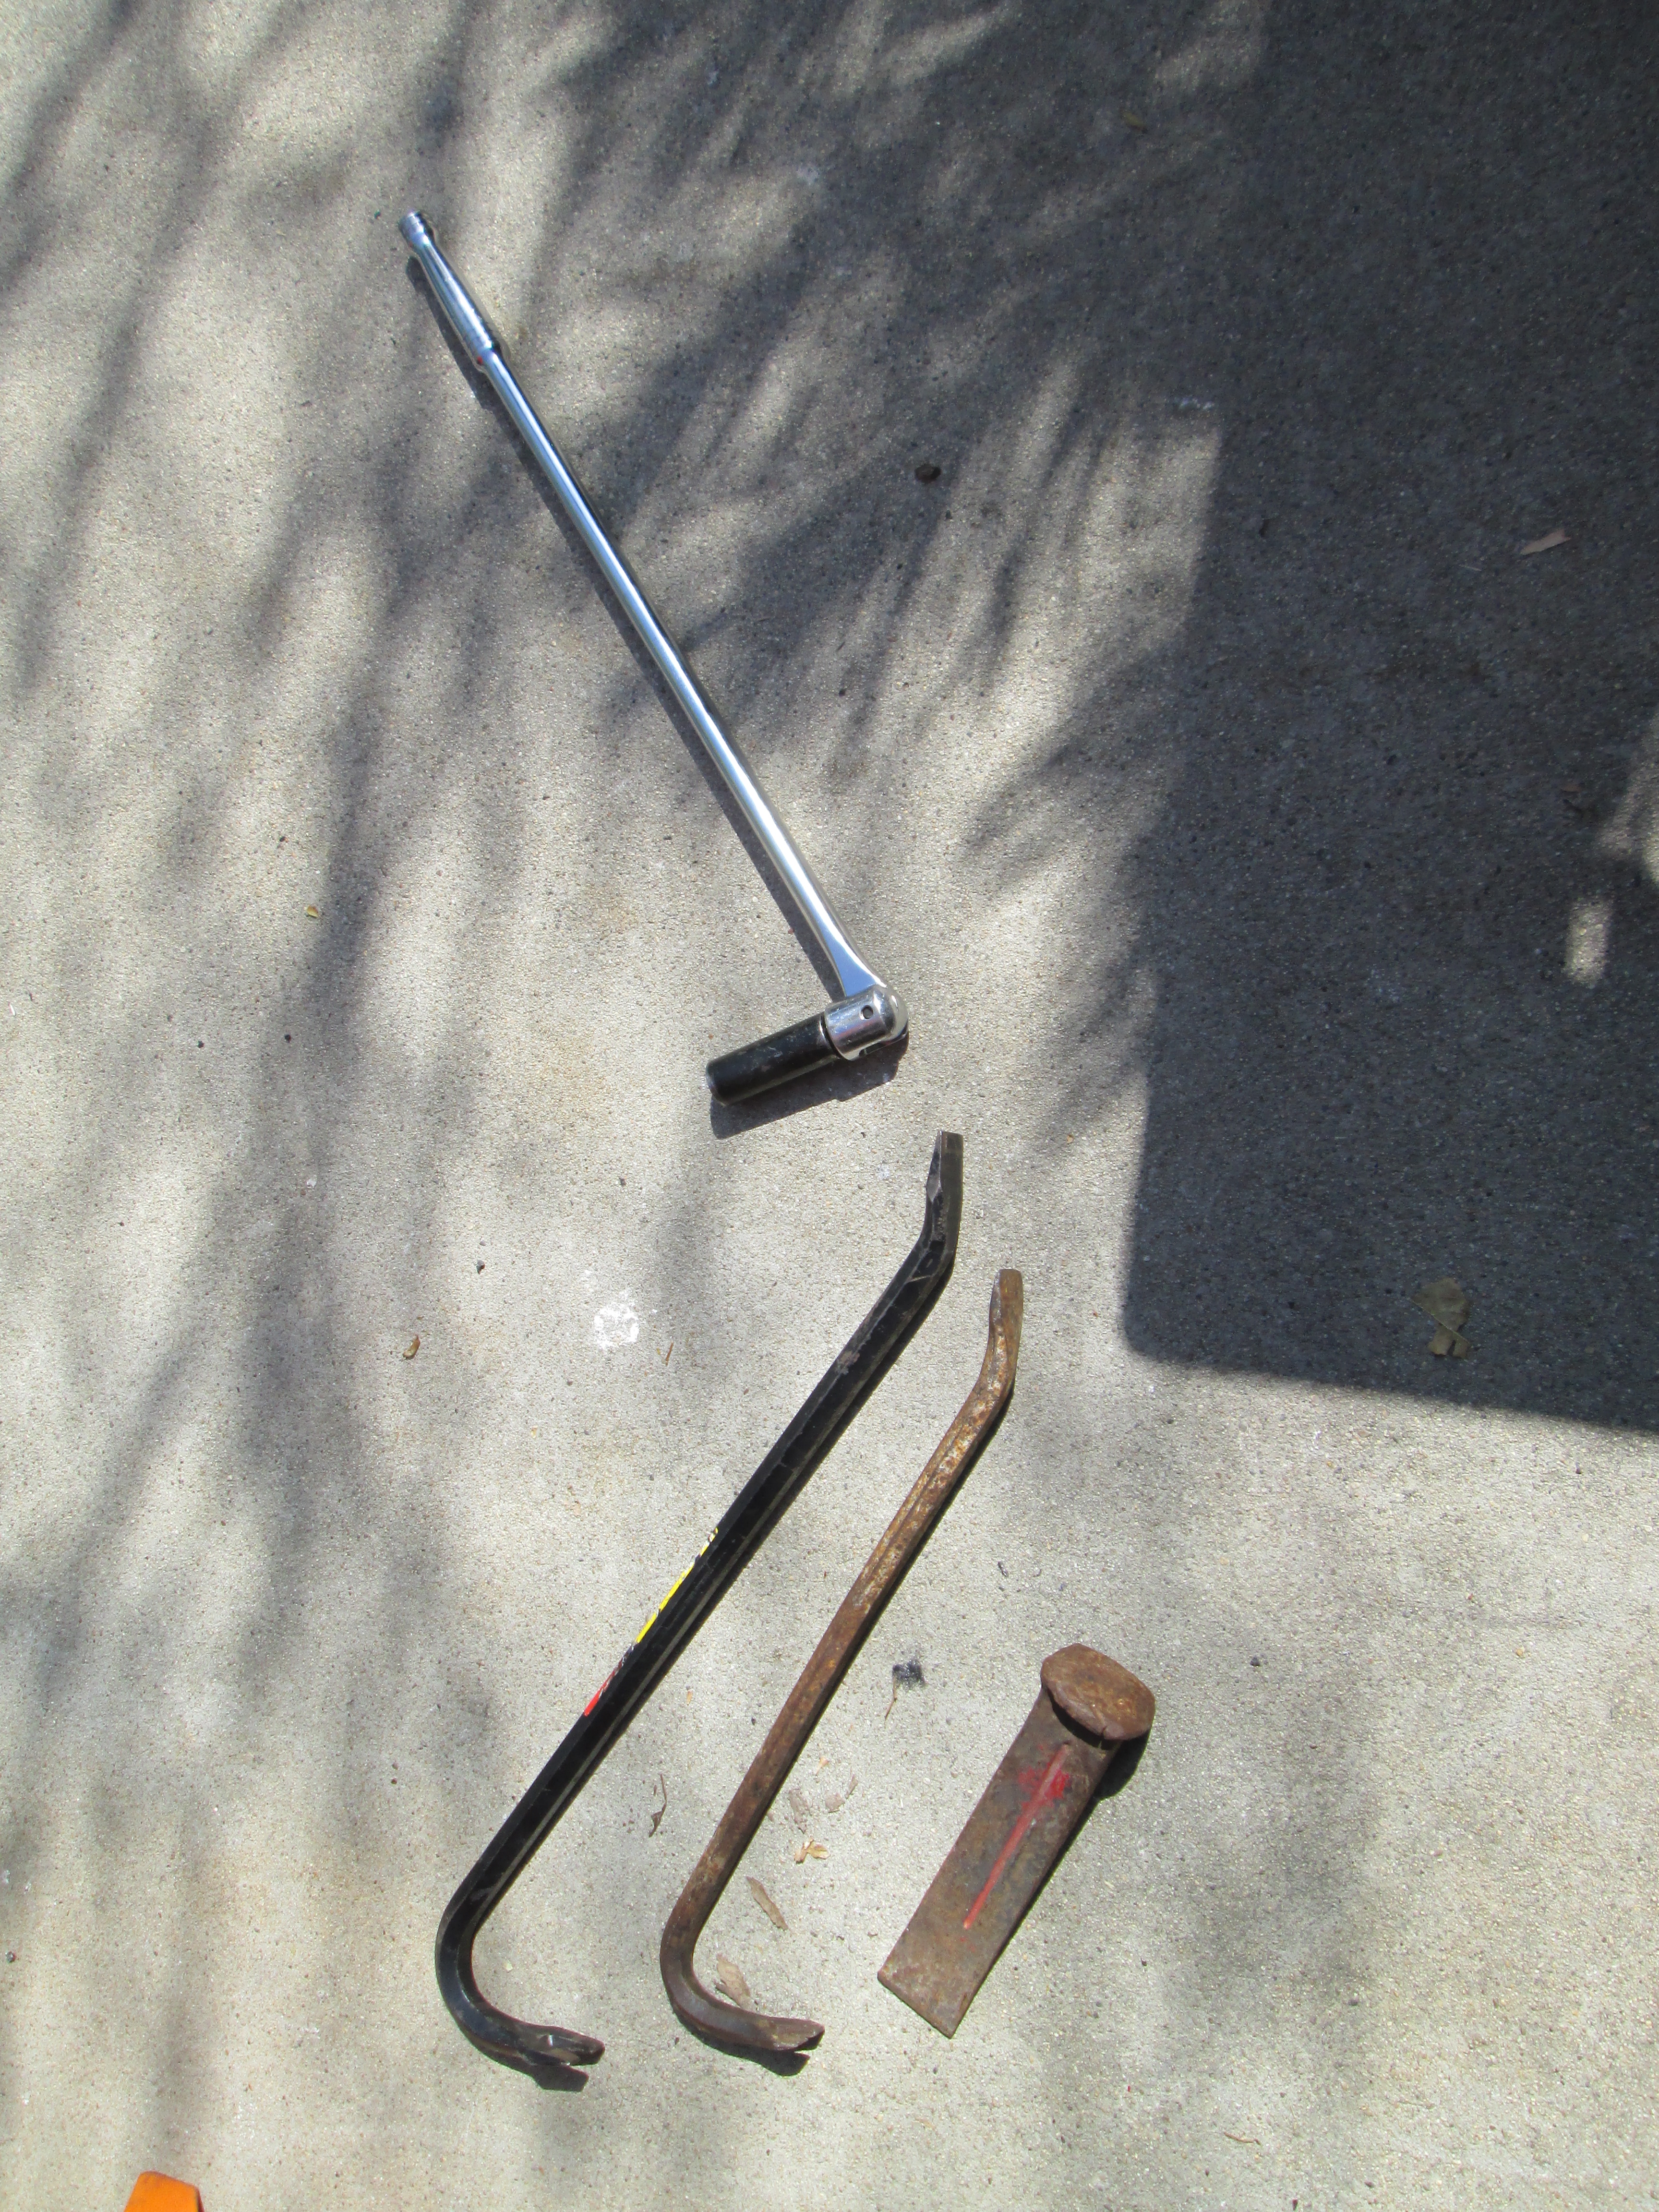
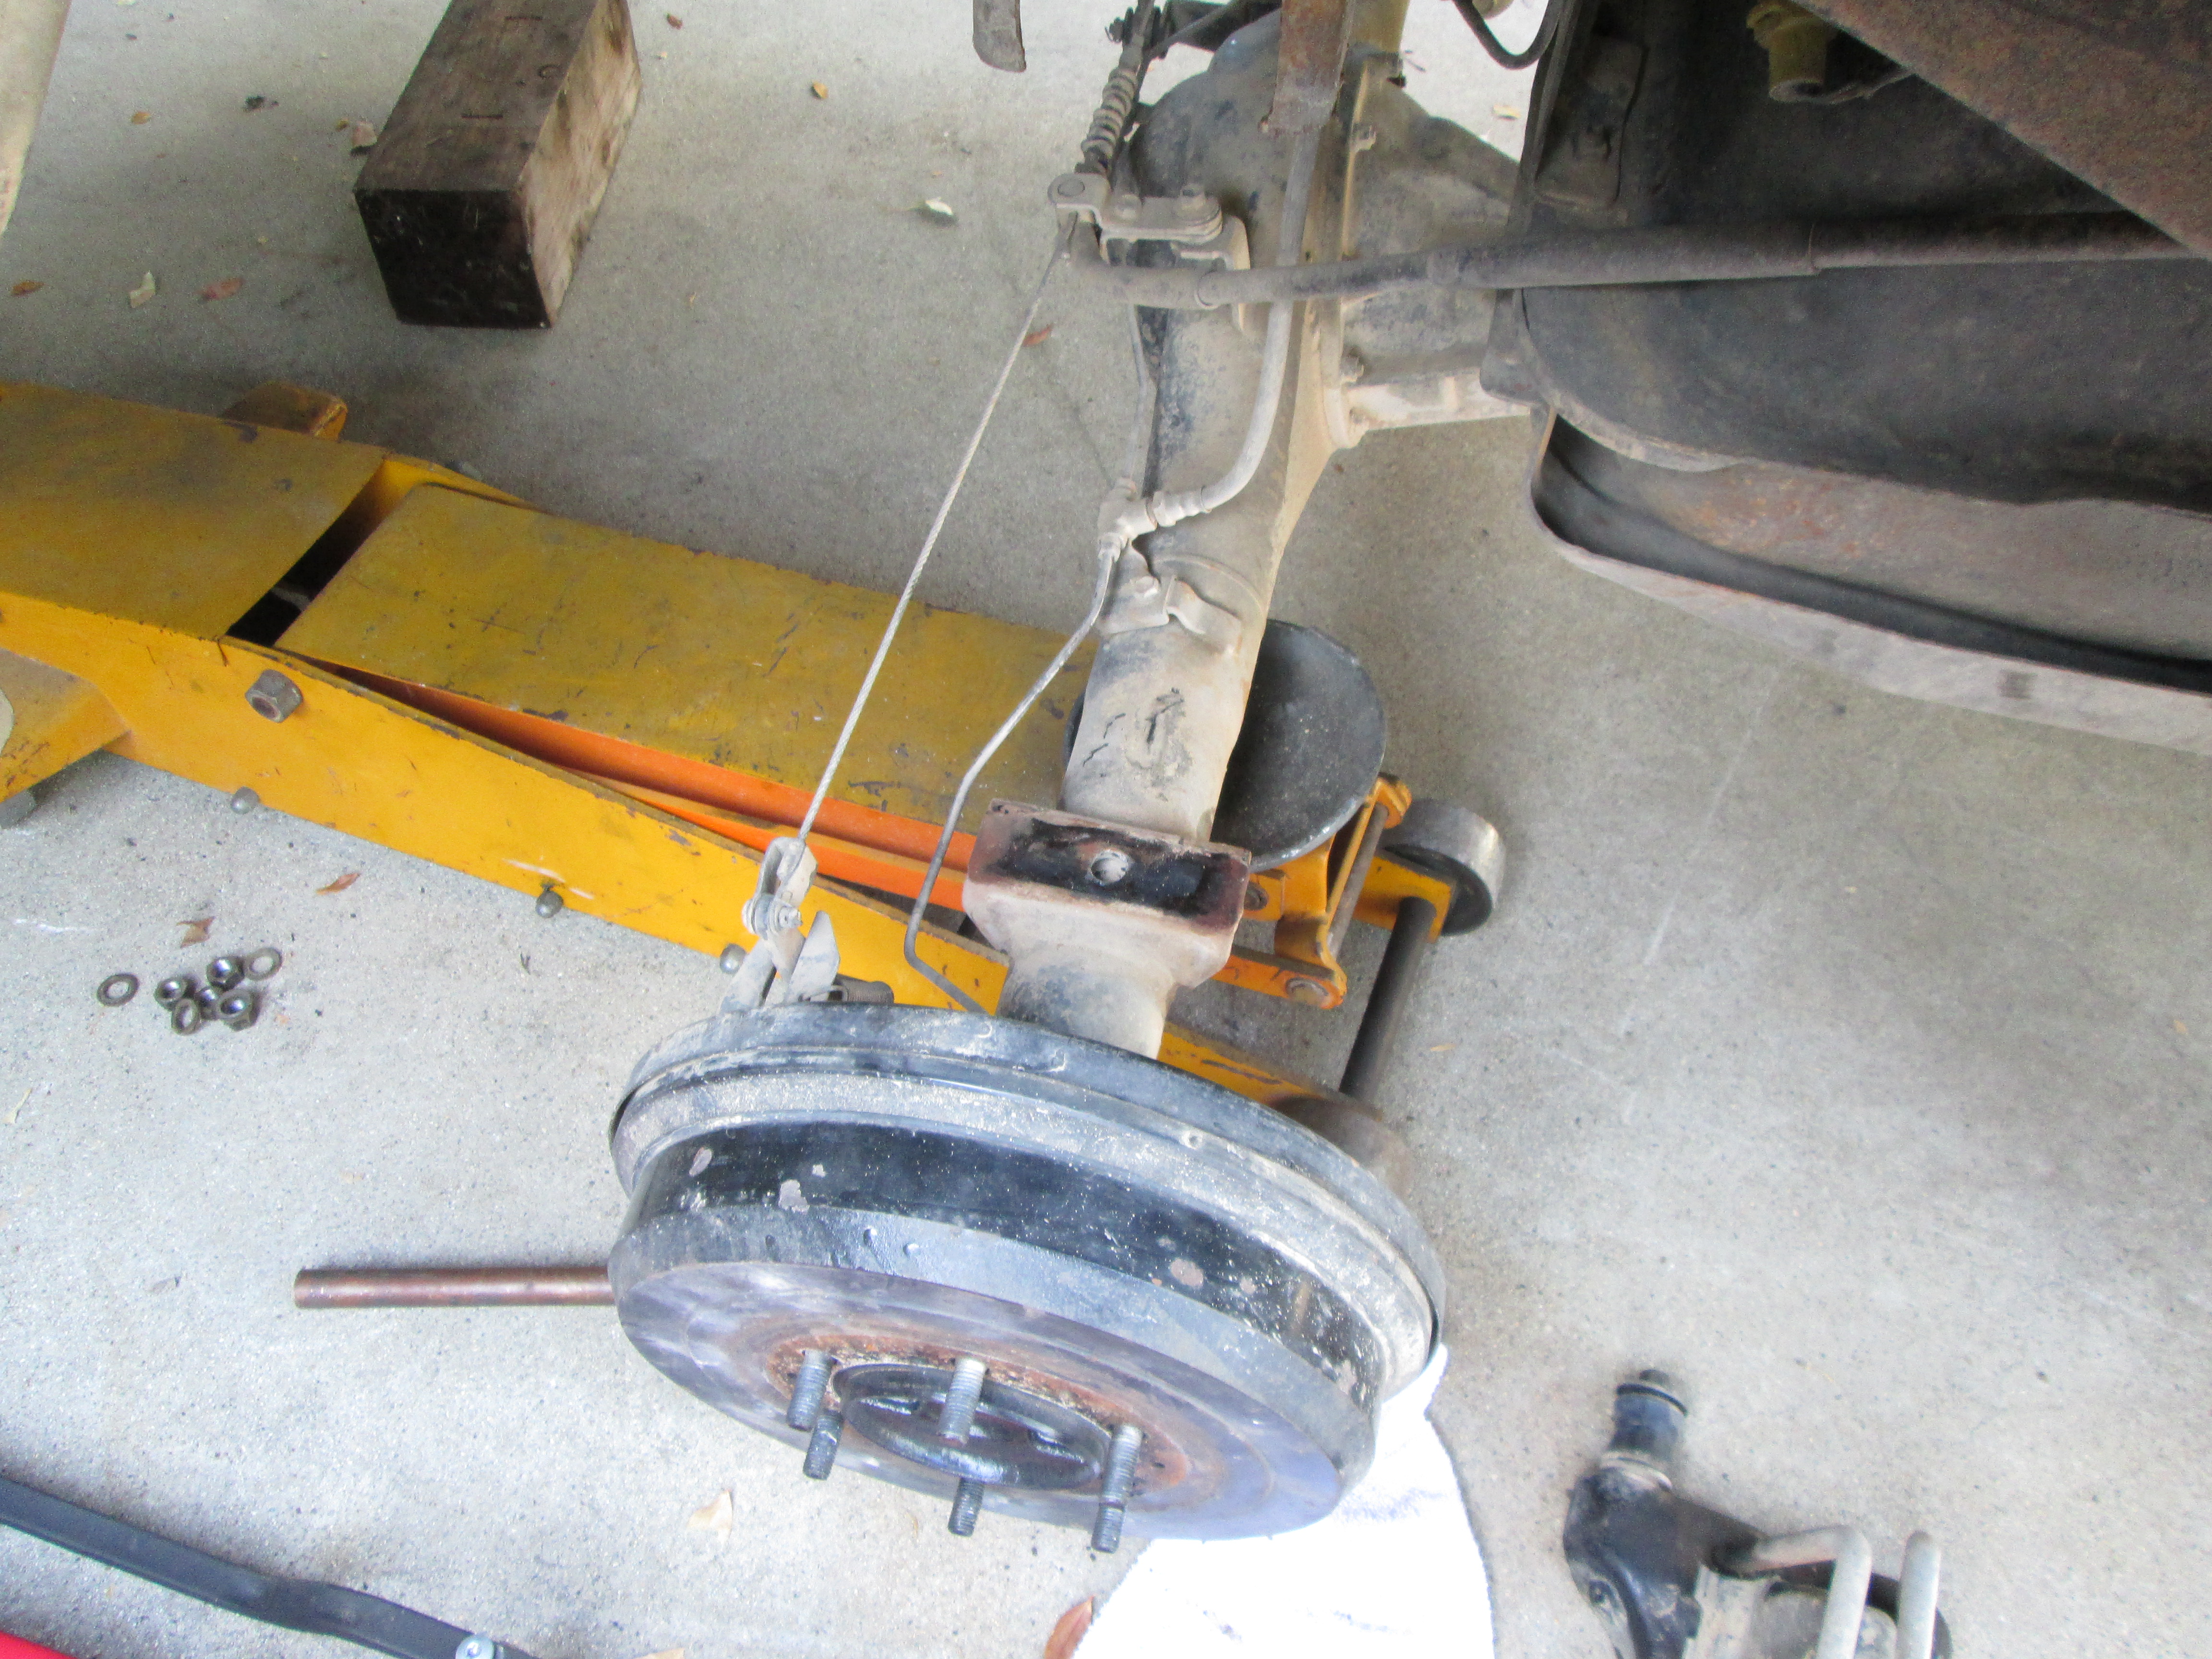
4. Now that you have the Upper Shackle Bolt free from the hanger....NEXT; Using a "17MM" Socket, remove the Lower Shock Bolt from the U-bolt and Shock Bracket... This will allow you to lower the axle further, while the leaf spring pivots on the front hanger, releasing all of the pressure you can from the Zuk Spring(My spring, being a 12"x125# Coil, it came free, but it was still frozen up in the bump stop tower. It easily popped free and rested again on the bump stop held in by the U-Bolts....) Since My Bump Tower has only the very end/plate cut off, .... I still had a lil budging to do to get it out... I chose these tools, pictured below(Nope, don't have a spring compressor haha)....and without much effort, I pried it out from the tower, then moved to the next step... (TOOLS)>>>
(As Ruined Adventures Noted; "Sceptics of the Zuk mod, worried that it might 'pop out', ..."... I too would note that, while my zuk mod is INSIDE the bump tower... it still gave me a lil bit of work, even at full articulation, WITHOUT the shock limiting at all.... Those things may some day BREAK? Who knows... But pop out? Doubtful... I know it's happened, but I would guess installer error or CRAZY airborne feats to be the culprit on that ONE instance I've seen that...out of HUNDREDS I've read!//// Also noting that this is why I chose what I felt was just a LIL more secure method to 'FIX' the Spring in place. HOWEVER; I DID notice that the spring has dug into the bump stops slightly... NOTHING major... but nothing I'd like to continue. SO, I DO recommend finding one of Zuks write ups on doing a coil mounting ring?)
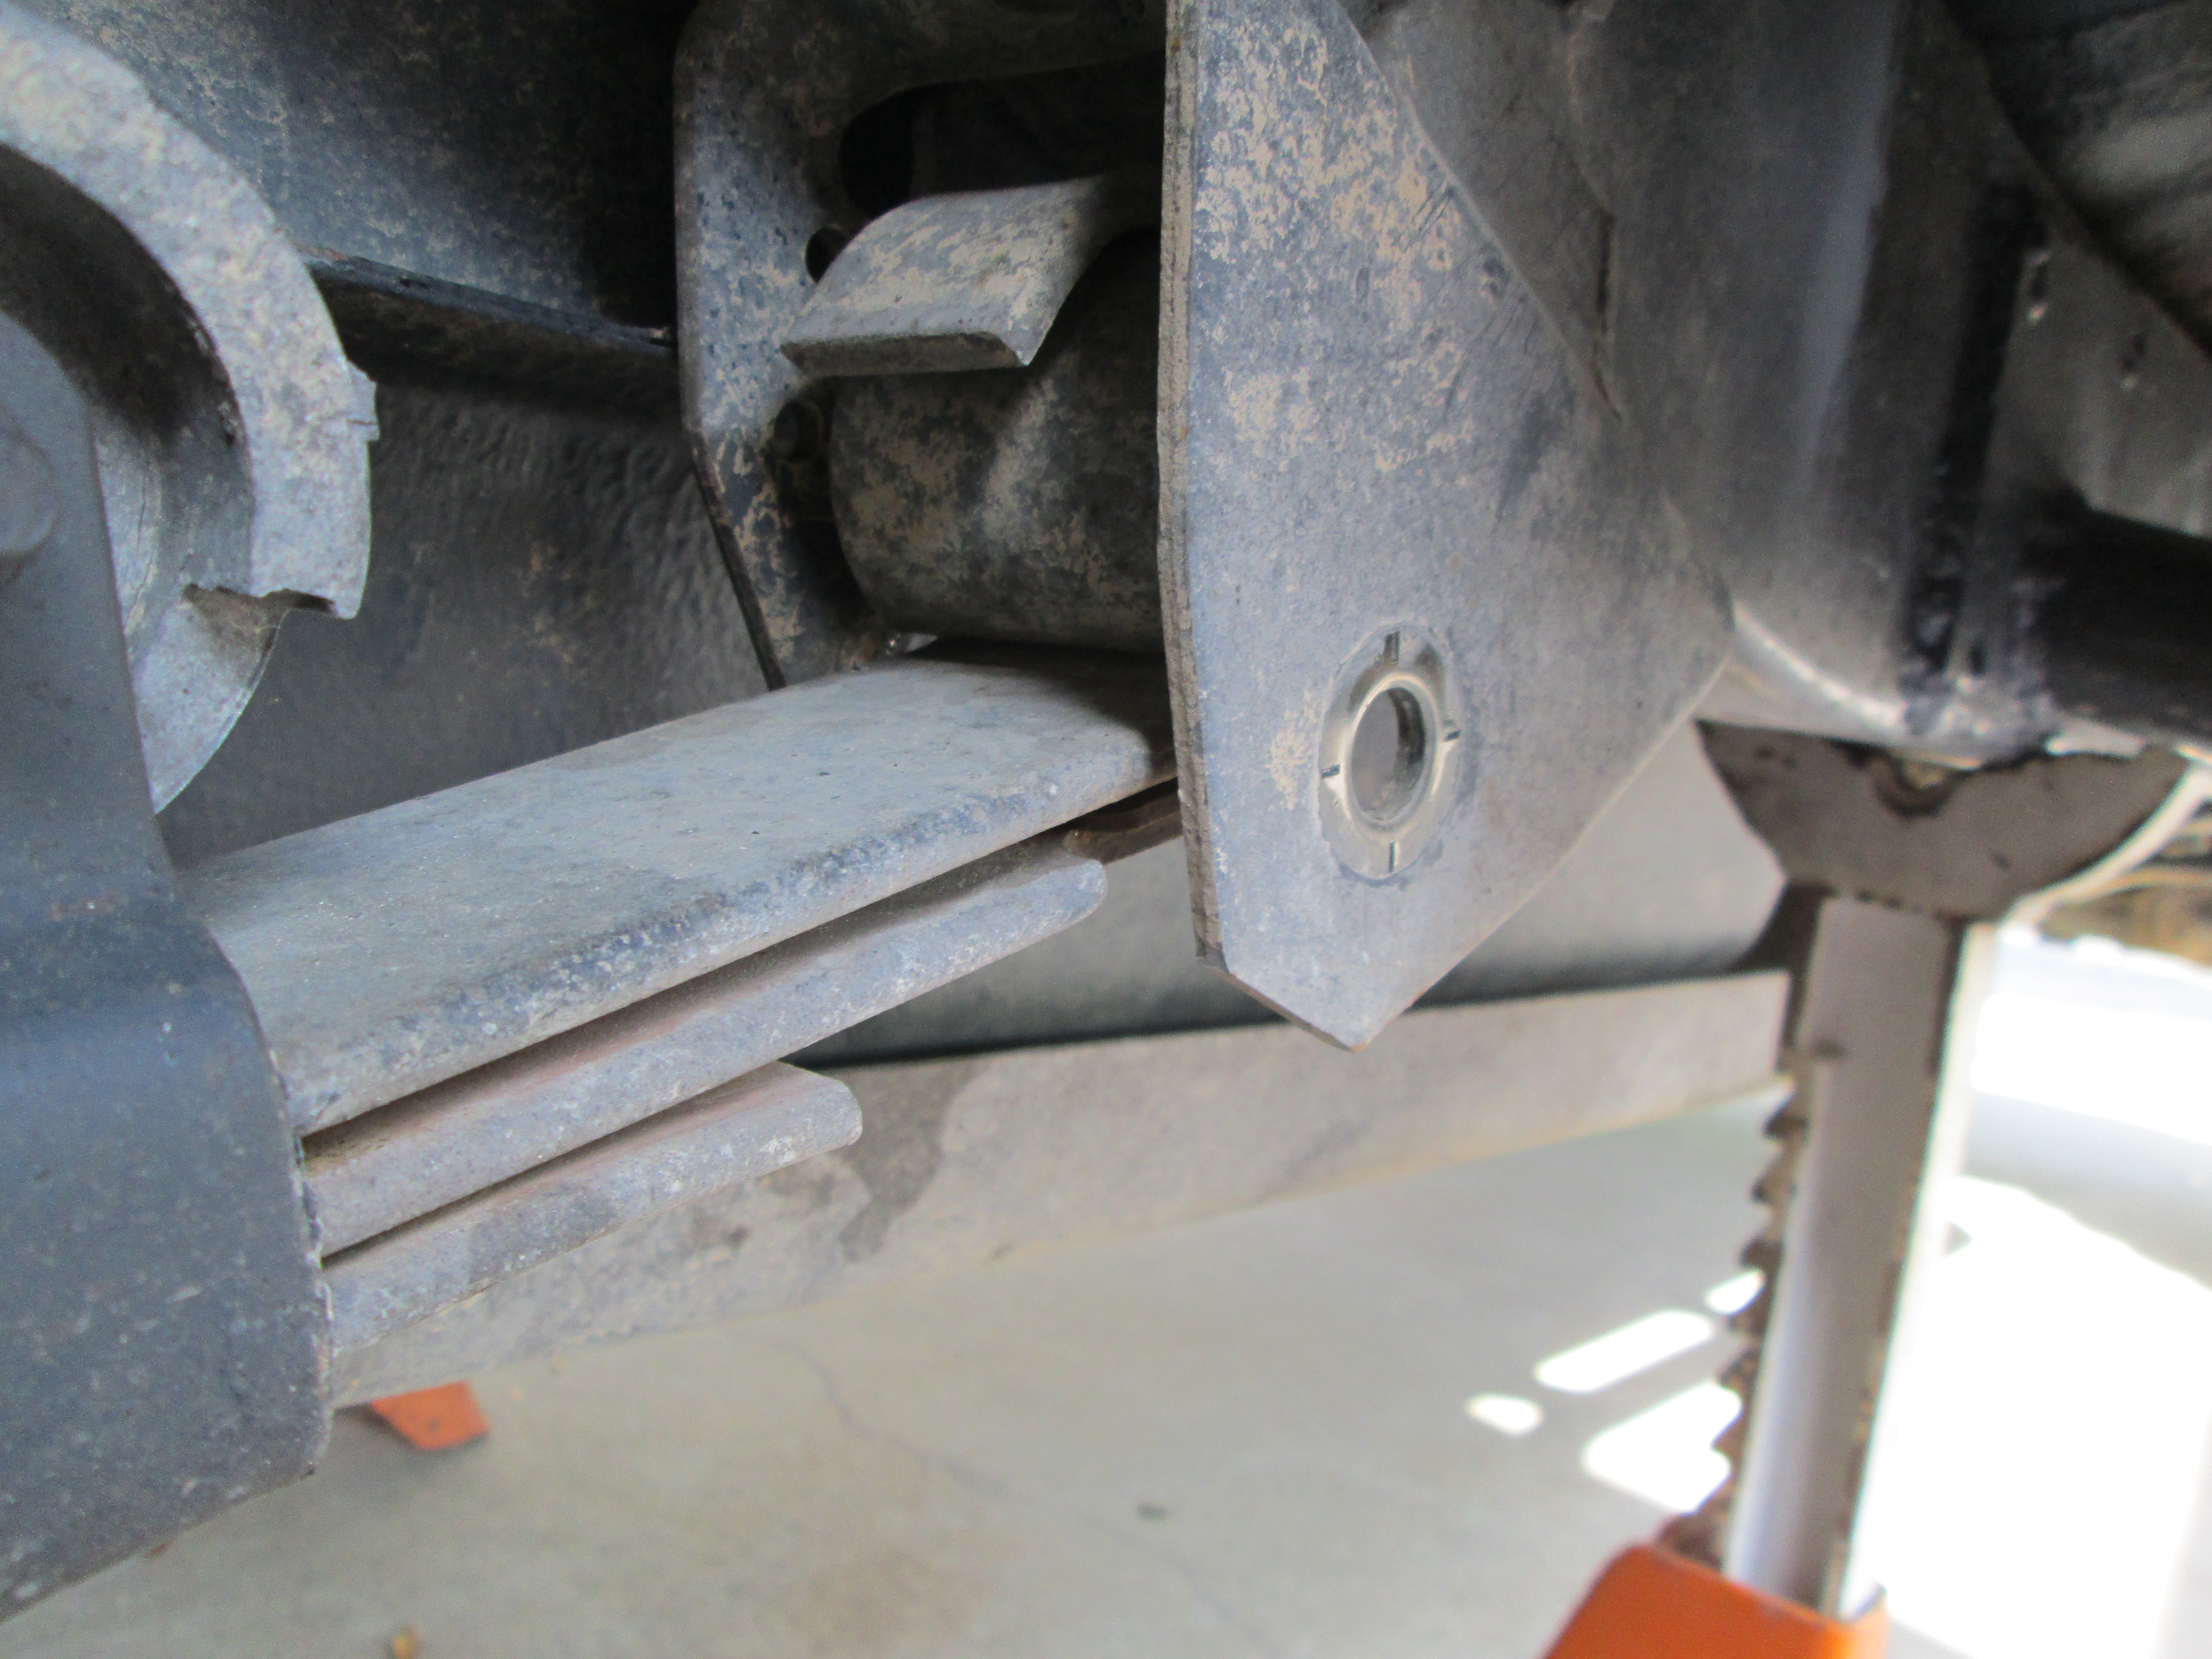
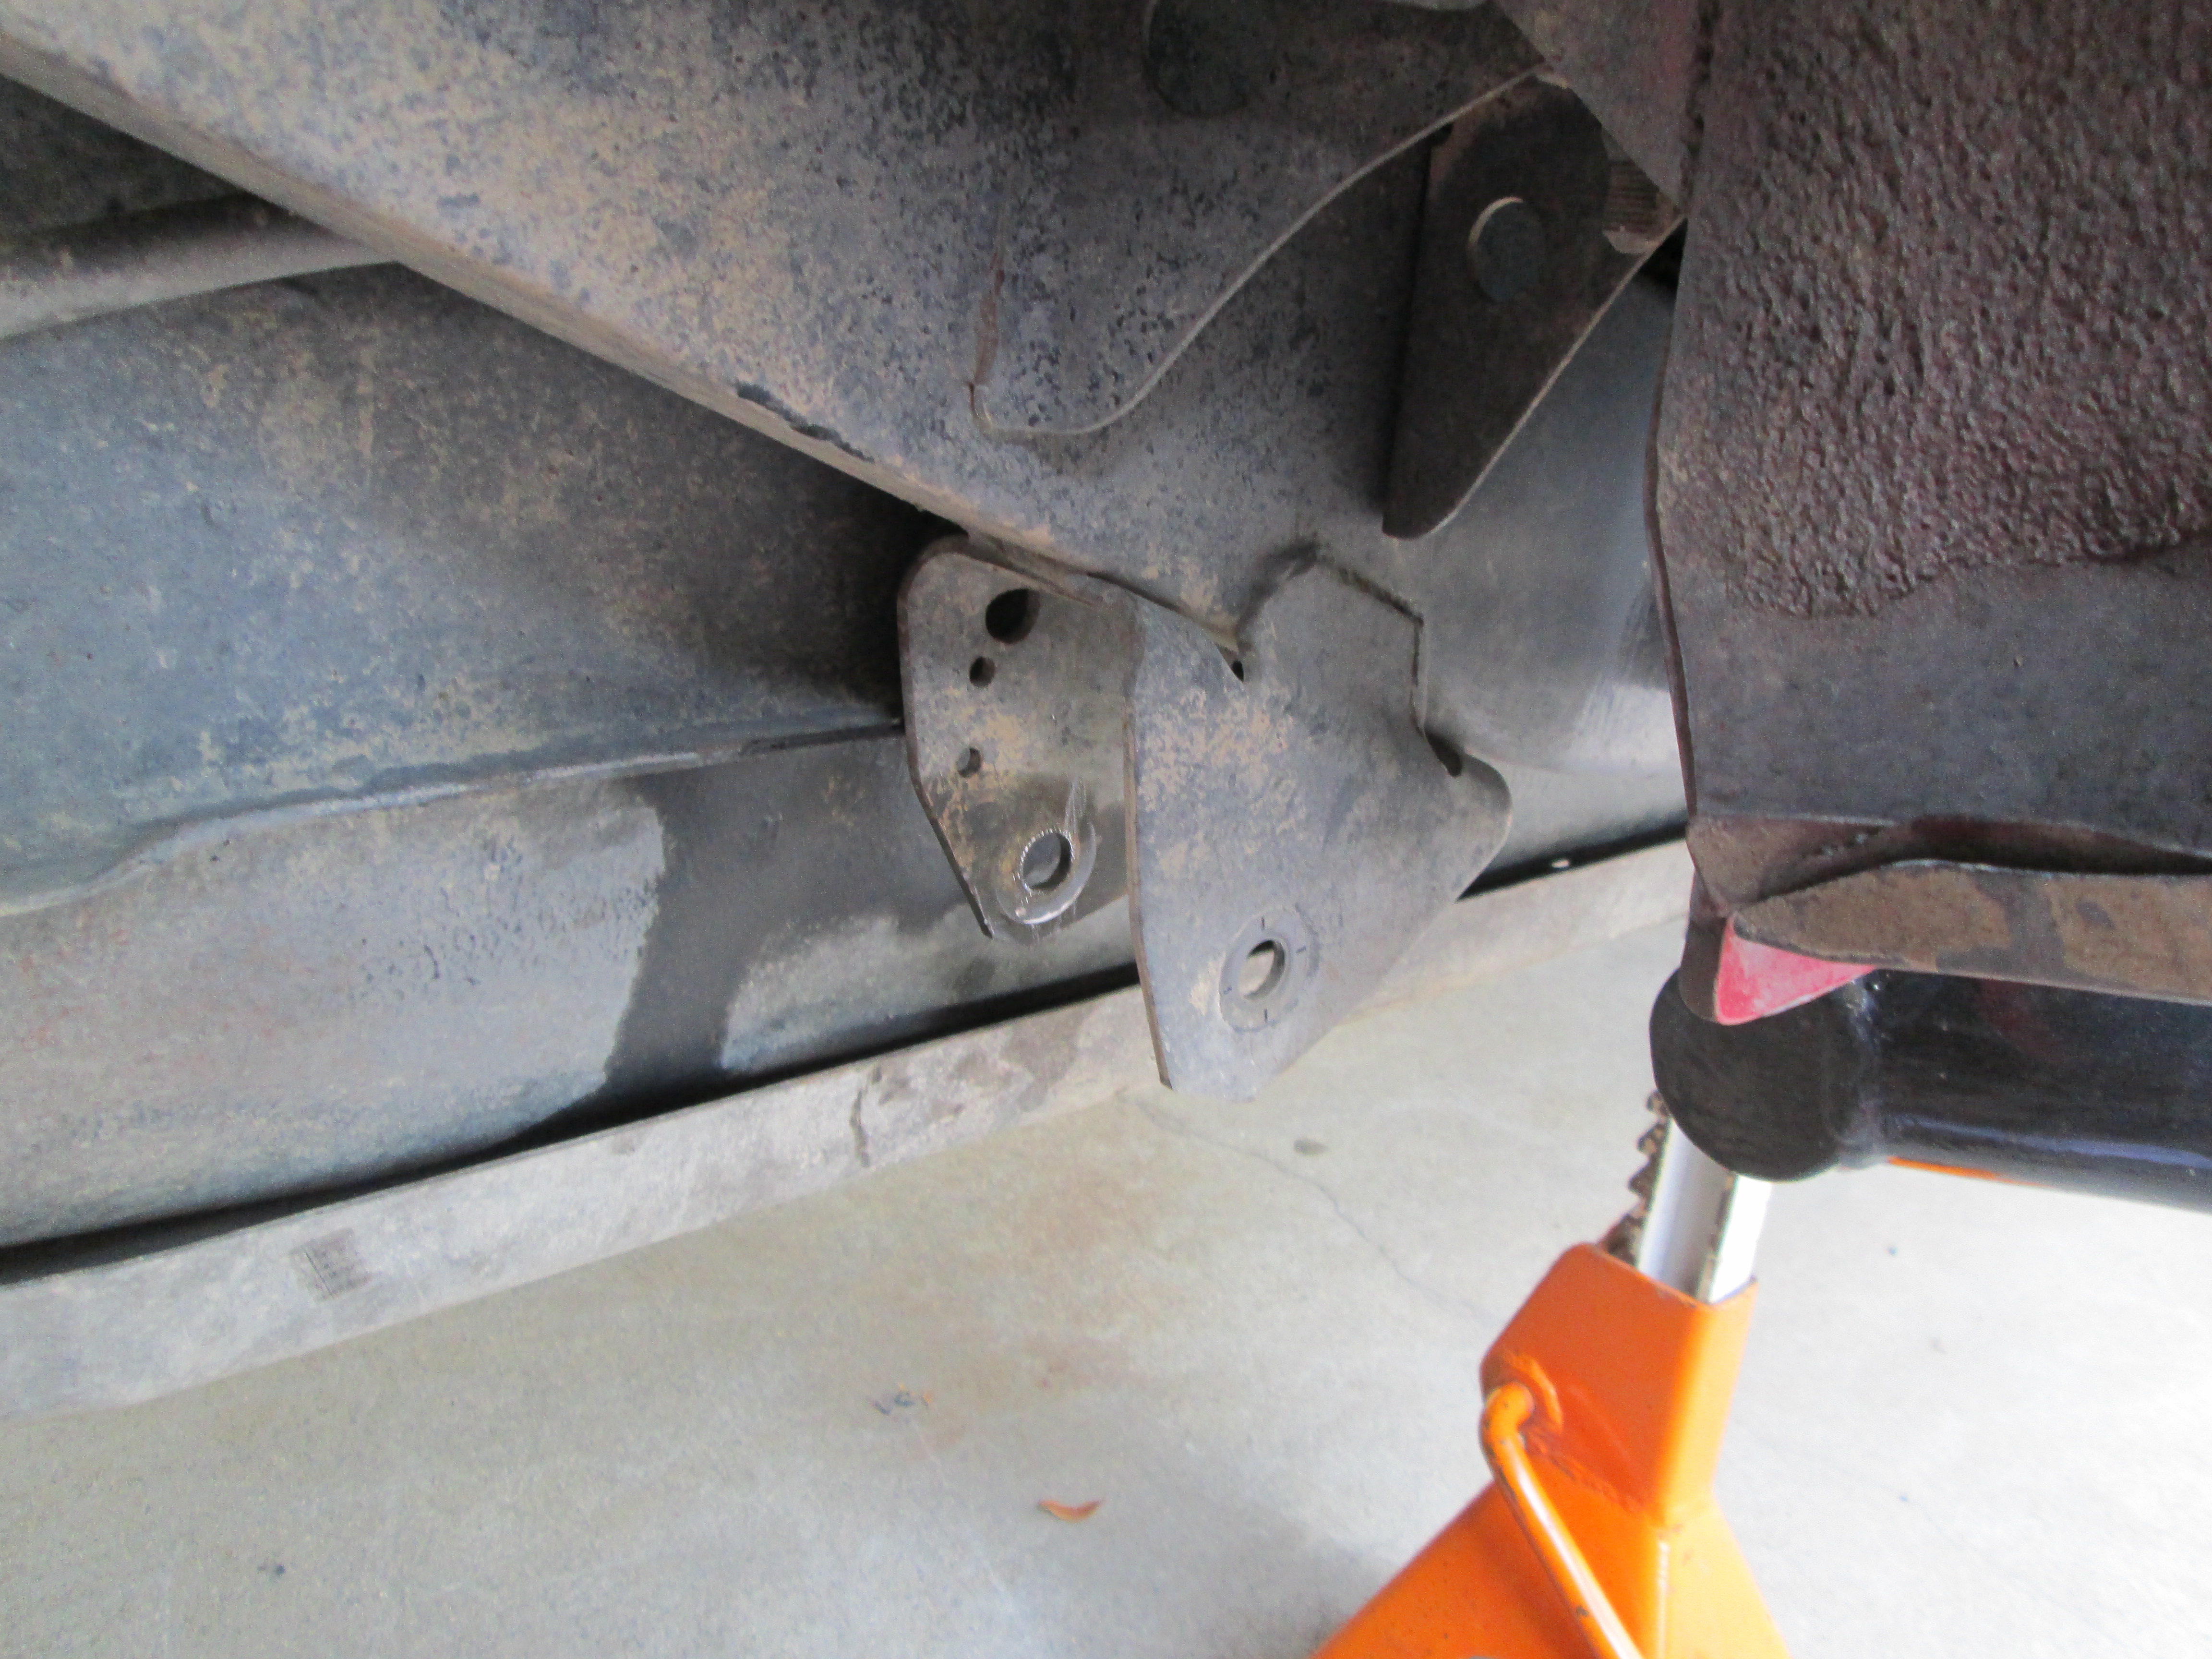
5. Now remove the "19MM" FRONT HANGER Nut and NON-FIXED Bolt, also "19MM"..(do not lose this bolt! there is no replacement in your OLD MAN EMU CS009R Leaf Spring kit).
6. Now that the leaf pack is free from the hangers, jack the axle back up to more easily get to the "19MM" U-Bolt Nuts>>>>
7. Once you've removed the U-Bolts, bracket and Bump Stop, CAREFULLY, lower the axle and remove the leaf pack WITHOUT DAMAGING/CRUSHING/RIPPING IN HALF- THE BRAKE LINES/E-BRAKE CABLE! ....Removed>>>>>
8. Now you want to GREASE EVERYTHING on your Old Man Emu Leaf Pack and EVERY BUSHING, thoroughly. This is the time you would assemble your greaseable shackles.
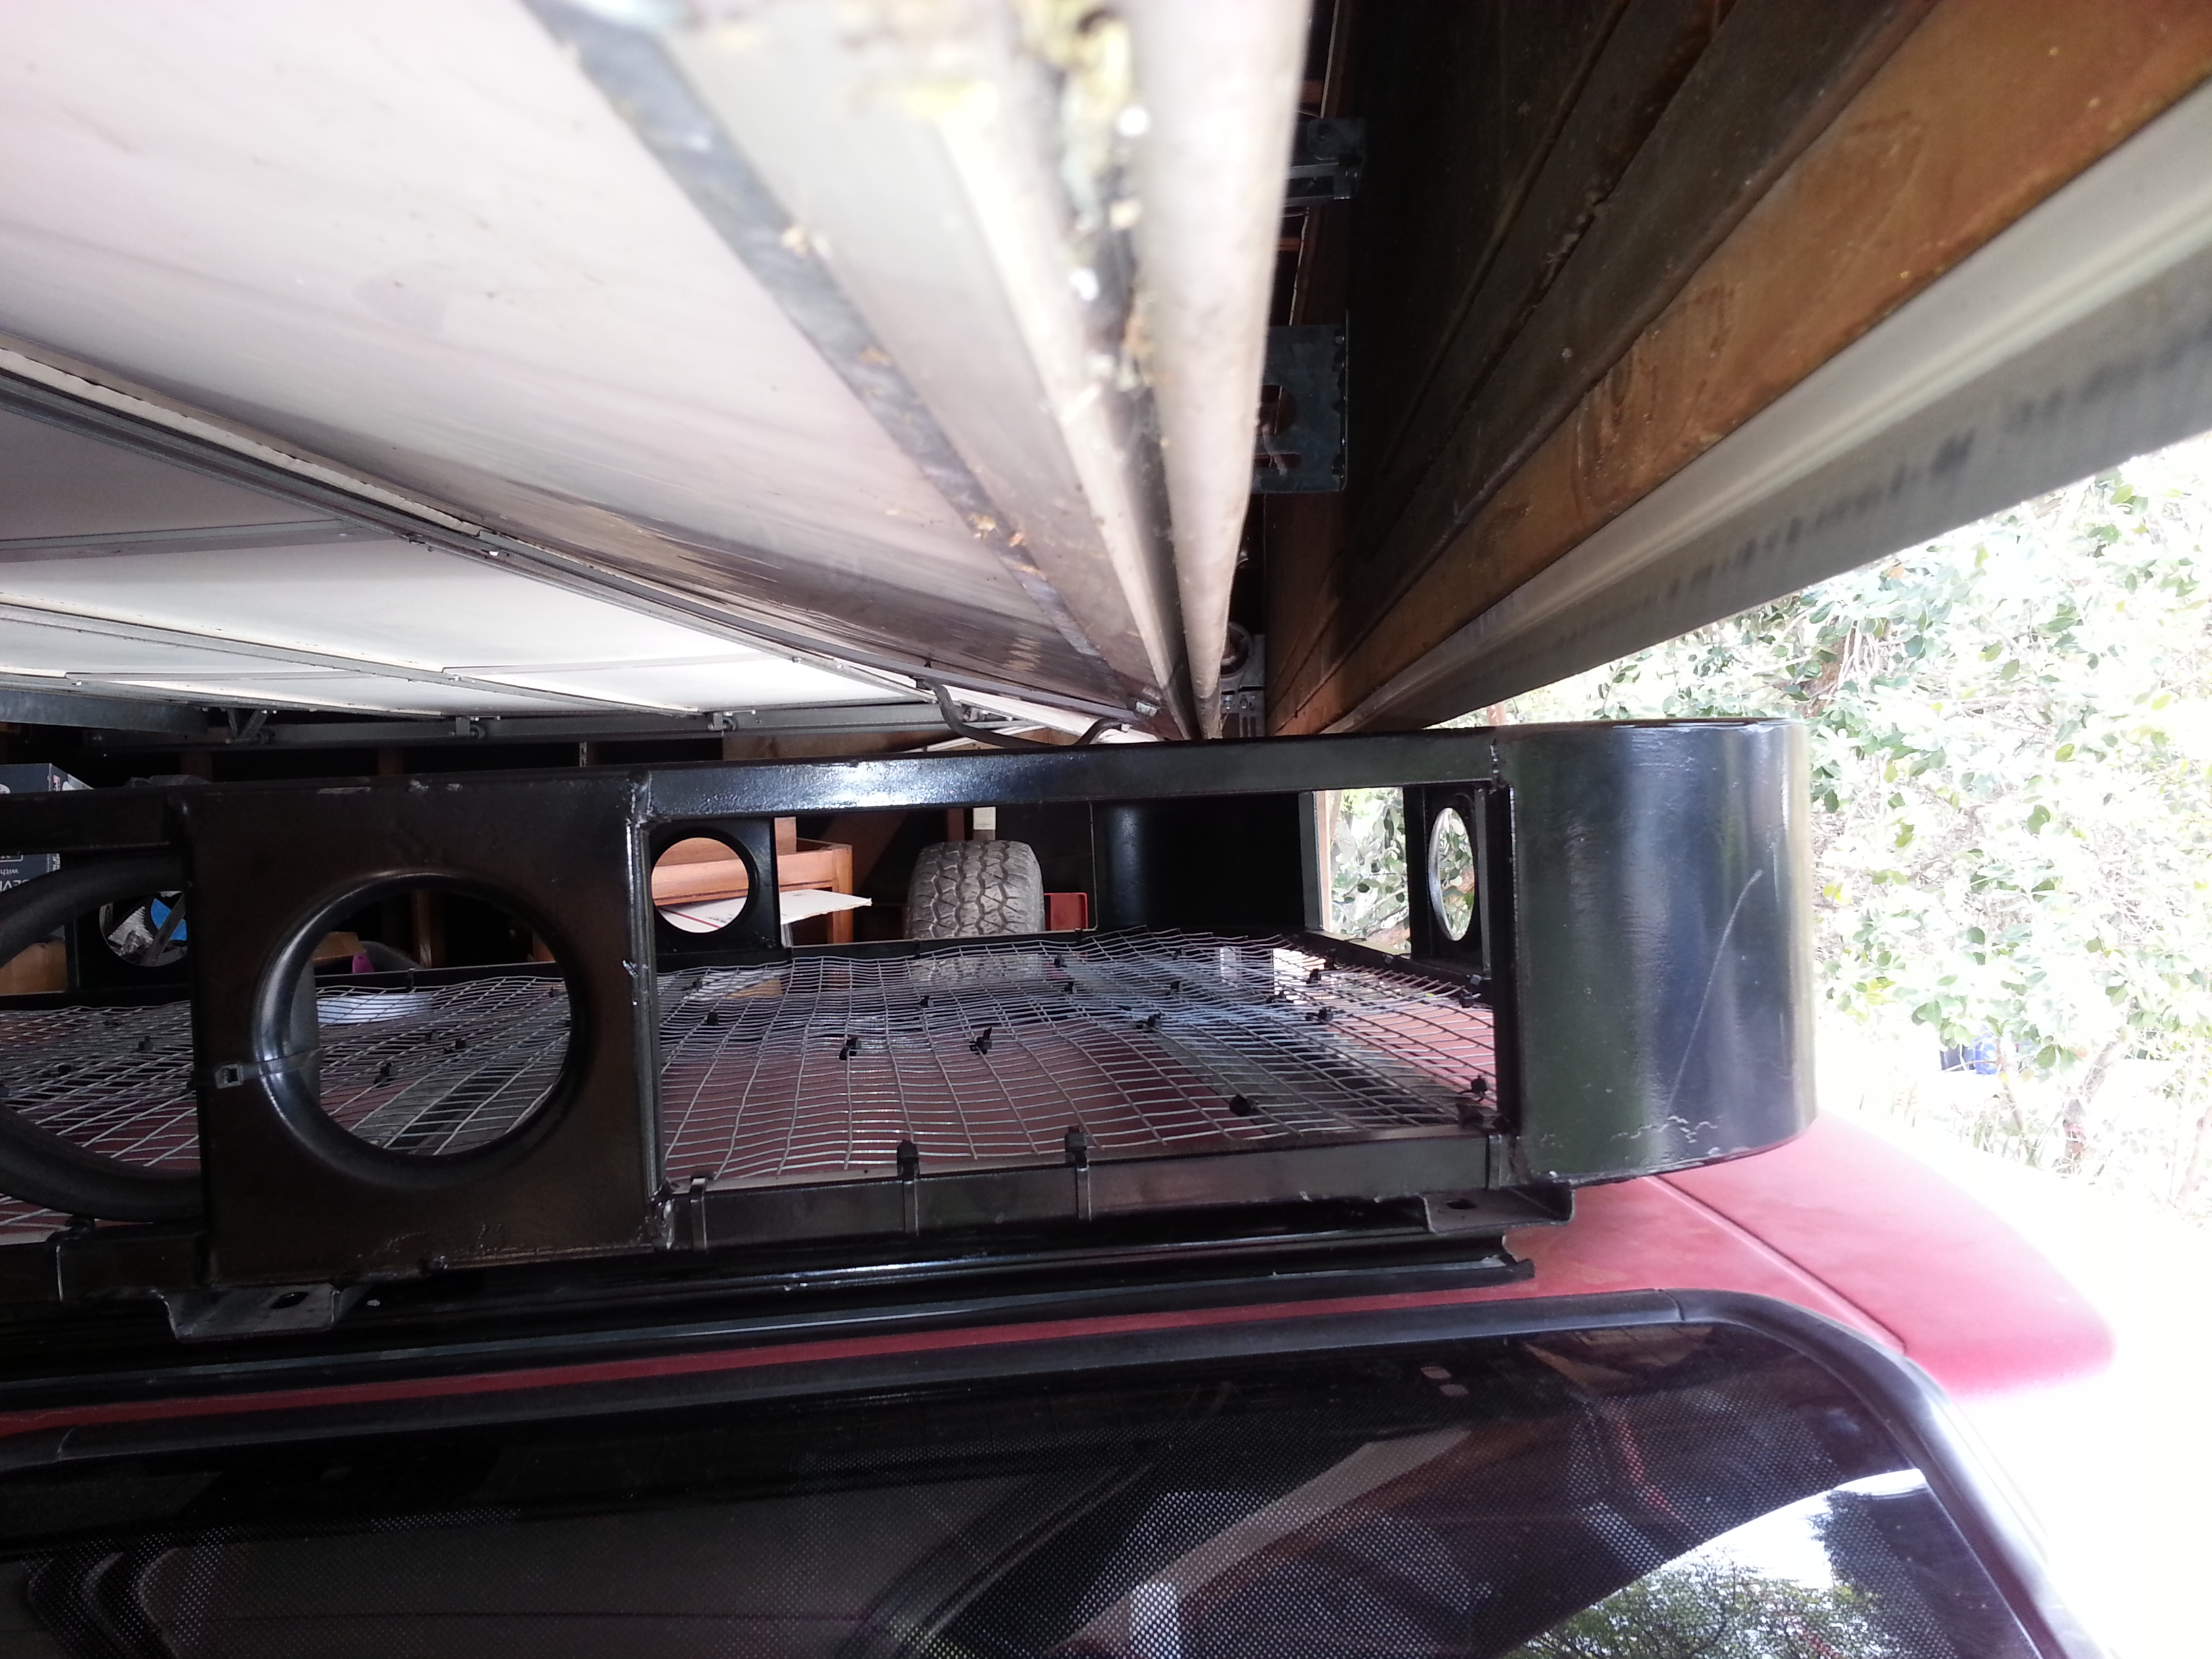
(THIS IS WHERE MY FUN BEGAN! haha.... I ordered my OMEmu CS009R Kit from 4Wheelparts, over the phone. While speaking with the ARB-USA Rep, weeks before, I had decided I would just stick with the Original Packs, maybe grab some greaseable bolts from 4crawler... So I didn't have the part number... The guy on the phone at 4wheelparts found the 1.5" greaseable shackle kit and said it would likely be there in a couple days. A MONTH later, the order was complete because my Daystar product/kit came in. I pick it up, take it home.. Long story short, as I was going to assemble everything, I took a closer look at the shackles... They were NOT EVEN CLOSE to what I ordered. Part number on the box? RIGHT ON, lol... What I GOT? 3" Wide Leaf, ?" lift Shackles with 27MM bolts and nuts... The bolts fit the OMEmu bushings, shockingly, lol... And my hanger... BUT, the shackles being set up for 3" Wide leafs... while ours are 2.25".... SCREWED! lol. There were no sleeves, not 18mm bolts as the kit said, .... BUT, in the end, it's a good thing! AS IT IS, my lift came up another nearly 2" from what I had with the ZUK.. Maybe 1.75"... Obviously the OMEmu's will settle.... But I nearly tore off my garage door heading in, very SLOWLY, THANK GOD! lol...[The Con-Ferr!] ... I adjusted the Garage door to open all the way, and IT BARELY fits. I will get pics, tomorrow, then edit this and post a pic )
Here is Ruined Adventures posting on the greaseable shackles(I will likely be adding these/or others, with 0" added lift, for now, at a later date).....
*************************************************
An Intermission before assembly to share another 'OOPS', regarding a "I did NOT NOTICE THAT, BEFORE" moment! lol....

* When I went to remove the driver side front hanger bolt/pin.... I realized as I began to free it, .... it was heading RIGHT FOR THE SLIDER! hahaha..... So, after trying everything to get it free...
* I had 2 choices.
1. CUT THE EDGE OF THE SLIDER, after Socal85's BEAUTIFUL WORK? HELLLLLLLLLLLLLLZ NO! lol.... OR, ....
2. Cut the bolt and QUICKLY find a replacement!
* WELL, wouldn't you know.... O'reilly? NOPE! Napa? CLOSED on Sunday ... Pep Boys? NADA! Lowes and Home Depot? NOTHING OVER M12.....
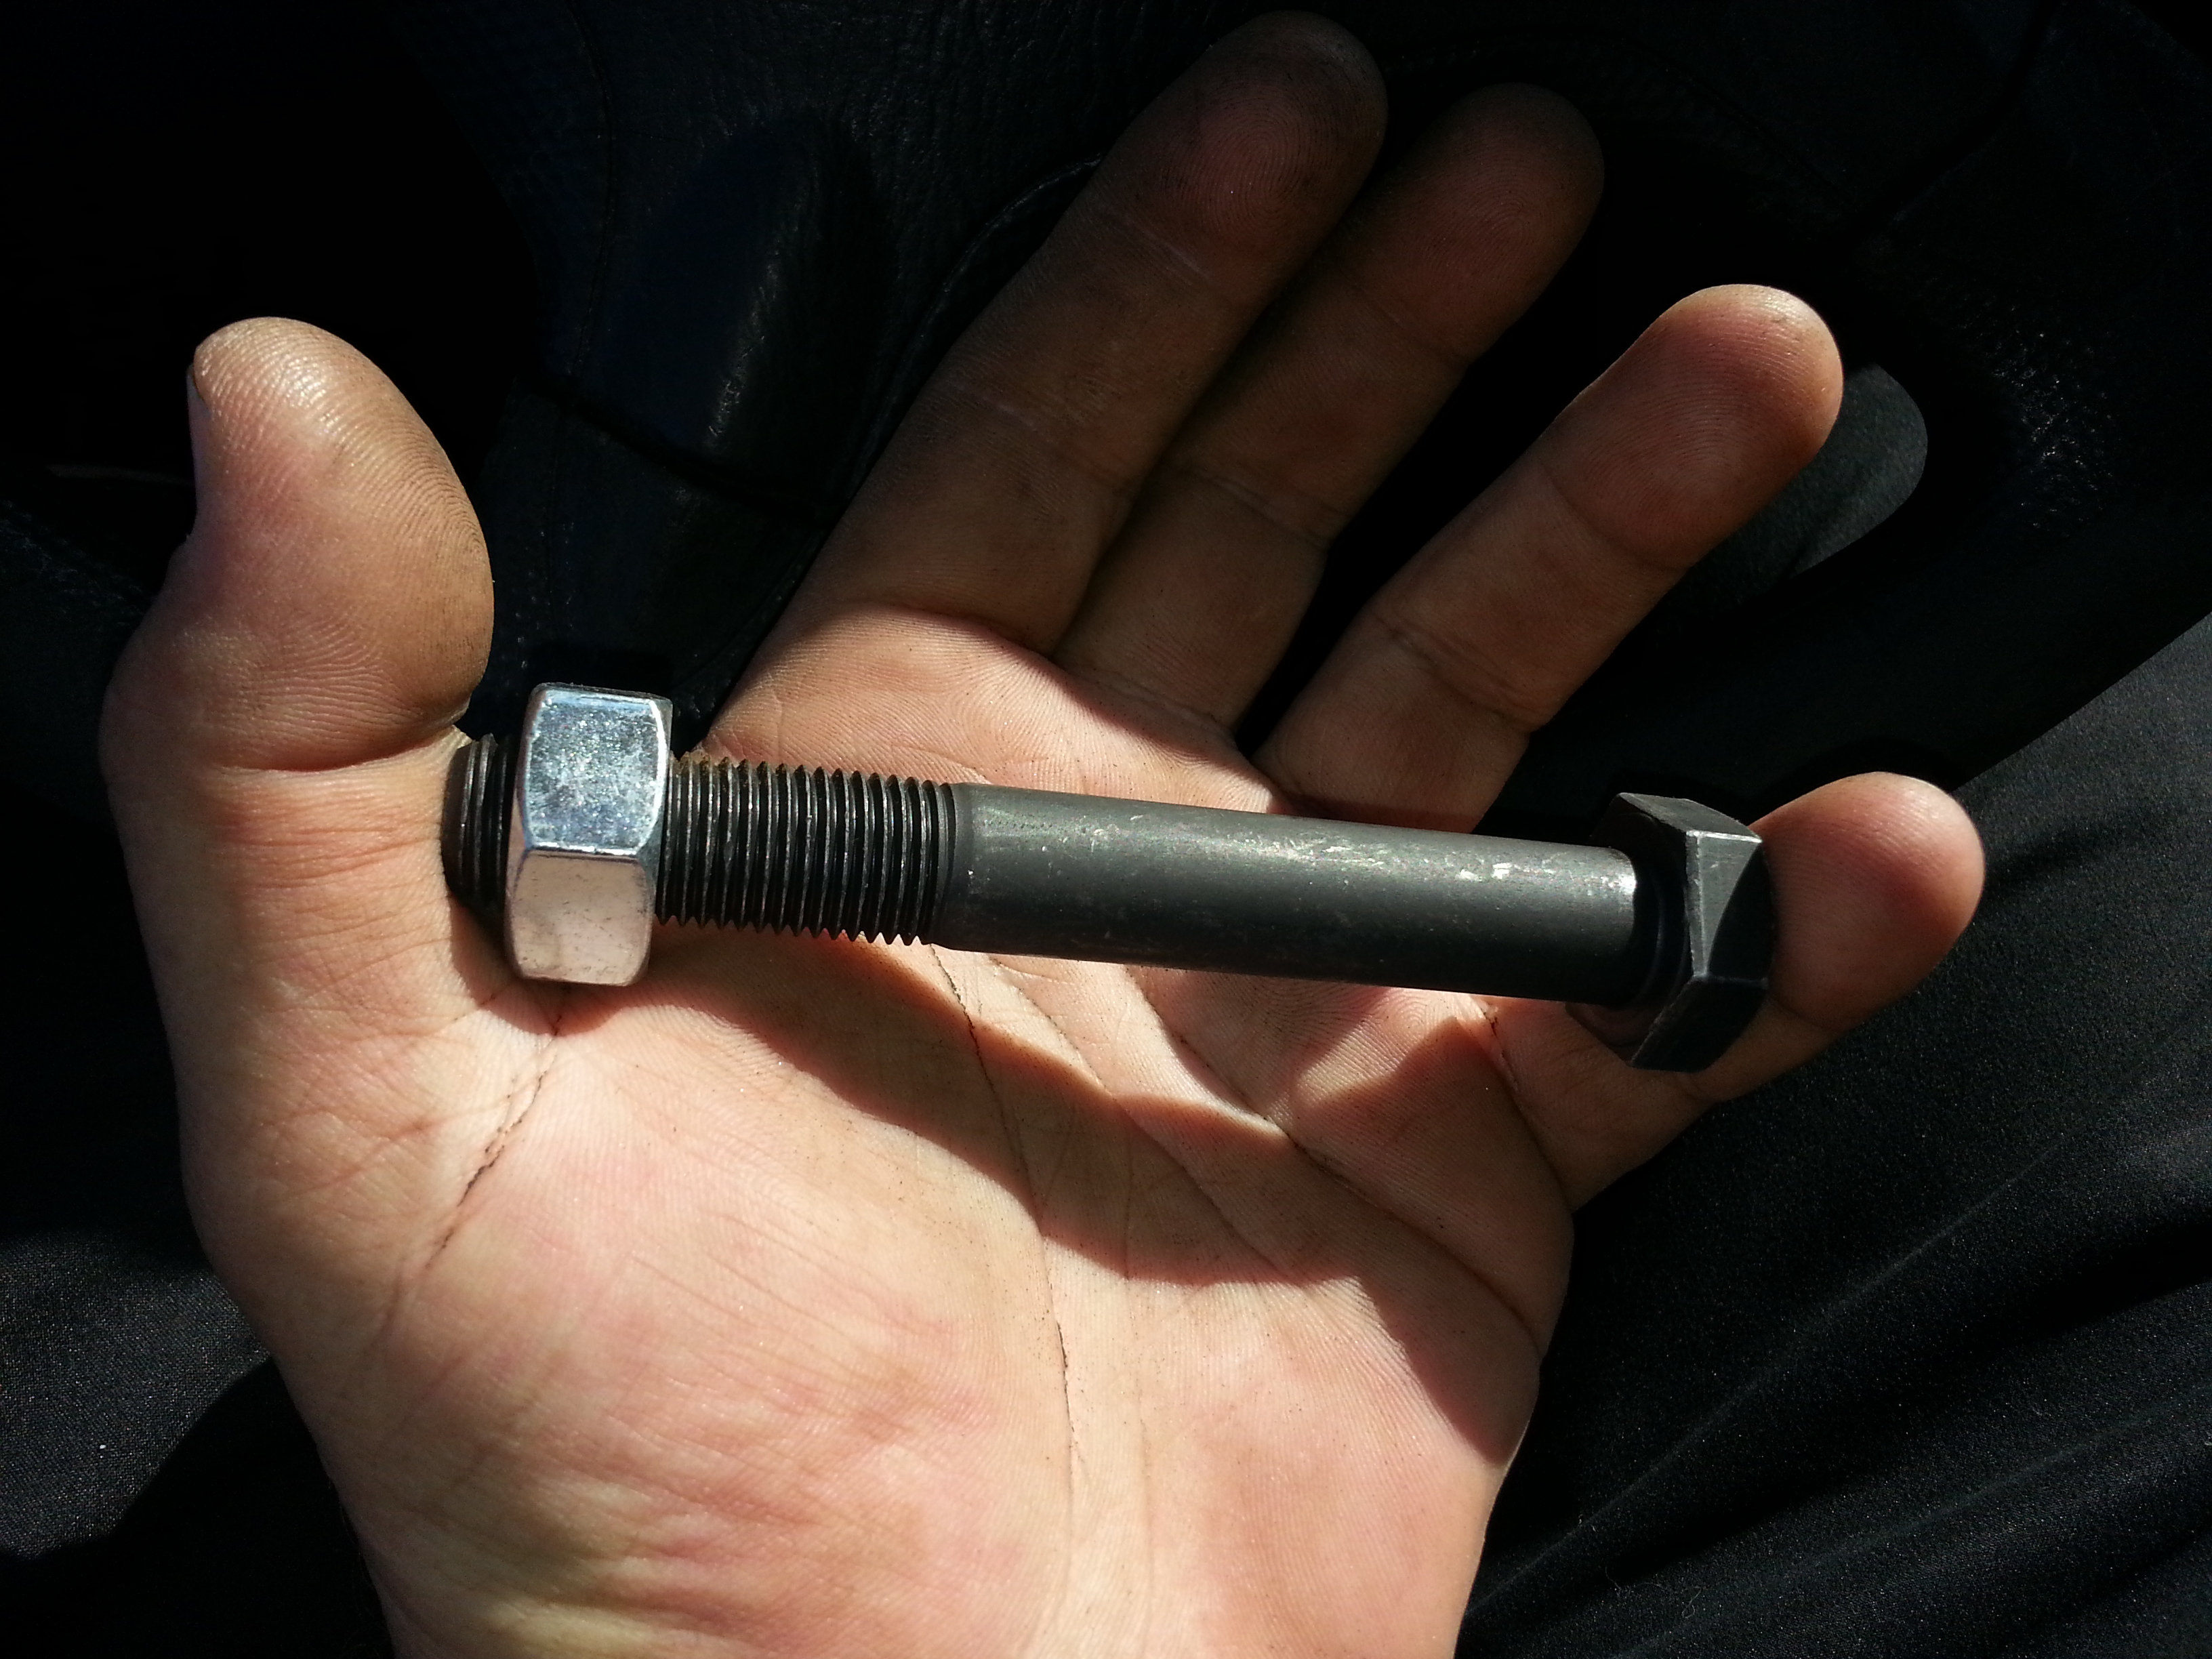
This bolt is an M14-1.50-100MM bolt.... With a round flange head beyond the Hex portion... I'm guessing this aids in pressure, like the Crank Pulley Bolt?.....
My LAST STOP, at 4:50PM on Sunday, 10 Minutes before they close......
Used to be a famous 'EVERYTHING you can't find elsewhere' store, called "Lovelady Hardware Co."..... It's new owners, and MAN, I'M NOT KIDDING.... Between Ian Bosco at Lowes(Redeth knows what I'm talkin bout!).... and this place, .... I COULD NOT have been treated better! This guy hear me asking for something unusual for my 4Runner... He looked a lil deeper than the guy helping me, and VOILA, ...an M14-1.50-100MM- GRADE 10.9 bolt!!!!! >>>>
Now, I could head back, CUT the freakin pin-bolt out >>>
>>>
PROBLEM 2? lol.... The muffler is VERY close to limiting me in getting a drift or something in there.... So what did I dig up from that first motor? ONE SOUVENIR I kept.....
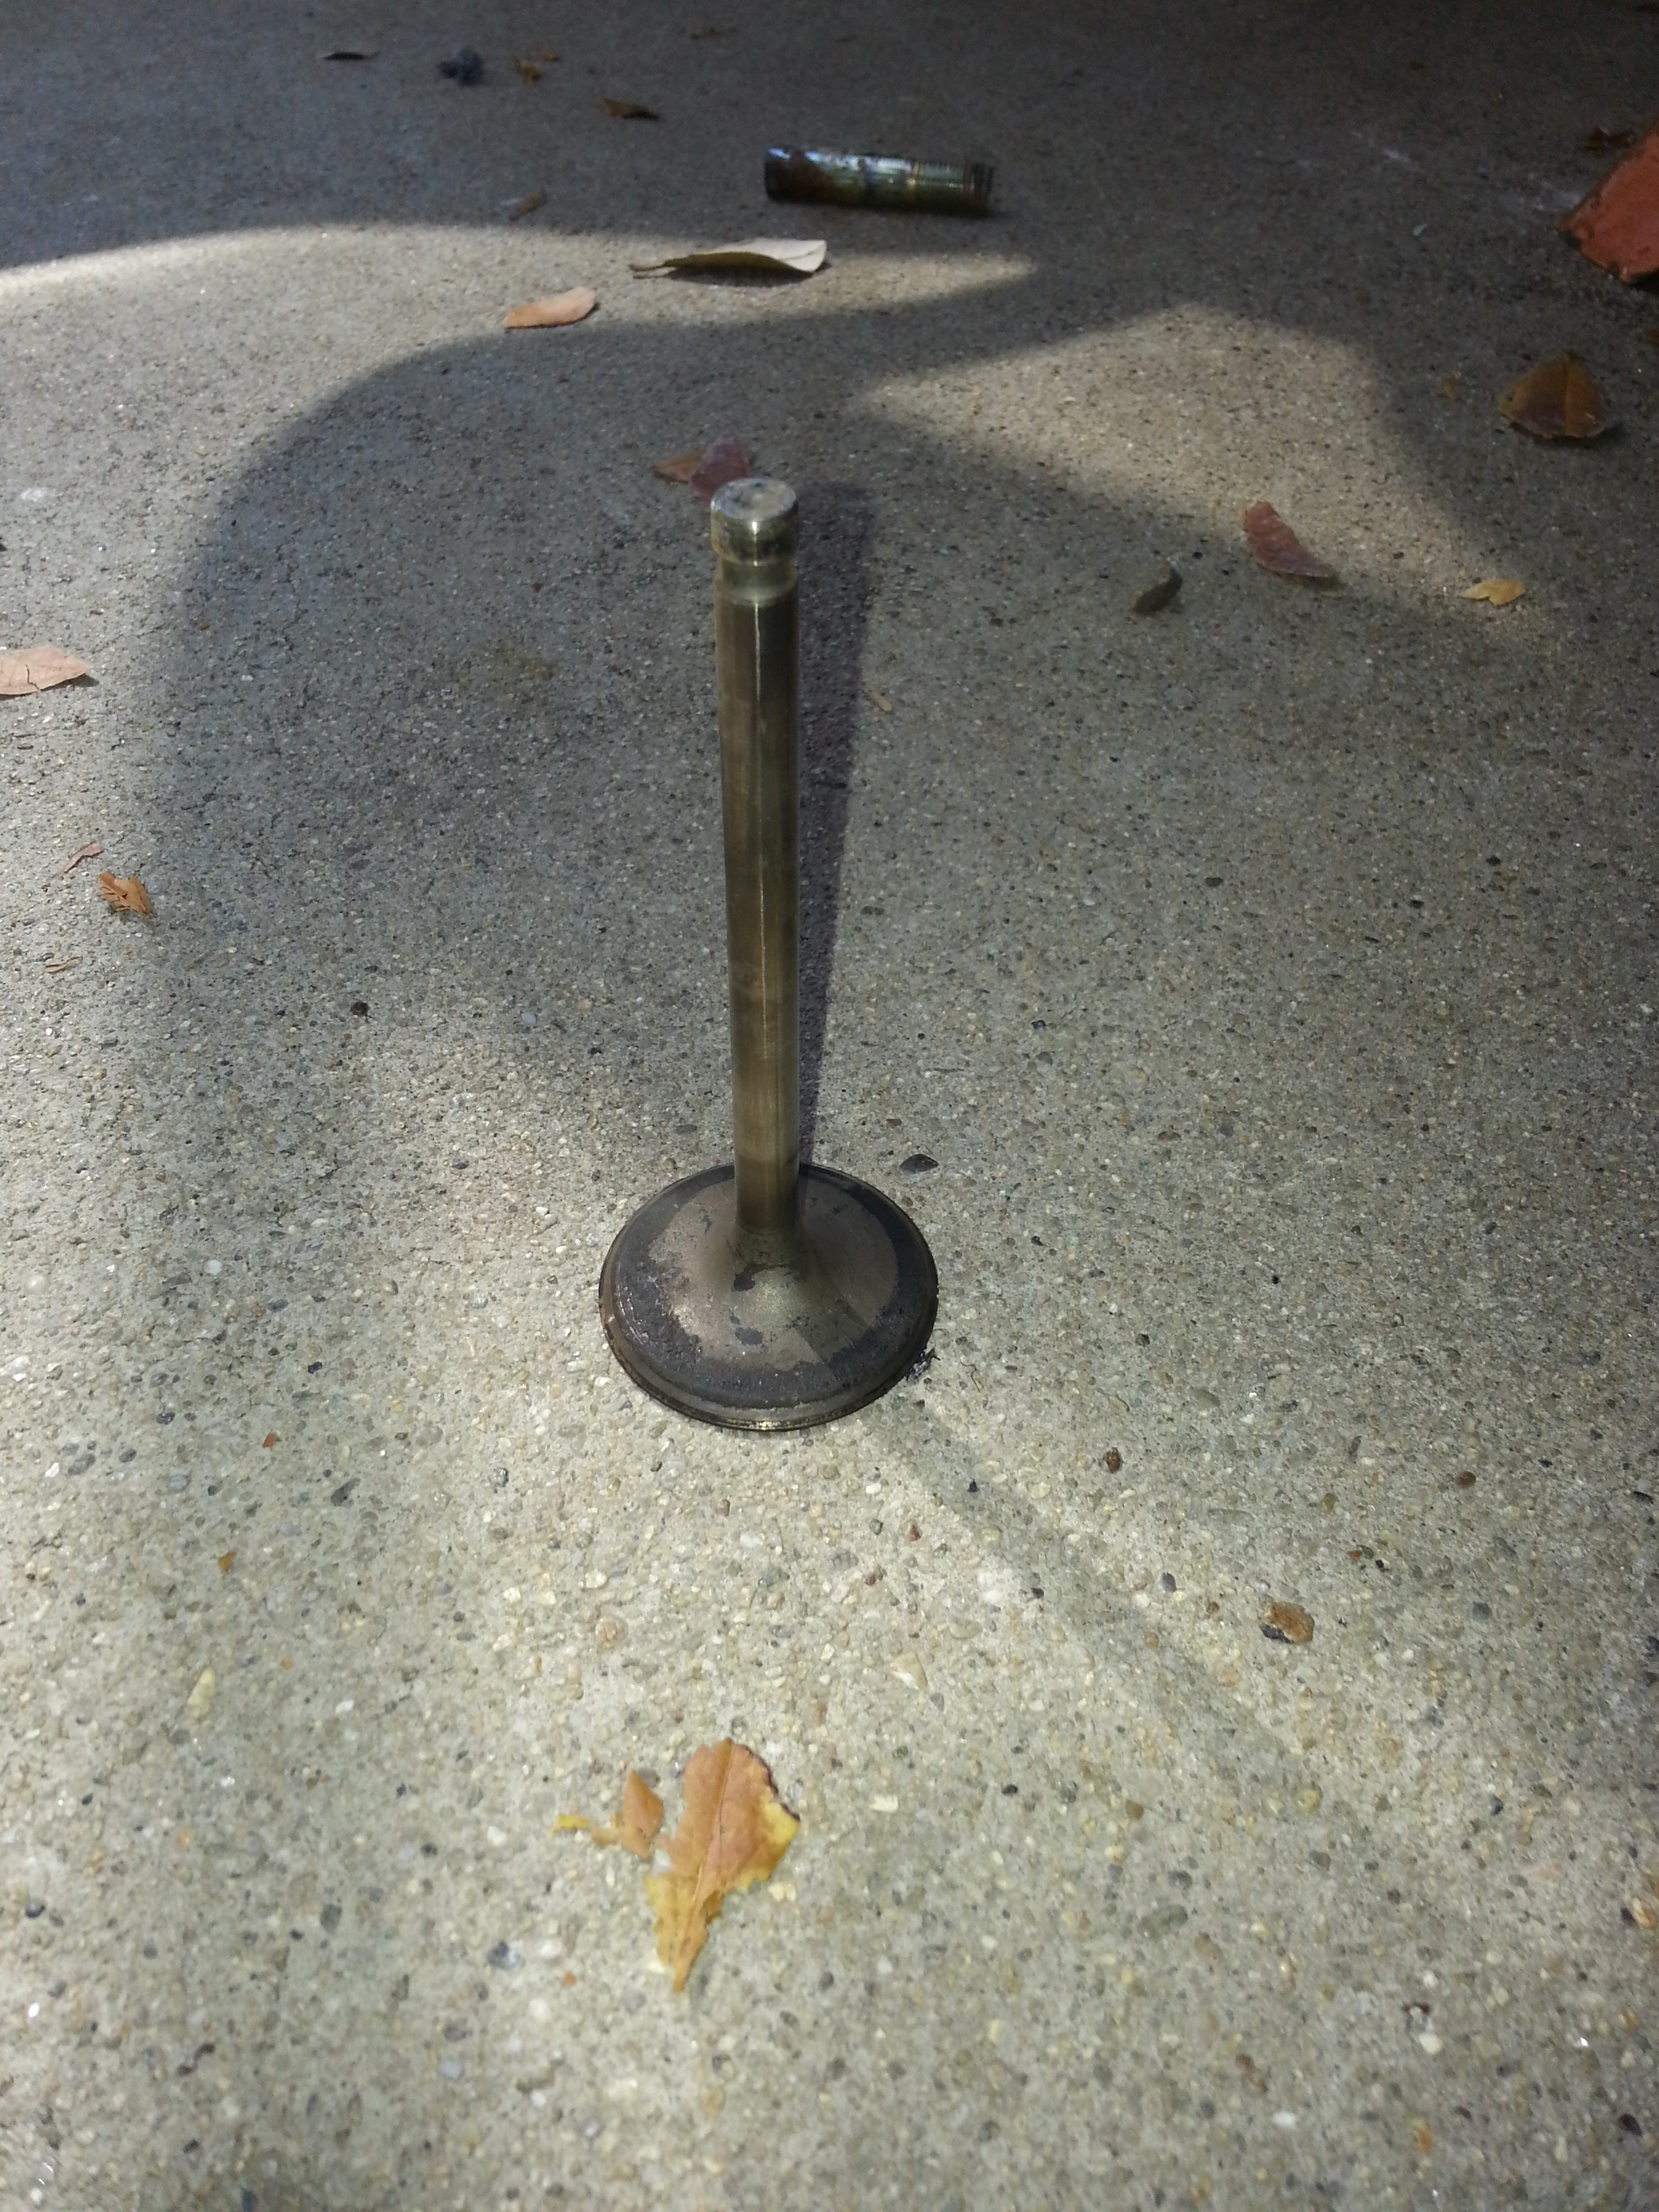
^^^ WORKED PERFECTLY, just enough room to rap it out and put in my new Grade-10.9 Bolt and Nut(22MM head).... >>>
SOOOOOOO, now, with my bolt greased up, ready to go into the new OMEmu Bushing Sleeve on the driver side.... I proceeded to 'reassemble' hehehe....
BUT, FIRST, ...since I didn't have the shackles I was going to use... I had another problem. SOOOOOO, lol.... I had to remove them from the Original Leaf Packs, clean up the pins/bolts really well... Grease em up/and the bushings and slap em back in. So, again, I used the "VICE METHOD"!
************************************************** **********
1. Install the new OME Bushings, WELL GREASED, into your OMEmu Leaf Pack... Also install the 3rd pair in the REAR MOST/UPPER Shackle - hanger mount.
2. Even reusing my original Shackles... I cleaned up the shackle hardware with Fine Metal Emery Cloth, til sparkly, then greased em up and installed them in the rear/lower most bushing in the leaf pack, that secures the shackles to the pack, first. Secure the Pin/nut, but don't torque it down to specs just yet. "SNUG", but not, "HOLY BUGGER", haha...
3. Now, you're ready to bring your prepared OMEmu leaf pack over to the rig, CAREFULLY glide it up and in, onto the Axle dowel keyhole(Center Pin)... then jack up the axle again, then secure the axle to the leaf pack using the LONGER U-BOLTS provided by OMEmu. (specs, IIRC, were 78-110#, on the u-bolts... I will get it for ya and edit).
4. After you've secured the leaf pack to the axle; FIRST... HANG THE FRONT of the leaf pack in the hanger, slide the WELL GREASED pin through, MAKING SURE YOU DIDN'T FORGET THE BOLT SLEEVE IN THE FRONT EYE/inside the bushings! >>>
5. With your lower shackle bolt already secured SNUG to the rear eye of the leaf pack.... Jack up the axle until you can line up the upper holes in the shackle to the hanger.... (Use what you want, .... I chose to use 1/4" and 3/8" Socket Extension rods, because I didn't want anything 'gouging' my new OMEmu Bushings)... Secure the upper hanger/shackle pin bolt to 54-72#, IIRC, and then torque your entire set up, every bolt/nut and ESPECIALLY make sure they are all torqued to specs... Sure, brakes are SO important, ...one of the worst things to neglect... BUT, if your U-bolts or hanger pins fall out... YEAH, not good! HAHAHA.
6. Lastly, but you could do it sooner, I reinstalled my Shock to the U-bolt bracket.... Torqued it down.... And voila, ....
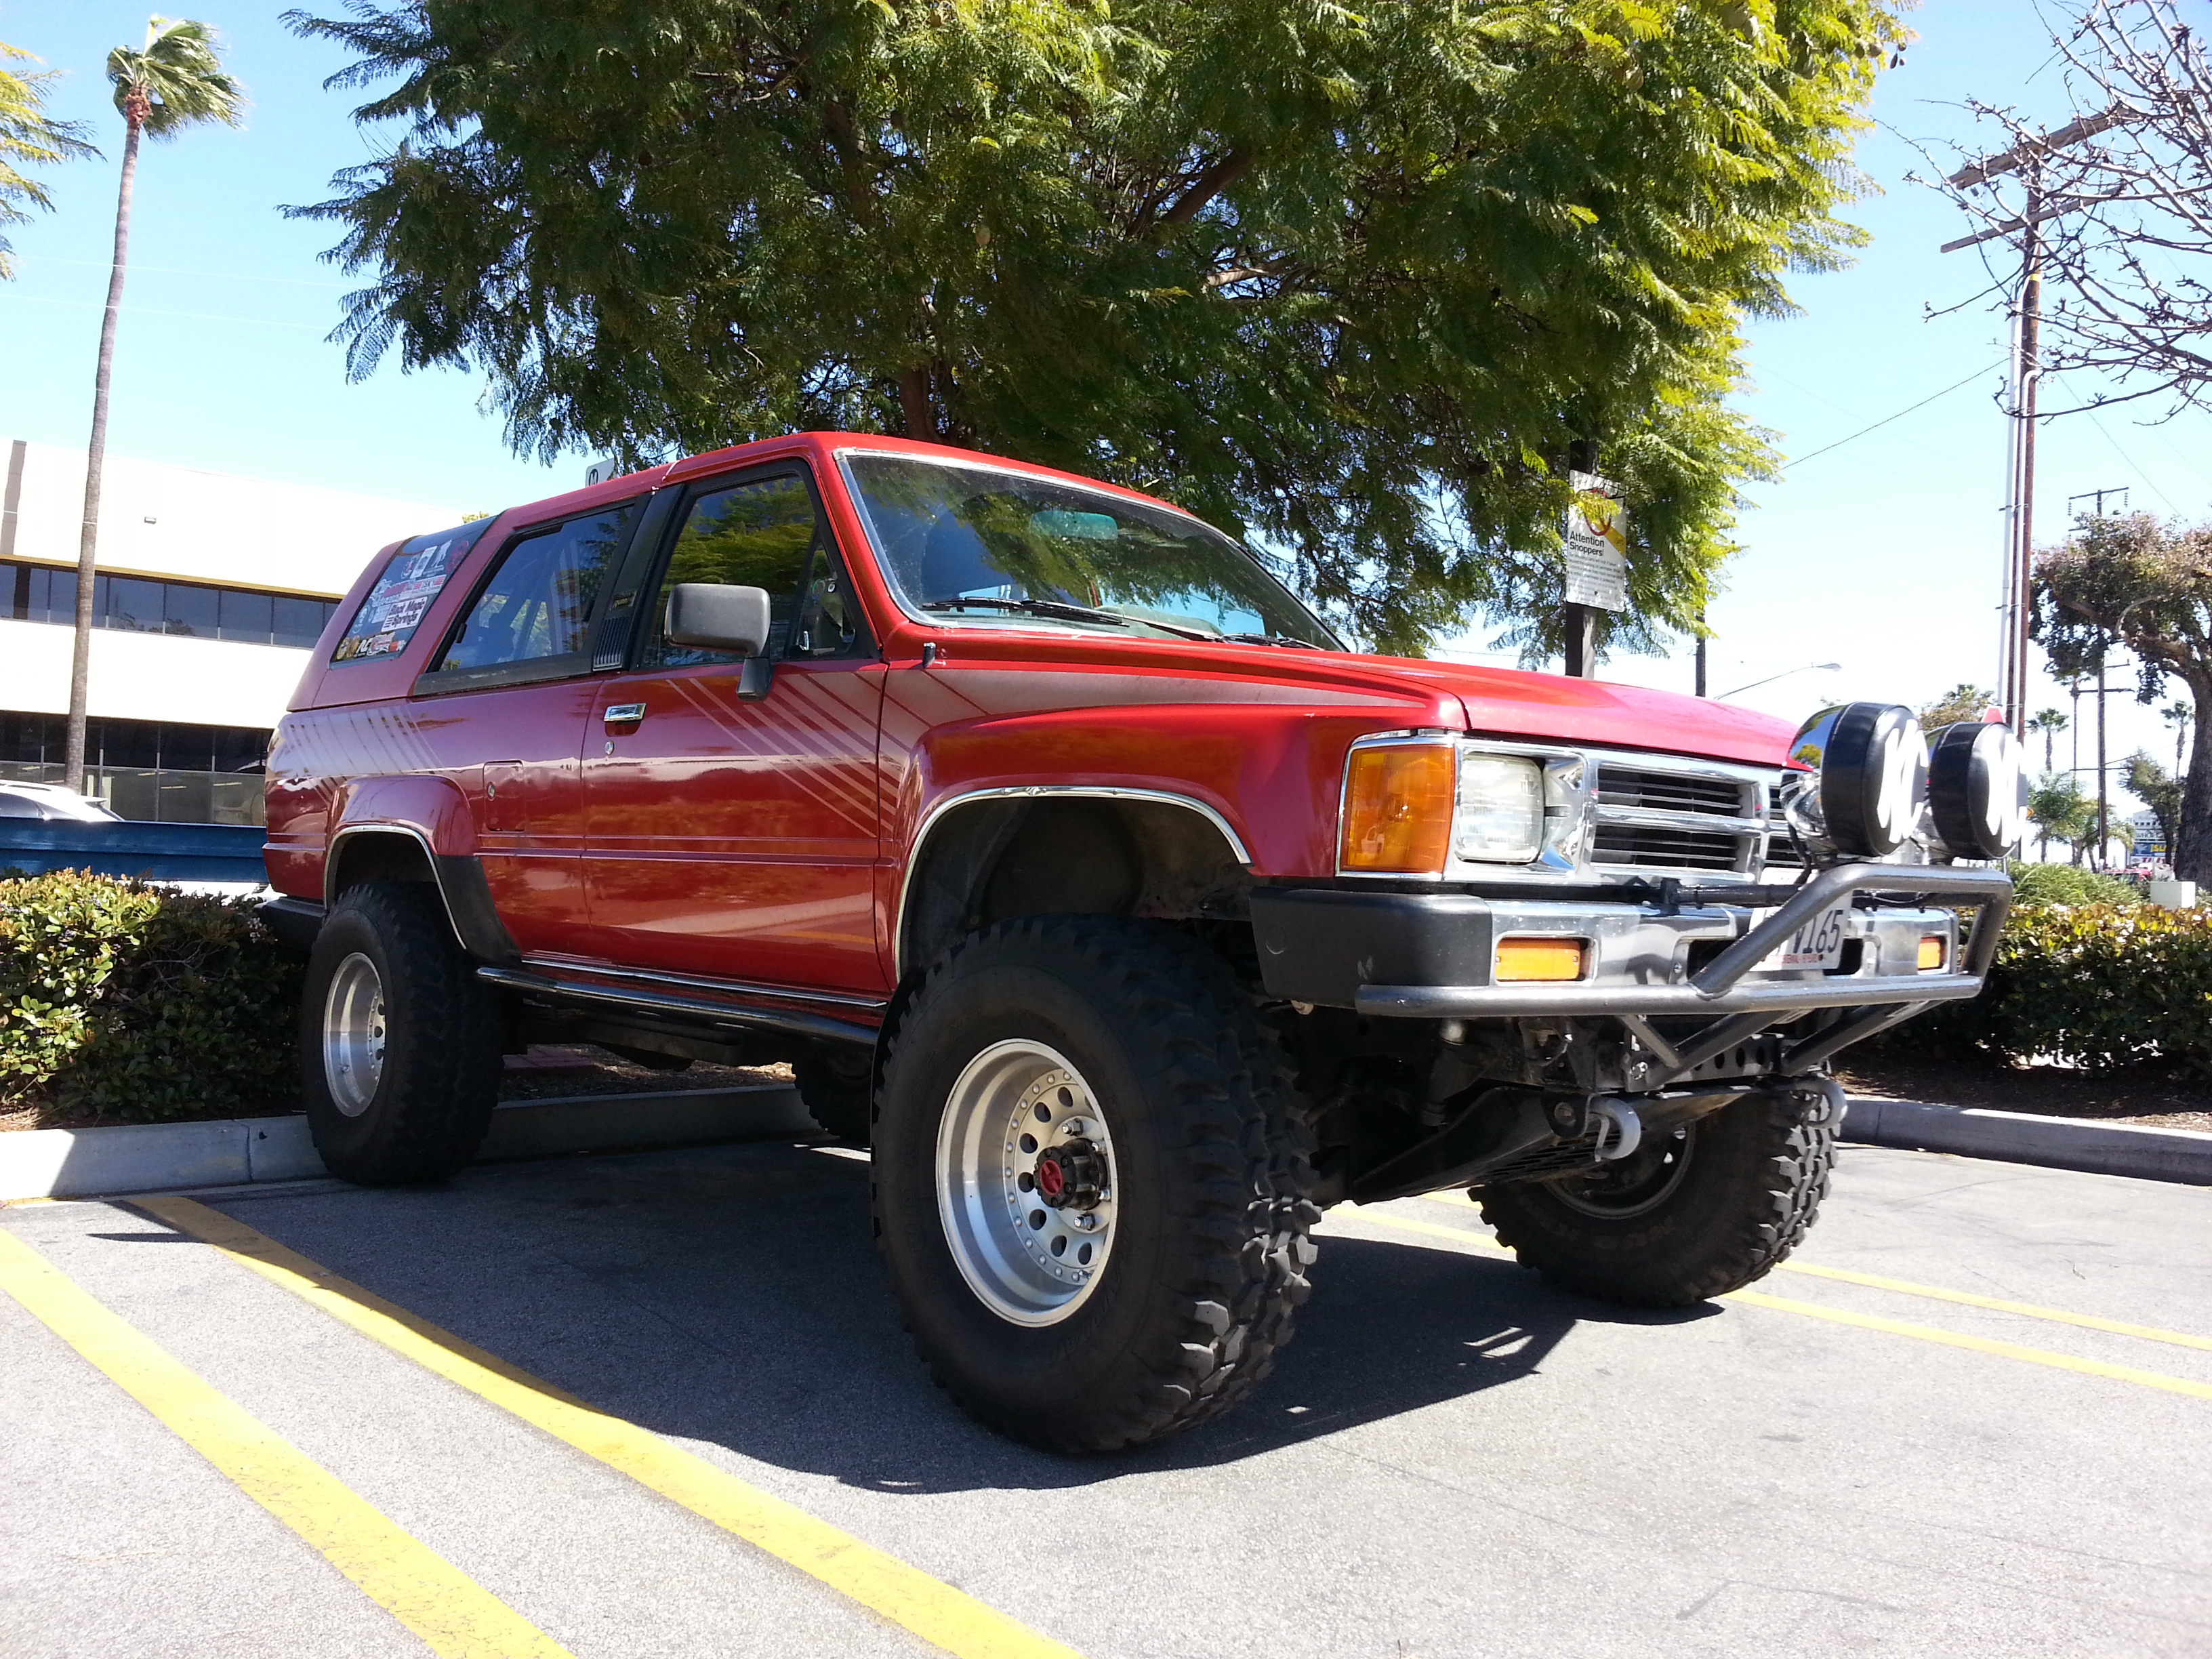
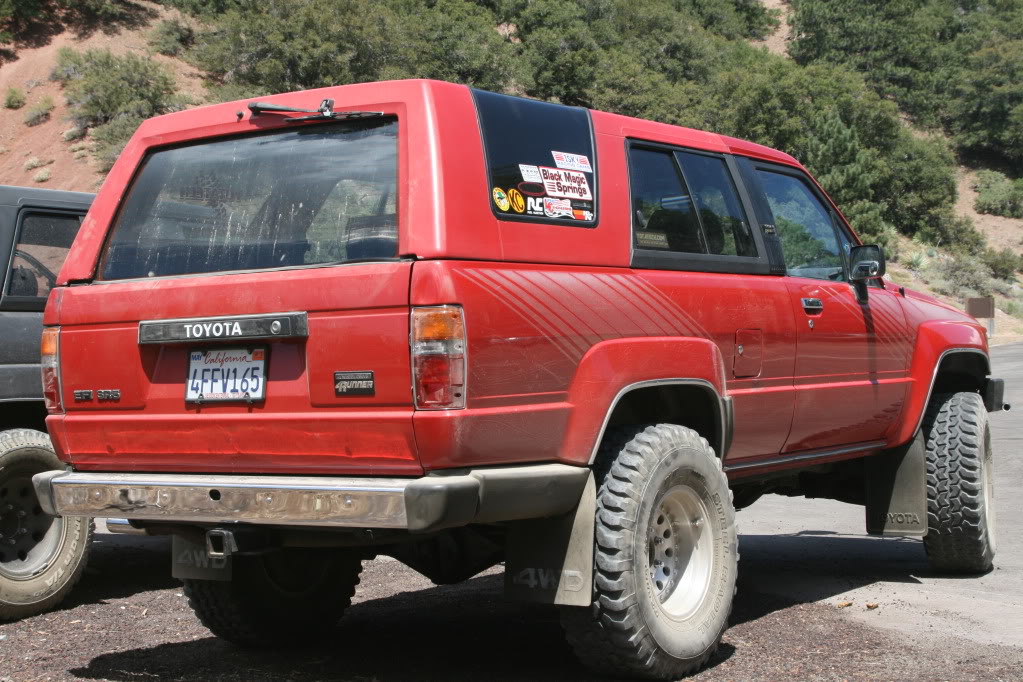
Before Zuk;
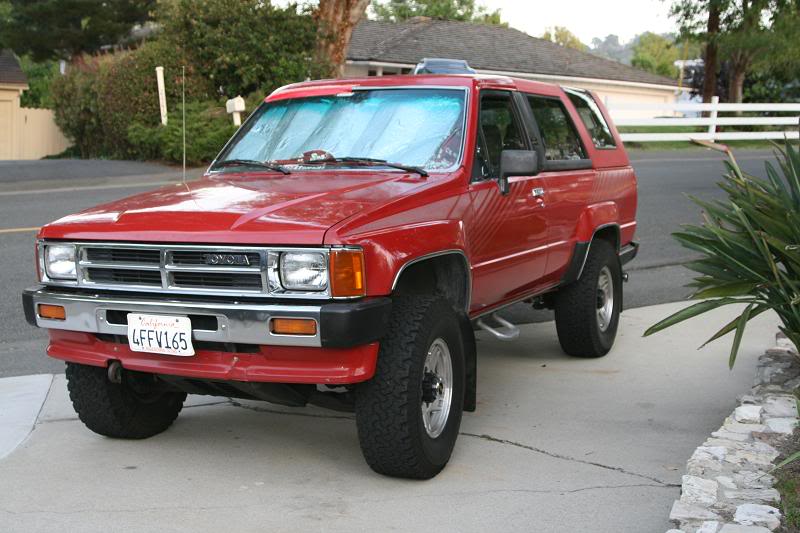
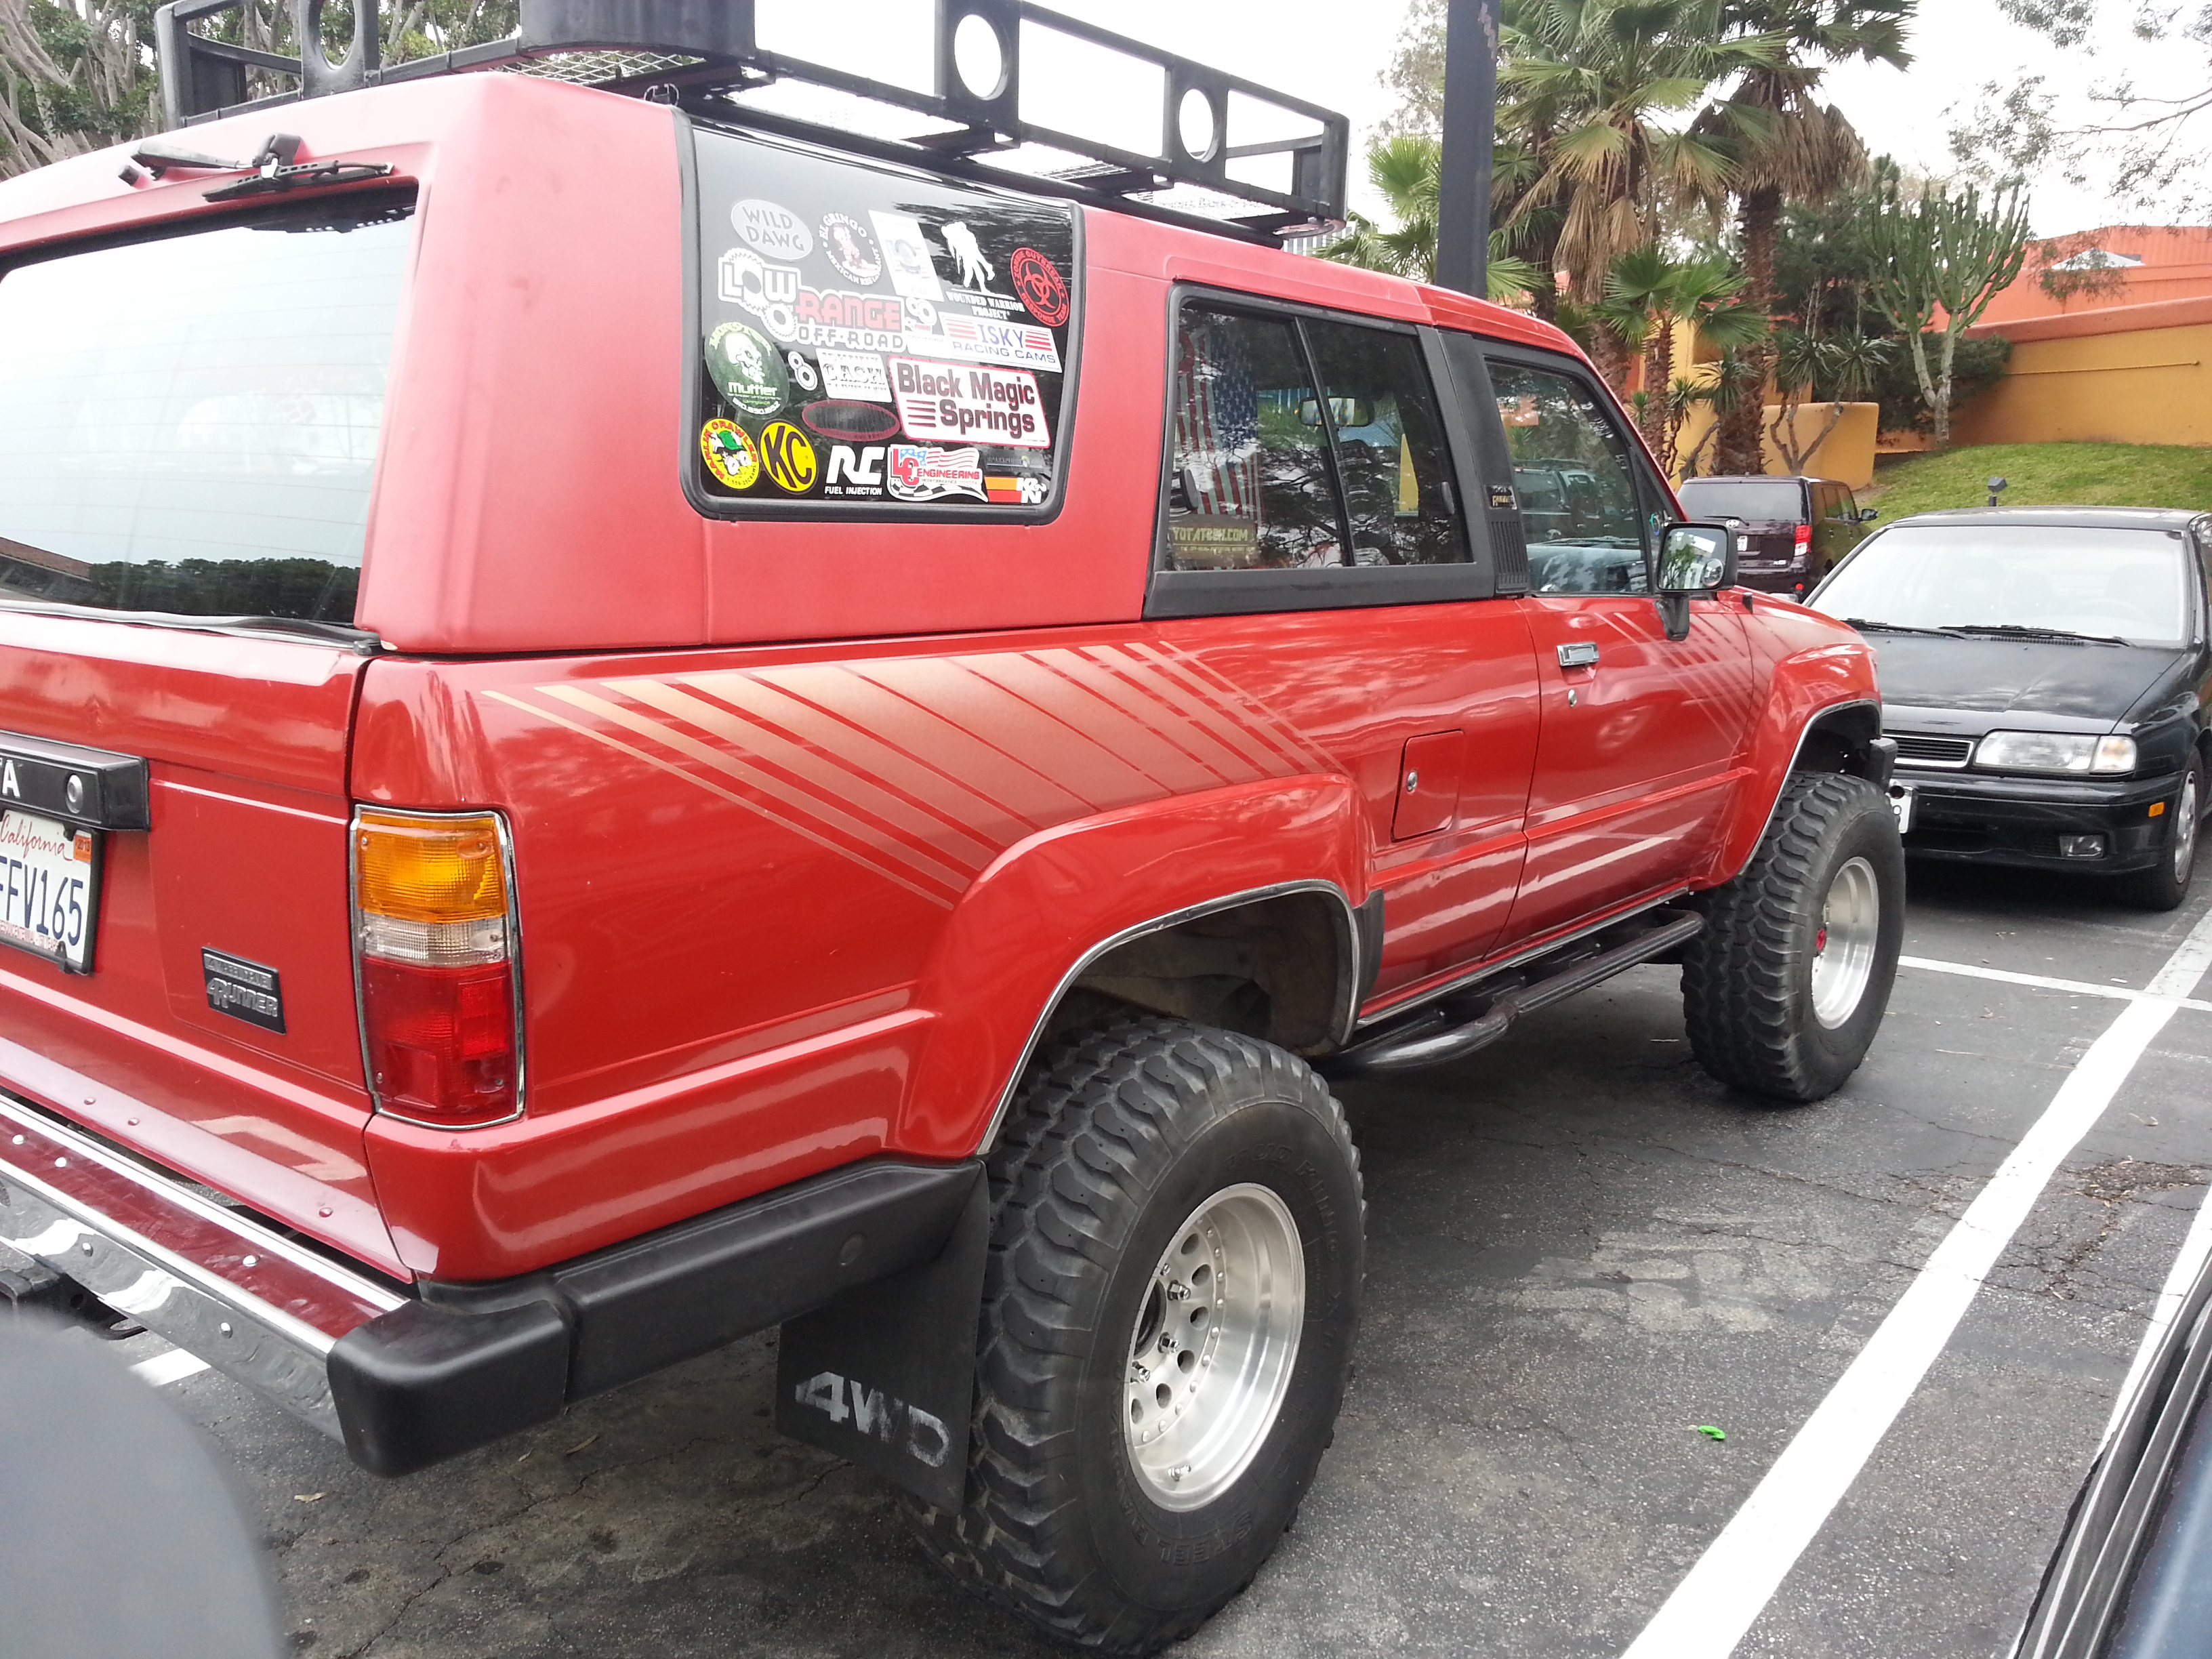
After Zuk;
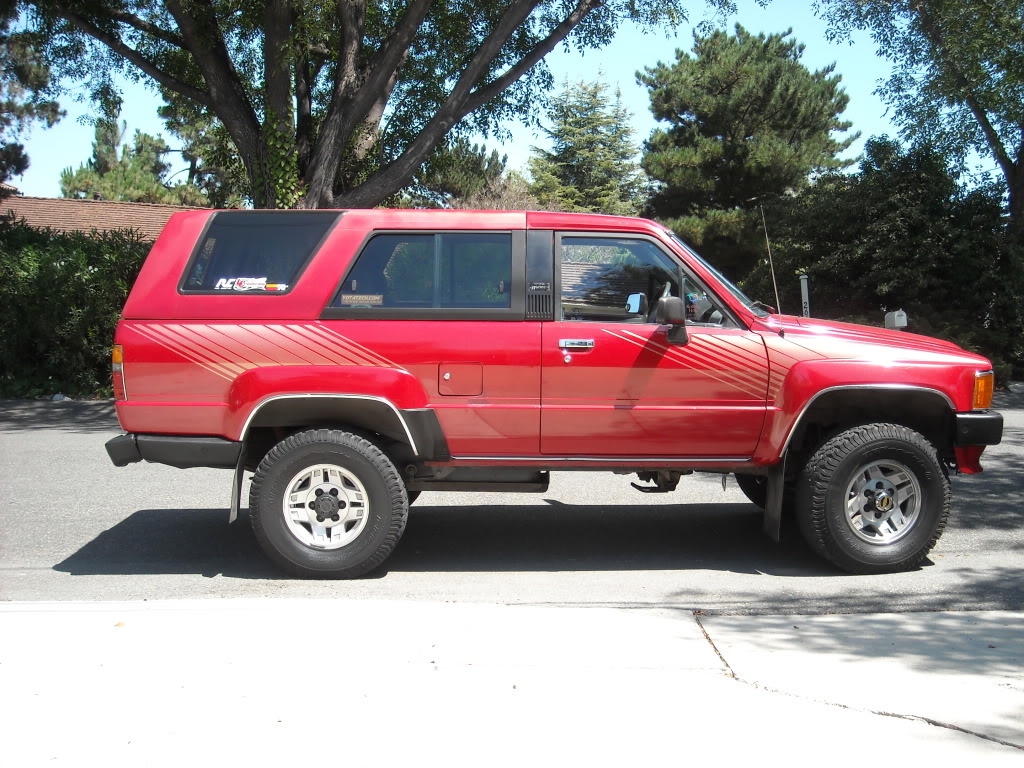
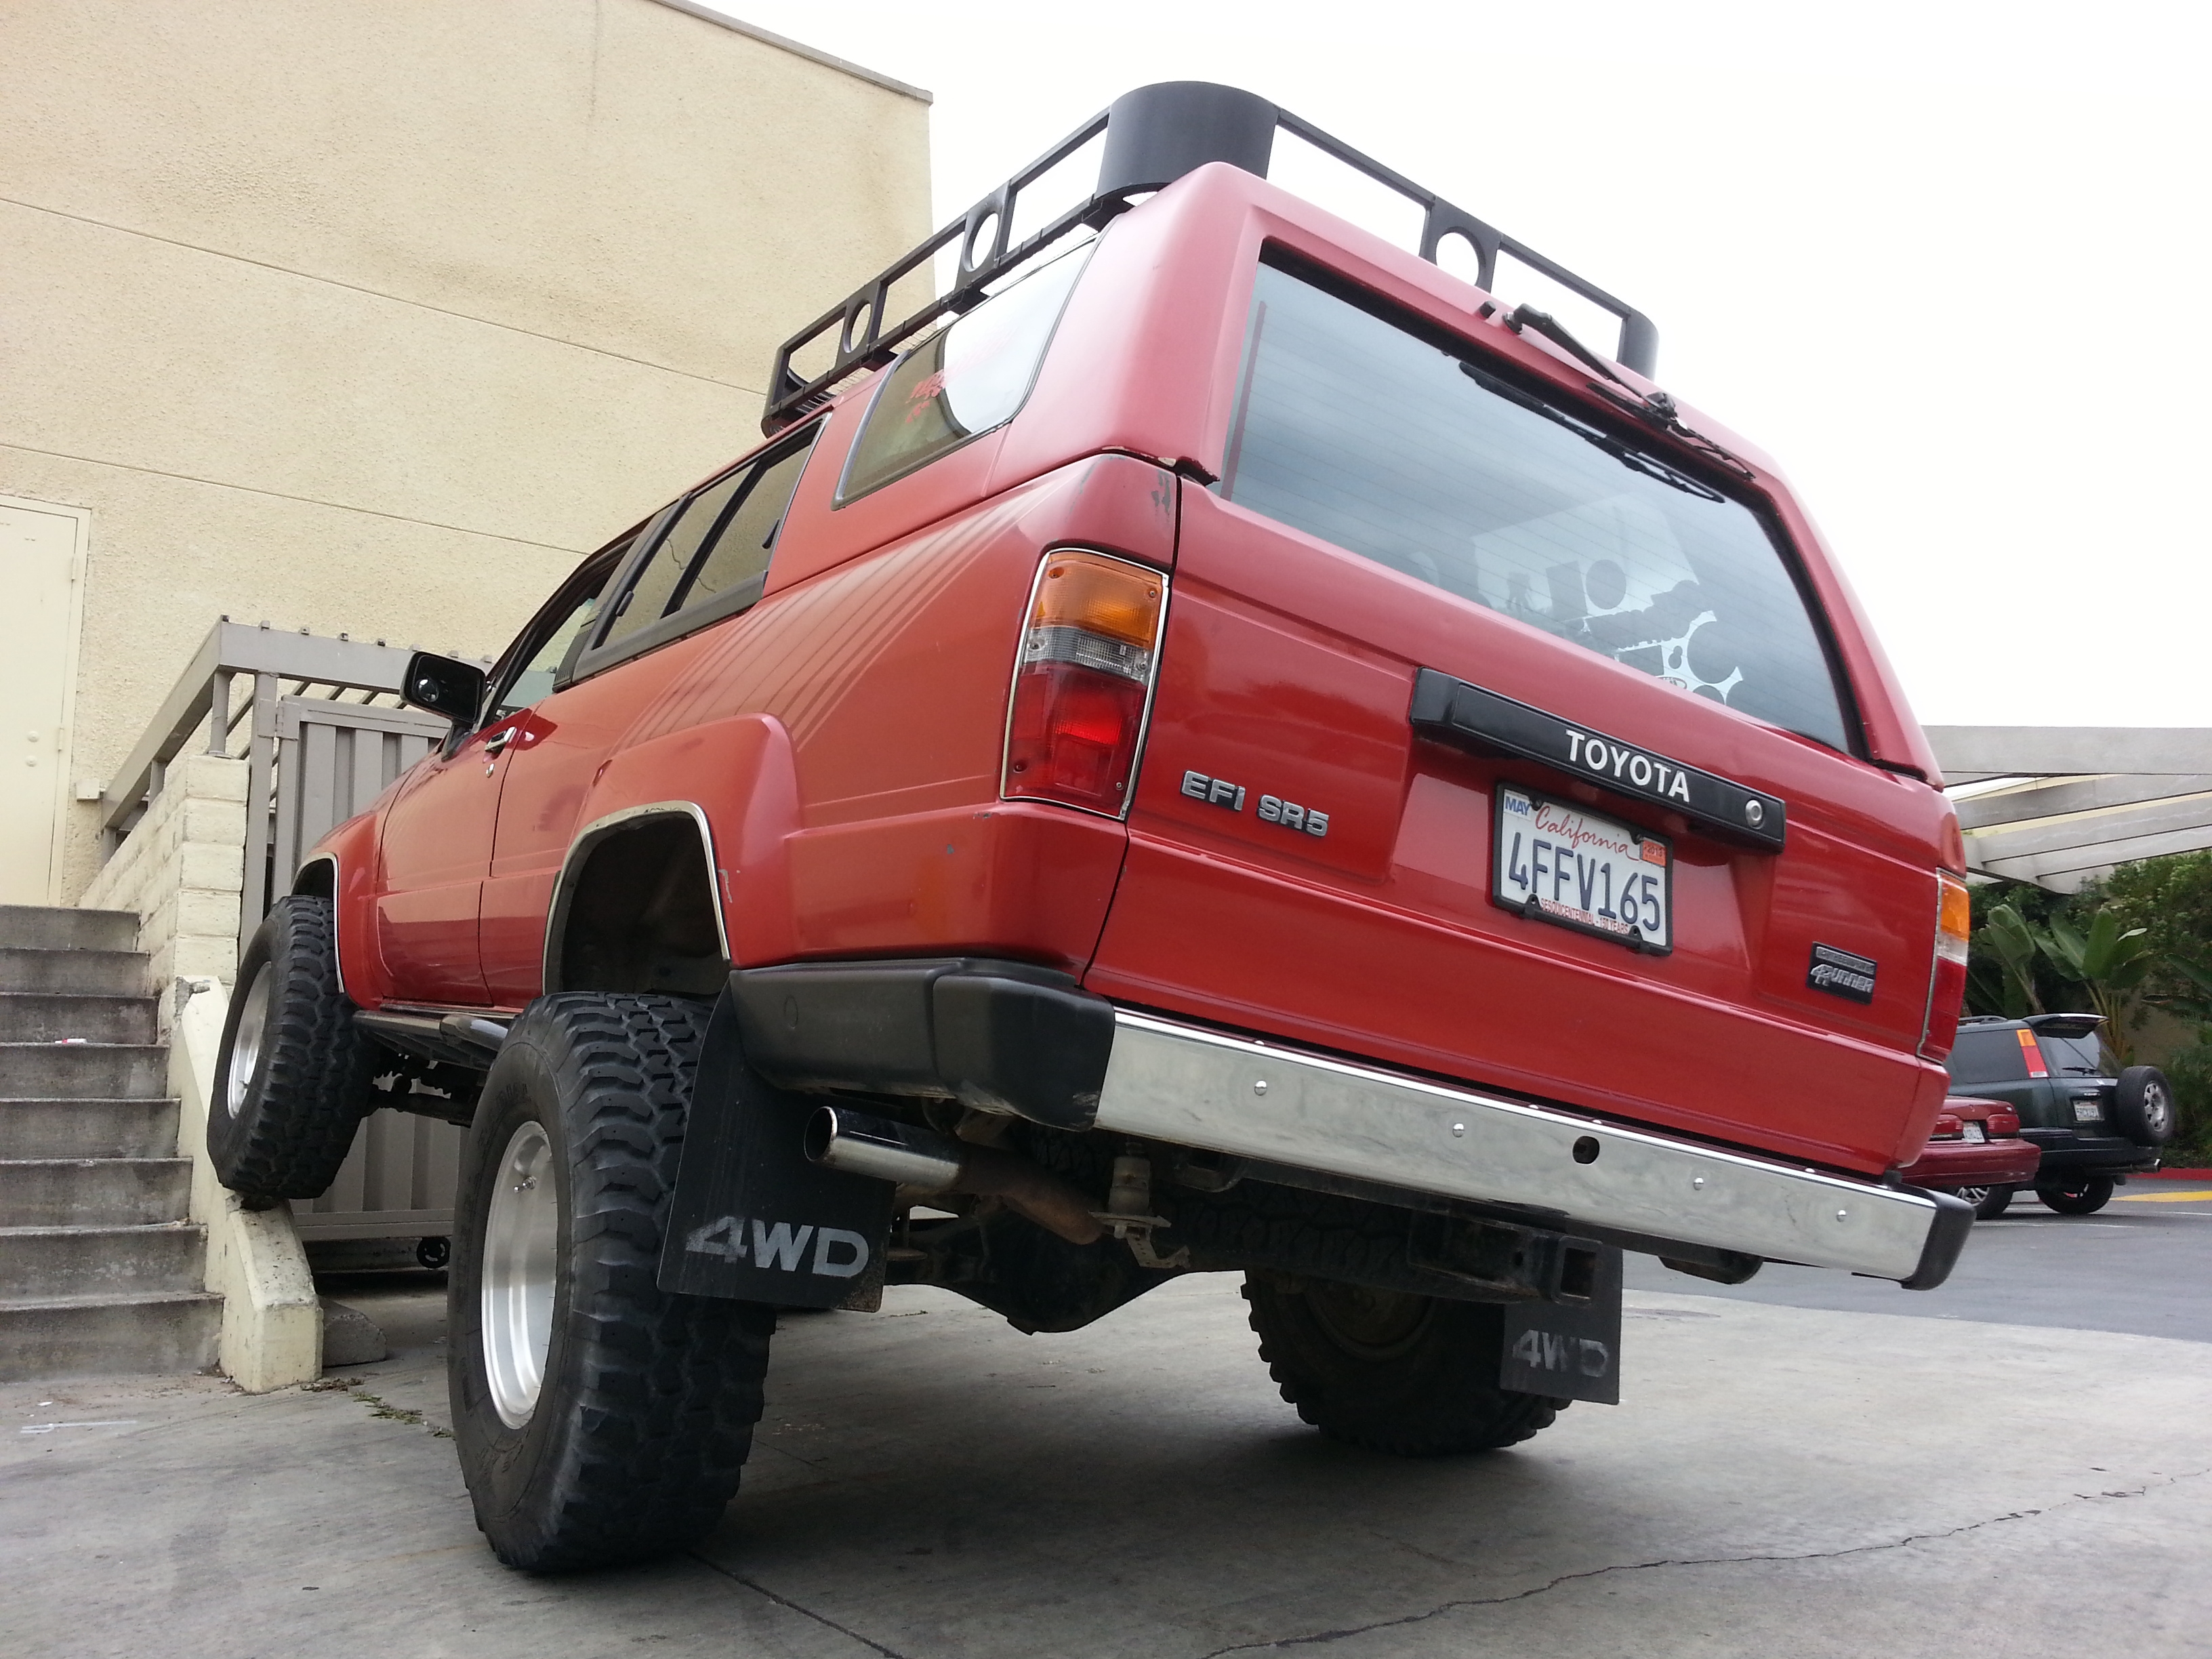
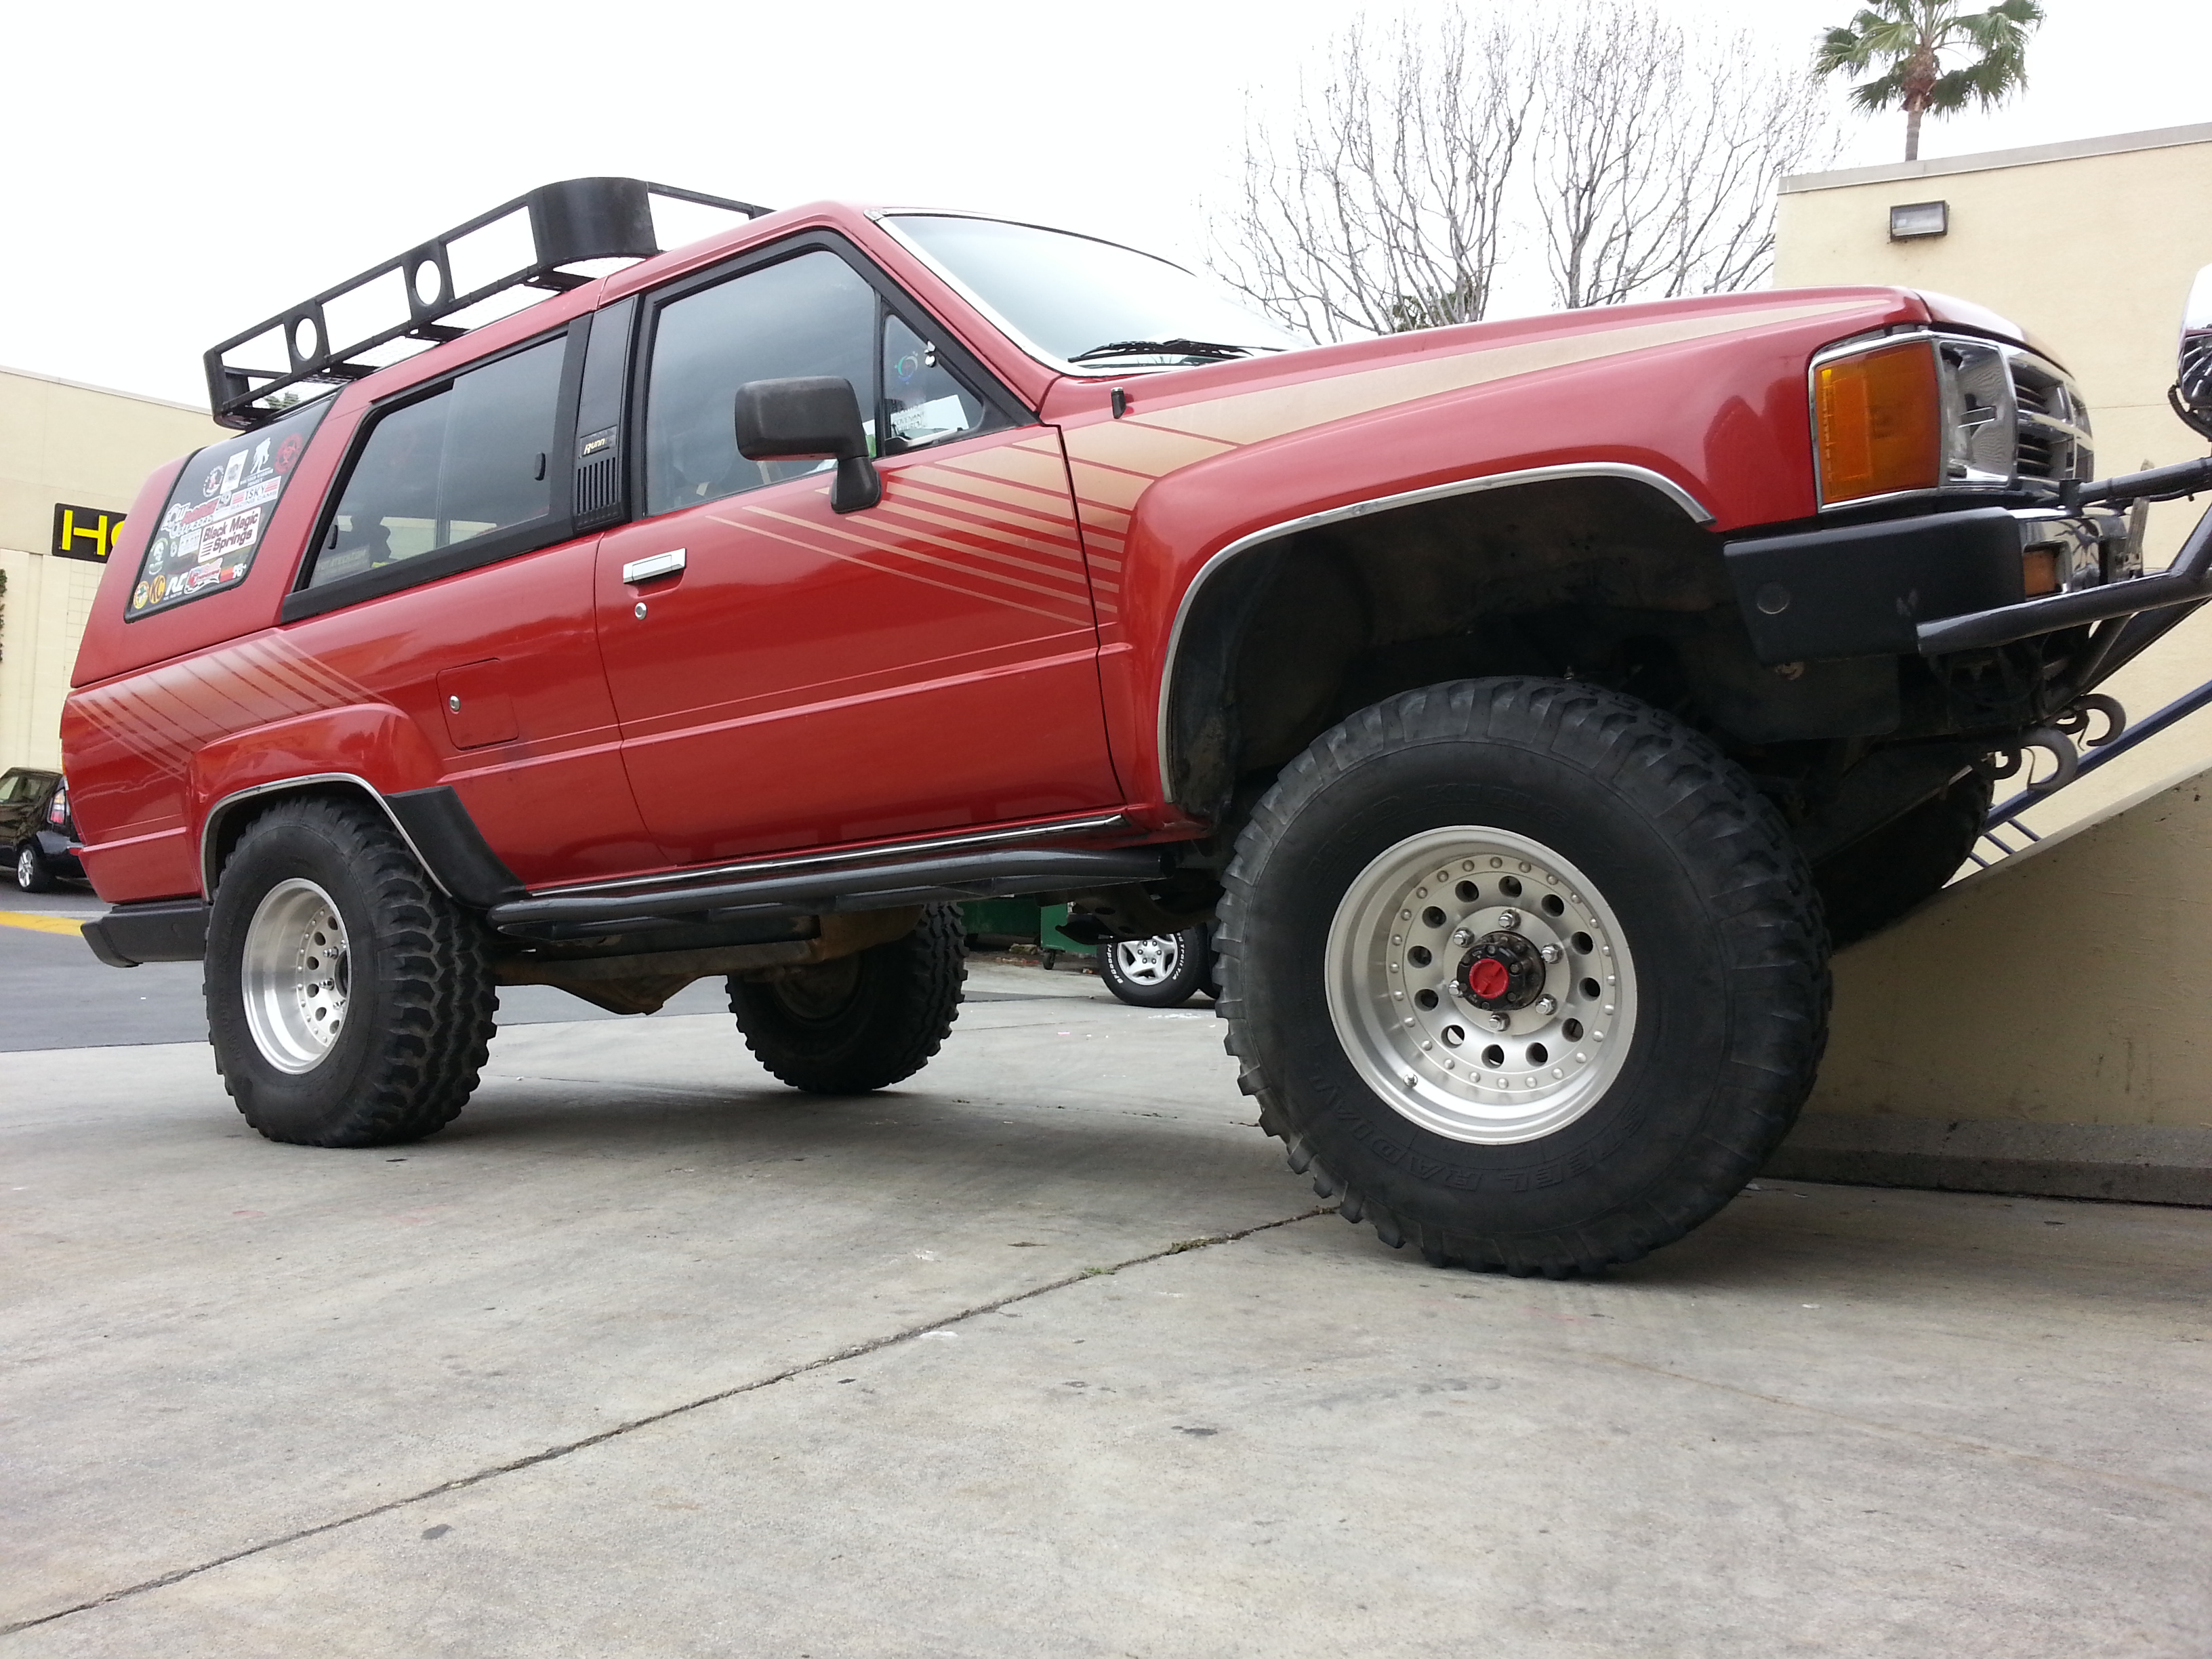
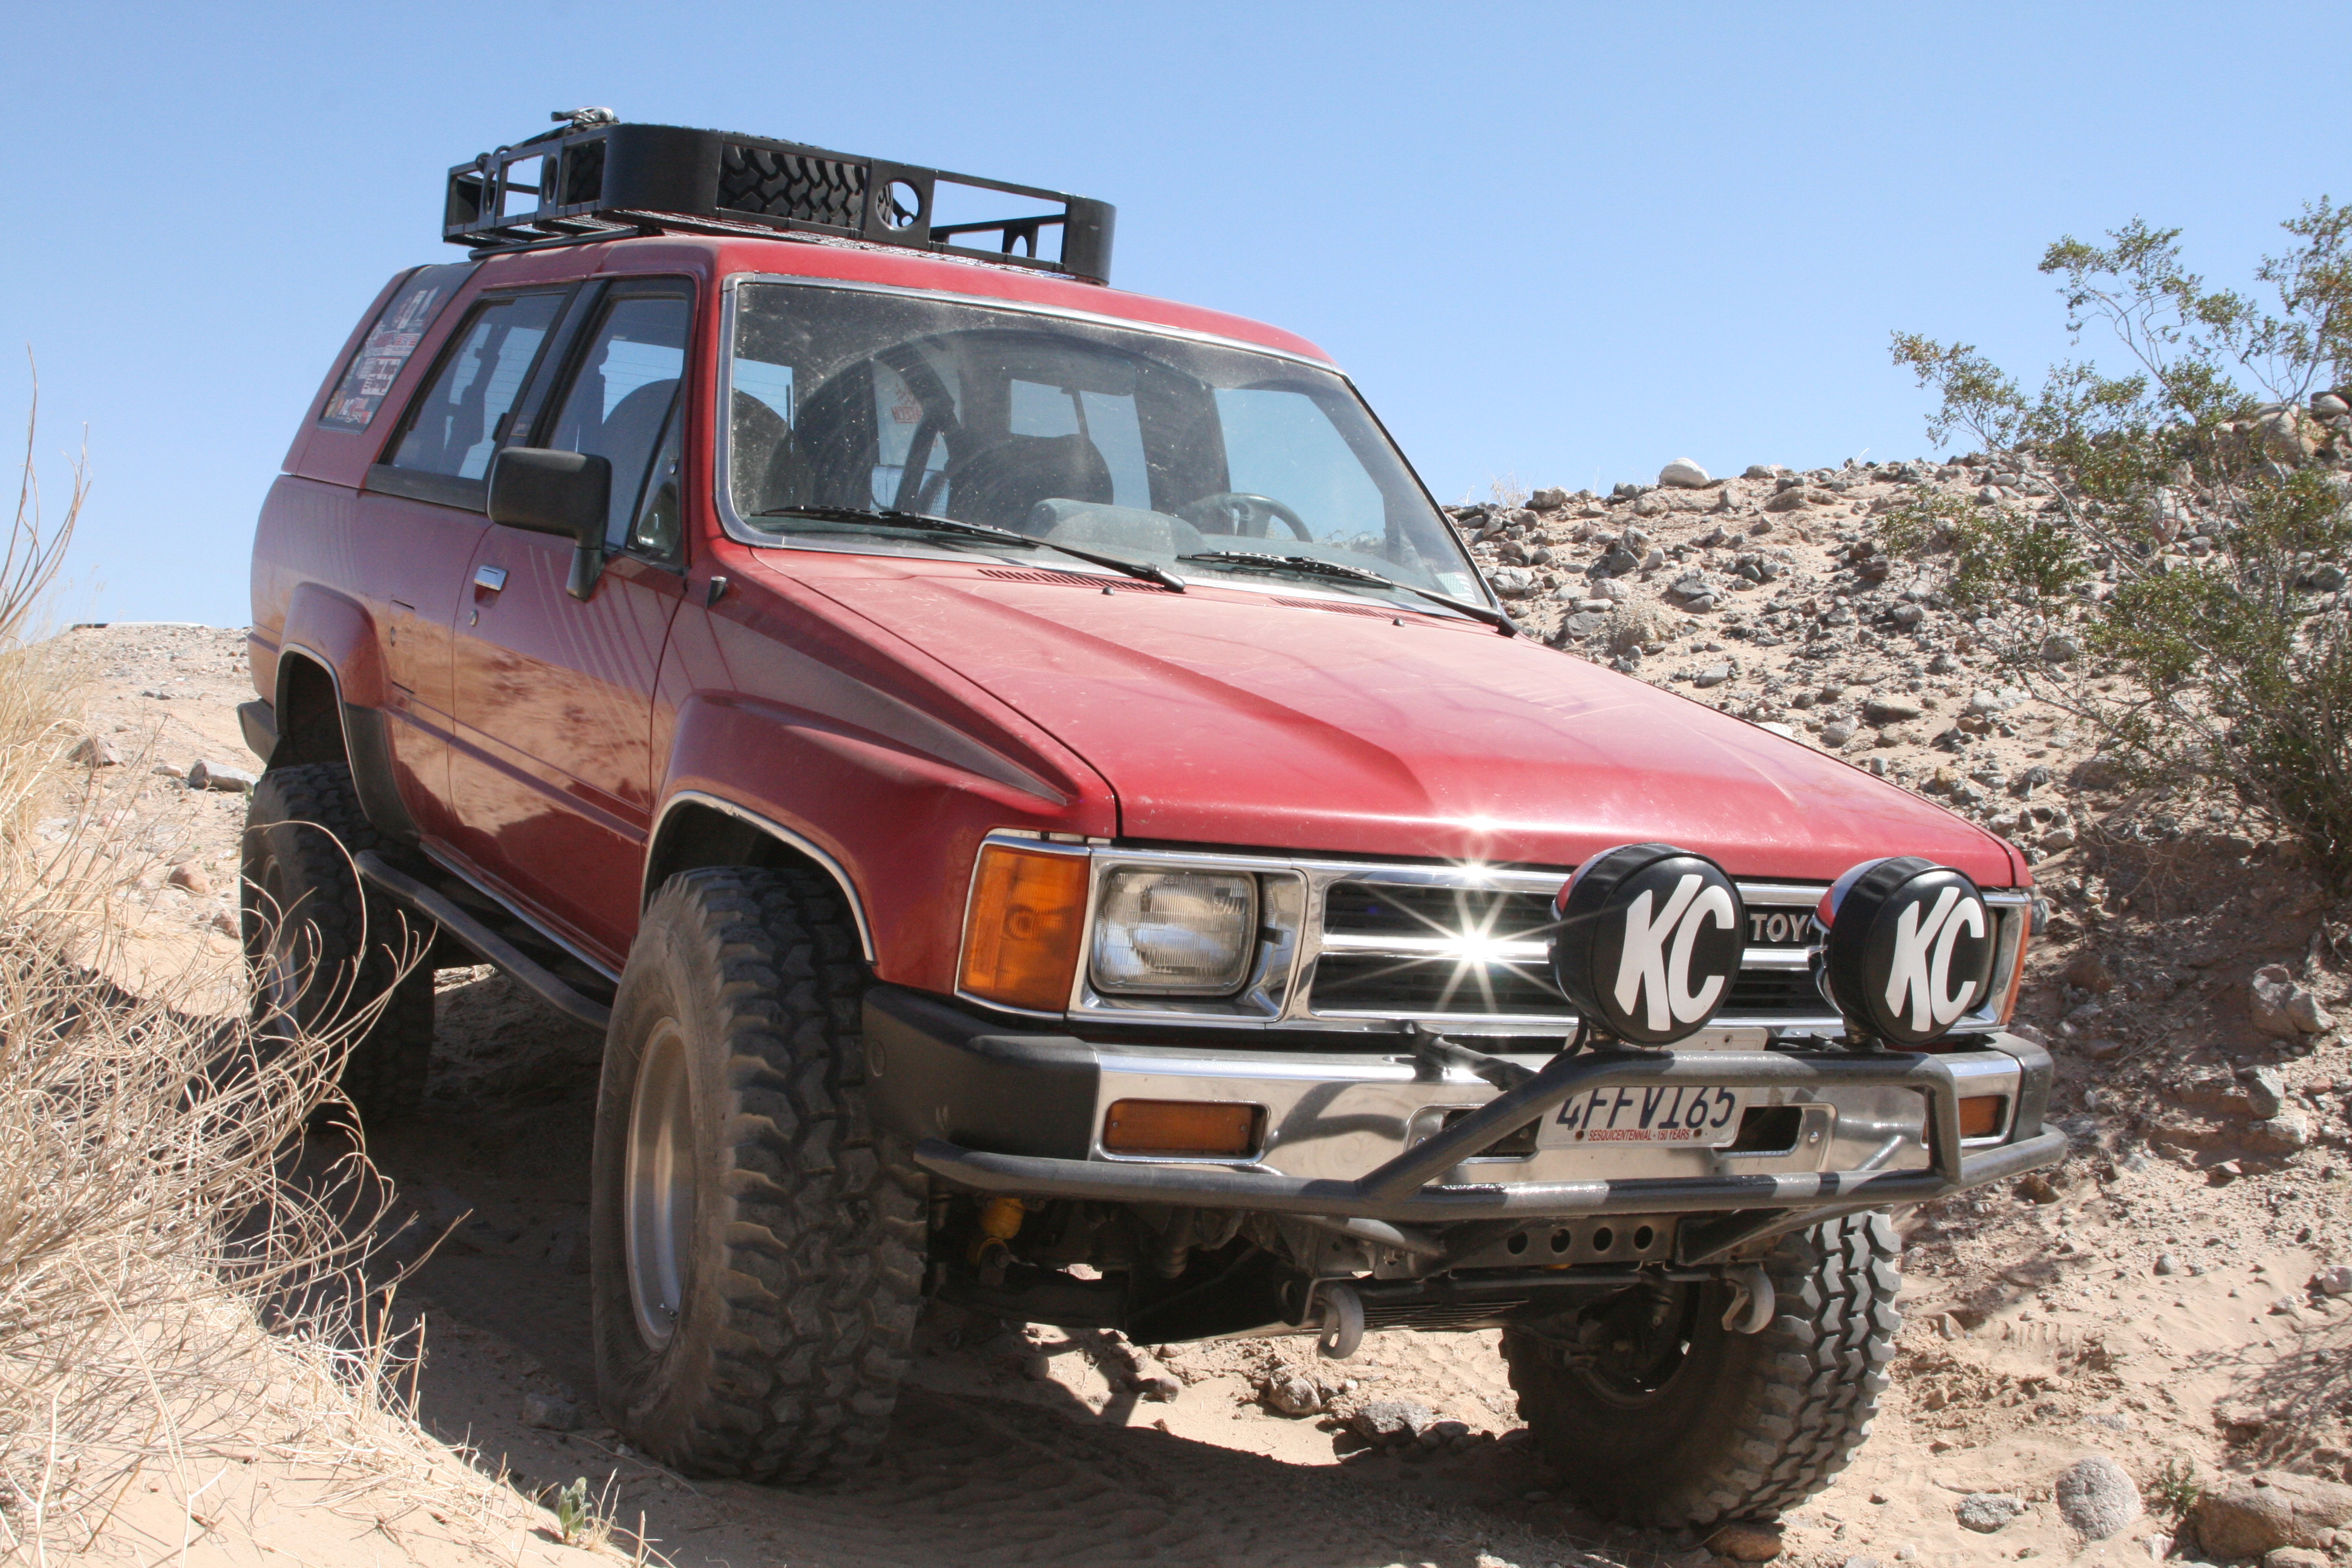
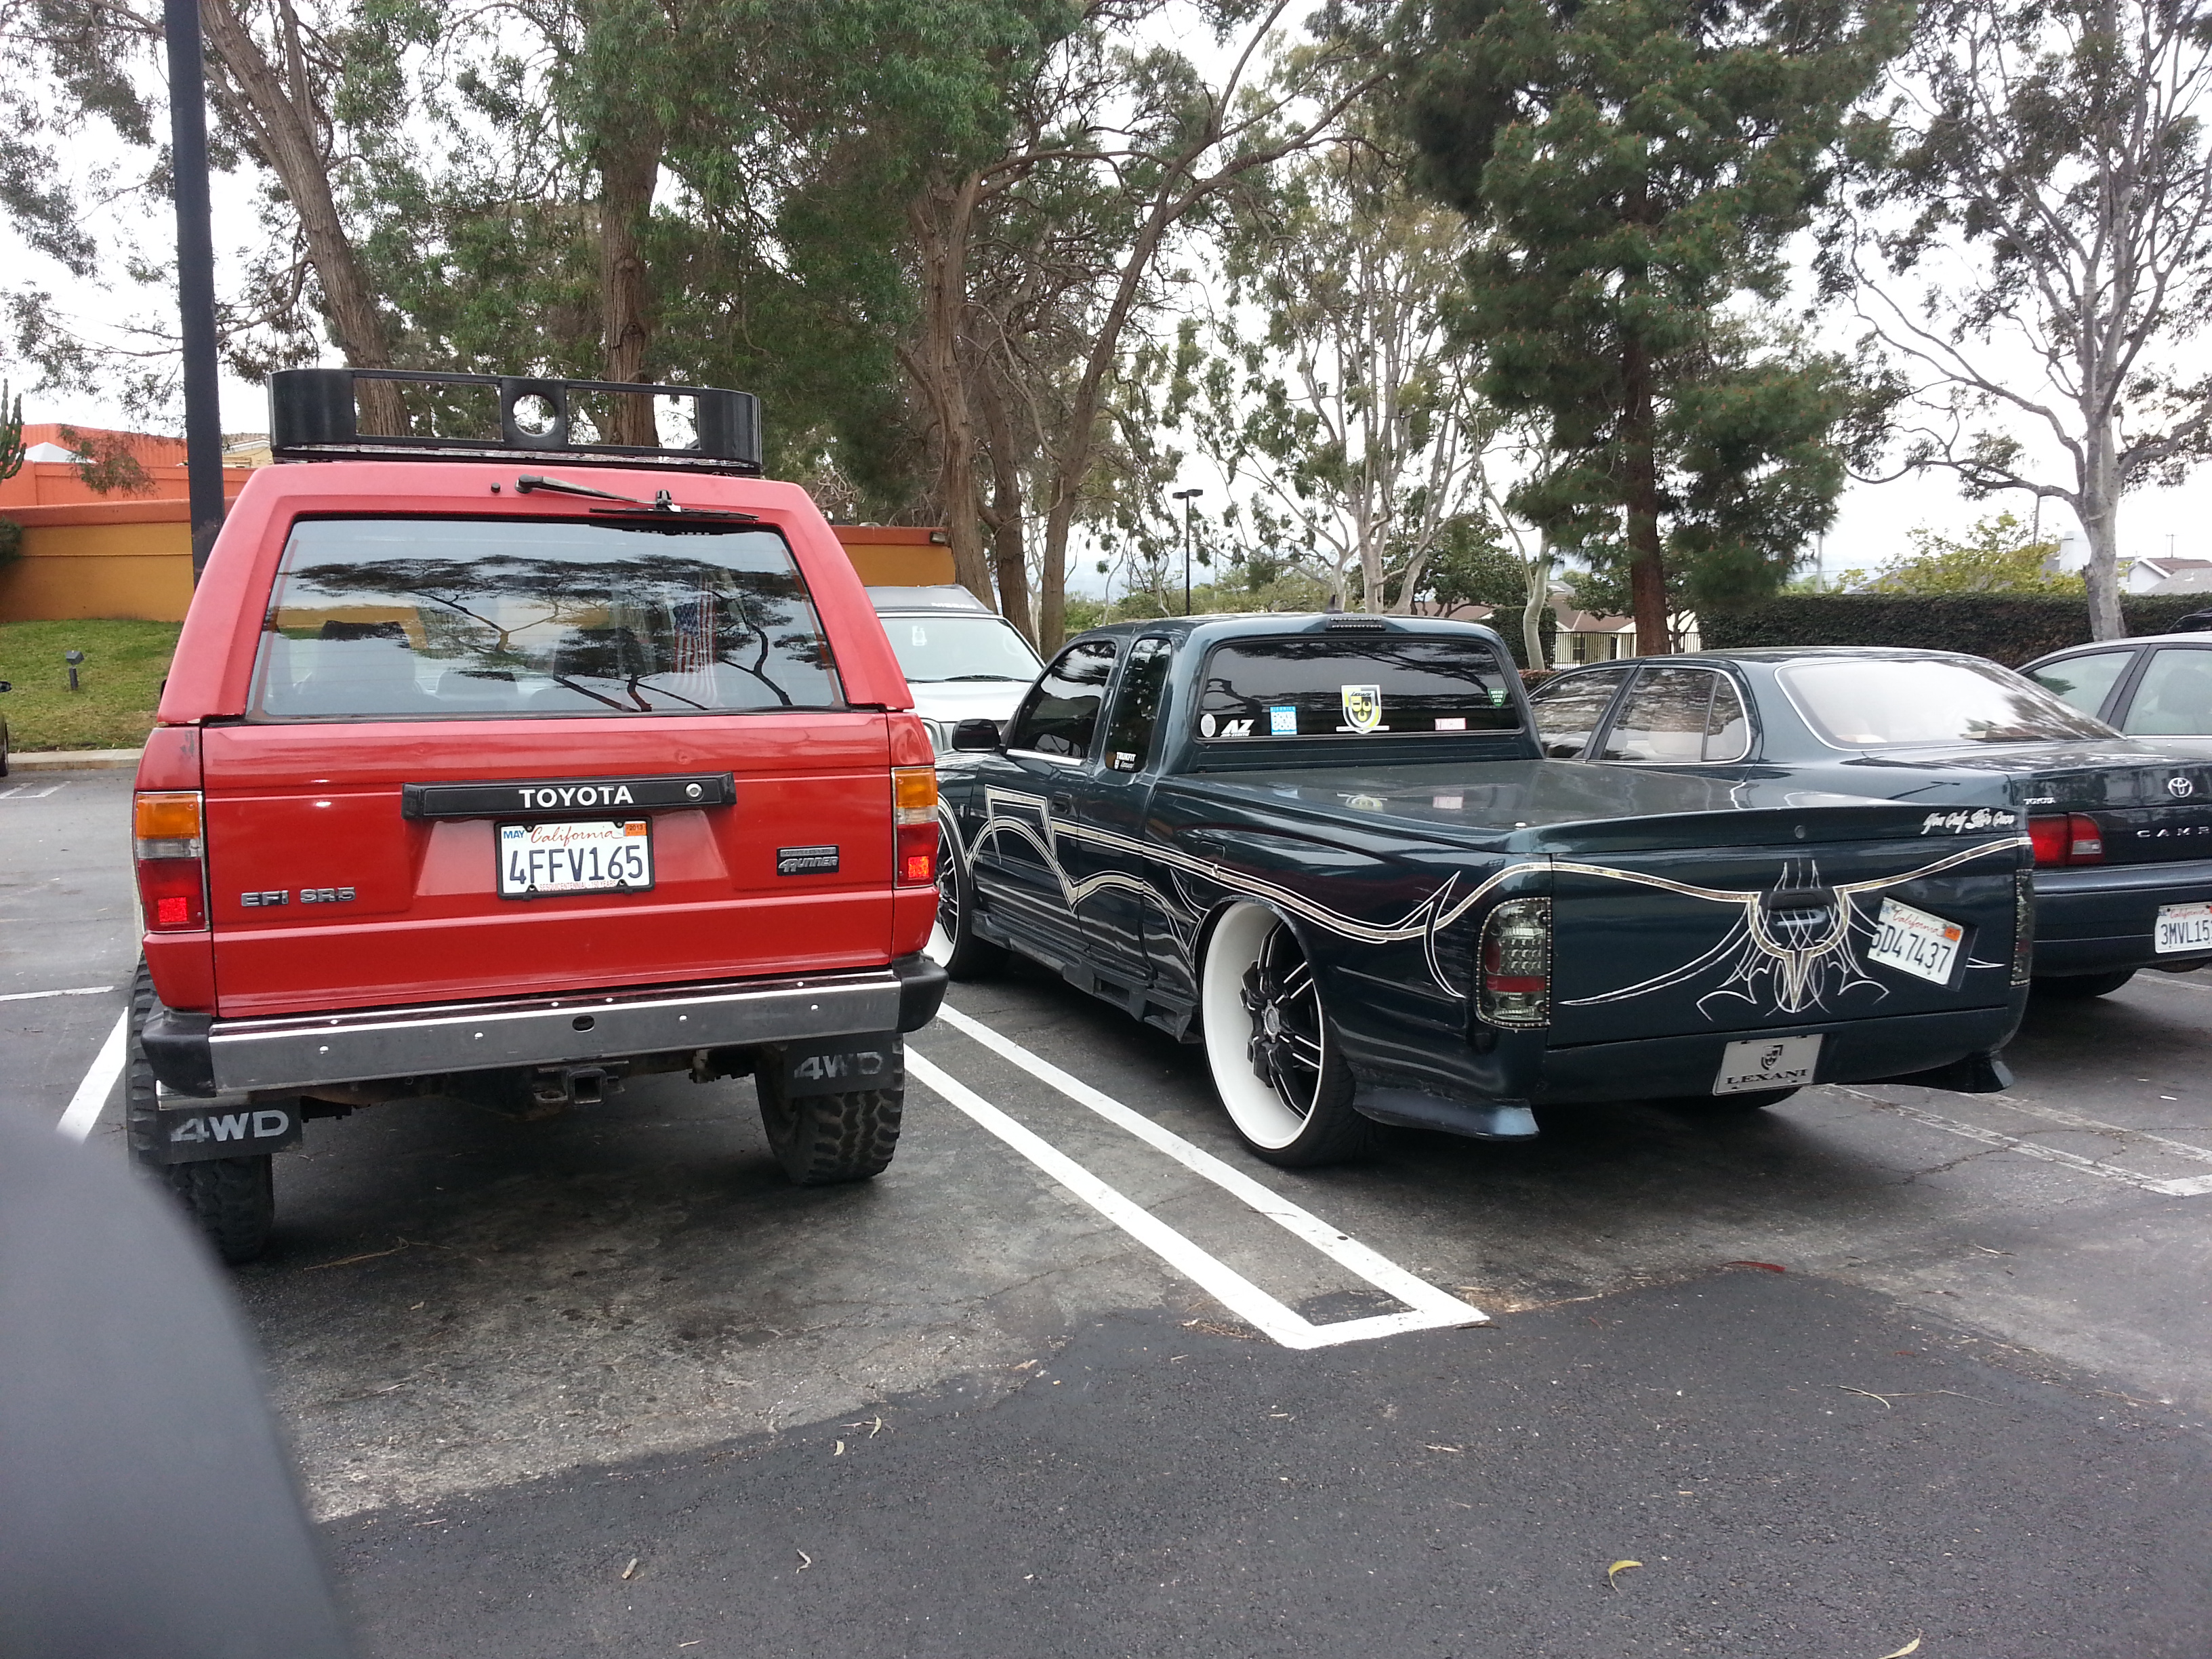
After OMEmu - CS009R Leaf Pack Swap;

************************************************** ********************
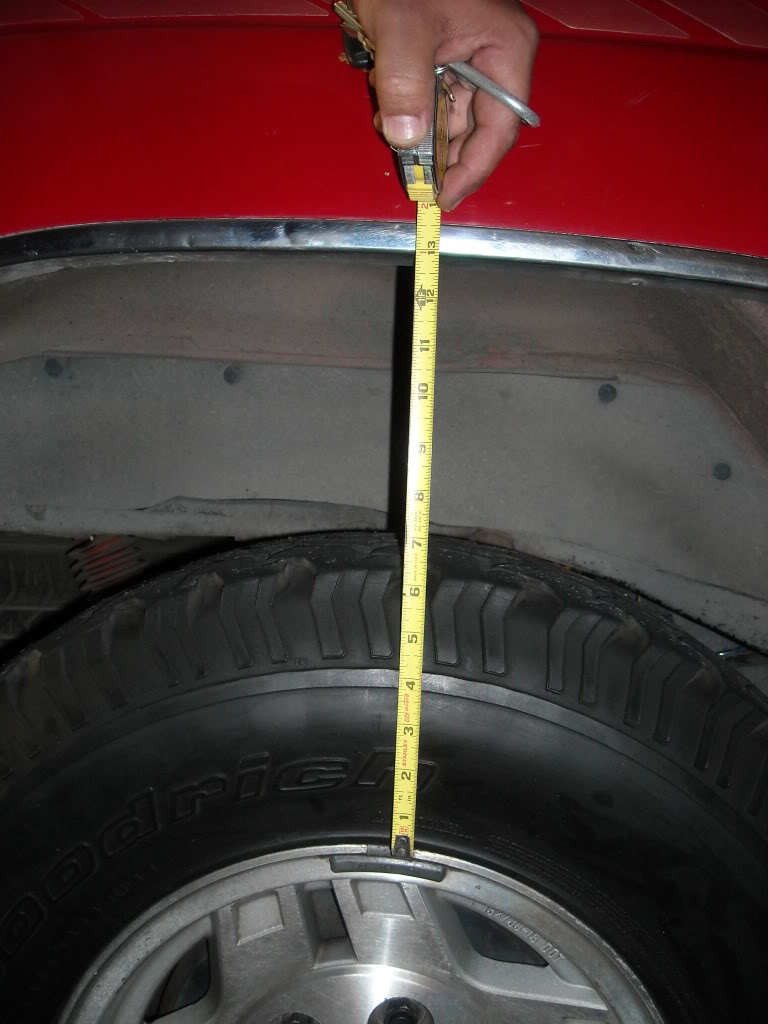
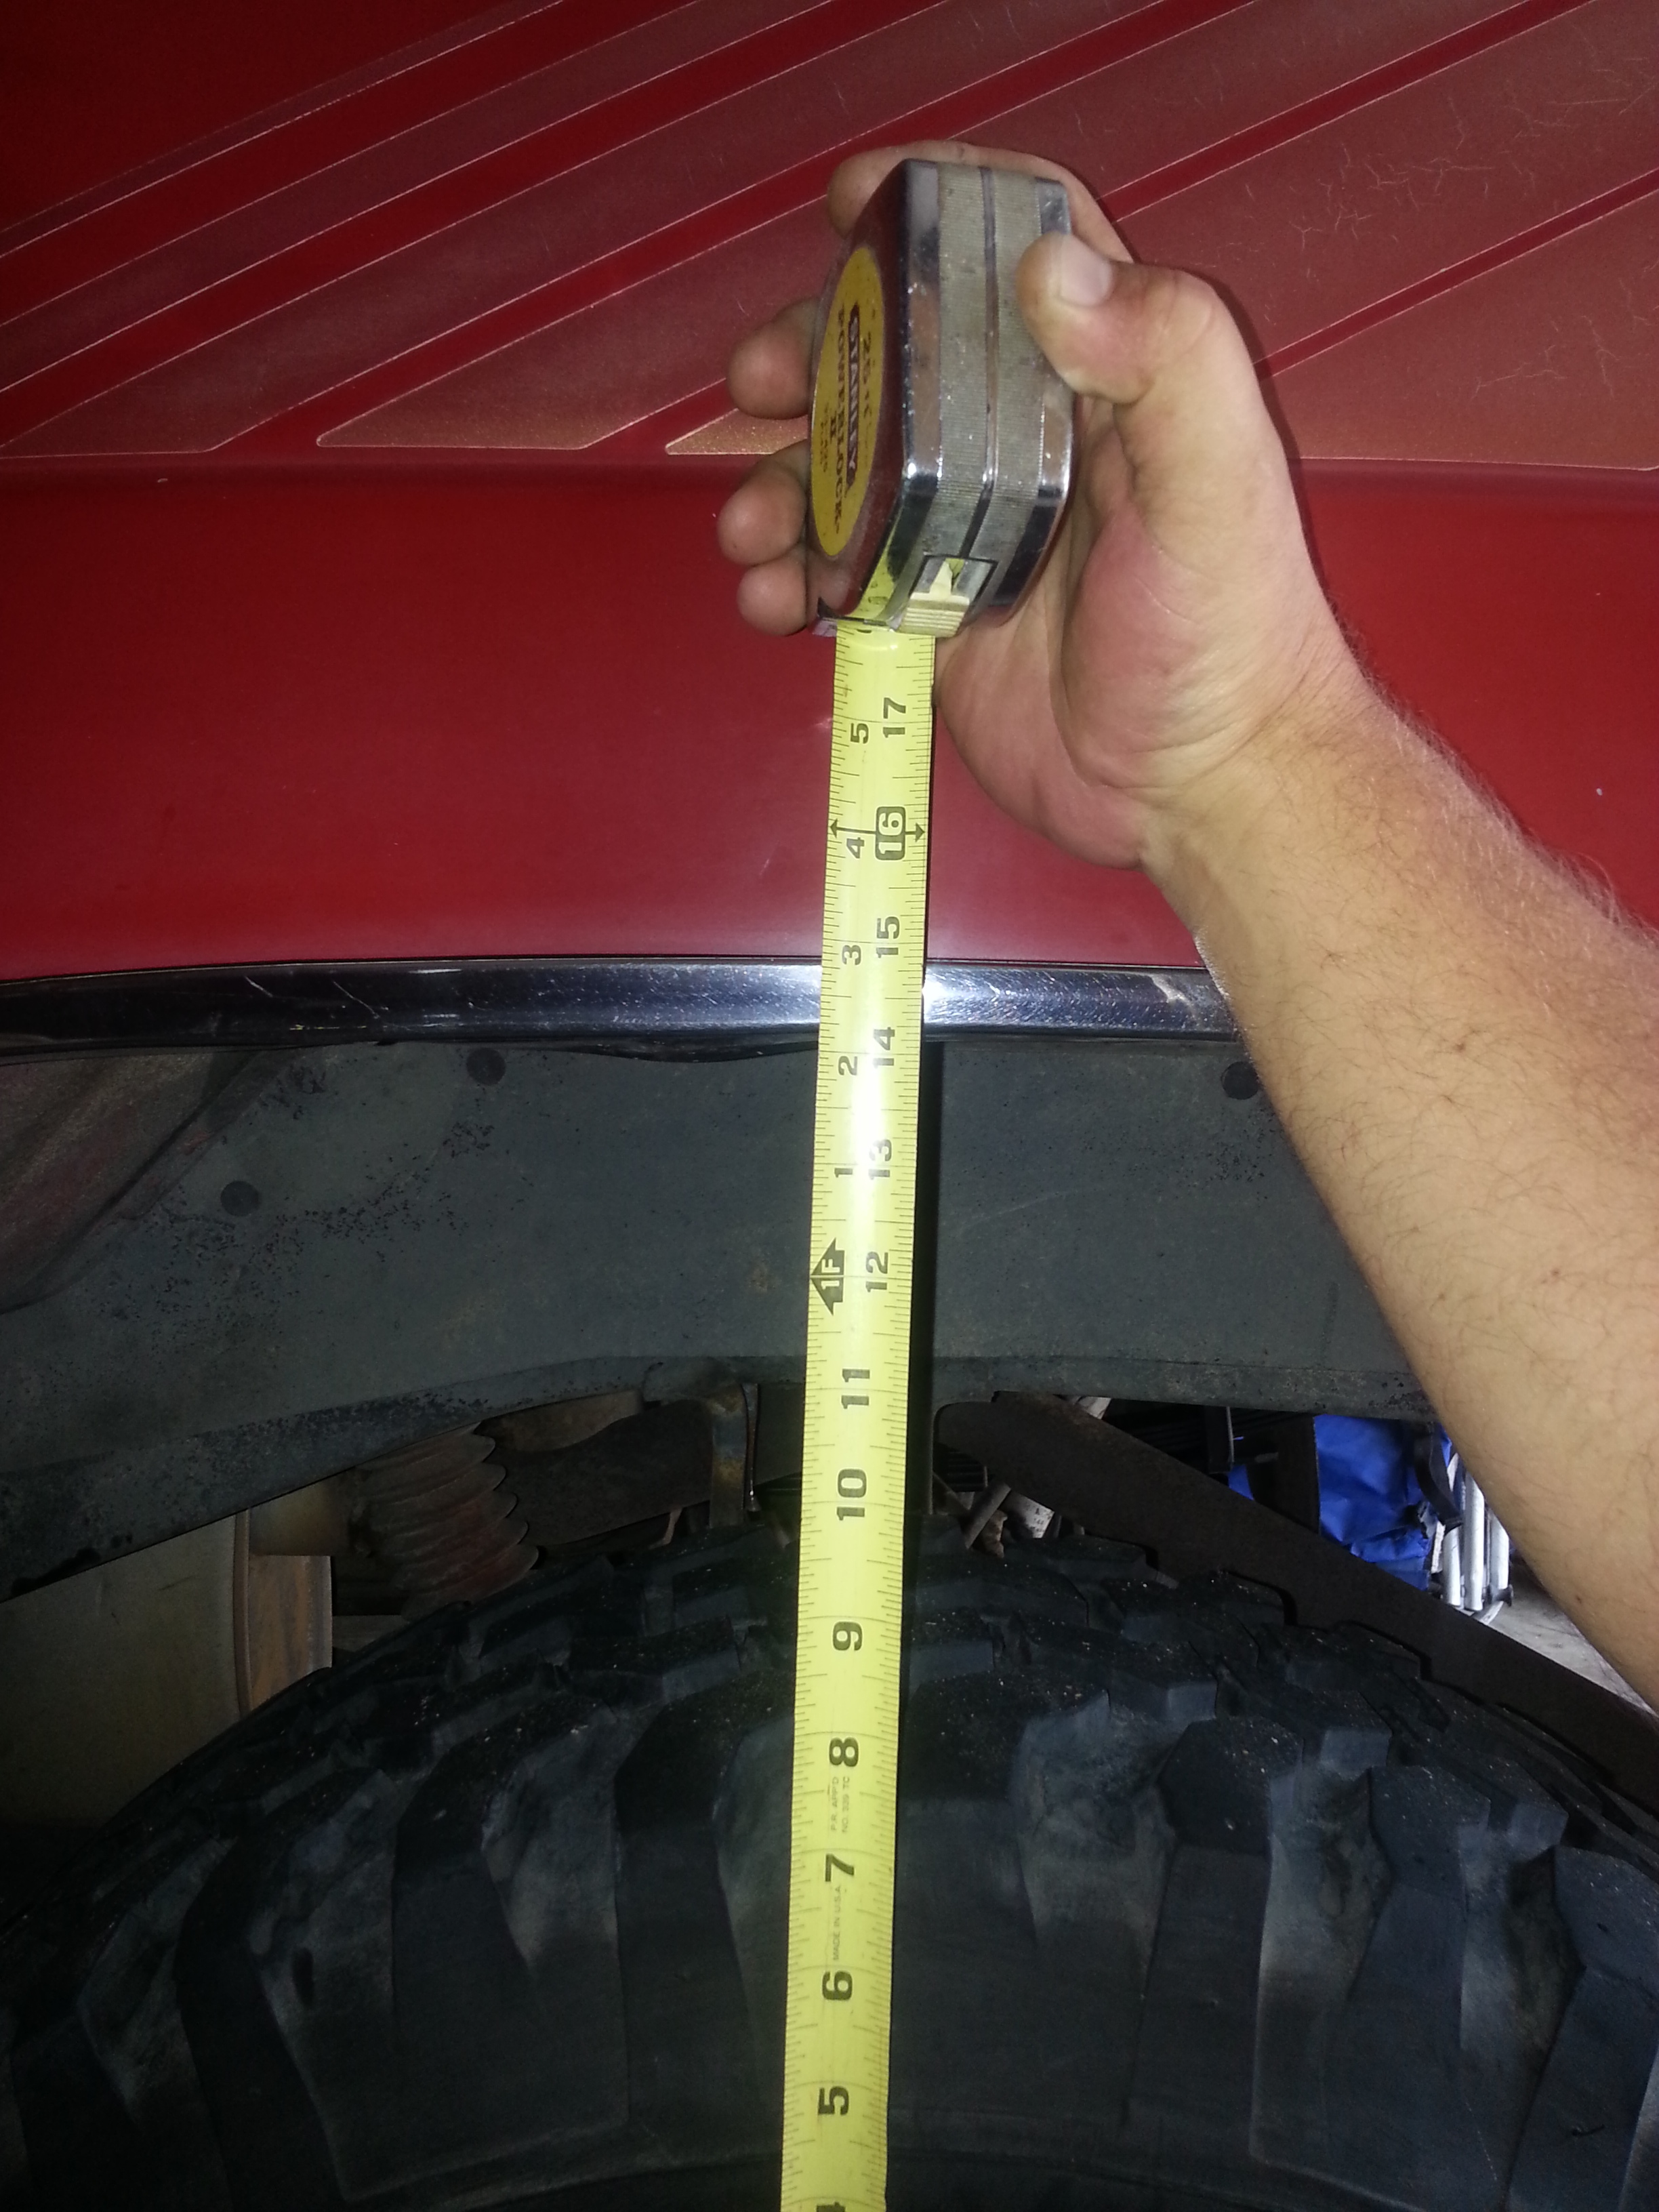
Measurements in rear, top of rim to top of wheel well lip, after Zuk and OMEmu CS009R Leafs:
After Zuk 12"x125#:
Measure/Rear;
After OMEmu:
Measure/Rear;
************************************************** **
My Overall Initial Impression? LOVE THESE LEAF PACKS!
The Zuk did everything I could ask of it, ....and in many ways, it may turn out to be something I will miss(Load Capacity with smooth ride offroad)... But I think I will definitely enjoy this and maybe improve upon it over time. I drove quite a bit today, and on speed bumps, etc.? The OME is MUCH nicer than my 12"x125# Zuk... Was just a BIT stiff. Might have been softer with the 14"x100#... I wouldn't know. But, I don't think it's meant to be soft... AND, it DID do away with the kidney busting bottoming out on every bump! HAHAHA.... On the streets, in turns, ALMOST feels to have less 'roll'.... Very tight in the turns. Also, they are QUIET!!!!! My Zuk did have a tendency to 'squeeeeek', lol.... I TOTALLY got used to it... didn't bother me. But it's nice to hear ALL my work turn to a quieter and quieter ride!
It's too early to tell... BUT, ... I think I have another problem....
* When I hit 55mph and up to around 68mph or so... it's like a steady/deep vibrating, almost like a rolling of the r's speed, in espanol? Maybe a lil faster.. I can feel it in my seat. I'm guessing, since it's selective speeds....
1. Driveshaft issues/pertaining to length?
2. Pinion angle?
It was making SOME noise on occasions, but nothing that ever concerned me... and nothing like this. This is clearly since I did this work. Wasn't there the other day..... New springs/height.... Noise is there, lol.
ANY THOUGHTS, I'D BE GRATEFUL!
I will edit this post and maybe make a thread down the road.... I'm just very pleased, initially... and, well, to be honest, HAPPY AS HECK that it's over! lol.
I am considering some other things, soon.... Not sure what just yet... BUT, if I go higher, it will likely be along with other big things.... Right now, I'm at 2"+ Lift, all around(slight rake in the rear for now, til these springs settle I'm guessing... PLUS, I have relaxed the t-bars up front.... that AINT CHANGING! lol.... I will not suffer a stiff as heck ride for asthetics.... I think it looks pretty good! lol... I will get better pics, later. ...
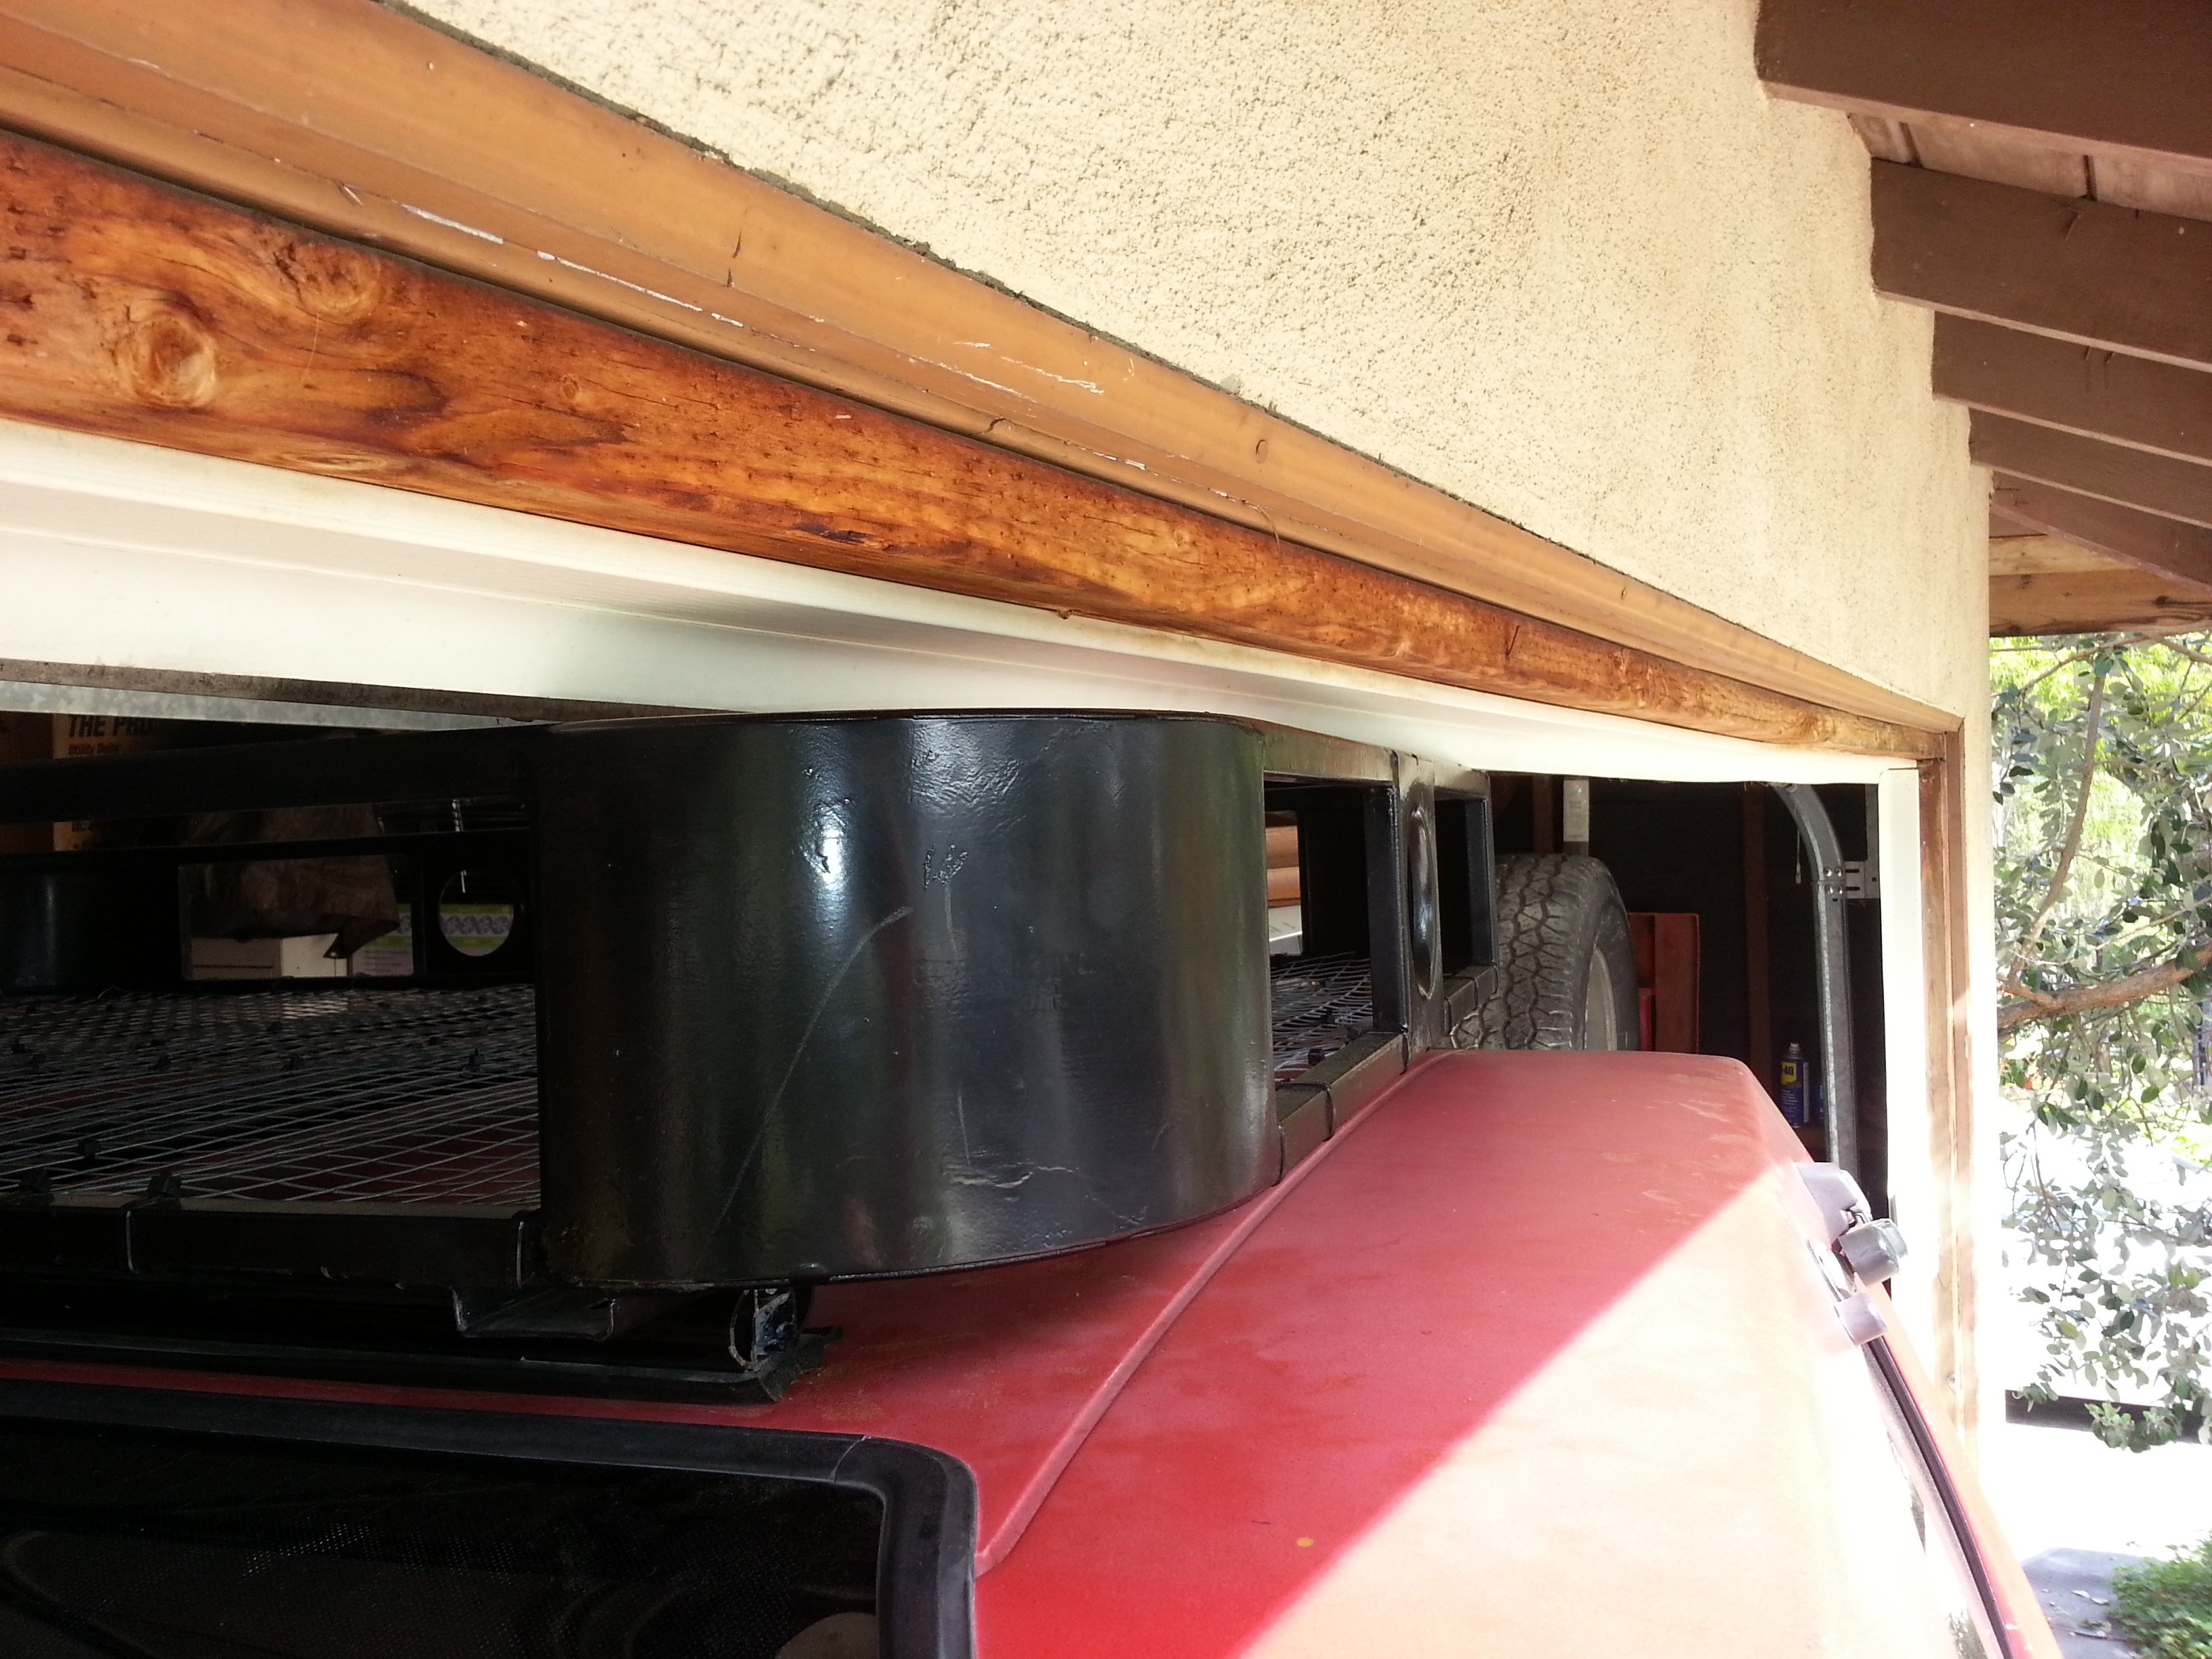
BUT, I mention the height because, well, as I said, I nearly tore my garage door off, just trying to squeeze in, lol... Let the door go up a lil further and it fits... But I will likely try to figure out my final solution for the easy on and off 'con-ferr'.... This will give me around 4 more Inches, if I were ever to go there! SHHHHHHHHHHH! hahaa.
Garage door clearance after adjusting door all the way up......
I AM NOT gonna bitch.... it's useless. I'm also going to just share, .... I put this off for a day or so(Doing this 'kind of a write up', lol).. as I was just SOOOOOO ticked about the shackles... And YET, I have to take some blame for even leaving there with them in the first place. On the instructions, in tiny print, it says "This kit should have".... And it listed "18mm bolts, 18mm nuts, bushing sleeves and 2.25"/1.5" lift shackles.... AND, it turns out.... Even as these settle... I'm already, for some reason, another 1.5-2" over what I had with the Zuk(12"x125# Coils).... Soooo, ..... all worked out for the best, for now. I will still have to, later, install some greaseable shackles... Just haven't decided which route to go. I might just leave the stockers and buy some grease-nipple fitted bolts from 4Crawler, HERE
************************************************** *****
First, I thought A pic with the 12"x125# Zuk Mod/Cut Method, would be appropriate, ... just showing the ride height on level ground.....
*********************************
And a lil bit of the flex of the rear with the Zuk........
********************************************
The Flex with the OMEmu CS009 Pack will go here, later>>>
********************************************
OK, to begin;
When swapping in OMEmu or any leaf packs, where you're pulling out your Original Leafs AND A ZUK, .... There are additional steps, obviously. Even if you still plan to run the Zuk, as Ruined Adventures did, in the thread I previously posted(he did the same swap, but from Jeep Front Coils/No Cut Method)... You still have to remove the Zuk to add the new Pack. Here is his thread, "Weldless Zuk Mod to Old Man Emu" I CAN'T THANK YOU ENOUGH, RUINED ADVENTURES! Your thread helped me a great deal to work through problems, etc.
**************************
So, to begin;
1.) Jack up the Truck by the Frame, letting the rear axle sag as much as possible, until the springs/shocks hit their limit(I chose to use a Big Block and jack up at the Hitch)>>>>
(I then also supported the frame on both sides with Stands)>>>>
2. Using a Bottle Jack, I raised the axle tube on the passenger side, first(doesn't matter which side you start on), taking pressure off the rear hanger/shackle. Remove the "19MM" Nut ON THE UPPER BOLT/HANGER, FIRST!(LEAVE THE LOWER ONE ALONE FOR NOW).....
THIS NUT>>>
3. Knock the fixed bolt/round headed stud out using a rubber mallet and large screwdriver you could care less about.(This did NOT work for me, as the stud was completely frozen in the hanger/splines would NOT budge loose, even though I'd soaked it for 3 tries and have a fairly rust free rig... SOOOO, I did what anyone with a loaned out pitman arm puller would do... GRABBED MY VICE! haha.... a full turn or so, using the method in the picture, below, ...and POPPPPPPPP! MAN was that stuck! lol)>>>
4. Now that you have the Upper Shackle Bolt free from the hanger....NEXT; Using a "17MM" Socket, remove the Lower Shock Bolt from the U-bolt and Shock Bracket... This will allow you to lower the axle further, while the leaf spring pivots on the front hanger, releasing all of the pressure you can from the Zuk Spring(My spring, being a 12"x125# Coil, it came free, but it was still frozen up in the bump stop tower. It easily popped free and rested again on the bump stop held in by the U-Bolts....) Since My Bump Tower has only the very end/plate cut off, .... I still had a lil budging to do to get it out... I chose these tools, pictured below(Nope, don't have a spring compressor
haha)....and without much effort, I pried it out from the tower, then moved to the next step... (TOOLS)>>> (As Ruined Adventures Noted; "Sceptics of the Zuk mod, worried that it might 'pop out', ..."... I too would note that, while my zuk mod is INSIDE the bump tower... it still gave me a lil bit of work, even at full articulation, WITHOUT the shock limiting at all.... Those things may some day BREAK? Who knows... But pop out? Doubtful... I know it's happened, but I would guess installer error or CRAZY airborne feats to be the culprit on that ONE instance I've seen that...out of HUNDREDS I've read!//// Also noting that this is why I chose what I felt was just a LIL more secure method to 'FIX' the Spring in place. HOWEVER; I DID notice that the spring has dug into the bump stops slightly... NOTHING major... but nothing I'd like to continue. SO, I DO recommend finding one of Zuks write ups on doing a coil mounting ring?)
5. Now remove the "19MM" FRONT HANGER Nut and NON-FIXED Bolt, also "19MM"..(do not lose this bolt! there is no replacement in your OLD MAN EMU CS009R Leaf Spring kit).
6. Now that the leaf pack is free from the hangers, jack the axle back up to more easily get to the "19MM" U-Bolt Nuts>>>>
7. Once you've removed the U-Bolts, bracket and Bump Stop, CAREFULLY, lower the axle and remove the leaf pack WITHOUT DAMAGING/CRUSHING/RIPPING IN HALF- THE BRAKE LINES/E-BRAKE CABLE! ....Removed>>>>>
8. Now you want to GREASE EVERYTHING on your Old Man Emu Leaf Pack and EVERY BUSHING, thoroughly. This is the time you would assemble your greaseable shackles.
(THIS IS WHERE MY FUN BEGAN! haha.... I ordered my OMEmu CS009R Kit from 4Wheelparts, over the phone. While speaking with the ARB-USA Rep, weeks before, I had decided I would just stick with the Original Packs, maybe grab some greaseable bolts from 4crawler... So I didn't have the part number... The guy on the phone at 4wheelparts found the 1.5" greaseable shackle kit and said it would likely be there in a couple days. A MONTH later, the order was complete because my Daystar product/kit came in. I pick it up, take it home.. Long story short, as I was going to assemble everything, I took a closer look at the shackles... They were NOT EVEN CLOSE to what I ordered. Part number on the box? RIGHT ON, lol... What I GOT? 3" Wide Leaf, ?" lift Shackles with 27MM bolts and nuts... The bolts fit the OMEmu bushings, shockingly, lol... And my hanger... BUT, the shackles being set up for 3" Wide leafs... while ours are 2.25".... SCREWED! lol. There were no sleeves, not 18mm bolts as the kit said, .... BUT, in the end, it's a good thing! AS IT IS, my lift came up another nearly 2" from what I had with the ZUK.. Maybe 1.75"... Obviously the OMEmu's will settle.... But I nearly tore off my garage door heading in, very SLOWLY, THANK GOD! lol...[The Con-Ferr!] ... I adjusted the Garage door to open all the way, and IT BARELY fits. I will get pics, tomorrow, then edit this and post a pic
)Here is Ruined Adventures posting on the greaseable shackles(I will likely be adding these/or others, with 0" added lift, for now, at a later date).....
*************************************************
An Intermission before assembly to share another 'OOPS', regarding a "I did NOT NOTICE THAT, BEFORE" moment! lol....
* When I went to remove the driver side front hanger bolt/pin.... I realized as I began to free it, .... it was heading RIGHT FOR THE SLIDER!
hahaha..... So, after trying everything to get it free...* I had 2 choices.
1. CUT THE EDGE OF THE SLIDER, after Socal85's BEAUTIFUL WORK? HELLLLLLLLLLLLLLZ NO! lol.... OR, ....
2. Cut the bolt and QUICKLY find a replacement!
* WELL, wouldn't you know.... O'reilly? NOPE! Napa? CLOSED on Sunday ... Pep Boys? NADA! Lowes and Home Depot? NOTHING OVER M12.....
This bolt is an M14-1.50-100MM bolt.... With a round flange head beyond the Hex portion... I'm guessing this aids in pressure, like the Crank Pulley Bolt?.....
My LAST STOP, at 4:50PM on Sunday, 10 Minutes before they close......
Used to be a famous 'EVERYTHING you can't find elsewhere' store, called "Lovelady Hardware Co."..... It's new owners, and MAN, I'M NOT KIDDING.... Between Ian Bosco at Lowes(Redeth knows what I'm talkin bout!).... and this place, .... I COULD NOT have been treated better! This guy hear me asking for something unusual for my 4Runner... He looked a lil deeper than the guy helping me, and VOILA, ...an M14-1.50-100MM- GRADE 10.9 bolt!!!!! >>>>
Now, I could head back, CUT the freakin pin-bolt out
>>> PROBLEM 2? lol.... The muffler is VERY close to limiting me in getting a drift or something in there.... So what did I dig up from that first motor? ONE SOUVENIR I kept.....
^^^ WORKED PERFECTLY, just enough room to rap it out and put in my new Grade-10.9 Bolt and Nut(22MM head).... >>>
SOOOOOOO, now, with my bolt greased up, ready to go into the new OMEmu Bushing Sleeve on the driver side.... I proceeded to 'reassemble'
hehehe.... BUT, FIRST, ...since I didn't have the shackles I was going to use... I had another problem. SOOOOOO, lol.... I had to remove them from the Original Leaf Packs, clean up the pins/bolts really well... Grease em up/and the bushings and slap em back in. So, again, I used the "VICE METHOD"!
************************************************** **********
1. Install the new OME Bushings, WELL GREASED, into your OMEmu Leaf Pack... Also install the 3rd pair in the REAR MOST/UPPER Shackle - hanger mount.
2. Even reusing my original Shackles... I cleaned up the shackle hardware with Fine Metal Emery Cloth, til sparkly, then greased em up and installed them in the rear/lower most bushing in the leaf pack, that secures the shackles to the pack, first. Secure the Pin/nut, but don't torque it down to specs just yet. "SNUG", but not, "HOLY BUGGER", haha...
3. Now, you're ready to bring your prepared OMEmu leaf pack over to the rig, CAREFULLY glide it up and in, onto the Axle dowel keyhole(Center Pin)... then jack up the axle again, then secure the axle to the leaf pack using the LONGER U-BOLTS provided by OMEmu. (specs, IIRC, were 78-110#, on the u-bolts... I will get it for ya and edit).
4. After you've secured the leaf pack to the axle; FIRST... HANG THE FRONT of the leaf pack in the hanger, slide the WELL GREASED pin through, MAKING SURE YOU DIDN'T FORGET THE BOLT SLEEVE IN THE FRONT EYE/inside the bushings! >>>
5. With your lower shackle bolt already secured SNUG to the rear eye of the leaf pack.... Jack up the axle until you can line up the upper holes in the shackle to the hanger.... (Use what you want, .... I chose to use 1/4" and 3/8" Socket Extension rods, because I didn't want anything 'gouging' my new OMEmu Bushings)... Secure the upper hanger/shackle pin bolt to 54-72#, IIRC, and then torque your entire set up, every bolt/nut and ESPECIALLY make sure they are all torqued to specs... Sure, brakes are SO important, ...one of the worst things to neglect... BUT, if your U-bolts or hanger pins fall out... YEAH, not good! HAHAHA.
6. Lastly, but you could do it sooner, I reinstalled my Shock to the U-bolt bracket.... Torqued it down.... And voila, ....
Before Zuk;
After Zuk;
After OMEmu - CS009R Leaf Pack Swap;
************************************************** ********************
Measurements in rear, top of rim to top of wheel well lip, after Zuk and OMEmu CS009R Leafs:
After Zuk 12"x125#:
Measure/Rear;
After OMEmu:
Measure/Rear;
************************************************** **
My Overall Initial Impression? LOVE THESE LEAF PACKS!
The Zuk did everything I could ask of it, ....and in many ways, it may turn out to be something I will miss(Load Capacity with smooth ride offroad)... But I think I will definitely enjoy this and maybe improve upon it over time. I drove quite a bit today, and on speed bumps, etc.? The OME is MUCH nicer than my 12"x125# Zuk... Was just a BIT stiff. Might have been softer with the 14"x100#... I wouldn't know. But, I don't think it's meant to be soft... AND, it DID do away with the kidney busting bottoming out on every bump! HAHAHA.... On the streets, in turns, ALMOST feels to have less 'roll'.... Very tight in the turns. Also, they are QUIET!!!!! My Zuk did have a tendency to 'squeeeeek', lol.... I TOTALLY got used to it... didn't bother me. But it's nice to hear ALL my work turn to a quieter and quieter ride!
It's too early to tell... BUT, ... I think I have another problem....
* When I hit 55mph and up to around 68mph or so... it's like a steady/deep vibrating, almost like a rolling of the r's speed, in espanol? Maybe a lil faster.. I can feel it in my seat. I'm guessing, since it's selective speeds....
1. Driveshaft issues/pertaining to length?
2. Pinion angle?
It was making SOME noise on occasions, but nothing that ever concerned me... and nothing like this. This is clearly since I did this work. Wasn't there the other day..... New springs/height.... Noise is there, lol.
ANY THOUGHTS, I'D BE GRATEFUL!
I will edit this post and maybe make a thread down the road.... I'm just very pleased, initially... and, well, to be honest, HAPPY AS HECK that it's over! lol.
I am considering some other things, soon.... Not sure what just yet... BUT, if I go higher, it will likely be along with other big things.... Right now, I'm at 2"+ Lift, all around(slight rake in the rear for now, til these springs settle I'm guessing... PLUS, I have relaxed the t-bars up front.... that AINT CHANGING! lol.... I will not suffer a stiff as heck ride for asthetics.... I think it looks pretty good! lol... I will get better pics, later. ...
BUT, I mention the height because, well, as I said, I nearly tore my garage door off, just trying to squeeze in, lol... Let the door go up a lil further and it fits... But I will likely try to figure out my final solution for the easy on and off 'con-ferr'.... This will give me around 4 more Inches, if I were ever to go there!
SHHHHHHHHHHH! hahaa.Garage door clearance after adjusting door all the way up......
Last edited by ChefYota4x4; 03-20-2013 at 12:12 AM.
03-19-2013, 02:43 AM
#6115
Registered User

Yep, sounds like you'll have to do something bout that Con-Ferr when you take those new OME leafs and use em for an RUF SAS!
On the vibes, how new are your u-joints? I've heard of a few people lifting and getting some vibes that went away after awhile. The most prevalent theory I've seen so far is that the u-joints had just sort of worn into the angle they were at for so many thousands of miles and they simply had to "wear in" to a new angle. Food for thought, I can't say that I ever noticed any vibrations after my OME coils, but my pinion angle I set by links, so that could make a difference.
Looks great, anyway!
03-19-2013, 04:31 AM
#6116
Registered User
Sounds like drive shaft vibrations. Could be as stated above, could also be length, not enough in the yoke after the lift. I had a new shaft made when installed the r1fa t-case onto the R150f Trans, because I didn't have a shaft to fit out of the three I had, my measurement for the drive shaft was taken with some extended shackles that I have now redrilled for stock length.
Nice write up. Btw, I used marlin crawlers shackle kit.
Nice write up. Btw, I used marlin crawlers shackle kit.
03-19-2013, 07:35 AM
#6117
Contributing Member
Join Date: Mar 2003
Location: COTKU,Ontario,Canada
Posts: 11,334
Likes: 0
Received 0 Likes
on
0 Posts
 ... but they're the wrong ones!

Yeah you're gonna hafta remember you're a little taller now Mark
... be careful you don't want to amputate that basket.. maybe consider taking it off when your not using it and leave it in the garage... your fuel economy will improve if you do that...the flange on the shackle bolt is to spread the load out over a wider area on the bracket and protect the mount/hole... you may want to consider adding a fender washer if you did'nt already when you installed it.
the vibrations could be your pinion bearing... I had that and waited to long to fix it since it did'nt really annoy too much and had to get a whole new diff. ...the drive angle probably isin't all that extreme so I doubt that's it...
fwiw I would get those new reinforced shakles and grease-able bolts.
they appear to be a much more robust assembly than the stock two strips of sheet steel.
Great write up ... kick back and

Last edited by aviator; 03-19-2013 at 07:41 AM.
03-19-2013, 08:26 AM
#6118
Registered User
Wow, nice writeup on the OME install. Your truck just keeps getting better. Sorry about the parts issues, I thought that stuff only happened to me. If I were you, I'd check those Ujoints and your pinion flange for any play before doing too much driving. Ujoints are a pain in the butt, I do not enjoy changing them.
03-19-2013, 09:44 AM
#6119
Yep, sounds like you'll have to do something bout that Con-Ferr when you take those new OME leafs and use em for an RUF SAS!
On the vibes, how new are your u-joints? I've heard of a few people lifting and getting some vibes that went away after awhile. The most prevalent theory I've seen so far is that the u-joints had just sort of worn into the angle they were at for so many thousands of miles and they simply had to "wear in" to a new angle. Food for thought, I can't say that I ever noticed any vibrations after my OME coils, but my pinion angle I set by links, so that could make a difference.
Looks great, anyway!
On the vibes, how new are your u-joints? I've heard of a few people lifting and getting some vibes that went away after awhile. The most prevalent theory I've seen so far is that the u-joints had just sort of worn into the angle they were at for so many thousands of miles and they simply had to "wear in" to a new angle. Food for thought, I can't say that I ever noticed any vibrations after my OME coils, but my pinion angle I set by links, so that could make a difference.
Looks great, anyway!
I HAVE both rear joints to the t-case, new, in boxes, for 5 years now. They are the OLD school MOOG, before they shifted to Taiwan? Anyway, my old school MOOG idler arm has been through the ringer for 50k or so.... no drama, tight as new. Came with bronze bushings. I cant return them, so they're wut I have to use. (Got them at what was Kragen when they carried HD Moog stuff.... might have been 6 yrs ago.)
Pinion angle set by links... hmmmmm.
Sounds like drive shaft vibrations. Could be as stated above, could also be length, not enough in the yoke after the lift. I had a new shaft made when installed the r1fa t-case onto the R150f Trans, because I didn't have a shaft to fit out of the three I had, my measurement for the drive shaft was taken with some extended shackles that I have now redrilled for stock length.
Nice write up. Btw, I used marlin crawlers shackle kit.
Nice write up. Btw, I used marlin crawlers shackle kit.
Also, could I do alright by grabbing the "0 LIFT" OMEmu or daystar or TG or 4Crawler greaseable shackle kit? (So u went back to wutever lift the springs offer on their own? Why-come? Haha). I know if I do go up to 4" for some reasason, lol, I will HAVE to address all this stuff.. Darn, was hoping it wouldnt change much from where I was, avoiding other dramatic alterations) DID YOU find urs settled a vit? Cuz this is more like 2.5"+ ...???
... but they're the wrong ones! Yeah you're gonna hafta remember you're a little taller now Mark
... be careful you don't want to amputate that basket.. maybe consider taking it off when your not using it and leave it in the garage... your fuel economy will improve if you do that...the flange on the shackle bolt is to spread the load out over a wider area on the bracket and protect the mount/hole... you may want to consider adding a fender washer if you did'nt already when you installed it.
the vibrations could be your pinion bearing... I had that and waited to long to fix it since it did'nt really annoy too much and had to get a whole new diff. ...the drive angle probably isin't all that extreme so I doubt that's it...
fwiw I would get those new reinforced shakles and grease-able bolts.
they appear to be a much more robust assembly than the stock two strips of sheet steel.
Great write up ... kick back and
Well, the rack is easy off now (the cage is) , so thats ok. Wasnfonna do a weekend run maybe thos coming weekend... not sure, so would rather leave it on if possible, just til I know either way.
The flange on shackle bolt issue should be ok, as I'm using a newer 10.9 - Grade M14 x 1.50 x 100mm bolt.... which has a 22mm head and nut. Is at least the width of the flange that was under the original 19mm bolt. I will look later
haha.Pinion bearing eh? YEA!!!!!! I always wanted that to add to my INSANE LIST of "whats next?!?" HAHAHA. Jk.... ok, good info! Thanks!
Shackles..... I agree on going new... abd as you know, I WAS! Hehehe..... KNOBS! At least ONE knob at daystar anyhow... How could you not notice the size and missing parts factor, NOOOOO? Lol. .. Oh well, whatever. O.o ...hehe. Guess, from what RBX said, I shouldbgrab someones "0 inch lift shackles"? Lol. ... I mean, adding more height would only increase wutever drama I'm hearing.
Could it be the t-case? Almost feels lije its right under me. GAWD I HOPE IT'S NOT THAT GIANT YOLK JOINT THINGYMADOOHICKIEMABOBBER! hahahaha
Wow, nice writeup on the OME install. Your truck just keeps getting better. Sorry about the parts issues, I thought that stuff only happened to me. If I were you, I'd check those Ujoints and your pinion flange for any play before doing too much driving. Ujoints are a pain in the butt, I do not enjoy changing them.
Gonna add more info, pics and edit that post as I go.
just really busy right after! LolPS> I ONLY hear/feel this vibrating when under load/acceleration and it seems to be more 55-68mph'ish only?
Last edited by ChefYota4x4; 03-19-2013 at 10:45 AM.
03-19-2013, 11:31 AM
#6120
Registered User
shweet stuff mark umm i know air down your tires to park then air them back up when you leave? ... J/K
as for the vibration have the alignment shop check your rear end making sure its parallel with the front wheels just an idea that no one has mentioned
as for the vibration have the alignment shop check your rear end making sure its parallel with the front wheels just an idea that no one has mentioned


