
ChefYota4x4's 1987 4Runner Build-Up Thread
 07-21-2010, 09:58 PM
#581
Registered User
Join Date: Feb 2010
Location: Seattle
Posts: 156
Likes: 0
Received 0 Likes
on
0 Posts
I got the email notifications and kinda scratched my head for a minute  I updated my signature for yah, been busy on the rig, I'll put some stuff up next week once I've fabbed my new exhaust
Looks like around 341 for the 4wd bumper. Spendy. I'd rather save up for my LCE engine ;D
I updated my signature for yah, been busy on the rig, I'll put some stuff up next week once I've fabbed my new exhaust Looks like around 341 for the 4wd bumper. Spendy. I'd rather save up for my LCE engine ;D
Last edited by ra33it; 07-21-2010 at 10:01 PM.
 07-21-2010, 10:14 PM
#583
PS> I think Trail Gear makes a nice wrap around for around 250, no? Personally, I LOVE their bumper for the 1st gens, more than any out there. However, like you, I'm trying to space out every dollar! lol.
They have a nationwide Yard network, Ra33it, ...maybe you can get on one and have them ship?
They have a nationwide Yard network, Ra33it, ...maybe you can get on one and have them ship?
07-21-2010, 10:25 PM
#584
Registered User
Join Date: Feb 2010
Location: Seattle
Posts: 156
Likes: 0
Received 0 Likes
on
0 Posts
Thanks Chef, I have a real good yard up here that just got a new truck in recently(89), I'm gonna take a look at it tomorrow and see what I can get. Best price new on a rear I've seen for my model is 225, and from the same yard (nix99). I think you're right, local is best, followed closely by salvage from nearby. I'll keep my ears perked up
07-25-2010, 10:17 AM
#585
Ok, well, I'm free for the rest of the day, and while I'd like to just go hang at the beach, ....I'm going to work on the rig, instead! lol. Actually, I can do that and jump in the pool from time to time, while getting some sun! BEAUTIFUL DAY!
1. I'm going to pull the steps off the side.(CAN'T BELIEVE it's taken me this long... but I just keep forgetting, hahaha. Also, it wasn't much of a priority, and I've had such limited time to work on her, so I figured.... 'it can wait', when I did think about them.) I NEVER use them, except for cleaning the roof.... I can just stand in the cab for that, eh? lol)
2. I'm going to remove the fuse box(engine bay) and replace that power wire from the battery to box.
3. I'm going to research getting a heater for my 02 Sensor, as having it back a bit further(after the LCE Header install) might be causing it to run a bit more rich??? Thook??? hahaha.
4. If I have time, I'm going to remove the bumper mount in the rear that's caved in, and hopefully put a spacer between the mount and body to bring the right side of the rear bumper back 'up' a bit. I tested it out last night, and I think if I can get the mounting hole arms on the bumper side straightened out just right, ....I might not need to buy a new mount. Unfortunately, the body side where the mount screws in was caved in whenever the PO got nailed... so I'll have to try the spacer washers. I picked up a #20 bolt, yesterday, at Lovelady Hardware in Torrance, which was a bit longer, so I can have more space to fit in the washers.
Hope it all works out. If I don't get up from here, however, it'll be 3pm before I realize I've droned out all day due to my Yotatech Addiction! hahaha.
PS> I'll get pics without the steps on, shortly. Post them, l8r!
Have a nice day, guys,
Mark
07-25-2010, 11:02 PM
#586
Okkkkkkkk, lol.
Well, anywhooooo, today, I.......
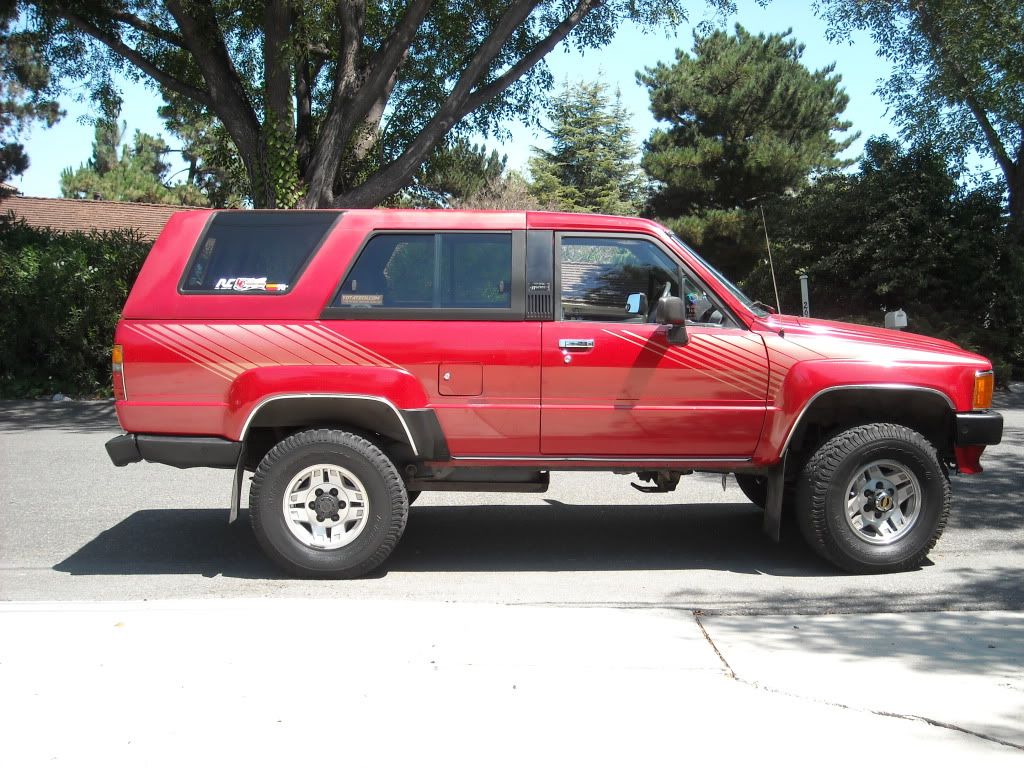
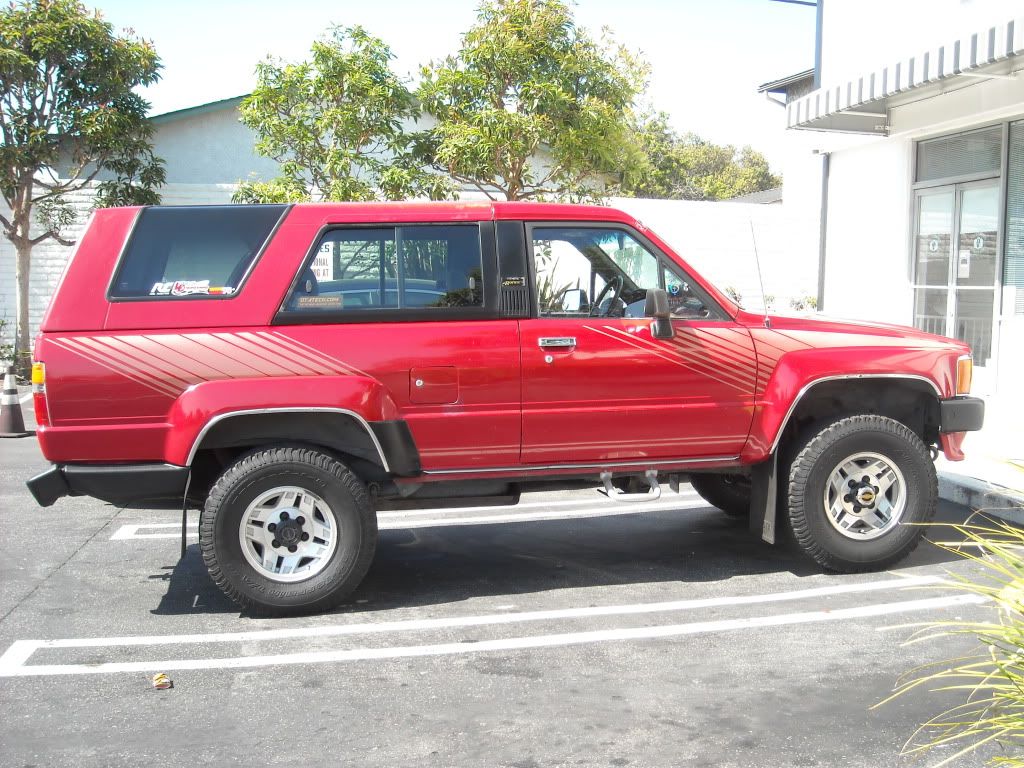
1. Pulled the steps off the side.........
Before;
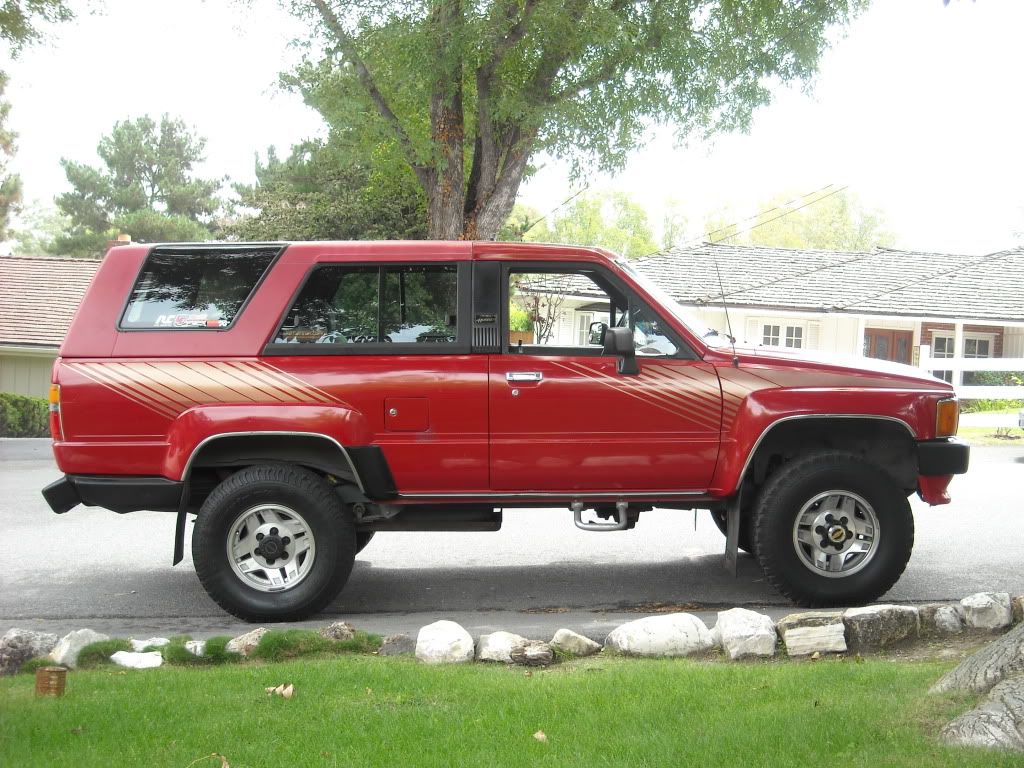
After;

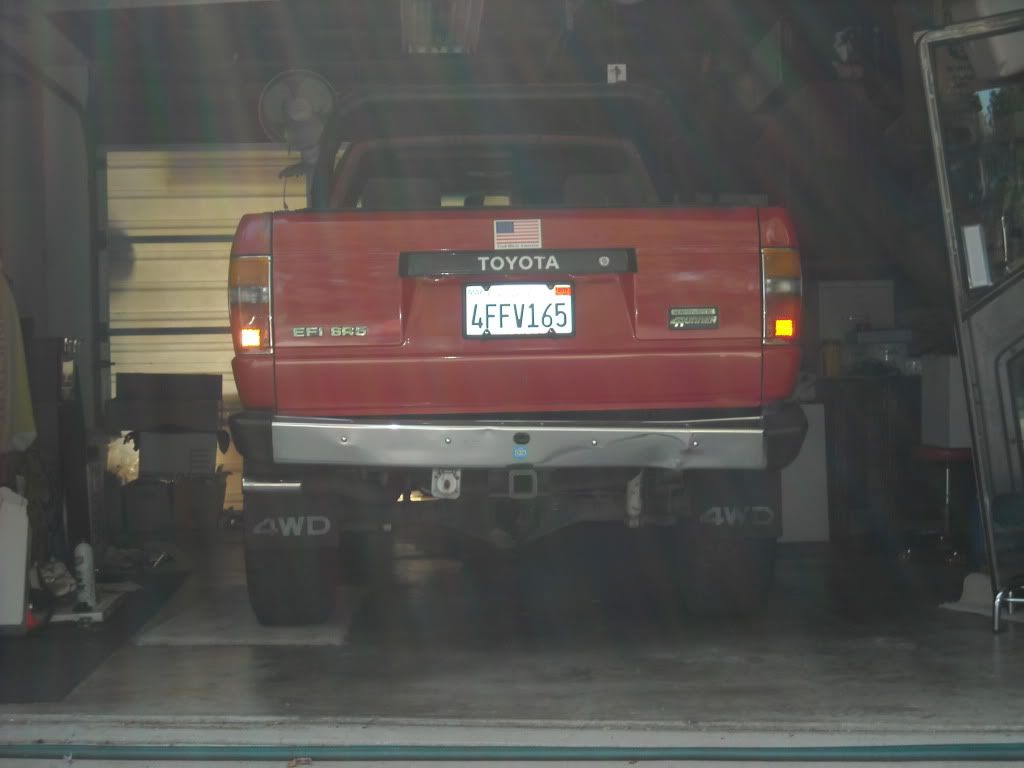
Put a spacer in, between the bumper mounts and body, ..brought the bumper up enough that I think when I get a straight face bar, ...it should work! I got creative and put a 3" wide plate/with slot, 1/3" thick, to force the angle upward.....
Before;
After;
I also replaced the Starter wire from the battery, ...Then, the wire from the positive terminal to the Fuse Box(under the 80amp fuse) PITA in my case, since the plate wanted to slide down and gave me trouble lining up, ...until I Re-installed the bolt to the plate/right side...... I also cleaned up all the grounds to the firewall and heatshrunk all of it. No real change, not that I could notice in a 4 Minute idle and jog around the block.
Still hunting for that miss and really would be grateful for any input on "thoughts on bad mileage".
Thanks guys,
Mark
Well, anywhooooo, today, I.......
1. Pulled the steps off the side.........
Before;
After;
Put a spacer in, between the bumper mounts and body, ..brought the bumper up enough that I think when I get a straight face bar, ...it should work! I got creative and put a 3" wide plate/with slot, 1/3" thick, to force the angle upward.....
Before;
After;
I also replaced the Starter wire from the battery, ...Then, the wire from the positive terminal to the Fuse Box(under the 80amp fuse) PITA in my case, since the plate wanted to slide down and gave me trouble lining up, ...until I Re-installed the bolt to the plate/right side...... I also cleaned up all the grounds to the firewall and heatshrunk all of it. No real change, not that I could notice in a 4 Minute idle and jog around the block.
Still hunting for that miss and really would be grateful for any input on "thoughts on bad mileage".
Thanks guys,
Mark
Last edited by Terrys87; 05-08-2015 at 11:16 AM.
07-26-2010, 08:32 AM
#587
Registered User
iTrader: (2)
Join Date: Dec 2009
Location: Pleasanton, CA - SF Bay Area
Posts: 2,159
Likes: 0
Received 7 Likes
on
5 Posts
Chef - I just replaced my same starter to battery cable this weekend (my cheapo "new" one cracked!). While I was in there, I took apart the fuse box with the intention of also replacing the wire that goes to the positive terminal, as the original one is a mess of splices and old wire....
I found it was connected in the fuse box to a "plate" and crimped on there really good.
Do you know:
1) If that part is available?
2) what gauge wire that is?
Thanks!
I found it was connected in the fuse box to a "plate" and crimped on there really good.
Do you know:
1) If that part is available?
2) what gauge wire that is?
Thanks!
07-26-2010, 09:43 AM
#588
Hey Phil,
Good to hear from ya. Ok, wellllllllllll, lol, ... To answer on the "plate", ..not sure if it's available, but I'd imagine the only place you're going to get it is Toyota..... I'd also bet that you'll have to buy the whole panel/box. However, I could be wrong. As far as the wire, it's not noted on the wire, of course, but it's definitely larger than 10g. I'm assuming it's 8, but seems a lil smaller. I'm going to re-do that, later, but I HAD to get it back together yesterday evening. For now I used 10g, butt connected then heat-shrink wrapped and new connector to slide over the battery-wing nut post. It's working fine, but I believe I have a loose or poor connection somewhere in between the box and the dash harness. When I turn on my signal, the gauge for voltage bounces very slightly. Not sure if that's normal, ...anyone have any thoughts?
I have to call Toyota when my rear bumper face comes to me from Discount Body Parts, to make sure they have all 3 (End Cap, Extension and End Cap Brace), ....so I'll look into whether that plate is available. I have read others on here saying, "I replaced it with 6 Gauge Wire and 'WOW, WHAT AN IMPROVEMENT', ....and I'm curious, to say the least, as to how they managed to not only remove the HARD crimp on the wire and secondary crimp, for wire insulation, ..but also as to how they would fit 6gauge wire in that connector. Maybe crimped as well as possible and then solder? I guess it could work. I think the 8gauge should be fine to power that box and onward. The PO had joined the original 8g(?) wire from the box to the post, in the middle, with a CHEESY(maybe it just deteriorated since he did it 10yrs. ago? hahaha) fusible link, down to around 12g wire and a clump of solder. It was all green and frayed mildly, ...so I figured, "WHAT COULD IT HURT?"....Not to mention, FLECKER TOLD ME TO DO IT! lol. Seriously, I really respect the guy and anyhow, aside from him being right, IT CLEARLY needed to be replaced.
PS> Does it look better without the steps? lol. The new bumper set up will really help, but I have to hope that I've pounded the bracket out properly and that the space will help to even it out. Can't know until I get the new face.
07-26-2010, 10:10 AM
#589
Registered User
iTrader: (2)
Join Date: Dec 2009
Location: Pleasanton, CA - SF Bay Area
Posts: 2,159
Likes: 0
Received 7 Likes
on
5 Posts
Thanks Mark for checking on that for me - The hard crimp looked impossible to undo without destroying it, so I stepped back....
I have also heard about upgrading the thickness of the wire - and would like to. Now, being an electronics noob, do I need to put anything in between the fuse box and the + terminal, or does the fuse it hooks up to take care of that?
I can solder, and would likely do that when I set this up with the thicker wire.
I like your truck without the steps, yes!
07-26-2010, 10:23 AM
#590
Yeah, my PO had placed a fusible link between the fuse box and positive post. WHY? I mean, it's connected from the post directly to an 80AMP FUSE! lol. Personally, I'd rather have a spare 80AMP fuse to replace(spare) than solder and wiring up on some trail, ya know? lol.
07-26-2010, 11:03 AM
#591
Registered User
iTrader: (2)
Join Date: Dec 2009
Location: Pleasanton, CA - SF Bay Area
Posts: 2,159
Likes: 0
Received 7 Likes
on
5 Posts
Yeah, my PO had placed a fusible link between the fuse box and positive post. WHY? I mean, it's connected from the post directly to an 80AMP FUSE! lol. Personally, I'd rather have a spare 80AMP fuse to replace(spare) than solder and wiring up on some trail, ya know? lol.
OK, total newbness showing here....are you being sarcastic? Are you saying "of course you should have a fusible link" or "no you don't need one since there is an 80AM Fuse in the box that will blow before any damage is done (and wiring up a blown fusible link would suck)"?
07-26-2010, 11:11 AM
#592
No, wasn't being silly. lol. Sorry, Phil... I'm not really experienced with electrical work, ..but I'm learning. From everything I've been told(including from Flecker, who was here, telling me, "You don't need that fusible link, ...it's redundant"), I'm guessing it's not needed. I mean, that panel IS A FUSIBLE link, know what I mean? And yet, now that I think about it, ...I'd probably rather replace the wire than tear that thing apart again. Just not sure the link is the way to go, considering what I've been told. I would think a solid wire from box to battery is the way to go... 8-6G?
07-26-2010, 11:14 AM
#593
Registered User
iTrader: (2)
Join Date: Dec 2009
Location: Pleasanton, CA - SF Bay Area
Posts: 2,159
Likes: 0
Received 7 Likes
on
5 Posts
That's kind of what I thought...would be like putting 2 fuses on one wire, like you said.
I'll wait to hear from you on the plate part number, if you can track that down
thanks!
I'll wait to hear from you on the plate part number, if you can track that down
thanks!
07-26-2010, 11:29 AM
#594
Yeah, well, you're not gonna like this one, Phil, hahaha;
"Hello, Parts, DCH Toyota?" .... "Yes, I want the Fuse Box Plate,...blah blah", ...on hold for 30 seconds or so, when he came back to tell me, "Yeah, not only is the plate not available individually.... but you can't even get the box by itself. You have to buy the entire harness"......... PAUSE, 'WOTTTTTT?' hahahaha.
Sorry bud, it looks like it's junk yard mod time, eh? It shouldn't be too difficult to pry out that crimp and then solder in a new 6G wire.... But they come factory with 8g, ...which I don't THINK is too bad of a size. If you want to put a new wire, all the way, then if you can get the crimps out and put a new 8G, ...should be good to go, eh?
07-26-2010, 12:39 PM
#595
UPDATE:
Guys, I'm sure many have either lost interest or just are plum out of suggestions with my troubleshooting thread, hahaha. However, I just wanted to throw out there, one more time, that, I have REALLY hit a wall in regards to what could be causing my excessive fuel consumption, 'pup-...........pupupupu............pup.........pup" miss, and; I rolled into Toyota this am, and the foreman there(whom I know), basically told me that he'd not be able to check things out for free when it came to getting into it like he'd have to in order to diagnose what my issue might be. He said, "It needs to be scoped out and fuel pressure, etc. Because, as you rolled in, today, ....with the regular diagnosis and as I see it running, I'd be left telling you, 'Nothing is really wrong with this that I can tell with a basic diagnosis. No codes, no real issue with idling or misfire/backfire, ... seeming to drive fine throughout all ranges. It needs a REALLY in depth scope write up, including all electronics and exhaust readings... With my system the way it is, I can't hook up to those without a proverbial arm and leg, ya know?"
Soooooooo, I got a number from him to a Japanese Truck Specialists- Shop in Carson... They specialize in MOSTLY Toyota, also Nissan and Mazda trucks, as well as Ford rigs with Mazda motors, lol. Anyway, he said, "I know your guy at Toy, ...he's a good guy, and if he's sending it out, sounds like a challenge to me. I tell you what, ...I'll diagnose it for free. But, if I find your problem and you choose to fix it, just pay me half of the diagnosis fee of 98$ We check everything, including your tranny, and I have no problem helping you out. It's just that I can't do the work of checking it out for nothing , if I find the problem... My boss expects the work to be done here for the 'Free Diagnosis' deal, ... Sound good?"
I guess I'm on it, guys.... I think it beats me trying to diagnose further, buying a Fuel Pressure Test Kit, etc., ...when I can have him check it out and HOPEFULLY figure it out for 50$ or so, ...ya know? I think I'm going to drop it off in the AM, tomorrow. I just can't spare any more time, NOR RUNNING AT 10-14 MPG! I'll update asap, ok?
07-26-2010, 12:44 PM
#596
Registered User
Geeze man, I've been gone for a bit on holiday and I thought you would have had this buttoned up by now. I can't believe it's still doing the same things as before and you have done a ton of checking about.
Hopefully this other chap will be able to get you straightened out. Best of luck...Chances are it's probably something really dumb.
Hopefully this other chap will be able to get you straightened out. Best of luck...Chances are it's probably something really dumb.
07-26-2010, 12:48 PM
#597
Yeah, I bet! I'm only left to guess, ya know? I can't believe NOTHING is wrong though, getting such terrible mileage. Like I said, it was all in town and I did a bit of stomping on it... Plus, I live with nothing but hills around me. However, EVEN THEN, that seems pretty low. And, I did baby it half the time, too. Shifting at 12mph at 1st to 2nd, then 25 2nd to 3rd, lol. etc. I just don't know, and I think the hiccup has GOT TO HAVE something to do with the fuel consumption, don't you? I mean, ..... the only thing is, ...I DON'T HAVE ANY SMOKE, doesn't smell really rich, etc. Its just really bizarre. In fact, I passed smog before the build with it using a bit more fuel than it should(not good mileage, ... about the same but maybe a TEENY bit better)......which is also strange, seeing as it's breathing better I should be getting a bit better mileage, no?
07-26-2010, 12:58 PM
#598
Registered User
I agree totally. You should be getting better mileage since the build. All I can really think of is that the O2 sensor is out of wack and causing you to run rich but then you'd smell it but not if it's burning it all...Sooooo maybe a vac leak causing you to run rich which is normal now since it's burning all the fuel due to the extra air from the vac leak??? Hmmmm You have tried swapping the AFM. Well how about this: Vac leak with a faulty FPR so you're getting more fuel but you still are burning it with the leak?
But really I donno...I know you have gone over that thing 100 times now and you would have found the leak if you had one. maybe some thing with the EGR stuff? I wish I had a n answer for ya.
But really I donno...I know you have gone over that thing 100 times now and you would have found the leak if you had one. maybe some thing with the EGR stuff? I wish I had a n answer for ya.
07-29-2010, 08:56 PM
#600
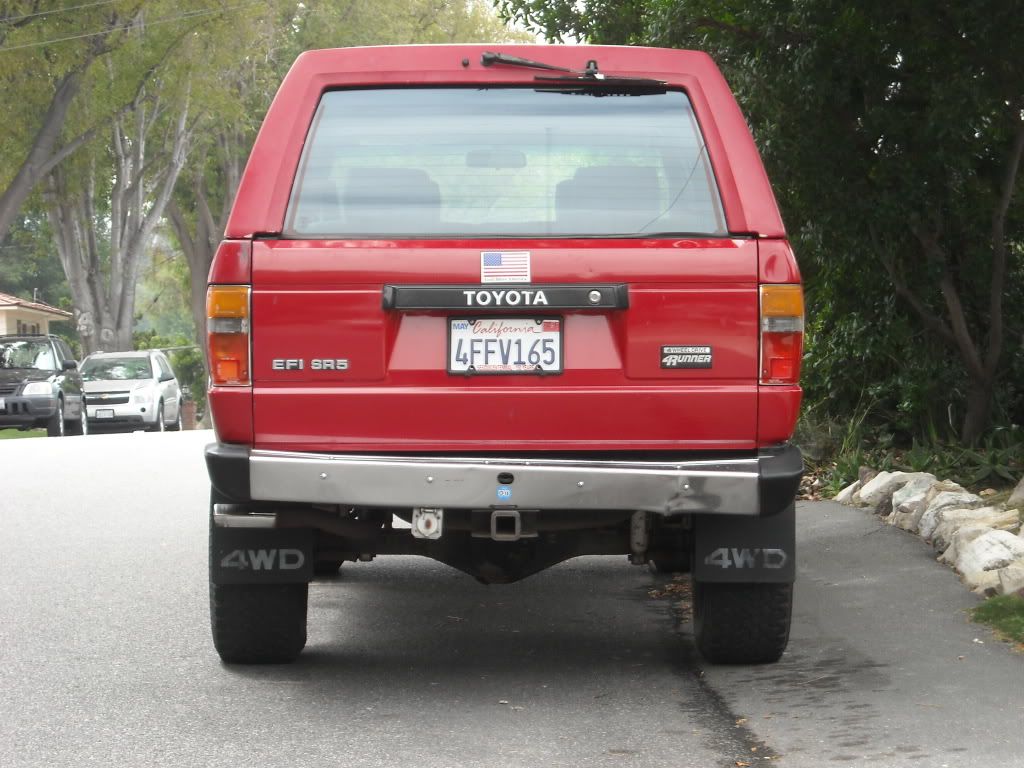
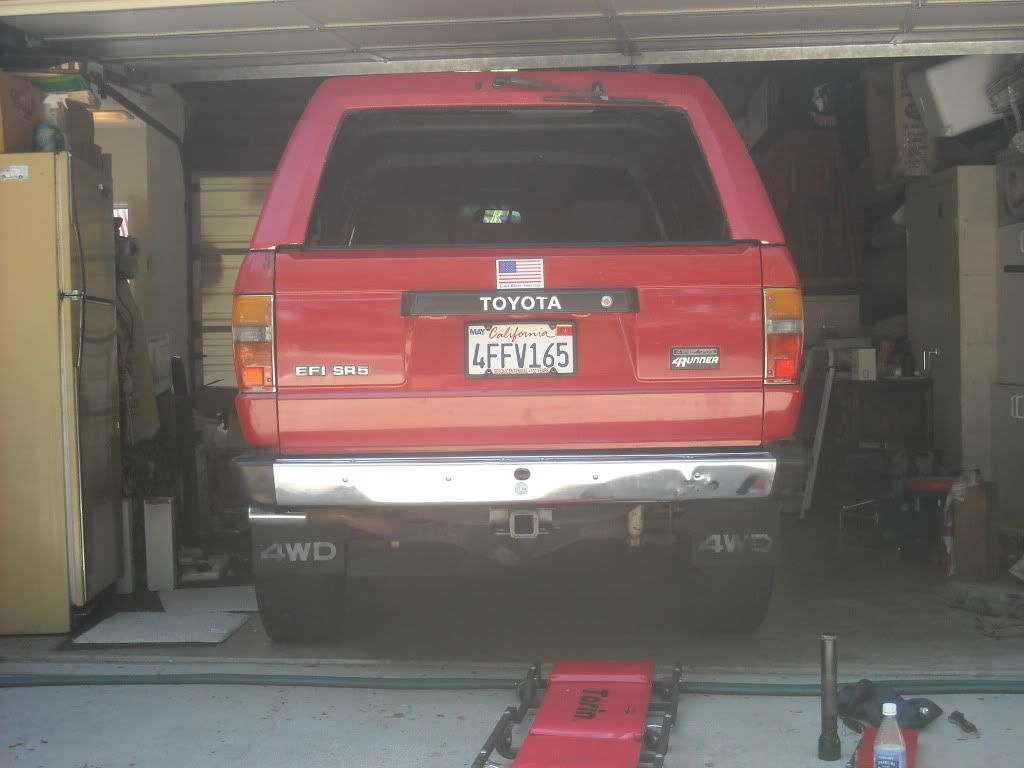
First, since this is my 'Build thread', I"ll update on the 'new bumper'... Then I'll do another post on what I found, today, regarding my mileage.
***************************
Got a new Chrome Bumper Face and Passenger End cap and Extension all for 168$ Wanted to TG bumper, for 338$ w/Shipping and Tax Included...but then I'd need the side supports, being a 4Runner, for another 40$ Plus Tax and Shipping. THEN, I'd HAVE to get the TG front bumper, as well, for another 400$ plus shipping and handling and whatever extra $ for the special recommended bracket....ET CETERA, lol.. And being a lil tight, I figured, ...what the heck, I'll put that saved 800$ into other things right now,lol... But SOME DAY, I might just splurge and buy those bumpers front and rear! lol
Before new Bumper.............
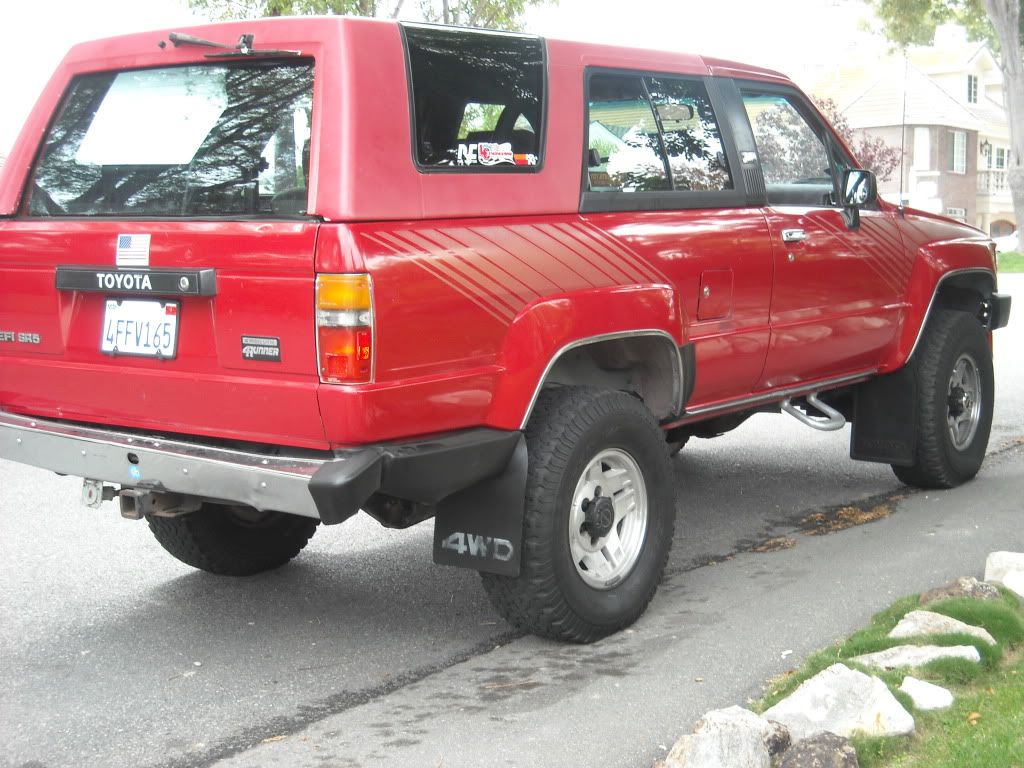
After New Bumper...............
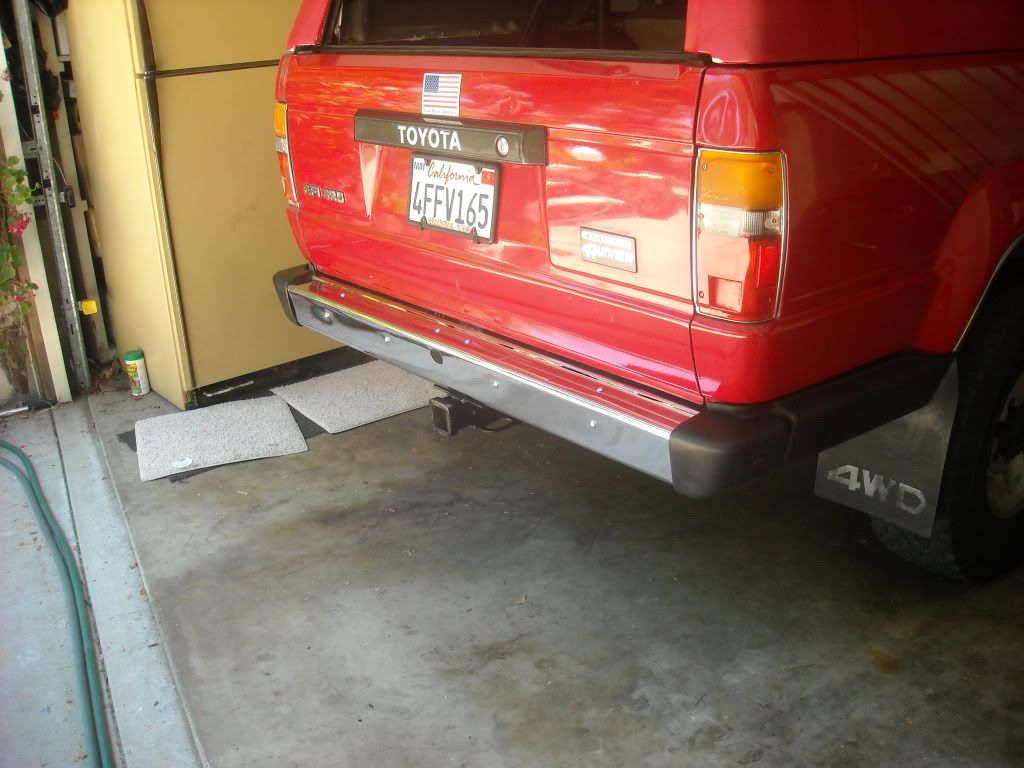

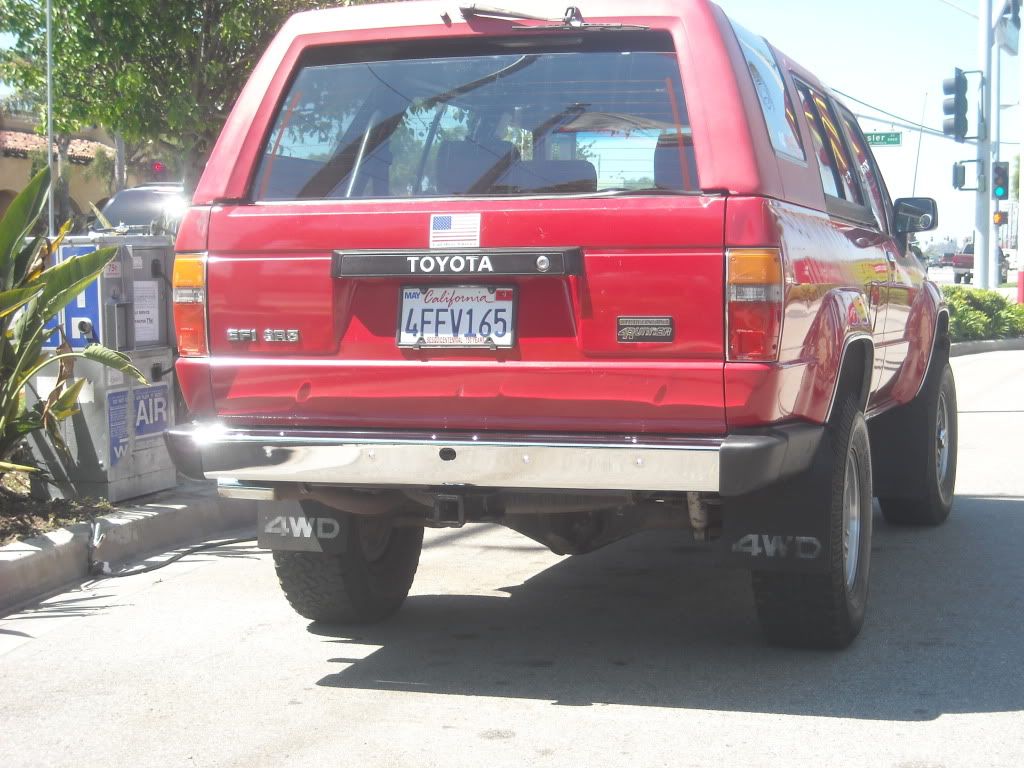
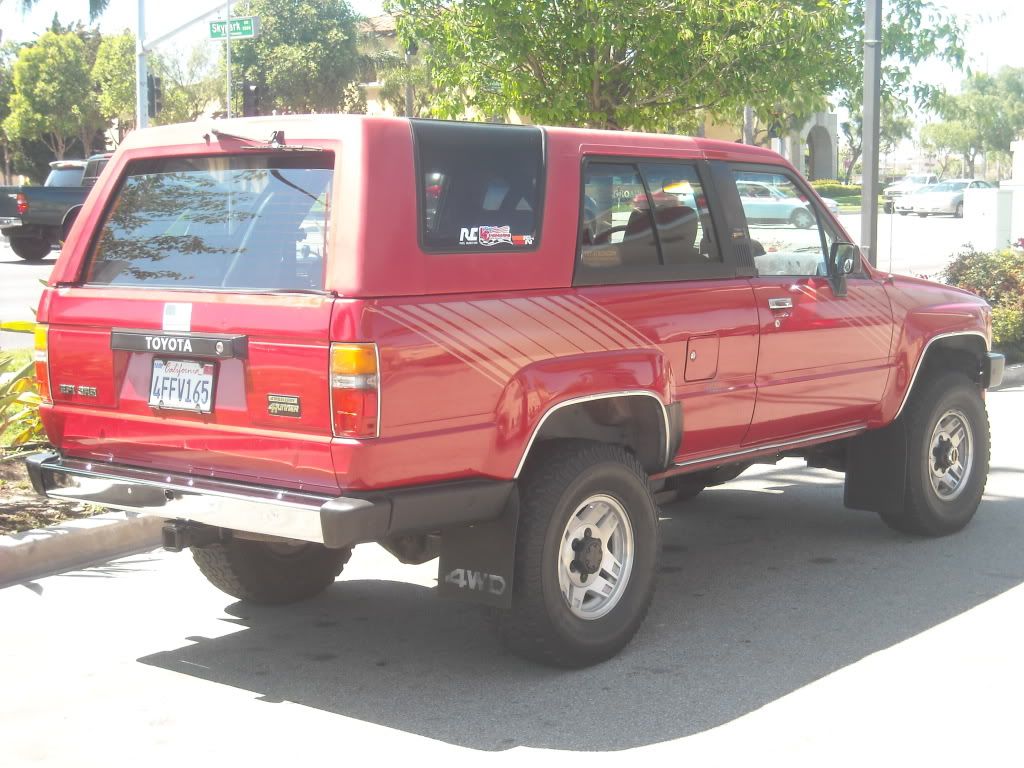
Of course, it took quite a bit of pounding and bending back of the old original brackets, prying back the end cap mounts, spacing the passenger side bracket/to underbody out with a home made spacer/washer, ...but I think I got it pretty straight!
***************************
Got a new Chrome Bumper Face and Passenger End cap and Extension all for 168$ Wanted to TG bumper, for 338$ w/Shipping and Tax Included...but then I'd need the side supports, being a 4Runner, for another 40$ Plus Tax and Shipping. THEN, I'd HAVE to get the TG front bumper, as well, for another 400$ plus shipping and handling and whatever extra $ for the special recommended bracket....ET CETERA, lol.. And being a lil tight, I figured, ...what the heck, I'll put that saved 800$ into other things right now,lol... But SOME DAY, I might just splurge and buy those bumpers front and rear! lol
Before new Bumper.............
After New Bumper...............
Of course, it took quite a bit of pounding and bending back of the old original brackets, prying back the end cap mounts, spacing the passenger side bracket/to underbody out with a home made spacer/washer, ...but I think I got it pretty straight!


