
ChefYota4x4's 1987 4Runner Build-Up Thread

 10-23-2012, 03:46 PM
#5122

Best way to design something is to really put yourself into the situation that needs it; really put down the seats, lie in the back and see where's best to to put the switches. Same reason why good manufacturers of outdoors gear sends their designers out there in the field.
Yep, about 2 feet of wire is all one needs. I guess I'll do mine that way now
BTW, Terry posted a few times on here how to make it hot... very simple, you ground the blue wire to the FRONT of the console mounting flanges that come out of the floor. Terry has never had an issue. I THINK that the lock switch might be made irrelevant by that...
BTW, I found a Pep Boys that carries the Thermo Shield! Will pick some up tonight so I can put my carpet and panels back soon. Thanks for the lead!
Last edited by RAD4Runner; 10-23-2012 at 03:50 PM.
10-23-2012, 09:21 PM
#5123
LIL more progress >>>>
First, I want to thank everyone who's throwing out ideas... Dragon, RAD, Grego, Terry, Jason, RBX, Paul, the-lot-of-ya! lol. Also, thanks again to Bryan89... And STANZ, getting some great ideas from you, as well, sir! 
************************************************** **********
Today, I dug into the driver side panel a lil bit... What I found was MILDLY upsetting... but nothing that can't be figured out.
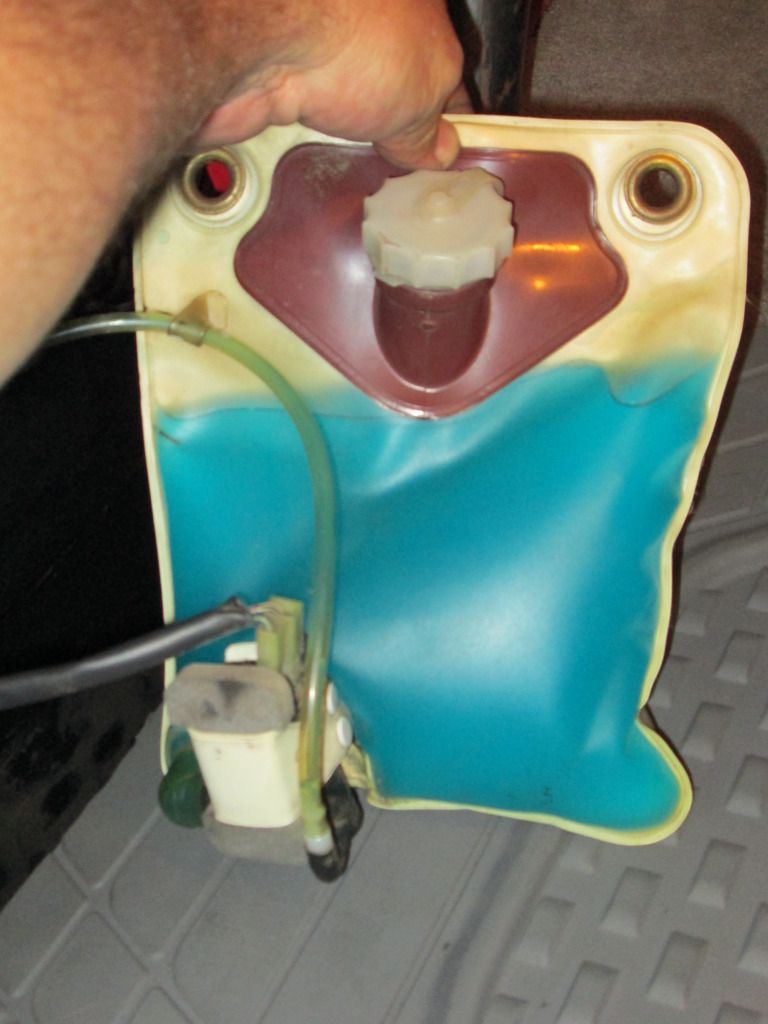
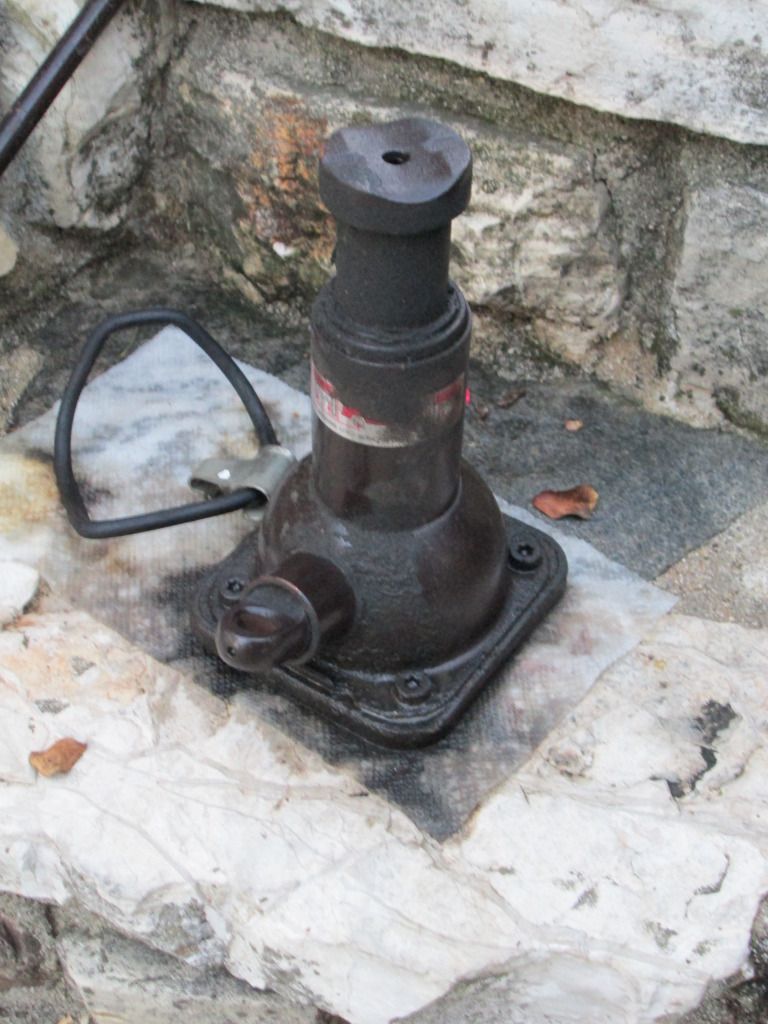
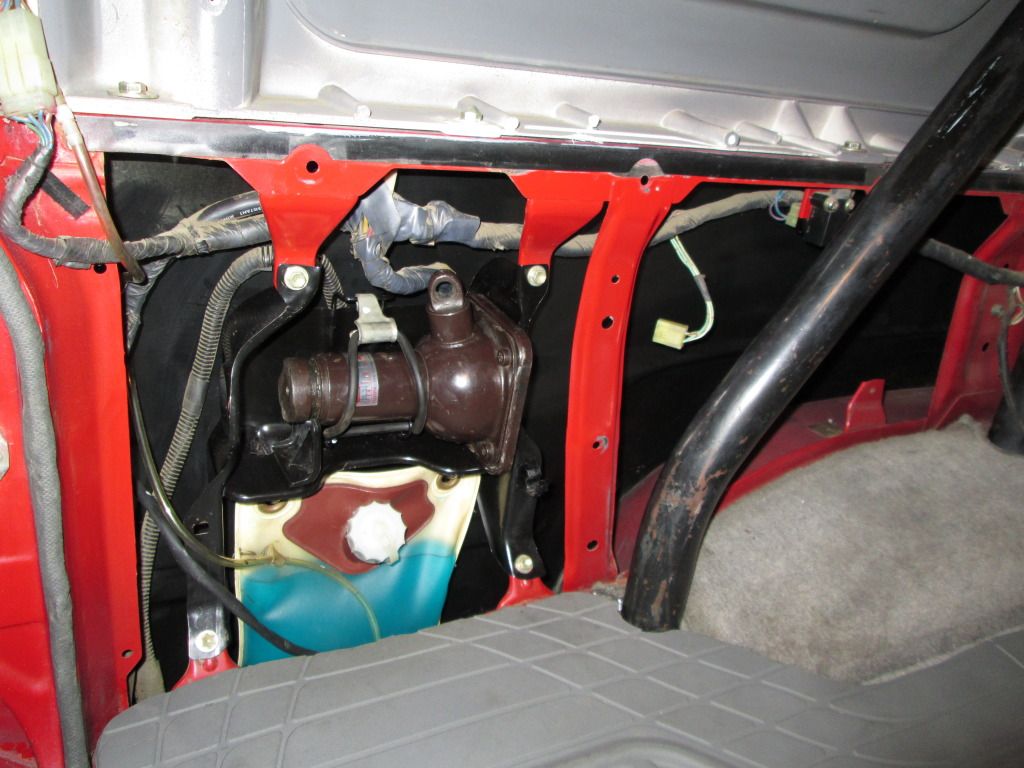
I realized that I'VE NEVER removed this OEM Jack... Upon digging in, I noticed that it was AWFULLY greasy... The Washer fluid bag was COMPLETELY covered in pretty thick layer of grease and dust. The jack as well... And, as I dug out the jack and rear wiper fluid bag... I saw what a mess this has made down below. In a jack, you put fluid, right? Well, this fluid is often corrosive. YEP, lil bit of that in there... but mostly, LUCKILY, just a big mess.(The problem from the jack came from something very simple that I never noticed when having the door opened..... The PO opened the jack til it was pushing against the outermost portion of the jack mounting bracket. THIS caused 1. Leaking... 2. MORE LEAKING! lol. The jack mounts perfectly(as you'll see in one of my pics) when the jack is FULLY CLOSED... This also keeps it sealed. AND; Mount it with the raising dial facing upward) ....... On with some pics.......
Using some Purple Power Citrus Cleaner, I think I got the Washer fluid bag, motor and hose and cable VERY clean.......
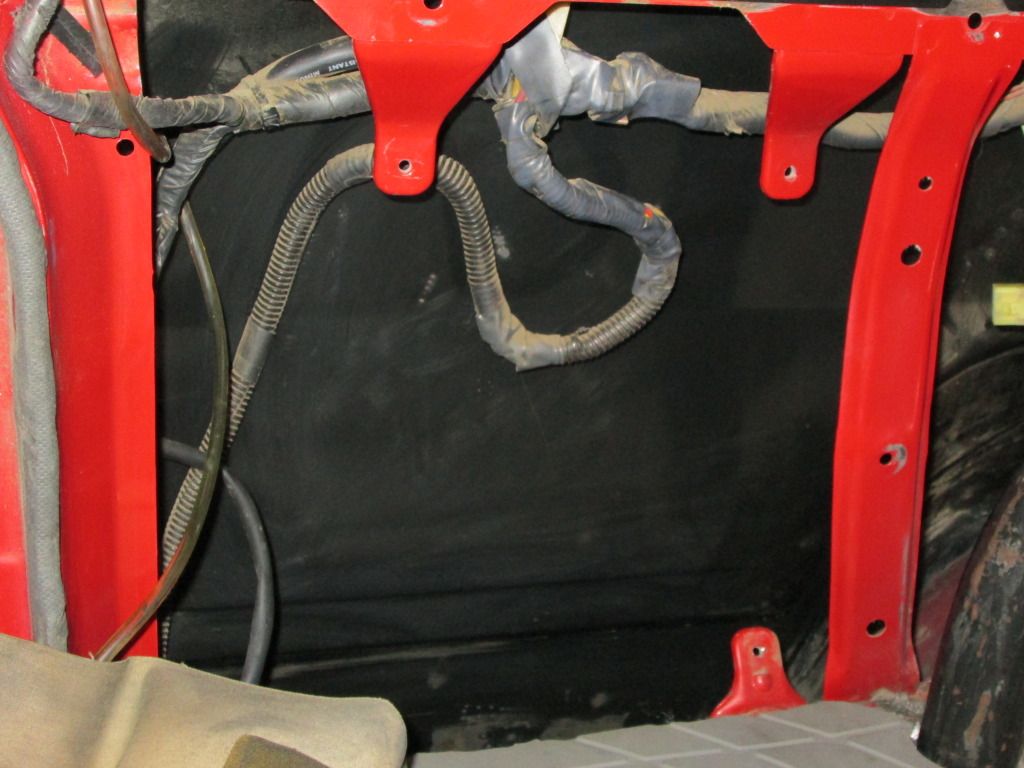
Then, I noticed that the inside of my panel is.... not red? lol. It's NOT rubberized or anything... but you can clearly see it's coated in black, not plain paint..........
Here's my original jack, EVEN AFTER soaking it a few times with the Purple power... lol>>>
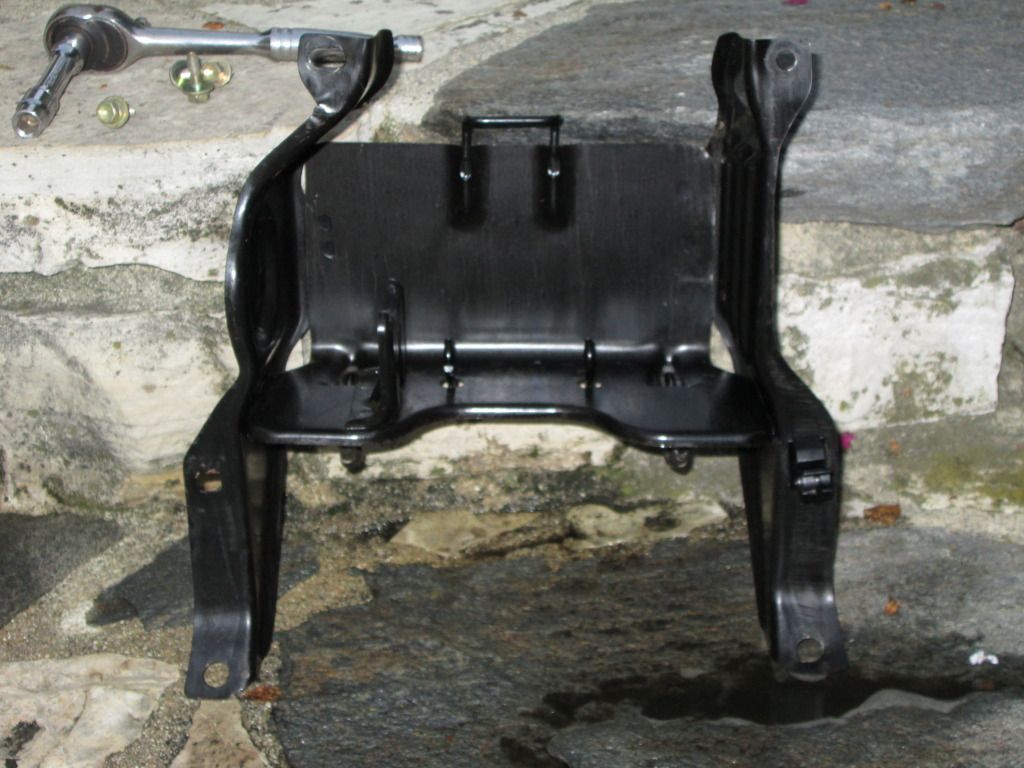
And the jack mounting bracket/carrier(it was COMPLETELY covered in crap, thick grease and dirt, etc.... about a 1/4" on the bottom, NO KIDDING! lol)....
First, just show the replacement jack I got at PYPart all cleaned up, the fluid bag all cleaned up, the panel insides all cleaned up....
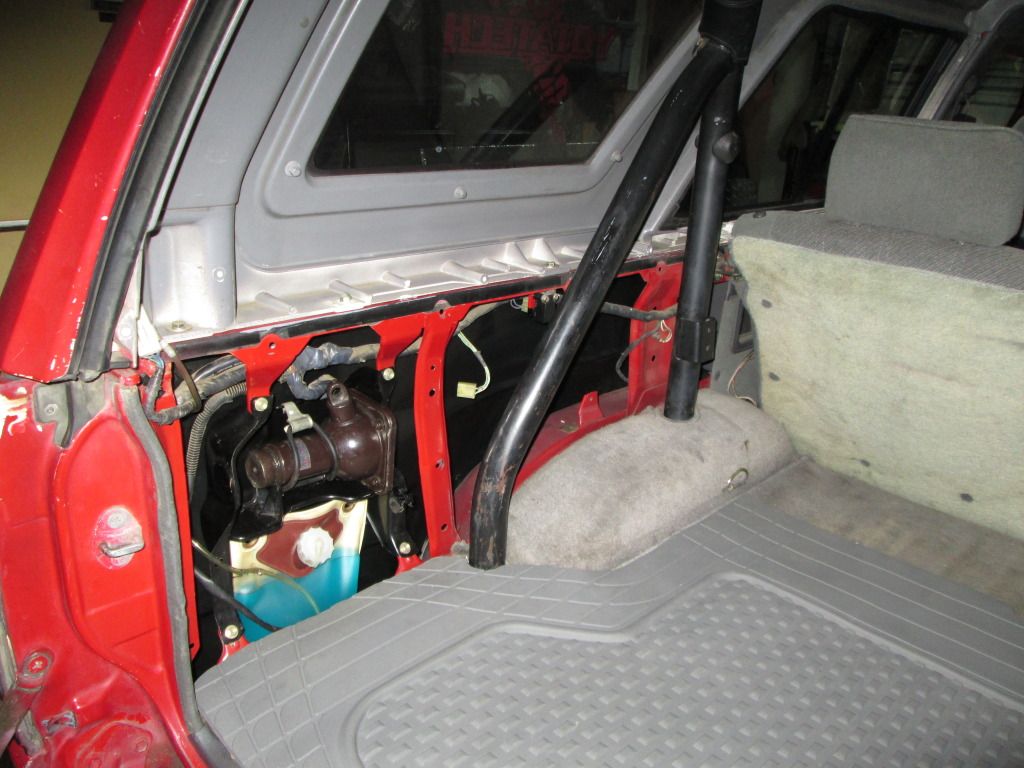
Then I test fitted the panel I made... Looks pretty good... Just needs a lil adjustment........

*****************************************
OK, so I wanted to show some components and their locations....
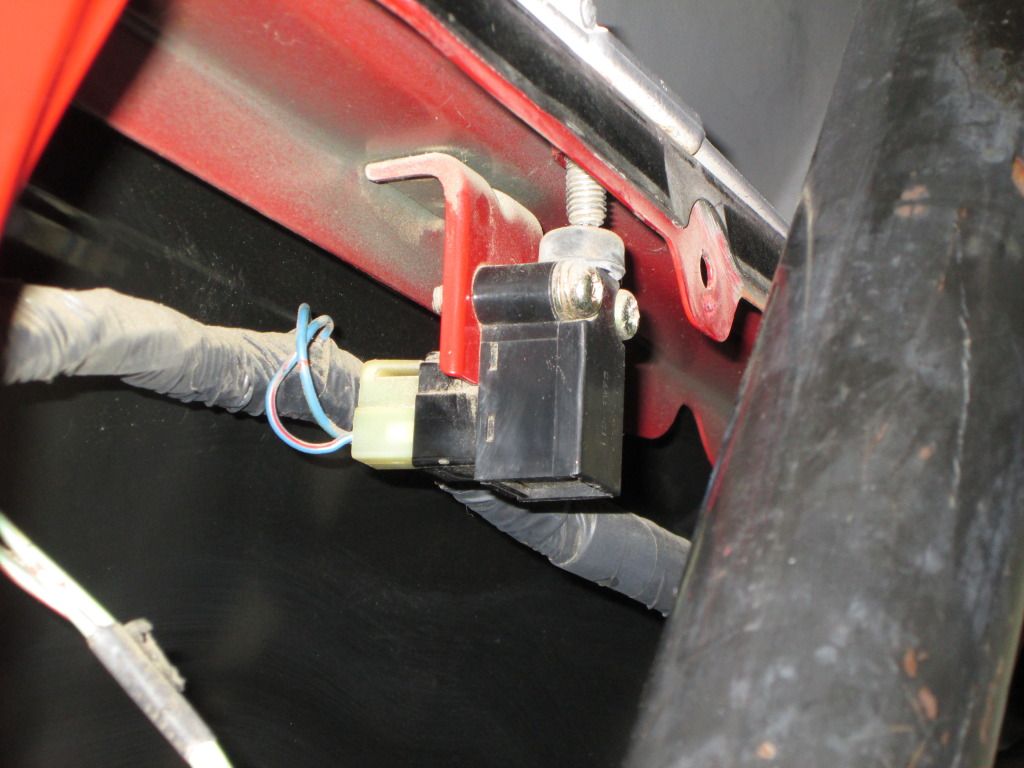
Here is the "top off window stop switch"(can't remember what it's called)......
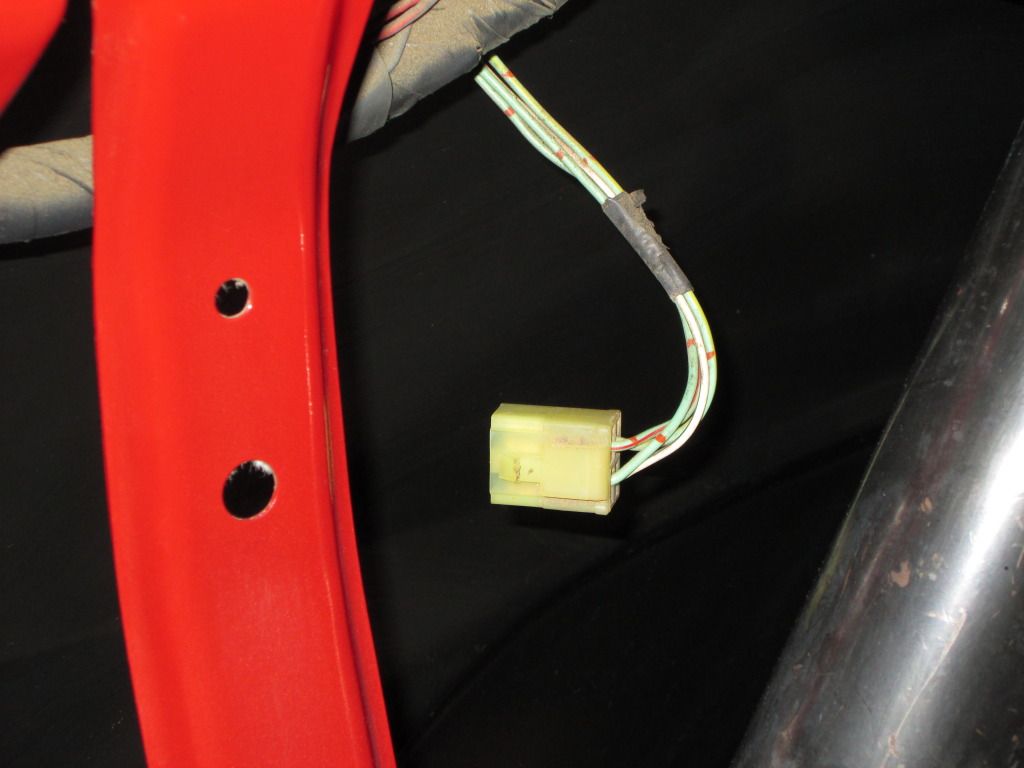
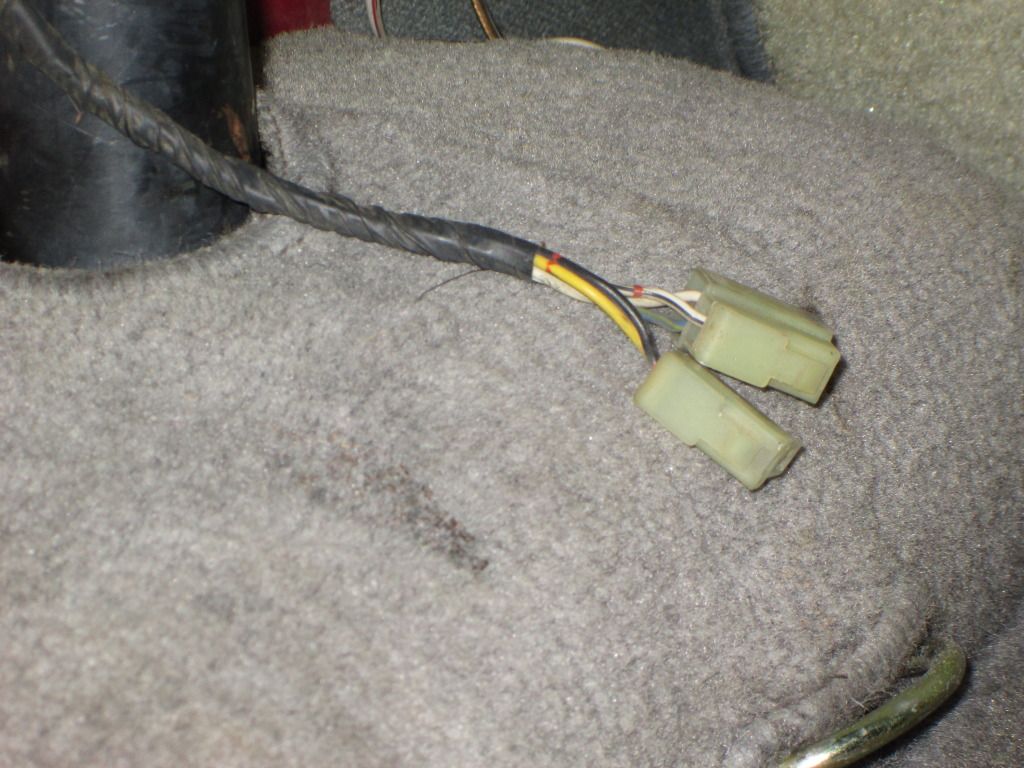
This is the plug connector that goes to the Deck Lamp.......
*************************
This is a pair of white with black striped wires... And, I'm curious what they are(Switched ground wires to the chassis? Chassis grounds for the rear window motor/locks, etc.?).......
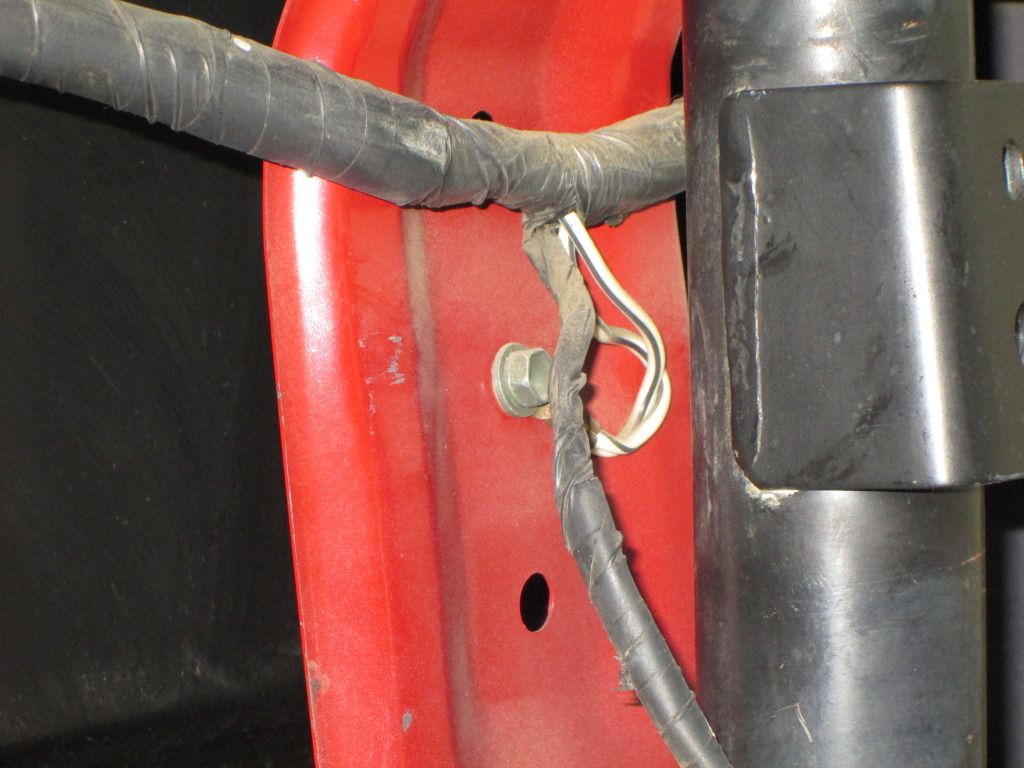
Those ^^^ seem to come out from a break away few wires that come out of the loom and lead to a couple connectors........ I'm guessing these are the old speaker connectors?(I know some have had issues with systems cuz they found that the stock deck system had speakers back here with built in amps? >>>
**************************************************
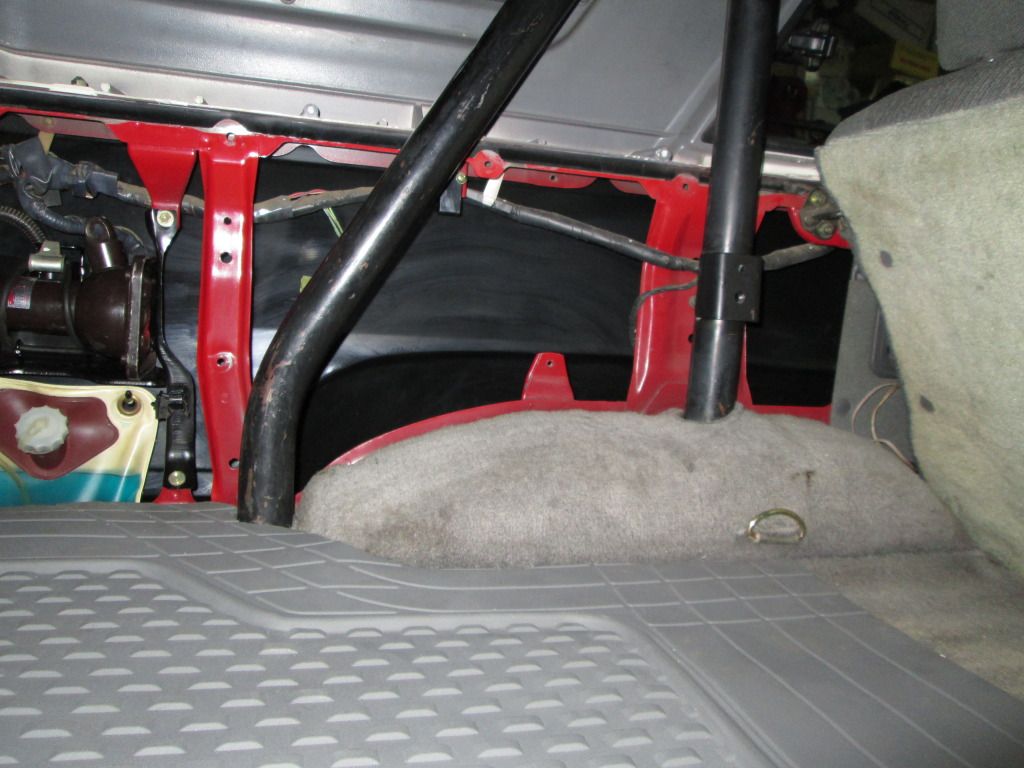
NOW, ... I wanted to give a look at the hole between the roll bar(The TAB on the bottom is bent back slightly... and it's where the Rear Tire lowering and Jack handle slide in... It was wedged there... But I'm wondering if I'm missing something there? It's threaded... so I'm guessing it's a clip or some kind that goes there and holds in the squared end of the jack handle rod??? .......
*** Does anyone happen to have the LEFT SIDE jack handle carrier clip? I notice they're almost ALWAYS broken at the yards... I could find one at the dealer I suppose.. BUT PLEASE, if anyone knows what goes into that screw hole on the bottom? PLEASE let me know?
**** BTW, the support beams on the sides, the red pillars going vertically from top to bottom?>>> They're HIGHLY contoured and concave in spots... I HAD NO CLUE, .... I thought they were straight up and down. I'm curious if those have the same bend in them on the passenger side???????? I was going to use them to put the 3/4" MDF wood behind there... Then screw the panels into them, THROUGH the Red Body Support Beams/weather stripping on the both sides of the support beams and body sealer behind the mock box 3/4 MDF side panels , where they near the outer portion/rear corner panels.... SO, if the passenger side support pillars are all contoured like the driver side ones.. Then I'll have to cut the wood very uniquely, ya know? GRRRRRRR! lol .
************************************************** *******
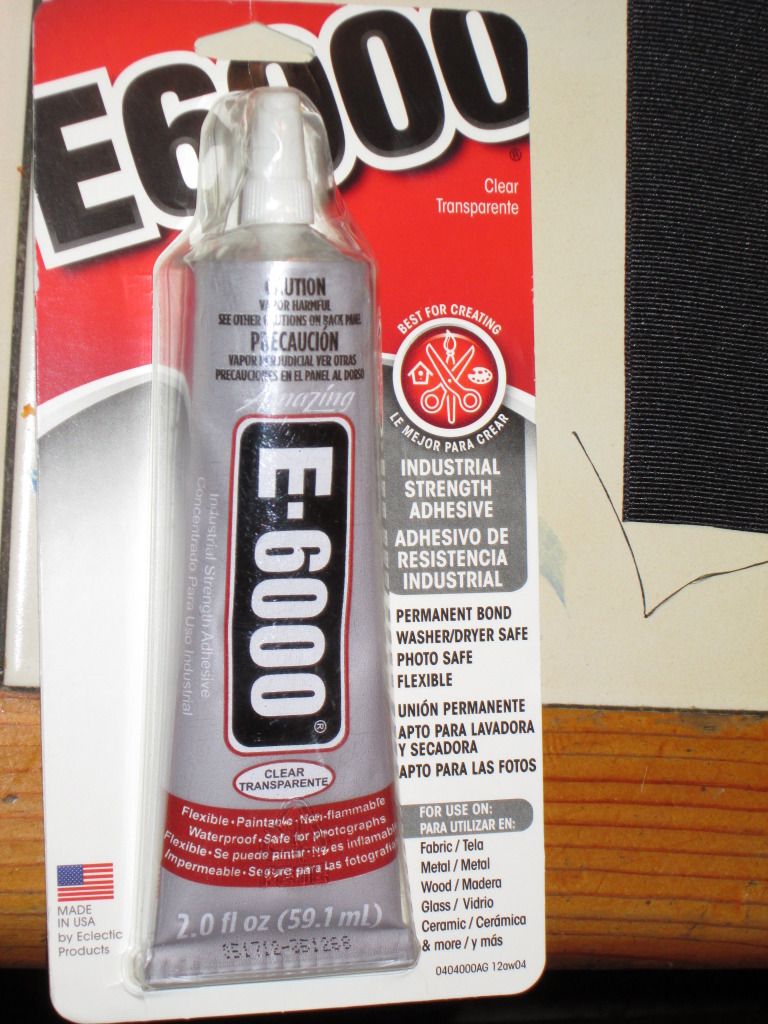
PS> Here's the Pliable, Non-Permeable, Waterproof Permanent Adhesive that I picked up at Michael's Crafts.......
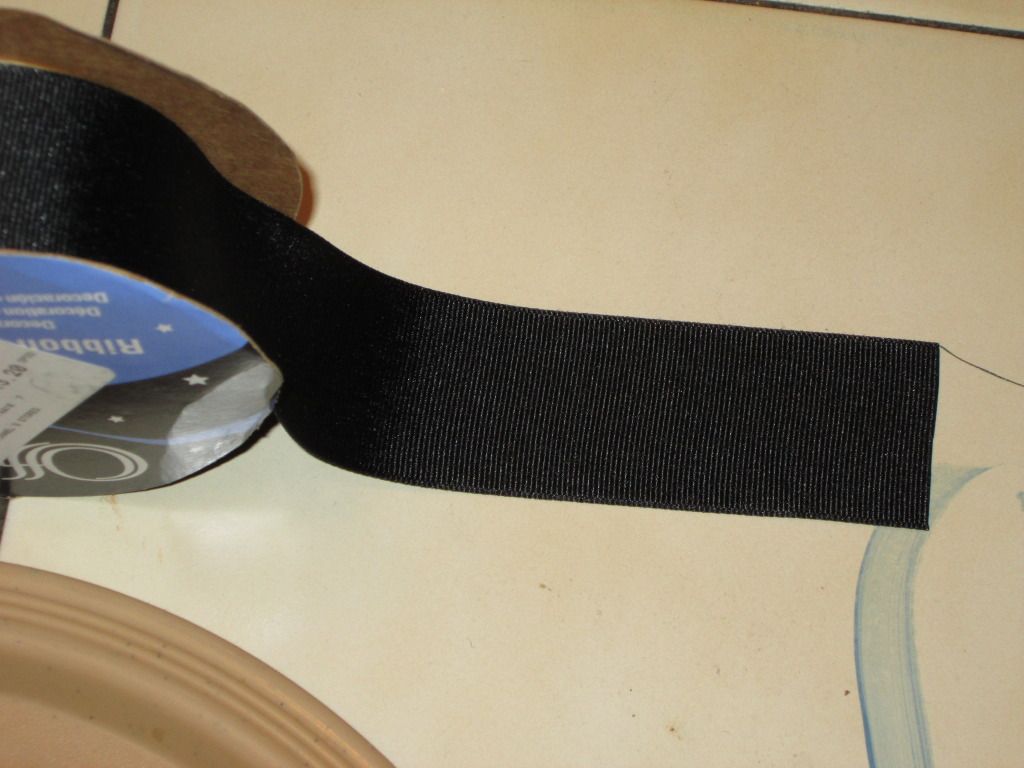
Here's the HD Black Fabric Ribbon that I got there too........ For sewing up the edging of the carpet........
************************************************** *******
PSS> ONE MORE THING..........
The leaking of the jack caused some corrosion, VERY tiny bit... I'm dealing with that. BUT, I noticed there's what looks to be an intentional hole there on the body seam front more portion(where it's lowest).... It's like where the 3 corners meet... Fender well, body panel and chassis panel... Like a seem that ends in a hole, hahaha. Is that in case the rear wiper bag leaks? Or would I be best to seal that off???????????????????????????????????
************************************************** **********
Today, I dug into the driver side panel a lil bit... What I found was MILDLY upsetting... but nothing that can't be figured out.
I realized that I'VE NEVER removed this OEM Jack... Upon digging in, I noticed that it was AWFULLY greasy... The Washer fluid bag was COMPLETELY covered in pretty thick layer of grease and dust. The jack as well... And, as I dug out the jack and rear wiper fluid bag... I saw what a mess this has made down below. In a jack, you put fluid, right? Well, this fluid is often corrosive. YEP, lil bit of that in there... but mostly, LUCKILY, just a big mess.(The problem from the jack came from something very simple that I never noticed when having the door opened..... The PO opened the jack til it was pushing against the outermost portion of the jack mounting bracket. THIS caused 1. Leaking... 2. MORE LEAKING! lol. The jack mounts perfectly(as you'll see in one of my pics) when the jack is FULLY CLOSED... This also keeps it sealed. AND; Mount it with the raising dial facing upward) ....... On with some pics.......
Using some Purple Power Citrus Cleaner, I think I got the Washer fluid bag, motor and hose and cable VERY clean.......
Then, I noticed that the inside of my panel is.... not red? lol. It's NOT rubberized or anything... but you can clearly see it's coated in black, not plain paint..........
Here's my original jack, EVEN AFTER soaking it a few times with the Purple power...
lol>>> And the jack mounting bracket/carrier(it was COMPLETELY covered in crap, thick grease and dirt, etc.... about a 1/4" on the bottom, NO KIDDING! lol)....
First, just show the replacement jack I got at PYPart all cleaned up, the fluid bag all cleaned up, the panel insides all cleaned up....
Then I test fitted the panel I made... Looks pretty good... Just needs a lil adjustment........
*****************************************
OK, so I wanted to show some components and their locations....
Here is the "top off window stop switch"(can't remember what it's called)......
This is the plug connector that goes to the Deck Lamp.......
*************************
This is a pair of white with black striped wires... And, I'm curious what they are(Switched ground wires to the chassis? Chassis grounds for the rear window motor/locks, etc.?).......
Those ^^^ seem to come out from a break away few wires that come out of the loom and lead to a couple connectors........ I'm guessing these are the old speaker connectors?(I know some have had issues with systems cuz they found that the stock deck system had speakers back here with built in amps? >>>
**************************************************
NOW, ... I wanted to give a look at the hole between the roll bar(The TAB on the bottom is bent back slightly... and it's where the Rear Tire lowering and Jack handle slide in... It was wedged there... But I'm wondering if I'm missing something there? It's threaded... so I'm guessing it's a clip or some kind that goes there and holds in the squared end of the jack handle rod??? .......
*** Does anyone happen to have the LEFT SIDE jack handle carrier clip? I notice they're almost ALWAYS broken at the yards... I could find one at the dealer I suppose.. BUT PLEASE, if anyone knows what goes into that screw hole on the bottom? PLEASE let me know?
**** BTW, the support beams on the sides, the red pillars going vertically from top to bottom?>>> They're HIGHLY contoured and concave in spots... I HAD NO CLUE, .... I thought they were straight up and down. I'm curious if those have the same bend in them on the passenger side???????? I was going to use them to put the 3/4" MDF wood behind there... Then screw the panels into them, THROUGH the Red Body Support Beams/weather stripping on the both sides of the support beams and body sealer behind the mock box 3/4 MDF side panels , where they near the outer portion/rear corner panels.... SO, if the passenger side support pillars are all contoured like the driver side ones.. Then I'll have to cut the wood very uniquely, ya know? GRRRRRRR! lol .
************************************************** *******
PS> Here's the Pliable, Non-Permeable, Waterproof Permanent Adhesive that I picked up at Michael's Crafts.......
Here's the HD Black Fabric Ribbon that I got there too........ For sewing up the edging of the carpet........
************************************************** *******
PSS> ONE MORE THING..........
The leaking of the jack caused some corrosion, VERY tiny bit... I'm dealing with that. BUT, I noticed there's what looks to be an intentional hole there on the body seam front more portion(where it's lowest).... It's like where the 3 corners meet... Fender well, body panel and chassis panel... Like a seem that ends in a hole, hahaha. Is that in case the rear wiper bag leaks? Or would I be best to seal that off???????????????????????????????????
Last edited by ChefYota4x4; 10-23-2012 at 11:15 PM.
 .....
10-23-2012, 11:30 PM
.....
10-23-2012, 11:30 PM
#5126
This is a pair of white with black striped wires... And, I'm curious what they are(Switched ground wires to the chassis? Chassis grounds for the rear window motor/locks, etc.?).......
for the rear controls. If you look at schematic, at the very bottom, the horizontal ground lines have labels "a" "b" or "c" and there's a legend for those letters showing location of ground points.
NOW, ... I wanted to give a look at the hole between the roll bar(The TAB on the bottom is bent back slightly... and it's where the Rear Tire lowering and Jack handle slide in... It was wedged there... But I'm wondering if I'm missing something there?
the red pillars going vertically from top to bottom?I'm curious if those have the same bend in them on the passenger side? I was going to use them to put the 3/4" MDF wood behind there... Then screw the panels into them
10-23-2012, 11:42 PM
#5127
Registered User
id not seal that opening mark it is likely for window washer fluid if the bag were to leak or someone spill some in there it'd run right out unless your going for the submarine type of runner with snorkeler pipes
10-24-2012, 12:37 AM
#5128
I believe the jacks also take brake fluid. That strips paint off and hastens corrosion.
Thanks, bud... Yeah. It's not BADLY corroded or anything....... BUT, it needed attention and I've already addressed it/coated over what I did with 'Rust Ender' and black paint in there. First shot it with brake cleaner and then alcohol and then dried it out with my 12V Harbor Freight Heater really well. You'd NEVER know it was leaking in there now (Funny, .... there's ALWAYS SOMETHING to set you back a full day at a time, ya know? ... But I wont 'grr' or
  or the like.. because I watch my Yotatech Brethren fighting HORRIFIC rust and corrosion all the time... And doing AMAZING restorations from things I'd probably drive off a cliff before I knew what was possible
Yes, white wires with Black Stripe (W-B) are chassis ground. Probably
for the rear controls. If you look at schematic, at the very bottom, the horizontal ground lines have labels "a" "b" or "c" and there's a legend for those letters showing location of ground points.
Ahhhhh, Ok, .... Wow, once again, you've tossed me GREAT info and reminded me of something .... THE SCHEMATIC! hahaha. It's funny.... I thought that the "topper bolt/window stop relay" was at the furthest bolt back... not in the middle there in my pics ..... Anyway... Anyway..... DID YOU MOVE THOSE WIRES TO THE OTHER SIDE OF THAT PILLAR, RAD????????? I find it odd that my wiring all comes to the outside of that pillar then goes back behind, ya know? Seems they're all that way.. And everything looks UNTOUCHED/UNMOLESTED, .. .which is good news so far. I'm glad I've decided not to tap into those wires nor add a switch for the rear window back there.... And glad my accidental mental stumbling upon that thought might even help someone else too! hahaha. BTW, I EASILY reach down there for stuff when I'm camping in the back. My buddy built curtains for the front part to block the rear off ... black out curtains.. REALLY nice.. They hang on the bolts that go across and hold the shell to the body... he just unscrews them a lil bit and hoops these lil eyelets over those. They then hoop over a rod that's angled on the ends and goes right up to the sides... I have black out panels for my rear windows, too.... Easy to put suction cups through pressed in support rings on the surface of cut outs of Windshield Visors... i can black out ALL 4 windows... Cost me around 15$ all together for the heavy duty windshield visors/"JUMBO" ones.
My dlx does not have it, but yes, probably an extra cradle for the jack handle extension.
Ok... Well, Stanz has them, but they seem to have brass bolts in them. Not sure WTH is up with those... I'm PRETTY SURE, almost positive that the back end of the jack handle/tire lowering handle sits in there. Interesting thing, RAD... My 4Runner has just a simple ROD with 3/8" Socket Extension style end on the one end ... and a Hook on the other, like they should all have. BUT, the jack I got from the Red on Red PYPart one? It was the type with a bung wrench style handle at the end of the hook. I'm guessing that my other one, the bung style one, might be in my passenger panel pocket. I can't remember... But it looks familiar. See, the Jack/Tool kit I have has an L-Crank Handle that fits over the "Socket Extension end" and you just 'CRANK IT', like an old Model T type cranking.(spinning portion, the part you hold while cranking.. It spins freely I mean, like a Roller Fairlead on a shaft. ) But, if I turn it around, I can let down the tire..... The one I got from the 87? It doesn't have that socket end on it.. So it CAN NOT let the tire down/the spare. I'm starting to think I maybe got the handle from a Pick up.. But, wouldn't that also need that socket end thingy to let the tire down?????? I will get pics of my tool kit, tomorrow if I remember.
Yes, Chef, pillars on passenger side are also contoured (see my sub-woofer install pic in earlier post). What you could do is find or make standoffs that would be flush with back of panel, You could use 1" x 1" wooden blocks. Screw that into the pillar, and screw panel into block
Dude, that is a GREAT idea. I like the 1x1" block for support. And, you've inspired me so much, RAD, ... i've really begun to pick up speed. I went back out tonight, got some cardboard, and already made templates. The wood has to be a bit contoured in the back... But can, as you said, be straight on the front side. And see, on the passenger side, I wont have that jack crap in the way. So, I could build the box in there right up to the edge of the door/toward the tailgate from the last pillar around 1/2". ...... I think it would sound best, man... BUT, ..anything dense enough would work. I don't HAVE to use Wood... I could use pool noodles and such like stanz did... As he said, 'it sounds SICK!'... and I believe him. He's done such a nice job on everything else, ya know?
Thanks, bud... Yeah. It's not BADLY corroded or anything....... BUT, it needed attention and I've already addressed it/coated over what I did with 'Rust Ender' and black paint in there. First shot it with brake cleaner and then alcohol and then dried it out with my 12V Harbor Freight Heater really well. You'd NEVER know it was leaking in there now
(Funny, .... there's ALWAYS SOMETHING to set you back a full day at a time, ya know? ... But I wont 'grr' or or the like.. because I watch my Yotatech Brethren fighting HORRIFIC rust and corrosion all the time... And doing AMAZING restorations from things I'd probably drive off a cliff before I knew what was possible Yes, white wires with Black Stripe (W-B) are chassis ground. Probably
for the rear controls. If you look at schematic, at the very bottom, the horizontal ground lines have labels "a" "b" or "c" and there's a legend for those letters showing location of ground points.
Ahhhhh, Ok, .... Wow, once again, you've tossed me GREAT info and reminded me of something .... THE SCHEMATIC! hahaha. It's funny.... I thought that the "topper bolt/window stop relay" was at the furthest bolt back... not in the middle there in my pics
..... Anyway... Anyway..... DID YOU MOVE THOSE WIRES TO THE OTHER SIDE OF THAT PILLAR, RAD????????? I find it odd that my wiring all comes to the outside of that pillar then goes back behind, ya know? Seems they're all that way.. And everything looks UNTOUCHED/UNMOLESTED, .. .which is good news so far. I'm glad I've decided not to tap into those wires nor add a switch for the rear window back there.... And glad my accidental mental stumbling upon that thought might even help someone else too! hahaha. BTW, I EASILY reach down there for stuff when I'm camping in the back. My buddy built curtains for the front part to block the rear off ... black out curtains.. REALLY nice.. They hang on the bolts that go across and hold the shell to the body... he just unscrews them a lil bit and hoops these lil eyelets over those. They then hoop over a rod that's angled on the ends and goes right up to the sides... I have black out panels for my rear windows, too.... Easy to put suction cups through pressed in support rings on the surface of cut outs of Windshield Visors... i can black out ALL 4 windows... Cost me around 15$ all together for the heavy duty windshield visors/"JUMBO" ones. My dlx does not have it, but yes, probably an extra cradle for the jack handle extension.
Ok... Well, Stanz has them, but they seem to have brass bolts in them. Not sure WTH is up with those... I'm PRETTY SURE, almost positive that the back end of the jack handle/tire lowering handle sits in there. Interesting thing, RAD... My 4Runner has just a simple ROD with 3/8" Socket Extension style end on the one end ... and a Hook on the other, like they should all have. BUT, the jack I got from the Red on Red PYPart one? It was the type with a bung wrench style handle at the end of the hook. I'm guessing that my other one, the bung style one, might be in my passenger panel pocket. I can't remember... But it looks familiar. See, the Jack/Tool kit I have has an L-Crank Handle that fits over the "Socket Extension end" and you just 'CRANK IT', like an old Model T type cranking.(spinning portion, the part you hold while cranking.. It spins freely I mean, like a Roller Fairlead on a shaft. ) But, if I turn it around, I can let down the tire..... The one I got from the 87? It doesn't have that socket end on it.. So it CAN NOT let the tire down/the spare. I'm starting to think I maybe got the handle from a Pick up.. But, wouldn't that also need that socket end thingy to let the tire down?????? I will get pics of my tool kit, tomorrow if I remember.
Yes, Chef, pillars on passenger side are also contoured (see my sub-woofer install pic in earlier post). What you could do is find or make standoffs that would be flush with back of panel, You could use 1" x 1" wooden blocks. Screw that into the pillar, and screw panel into block
Dude, that is a GREAT idea. I like the 1x1" block for support. And, you've inspired me so much, RAD, ... i've really begun to pick up speed. I went back out tonight, got some cardboard, and already made templates. The wood has to be a bit contoured in the back... But can, as you said, be straight on the front side. And see, on the passenger side, I wont have that jack crap in the way. So, I could build the box in there right up to the edge of the door/toward the tailgate from the last pillar around 1/2".
...... I think it would sound best, man... BUT, ..anything dense enough would work. I don't HAVE to use Wood... I could use pool noodles and such like stanz did... As he said, 'it sounds SICK!'... and I believe him. He's done such a nice job on everything else, ya know? 
HEY, NOW THAT'S A GREAT IDEA........ "My Ruby Red Submariner Build up" ! heheheh. It's supposed to be there? Is it there in yours? I'm thinking of filling the entire crevace with a clean sunken bead of E-6000 and then at the end, stick a thick straw through, then snip it off at the lowest portion I can and snip the straw on the bottom around 3" out the bottom... Why, you ask? Because, I think TONS of moisture and road crap and grime has been coming up in there from that hole. And if you're right, and it's for the window wiper fluid,brake fluid... and spills... Then I bet it's on the other side, too. I could do a breather type thing on the end, so no water can come up the hose... But I think that would be overkill... Just the straw would work. Whatcha think?
10-24-2012, 06:54 AM
#5129
Contributing Member
Join Date: Mar 2003
Location: COTKU,Ontario,Canada
Posts: 11,334
Likes: 0
Received 0 Likes
on
0 Posts
Brilliant, Chef! Why haven't I though of that? LOL! Yes, more advantages:
Still need to verify if possible to operate without key in ignition. Else, figure out how to make circuit hot.
- Much simpler to do, and requires less hardware. This will share window lock switch with front console switch.
- If two people are sleeping in back, both can reach it without having to crawl over the other.
Still need to verify if possible to operate without key in ignition. Else, figure out how to make circuit hot.

 10-24-2012, 07:17 AM
#5130
Contributing Member
Join Date: Mar 2003
Location: COTKU,Ontario,Canada
Posts: 11,334
Likes: 0
Received 0 Likes
on
0 Posts
The small hole would be a body drain hole to allow any water/fluid/condensation etc. to have a way to get out rather than being held in and rusting out the body... if you look along the lower body seam of most any vehicle you will find several... they often get clogged with grime, dust, etc. leading to rot... a small piece of wire can be shoved thru them occasionally to keep them open and draining properly...
jacks are often filled with hydraulic oil {sometimes brake fluid[which is a form of hyd. oil [brown] or 5606 hydraulic oil [red]}
it's interesting to me that that the rear washer uses a bag for the fluid... I'd have thought there'd be a solid tank like the front uses...
to help quiet down and insulate the rear spray the backside of the outer panel with black rubberized rocker panel gunk... it goes for about $10 a rattle can for the "premium" type and one should do both sides... the identical stuff from that "sound mat" co. costs $30+... just keep those drain holes open...
10-24-2012, 10:00 AM
#5132
Hey Paul, thanks for the confirmation of what Dragon said. I don't need the straw idea, cuz I cleaned and painted the hole very well to prevent rust. Also, as I said, got a scouring pad and got the rust, then rust ender, then paint... So it's good down there, I'm not worried with the LIMITED/tiny amount of rust I found after 25 years, ya know?
And Paul, Dragon, Terry, ANYONE??? >>>>>>>> Why are the panel walls painted black? Is that some kinda coating for rust prevention?
Thanks, Richard
And Paul, Dragon, Terry, ANYONE??? >>>>>>>> Why are the panel walls painted black? Is that some kinda coating for rust prevention?
Thanks, Richard
 10-24-2012, 10:36 AM
#5135
10-24-2012, 11:20 AM
#5137
Registered User
mine has SO much rust back there i havent started looking at it (i dont wanna cry)
my tire bar/jack handle has the 3/8" end an hook with a handle (just FYI)
looking back at Terrys his are all gray inside as well id say someone gave yours a bit more loving TLC
10-24-2012, 02:31 PM
#5138
Contributing Member
Join Date: Mar 2003
Location: COTKU,Ontario,Canada
Posts: 11,334
Likes: 0
Received 0 Likes
on
0 Posts
Black is probably just the base colour protective paint they had... IK on the aftermarket fenders/doors I got they were painted black to protect them from oxidation... fwiw the inside of body panels on my 94 seem to be black also in some spots... I would guess back in the day yota was'nt doing full body dip painting like they seem to do now...
10-24-2012, 08:30 PM
#5140
Hey Guys, thanks for the input on the black inlay.
Welcome back, RW!
I laid a bead, Paul, Dragon, .... then channeled it then did the reusable straw drain plug(it's 1/4")... The holes not much bigger, but at least this way, no more possible leakage could do this in the crease where it's more susceptible to what would be DAMAGING rust in the creases, ya know?


