
ChefYota4x4's 1987 4Runner Build-Up Thread

 06-03-2011, 05:26 AM
#2422
Registered User
Hope today is a better day for ya man, I know you really want/need to get this done but if you push till your really sick your plans wont happen AND you'll be sick. Take it easy bud.
06-03-2011, 06:55 AM
#2423
Hey chef just got done catching up aint been able to get on a computer for awhile great progress if will be finished soon enough. I didnt see what you decided to do with the head stay stock or go oversized. I think the oversized helped alot on my truck in my opion. Im glad your new machinest is makeing sure everything is as close to prefect as it can be for ya. Keep up the great work man
P.S. I have searched everywhere and couldnt find anything on another brand of mega flex bj's. If you talk to that Jim guy or find something that i couldn't i would greatly apprecate the help. Thanks
P.S. I have searched everywhere and couldnt find anything on another brand of mega flex bj's. If you talk to that Jim guy or find something that i couldn't i would greatly apprecate the help. Thanks
Get well soon buddy! Looking forward to seeing that rig fire up again! Once I get my motor built finally, we should race! LOl j/k! 
A lil off topic and random; but how close is Palos Verdes to Santa Clarita? O.o I know I've lived in cali for years, and should know this kind of thing, but I still don't, lol
A lil off topic and random; but how close is Palos Verdes to Santa Clarita? O.o I know I've lived in cali for years, and should know this kind of thing, but I still don't, lol
I hear ya.... Gotta get over there, now, and get started before the 'hoards' start dropping things off! GRRRRRRRRRRRRRRRRR! Thanks a lot, Jason,...always great talking to ya! Tell Miss Sassy I said hi! hahaha
06-03-2011, 06:57 AM
#2424
PS> I'll just wait to post the pics till later. Crazy how exhausted this crap makes you feel! lol.... I left the cam in the car, .....and I DON'T WANNA GO GET IT! wahhhhhh! HAHAHAHA.
See you later, guys, REALLLLLLLLLLLLLLLLY appreciate all your help and encouragement!
See you later, guys, REALLLLLLLLLLLLLLLLY appreciate all your help and encouragement!
06-03-2011, 04:37 PM
#2425
Have the short block in the trunk of the CRV....
I actually wound up doing most of it, .... and I think he's only charging me a couple C'notes for the machining of the bare block and re-working the rod bearing journals, etc.
Unfortunately, ...I'M NOW INCREDIBLY ILL! lol.... I only laugh because I KNEW I would be, but I didn't have much choice. If i hadn't gone today, I'd DEFINITELY not have taken home my short block.
The head WILL BE ready on Monday, and I am going to hold him to that, FIRMLY! I"m finishing up cleaning the block's outside, painting, then putting most of it together tomorrow(if I'm physically able, I'll start, anyhow, lol).
QUESTION;
As many of you know..... I have a nearly new Harmonic Balancer. In spite of that, it leaked out the front main, like a lil DRIPPPPPP, lol. But regardless, enough to be a concern. So, what I'm wondering is, ...............
*** How snug should A NEW HARMONIC SLEEVE be inside of a front main? Mine feels fairly loose when I test insert it into the new seal, ....but I can't know it's 'TOO LOOSE', etc. I contemplated getting a speedy sleeve, but GOSH DANGIT, ..I shouldn't have to, ya know? Can anyone just tell me how snug that connection was for them on the harmonic to main seal? If I have to take this half a apart again for some STUPID thing like that.... OH MAN, .... I think that would be the last straw! lol. ***
06-03-2011, 07:59 PM
#2427
Registered User
Join Date: Apr 2011
Location: Southern Ontario
Posts: 428
Likes: 0
Received 0 Likes
on
0 Posts
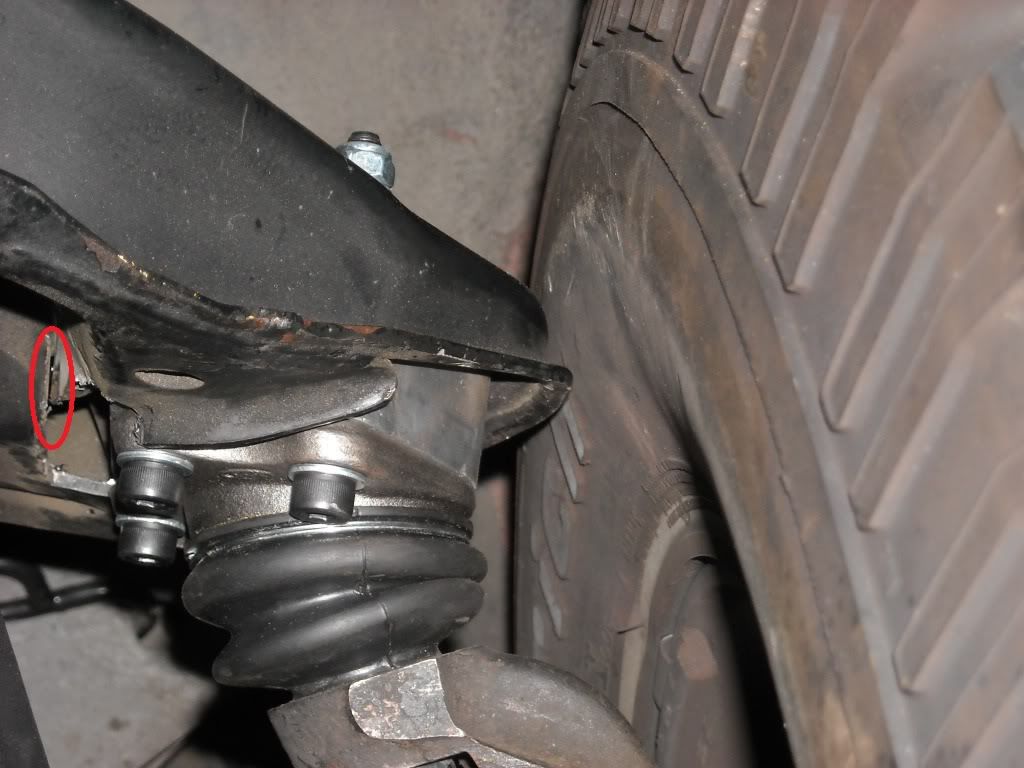
Honestly I'd be very surprised if anything happened at all considering where the cut is. It's just good practice to round off any sharp grooves/cuts with steel especially if it's subject to shock. If you're handy with a welder I'd weld it up and smooth out the edge with a die grinder. I tend to go overkill though. Heck I built my back deck out of old telephone poles. If you're not used to welding thin materials I'd leave it alone and just have a look whenever you're doing an oil change or something.
06-03-2011, 08:59 PM
#2428
Ok, thanks, Jason, Dutch, .... I really want to get some solid answers on the harmonic fit into the front main seal... Mine is touching and resists a LIL bit, ...but not much. Maybe when oil it and install the whole lot of that stuff it will seal up fine. It is a new seal, since it was leaking before.... and I CAN'T REMEMBER when I did the cover swap, etc., if I oiled it before installation(that would POSSIBLY explain it leaking. I wouldn't think you'd want it too tight, anyhow, since oiled or not it would eventually ride on the harmonic pretty hard and wear a groove and subsequently leak?????
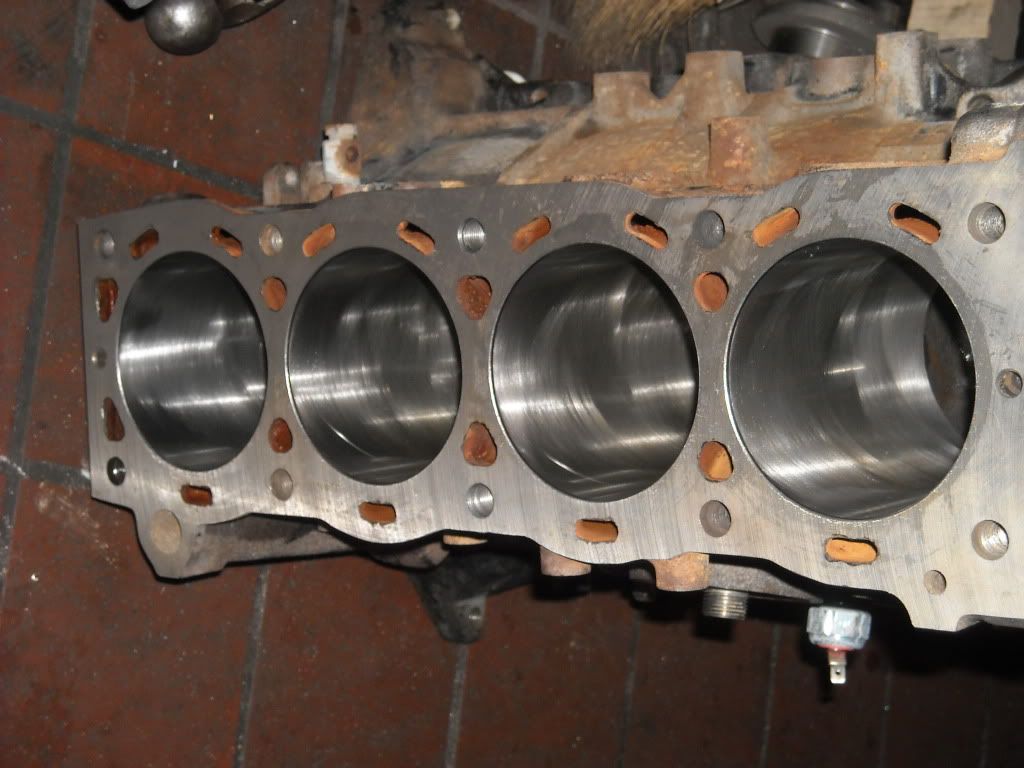
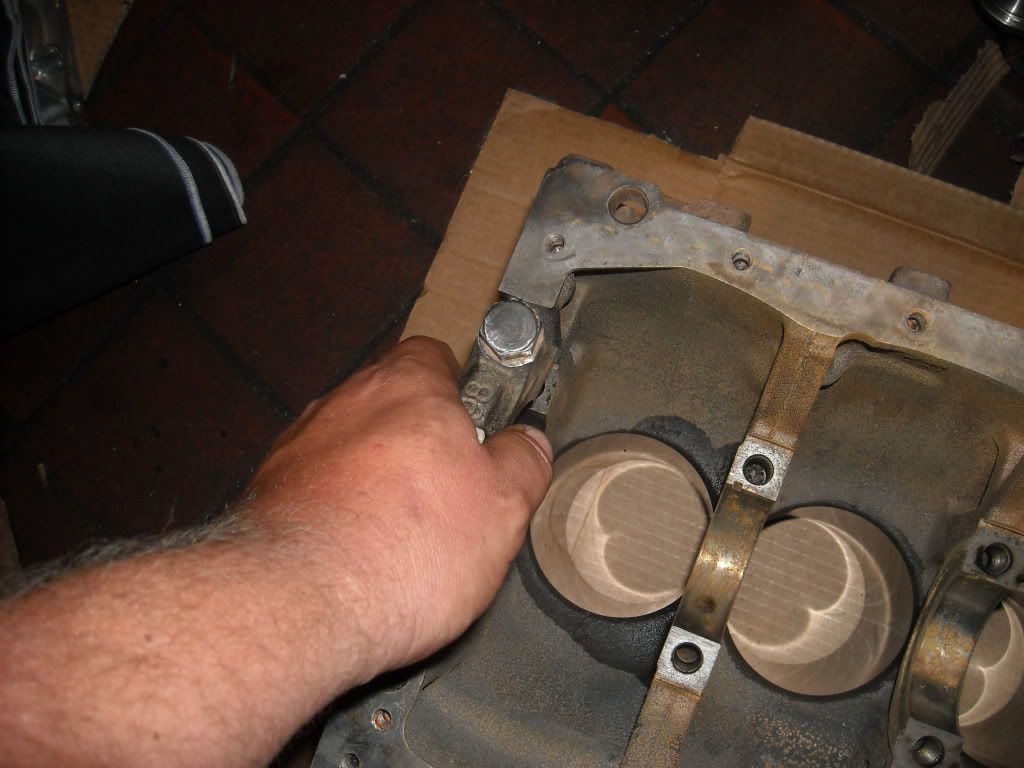
Ok, so, I have a couple pics of when I was working in the machine shop. Just got the block out of the hot tank and then went out and soap and watered it, rinsed and then shot it with air completely dry......(this is before all that, just out of the tank) after being bored and honed........
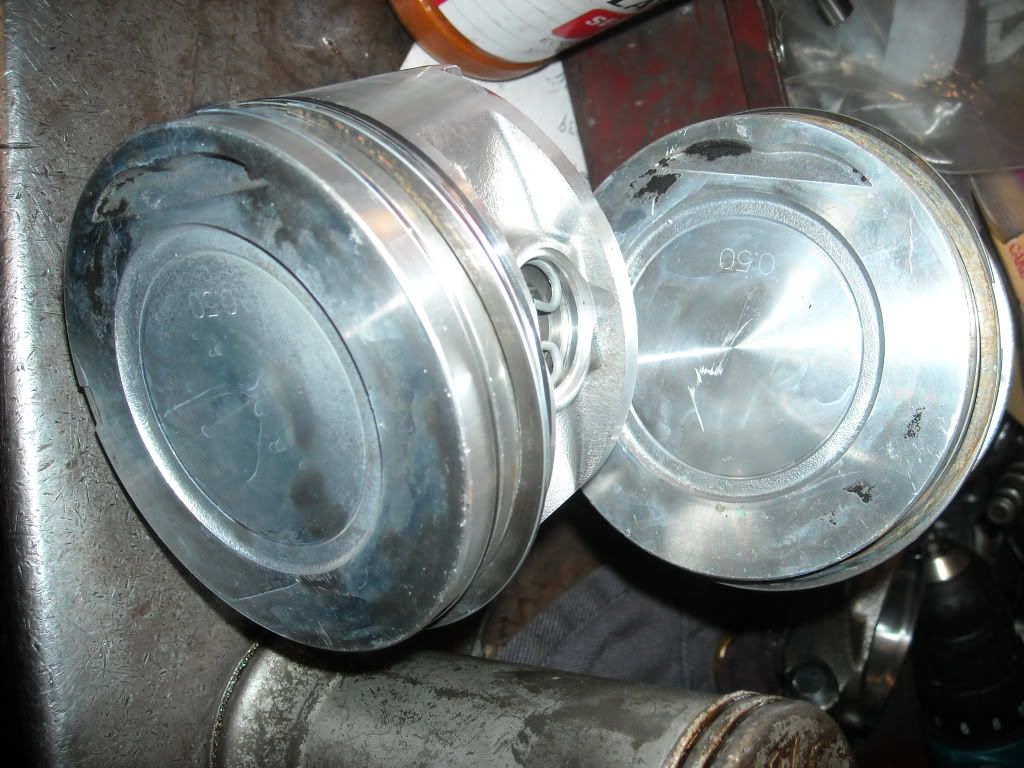
Hot tanked my pistons, and then he took em to the rod bearing journal honer and took em to nice a round(My previous machinist didn't do one or the other, crank/rod journals, and they AND the crank were out of round.... This is a new crank, which is next.....)>>>
Reemed, simple greened the oil passages really well, flushed em with air, plugging the one behind to force the crap out the next and the next until it was really coming out clean, ...then removed the product that the Crank Shop puts on(germolium? hahahah, Can't remember.. it's brown and kinda sticky)...... got it ready to install in the block...
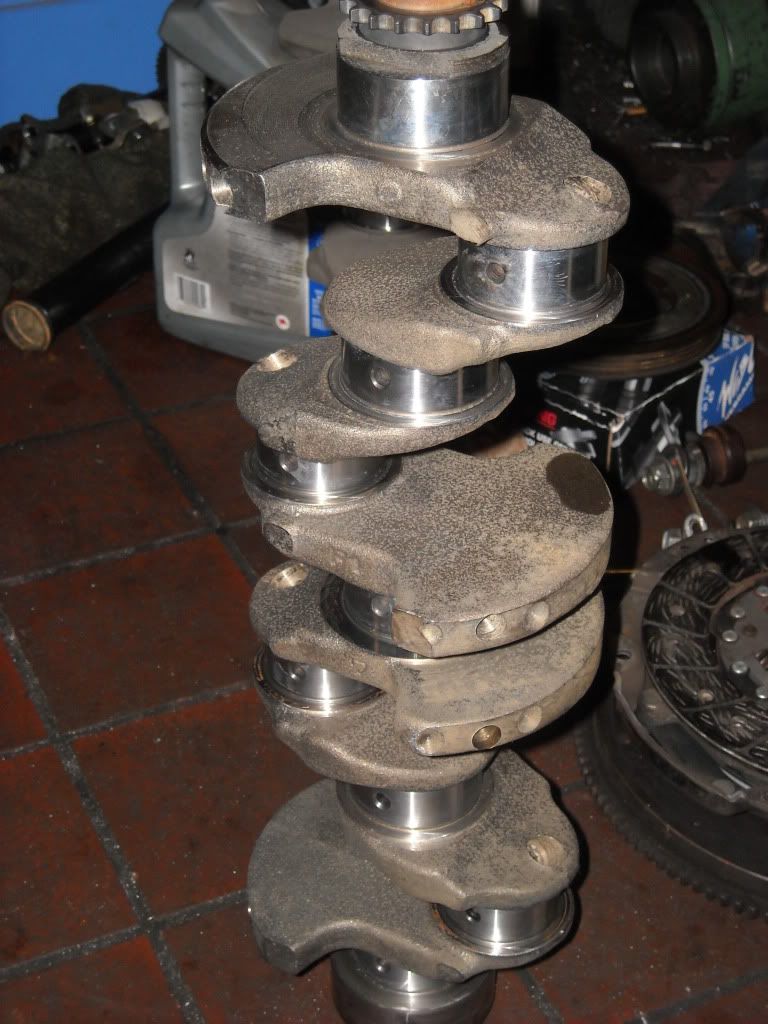
Pulling the Main Caps after triple checking the main journal trueness(After this I polished the journals, installed the main bearings and installed the crank, then rods and rod bearings with the cleaned up pistons and new Hastings Rings and Saiko Bearings...Could not stop and go find my camera when doing the assembly,...REALLY ticked, but oh well, ....he was there to watch me do the whole thing... He said, "You did fine, grasshopper" hahahaha...)......
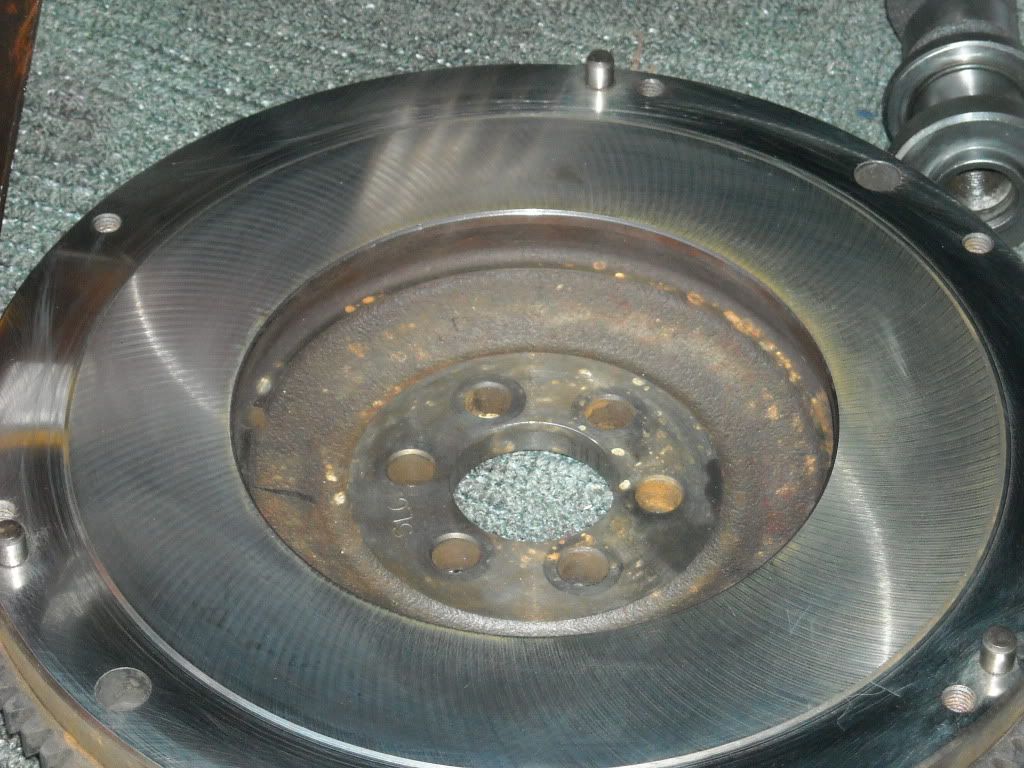
Then, he showed me how to set up the Flywheel grinder and gave my flywheel a good once over to remove the hot spots, etc., from the slinging gear oil in there, etc....
We then set the head/block down pins back in, did some checking of threads and such and then I headed home on my way.......On the way home, I saw this, ...thought it was cool.....

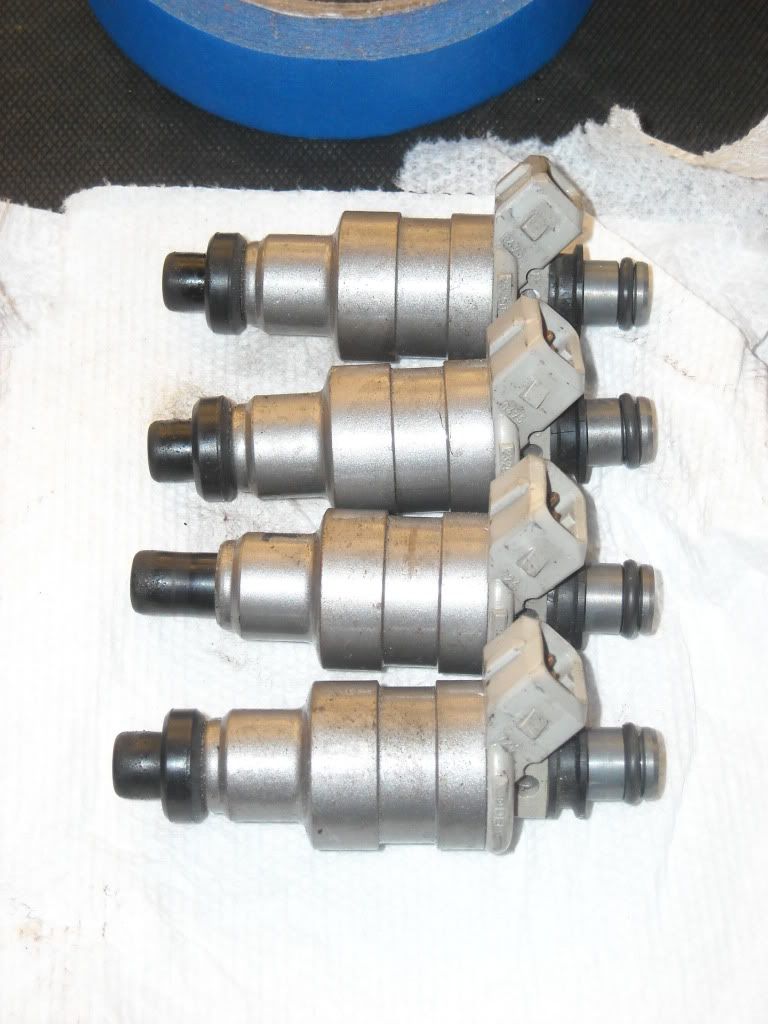
Stopped by RC to drop these off, ....but they were closed lol........
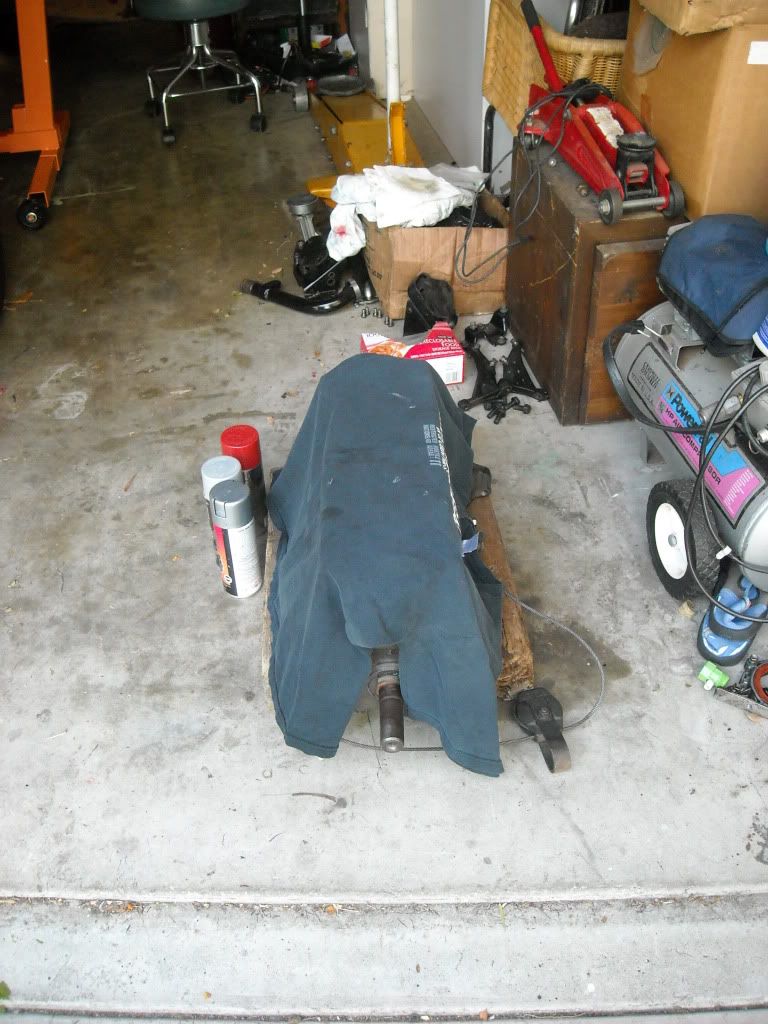
Got home, lifted the motor out and placed it on blocks so I could start painting.....
Then I taped off a bit, did a couple coats of the paint I chose and here's where I'm at.......

************************************************** ****************
I'm going to be asking a few questions, I really appreciate, in advance, any input y'all might have 
Ok, so, I have a couple pics of when I was working in the machine shop. Just got the block out of the hot tank and then went out and soap and watered it, rinsed and then shot it with air completely dry......(this is before all that, just out of the tank) after being bored and honed........
Hot tanked my pistons, and then he took em to the rod bearing journal honer and took em to nice a round(My previous machinist didn't do one or the other, crank/rod journals, and they AND the crank were out of round.... This is a new crank, which is next.....)>>>
Reemed, simple greened the oil passages really well, flushed em with air, plugging the one behind to force the crap out the next and the next until it was really coming out clean, ...then removed the product that the Crank Shop puts on(germolium? hahahah, Can't remember.. it's brown and kinda sticky)...... got it ready to install in the block...
Pulling the Main Caps after triple checking the main journal trueness(After this I polished the journals, installed the main bearings and installed the crank, then rods and rod bearings with the cleaned up pistons and new Hastings Rings and Saiko Bearings...Could not stop and go find my camera when doing the assembly,...REALLY ticked, but oh well, ....he was there to watch me do the whole thing... He said, "You did fine, grasshopper" hahahaha...)......
Then, he showed me how to set up the Flywheel grinder and gave my flywheel a good once over to remove the hot spots, etc., from the slinging gear oil in there, etc....
We then set the head/block down pins back in, did some checking of threads and such and then I headed home on my way.......On the way home, I saw this, ...thought it was cool.....
Stopped by RC to drop these off, ....but they were closed
lol........Got home, lifted the motor out and placed it on blocks so I could start painting.....
Then I taped off a bit, did a couple coats of the paint I chose and here's where I'm at.......
************************************************** ****************
I'm going to be asking a few questions, I really appreciate, in advance, any input y'all might have
06-04-2011, 02:03 AM
#2429
YotaTech Milestone-Two Millionth Post
Hey Mark.....good looking stuff...sounds like you is be getting schmarter by the minute. really liking this build now and how you are doing "the everything" to make it right.
nice pics.
I noticed you didn't do the crossword puzzle......may want to do it to stimulate thy brain.....and then maybe between that and the peacock screeching, your head will split open and make more room for engine stuff
nice pics.
I noticed you didn't do the crossword puzzle......may want to do it to stimulate thy brain.....and then maybe between that and the peacock screeching, your head will split open and make more room for engine stuff
06-04-2011, 05:10 AM
#2430
Registered User
Chef that harmonic sleeve and seal gets greased prior to install, same with the rear main to crank. What type of grease I am not sure, I just used my trusty Sta-Lube Marine grease in the blue can.
06-04-2011, 08:13 AM
#2431
Hey Mark.....good looking stuff...sounds like you is be getting schmarter by the minute. really liking this build now and how you are doing "the everything" to make it right.
nice pics.
I noticed you didn't do the crossword puzzle......may want to do it to stimulate thy brain.....and then maybe between that and the peacock screeching, your head will split open and make more room for engine stuff
nice pics.
I noticed you didn't do the crossword puzzle......may want to do it to stimulate thy brain.....and then maybe between that and the peacock screeching, your head will split open and make more room for engine stuff
But Brandon,.... what kind of fit was it? Was it snug to where you felt lots of resistance pulling it on and off the harmonic? Or fairly loose. PLEASE don't say I'm being paranoid, either, k? hahahaha. I mean, ...it was leaking, ya know? lol. I have some Sta-Lube Engine Assembly/Moly.... but those have Graphite in them, don't they? Just wasn't sure the 'Rubber stuff' liked that.
06-04-2011, 09:05 AM
#2432
Registered User
Chef the pulling on and off resistance is all gonna be determined on what kind of shape your crank keys are, if they are new should be little resistance to where you might not even need a hammer to put it on, but.... if the keys were damaged etc etc trying to remove them from the crank etc etc then it might be real difficult to get it back on.
Unless your talking about the sleeve going onto the balancer, then you should need to give it some slight taps on it with a hammer (not hard though) to get it on. But that is also gonna depend on how damaged the balancer was. Once its on mine was nearly impossible to get of without damaging seal but I had a pretty large groove in mine.
It shouldn't go on as easy as a condom though. But then again I got 3 kids two different mothers, so what do I know. hahahahahahah.
Last edited by xxxtreme22r; 06-04-2011 at 09:07 AM.
06-04-2011, 09:13 AM
#2433
Yeah, Brandon.... I'm just talking about trying 'test fitting' the harmonic into the seal sleeve. Same with the last seal, ...it's going in fairly easily. What I mean is, ..with the timing cover laying on my tailgate, assembled, seal installed, ...I put the harmonic into the seal sleeve and it just falls right in, very lil resistance at all, even without oil. I'm beginning to wonder if the IDIOT machinist before got me the wrong harmonic? Is that even possible that it would not be a tight fit with an almost brand new Harmonic? I'm ready to go down and micrometer one out at the Napa or something..just to be sure, ya know? Otherwise I have to do a speedy sleeve, and THAT SUX!
Funny thing, Brandon...the "Updated" seal I got from Toyota? It was EVEN MORE LOOSE! WTH???????
Funny thing, Brandon...the "Updated" seal I got from Toyota? It was EVEN MORE LOOSE! WTH???????
06-04-2011, 09:51 AM
#2434
Registered User
Chef I am still confused because your using seal sleeve and speedy sleeve in the same sentence. Are you talking the fitment of a steel sleeve at goes onto the balancer or the front oil seal to the unsleeved balancer? I doubt he got the wrong balancer. If the front oil seal to the unsleved new balancer, I can't really tell ya, I used a steel sleeve on mine instead of getting a new balancer. But I don't think it should be all that tight, it's soft rubber with that spring to help squeeze it which isn't that tight of a spring.
Last edited by xxxtreme22r; 06-04-2011 at 09:54 AM.
06-04-2011, 11:54 AM
#2435

Lookin good mark!
I hope this is the last time you have this motor out for a while!!!
Ive got tabs on a toyota down the road from me im looking into buying as a daily driver.
Then my 94 will become my rock crawling project
I hope this is the last time you have this motor out for a while!!!
Ive got tabs on a toyota down the road from me im looking into buying as a daily driver.
Then my 94 will become my rock crawling project
06-04-2011, 02:22 PM
#2436
Chef I am still confused because your using seal sleeve and speedy sleeve in the same sentence. Are you talking the fitment of a steel sleeve at goes onto the balancer or the front oil seal to the unsleeved balancer? I doubt he got the wrong balancer. If the front oil seal to the unsleved new balancer, I can't really tell ya, I used a steel sleeve on mine instead of getting a new balancer. But I don't think it should be all that tight, it's soft rubber with that spring to help squeeze it which isn't that tight of a spring.
1. I have a fairly new Harmonic(last machinist got it for me) that has no speedy sleeve on it.
2. After I did that timing cover yoink a bit back, trying to fix the leak, remember? >>> I put the harmonic back in the front main seal, when putting it all back together, ...using the SAME SEAL as since the rebuild, ...and it leaked out the harmonic/seal joining from behind. Not enough so that the oil slinger in the back was shooting it everywhere....just was dripping down the outer part of the seal, then down the oil pump front main seal housing, .... kinda like a lil drip right underneath the oil pump(you could see it from the floor, looking up)... and again, it was NOT getting slung all over(YET! hahaha).. So I can't be CERTAIN it wasn't leaking from the outer edge of the seal, rather than from the harmonic/seal lip union.
3. I have a new SFK seal that I put in, sealed on the outer part by 'some special, hard to get stuff that the machinist had' in a bottle with a paint stick attached to the lid/seal of the bottle. You know, kinda like a thread sealer jar where the applicator is attached to the lid like a stick with a wad of poly on the end??? lol... (He used it on all the freeze plugs as well... it's supposed to be IMPENETRABLE! HAHAHA)
4. I went to the Yard today, and asked them to grab me a Yota Harmonic, to check against my 'new replacement/aftermarket one'.... And the Toyota one seemed to fit in the seal a lil tighter(Keep in mind, I'm taking my Timing Cover around with me, ..it's not attached to the motor yet. Seal is installed in it, etc.....you know, to just 'test' fit the harmonic back into the seal?)....... It wasn't MUCH tighter, and I had to accept that when I micrometer tested both of them... maybe 1thousandth difference... Not sure that's enough. Plus, I also had to accept that my "new replacement harmonic balancer" has a much smoother finish on the back portion that slides in the seal, ya know?
5. What I also mentioned, and I think might have been the problem was, .... "I can NOT be sure that I lubed the seal last time, when I put it back together, trying to fix the timing cover, ya know? And, ....I used the same seal I've had in there for 5K...which I'm sure would be fine, HAD I lubed the seal... and, well, that harmonic has been in and out of that seal 6 TIMES IN ONE YEAR! lol....
************************************************** ***
I'm going to oil it up well and hope for the best. I was told by a couple machinists 'not' to use grease, unless I was using a very thin film....and even then, to STILL coat it with oil as well, liberally, before inserting the harmonic into the seal and over the crank/cranking it down to 116#.
************************************************** ***
On a side note;
I have a 'newer' coolant bleeder valve/drain plug in the bottom/driver side of the block in my 'red' motor.... and I'm going to use it in this motor. I'm glad I removed that plug to swap them, because the ports behind that were COMPLETELY plugged with crap, ...as was the bleeder valve itself!!! I'm carefully cleaning it out, and I'll get some pics of all the crap I got out of that port, as well as the totally plugged bleeder valve.
Thanks, Bo, and I HOPE SO TOO! lol! Great luck wished to ya on the 94! Just remember I said this...... THAT, TOO, WILL TURN INTO A PROJECT! have you not learned yet? hahahahaha. Jk, and I hope it's a great find!
Last edited by ChefYota4x4; 06-04-2011 at 02:24 PM.
06-04-2011, 04:38 PM
#2437
Just cleaned out that bleeder valve port and installed my newer bleeder valve with the brass plug. I was amazed how much crap was in that one port. The others look ok.
Painted the other side of the block, have the 2-500W halogen work lights on it right now, helping it along with the dry'age, lol. One more coat in an hour, then install everything, tomorrow that I can.
************************************************** ***********
Question;
*** Starting with a short block, as I am, I was wondering if I should slap the timing cover on, now, chain and all, tie off the chain and sprocket on top and then push back the tensioner when it's time to get it on the CAM, ...or just Put the timing assembly on after I get the head on and then slip on the cover(so I can tape back the tensioner and then remove it when it's time to put the cover on) ???? ***
Was a bit of a PITA to push the tensioner back by myself and get the chain and sprocket up over the CAM, last time I was in there(when I had to do the CAM swap, months ago, while the cover was still on).
Last edited by ChefYota4x4; 06-04-2011 at 04:39 PM.
06-04-2011, 04:47 PM
#2438
YotaTech Milestone-Two Millionth Post
Mark....chance of crunching the hanging-over portion of the head gasket putting the cover on AFTER the head.....it's been done, but I wouldn't. however I HAVE hear of cutting an aluminum can to use to kinda shoehorn it past the head gasket
06-04-2011, 08:41 PM
#2439
I think if I do it I that way, i will definitely use the aluminum can piece method(I think I'd rather find something more 'flat', lol.)
I know the 'corners' application of RTV up there, ....lil more tricky with the head still/already on. Hmmmm, lol.
Anyway, I have some pics, .... finished painting the block, dipstick housing, ....should have the lot done and ready tomorrow(brackets, etc.).. And I think I'm going to assemble as much of the long block as possible, including the head and possibly lower intake, before installing it into the truck. (So add 'remove hood' to the list, lol) I'll post the pics in a bit.
Last edited by ChefYota4x4; 06-04-2011 at 08:57 PM.
06-04-2011, 08:54 PM
#2440
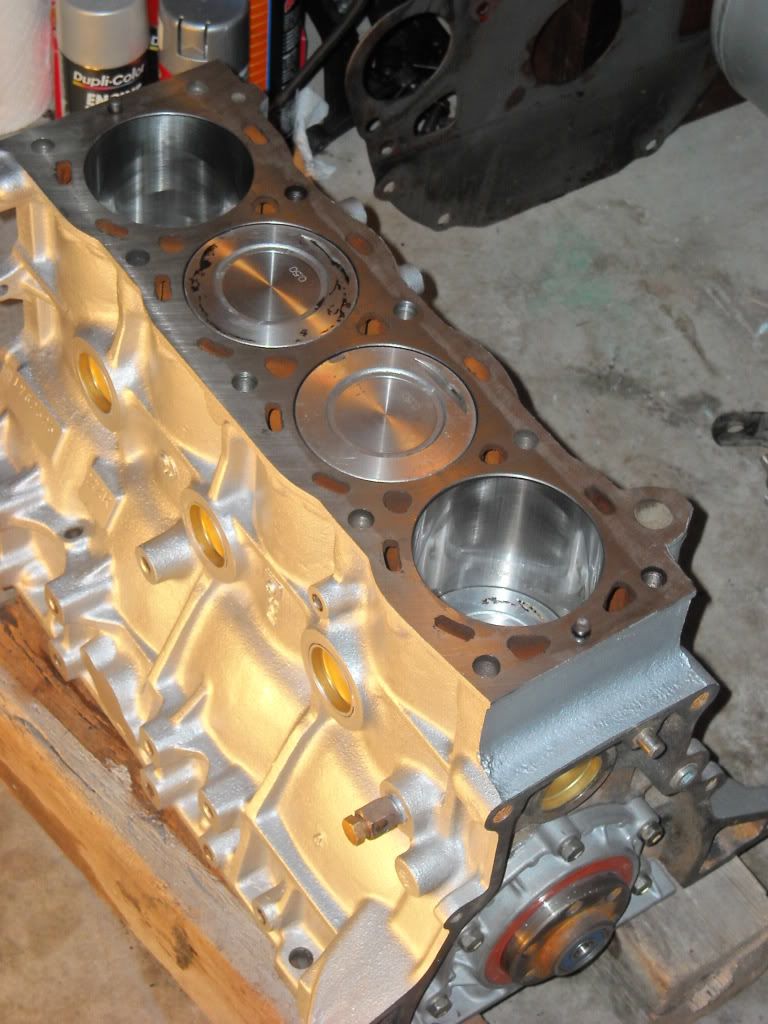
Here she is, ready to go in..........after a bunch of crap goes back on! hahaha..... I just put my 2-500W Halogen work lamps right up to it and it dried REALLY quick!.........
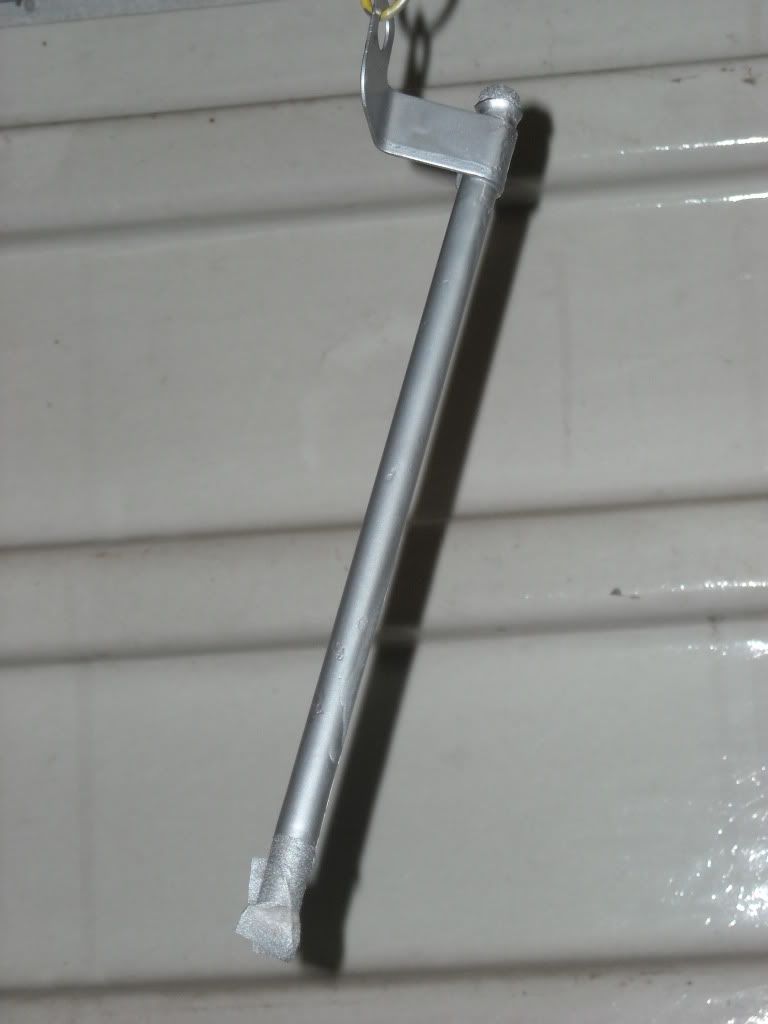
The Dipstick Guide hangin up to dry...............
Any Goodies you guys wanna add, ...SHOOT EM! I know, I am pretty thorough, but I forget stuff, and I probably have this time as well! lol.
The Dipstick Guide hangin up to dry...............
Any Goodies you guys wanna add, ...SHOOT EM! I know, I am pretty thorough, but I forget stuff, and I probably have this time as well! lol.


