
ChefYota4x4's 1987 4Runner Build-Up Thread

 05-29-2011, 05:18 PM
#2362
Registered User
Join Date: Apr 2011
Location: Southern Ontario
Posts: 428
Likes: 0
Received 0 Likes
on
0 Posts
I'm at a loss on how you would gain travel with a spacer, and I'm not saying that because I know, I'm saying that because I'm hoping someone would explain it. I'd always assumed you gain the lift at the loss of the travel as truckman has inferred. I wouldn't know about ride quality, however. Would probably be difficult for you (Chef) to compare as you've improved so much of your suspension during this process.
05-29-2011, 05:32 PM
#2363
Registered User
The spacers increase overall travel because it increases the distance between the bump stops.
So with that said the spacers can give you almost 1.5" of overall bumpstop to bump stop travel. It's not exact because of the geometry of the UCA, LCA etc etc but it's close. It might be slightly more or slightly less I forget.
05-29-2011, 05:53 PM
#2364
Registered User
Join Date: Apr 2011
Location: Southern Ontario
Posts: 428
Likes: 0
Received 0 Likes
on
0 Posts
I would think if you put in the spacers the upper control arm gains/loses nothing as they're not effected, rather everything below them has been effected, but the lower control arm's geometry has changed. But someone had mentioned (think it was mfwimg-forgive me if I'm wrong) that you need to add spacers to the stops, which would leave travel about the same as before. Once again posting not because I know, but rather because I'm hoping someone can confirm/deny my logic.
05-29-2011, 06:03 PM
#2365
Registered User
you do not have to add spacers in the bump stops if your not using low profile stops. This is according to 4crawler.
Here since noone had looked at 4crawalers site after I mentioned no shims needed on bump stops.
Since the spacer is put effectively in between the upper and lower control arms (yes the steering knuckle is in between) this increases the distance between the stops. But I have to look at line once again maybe droop isn't affected unless cranking on the t-bars.
EDIT2: wait a second if droop isn't increased why is spacers in the bump stops even mentioned. Notice the 4crawelr photo is of the droop stop not the compression stop.

Now this I am assuming if your CV's are wore out this might be an issue. If new they might not bind.
Here since noone had looked at 4crawalers site after I mentioned no shims needed on bump stops.
Since the spacer is put effectively in between the upper and lower control arms (yes the steering knuckle is in between) this increases the distance between the stops. But I have to look at line once again maybe droop isn't affected unless cranking on the t-bars.
EDIT2: wait a second if droop isn't increased why is spacers in the bump stops even mentioned. Notice the 4crawelr photo is of the droop stop not the compression stop.
For low profile bump stops only:
Shim them approx. 1/2" with some washers or use stock bump stops.
Failure to do so could result in damage to CV joints, shocks, or other components.
Low profile bump stops are typically made of polyurethane and will be colored red or some other color as shown below.
Stock bump stops are typically a black runner material by comparison.
Even with stock bump stops, you may experience some CV axle binding.
To check, let the suspension hang at full droop.
Easy to do this when you finish installing the spacers, as the front end should be up in the air.
Rotate each CV axle shaft by hand and check for any binding at the CV joints and also check with the wheels turned to the steering stops in each direction.
Also, you may want to feel the CV axle rotation before installing the spacers, just to familiarize yourself with what they feel like "normally".
If felt, several options to fix it are available:
Add some shims as shown above for the low profile bump stops.
Or install a front differential drop kit to lower the differential and thus lessen the CV joint angles.
Last edited by xxxtreme22r; 05-29-2011 at 06:08 PM.
05-29-2011, 06:20 PM
#2366
Registered User
Join Date: Apr 2011
Location: Southern Ontario
Posts: 428
Likes: 0
Received 0 Likes
on
0 Posts
Thanks for that post XXX, clears up a lot of the ?? I had on the subject, and your post (#2363) makes perfect sense to me logically. So the upper control arms maintain their travel to the droop stops and the lower control arms gain 1.5" of travel to the bumpstops, barring slight geometry changes as you mentioned, which are pretty much negligible. Hope this info is interesting to Chef, cause I really don't mean to hijack the thread.
05-29-2011, 07:06 PM
#2367
Registered User
Join Date: Aug 2010
Posts: 109
Likes: 0
Received 0 Likes
on
0 Posts
I also have another question;
I'm going to get it aligned since I've installed the lift, etc. But I'm wondering if something might be 'wrong'..... Because; When I look from the front of the truck, ...the driver side tire looks as if it's turning right just slightly while the pass. side tire looks straight. It might be the pass. side that's off, and not the driver side.... I'll check the pitman alignment mark and decide from there. It might also be 'toe out' on the driver side...Kinda hard to tell, so it's not dramatic if it is, but I guess I'm just wondering, ............
*** WHAT COULD BE CAUSING THIS? ***
I haven't TOTALLY torqued down the ball joint to knuckle unions yet. But I got the marks on the cam adjusters for the LCA pretty much DEAD ON... The knuckle thing might explain the "TOE OUT" stuff... but the turned inward thing,...that seems it would be more LCA adjusting cam stuffs.
*** ANY IDEAS???? ***
05-29-2011, 08:01 PM
#2368
Registered User
OK guys I feel like like I spoke out of turn and made a fool of myself, I would swear I read the 3 inch of travel thing somewhere thought it was on marlins site maybe not, someone probably told me that and I took for Gospel.
05-29-2011, 08:33 PM
#2369
Wow, ....Ok, .... wanna clarify a couple things.
Mike, ...I never suggested you were crazy for mentioning this, nor that I wasn't paying attention... I hear ya, and I will DEFINITELY be doing all the tests.... I've just been unable, since slapping it together, to get back to my truck for ANYTHING! grrr!lol................. Couldn't get to it because;.......
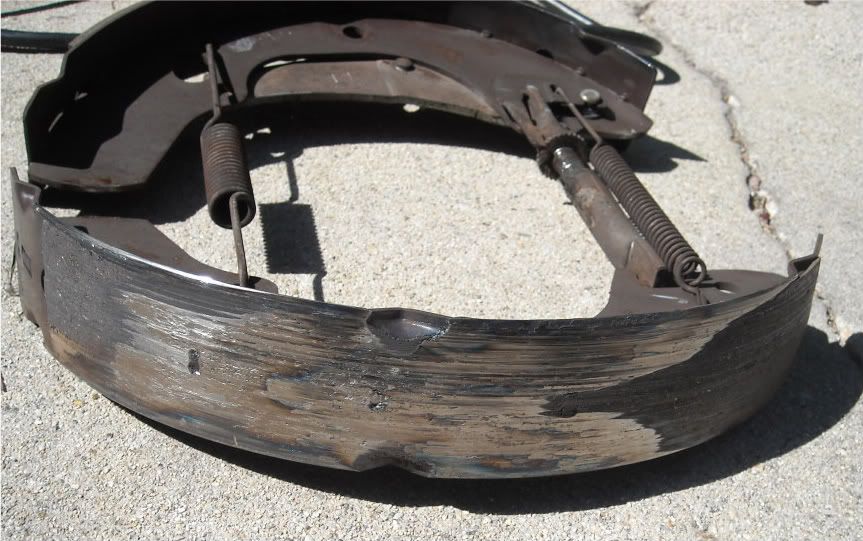
....Reason being, ....my daughters truck. By the time she pulled in the driveway, the rear shoes were nearly on fire, RED HOT, and had almost literally melted to the drums. There was over a 1/4" GONE out of them on the outer edges, and the spring had come off the adjuster limiter.... and they had adjusted so far out that I could not get anything on them to loosen them enough... So, I had to POUND on it until there was enough space to get a tool in there and undo the lower spring, remove the front-outward facing springs and push them in enough....then it finally came off.. THE CARNAGE WAS INSANE! VERY disappointed and a bit ticked off...but I'm just happy she NOR MY GRANDSON were killed!
Brandon, .... I did see what you said, and I did tell ya, "I have it printed out", etc., in post #2355. "And they are low pro's, indeed"....something to that effect. lol. I actually had the paper printed out. The problem for me was that I had to remove/and replace new, the upper ball joints. But, after doing so, and everything was in... I could not get the CV's to bind up, ...but I didn't lock the hubs in...That's what I was also asking 'if it is necessary'? lol. Just didn't want Mike to think I was dismissing what he said, nor that it was 'just not gonna happen to me, muahhahaha', lol. So, I figured "Let's talk it out", ...and that's happened, ..and that's good, hahaha.
Ok, so, once again, ..."I WILL", promise, as soon as my daughters truck is done, probably tomorrow(GOD WILLING THE FRONTS AREN'T RIDDLED WITH CARNAGE!), I will do all the tests that will give me a really good idea on 'just what, if anything, will cause me some dangerous binding.'... If it matters any, my CV's look and feel like brand new. The rubber is in great shape and not one blemish/crack/weather or oil or otherwise caused fractures, .... Heck, they were even hanging when I dropped the upper knuckle from the arm, completely... and I could see it pulling the boot kinda straight.... Even then, they turned.
I'm going to read his page again, ...but I just don't remember Roger ever saying, "Lock the hubs in and test the cv's...... " so I was askin.
Anyway, .... I'm probably sounding like a dolt, .....because I am LITERALLY WIPED OUT! lol. Really ticks me off fixing things when you've already told the person, "HEY< get over here before it gets worse!".... and then a month OR 2 later, .... They're so bad that it takes half a day instead of a couple hours. I am uploading pics... post them soon!
Mike, ...I never suggested you were crazy for mentioning this, nor that I wasn't paying attention... I hear ya, and I will DEFINITELY be doing all the tests.... I've just been unable, since slapping it together, to get back to my truck for ANYTHING! grrr!lol................. Couldn't get to it because;.......
....Reason being, ....my daughters truck. By the time she pulled in the driveway, the rear shoes were nearly on fire, RED HOT, and had almost literally melted to the drums. There was over a 1/4" GONE out of them on the outer edges, and the spring had come off the adjuster limiter.... and they had adjusted so far out that I could not get anything on them to loosen them enough... So, I had to POUND on it until there was enough space to get a tool in there and undo the lower spring, remove the front-outward facing springs and push them in enough....then it finally came off.. THE CARNAGE WAS INSANE! VERY disappointed and a bit ticked off...but I'm just happy she NOR MY GRANDSON were killed!
Brandon, .... I did see what you said, and I did tell ya, "I have it printed out", etc., in post #2355. "And they are low pro's, indeed"....something to that effect. lol. I actually had the paper printed out. The problem for me was that I had to remove/and replace new, the upper ball joints. But, after doing so, and everything was in... I could not get the CV's to bind up, ...but I didn't lock the hubs in...That's what I was also asking 'if it is necessary'? lol. Just didn't want Mike to think I was dismissing what he said, nor that it was 'just not gonna happen to me, muahhahaha', lol. So, I figured "Let's talk it out", ...and that's happened, ..and that's good, hahaha.
Ok, so, once again, ..."I WILL", promise, as soon as my daughters truck is done, probably tomorrow(GOD WILLING THE FRONTS AREN'T RIDDLED WITH CARNAGE!), I will do all the tests that will give me a really good idea on 'just what, if anything, will cause me some dangerous binding.'... If it matters any, my CV's look and feel like brand new. The rubber is in great shape and not one blemish/crack/weather or oil or otherwise caused fractures, .... Heck, they were even hanging when I dropped the upper knuckle from the arm, completely... and I could see it pulling the boot kinda straight.... Even then, they turned.
I'm going to read his page again, ...but I just don't remember Roger ever saying, "Lock the hubs in and test the cv's...... " so I was askin.
Anyway, .... I'm probably sounding like a dolt, .....because I am LITERALLY WIPED OUT! lol. Really ticks me off fixing things when you've already told the person, "HEY< get over here before it gets worse!".... and then a month OR 2 later, .... They're so bad that it takes half a day instead of a couple hours. I am uploading pics... post them soon!
05-29-2011, 08:55 PM
#2370
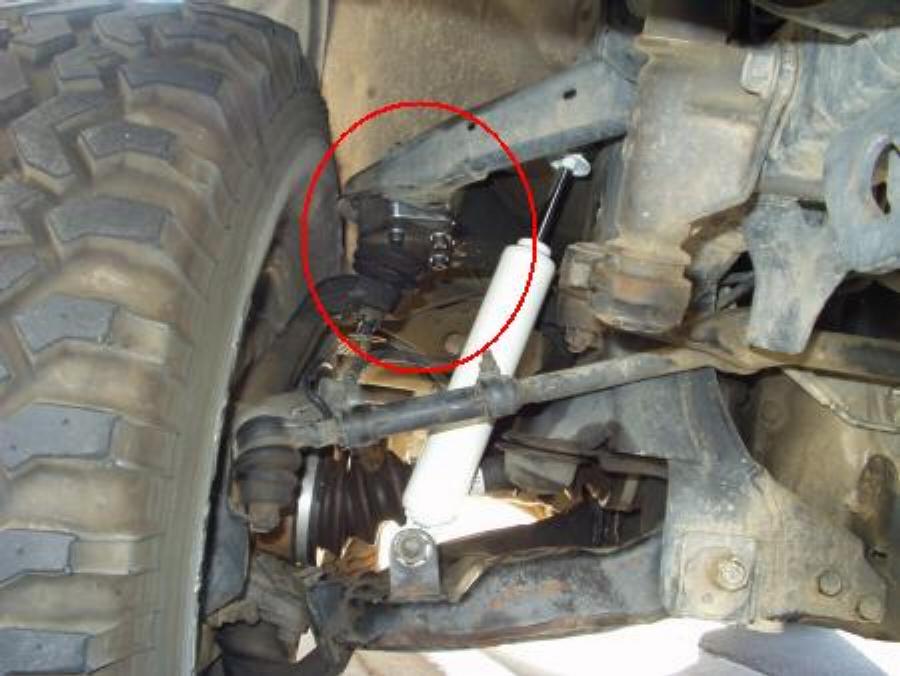
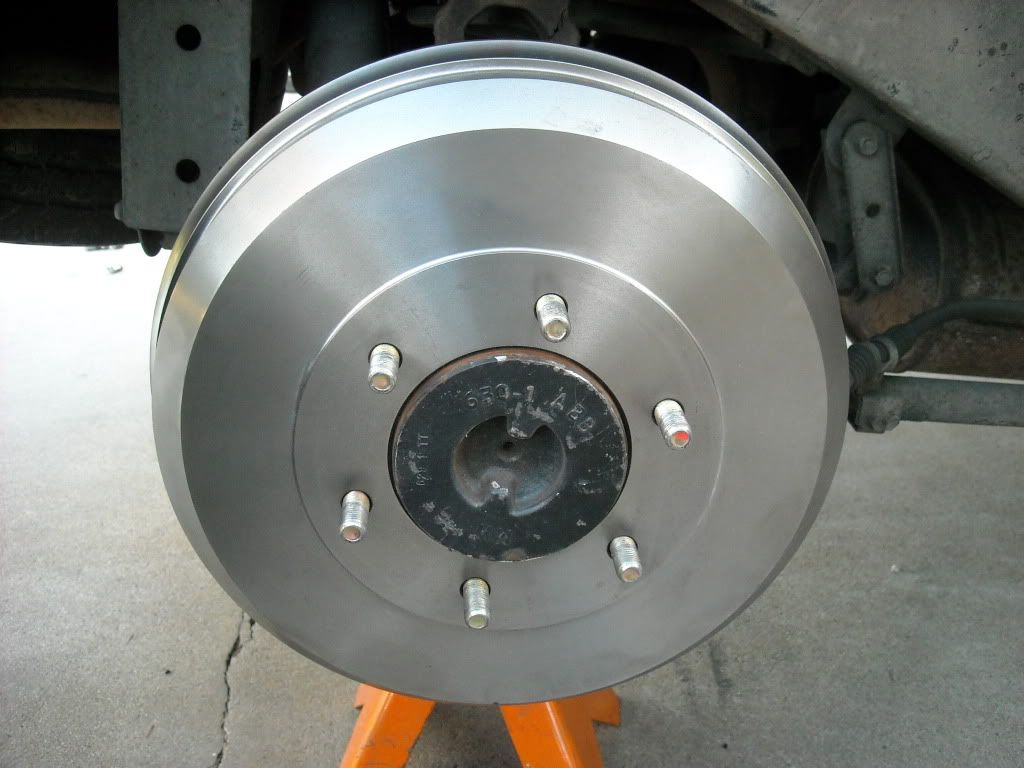
Ok, .... from this..............
And this.....
.................................................. .................................................. ........
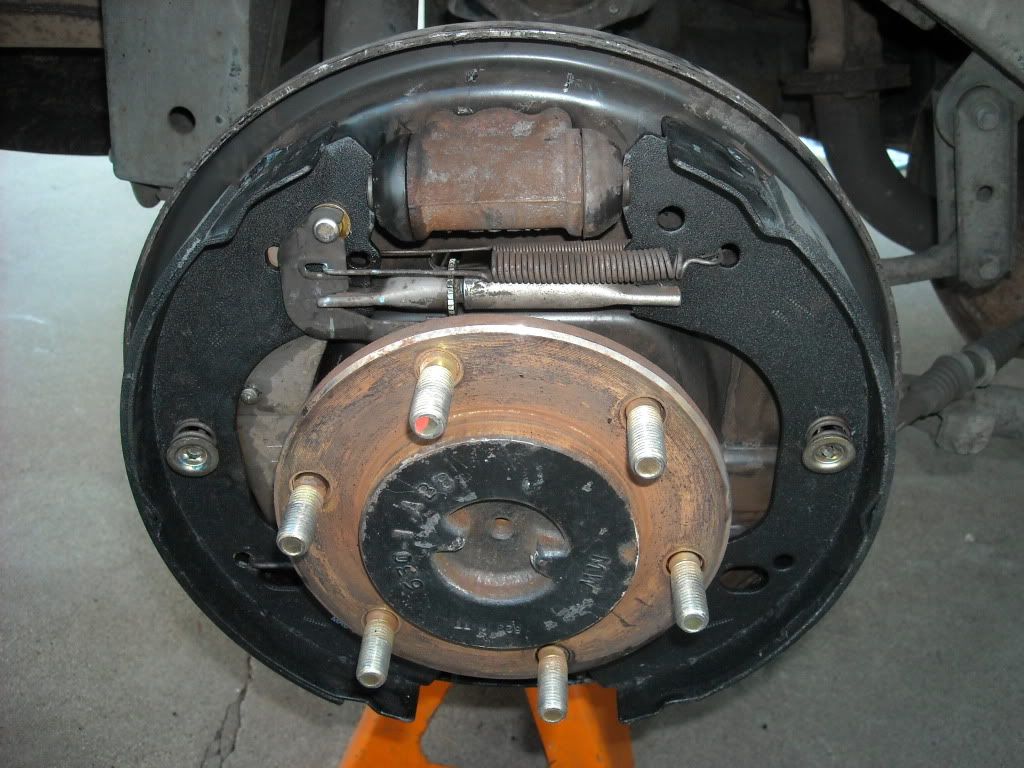
To this.........................
And this...............
************************************************** ********
Her mom is SO TICKED, ...and it's in her name, ....so it's some shaky ground stuff going on right now in that sitch! Know what I'm sayin? lol.
BTW, ....this 2001 Isuzu Rodeo Sport V6 w/Leather and all Power package?>>>> was a GIFT, from her God Mother, .... FREE! You know, the same truck that got TOWED!?!?! cuz it had no tags and so I had to spend like 700$ for insurance, tags, fees, yard fees?????? yeah, ...I'm not too CHIPPER, EITHER! lol. Love her none the less, ....but MAN!
And this.....
.................................................. .................................................. ........
To this.........................
And this...............
************************************************** ********
Her mom is SO TICKED, ...and it's in her name, ....so it's some shaky ground stuff going on right now in that sitch! Know what I'm sayin? lol.
BTW, ....this 2001 Isuzu Rodeo Sport V6 w/Leather and all Power package?>>>> was a GIFT, from her God Mother, .... FREE! You know, the same truck that got TOWED!?!?! cuz it had no tags and so I had to spend like 700$ for insurance, tags, fees, yard fees?????? yeah, ...I'm not too CHIPPER, EITHER! lol. Love her none the less, ....but MAN!
Last edited by ChefYota4x4; 05-29-2011 at 08:58 PM.
05-29-2011, 09:36 PM
#2372
Well, I made a mess. it was SUCH A PITA, Truckman.... never had that much trouble with drums before!(I'm sure you have many times, lol....But that's what you do all the time, haha).......
Anyway, yeah, .... In the process of doing all I had to do to get that drum off... I over extended the outer boot and POOF! So, I cleaned it all up pretty well and slapped it back in, ..but it left some mess on the outer-lip of the cylinder. Yeah, it was dry to the bone when I got in there. But HOW LONG WOULD THAT HAVE LASTED? I guess until it lit on fire and melted everything, right? lol.
Thanks, Truckman... I'm satisfied that I did a good job...but it WAS a bear! The actual work once those were off was about 1 hour, hahaha. Getting there? Let's just say, ... RIDICULOUS, ....Had some lunch, started in, .... Finished, and had a late dinner! lol.
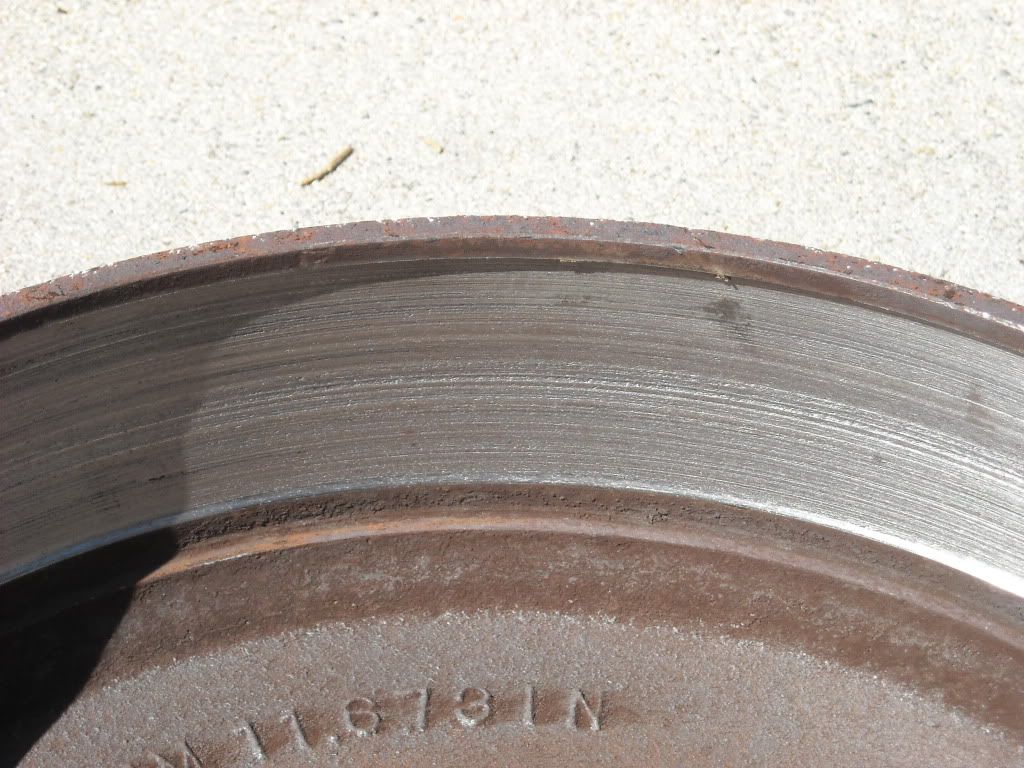
ROTORS TOMORROW! Good LORD, ...drums is spensive! So, I'm really hoping that the Rotors, while they're not NEARLY as pricey, ....hope they're salvageable, ya know? I know, ... and if they're even close, I'll replace em... But when I took a closer look today, they didn't seem to bad... and I think that having NO REAR BRAKES, that might have contributed to the fronts getting a lil hotter than normal.
Just insane how things are built now adays. Some better, I know...but GEESH,.. with this one, and others I've seen.... 2001, .....and it might have locking up Calipers and such, already???????? My calipers started leaking at 240K! lol. This thing has 100K on it, and it drives pretty nice... peppy for a Isuzu, lol. But, it's just clickity clankin a bit in spots... FAR more than mine, which is 24 years old! lol. As they say... "They just don't make em like they used to!" lol.
Anyway, yeah, .... In the process of doing all I had to do to get that drum off... I over extended the outer boot and POOF! So, I cleaned it all up pretty well and slapped it back in, ..but it left some mess on the outer-lip of the cylinder. Yeah, it was dry to the bone when I got in there. But HOW LONG WOULD THAT HAVE LASTED? I guess until it lit on fire and melted everything, right? lol.
Thanks, Truckman... I'm satisfied that I did a good job...but it WAS a bear! The actual work once those were off was about 1 hour, hahaha. Getting there? Let's just say, ... RIDICULOUS, ....Had some lunch, started in, .... Finished, and had a late dinner! lol.
ROTORS TOMORROW! Good LORD, ...drums is spensive! So, I'm really hoping that the Rotors, while they're not NEARLY as pricey, ....hope they're salvageable, ya know? I know, ... and if they're even close, I'll replace em... But when I took a closer look today, they didn't seem to bad... and I think that having NO REAR BRAKES, that might have contributed to the fronts getting a lil hotter than normal.
Just insane how things are built now adays. Some better, I know...but GEESH,.. with this one, and others I've seen.... 2001, .....and it might have locking up Calipers and such, already???????? My calipers started leaking at 240K! lol. This thing has 100K on it, and it drives pretty nice... peppy for a Isuzu, lol. But, it's just clickity clankin a bit in spots... FAR more than mine, which is 24 years old! lol. As they say... "They just don't make em like they used to!" lol.
05-29-2011, 09:59 PM
#2373
Registered User
Join Date: Jan 2011
Location: va
Posts: 353
Likes: 0
Received 0 Likes
on
0 Posts
Hey chef nice work on the brakes glad you got them fixed before something bad happened. Brakes are one of those things you want to keep a close eye on. I didnt get the chance to work on my bj spacers today grrr been another busy day. I seen where you changed the upper bj to those megn travel 1st what did they run you and 2nd are they pose to help with travel or just withstand more extreme angles??
05-29-2011, 10:11 PM
#2374
Hey Baddest, ...
I got them from Jim, the owner of Downey, and no, there are no more of those in particular... I bought the last pair he had.. And, According the Jim of Downey, ...they should increase Travel, and he said, "We designed them to go with BJ spacers and we got up to 11" of travel as compared to 6.5 stock." .... We'll see, ...I'm still trying to figure it all out, hahaha... and hey, for 80$ for both, when he used to sell them for 80$ for one? I think it's a pretty good deal.
I got them from Jim, the owner of Downey, and no, there are no more of those in particular... I bought the last pair he had.. And, According the Jim of Downey, ...they should increase Travel, and he said, "We designed them to go with BJ spacers and we got up to 11" of travel as compared to 6.5 stock." .... We'll see, ...I'm still trying to figure it all out, hahaha... and hey, for 80$ for both, when he used to sell them for 80$ for one? I think it's a pretty good deal.
05-29-2011, 10:15 PM
#2375
 I'd LOVE to have that kind of flex you got outta your IFS! But, alas, I'm broke, and broke and HUGE FLEX on the IFS don't go together, eh? lol.
05-29-2011, 10:15 PM
I'd LOVE to have that kind of flex you got outta your IFS! But, alas, I'm broke, and broke and HUGE FLEX on the IFS don't go together, eh? lol.
05-29-2011, 10:15 PM
#2376
Registered User
Join Date: Jan 2011
Location: va
Posts: 353
Likes: 0
Received 0 Likes
on
0 Posts
Yea thats a great deal so if he don't sell em any more is there anywhere else that does or something simular to them. I wish i coulda got started on mine today im ready to get them in and the new procomp 9000s so that it aint beating me to death lol.
05-29-2011, 10:19 PM
#2377
You will get it, soon enough, don't sweat it too much, man... But yes, I know how frustrating that can be, lol.
Far as the BJoints, ... not sure. I think he said someone copied his design, ..but he used to to the Japan and everything, using Toyota's machines, dies, casts, ..all kinds of stuff. They shave away so the ball joint can travel further before it hits the limit.
Let me know when you get started, and if I can help with some advice, I surely will!
05-29-2011, 10:26 PM
#2378
Registered User
Join Date: Jan 2011
Location: va
Posts: 353
Likes: 0
Received 0 Likes
on
0 Posts
Im sure i will have some questions my buddy who helps me with all my projects is ase certified but he said he aint ever done spacers before. You wouldnt happen to remember the name of the company who copied him do you so that i could find them and try to do some research on em. Sounds like there a great addition to the spacers
05-30-2011, 07:35 AM
#2379
I don't remember, Baddest.... Sorry man. I would start by googling "86-95 Toyota Mega Travel Ball Joints", .... and maybe it wouldn't be named "MEGA" by someone else, ...I don't know, lol.
If he's ASE and .....HAS DONE some suspension, it should be butter for him, ya know? Only difference is that you're knocking the studs out the Ball Joints(something I would imagine most mechanics don't often do, lol).... and if you're adding ball joints up there.
I would;
If you're not going to replace the Ball Joints, I would pull the nuts and drop down the lower arm a lil, maybe raise the upper a lil(might not need to), and with the studs STILL ON the orig. ball joint, ...put the spacer over it, ...then use that TO TEST YOUR CUT! Remember what I said..... You can cut and the spacer will fit fine...YOu'll see all the holes perfectly lined up, etc. THEN, you put on the spacer to the ball joint(which has a wider base in the corners than the spacer), and you might see you need to cut a lil more(seems to me, mainly in the corners are the troubled spots).
If you are going to change the ball joints, .... DEFINITELY leave the ball joint attached securely to the A-ARM while you knock out the knuckle from the ball joint taper. Then, just install the ball joint 'INTO THE KNUCKLE', first, .....and when you have it in, then bring it up with the lower arm, into place.(At this point, you might see what I mean about having a lil more trouble and possibly needing to jack up the upper arm a lil, as the spacer is 'floating' around on there....and besides that will only give you a lil more space, right? lol.) You can also lower the upper one if it's elevated, kinda working both into place. Either way, you CAN rotate/gyrate the Ball Joint around to get the right angle, ...then get one allen bolt in, one in front and one in rear, diagonally from each other, and you should know you're in Biz!
Still haven't loaded that video.... they have the camera for their party, ... and the card is in there! lol.(YES, ...it's their Nikon point and shoot, .... I had a Canon-Rebel... but can't use it for video, lol.... Need to get me one of my own!)... And anyway, ....I'm sure your buddy is a lot more experienced with this stuff than myself.
PS> ......DON'T FORGET; Remove the sway bar ends! lol.(That is, ...if you want the lower arm to drop as much as possible, lol)
05-30-2011, 10:03 AM
#2380
Registered User
Join Date: Jan 2011
Location: va
Posts: 353
Likes: 0
Received 0 Likes
on
0 Posts
Thanks thats sum great info man I wasnt going to replace them till i read your post bout the mega travels. Mine look good but if i can put something in there to help my travel ill try and find some lol. As far as my buddy goes he said we shouldnt have any probs with them but usually thats when things go wrong lol. Thanks for all the advice reading and searching on here has made me feel more comfortable in my ablilitys lol. Ill post the pics hopefully i can get to them pretty quickly


