
ChefYota4x4's 1987 4Runner Build-Up Thread
 05-21-2011, 09:12 PM
#2261
THANKS, ZACH!
BTW, guys........ AXLES, .....OUT! lol. Pics to follow, including one of the infamous 'BFH!',.... and the particular screwdriver I used to force the axles out of the diff..... As per 'ZUK- FRONT IFS DIFF REMOVAL' - link(I believe it's for gear swapping instructions that follow)..... I will just say, ''THANKS, ZUK, ONCE AGAIN, FOR FANTASTICAL INSTRUCTIONS AND PICS, ETC., ETC.!!!!!" Gotta love the ZUK MAESTRO! LOL.
BTW, guys........ AXLES, .....OUT! lol. Pics to follow, including one of the infamous 'BFH!',.... and the particular screwdriver I used to force the axles out of the diff..... As per 'ZUK- FRONT IFS DIFF REMOVAL' - link(I believe it's for gear swapping instructions that follow)..... I will just say, ''THANKS, ZUK, ONCE AGAIN, FOR FANTASTICAL INSTRUCTIONS AND PICS, ETC., ETC.!!!!!" Gotta love the ZUK MAESTRO! LOL.
 05-21-2011, 10:31 PM
#2263
Thanks, NV! Far as the 'ouch'.... Yeah..... whatcha gonna do, ya know? haha
Ok, pics as promised................
Cleaned up MY diff cover from the 4.10 diff with the breather(have to clean and steal that one for this 4.30 diff... Rob needed it for his ) Hope you're loving them, Rob! (Kind of curious how Rob's buddy got the tube/axle out, without removing the cover.... i'm guessing with some coaxing and maybe a vice and puller?) That would have worked really well, actually... Hmmmm, well, regardless......

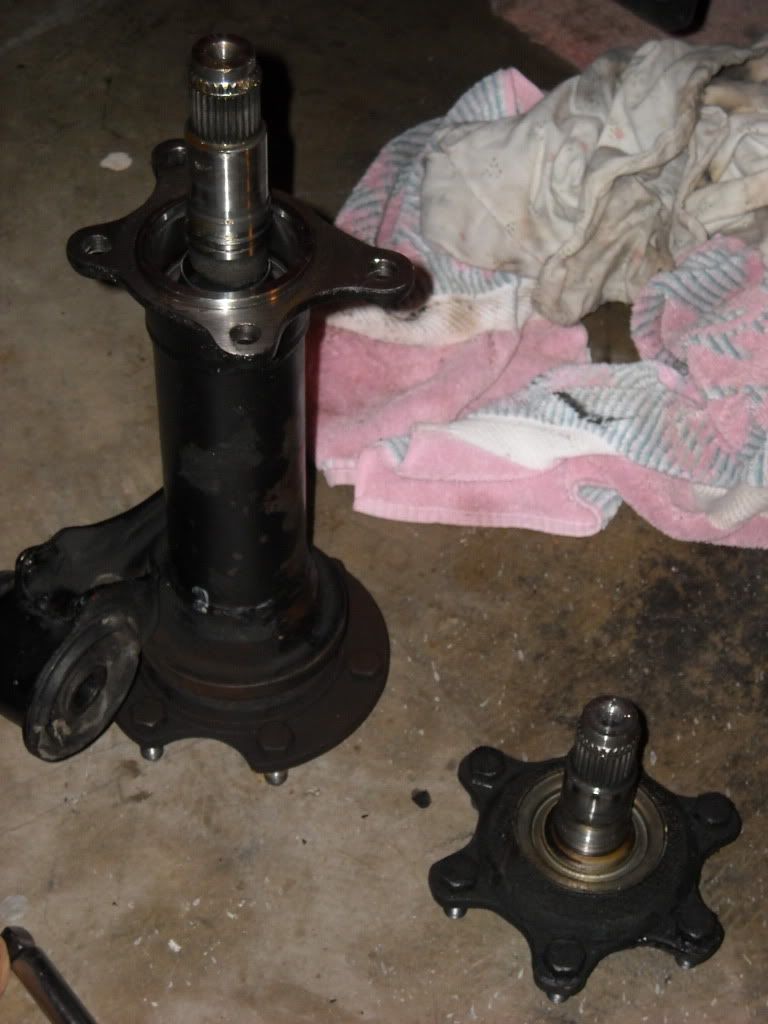
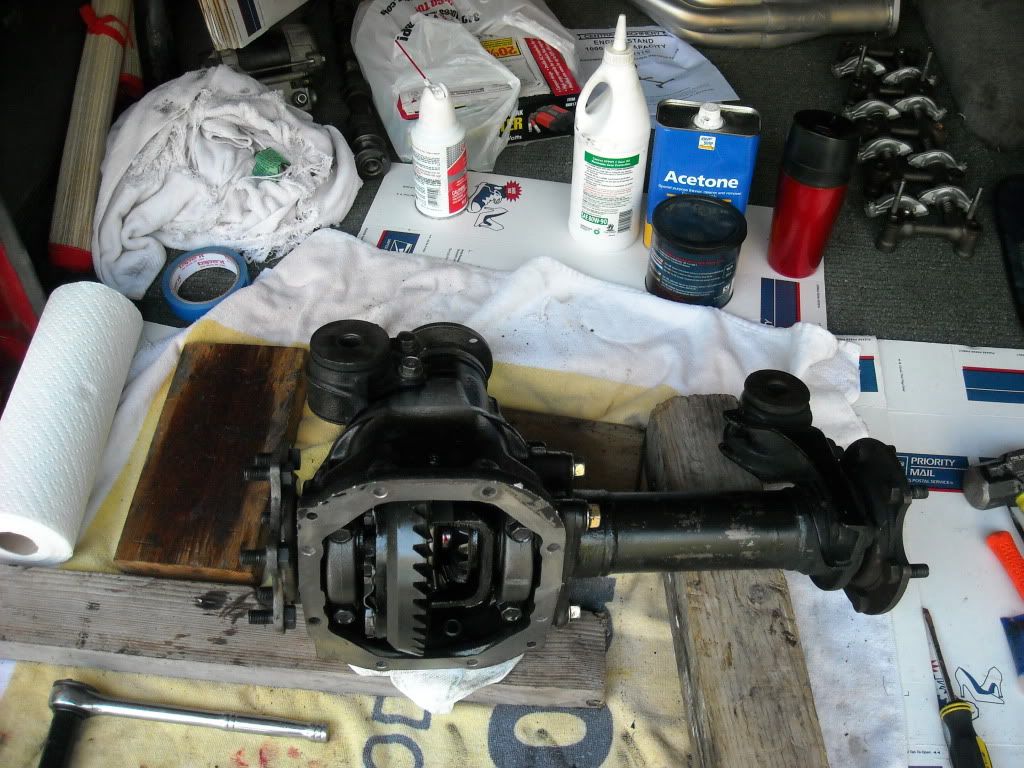
The Axles....
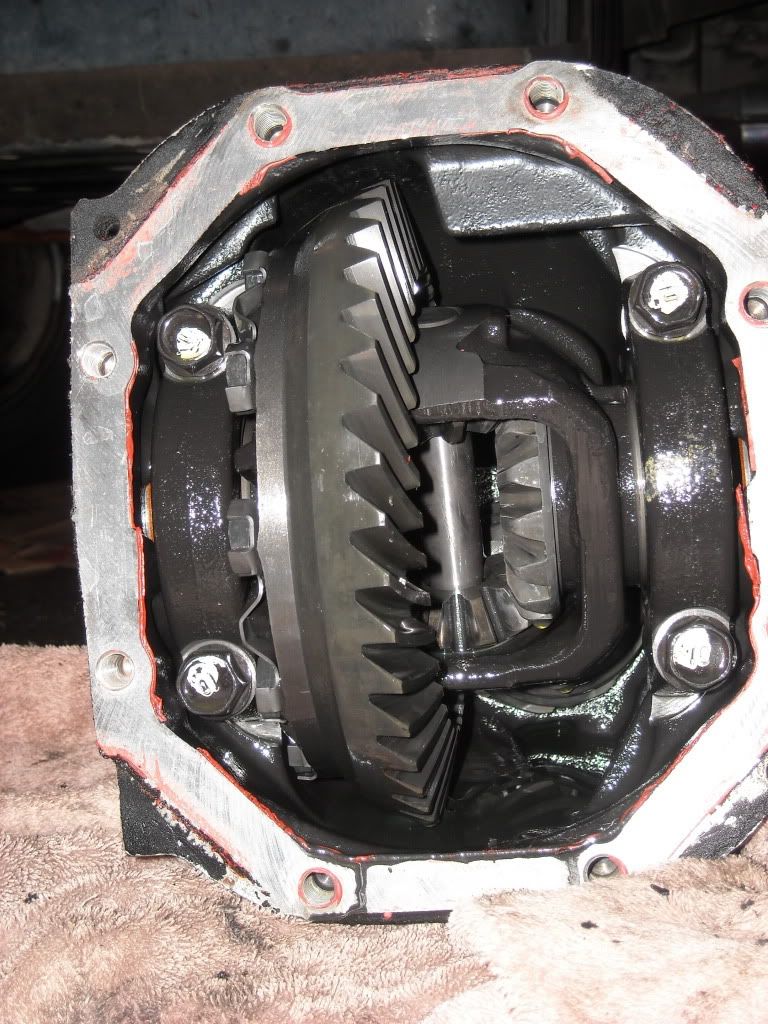
The inside of, ...I THINK, the 4.30's...(sorry, my camera died quick again...same batteries....can't remember which one saved, as I snapped the last two of the two diffs, lol)
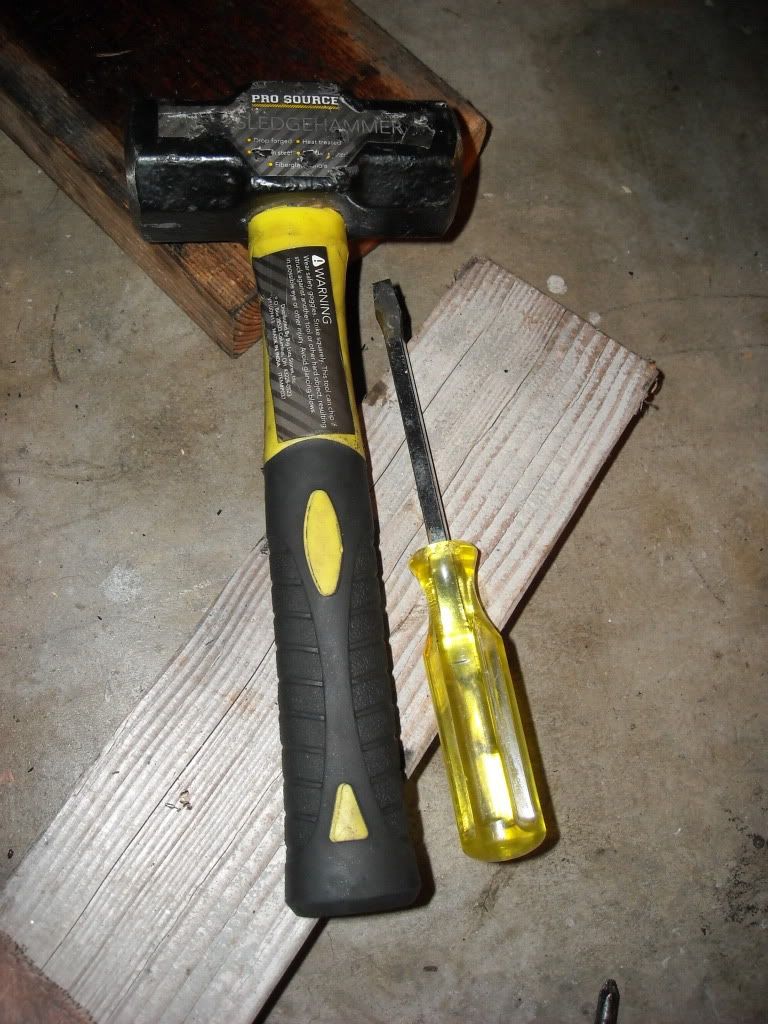
Ok, lastly, the INFAMOUS BFH!... and beside her,......the perfect screwdriver(IMHO) for removing the axles from the diff(just put between the pin and axle end and bing-bing-bing a couple times and voila.....popped right out as Zuk said it would. Same with the one I don't wanna use that was in the 4.30 diff.)
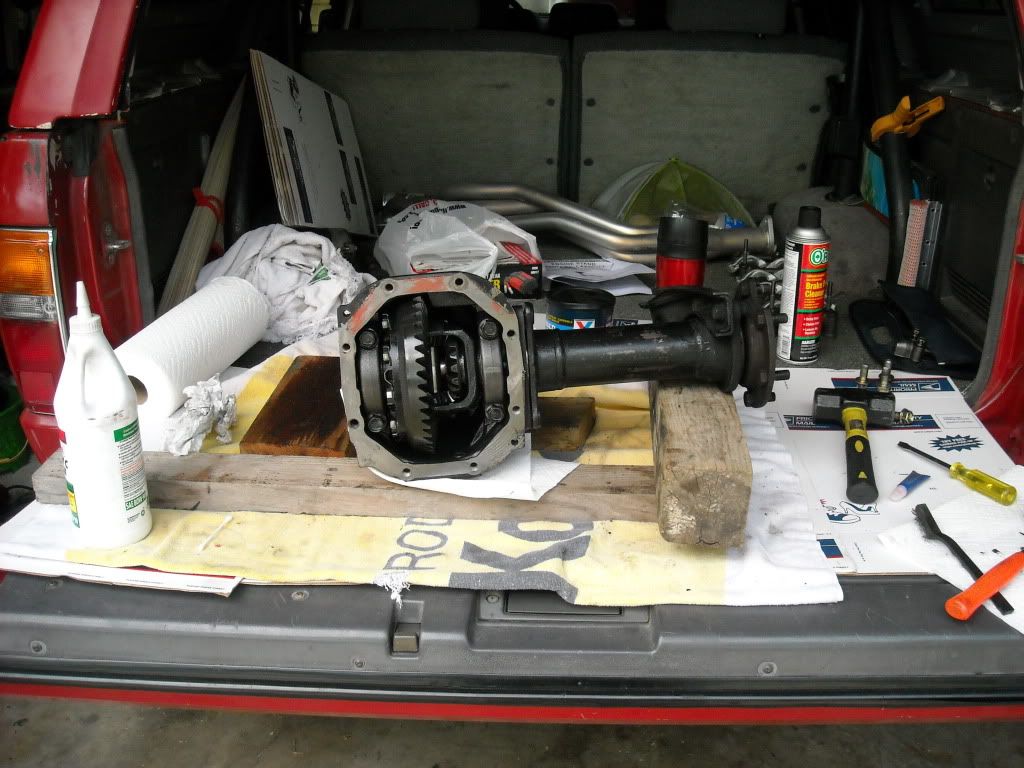
Just have to clean up the 4.30 housing and seals a bit, ...lotsa goop and mud and some rust, ....gonna do my best to CAREFULLY clean the rubber, etc., ....then slap in my axles and tube into it!
Thanx again, guys, for all the kind words and best wishes on the healing, etc., ......... and I sure hope I can get that stinkin diff up in there without TOOOOOOOOOOOOO much drama! lol. Pretty sure I gotta guy to help, ......that guy I mentioned before. Ran into him tonight, hahaha... Small world!
Ok, pics as promised................
Cleaned up MY diff cover from the 4.10 diff with the breather(have to clean and steal that one for this 4.30 diff... Rob needed it for his ) Hope you're loving them, Rob! (Kind of curious how Rob's buddy got the tube/axle out, without removing the cover.... i'm guessing with some coaxing and maybe a vice and puller?) That would have worked really well, actually... Hmmmm, well, regardless......
The Axles....
The inside of, ...I THINK, the 4.30's...(sorry, my camera died quick again...same batteries....can't remember which one saved, as I snapped the last two of the two diffs, lol)
Ok, lastly, the INFAMOUS BFH!... and beside her,......the perfect screwdriver(IMHO) for removing the axles from the diff(just put between the pin and axle end and bing-bing-bing a couple times and voila.....popped right out as Zuk said it would. Same with the one I don't wanna use that was in the 4.30 diff.)
Just have to clean up the 4.30 housing and seals a bit, ...lotsa goop and mud and some rust, ....gonna do my best to CAREFULLY clean the rubber, etc., ....then slap in my axles and tube into it!
Thanx again, guys, for all the kind words and best wishes on the healing, etc., ......... and I sure hope I can get that stinkin diff up in there without TOOOOOOOOOOOOO much drama! lol. Pretty sure I gotta guy to help, ......that guy I mentioned before. Ran into him tonight, hahaha... Small world!
05-21-2011, 10:47 PM
#2264
Registered User
 CHEF IS THE MAN! I was about to come back to this thread and tell you i found a guy (my borther inlaw) whose done it and told me how. But looks like you got it all by yourself, down one finger too i might add. Nice work man
 on my finger... to
  ... to
  05-21-2011, 11:23 PM
#2267
Well, ... next,..... sleep! lol. This finger thing really wore me out, ..... the pain, using tools differently, ....work, etc., lol... But seriously?>>>
Next I will clean up the diff really well, lube the seals, install the axles, install the cover, install the 4.30 diff and then VOILA, .... I'm locked with 4.30's and ready for the new motor! lol...
But, hopefully, before the new motor comes, ...I'm planning on installing stuff I've had for MONTHS! .....
1. BJ Spacer and Diff and Sway drop kit from 4Crawler
2. Brand new Upper Downey Mega Travel BJ's and OEM Lower BJ's
3. Brand new OMEmu Shocks for 2" lift to go with my spacers and OMEmu Steering Damper
4. At LEAST the lower control arm bushings(OEM)... and possibly the UCA bushings(Also OEM)
5. Install the Sway Bar Bushing Set(all 8- OEM)
That should keep me busy till it's time to FIRE UP THE PROPERLY MACHINED 22RE! LOL.
05-22-2011, 12:47 AM
#2268
Registered User
Join Date: Mar 2010
Location: Mojave Desert, California
Posts: 413
Likes: 0
Received 0 Likes
on
0 Posts
Very nice man! According to the previous owner's buddy, the parts runner I recently acquired should have a 4.56 and locker equipped rear 3rd, gotta find out tomorrow. Looks like things are coming along great for you! Aside from the finger, I managed to get through the work on mine today with only one weld burn and some singed nose hairs...those metal sparks go everywhere when your using a grinder O.o.
Old Man Emu Steering Stabilizer? Hm...you'll have to let us know how much the helps, I might have to get one of those, lol.
Keep up the good work man! Can't wait to see the motor back in there!
Old Man Emu Steering Stabilizer? Hm...you'll have to let us know how much the helps, I might have to get one of those, lol.
Keep up the good work man! Can't wait to see the motor back in there!
05-22-2011, 08:25 AM
#2270
Very nice man! According to the previous owner's buddy, the parts runner I recently acquired should have a 4.56 and locker equipped rear 3rd, gotta find out tomorrow. Looks like things are coming along great for you! Aside from the finger, I managed to get through the work on mine today with only one weld burn and some singed nose hairs...those metal sparks go everywhere when your using a grinder O.o.
Old Man Emu Steering Stabilizer? Hm...you'll have to let us know how much the helps, I might have to get one of those, lol.
Keep up the good work man! Can't wait to see the motor back in there!
Old Man Emu Steering Stabilizer? Hm...you'll have to let us know how much the helps, I might have to get one of those, lol.
Keep up the good work man! Can't wait to see the motor back in there!
Yeah, ... I painted the rear axle and third, ..... gotta paint the front one and the surrounding stuff's...BUT, ...lots'O'grease in there. Gotta clean her up first in there. BTW..... It's in the garage w/the crossmember out, third out.... I can't really paint in there, ya know? Worse, ....I can't CLEAN all that stuff properly enough to paint in there, either. S'all good, ...I WILL get it cleaned up once the stuff is back in. Painted as well. Probably sand and paint or powdercoat the a-arms as well..... I'ma have them out(at least the lower ones)..so why not, right? lol.
05-22-2011, 09:30 AM
#2271
Heading out to clean up everything I CAN on the diff/axles in the garage .... then install the axles, try to install the diff by myself(First point on the 'doing in garage'... can't roll it out as it might rain and can't clean it in there. Secondly, on the 'try by myself'... well, just not quite 100% as you know, lol... and not sure I can get help today, as the guy I know is very dedicated/involved at his church... so I don't think he's done and home soon-thereafter like myself, more recently.......)
If I have trouble installing it by myself...., I'll wait and move on to the suspension stuff.
Hope you guys have a great and productive day, .....Yota-Brudda's! lol.
PS> Zuks thing didn't have much in the way of 'install'... and while I'm sure it's reverse of removal, for the most part...I want to be careful installing the axles into this different differential. I have a BFH, as you know....hahaha..., but I don't wanna 'ding' the splines! lol.
.... then install the axles, try to install the diff by myself(First point on the 'doing in garage'... can't roll it out as it might rain and can't clean it in there. Secondly, on the 'try by myself'... well, just not quite 100% as you know, lol... and not sure I can get help today, as the guy I know is very dedicated/involved at his church... so I don't think he's done and home soon-thereafter like myself, more recently.......)If I have trouble installing it by myself...., I'll wait and move on to the suspension stuff.
Hope you guys have a great and productive day, .....Yota-Brudda's! lol.
PS> Zuks thing didn't have much in the way of 'install'... and while I'm sure it's reverse of removal, for the most part...I want to be careful installing the axles into this different differential. I have a BFH, as you know....hahaha..., but I don't wanna 'ding' the splines!
lol.
Last edited by ChefYota4x4; 05-22-2011 at 09:31 AM.
05-22-2011, 11:14 AM
#2273
05-22-2011, 01:19 PM
#2274
Registered User
Hey Mang!  ......
Thanks, so much for the input, guys!!!! Jerry.... you ROCK, and you areeeeeee shmart!(for some reason that reminds me of Goldmember, hahaha,,,,"an unfortunate schhhhhhmelting accident", lol).......
AnywHoooooooooooooo.....ters, lol..... ,YEAH,.... I woke up and it's pretty swollen and strangely, not AS black and blue as last night....... Seems like more of the swelling is on the underside of my finger now. I'm able to manipulate it a bit.... but pushing in the center on the nail side?>>> WAHOOOIE! lol. I can bend it as well, so I think the knuckle is safe, but yes, Jerry.... I think it's a hairline or something of that sort. If I can't handle the pain any longer, or if it gets ANY worse(it's not constant any longer, ....more of a throbbing at times, especially when wrapped with ice-gel pack, lol.... or held low while walking.. Yeah, ..the blood rushing to an already over stuffed with blood finger, ....ouchie, hahaha.) ..if I can't take it, I'll get in asap.... just no time, man!(Especially considering it looks like I'll have to redo my daughters entire brake system on her 2001 Rodeo...... really pffft'd... The guy who did it, he never bled the brakes properly after new Master,....now the master is leaking, and, ... she just kept driving it with no brake fluid and burned up NEW ROTORS, DRUMS, THE LOT!... She knows better... Good thing I love her so much! hahaha.)
I've had this happen with a toe, couple times... One time it WAS a break, and it took around 3 weeks to stop hurting, but nothing much they could do. The other time?... a bad bruising of the bone through the nail... which took about 4 days to be MUCH more useable and clearly not broken(second time, was camping in the middle of nowhere for 2 months..... yeah, thought my trip was over, hahahaha).
I have limited time over the weekend, so I will do what I can(circumstances allowing) to finish up the diff swap. 2 more crossmember bolts and the diff can drop out, .....grrr! lol.
Then, I have the torch blades to cut back the lip in the a-arm to install the bj spacers.... will also install the upper and lower ball joints while in there, and probably have the lower arm out to have the new bushings put in(old ones pushed out).
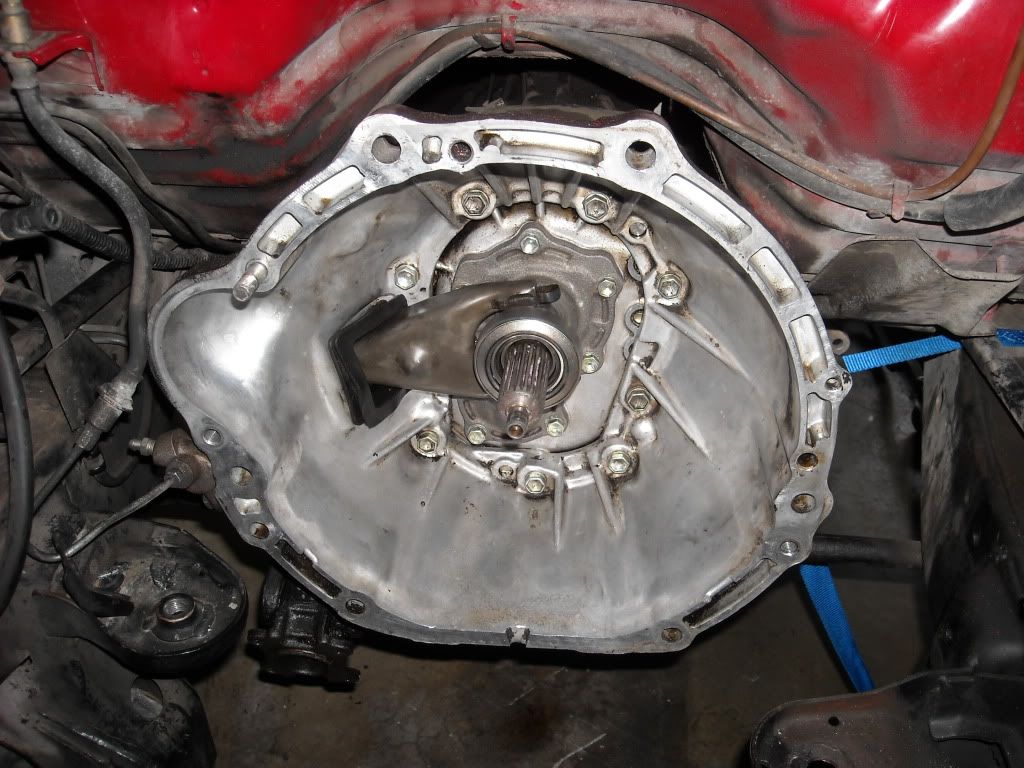
I think the bell housing came out nice, thanx... and I have a boot, new, from Marlin crawler to put back in........ Just gonna have to see what I can get done with a boo boo! lol.
...... Thanks, so much for the input, guys!!!! Jerry.... you ROCK, and you areeeeeee shmart!(for some reason that reminds me of Goldmember, hahaha,,,,"an unfortunate schhhhhhmelting accident", lol).......
AnywHoooooooooooooo.....ters, lol..... ,YEAH,.... I woke up and it's pretty swollen and strangely, not AS black and blue as last night....... Seems like more of the swelling is on the underside of my finger now. I'm able to manipulate it a bit.... but pushing in the center on the nail side?>>> WAHOOOIE! lol. I can bend it as well, so I think the knuckle is safe, but yes, Jerry.... I think it's a hairline or something of that sort. If I can't handle the pain any longer, or if it gets ANY worse(it's not constant any longer, ....more of a throbbing at times, especially when wrapped with ice-gel pack, lol.... or held low while walking.. Yeah, ..the blood rushing to an already over stuffed with blood finger, ....ouchie, hahaha.) ..if I can't take it, I'll get in asap.... just no time, man!(Especially considering it looks like I'll have to redo my daughters entire brake system on her 2001 Rodeo...... really pffft'd... The guy who did it, he never bled the brakes properly after new Master,....now the master is leaking, and, ... she just kept driving it with no brake fluid and burned up NEW ROTORS, DRUMS, THE LOT!... She knows better... Good thing I love her so much! hahaha.)
I've had this happen with a toe, couple times... One time it WAS a break, and it took around 3 weeks to stop hurting, but nothing much they could do. The other time?... a bad bruising of the bone through the nail... which took about 4 days to be MUCH more useable and clearly not broken(second time, was camping in the middle of nowhere for 2 months..... yeah, thought my trip was over, hahahaha).
I have limited time over the weekend, so I will do what I can(circumstances allowing) to finish up the diff swap. 2 more crossmember bolts and the diff can drop out, .....grrr! lol.
Then, I have the torch blades to cut back the lip in the a-arm to install the bj spacers.... will also install the upper and lower ball joints while in there, and probably have the lower arm out to have the new bushings put in(old ones pushed out).
I think the bell housing came out nice, thanx... and I have a boot, new, from Marlin crawler to put back in........ Just gonna have to see what I can get done with a boo boo! lol.
I had to comment on the master cyl thing. a leaking master won't kill everything else. unless the master sticks and if it's a recent master, i would seriously doubt that's the case. more than willing to help ya though this one too!
05-22-2011, 01:54 PM
#2275
1. The rears are METAL ON METAL, from what I can tell. HOPEFULLY, the drums are still able to take a grind.
2. Rotors have a decent lip on top and bottom, both sides, worse on driver side... (Pads wearing into the rotor only on 85% of the rotor, if you know what I"m saying? Concave slightly where the pads run.... )
3. Can't be sure if the master is leaking. Seems NOT to be in the cab, ...and there IS SOME fluid under the master on the booster... but can't be sure that's 'new', if you know what I mean?
4. I'll have to start with the turning of the rotors if possible, and drums as well(haven't actually looked at the drums yet, but they are REALLY 'SHHHHHKKKKKKKKKKKKKKKKK'-TYPE GRINDING. lol.)
5. When I felt her rotor, they are a lil wavey, ...but actually, what I noticed was that they were SCREAMING HOT, ...literally burned my finger after sitting 10 minutes, but the DRUMS WERE NOT EVEN WARM. (I'm starting to think that air in the system is keeping the drums from actually working right....... Or, some type of LVSV for this truck has air in it, etc......) But I would just think that, if metal on metal....they'd at LEAST be warm.... While I DO KNOW that the Rotors do most of the work in any system.
Anyway, SURE, any input would be great, and appreciated, as always!

************************************************** *****
Far as my diff, ......it's cleaned up pretty nicely, and I scraped off around 2 CUPS OF ......STUFF! lol. I'm guessing it's mudd and clay stuff caked on there from Rob's Adventures? lol. All I could think of. Actually, hoping that the pinion seal isn't leaking, but doesn't appear to be any trail of fluid on that end... neither on the fill or drain plugs... So we'll see. I was going to just use my housing and swap the gears... but I wasn't sure if the journals in there would "work well with others" after a swap!?! lol.
I'm going to just use some 80W-90 to lube up the axle seals on this diff, too, ....that ok? Or should I use some of the Red Grease I have(lithium equivalent for the bearings, etc, from valvoline)
Thanks on this, too^^ lol.
05-22-2011, 06:49 PM
#2278
Ok, ....HUGE day, ...for me anyway, don't bust my.. yeah. hahaha.
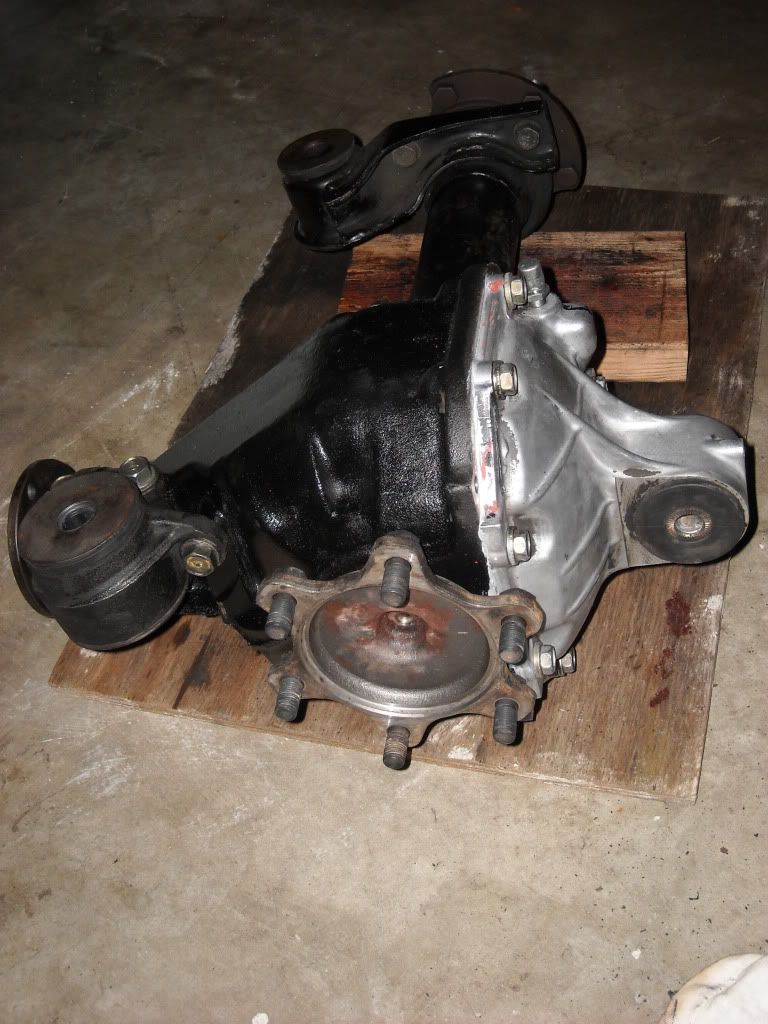
Cleaned up and painted the front diff(cleaning that thing was a bit of a task even with a rotary drill-brush bit..... Whatever was on there was like PETRIFIED! LOL. But y'all know me,...I kept at it and it was spotless before painting it...........Then got the tube side axle in(GAVE A LIL MORE TROUBLE THAN THE SHORT SIDE... Actually, short side was really pretty easy...Guess the c-clip was more compressed on the short one, went in easier? lol) ...got it in using my favorite bench..........
Then, got the short side in too, torqued down the tube-to-housing mounting bolts, pass side diff mounting bolt housing(that wasn't on there, either...so used mine)....
Now, all painted, assembled to proper torque values and ready to go back in, MAYBE tomorrow, possibly Tues... (depending on when my daughter get's here)....
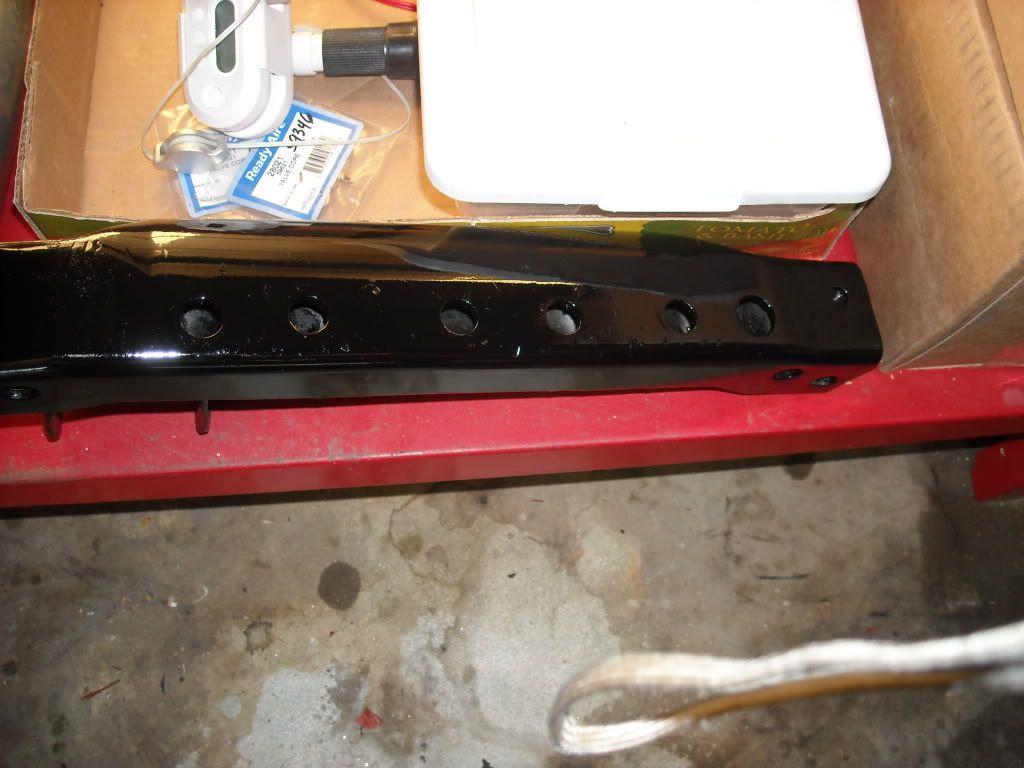
Also painted the crossmember..........
Got the Throwout/clutch slave fork BOOT in......
And, well, as they say, 'TOMORROW'S ANOTHER DAY', EH? LOL. NOT looking forward to installing this.... but I CAN DO IT! Just wish me best on not messing up the CV boots, ....mine are older, but pristine... don't wanna incident! lol.
Cleaned up and painted the front diff(cleaning that thing was a bit of a task even with a rotary drill-brush bit..... Whatever was on there was like PETRIFIED! LOL. But y'all know me,...I kept at it and it was spotless before painting it...........Then got the tube side axle in(GAVE A LIL MORE TROUBLE THAN THE SHORT SIDE... Actually, short side was really pretty easy...Guess the c-clip was more compressed on the short one, went in easier? lol) ...got it in using my favorite bench..........
Then, got the short side in too, torqued down the tube-to-housing mounting bolts, pass side diff mounting bolt housing(that wasn't on there, either...so used mine
)....Now, all painted, assembled to proper torque values and ready to go back in, MAYBE tomorrow, possibly Tues... (depending on when my daughter get's here)....
Also painted the crossmember..........
Got the Throwout/clutch slave fork BOOT in......
And, well, as they say, 'TOMORROW'S ANOTHER DAY', EH? LOL. NOT looking forward to installing this.... but I CAN DO IT! Just wish me best on not messing up the CV boots, ....mine are older, but pristine... don't wanna incident! lol.
05-22-2011, 09:09 PM
#2280
Thanks, man.....
Wish I could have taken some video...but I'm just so mentally overwhelmed right now, plus the finger, plus the daughter, plus.... well, anyway, not whining, just not 'thinking of everything' lately, hahaha.
I'll be sure to get some pics of it going in, ...... if I remember, hehehe.
At least I got some pics of the process, eh?
Tomorrow, this sucker is going in! Went out tonight and planned it out on paper, angles, etc. Gotta get the tube side in first, then up in with the shorty, then as they're just in, slap in the crossmember, both side mounting bolts(the 4crawler ones) with the diff drop installed,...... then tuck it in on the front center mount and then driveshaft... then I'll drain and refill the transfer case(maybe reseal a couple spots on it if I can clean it up and figure out WHERE it's leaking, first, lol).... Then, I'm done with that and can move on to the IFS Restore portion.


