
Bump's '90 4Runner Build-Up
 09-15-2015, 11:59 AM
#321
Registered User
Thread Starter
Thanks. And yea, these bushings that are going out are straight from the TG SAS kit. Ive seen ppl complain before but never about them going out this quick. Its weird to me that only the ones in the springs messed up. The ones in the frame tubes looked brand new when I pulled them. In fact, Im going to keep them as spares. But the second set in the springs on the shackle end had less than 30 miles on when I pulled it apart to put the davez shackle on and they were already trashed. Maybe im just an idiot and don't know how to install spring bushings lol
 09-16-2015, 08:19 AM
#322
Registered User
Join Date: Jun 2014
Posts: 229
Likes: 0
Received 0 Likes
on
0 Posts
Bushings and bearings is what I have heard is almost sure to fail on the TG kit. My bushings look like crap too after a couple hundred miles. I was pretty liberal with the grease when putting them in. I think they are just chinese junk.
Last edited by wberry85; 09-16-2015 at 08:21 AM.
09-28-2015, 05:11 PM
#323
Registered User
Thread Starter
I got to do a little off-roading in the 4Runner Saturday.
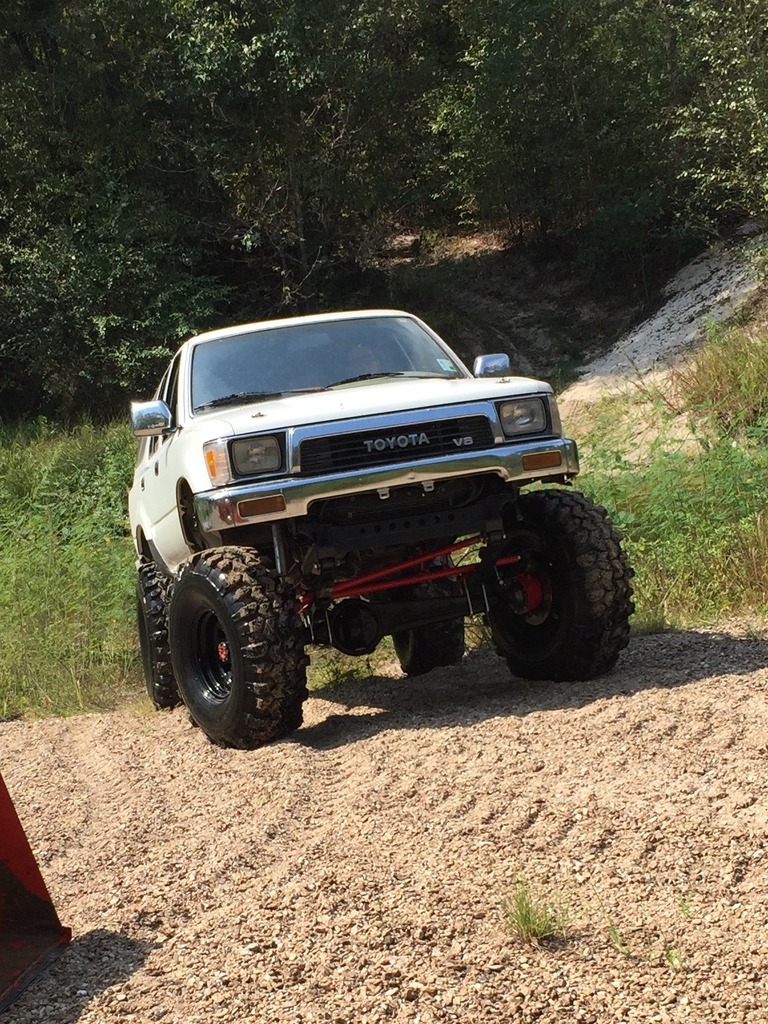
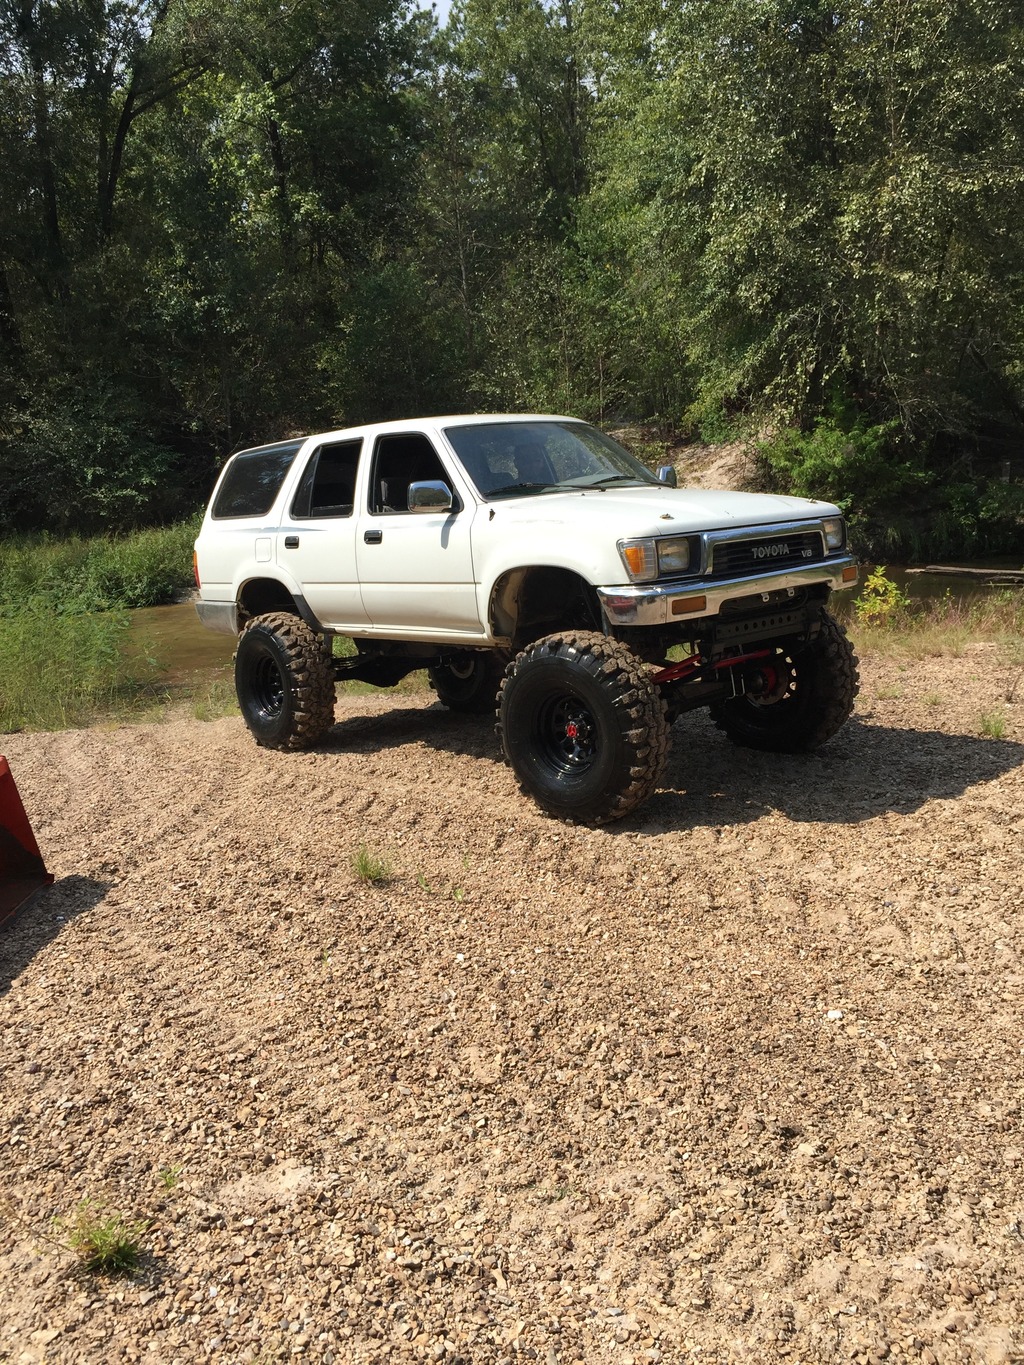
Still have to change the front bushings and hopefully build a front driveshaft this week.


Still have to change the front bushings and hopefully build a front driveshaft this week.
09-30-2015, 03:27 PM
#326
Registered User

Ok, so I am new here to yotatech, this is my second post. Im currently in the middle of a 3vze head rebuild, heads have already been taken to the shop and I just got the rest of the parts in the mail from rockauto.com. I have a quick question for y'all though. I'm wondering if I can bolt the passenger side and driver side exhaust manifolds on the cylinder heads before installing them in the truck? I did not take it apart this way, but it seems to me that it should work as long as I put the crossmember behind the engine first and bolt that up later after the heads are on. Has anyone done It this way? Or should I just put the ex. man. On after the heads are bolted on?
 10-01-2015, 05:17 AM
#328
Registered User
Thread Starter
Ok, so I am new here to yotatech, this is my second post. Im currently in the middle of a 3vze head rebuild, heads have already been taken to the shop and I just got the rest of the parts in the mail from rockauto.com. I have a quick question for y'all though. I'm wondering if I can bolt the passenger side and driver side exhaust manifolds on the cylinder heads before installing them in the truck? I did not take it apart this way, but it seems to me that it should work as long as I put the crossmember behind the engine first and bolt that up later after the heads are on. Has anyone done It this way? Or should I just put the ex. man. On after the heads are bolted on?
Thanks. I like the 4.3. I don't really have much to compare it to as far as Toyota tho. This is the only Toyota ive ever owned and the 3.0 was about dead when I got it lol.
10-02-2015, 05:06 AM
#329
Registered User
Thread Starter
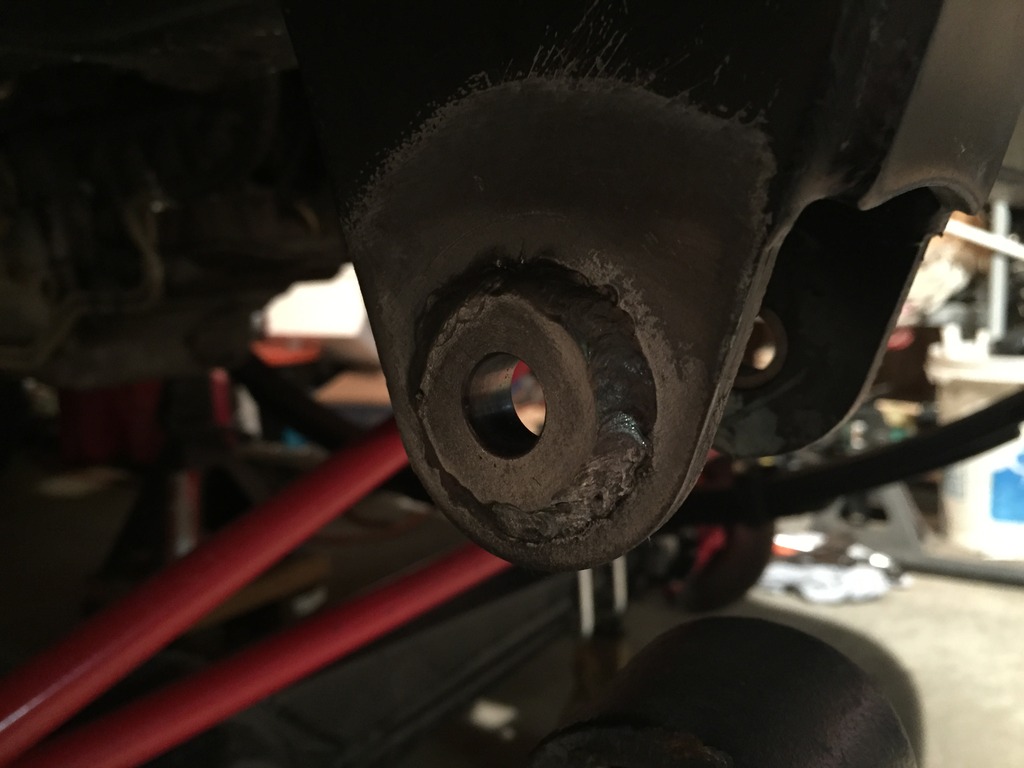
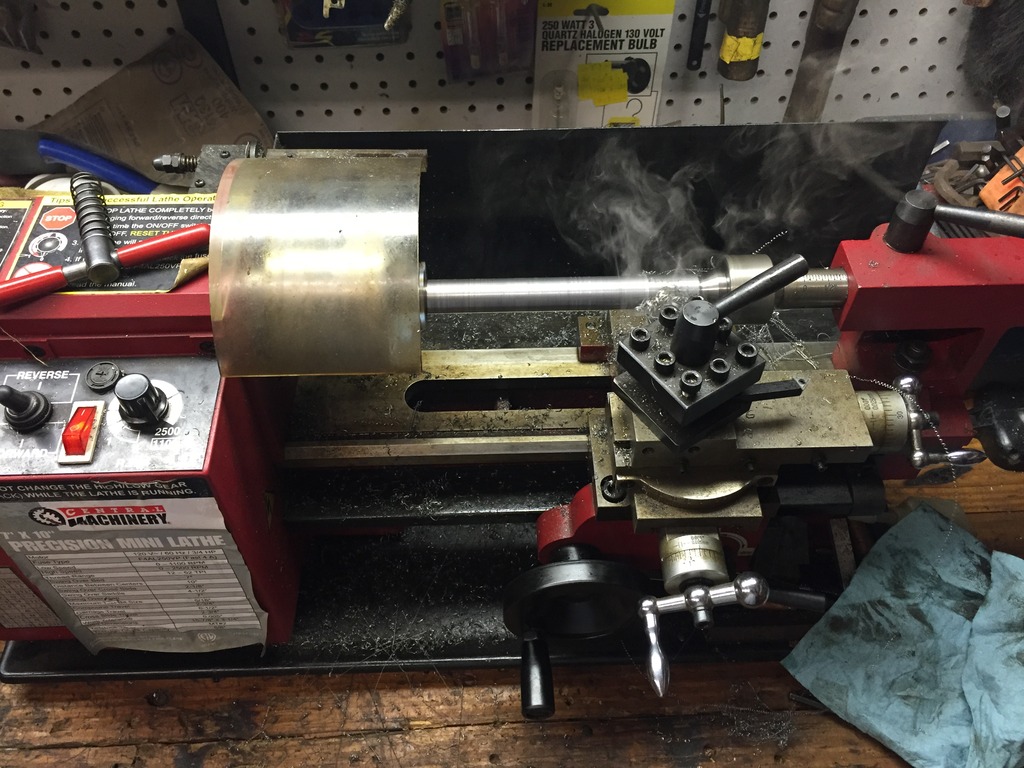
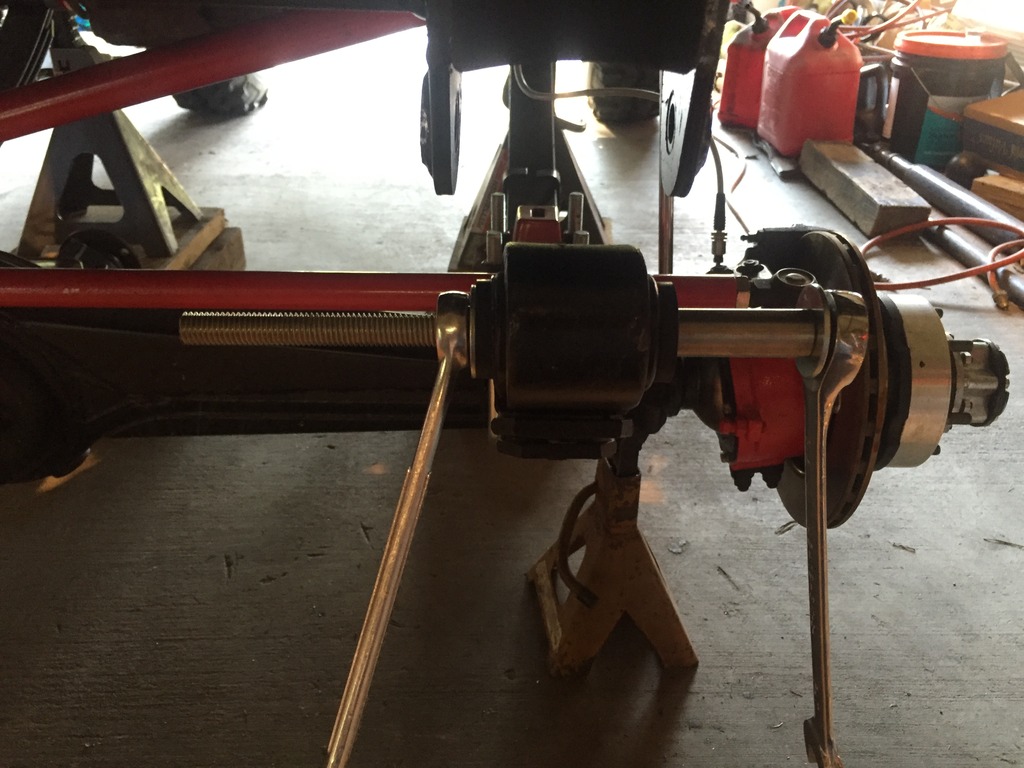
Well I finally fixed my front springs bushings. I used some energy suspension bushings (made for the frame tube, but they just need to be cut down in length to fit leaf springs) and some fix-it washers from RuffStuff. I used a piece of 3/4" DOM with .120 wall as sleeves so I could use the same size bolt as the Davez shackles use. I ended up turning to OD of the DOM down just a little on a lathe to better fit inside the bushings.
TG bushings or whats left of them

The fix-it washers welded in place
Turning the OD of the DOM down
I used some all-thread to get the sleeves inside the bushing
Now its time to build the front driveshaft. Planning to get the material today at lunch for that.
TG bushings or whats left of them

The fix-it washers welded in place

Turning the OD of the DOM down

I used some all-thread to get the sleeves inside the bushing

Now its time to build the front driveshaft. Planning to get the material today at lunch for that.
10-12-2015, 11:52 AM
#330
Registered User
Thread Starter
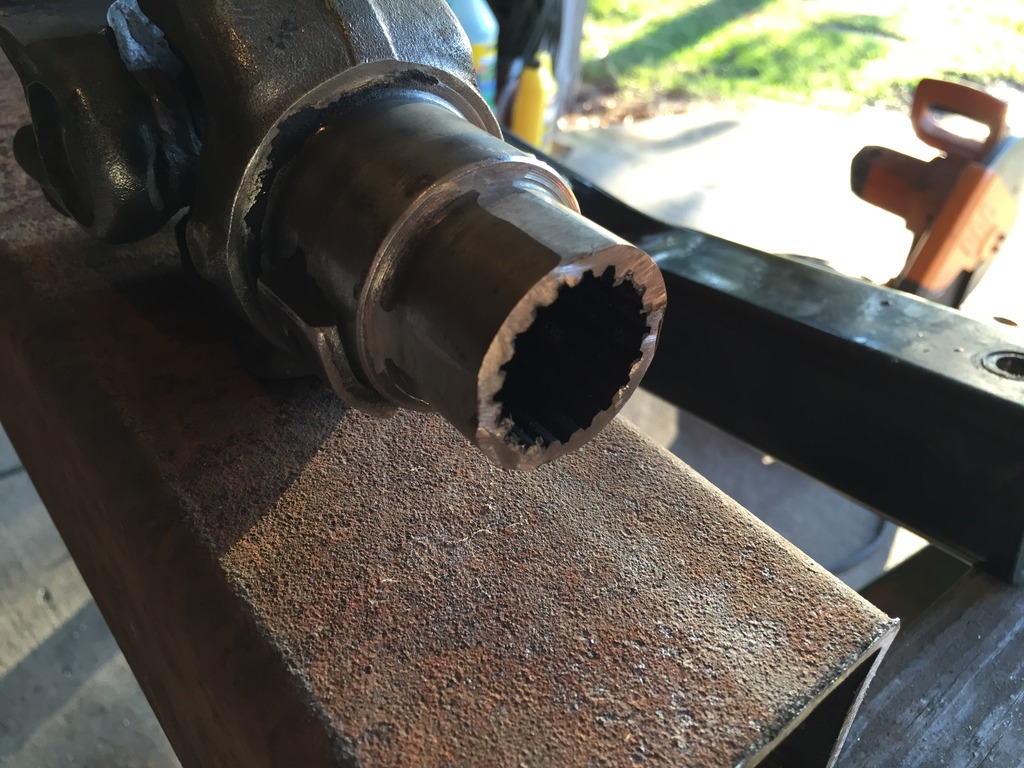
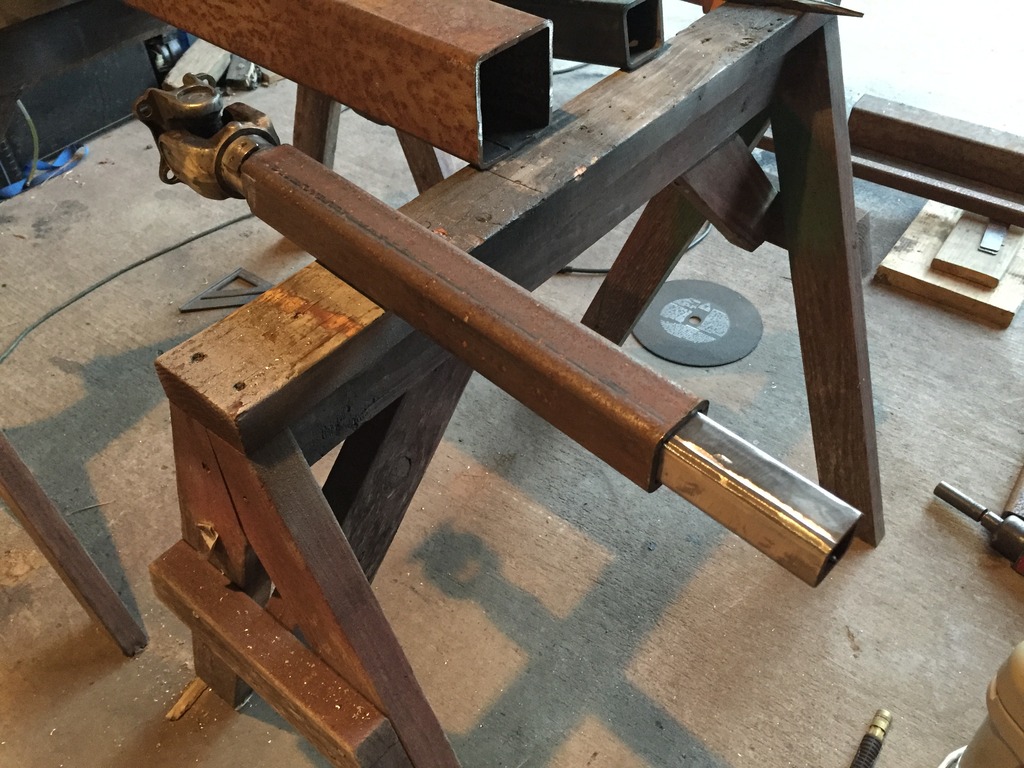
I finally got the front driveshaft built. I built it out of 2" and 1.5" square tubing, both 1/4" wall. I did have to grind a groove on the 1.5" tubing and run a flapper wheel on it to fit inside the 2". It was a tight fit.
I used 2 female ends to build it. I cut the splined section down to 1" long and used a grinder to make 4 flat spots in it. I had to take off about .020" off each spot to fit it inside the 2" tubing. I just used a short piece of 2" to fit the 1.5" on the ujoint.

After I installed it decided to flex it out on a log at the house. It was the biggest thing I could climb on at the time lol.

I used 2 female ends to build it. I cut the splined section down to 1" long and used a grinder to make 4 flat spots in it. I had to take off about .020" off each spot to fit it inside the 2" tubing. I just used a short piece of 2" to fit the 1.5" on the ujoint.


After I installed it decided to flex it out on a log at the house. It was the biggest thing I could climb on at the time lol.
 10-19-2015, 10:16 AM
#333
Registered User
Thread Starter
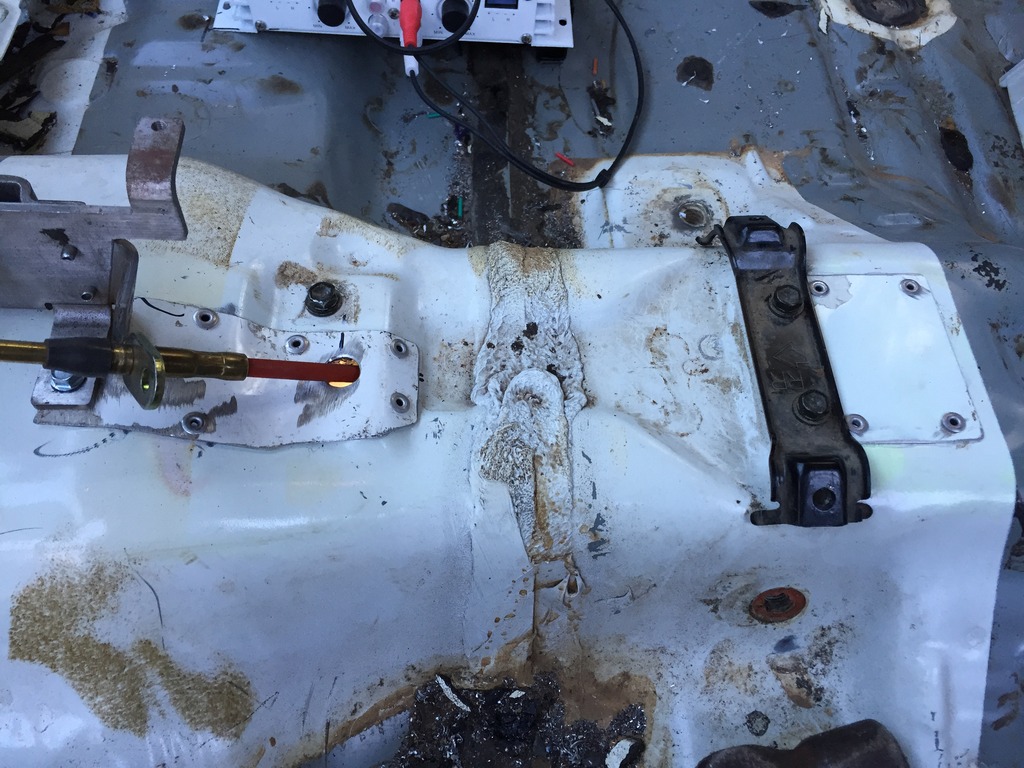
I finally got around to fixing the holes in the floor from the rear heater and where I ran the shifter cable thru. I also got an amp installed so I can have some music.
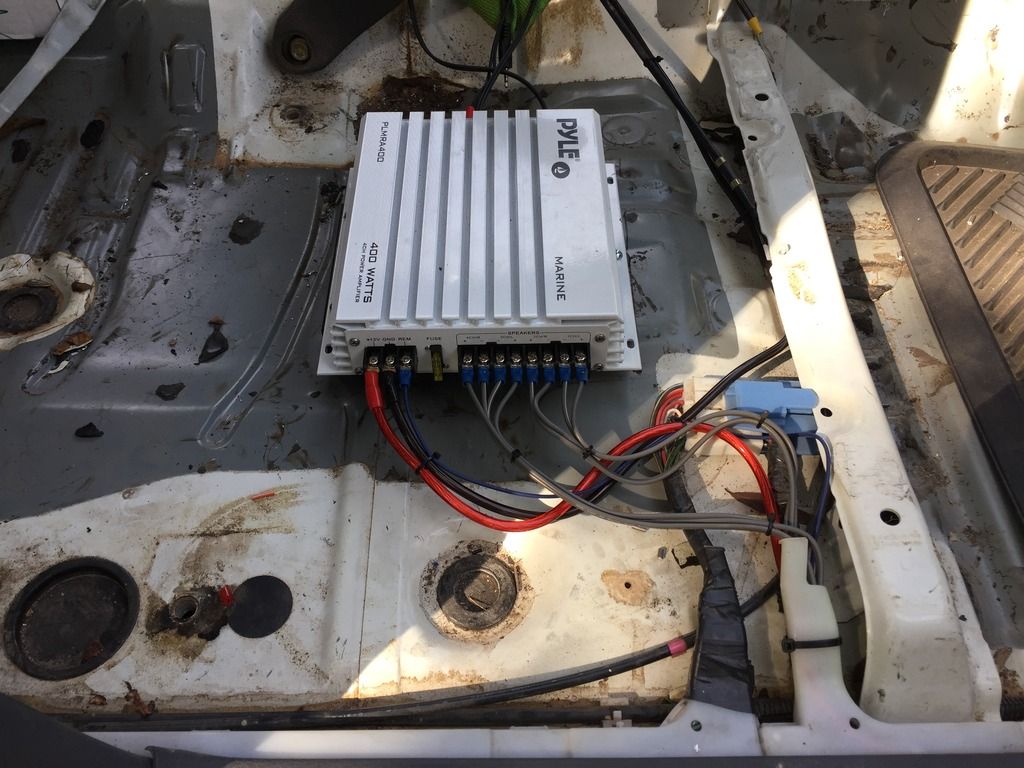
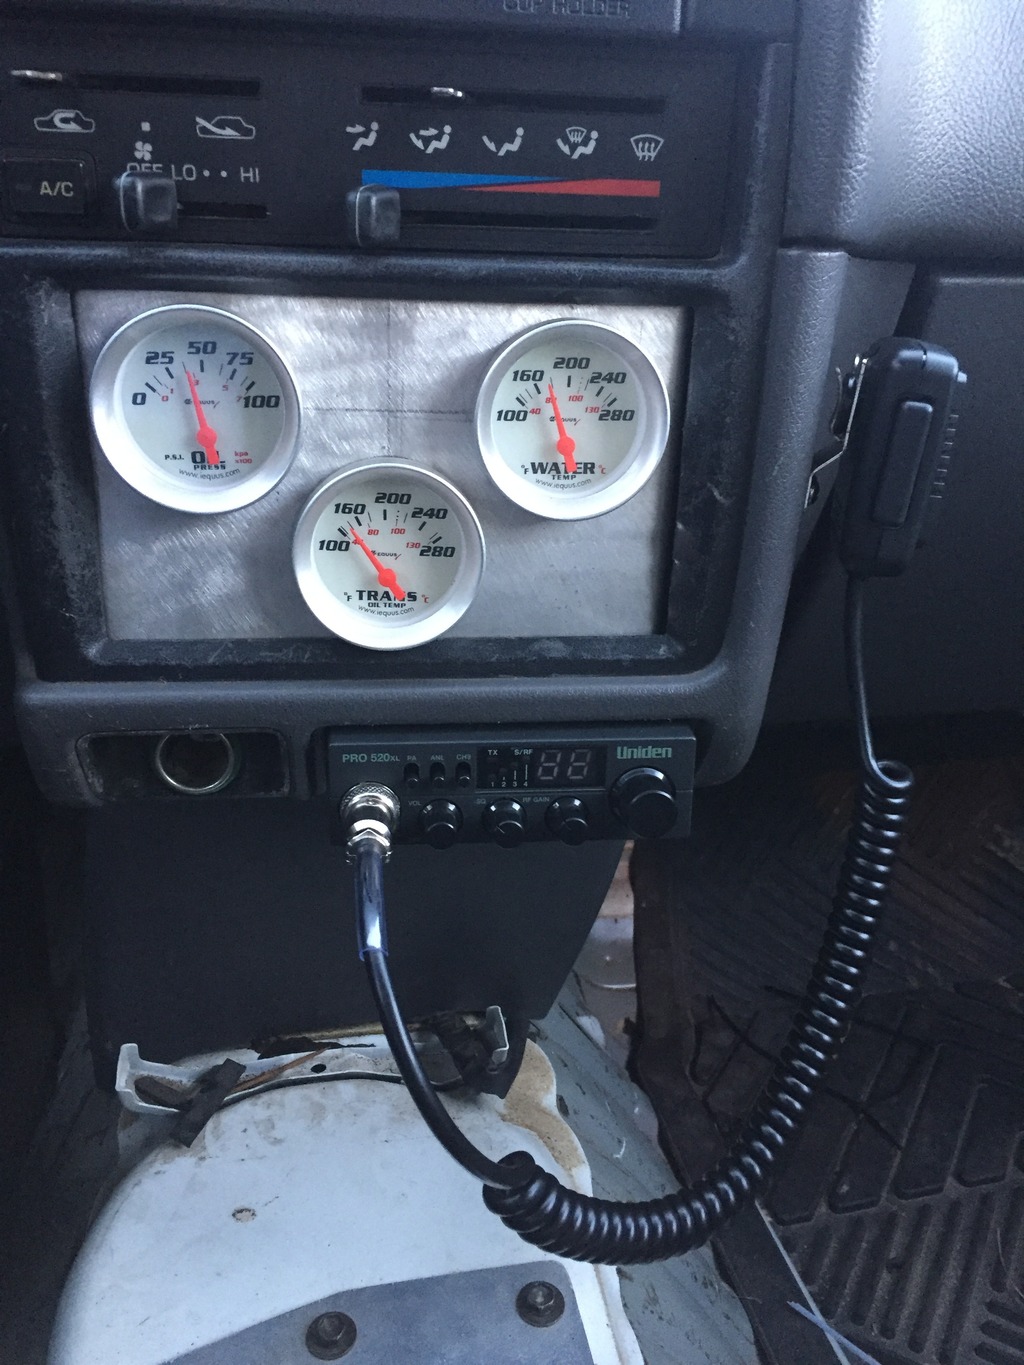
I also did some other little things like get the heater working and hooking up the new gauge lights so I can see them at night.


I also did some other little things like get the heater working and hooking up the new gauge lights so I can see them at night.
12-26-2015, 12:38 PM
#334
Registered User
Thread Starter
Well I don't have much to update. I've mainly just been driving and enjoying it.
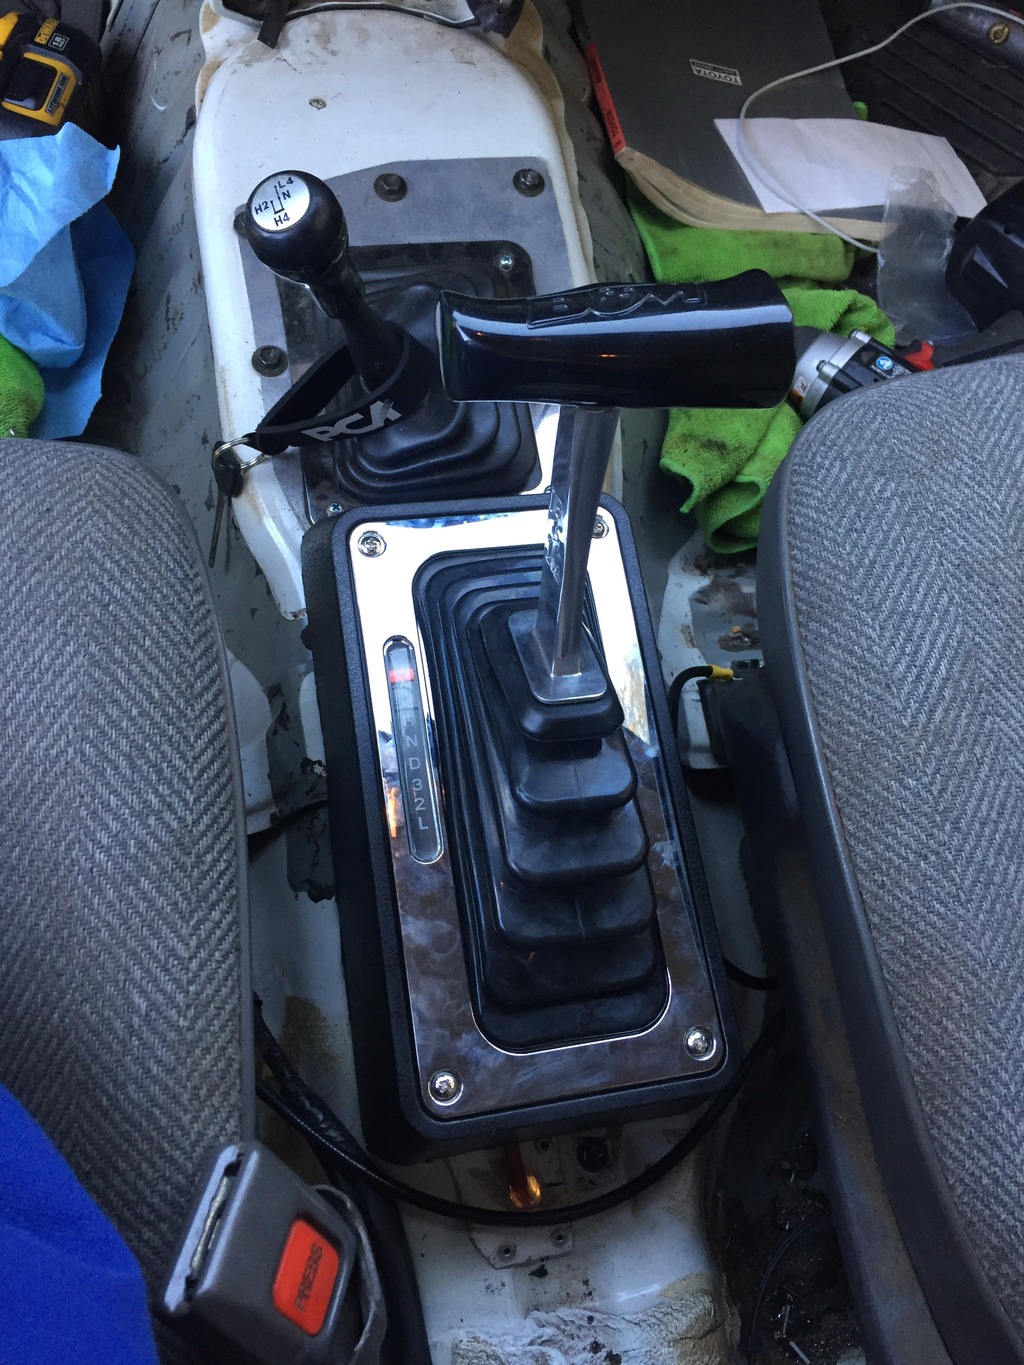
I installed the shifter cover which cleaned up the look a little.
I added a Uniden Pro520 CB
Then my latest addition
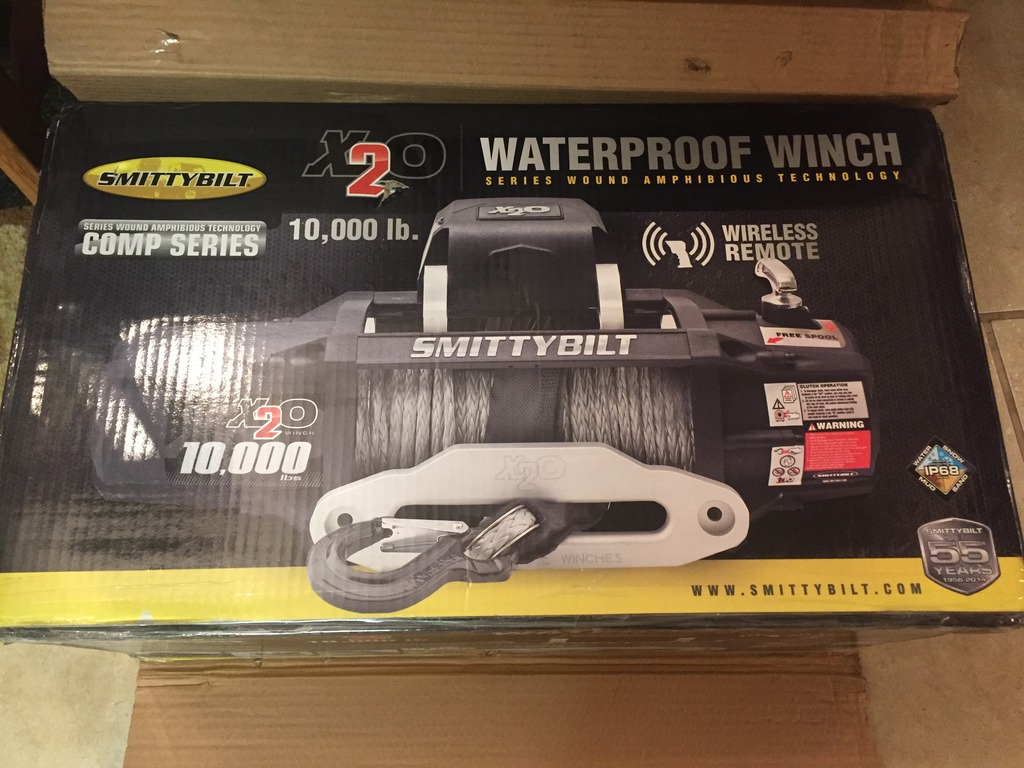
I just got the winch a couple days ago. I'll be building a front bumper for it next week. I'll post some pics of it when I get started.
I installed the shifter cover which cleaned up the look a little.

I added a Uniden Pro520 CB

Then my latest addition

I just got the winch a couple days ago. I'll be building a front bumper for it next week. I'll post some pics of it when I get started.
12-26-2015, 03:37 PM
#335
I like the B&M shifter, looks really good. That CB looks really compact, you'll have to give us an update on how you like it, I want to get one someday, and that one looks like it would fit just about anywhere! Did you mount it where the ashtray used to go? Look forward to the bumper build and winch install, are you going to go with tubing, or build a plate bumper?
Last edited by rustED; 12-26-2015 at 03:40 PM.
12-27-2015, 06:10 PM
#336
Registered User

Join Date: Nov 2015
Posts: 21
Likes: 0
Received 0 Likes
on
0 Posts
12-28-2015, 06:08 AM
#337
Registered User
Thread Starter
I like the B&M shifter, looks really good. That CB looks really compact, you'll have to give us an update on how you like it, I want to get one someday, and that one looks like it would fit just about anywhere! Did you mount it where the ashtray used to go? Look forward to the bumper build and winch install, are you going to go with tubing, or build a plate bumper?
Thanks. Hopefully its worth your time to read.
12-30-2015, 04:12 AM
#339
Registered User
Thread Starter
I probably have 1000-1500 miles on the swap. I still don't have a working speedo or odo to know exactly how far. Everything is still working good. Im a little disappointed in the fuel mileage. Im guessing its around 10mpg, but that's a pure guess. Im going to eventually track mileage with my phone and calculate it. I know these motors can get better mileage. Maybe some 5.29s would help lol. Luckily this is a toy and not a DD, although I seem to drive it more than my DD.
As far as settling...the front seems to have settled some, but I don't know how much. Im still hoping it will settle some more or that the new bumper and winch will help. If not, I will probably start pulling leafs out.
As far as settling...the front seems to have settled some, but I don't know how much. Im still hoping it will settle some more or that the new bumper and winch will help. If not, I will probably start pulling leafs out.


