
BlazeN8's 1986 4Runner Build-Up Thread
 10-16-2013, 07:29 PM
#281
Registered User
Thread Starter
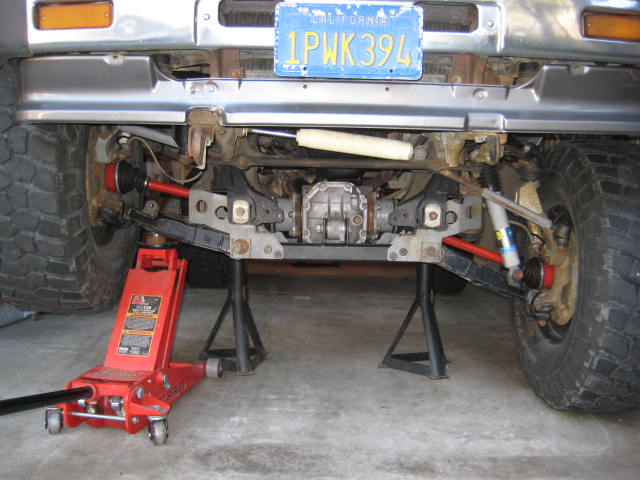
Now for setting up my bump stops. With the rig at ride heaght I put a straight edge on top of the front hanger bolt and on top of the lower shackle bolt. Then measured the distance from the straight edge to the main leaf (compensating for the radius of the bushing assembly). The distance was about 5" (this is how much up travel I get to at a flat arch) I then measured the distance from the bump stop to the inverted bump stop bracket. This distance was 6". So Jeff was right, I was 1" into negative arch. That wasn't even considering bump stop compression. There are many ways I could have shimmed the existing bumps but I decided to go with new bumps and a custom bolt on bracket. A picture sequence is worth a thousand words.
1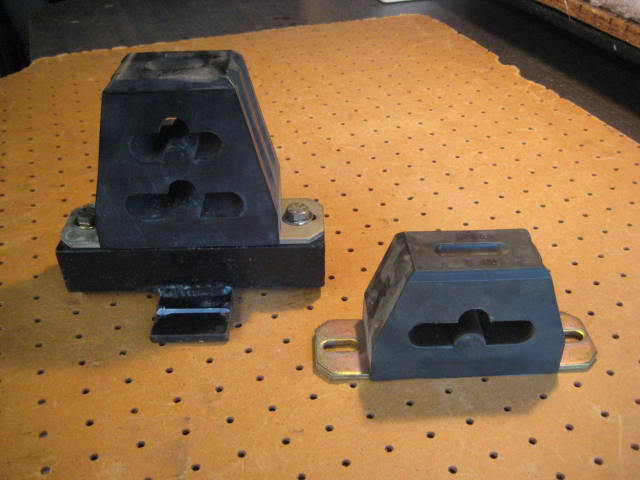
2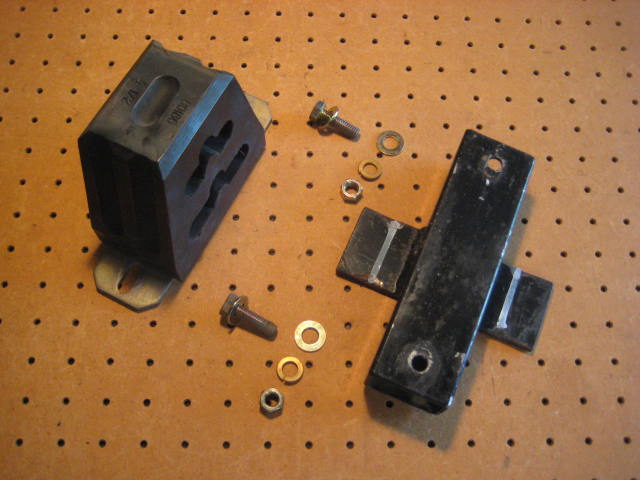
3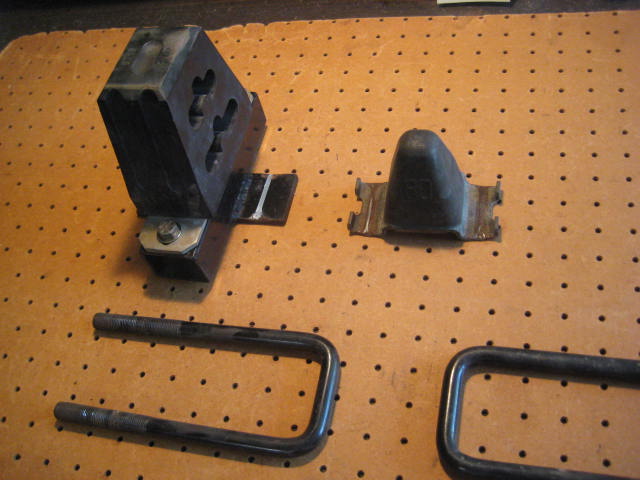
1
2
3
 10-16-2013, 07:30 PM
#282
Registered User
Thread Starter
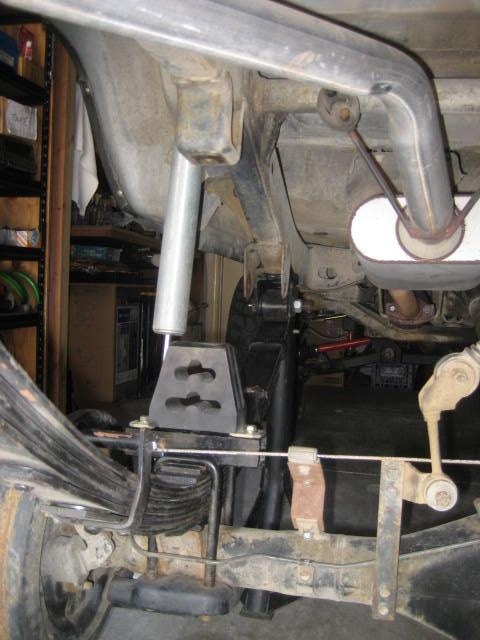
The bracket is constructed from a 1/4"x2" flat cut to length and a 1.5"x2" tube cut to length. Then I drilled some holes to except universal bump stops. The bumps come in different heights. I am showing a 2" and a 4" height in the photo. I calculated by using the 4" ones with the 1-1/2" tube I would be right where I need to be. Here is how it installs onto the spring. Looks massive compared to the factory bump.
4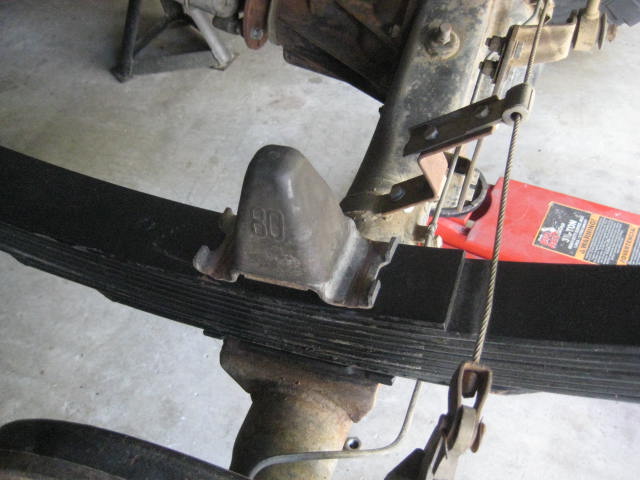
5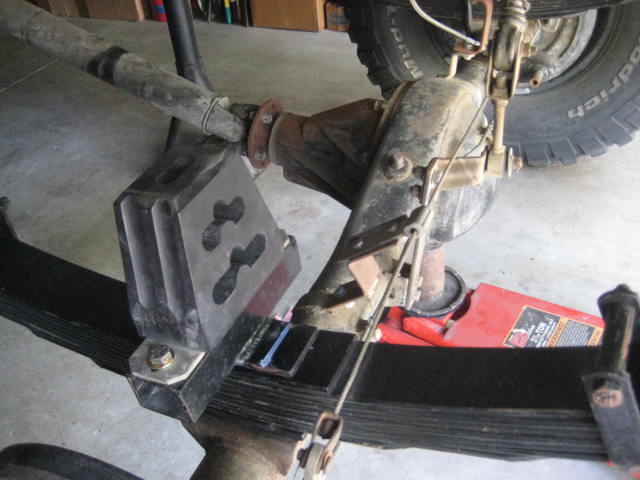
6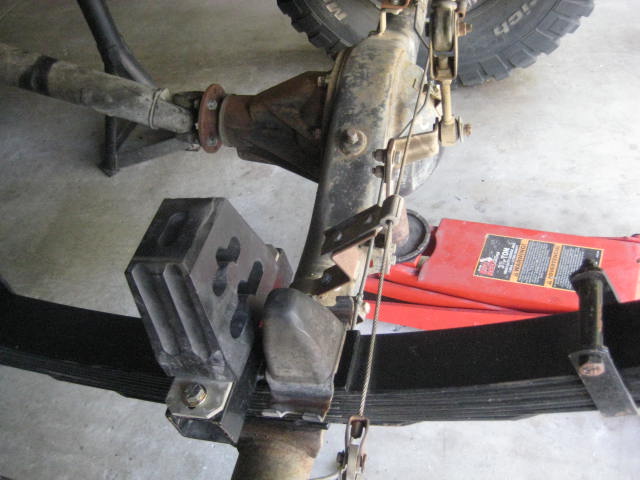
4
5
6
 10-16-2013, 07:31 PM
#284
Registered User
Thread Starter
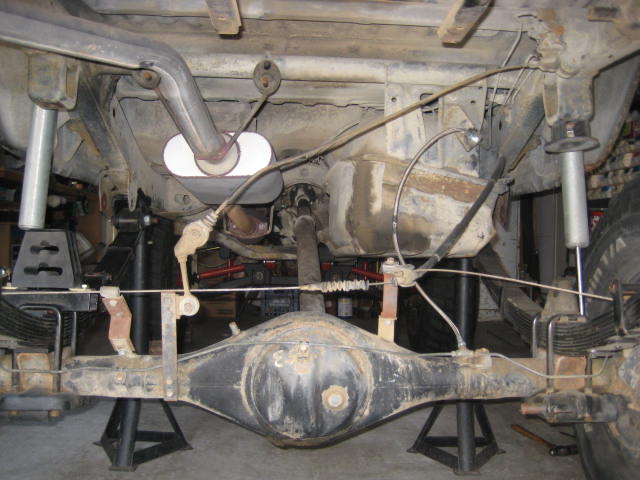
Here I have both sides finished and the rig is sitting at ride height. The measurement is about 5". The bumps are designed to compress about 2". This means that half way into the bump stop I am into negative arch. It should be okay to be into negative arch when its being controlled by the bump stop at 50% compress.
9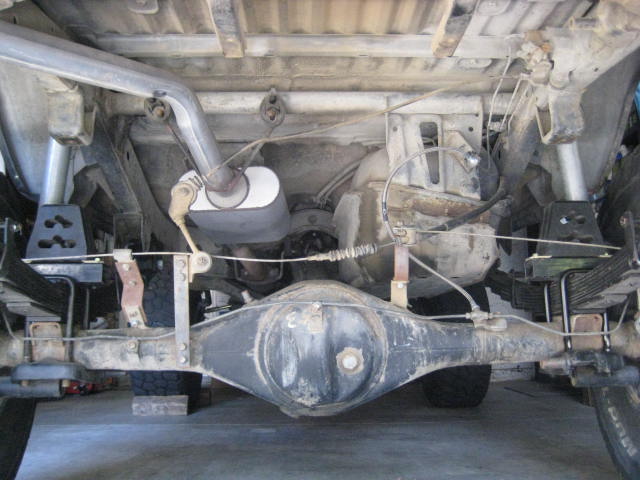
10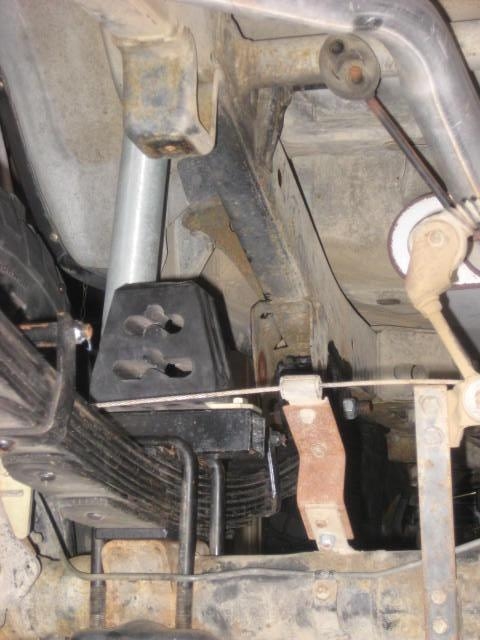
11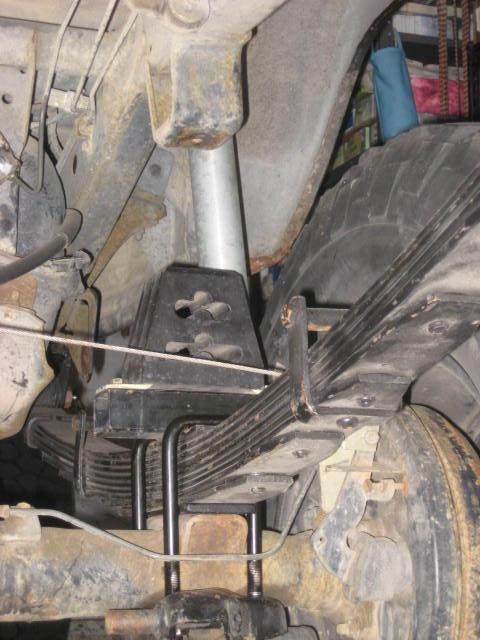
9
10
11
10-16-2013, 07:31 PM
#285
Registered User
Thread Starter
The pinion angle looks good. The bump stops are set to catch the up travel before too much negative arch and to keep the tire from rubbing the back of the fender well. Cant wait to go test it.
11-22-2013, 07:36 PM
#287
Registered User
Thread Starter
When doing a search for "Blazeland" you are probably coming up with hundreds of threads these days. I am creating a keyword to threads that are pertinent to the subject. Type in "Blazelander2013" to see threads that are heavy on a Blazeland related information.
11-25-2013, 05:33 PM
#288
Registered User
Thread Starter
The rear stuffs into the fender well fairly nicely! I was debating removal of my 1" Body Lift but after some testing this past weekend maybe not. I think if removed it the tires would rub the fender. I could always add a shim! Of course this means limiting up travel. I'll have to think about it a while!

Last edited by BlazeN8; 11-25-2013 at 05:44 PM.
11-25-2013, 05:34 PM
#289
Registered User
Thread Starter
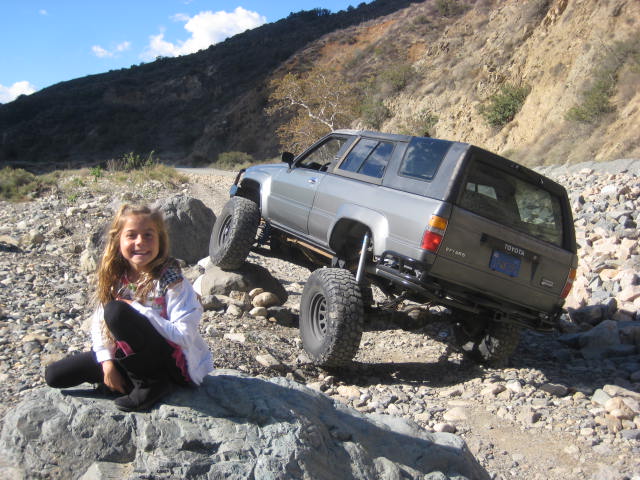
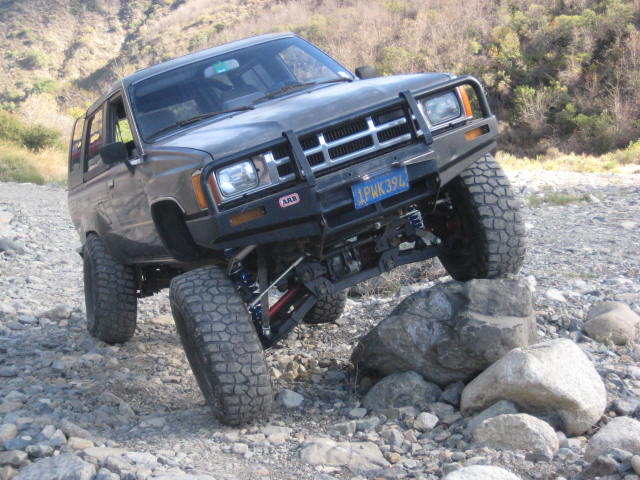
I got a few more photos from this past weekend. Here are some pics of the "RTI" rock I used a few months back.


Rear travel is looking great. In the front I picked up 1-1/2" maybe 2" of down travel since last time. As for up travel its not using what is available. I was not able to even come close to hitting the bump stops for slow speed articulation. However, the bumps were contacting nicely on the Pismo trip in the whoops and jumping. I still think a rear sway bar might balance things out between front and rear.
Rear travel is looking great. In the front I picked up 1-1/2" maybe 2" of down travel since last time. As for up travel its not using what is available. I was not able to even come close to hitting the bump stops for slow speed articulation. However, the bumps were contacting nicely on the Pismo trip in the whoops and jumping. I still think a rear sway bar might balance things out between front and rear.
Last edited by BlazeN8; 11-25-2013 at 05:55 PM.
11-25-2013, 05:39 PM
#290
Registered User
Thread Starter
Here is something new, a recent wash out across the old trail heading to the gate. Off Roaders have been eroding a nice trail across the road. It makes a nice twisty climb but I bet the county or land owners wont be happy. Good luck getting a 2WD vehicle past this.
11-26-2013, 07:21 PM
#294
Registered User
Thread Starter
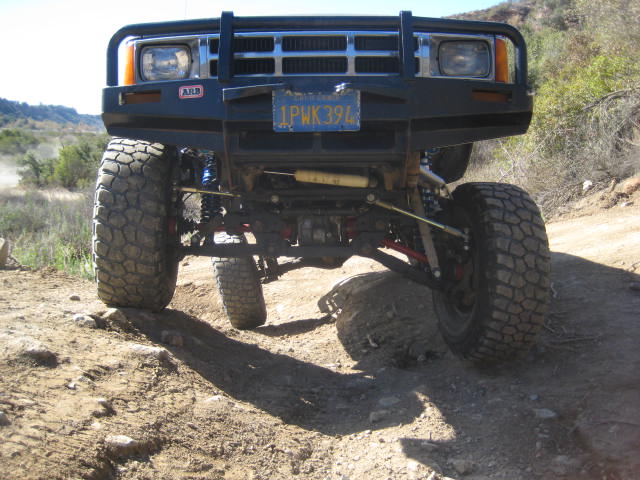
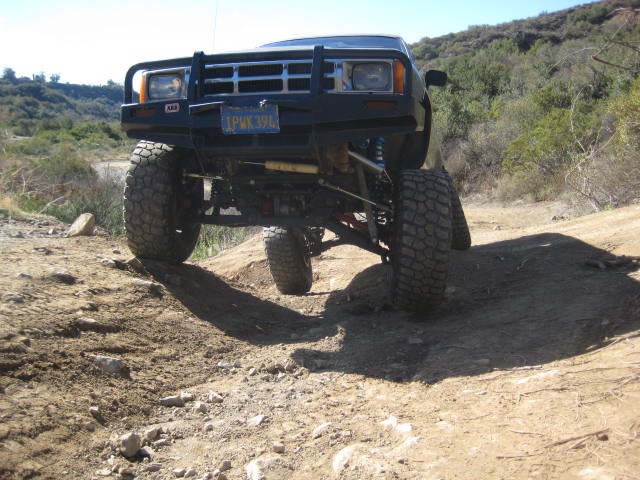
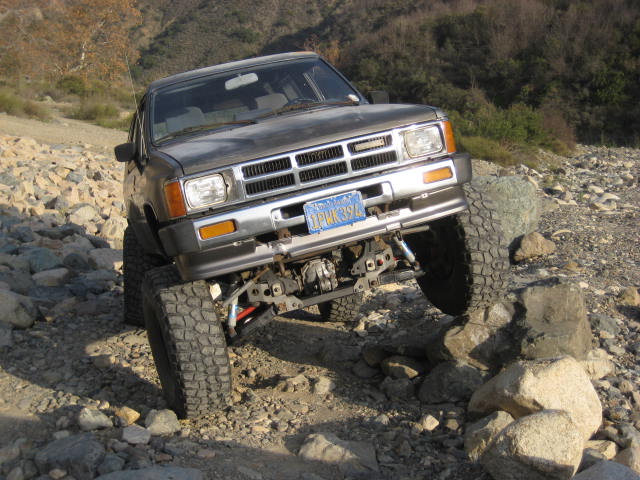
Yep, ToyoTech good observations! Below is a good comparison flex shot. The first one is from January and the second one November. A little different camera angle, different lighting and different bumpers. In the latest shot you can see I am higher up on the rock.
The angle of the LCA on the Up Travel is about the same. The distance from the Bump Stop to the LCA is much greater in the latter.
The Down Travel is much greater on the latter as well. The angle is greater and the control arm length and sub-fame pivot location has changed.
The angle of the LCA on the Up Travel is about the same. The distance from the Bump Stop to the LCA is much greater in the latter.
The Down Travel is much greater on the latter as well. The angle is greater and the control arm length and sub-fame pivot location has changed.
Last edited by BlazeN8; 11-26-2013 at 07:25 PM.
11-26-2013, 08:12 PM
#296
Registered User
Thread Starter
Here is a "drop bracket" sub-frame comparison.
The new Sub-frame has about the same amount of drop but as you can see its been narrowed. The track widths are about the same but control arm lengths are increased.
The UCAs, UCA pivots, Steering linkage, Ball Joints and a number of other things have also been reconfigured.
The new Sub-frame has about the same amount of drop but as you can see its been narrowed. The track widths are about the same but control arm lengths are increased.
The UCAs, UCA pivots, Steering linkage, Ball Joints and a number of other things have also been reconfigured.
11-26-2013, 08:20 PM
#297
Looking good Nate!
Yes it is.. I cant figure out what my next spring rate needs to be when I get my 10" travel coilovers.. The 600# springs are amazing on the trail. I can flex out every inch of travel I have... BUT if you remember from watching my truck at pismo. It does great in medium stuff but cant hold up to anything really big.
Im thinking a hydro bump added to a somewhat soft spring will work nicely. Pump the air up in the dunes/desert, let some air out so you can compress the bump stop to your full articulation for the trails.
Im thinking a hydro bump added to a somewhat soft spring will work nicely. Pump the air up in the dunes/desert, let some air out so you can compress the bump stop to your full articulation for the trails.
11-26-2013, 08:34 PM
#298
Registered User
Thread Starter
I'll have to talk with my contacts over at King and see if they have any ideas on setting up to flex for crawling vs. pre-run. As of now (in the case of the Mega Travel) it wouldn't matter what bumps I put in there they don't hit in crawl mode. If I am heading down hill and the weight transfers forward it will articulate better.
11-26-2013, 09:37 PM
#300
Registered User
Thread Starter
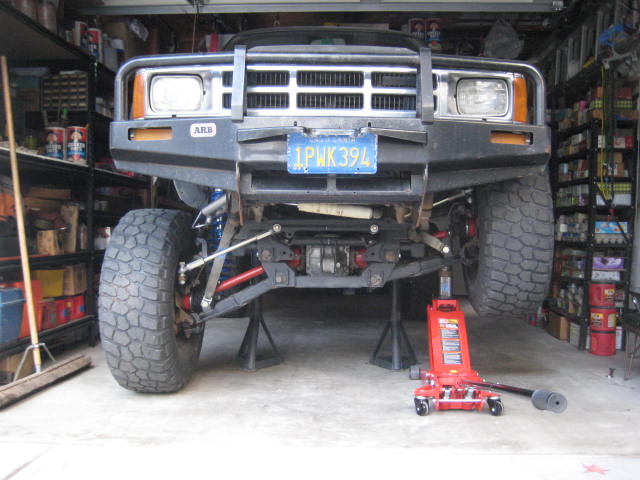
There is a build spec sheet set up at King for this. I can forward the contact information and King will set everything up. You would probably need a little stiffer valving for your ride since its a T-100. For the basics, here are the Kings I am running. The shocks are 2.5 10" travel. The main spring is 16" long and 500lb. The tender spring is 6" long and 500lb.
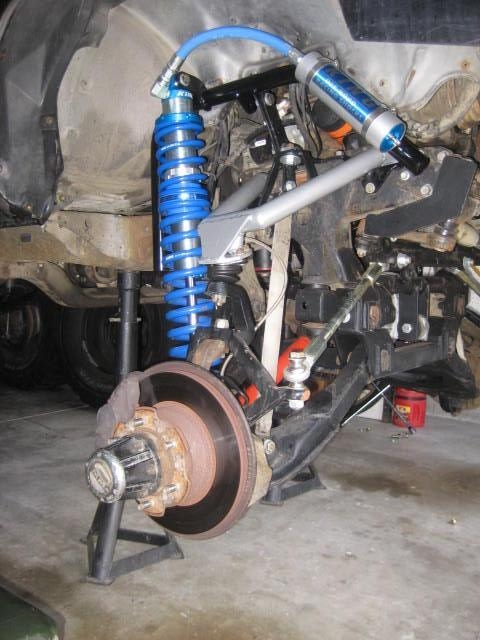
I was using the SAW Race Runners off the Fordota for the mock up (as seen below). They are also 2.5 10" travel. The main spring shown here is 16" long and 500lb. The tender spring is 4" long and 500lb. On the Fordota (not shown) I step up to a 18" long 600lb spring as its a heavier front end and I use it differently. The Fordota is set up for pre-running not general purpose.
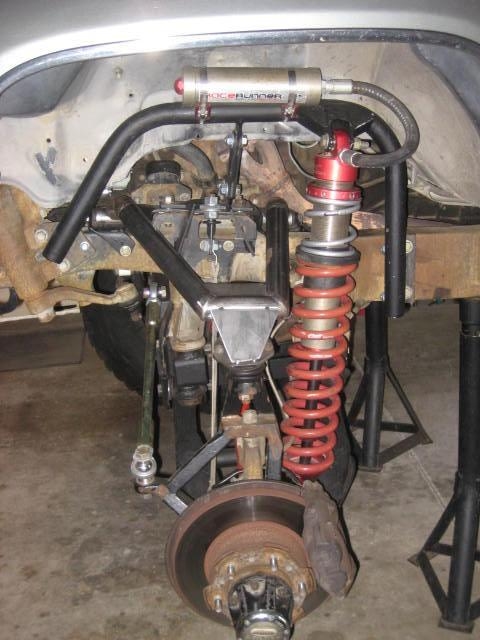
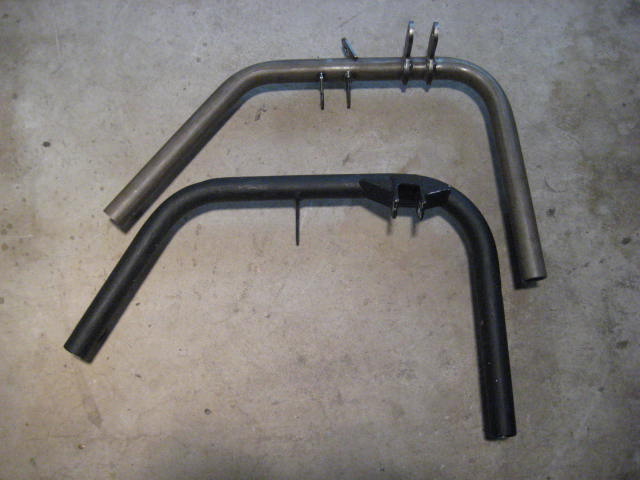
The shock hoops shown with the Kings are my standard Blazeland model I have been selling for years. The SAW shock hoops are a one-off design needed to accommodate the slightly different length of the Race Runner shocks. Its a good thing I designed my shock hoops to be modular and bolt on! I have been been able to switch around different shock hoops between vehicles and use different brands and length shocks with out too much trouble. I have four different sets of shock hoops to choose from now. Here are the two I am using in this write up.
I was using the SAW Race Runners off the Fordota for the mock up (as seen below). They are also 2.5 10" travel. The main spring shown here is 16" long and 500lb. The tender spring is 4" long and 500lb. On the Fordota (not shown) I step up to a 18" long 600lb spring as its a heavier front end and I use it differently. The Fordota is set up for pre-running not general purpose.
The shock hoops shown with the Kings are my standard Blazeland model I have been selling for years. The SAW shock hoops are a one-off design needed to accommodate the slightly different length of the Race Runner shocks. Its a good thing I designed my shock hoops to be modular and bolt on! I have been been able to switch around different shock hoops between vehicles and use different brands and length shocks with out too much trouble. I have four different sets of shock hoops to choose from now. Here are the two I am using in this write up.
Last edited by BlazeN8; 11-26-2013 at 09:47 PM.


