1UZFE into my 95 runner
#181
i had a few people quote me round 300 to have it done. well for that i could have got a new flywheel and clutch that are made for it. luckly i was told of a guy who had a full mahcine shop in his garage. i wish i hade his shop. he had every pice of tooling to make anything and everything he could need.
#183
i had a few people quote me round 300 to have it done. well for that i could have got a new flywheel and clutch that are made for it. luckly i was told of a guy who had a full mahcine shop in his garage. i wish i hade his shop. he had every pice of tooling to make anything and everything he could need.
$300 for a flywheel resurface?!?!?

Holy crap! We usually pay $45 per flywheel, even for the fancy dual mass ones like the Legacy GT's use.
Looks like I need to buy a machine shop out there, charge half your quoted price and get rich in the Rockies!
Who do you guys use when doing clutches at your shop?
Last edited by Dunkin; 04-07-2011 at 08:19 AM.
#186
Ahhh, gotcha. Makes more sense now.
No, but we are buying a dyno from the guys at Super Rupair... at least, that's the story that the boss told me.
#188
Hmmm I don't know they had a dyno
I haven't yet but I am going to. When I had the flywheel cut down to fit on my little subie I didn't have it balanced and it has a slight shutter at less then 1300 or so rpm. I would fix it but I'm putting a hole new driveline in when I'm done with my runner.
I haven't yet but I am going to. When I had the flywheel cut down to fit on my little subie I didn't have it balanced and it has a slight shutter at less then 1300 or so rpm. I would fix it but I'm putting a hole new driveline in when I'm done with my runner.
Last edited by SHAGGY21; 05-19-2011 at 06:55 PM.
#189
well i got the heads rebuilt yet again. the only thing i dont get is that i took the old heads apart to b=get the valve seals out as i wasnt going to buy more. they never ran i a car so i think its safe to reuse them. but there was 2 different spring sizes. but not like one sive for the exhaust and one size for the intake. one head was one size and the other was another size. but all in all i got them finished. o an one of the heads had a bent valve. my guess is from them being shipped. but i have a hole set of valves out of my other heads.


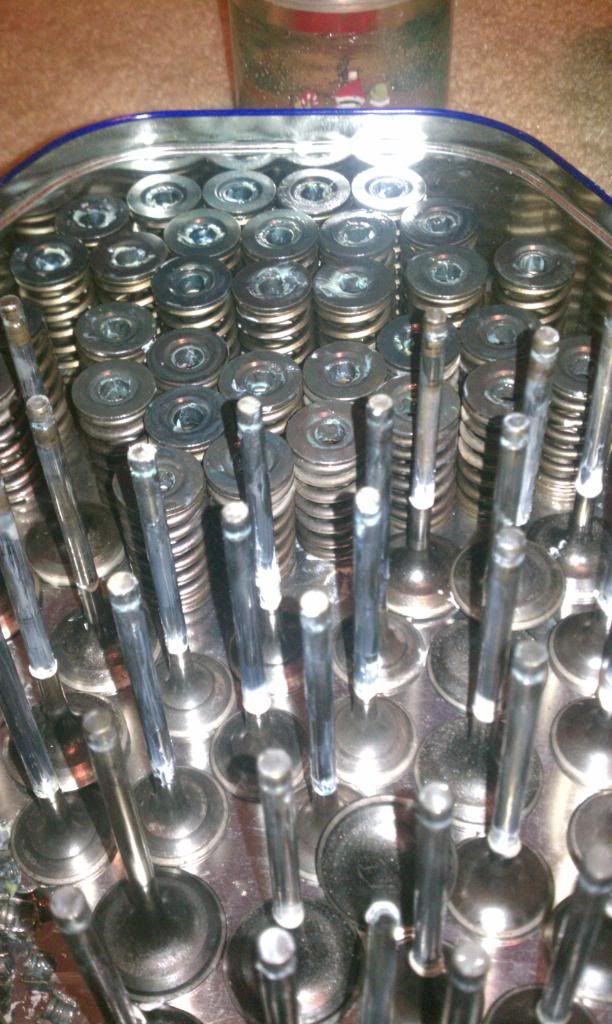
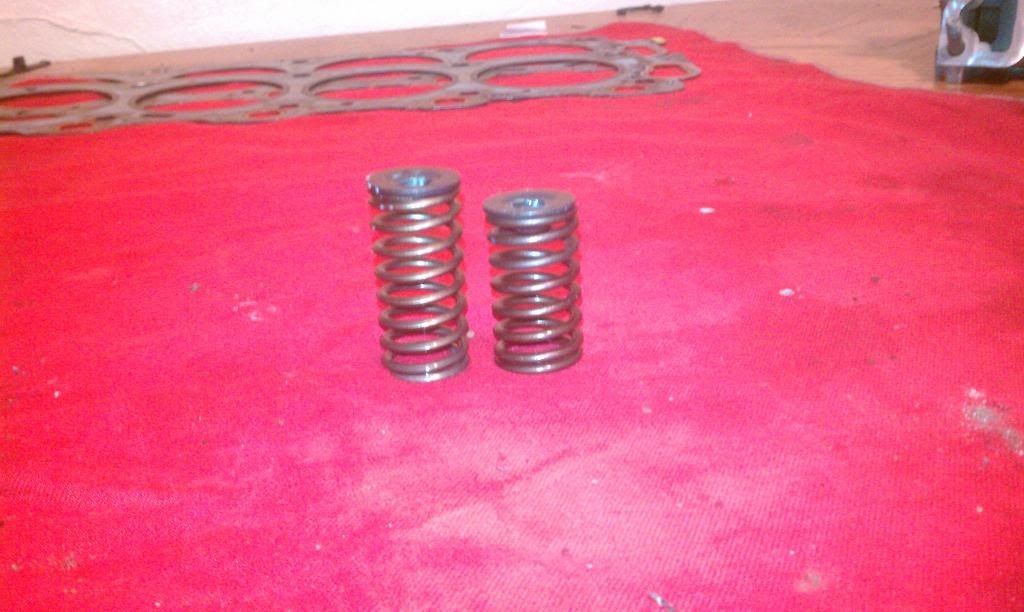

so i can now put the engine back in and not have to take it out again. yay. just need to order a clutch for it and i dont have to take the tranny out either.


so i can now put the engine back in and not have to take it out again. yay. just need to order a clutch for it and i dont have to take the tranny out either.
#191
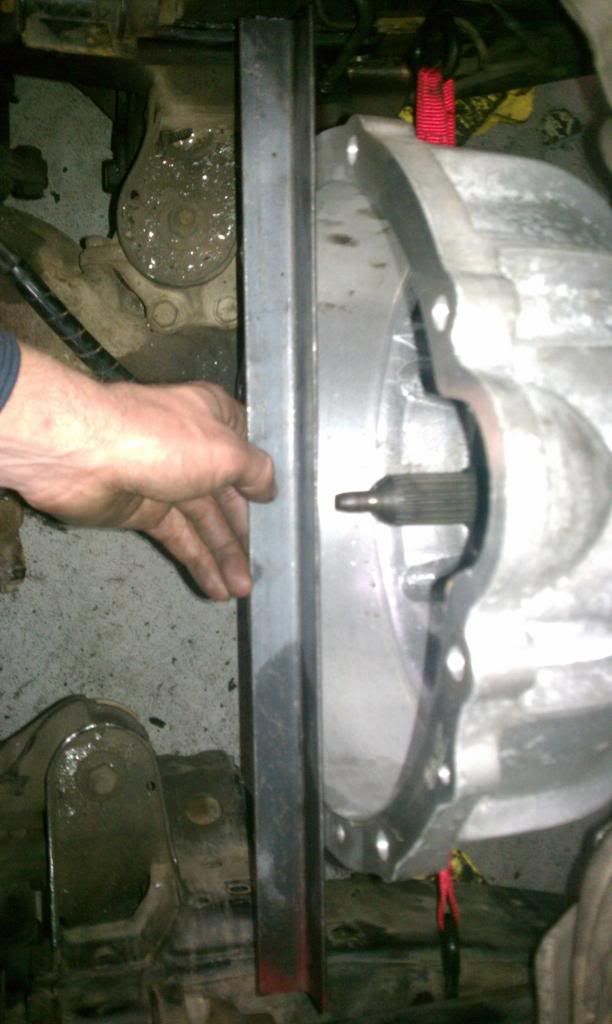
ok so i got some more work done tonight. i got the frame put back in. from this picture you can see where the tranny is sitting how the frame gets in the way of the drive shaft.

so i cut it out and moved it up and put some gussits in. and because i had to move the frame it means the body lift will never be able to come off. but i can live with that.
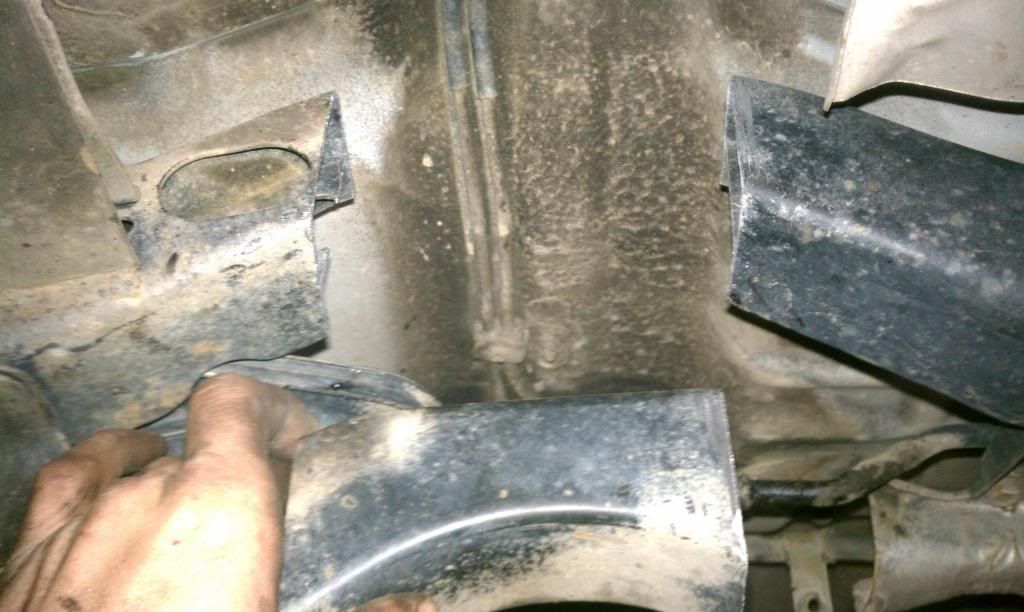


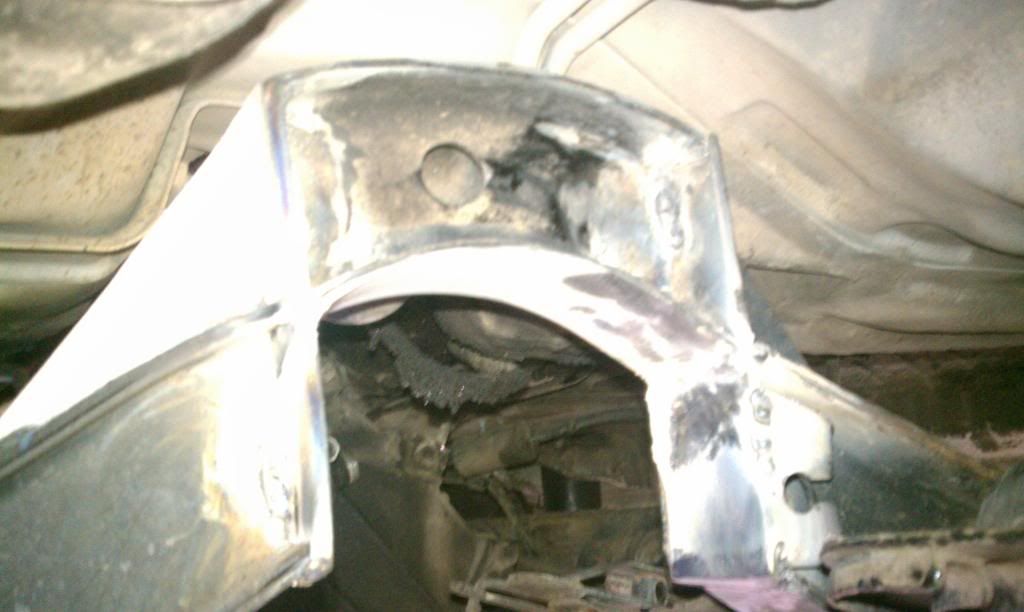

and i did some measurements and for now i will run an auto rear driveshaft. it will fit right in give or take a 1/4 inch. its just a matter of the driveshaft angle it the u-joints will hold. but where the tranny is sitting its like i put a 3 inch suspention lift in so i think it will work out for a little bit tell i have one made.
o and i also had to move the e-brake cable bracket but all the angles of the cable are the same for the most part.

so i cut it out and moved it up and put some gussits in. and because i had to move the frame it means the body lift will never be able to come off. but i can live with that.


and i did some measurements and for now i will run an auto rear driveshaft. it will fit right in give or take a 1/4 inch. its just a matter of the driveshaft angle it the u-joints will hold. but where the tranny is sitting its like i put a 3 inch suspention lift in so i think it will work out for a little bit tell i have one made.
o and i also had to move the e-brake cable bracket but all the angles of the cable are the same for the most part.
Last edited by SHAGGY21; 04-13-2011 at 07:40 PM.
#195
you won't need to pull the body off:
http://www.4crawler.com/4x4/CheapTri...ft/index.shtml
great stuff on that site, Roger has some really great tips and tricks.
http://www.4crawler.com/4x4/CheapTri...ft/index.shtml
great stuff on that site, Roger has some really great tips and tricks.
#196
Hmmm ill have to look into it. I would like it welded in and painted having the body on makes it a little harder to paint. And I got ur stuff in the mail. If all goes as planes all my wiring should be done in the next week.
#198
ok so befor i put the engine back in again i did some measurments for where ti input shaft was going to be as the spacer that comes with the ks kit dosnt fit over the input shaft. so here they are.
as you can see the pilot bearing it comes with is much to big for the r150 input shaft.

so as i was saying from the mesurements i took where the input shaft is going to be it sits just about 6.60mm inside the crank. so im sure it would work with a r150 pilot bearing.
ok so from the input shaft to the edge of the bellhousing its 12.00mm
and here from the block to the end of the crank is 18.60mm
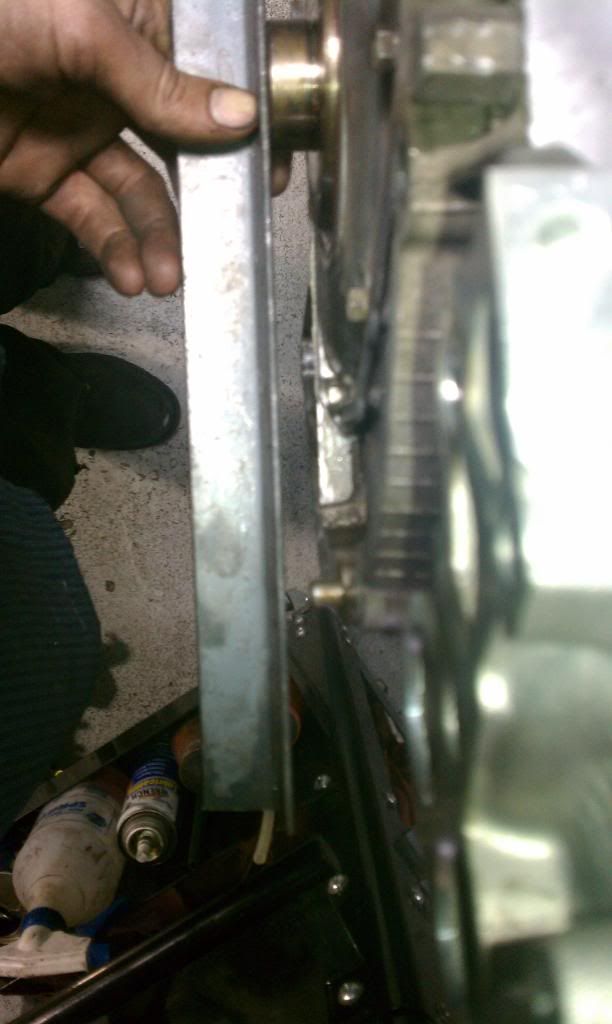
then from the edge of the crank to the pilot bearing spacer is 12.12mm.
and the pilot bearing is 8.95mm. so that leavs 3.55mm from the pilot bearing to the edge of the crank.

and the ridge on the input shaft spacer is..... well i didnt seem to write it down but here is a picture of the input shaft spacer after i drilled it out and put it all the way on the input shaft and installed the engine and as you can see without drilling it i dont see how it would work with my setup at least.

as you can see the pilot bearing it comes with is much to big for the r150 input shaft.

so as i was saying from the mesurements i took where the input shaft is going to be it sits just about 6.60mm inside the crank. so im sure it would work with a r150 pilot bearing.

ok so from the input shaft to the edge of the bellhousing its 12.00mm
and here from the block to the end of the crank is 18.60mm

then from the edge of the crank to the pilot bearing spacer is 12.12mm.
and the pilot bearing is 8.95mm. so that leavs 3.55mm from the pilot bearing to the edge of the crank.

and the ridge on the input shaft spacer is..... well i didnt seem to write it down but here is a picture of the input shaft spacer after i drilled it out and put it all the way on the input shaft and installed the engine and as you can see without drilling it i dont see how it would work with my setup at least.

#199
and here is the engine back in with all the stuff back on it and how it fits.
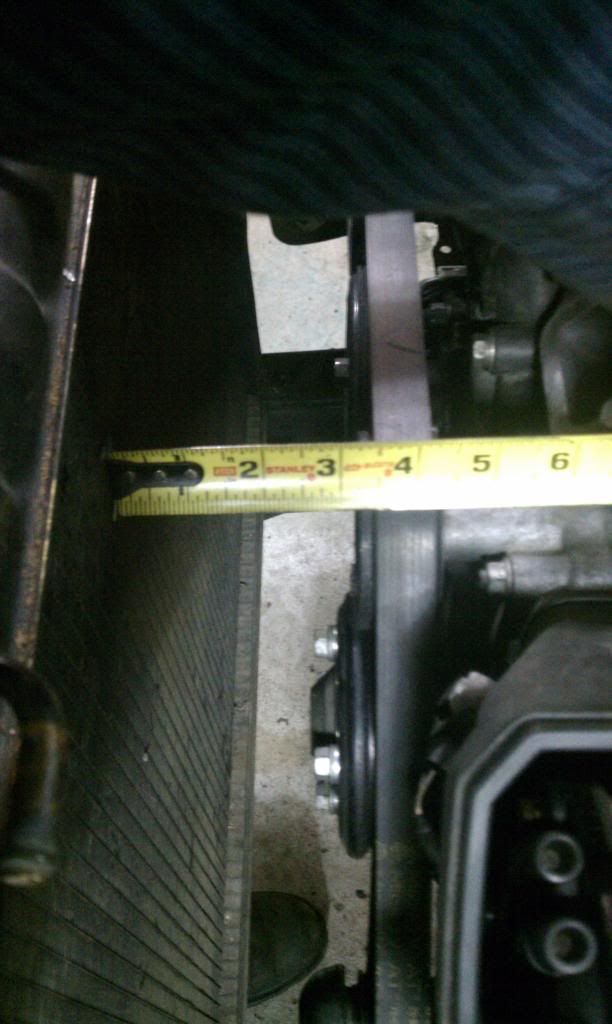
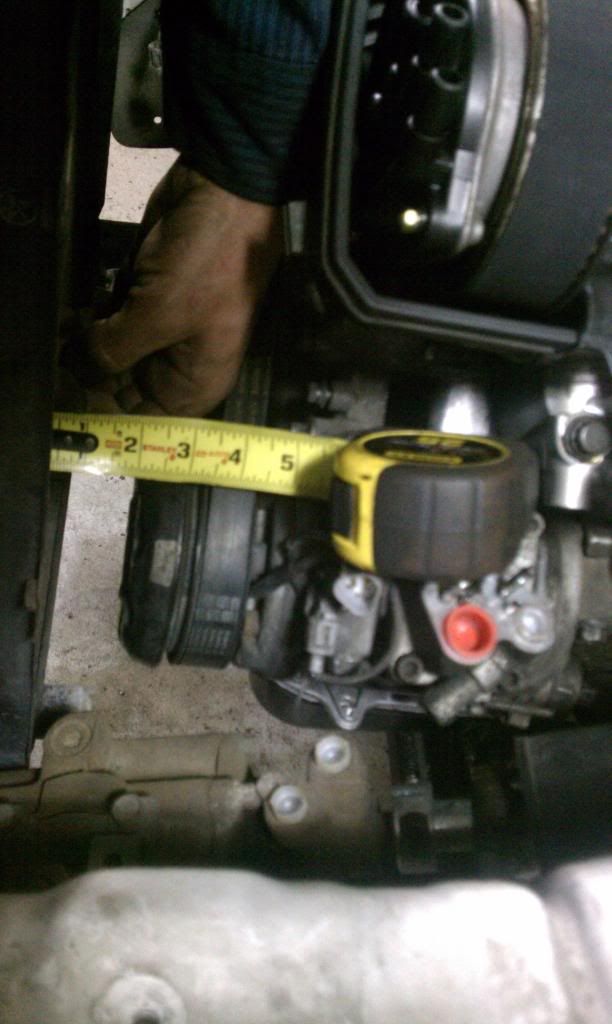



the a/c compressor is pretty tight in there but it will work. going to have to make my own power steering lines i also took the abs module out. i jsut need to get the the brake line that is ment to go in with it not having abs. ill be looking fot that stuff on saterday on my travels to the parts yards.


the a/c compressor is pretty tight in there but it will work. going to have to make my own power steering lines i also took the abs module out. i jsut need to get the the brake line that is ment to go in with it not having abs. ill be looking fot that stuff on saterday on my travels to the parts yards.
#200
Registered User
iTrader: (2)
Joined: Oct 2009
Posts: 1,044
Likes: 5
From: Centeral Willamette Valley Oregon
Shaggy are you talking about drilling out the center of the hole on the spacer extension? I know dunkin had some problems with his not fitting. Obviously you must have had some issues. But from I gather you just put the spacer into the vise and used a drill to tap it out so it would fit over the the end of the output shaft. Is drilling it out just making the spacer very thin now? I can't wait to see what I find when the kit gets here.
Dunkin are you going to keep the a/c compressor for future use or do you want to sell it?
Shaggy can you remind me how much body lift you have.
Dunkin are you going to keep the a/c compressor for future use or do you want to sell it?
Shaggy can you remind me how much body lift you have.


