
1987 4Runner Cyber Dude
 04-04-2014, 11:37 AM
#461
Super Moderator
Staff
iTrader: (1)
Join Date: Aug 2008
Location: Anderson Missouri
Posts: 11,787
Likes: 0
Received 25 Likes
on
22 Posts
You will be your own worse critic. I feel your frustrations, I have given 300% and when you get a flaw, it is depressing. As long as you know you gave it your best, it is still something to be proud of. I have met thousands of " I'm gonna or I wanna" restore my projects, but the handful of guys that really know what it takes to get one to where you envisioned it, those flaws are a laughing matter. They have been in the same situation where things didnt go as planned and know what it is like.
I still get flaws even after several trucks and have had to point some of them out that most would never notice. It is just that you know where they are. Even the flaws on both of my runners, I still get a great sense of an accomplishment and satisfaction. The very few on Yotatech and people I deal with in real life only know what goes into a build and the time it takes when you have so much else going on in life between family, work and the hundered other things that come up, its a miracle anything gets done.
Even if it didnt go as planned, now you are no longer worried about spraying it or rolling it out and your truck just melting away. It still gave you experience and confidence to tackle it again or on your other truck and still looks far better then it did then before you painted it. I had my fair share of critics on why I was building up my 86 for the condition it was in. What a great learning experience and sense of accomplishment. Sure beats sitting on the couch.
On your brakes, blow air thru the brake lines and then spray some PB Blaster in the lines and blow them out again. I start at the MC and blow to the rear. Some nasty stuff comes out of the lines.
You might be surprised at what inside your brake calipers look like and they are easily cleaned and rebuilt. They get into bad shape as well.
Here is some info that might help when I did my brakes. $7 for a seal kit if I recall right and a brillo pad can do the job as well. Use LOW air pressure when puhing out the pistons. It is an easy job.
Copied>>>
My left front brake caliper is dragging so I thought I would just pull on out of the shed and do a quick swap. That isnt going to work. The replacement caliper is in bad shape, but years ago, I used to rebuild them. Not as bad as you may think. That is if you can still get the seal kits for them. I do have a little honer to clean the walls out with.
Here is the replacement caliper. Just 4 bolts hold it together.
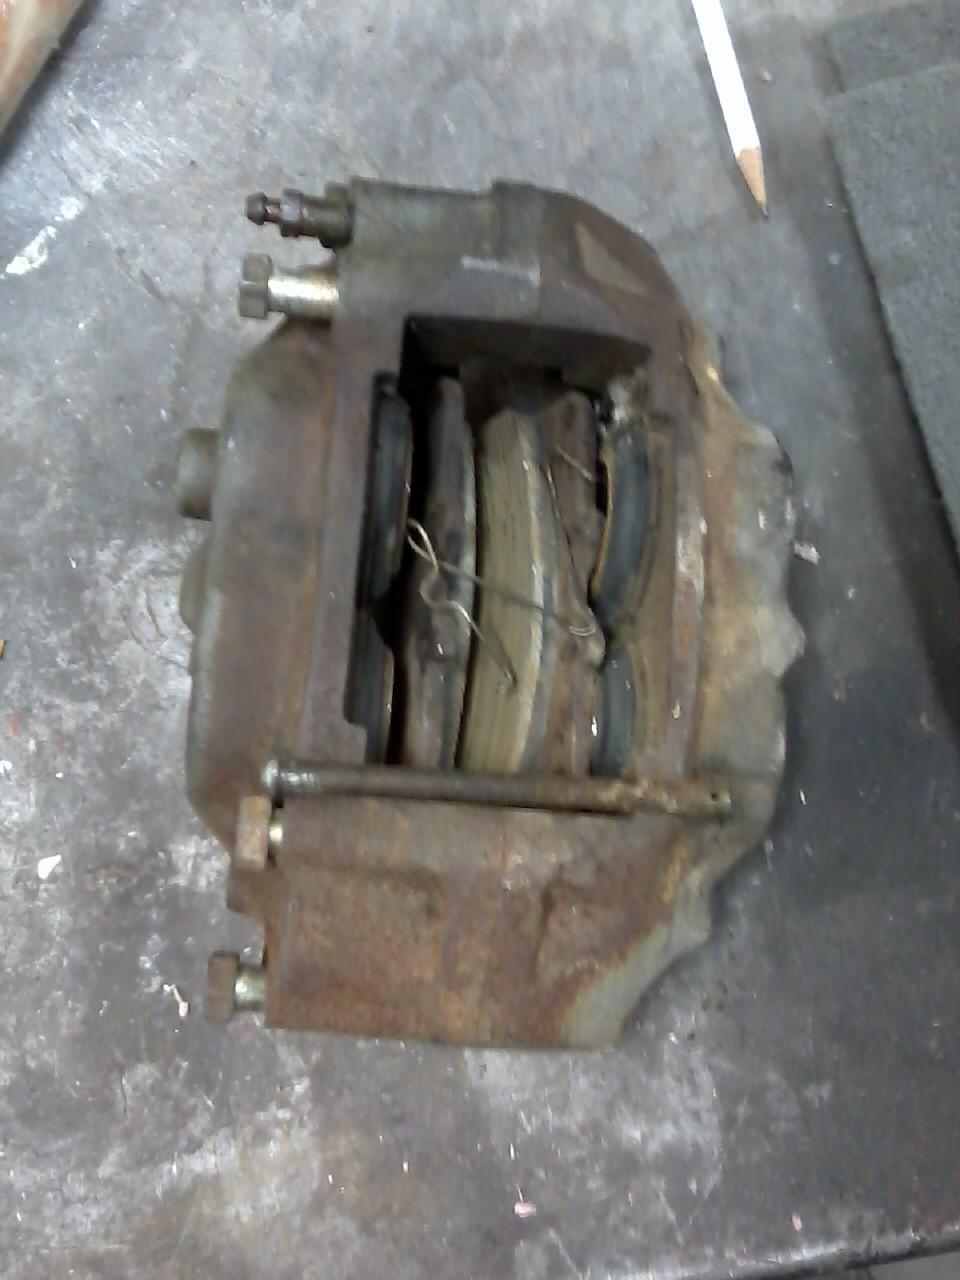
Here it is disassembled. Just hone the cylinder and replace the seal is what used to come in the rebuild kits. The black o rings seal against the area where my finger is.
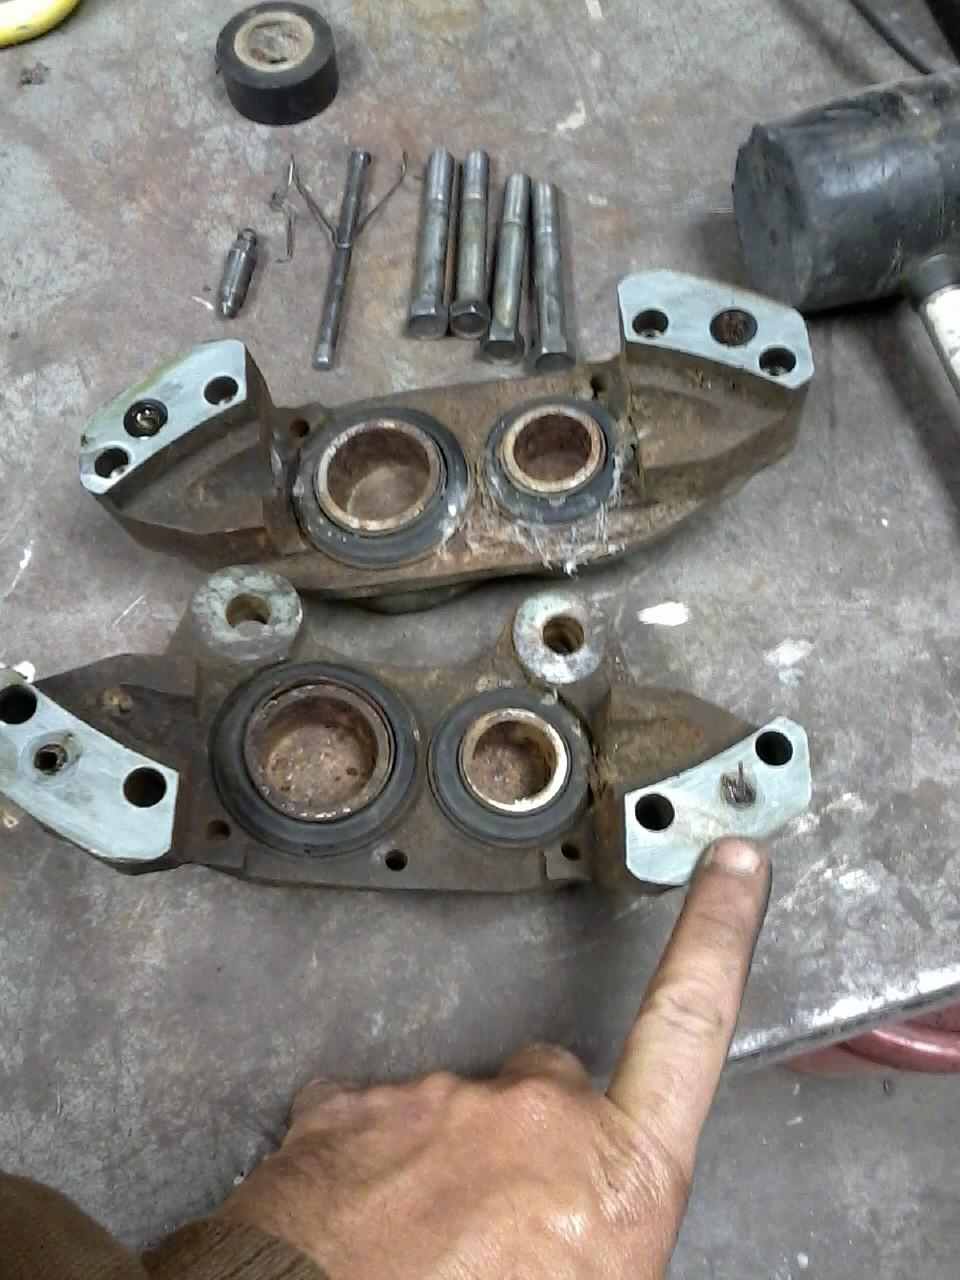
These little seals are all that seals the two pieces of the caliper together. I have the caliper soaking in WD40 and will hit them with an air hose again to get the pistons out. They look bad, but usually clean up nice with a little time and patience. My finger is showing how much it is plugged up. I try to once a year or so to flush all of the old brake fluid out to avoid alot of this mess.
I still get flaws even after several trucks and have had to point some of them out that most would never notice. It is just that you know where they are. Even the flaws on both of my runners, I still get a great sense of an accomplishment and satisfaction. The very few on Yotatech and people I deal with in real life only know what goes into a build and the time it takes when you have so much else going on in life between family, work and the hundered other things that come up, its a miracle anything gets done.
Even if it didnt go as planned, now you are no longer worried about spraying it or rolling it out and your truck just melting away. It still gave you experience and confidence to tackle it again or on your other truck and still looks far better then it did then before you painted it. I had my fair share of critics on why I was building up my 86 for the condition it was in. What a great learning experience and sense of accomplishment. Sure beats sitting on the couch.
On your brakes, blow air thru the brake lines and then spray some PB Blaster in the lines and blow them out again. I start at the MC and blow to the rear. Some nasty stuff comes out of the lines.
You might be surprised at what inside your brake calipers look like and they are easily cleaned and rebuilt. They get into bad shape as well.
Here is some info that might help when I did my brakes. $7 for a seal kit if I recall right and a brillo pad can do the job as well. Use LOW air pressure when puhing out the pistons. It is an easy job.
Copied>>>
My left front brake caliper is dragging so I thought I would just pull on out of the shed and do a quick swap. That isnt going to work. The replacement caliper is in bad shape, but years ago, I used to rebuild them. Not as bad as you may think. That is if you can still get the seal kits for them. I do have a little honer to clean the walls out with.
Here is the replacement caliper. Just 4 bolts hold it together.
Here it is disassembled. Just hone the cylinder and replace the seal is what used to come in the rebuild kits. The black o rings seal against the area where my finger is.
These little seals are all that seals the two pieces of the caliper together. I have the caliper soaking in WD40 and will hit them with an air hose again to get the pistons out. They look bad, but usually clean up nice with a little time and patience. My finger is showing how much it is plugged up. I try to once a year or so to flush all of the old brake fluid out to avoid alot of this mess.
Last edited by Terrys87; 04-04-2014 at 11:40 AM.
 04-07-2014, 08:12 AM
#462
You aren't kidding Terry, I am my own worse critic. When I was younger, I and being so young and in a supervisory postion I was told by my good friends that you can't be to hard on the employee as they will never do it as you would.
I never started anything this weekend it was mostly honeydo things I had to do and things around the house. So I wasn't able to work on anything.
Looking at what you posted here, I've been thinking that maybe I should take the front calipers off the 86 and clean them up and rebuild it and put them on my 87 then when I'm ready rebuild the 87 and put them on the 86. Cheapest way that it would work as a quick swap with the littlest down time, but sure would like to get a pair of spare calipers, one day I won't be able to do a swap.
Today I'm going to try and get some of the Butyl tape and try to put the rear glass on the topper. The cost for that tape should be around $15.00 for 15' of it. I'll see if I can put it on later this evening and get something done.
04-11-2014, 04:55 AM
#463
Got a little done yesterday, not much.
I wanted to try out a rust converter, but it seems no local stores really have any of the products recommend as fair to good for a rust converter. The only one that each store had was rustoleums rust reformer which is rated very low on the scale. And after trying it I can say they reviews are right on the money. Some of you are saying why would I say that about Rustoleum a great product. It sure is a great product, but the truth is in my book it failed here on the rust reform. After wire wheel and brushing and spraying the rusted area, I sanded it again and noticed that some of the rust remained below the rust reformer. I believe from what I've read that the rust converter actually penetrates the rust and converts it. I haven't tried it yet, so its all reading less experience.
Here's a shot of the frame before coating with the reformer.
Here's after spraying with the rust reformer.
The other side of the frame was worse, you can see where after spraying with the Reformer, the center track at the corner is gone, but that should not affect the performance of the sliding of the glass in my opinion.
Worked on the L-Trim too, I used the Metal filler to rough out the rusted parts that needed fixing to some degree. Also sprayed with rust reformer.
This picture is before using that metal filler wire brushed and sanded then sprayed with rust reformer.


I take a few more pictures of the L-trim after I did the filler this and sanding later today. After all this, I'm going to prime and paint the L-trim.
I wanted to try out a rust converter, but it seems no local stores really have any of the products recommend as fair to good for a rust converter. The only one that each store had was rustoleums rust reformer which is rated very low on the scale. And after trying it I can say they reviews are right on the money. Some of you are saying why would I say that about Rustoleum a great product. It sure is a great product, but the truth is in my book it failed here on the rust reform. After wire wheel and brushing and spraying the rusted area, I sanded it again and noticed that some of the rust remained below the rust reformer. I believe from what I've read that the rust converter actually penetrates the rust and converts it. I haven't tried it yet, so its all reading less experience.
Here's a shot of the frame before coating with the reformer.
Here's after spraying with the rust reformer.
The other side of the frame was worse, you can see where after spraying with the Reformer, the center track at the corner is gone, but that should not affect the performance of the sliding of the glass in my opinion.
Worked on the L-Trim too, I used the Metal filler to rough out the rusted parts that needed fixing to some degree. Also sprayed with rust reformer.
This picture is before using that metal filler wire brushed and sanded then sprayed with rust reformer.
I take a few more pictures of the L-trim after I did the filler this and sanding later today. After all this, I'm going to prime and paint the L-trim.
04-11-2014, 12:34 PM
#464
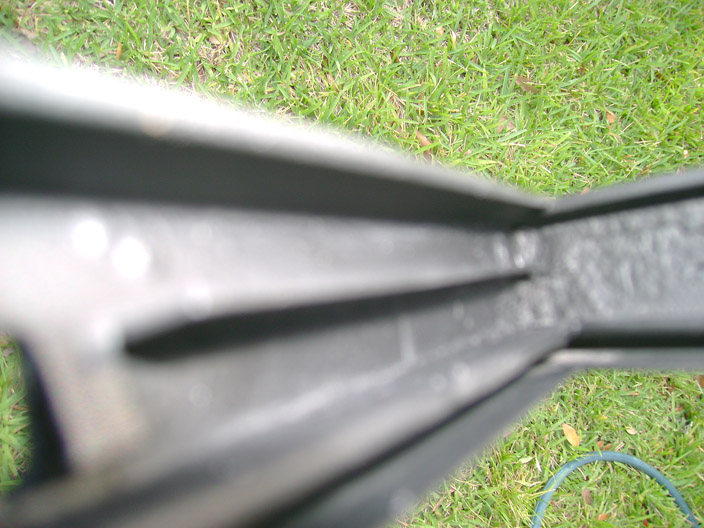
okay just for comparison I'm going to show you guys what I've done so far for the side topper sliding glass frame. I took pics of them side by side as i want to know how exactly they go back together I only disassembled one, now that I'm pretty much done with one side i can take apart the other.
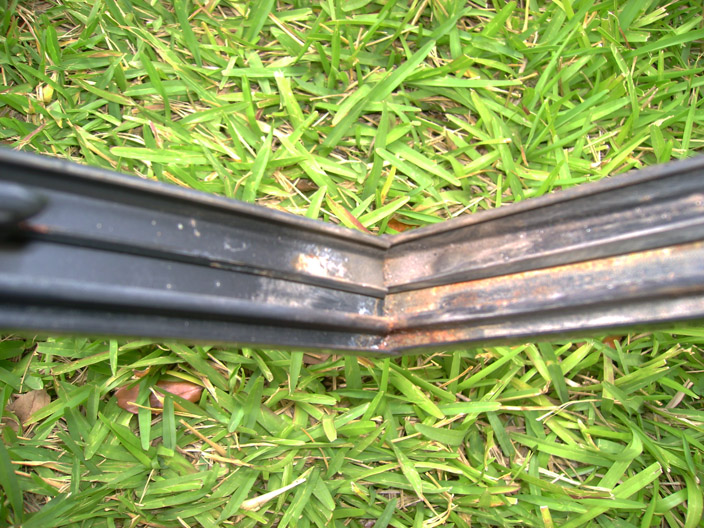
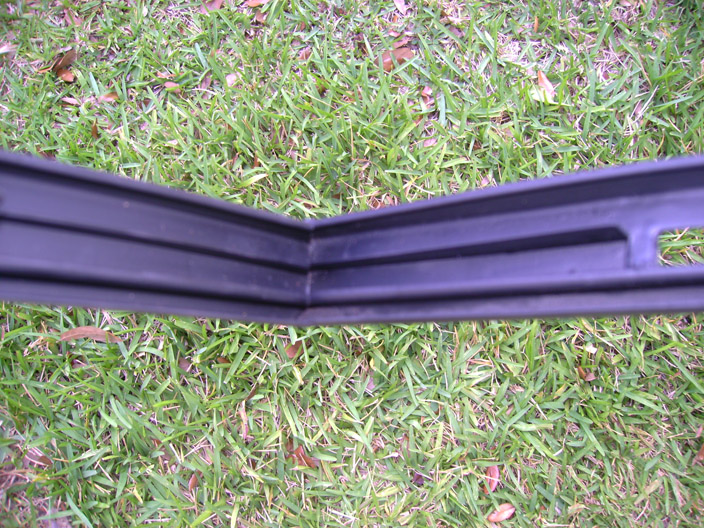
This picture show you basically what the corner looks like before and after. Amazing what a little cleaning and a little can of paint can do. Sure wish I had some rust converter instead of this rust reformer, I really don't care for the rust reformer.

This corner is the worst, I haven't figured out how I'm going to cope with this part as i don't think the All Metal will work that great, though it's not going to be exposed as that part you can see the corner of the one needing work has a whole section rusted out. That part actually is hidden behind the inside trim molding. I'm guessing that rusted out when water stood in the corner absorbing into the some what plastic cap molding around the window. i might just try and bond a piece of sheet metal there or something. look closely at the rusted frame corner you will see the rust out part.

This is the center post you can tell what a little water soaking then scrubbing will do to it. The old has all kinds of dirt and dust over it. The one cleaned was soaked in water then wire brushed then soaked in silicone spray.


The one cleaned up looks pretty good to me and hopefully will stay that way for a couple of years. I haven't put it back on yet as I am still pondering the seal around the window even though I've picked up some butyl tape from the auto part store, it's just not the right one. The rear glass requires a different one than the one on the front sliding glass.
Hopefully by the time I finish the other sliding glass frame I will have the butyl sealer in my hands the correct ones.
This picture show you basically what the corner looks like before and after. Amazing what a little cleaning and a little can of paint can do. Sure wish I had some rust converter instead of this rust reformer, I really don't care for the rust reformer.
This corner is the worst, I haven't figured out how I'm going to cope with this part as i don't think the All Metal will work that great, though it's not going to be exposed as that part you can see the corner of the one needing work has a whole section rusted out. That part actually is hidden behind the inside trim molding. I'm guessing that rusted out when water stood in the corner absorbing into the some what plastic cap molding around the window. i might just try and bond a piece of sheet metal there or something. look closely at the rusted frame corner you will see the rust out part.
This is the center post you can tell what a little water soaking then scrubbing will do to it. The old has all kinds of dirt and dust over it. The one cleaned was soaked in water then wire brushed then soaked in silicone spray.
The one cleaned up looks pretty good to me and hopefully will stay that way for a couple of years. I haven't put it back on yet as I am still pondering the seal around the window even though I've picked up some butyl tape from the auto part store, it's just not the right one. The rear glass requires a different one than the one on the front sliding glass.
Hopefully by the time I finish the other sliding glass frame I will have the butyl sealer in my hands the correct ones.
04-13-2014, 11:39 AM
#465
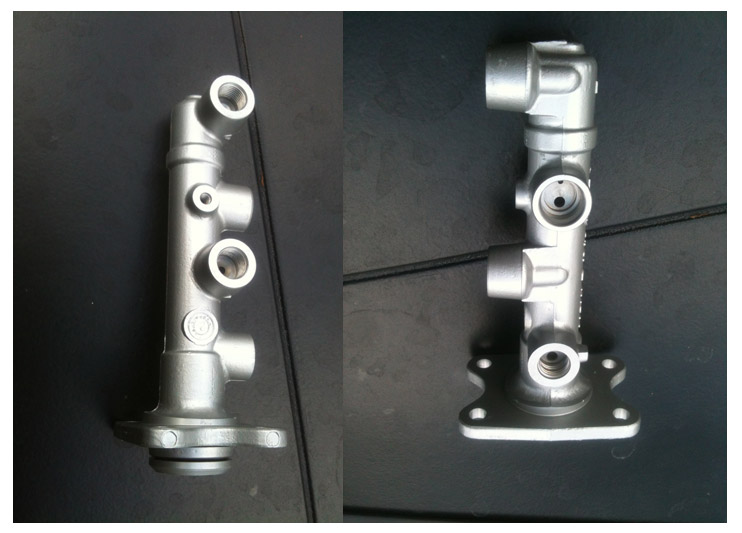
Master brake Cylinder
Okay I cleaned up the Master Brake Cylinder today as I finally was able to stop by the HF and exchange my limited lifetime snap ring pliers. The inside looks pretty good cleaned it up and got ride of the gunk and these particles about 1/32 in size. This should resolve a bunch of problems, i ordered the rebuild kit from rockauto.com first time buyer there as they had a good price on the rebuild kit. If this works out I'll probably purchase another just to rebuild the one when I take off the truck to put this one on. Clearly because of the age of these MC they need to be cleaned and rebuilt. Here's a picture of the piston when i pulled it out after removing the snap ring. Can't wait to get that rebuild kit.
Took the opportunity and painted the MC housing and it looks pretty decent. Once rebuilt, I'll match it up with that Brake Booster i cleaned up and it should work out pretty good.
Took the opportunity and painted the MC housing and it looks pretty decent. Once rebuilt, I'll match it up with that Brake Booster i cleaned up and it should work out pretty good.
04-13-2014, 11:45 AM
#466
Topper L-Trim
Been working on those L-trims cleaning up the rust and rusted out parts on it. Looks pretty decent compared to what they looked like before.
This is what they look like after using that all-metal on it.
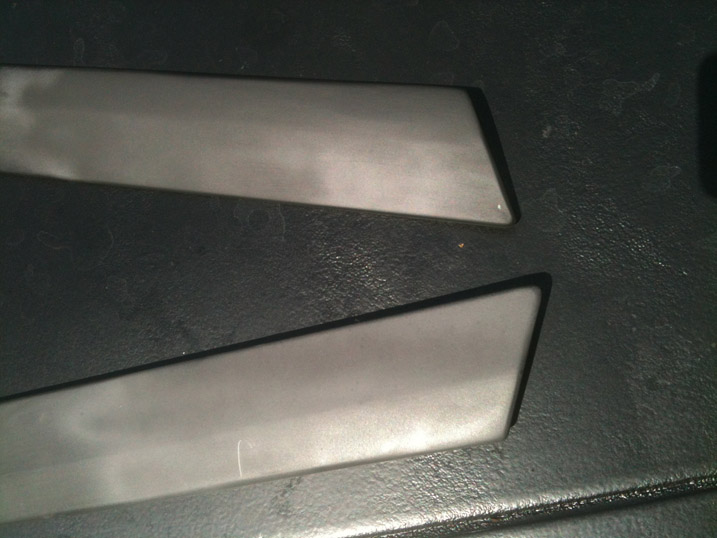
compared to what they looked like before I think they are looking pretty decent.
This is what they look like after using that all-metal on it.
compared to what they looked like before I think they are looking pretty decent.
04-15-2014, 01:47 AM
#468
04-15-2014, 05:38 AM
#469
Gizler00, Thanks it's really slow I sure wish i could hire the same crew you have at the same cost too... Your runner is looking really good, i like what you did for the bed of the truck that came out really good.
I too would like to have a soft topper as well, but the cost is rather high. on my list, that is one item I am looking to maybe fabricate, There are plenty of seamstress for hire in South Florida that would probably do it for in expensive and that fact that we have a bunch of boaters here year round looking to make those canvas T-tops makes it easier to find them. one day with time and $$$.
Also, going back a few on that windshield gasket, do you happen to have the width of the gasket or can you take a measurement off yours? I found a company who would sale me a 75' length for about $40 MOL shipped. It seems there motto is "we pay for shipping!". I would appreciate that if you could.
Last edited by junk4u; 04-15-2014 at 10:25 AM.
04-16-2014, 06:26 AM
#470
Been looking at those LED lights for the instrument panel and final found some cheapos to try out to see if they fit and work. As all of them they come from overseas so it will take a while before I get them, but at the price I got them for waiting will be the least of my problems as to seeing if they fit and work. They have brighter ones etc... but I thought I would give these a try.
Looking convert the tail lights as well including the dome lights. Been looking at those stripe lights that some have add to there bed and that looks good, so I'm looking at the roll of LED strips and it doesn't have to be waterproof I think.
Looking convert the tail lights as well including the dome lights. Been looking at those stripe lights that some have add to there bed and that looks good, so I'm looking at the roll of LED strips and it doesn't have to be waterproof I think.
 04-17-2014, 05:36 AM
#473
Yeah that would be a great dome light or cargo area light, but it's water proof so I might use it under the hood for night time vision.
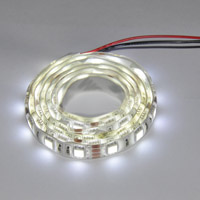
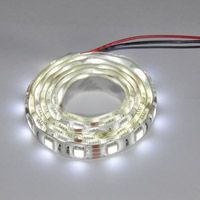
I just got bought this:
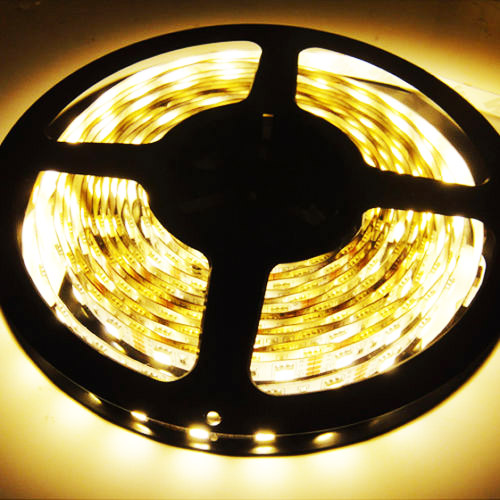
It's about 15' in length kind of a warm white color. It's not water proof so I'll be putting inside like you said gizler in the cargo area I'll wire it up with the deck light so It maybe possible to switch on and off from the back or front. Got to love those 3way switches.
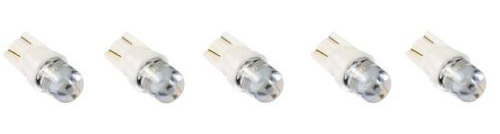
Also, by accident I got this:
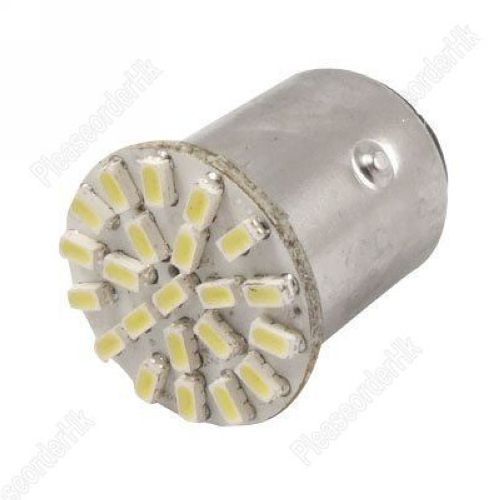
Didn't really want it, it was an accident. Well, I'll give a try and see how they work out they are suppose to be compatible with the 1157 bulbs. I'm pretty much into making my own tail lights some day.
Can't really say where I got these LED light, but most of you can guess where I'm buying off of. I can say it's coming from overseas and they were really cheap, so cheap I don't know what I will be getting let alone if I would be getting anything.
I just got bought this:
It's about 15' in length kind of a warm white color. It's not water proof so I'll be putting inside like you said gizler in the cargo area I'll wire it up with the deck light so It maybe possible to switch on and off from the back or front. Got to love those 3way switches.
Also, by accident I got this:
Didn't really want it, it was an accident. Well, I'll give a try and see how they work out they are suppose to be compatible with the 1157 bulbs. I'm pretty much into making my own tail lights some day.
Can't really say where I got these LED light, but most of you can guess where I'm buying off of. I can say it's coming from overseas and they were really cheap, so cheap I don't know what I will be getting let alone if I would be getting anything.
04-17-2014, 05:41 AM
#474
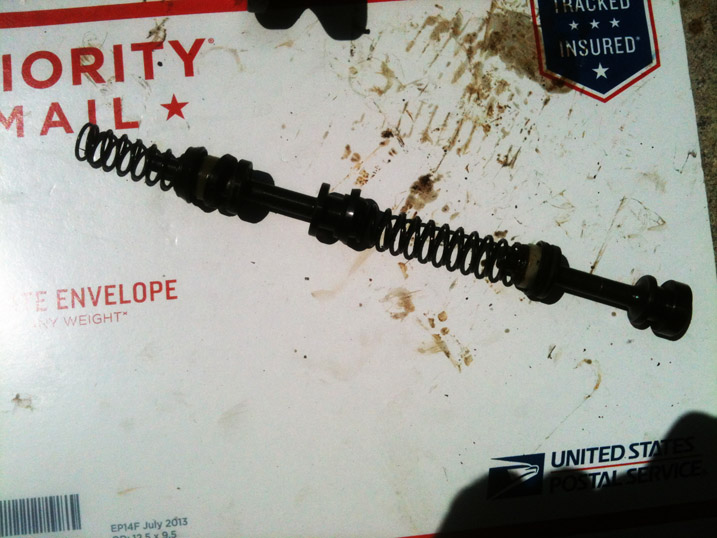
Look what arrive on my door steps yesterday, a day earlier than scheduled. Kind of nice considering it came via USPS regular mail.

Kind of a big box considering what's inside of it.
Well as it turns out the package is big the contents is small, but big bubble stuffing.
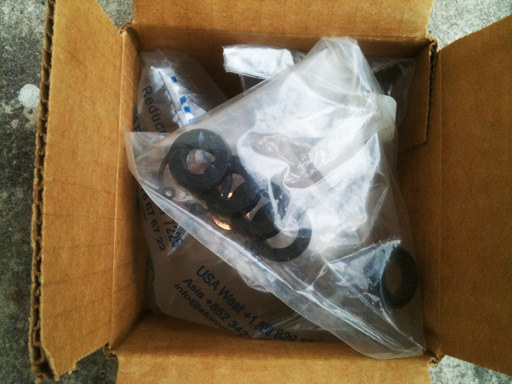
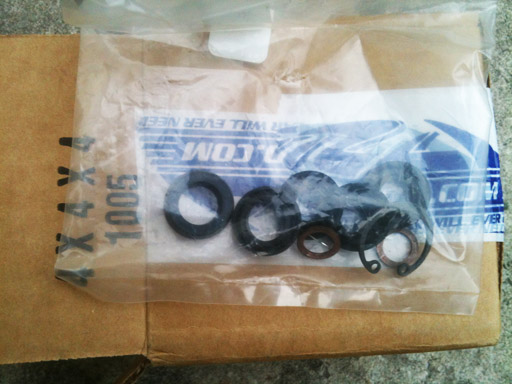
And this is all that was inside, it may have been cheaper to ship in a bubble envelope, but thank you rock auto for safely packing.
Kind of a big box considering what's inside of it.
Well as it turns out the package is big the contents is small, but big bubble stuffing.
And this is all that was inside, it may have been cheaper to ship in a bubble envelope, but thank you rock auto for safely packing.
04-17-2014, 06:09 AM
#475
Oh yeah, i forgot to add that all those LED light I just bought cost me a whooping $7.00
1) LED Dash Board lights Set of 10
2) 3ft 60 LED waterproof LED Strip
3) 2x 1157 LED Bulb for tail light.
4) 15ft 300 LED non-waterproof warm white light strip
Like I said before lets see what I get when they arrive from overseas in 20 to 30 days from now.
1) LED Dash Board lights Set of 10
2) 3ft 60 LED waterproof LED Strip
3) 2x 1157 LED Bulb for tail light.
4) 15ft 300 LED non-waterproof warm white light strip
Like I said before lets see what I get when they arrive from overseas in 20 to 30 days from now.
04-17-2014, 02:38 PM
#477
Registered User

Join Date: Jan 2008
Posts: 276
Likes: 0
Received 0 Likes
on
0 Posts
I just ordered two 15 foot rolls of the waterproof led strips from amazon and installed them under my rig as rock lights, the seem to use no power and will light up the world at night. Mine were a little more expensive as I did the three color strips. Straight white is cheap.
04-17-2014, 03:02 PM
#478
Super Moderator
Staff
iTrader: (1)
Join Date: Aug 2008
Location: Anderson Missouri
Posts: 11,787
Likes: 0
Received 25 Likes
on
22 Posts
I never thought of rebuilding my MC. Probably better then what you can buy at the parts store if going no OEM.
I seen a new Chevy commercial and they have leds in the side rails of their pickups. I am going to copy that to my 85.
I seen a new Chevy commercial and they have leds in the side rails of their pickups. I am going to copy that to my 85.
04-18-2014, 04:34 AM
#479
I just ordered two 15 foot rolls of the waterproof led strips from amazon and installed them under my rig as rock lights, the seem to use no power and will light up the world at night. Mine were a little more expensive as I did the three color strips. Straight white is cheap.
Hey Terry, I like to have OEM, but that doesn't always mean it's 100% OEM the inside rebuild kit is manufactured elsewhere. If this works out I'll order another one to rebuild the one I'm pulling off. I always thought it would be cheaper to rebuild, but that's not the case. It seems it's cheaper to buy a re-manufactured one. i got this kit because they are going out of style and it seems most manufactures are dumping the inventory of these rebuild kits opting for re-manufactured.
For me, I think the best part LED lighting is the low voltage and amps that it will draw glow brighter plus the fact that it will emanate less heat which in turn will reduce the yellowing of the lens. As gte718p stated, he got his on amazon. I checked and the waterproof LED 15ft white lights are cheaper there I think they were running about $7 to $8 a roll shipped . The Non-waterproof version I got for the inside were about $3.25 a roll shipped.
04-18-2014, 05:04 AM
#480
2nd Topper Sliding Glass Frame Repair
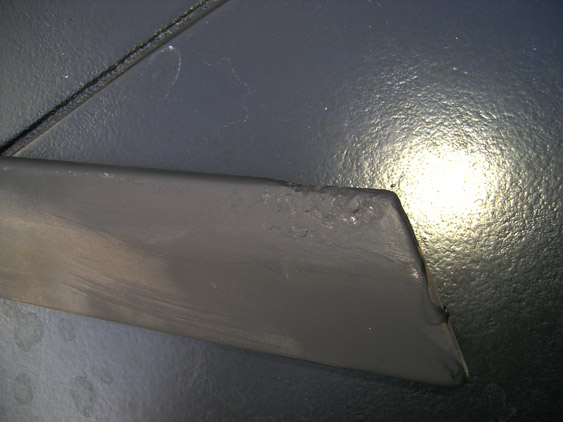
Okay back to the topper, I was able to clean up the frame with a wire brush and wire wheel. Didn't want to really get into grinding as this is pretty thin sheet metal. Not saying it can't be grind just to chicken too. After using the wire wheel I sprayed rustoleums rust reformer still not the best product, but it helps. Here's what it looks like at this point.
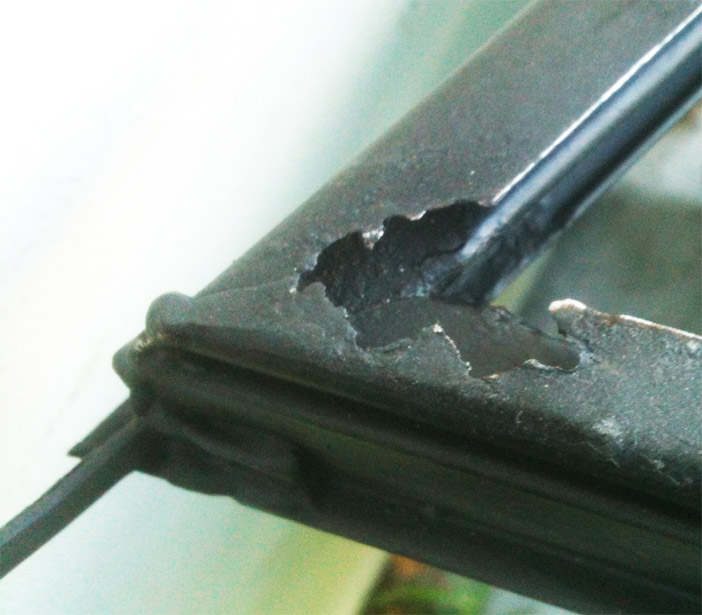
That mess is where water sits and never get to drain out. It must have flooded out as that rusted side the inside of the frame not on the outside as you would think and this rust under the trim wrapped in there so it would was hard for me to spot until I took off the trim which was a deal considering the rust had seized to the trim.
In order to repair this corner piece I decided to cut a small piece of metal and bond it to the outside of the frame this would help keep the trim firm on the there. I used Epoxy 88 I borrowed from my neighbor which they use on airplanes for various stuff. Cut a piece of aluminum to shape of the damaged area. This piece of aluminum is pretty thin just enough to work with. You can see the piece in the picture I out lined the cut in red.
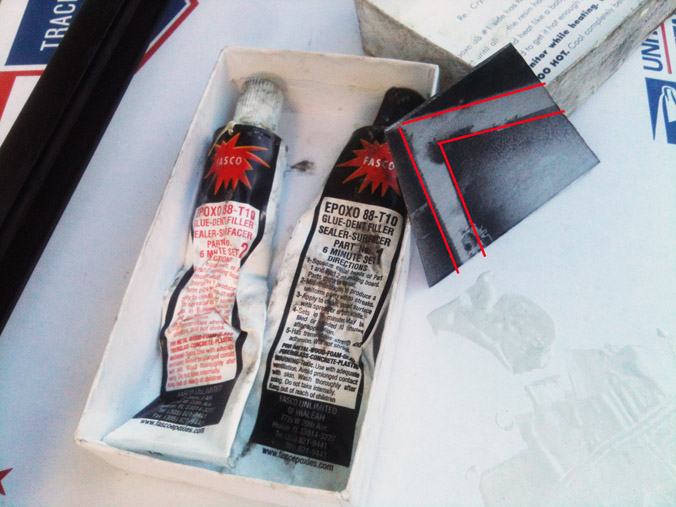
Once I got that all cut I started cleaning the bur off the edges and then started sanding the edges to fit. As i was doing that, it dawned on me that I could bond it on the side of the frame and then use that all-metal filler to smooth it out. I went and mixed up the epoxy and glued it on the inside and used some cardboard to keep pressure on the edges.
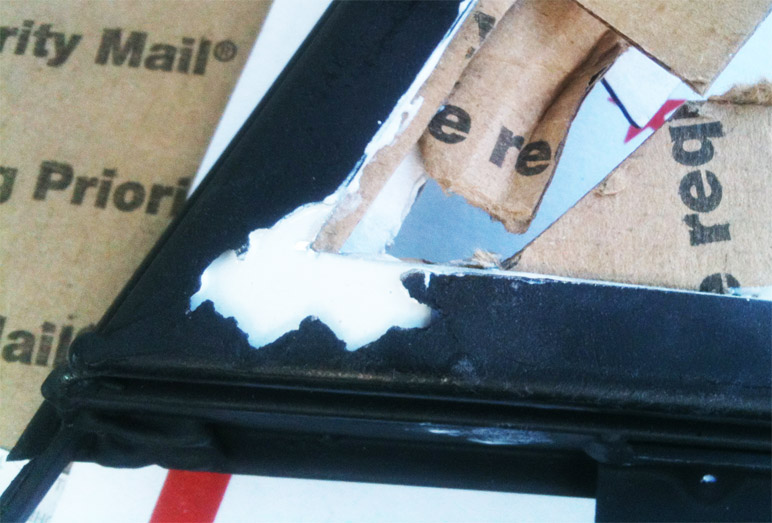
I'll finish it up today and we shall see how it turns out. shouldn't be too bad. And that epoxy 88 is pretty tough like fiberglass.
That mess is where water sits and never get to drain out. It must have flooded out as that rusted side the inside of the frame not on the outside as you would think and this rust under the trim wrapped in there so it would was hard for me to spot until I took off the trim which was a deal considering the rust had seized to the trim.
In order to repair this corner piece I decided to cut a small piece of metal and bond it to the outside of the frame this would help keep the trim firm on the there. I used Epoxy 88 I borrowed from my neighbor which they use on airplanes for various stuff. Cut a piece of aluminum to shape of the damaged area. This piece of aluminum is pretty thin just enough to work with. You can see the piece in the picture I out lined the cut in red.
Once I got that all cut I started cleaning the bur off the edges and then started sanding the edges to fit. As i was doing that, it dawned on me that I could bond it on the side of the frame and then use that all-metal filler to smooth it out. I went and mixed up the epoxy and glued it on the inside and used some cardboard to keep pressure on the edges.
I'll finish it up today and we shall see how it turns out. shouldn't be too bad. And that epoxy 88 is pretty tough like fiberglass.


