Elvota's 3.4 swap
#81
Sounds like your ECU is getting reset everytime you turn off your key. Do you have the ECU wired so it has power with the key off? Some codes are only thrown after 2 cool down cycles (P0420 cat efficiency is one of them), if your ECU gets reset every time the key is turned off it would never see the second cool down cycle...hince no code thrown.
#82
That could be the reason im not throwing those codes yet, but i havent had the chance to run it that many times to really see. Im sure after i get a chance to drive it i will get the codes eventualy. My problem is flooding gas and im not seeming to be getting power to my mass airflow meter. the codes im throwing right now are p0100 and p0110 both are MAF related one for the tmep and one for circuit malfuntion. Im getting ohm readings on the MAF so i think its good i think i have a dead spot in my wiring not giving the MAF power when it should
#83
Steve,
I didn't want to post until I had the chance to check the schematic that you posted, versus what is under the hood of my truck. I confirmed the configuration of your drawing. Color me VERY impressed that you had it figured out from my pictures (and, obviously, your personal knowledge!) I had been somewhat vague about the set-up, since it was based on the design from ORS, and I didn't want to step on any toes.
Your schematic is dead nuts on (technical term) to what I installed on my conversion. I have thrown no codes in relation to the evap system. As a matter of fact, the only codes that I have seen, at all, are in relation to the second O2 sensor - a common problem, as far as I have read.
I would have probably used the big box evap, if the '02 had had one (all the evap stuff is on top of the fuel tank), but using the old evap seems to have worked well, and it should for you, too - saving a bunch of space in the bargain.
Good luck!
Raj
#84
Thanks for the confirmation Brenknraj. I kind a guessed your setup was ORS inspired and understand why customers of ORS can't post.
But, myself not being a customer of ORS... I think we are in the clear. It took a little while looking at your setup and other vehicle pics and vacuum diagrams that I barely understand, so it's nice to know I got it figured out.
But, myself not being a customer of ORS... I think we are in the clear. It took a little while looking at your setup and other vehicle pics and vacuum diagrams that I barely understand, so it's nice to know I got it figured out.

#85
Hmmm... what issues have you had with the 2nd O2? I bought a new O2 for in front of the cat, because that seems the most critical working with the ECM and engine. My plan was to use the old O2 I had from the 3.0 setup, or use a O2 I scrounged from the 3.4 donor truck and place that behind the cat.
#86
Been too long since I checked the code number, Steve - I can't remember which one it was. I think it may have something to do with having 2 high flow Magnaflow cats, compared to the factory dual cat set-up. I'm pretty sure that Dale was running into similar problems (although his is only a single cat), and he added an O2 simulator to get rid of the issue.
I do know that the fault seems to crop up whenever I've been running slow for an extended period of time, like traffic jams or trail riding.
I do know that the fault seems to crop up whenever I've been running slow for an extended period of time, like traffic jams or trail riding.
#87
Been too long since I checked the code number, Steve - I can't remember which one it was. I think it may have something to do with having 2 high flow Magnaflow cats, compared to the factory dual cat set-up. I'm pretty sure that Dale was running into similar problems (although his is only a single cat), and he added an O2 simulator to get rid of the issue.
 Probably only a problem if the Donor truck had a 2 cat system.
#88
#89
#90
I do know the the EGR port on the manifold was blocked off from the factory, so my guess is that it did not have elaborate emissions... hopefully meaning a single cat.
#91
I believe that 2001 and newer are equipt with 2 cats for the more strict emission laws. I know you were saying that you dont want codes however the rear o2 simply monitors if the cat is working right and is pretty much usless for anything other than that. the front is the important one cause it controls the a/f ratio
#92
I can gaurentee you only had one cat in that model 4runner
#93
3.4 Install
Got a lot accomplished today. 
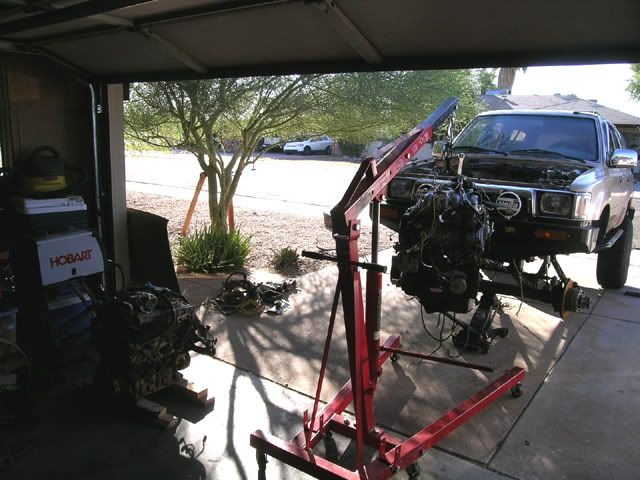
3.4 mill going in:
Made sure to be out of the way of the roof this time:
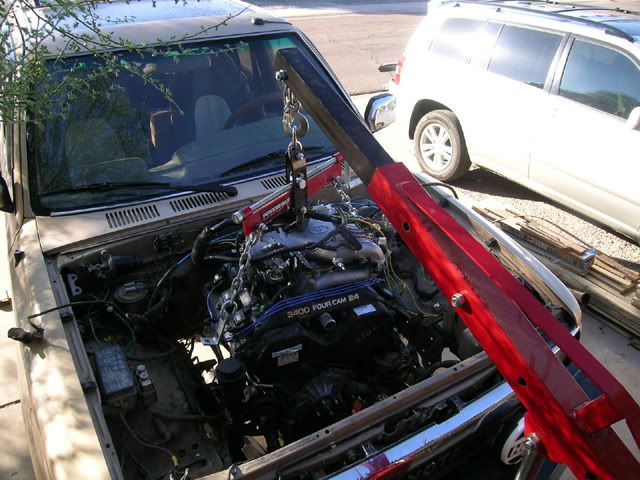
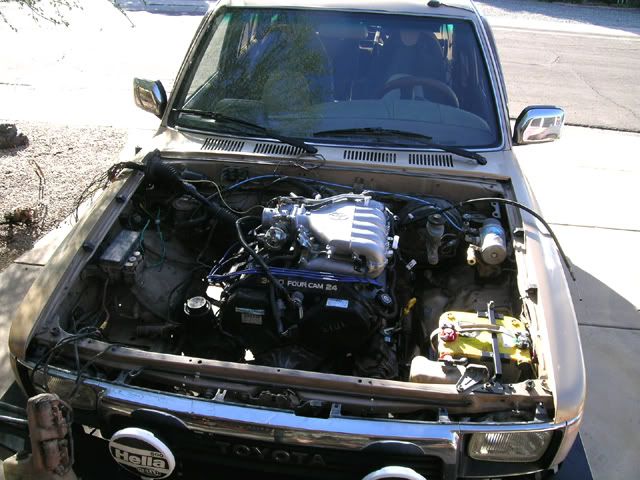
Wallah... perfect fit:
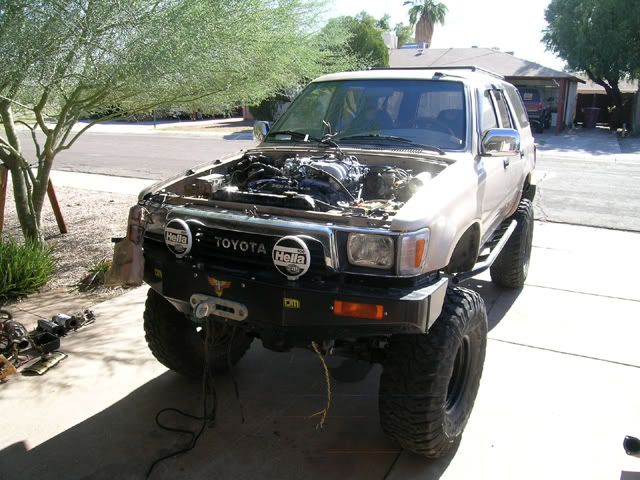
Wheels back on. Starting to look drivable again.:
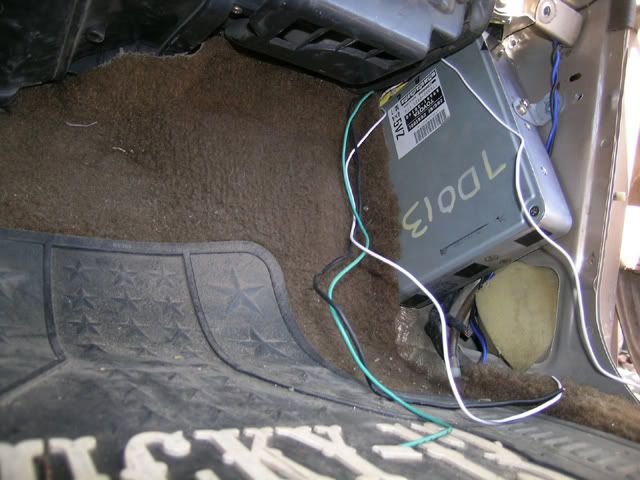
Managed to get the 3.4 plugs and harness pulled through the 3.0 firewall hole. Not much length to play with, but was able to get it all stuffed in there. Test fit the kick panel and seems like I won't have an issue getting that back on:
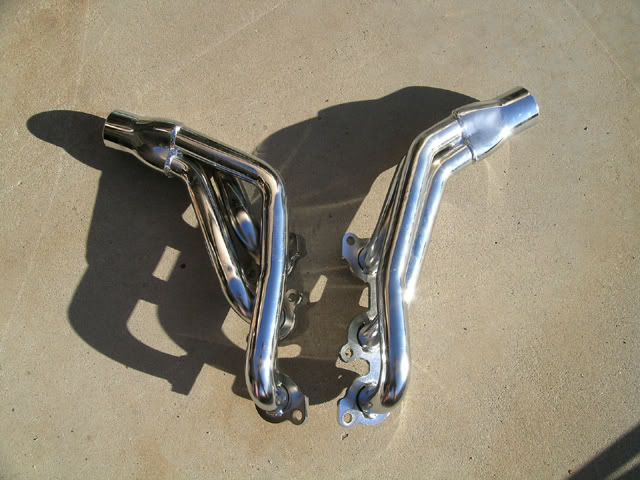
Got the headers out of the box. Kinda look like angels wings. Hope she flies when this is all done :
:
Couple notes:
The 3.0 fuel line mates no problem to the factory hardline on the PS once you have rotated the 3.4 line from the DS to the PS. Male to female, perfect thread match... no adapter needed.
My 3.0 alt is close to the steering shaft, but looks like there will be enough belt adjustment for it not to be an issue.
Then it was on to the tranny.... that did not go as well...

3.4 mill going in:

Made sure to be out of the way of the roof this time:

Wallah... perfect fit:

Wheels back on. Starting to look drivable again.:

Managed to get the 3.4 plugs and harness pulled through the 3.0 firewall hole. Not much length to play with, but was able to get it all stuffed in there. Test fit the kick panel and seems like I won't have an issue getting that back on:

Got the headers out of the box. Kinda look like angels wings. Hope she flies when this is all done
 :
:
Couple notes:
The 3.0 fuel line mates no problem to the factory hardline on the PS once you have rotated the 3.4 line from the DS to the PS. Male to female, perfect thread match... no adapter needed.
My 3.0 alt is close to the steering shaft, but looks like there will be enough belt adjustment for it not to be an issue.
Then it was on to the tranny.... that did not go as well...

Last edited by Elvota; 12-05-2007 at 10:16 PM.
#94
Tranny Install
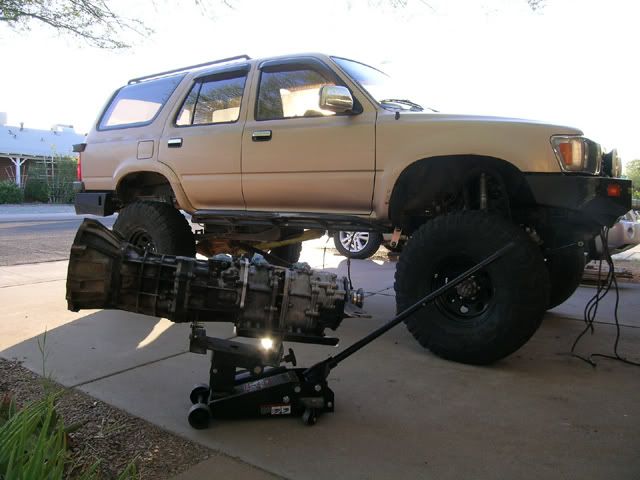
Although the FROR crossmember and related armor combined with dual transfer cases work amazingly well on the trail, they have made the tranny install one of the hardest parts of this swap.
Getting ready to stuff this under that:
I had in it under, all lined up to try and bring the 3.4 and R150 together when I suddenly realized I had forgotten to put in the clutch!! Man, that would have sucked. What a dufus... just rushing to much. Anyway, caught my obvious mistake before I got any farther.
Flywheel on:
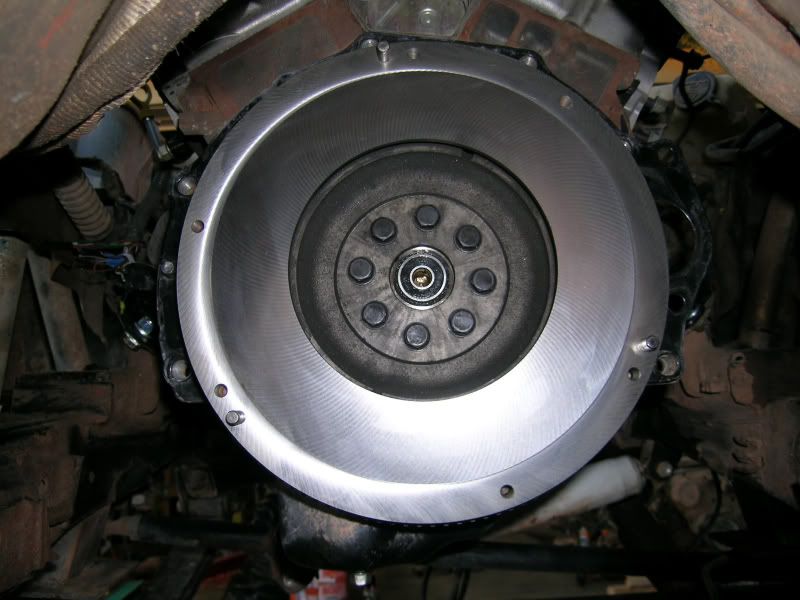
Pressure plate and clutch on:
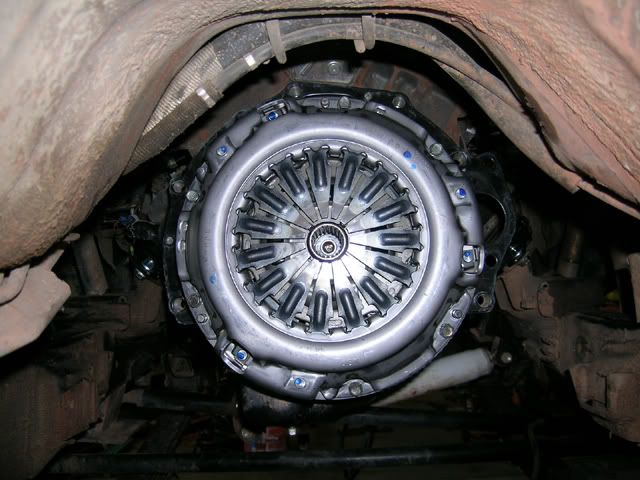
After that, I spent a good hour trying to get the dang thing to line up and come together with zero luck. Just figures with the magnitude of this entire project that something as simple as a clutch replacement stops me cold.
Luckily, Westy was free and came over to join in on the fight. Even my sweet girlfriend was called out into the garage... but to no avail. We finally decided that the FROR crossmember had to come off the transfer to even have a chance.
Once removed, we finally got things to start to line up. Definitely wasn't easy, but eventually we conquered.
After that, I got the crossmember back on, starter on, front DS on... and a few other things.
Tomorrow I hope to get the power steering line made up that will mate my 3.0 box to the 3.4 pump and eliminate the now deleted ABS box. Then on to the headers and exhaust with a possible key turn this weekend.
Getting ready to stuff this under that:

I had in it under, all lined up to try and bring the 3.4 and R150 together when I suddenly realized I had forgotten to put in the clutch!! Man, that would have sucked. What a dufus... just rushing to much. Anyway, caught my obvious mistake before I got any farther.
Flywheel on:

Pressure plate and clutch on:

After that, I spent a good hour trying to get the dang thing to line up and come together with zero luck. Just figures with the magnitude of this entire project that something as simple as a clutch replacement stops me cold.

Luckily, Westy was free and came over to join in on the fight. Even my sweet girlfriend was called out into the garage... but to no avail. We finally decided that the FROR crossmember had to come off the transfer to even have a chance.
Once removed, we finally got things to start to line up. Definitely wasn't easy, but eventually we conquered.

After that, I got the crossmember back on, starter on, front DS on... and a few other things.
Tomorrow I hope to get the power steering line made up that will mate my 3.0 box to the 3.4 pump and eliminate the now deleted ABS box. Then on to the headers and exhaust with a possible key turn this weekend.

#95
#96
#97
What kind of clutch did you go with? I went with marlins and it tuned out my throwout bearing was too long and was pressing on the pressure plate. I noticed this after i bleed the lines and my pedal was real stiff also i was tightning the crank bolt using the 5th gear 4wd method and it didnt engage so i had to order a smaller one pull the tranny and do it all again lol it sucked but its good now.
x2 its good for people to know about the fuel lines
x2 its good for people to know about the fuel lines
#98
I went with all Toyota parts in regards to the clutch. I had a Centerforce II on the 3.0, and the pedal always felt hard... especially when I drove a friends with the factory assembly.
I had understood that the 3.4 throwout bearing was to long, so I put in a new throw out bearing from a 3.0. Hopefully I wont have issues when I get the clutch bled, because the tranny is always a pain to get back together.
I noticed the soft section of my clutch line was heat checked and looked like it wouldn't last much longer. I had a stainless brake line left over from Marlin and it had the same thread as the slave cylinder and hard line from the master. So, I used that and it seems to be a perfect length. Still need to secure it away from the header:
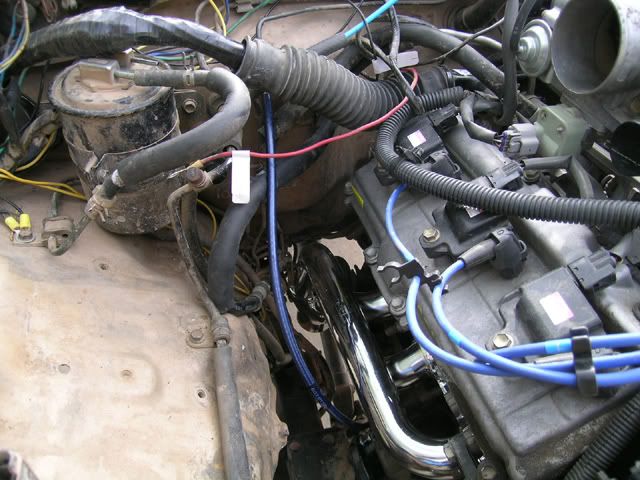
Plus it's blue and matches my spark plug wires and new Amsoil air filter.
I had understood that the 3.4 throwout bearing was to long, so I put in a new throw out bearing from a 3.0. Hopefully I wont have issues when I get the clutch bled, because the tranny is always a pain to get back together.
I noticed the soft section of my clutch line was heat checked and looked like it wouldn't last much longer. I had a stainless brake line left over from Marlin and it had the same thread as the slave cylinder and hard line from the master. So, I used that and it seems to be a perfect length. Still need to secure it away from the header:

Plus it's blue and matches my spark plug wires and new Amsoil air filter.

#100
Power Steering Lines
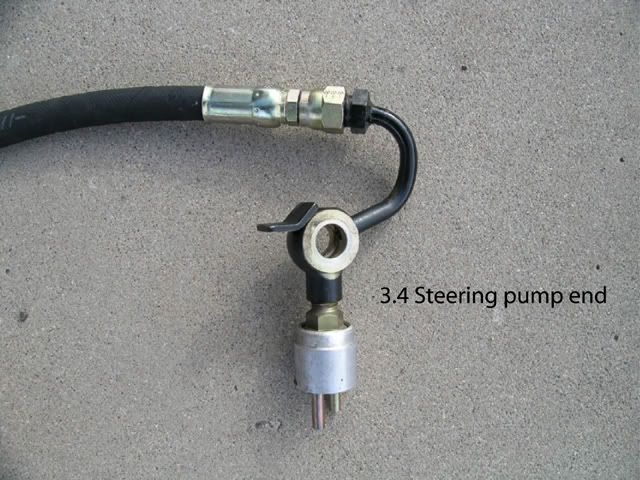
Found a guy just up the street from me (Scottsdale Automotive) that was willing and able to convert my PS line since I had removed the ABS block. Any locals who are interested with specifics, send me a PM and I'll give you his location and contact info.
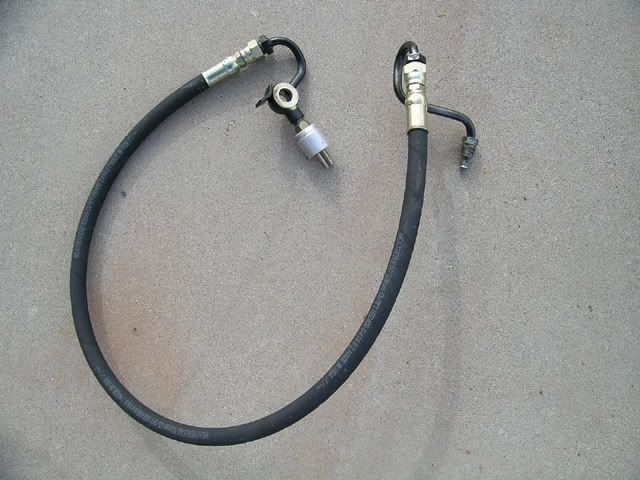
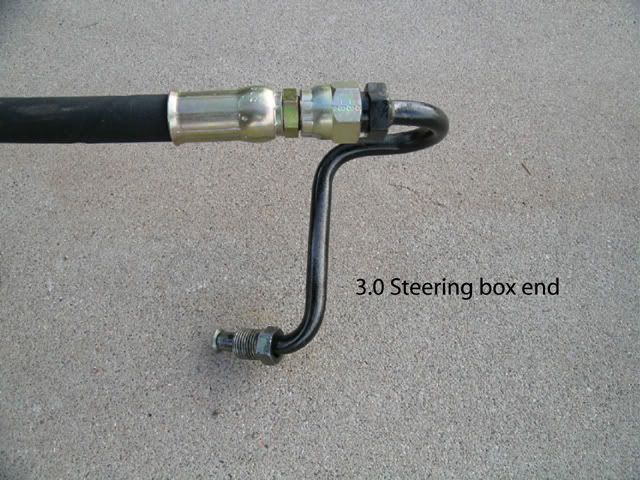
Basically, he cut off the 3.0 box hard line end and the 3.4 pump hard line end and soldered them onto a new standard fitting. Then the fitting was attached to a section of high pressure hose on which he crimped the ends. After tax...$60. It's possible that I could have found a cheaper source, but non-ABS 3.0 lines from salvage would have lost the 3.4 PS idle up feature... and I thought it would be nice to keep that if possible. I consider ORS, but this route was $30 less, and supported a small local guy.
Pics of the finished product:
I had planned to keep the hard line that spanned the frame rails just under the radiator, but it would have added a couple of connections and upped the cost. But now I needed a way to support this new line from the box to the pump.
Then I remembered I like to weld stuff for no reason, so I just found a length of tube and welded it between the frame rails:
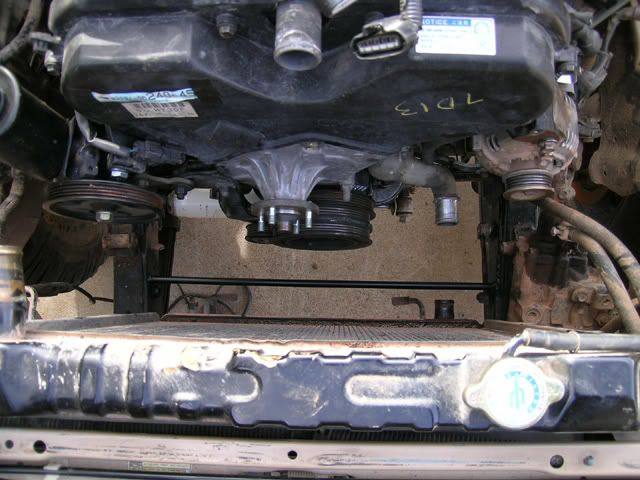
Now I can attach the new high pressure line as well as my return line to this support and keep everything tight and out of harms way. Nice.
Here it is with the new line loosely installed. I'll zip tie the return side when I get that plumbed and be good to go:
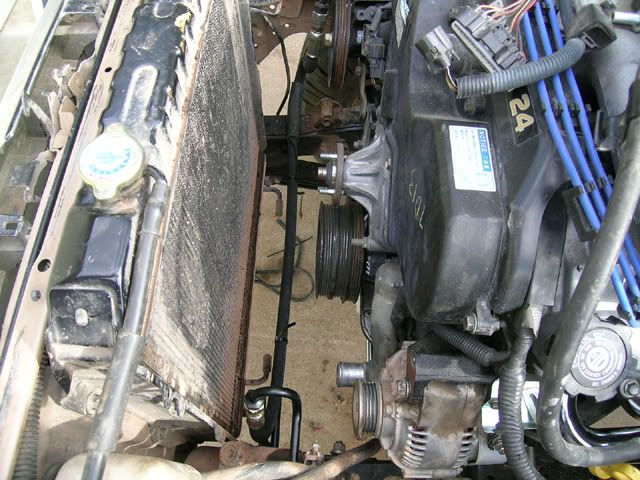
One last upside of this new line is that it is now somewhat standard, and I should be able to replace it at many locations should I need to in the future. Very helpful for road trips.
Basically, he cut off the 3.0 box hard line end and the 3.4 pump hard line end and soldered them onto a new standard fitting. Then the fitting was attached to a section of high pressure hose on which he crimped the ends. After tax...$60. It's possible that I could have found a cheaper source, but non-ABS 3.0 lines from salvage would have lost the 3.4 PS idle up feature... and I thought it would be nice to keep that if possible. I consider ORS, but this route was $30 less, and supported a small local guy.

Pics of the finished product:


I had planned to keep the hard line that spanned the frame rails just under the radiator, but it would have added a couple of connections and upped the cost. But now I needed a way to support this new line from the box to the pump.

Then I remembered I like to weld stuff for no reason, so I just found a length of tube and welded it between the frame rails:

Now I can attach the new high pressure line as well as my return line to this support and keep everything tight and out of harms way. Nice.

Here it is with the new line loosely installed. I'll zip tie the return side when I get that plumbed and be good to go:

One last upside of this new line is that it is now somewhat standard, and I should be able to replace it at many locations should I need to in the future. Very helpful for road trips.


