When you click on links to various merchants on this site and make a purchase, this can result in this site earning a commission. Affiliate programs and affiliations include, but are not limited to, the eBay Partner Network.
The Spec Stage 2+ clutch is nice and perfectly streetable for daily driving, pedal pressure isn't excessive and engagement is easy/smooth though it did take a bit getting used to and I stalled it pulling out a couple times in the first few weeks (maybe due to the slightly lighter flywheel). There was a bit of chatter occasionally for the first couple hundred miles until it broke in, but nothing that caused too much concern. If you're on and off the clutch a bunch and want to be able to slip it a bit more, maybe try their stage 1 clutch (probably not an issue if you have low gearing or a dual t-case). The adapter kit I'm running uses the 3.0 P/U-4runner clutch and pressure plate, their base "stage 1" clutch kit is rated to 350 ft/lbs and is reasonably priced ->click link<-
Here's the description of the different clutches they have ->click link<-
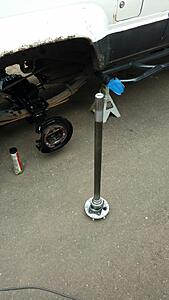
I'm not sure if I put it in here somewhere, but I also swapped out to a Landcruiser clutch master cylinder - FJ60, I believe. The stock 4runner MC is 3/4" and the Landcruiser is 7/8" - I dind't even try the stock 4runner MC, but it may work just fine (and if it moves enough fluid, it'd be a lighter feeling pedal with more travel to engage/disengage than the Landcruiser part)
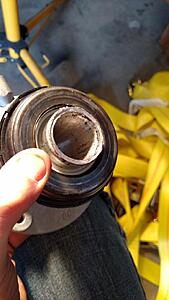
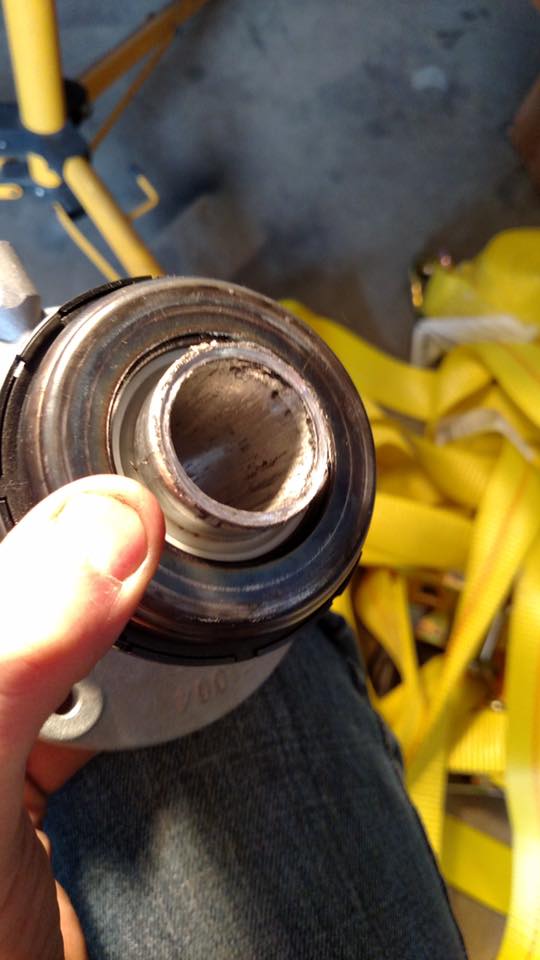
One slight problem I had using the Chevy T50 internal throw out bearing was, after I got the swap running, I started hearing a "ch-ch-ch" type rubbing/scraping noise from the bellhousing area (1UZFESwapKit.com adapter) as the engine warmed up. Eventually the noise went away, but it didn't make me feel better about what was making it to begin with. Props to Nick on FB for sharing this bit of info awhile ago (his pic, not mine), saved me a bunch of time worrying over nothing.
This is what he had to say, "There's a good chance the spline portion of the clutch disc is rubbing the aluminum inner guide tube/sleeve of the throw out bearing. I flap wheeled mine down about a 1/16" to give it a little more clearance. The guys for Marlin crawler had the same issue. But they said if you rev the engine a few times it'll clearance itself. The truck clutches seem to be a fraction thicker then what he designed his kits around.
The couple I've seen that make noise that, goes away pretty soon after it clearances itself and works no problem after. Beats having to pull the trans out."
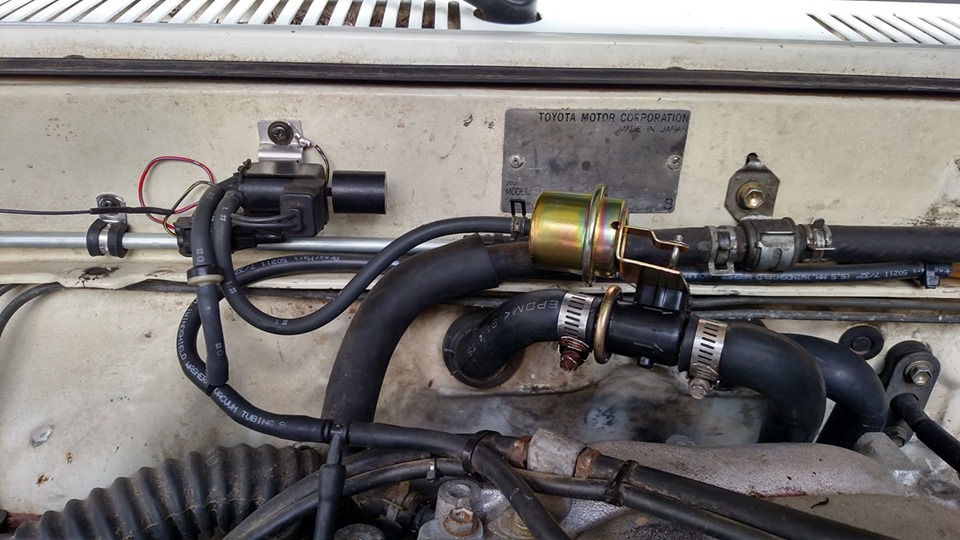
The cable actuated heater control valve wouldn't work with my swap, so this is what I came up with instead. A 5/8" vacuum actuated heater valve (normally closed, opens when vacuum is applied) with a simple vacuum solenoid wired to turn on when I press the A/C button (haven't had A/C in over a decade). This definitely dropped in-cab temps a bit, and the air coming out of the vents is cooler, since coolant isn't flowing through the heater core all the time.
The vacuum source hose before the solenoid has a small one-way check valve in it so the valve is less likely to close when the engine is making low vacuum (wide open throttle, for example). The vacuum valve I used is a
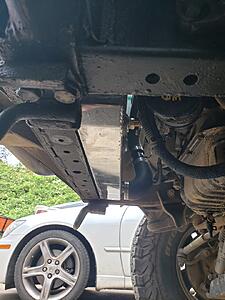
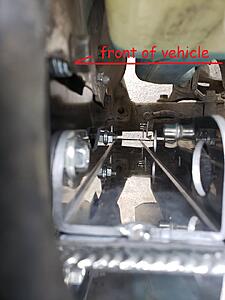
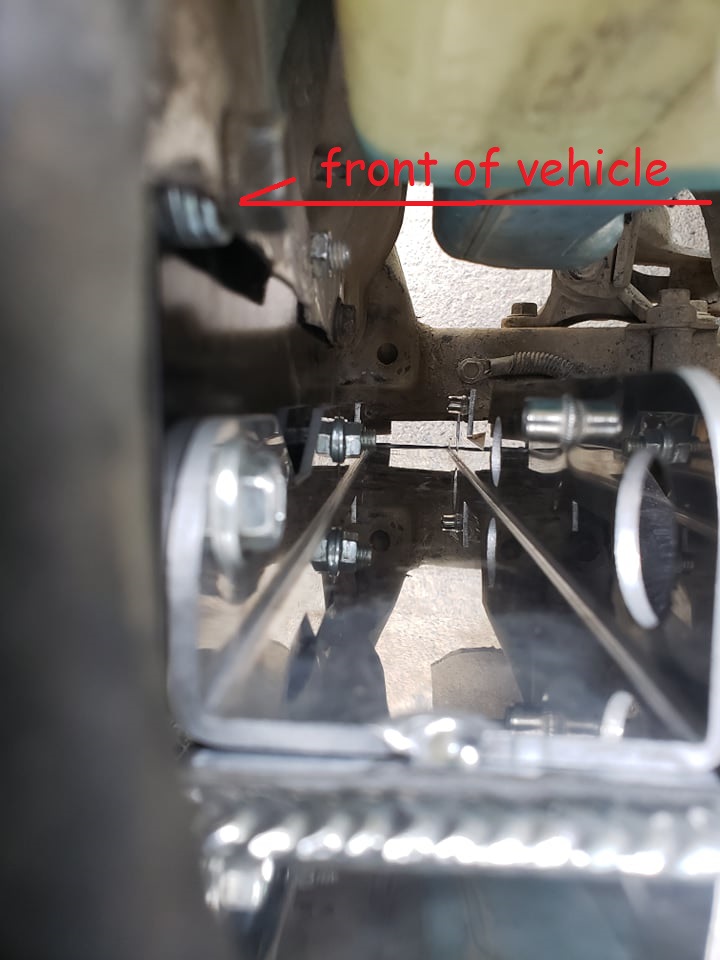
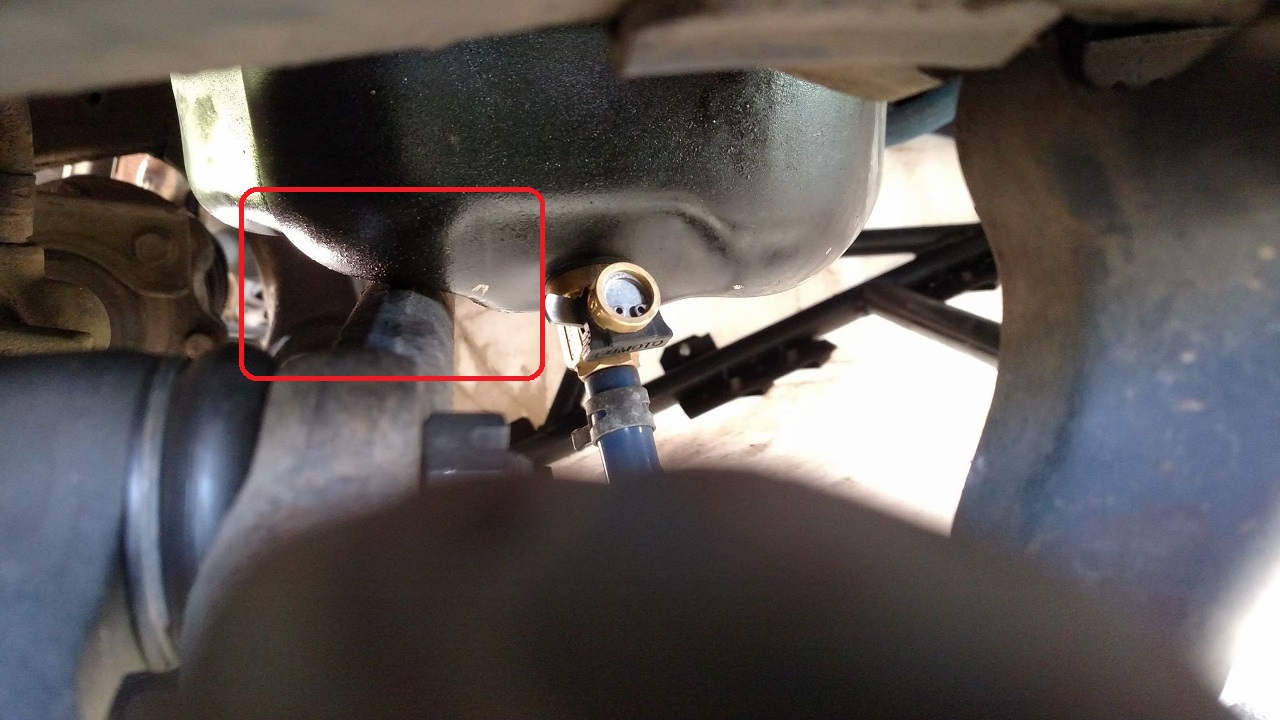
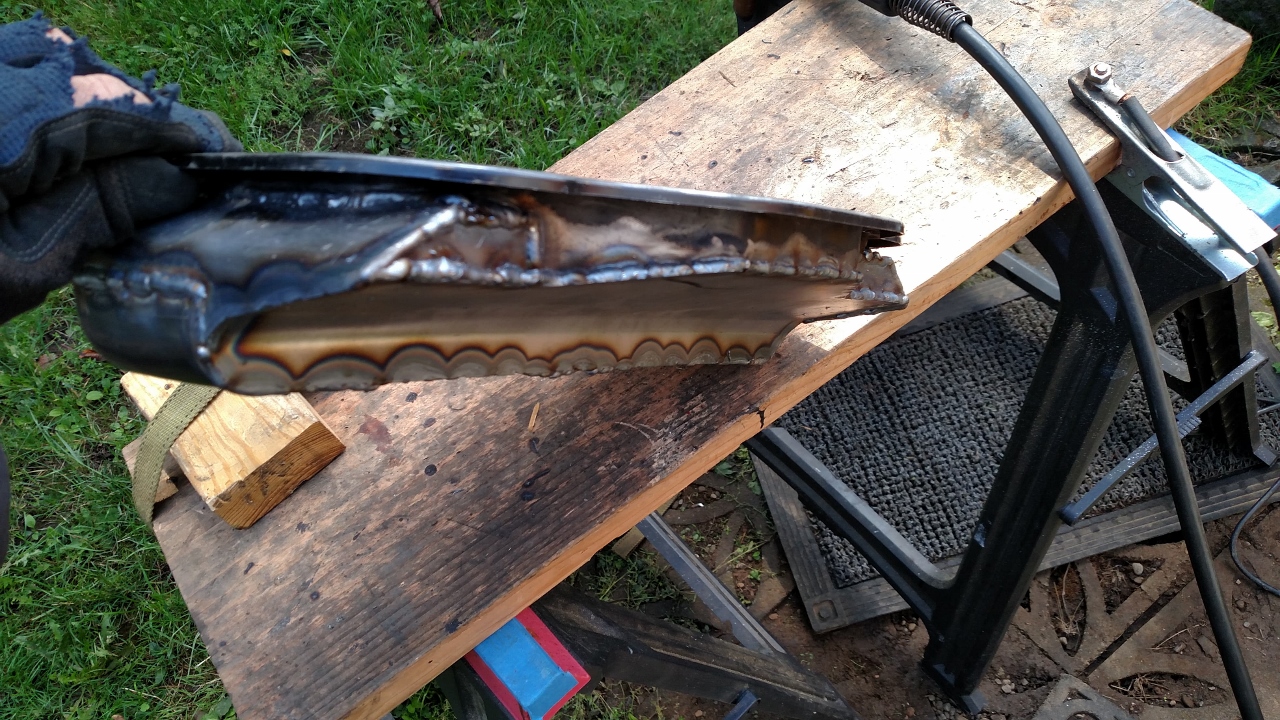
I used to have a small amount of space between the steering relay rod and the oil pan (about 1/8"), but I guess the rubber mounts settled a bit because it just barely touches now.
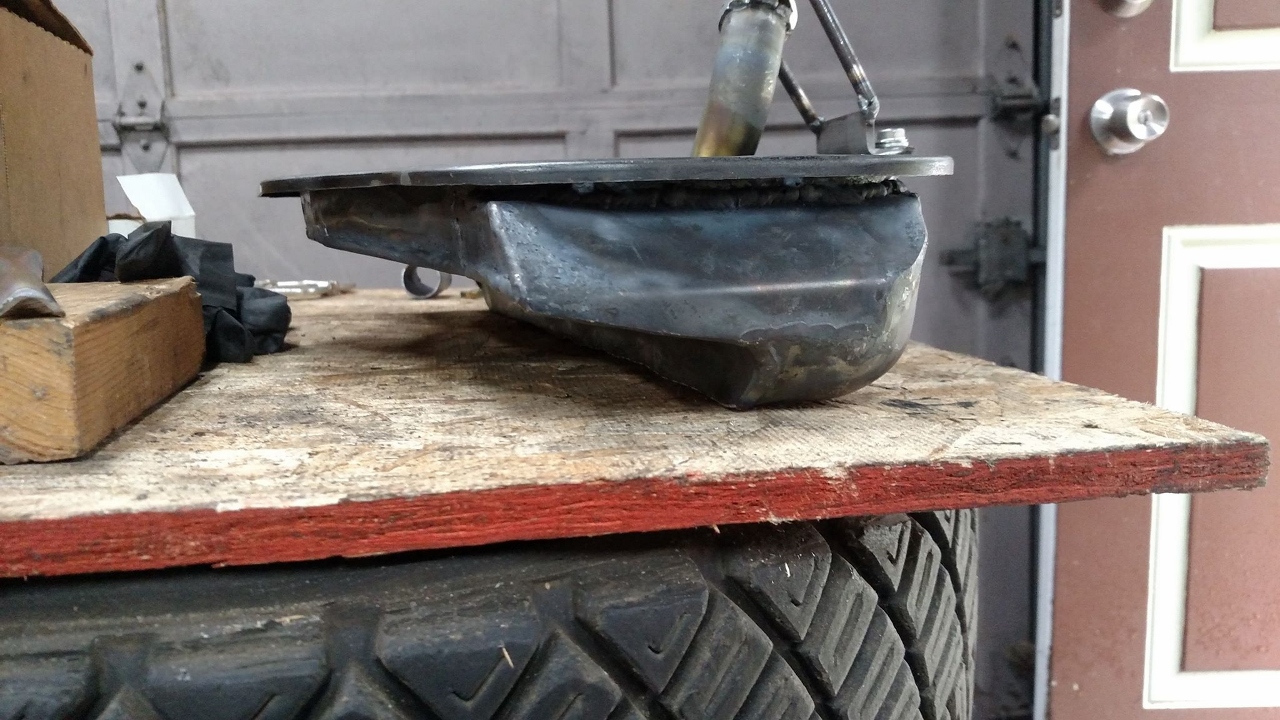
I widened it 1.5" on both sides, added some trap-door baffles, and raised the rear section just over an inch. There's a bit more work to do, but it's almost done.
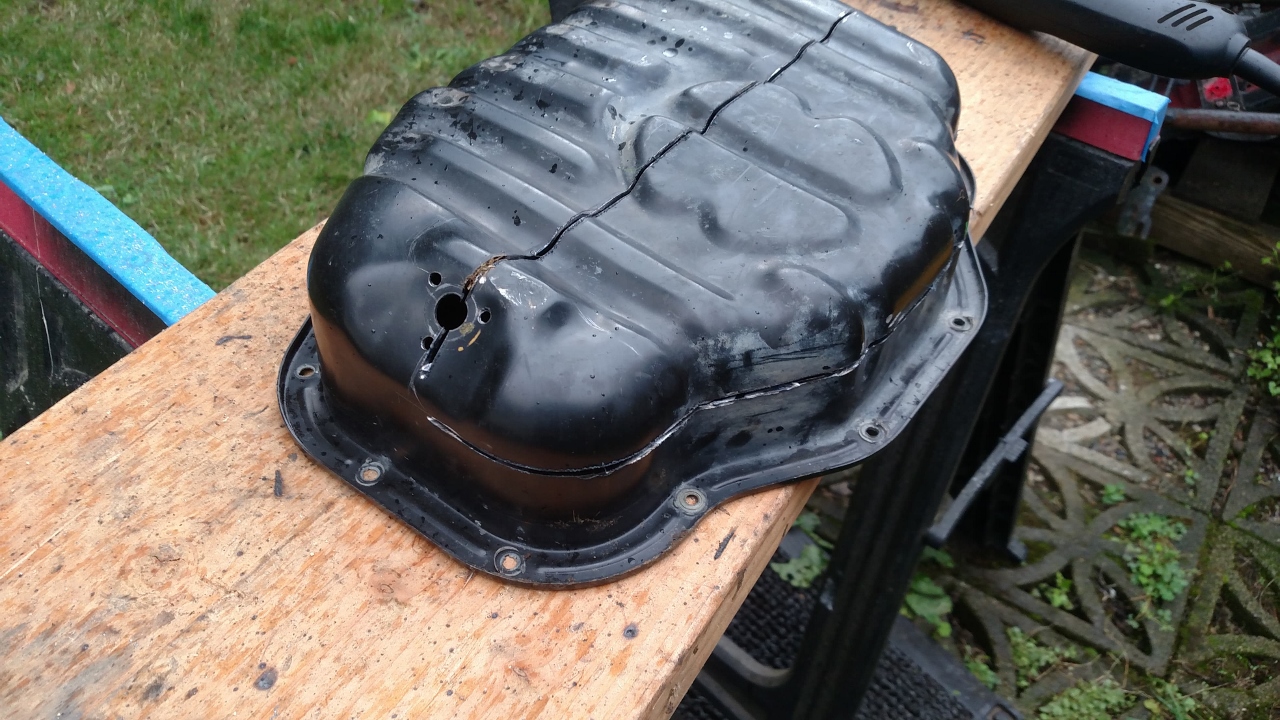
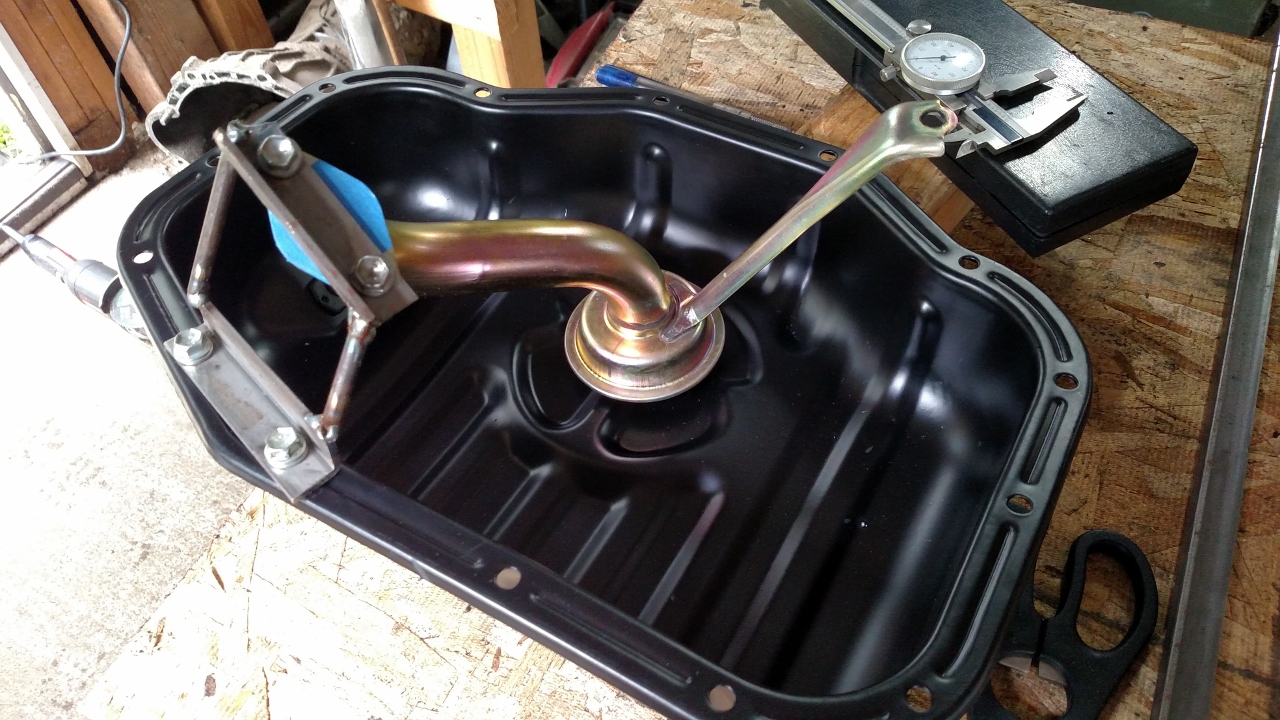
The toughest part was figuring out how to build an accurate jig so I could fab up a new oil pickup (it was originally at the rear of the pan). Luckily, I took a bunch of measurements from the junkyard engine I pulled it out of (the pic is of a new/unused oil pan I bought awhile back)
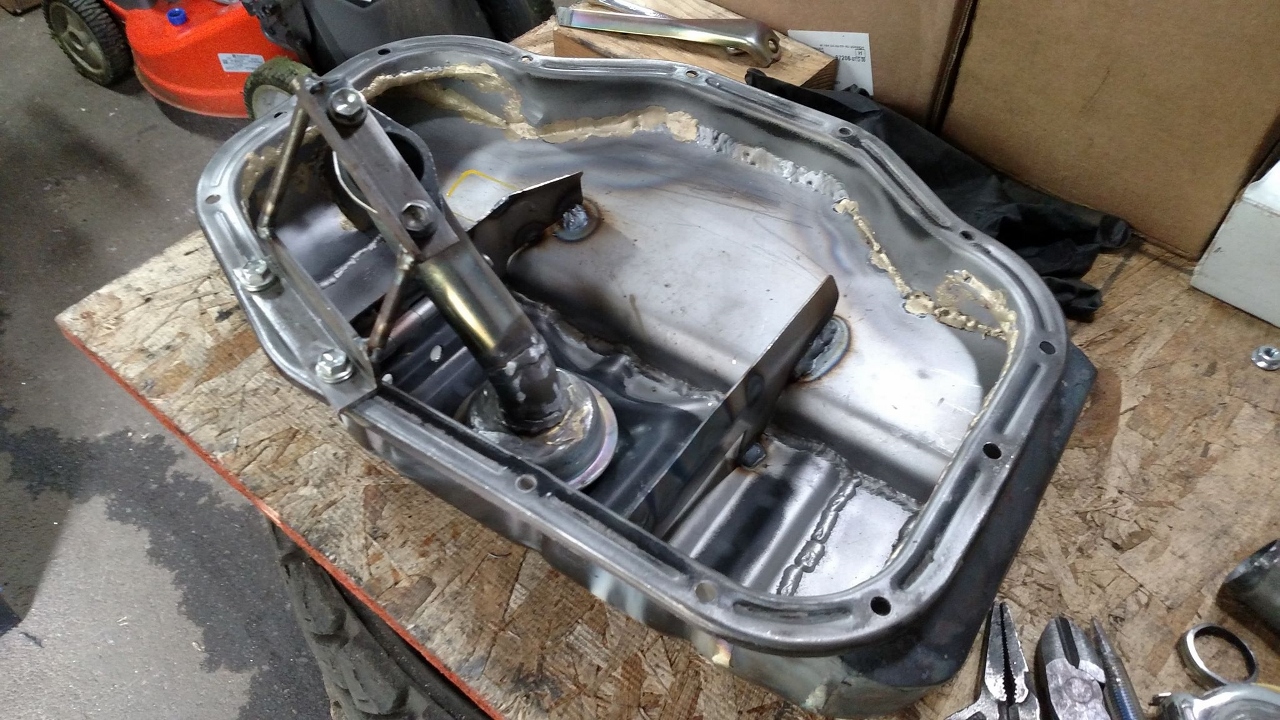
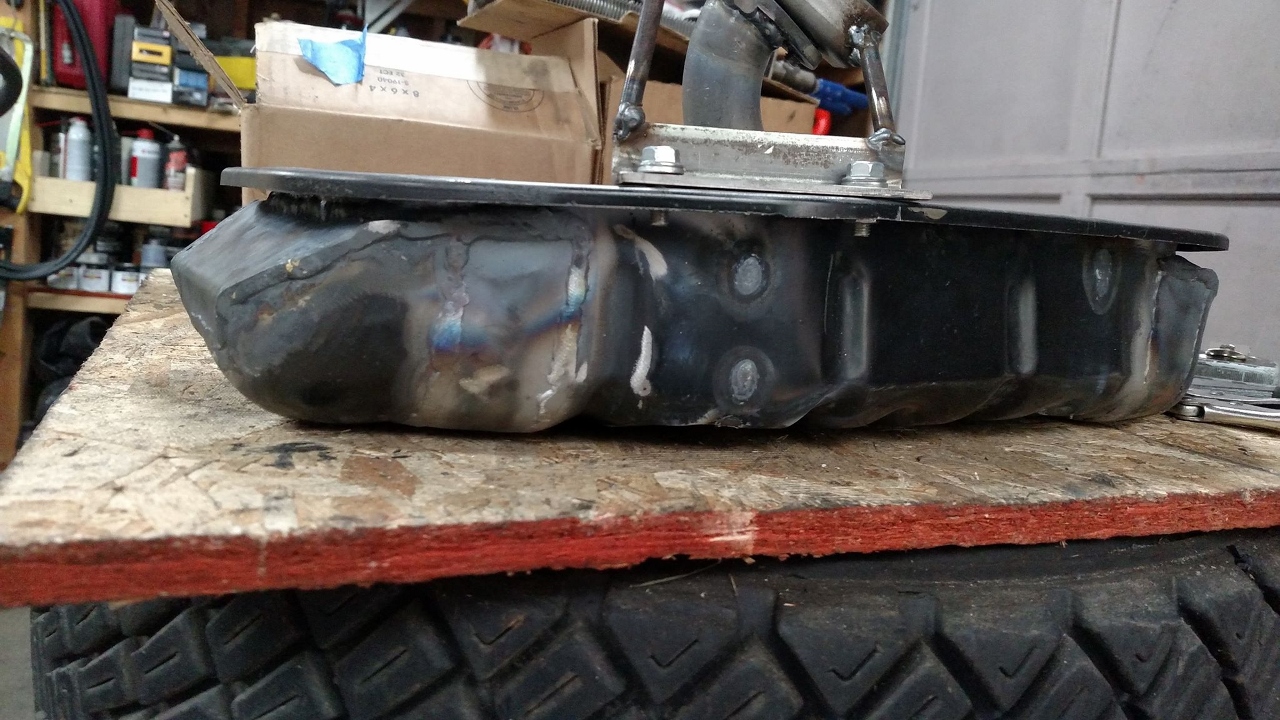
Jig bolted up to the new pan, oil pickup chopped and welded. Welds are ground down and will be brass brazed to ensure there are no pinholes. All the seams on the inside of the oil pan are already brass brazed to get rid of pinhole leaks (everything was stitch welded to reduce warpage)
The volume of a stock LS400 pan is 20.5 cups, this one is 19 cups. So I did lose a tiny bit of capacity (I can gain that back when I change to a remote oil filter mount). I might also chop up the pan I'm taking off to build another with more volume (I don't think I needed the rear section quite that high)
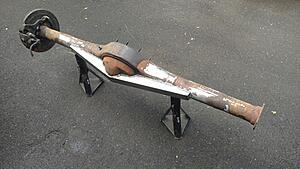
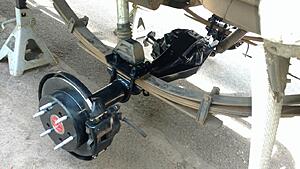
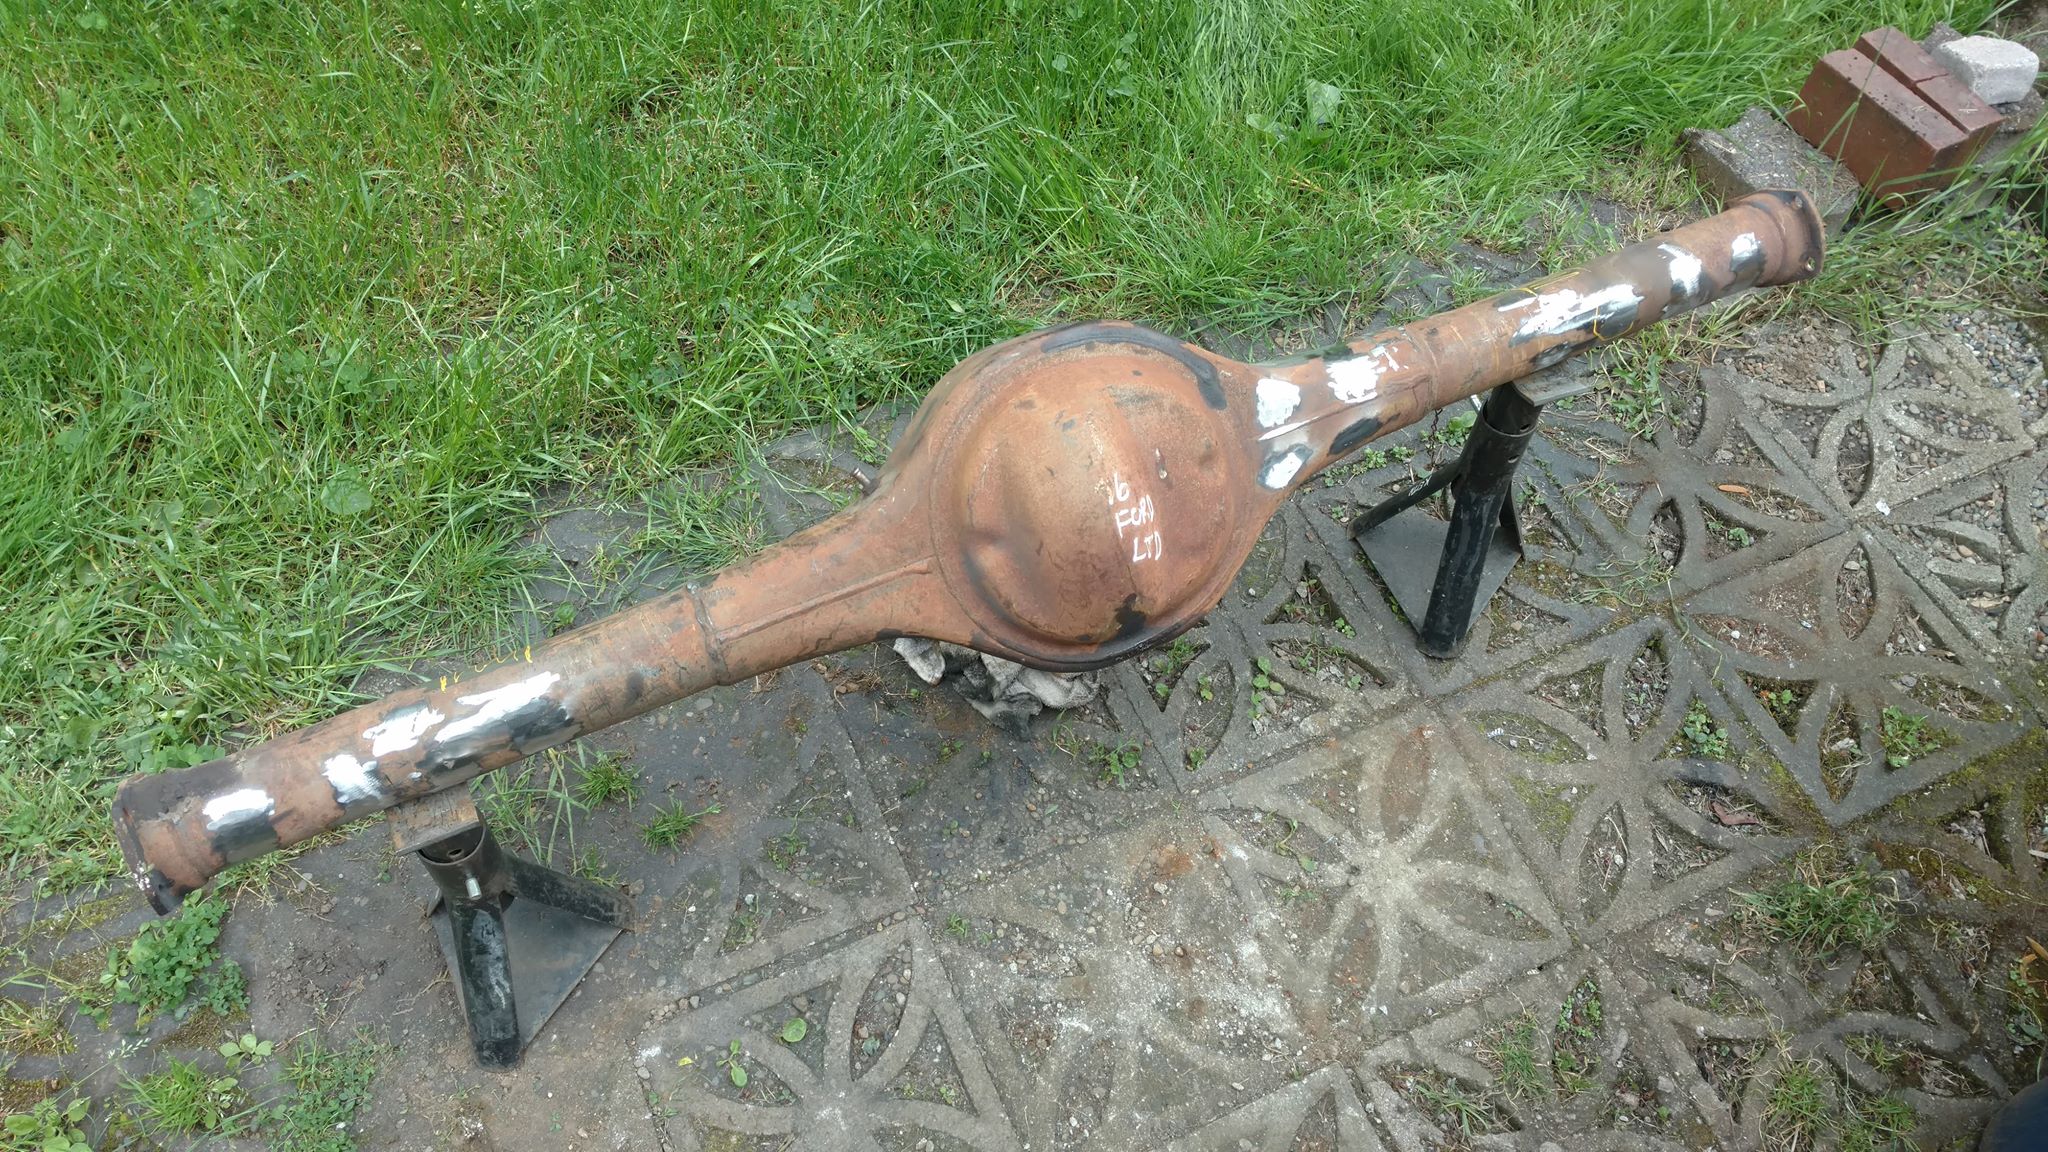
whenever you upgrade one part, expect another to become the weak link. last month, the 8" e-locker rear finally gave up the ghost, so a new rear axle seemed appropriate. I ran some numbers, and for a little bit more than what it would cost me to build a stout 8.4" Toyota axle, I could build a bullet proof Ford 9". This axle hasn't been used for nearly 30 years, but aftermarket parts are cheap and plentiful plus it's strength is well known and it's still used in motorsports. A good comparison of the D60 and Ford 9" can be found here:
This is what I started with - the axle ends made me think it was a 31 spine (it wasn't) and I was hopeful it might have a TracLok LSD as those were a very common option (it didn't), but it does have "early" big bearing ends. Funniest part about the axle I bought, it had 2.75:1 gears in it
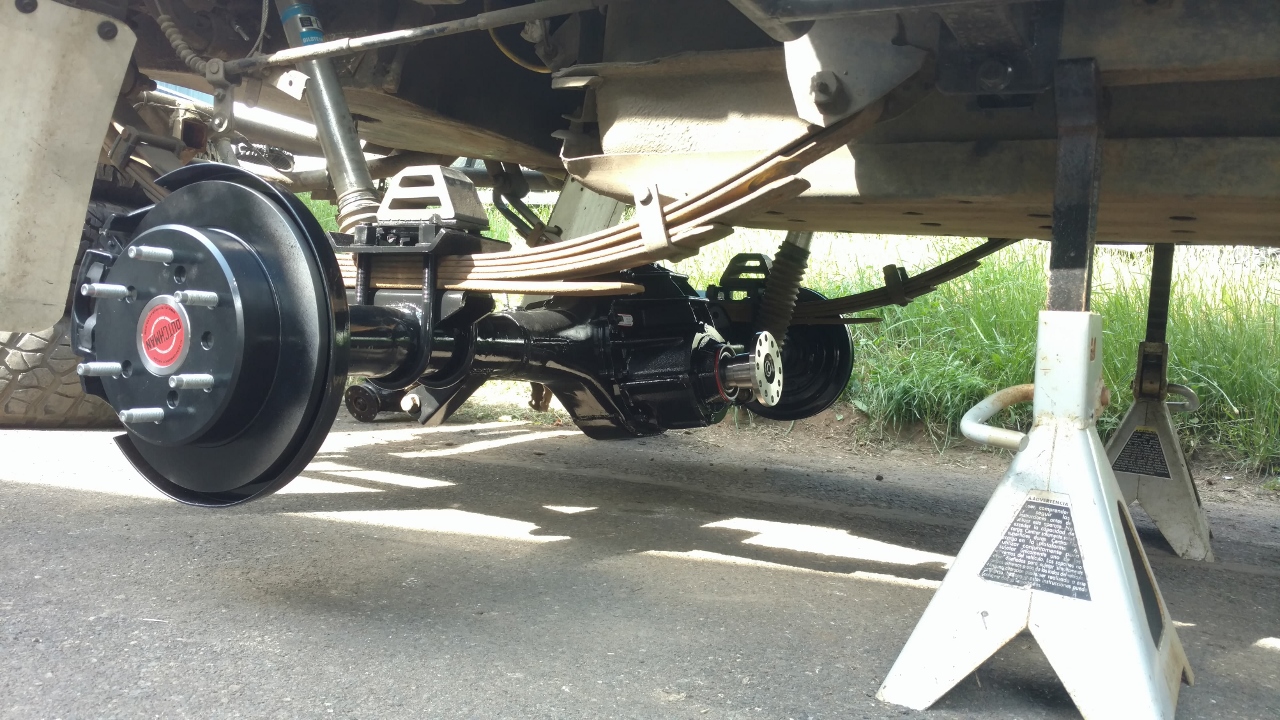
after stripping off all the bracketry. this housing measured 60.5" flange-to-flange, add 5 inches for the axle to poke out, and it's almost a perfect match width for the front long travel
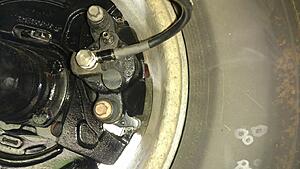
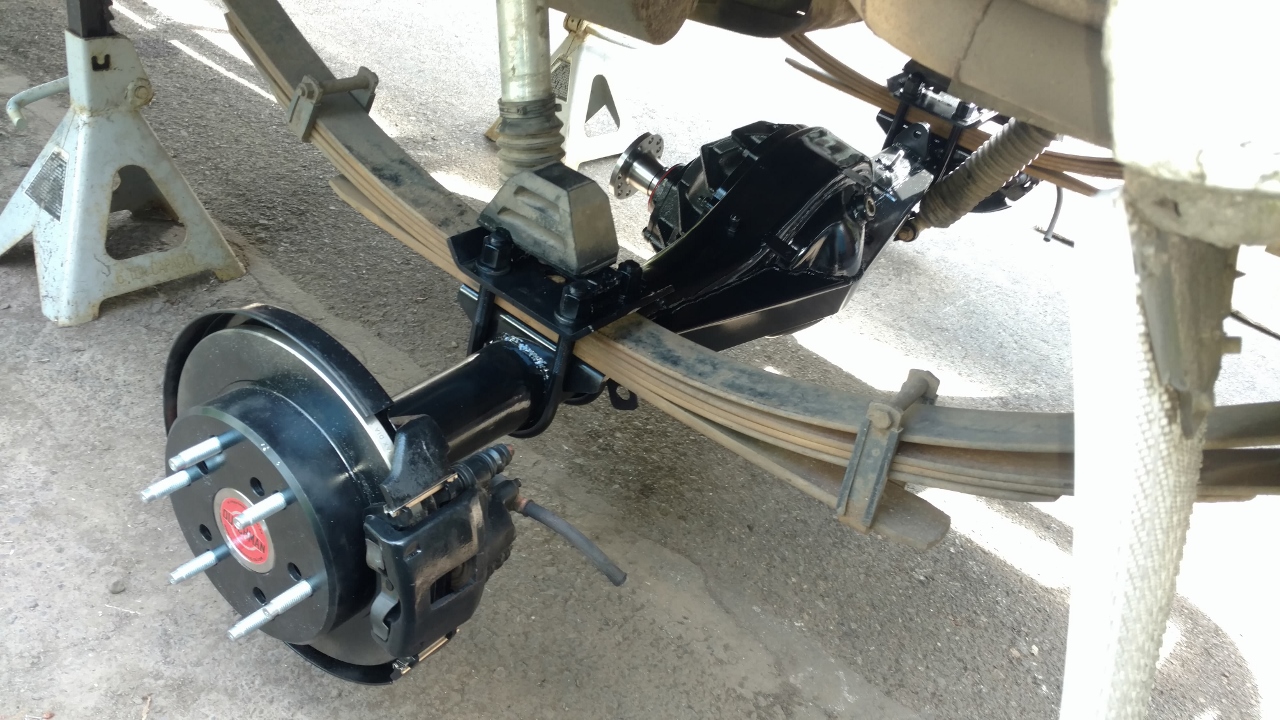
a simple back brace brace was installed and 95-00 Ford Explorer disc brakes were mocked up. I like the Ruff Stuff F9 back brace better, but was hopeful that this style would leave me with enough room to keep my 33" spare underneath the truck (it didn't). The Ford disc conversion is a direct bolt-on for "Torino" style or "late" big bearing housings, but can work as well on "early" big bearing housings with a small amount of bolt hole slotting. A special spacer also has to be used between the bearing retainer plate and the bearing if you decide to go with Exploder discs (Currie makes one, so does Dutchman Axle and several other companies).
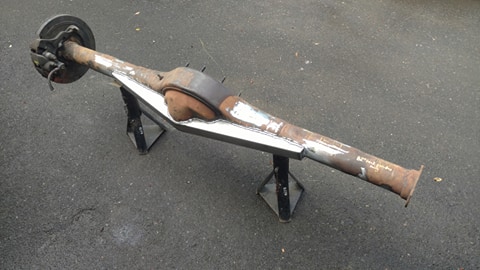
getting the spring perches tacked in place so the pinion flange angle matches the transfer case flange angle. Of note is that the top of the axle tube on all Ford 9" housings is crushed flat at the factory, so normal spring perches for round tube need some grinding to have a nice tight fit before welding. I also welded in a 3/4" NPT fill/inspection port at the top and 3/8" drain plug at the bottom rear of the housing (there was no drain plug originally)
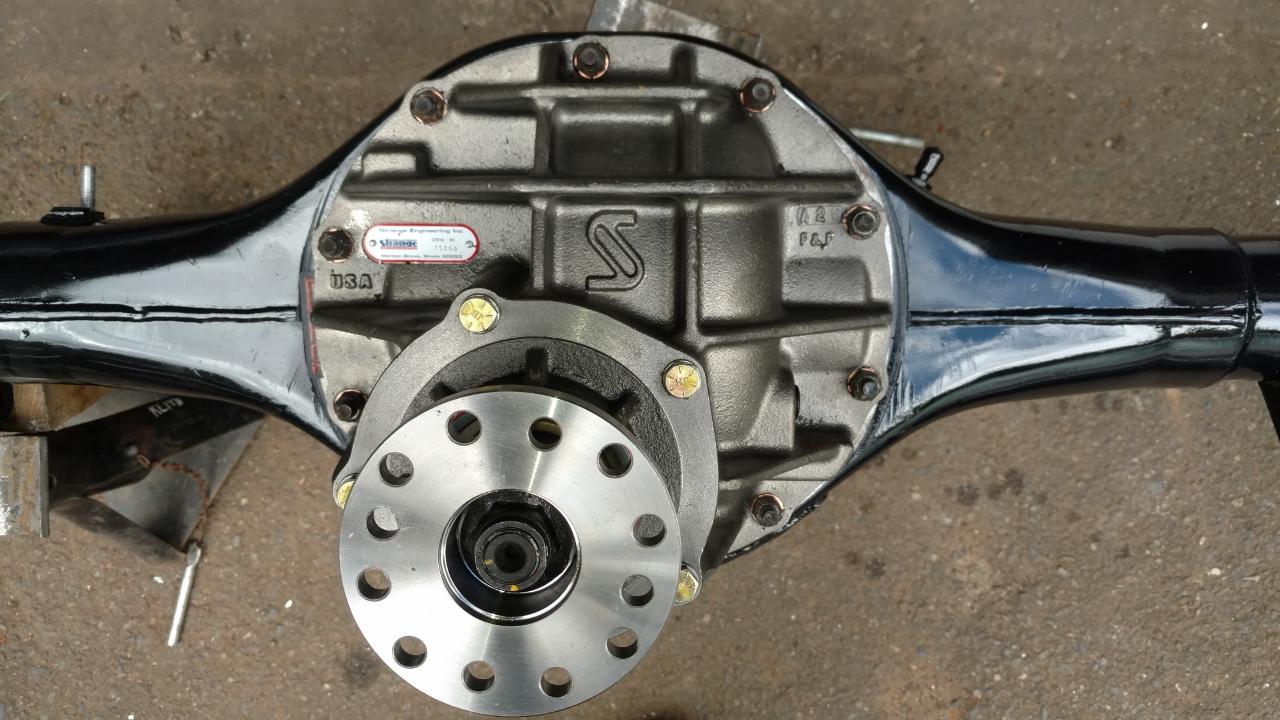
Some other goodies arrives from Dutchman Axle in Idaho. When I priced all the parts I wanted, I realized that they could build the center section for about the same cost as the individual parts. the build list is something like this: Strange Engineering nodular Pro Series center, cast iron "Daytona" style pinion support, 4.86:1 US gears (close enough match to the 4.88:1 I have in front), and Detroit Truetrac helical LSD for 35 spline axles (largest factory F9 axle shaft is 31 spline, 35 spline also requires a larger differential side bearing than Ford offered, so more beef). I also used a Trail Gear F9 triple drilled pinion flange so a Toyota driveshaft could be bolted on (this one seeps a bit, I think it might have to do with the machine finish at the seal area and might try polishing it, Nitro Gear also has a triple drilled F9 pinion flange)
35 spline axles are beefy. Dutchman made them in 6 x 5.5 bolt pattern for me with a center pilot to match the Exploder discs. I had them ship the axles without bearings and lug studs installed so that I could use the axle flange as a pattern to drill the Exploder discs to 6 lug as well. Axle shafts are using the stronger Set20 tapered bearings which are normally lubricated by the gear oil in the housing (need to remove the inner axle seal), but sometimes leak if you have to remove and reinstall the axle shaft. Dutchman also offers an optional bearing retainer collar which lets you keep the inner axle seal, for less chance of a gear oil leak, which means the tapered bearing has to be packed with grease so it doesn't die a quick death. If I had to do it over, the only change I would ask is that the center pilot on the wheel flange be extended a bit so I could run a hub-centric ring for the wheels (a dab of crazy glue would work to hold it in place). If you order axles to work with Exploder brakes, make sure they have 2.5" backspacing from the wheel flange to bearing (many stock axles have 2.375" and the rotor contacts the backing plate) and there needs to be an inspection hole drilled in the wheel flange to be able to tighten the bearing retaining plate nuts.
I weighed everything before assembly and this is what I came up with:
48.1 lbs for both 35 spline axle shafts - fully assembled
39.6 lbs for both rear disc assemblies - backing plates, calipers, parking shoes, disc pads
62.0 lbs for housing with all brackets/mounts installed
77.9 lbs for fully assembled Strange center section
227.6 lbs total dry weight without the 3.5 qts of 85-140 gear oil it takes to fill it
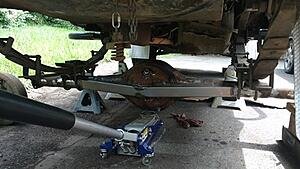
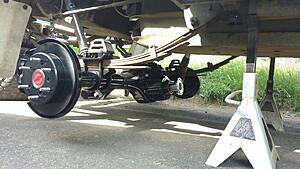
shock mounts were located and welded in place to let me use 10" stroke Bilstein monotubes with the stock upper mounts - a future project is going longer stroke with outboard shocks, but I needed to get this back on the road
I might try shifting my auxiliary gas tank and spare tire hoist back a bit to see if I can put the spare underneath again, but this is too close at ride height
plenty of room for the brakes inside stock 15" Taco alloy wheels. Brake feel is great and stopping is much better than my old Toyota drums ever were.
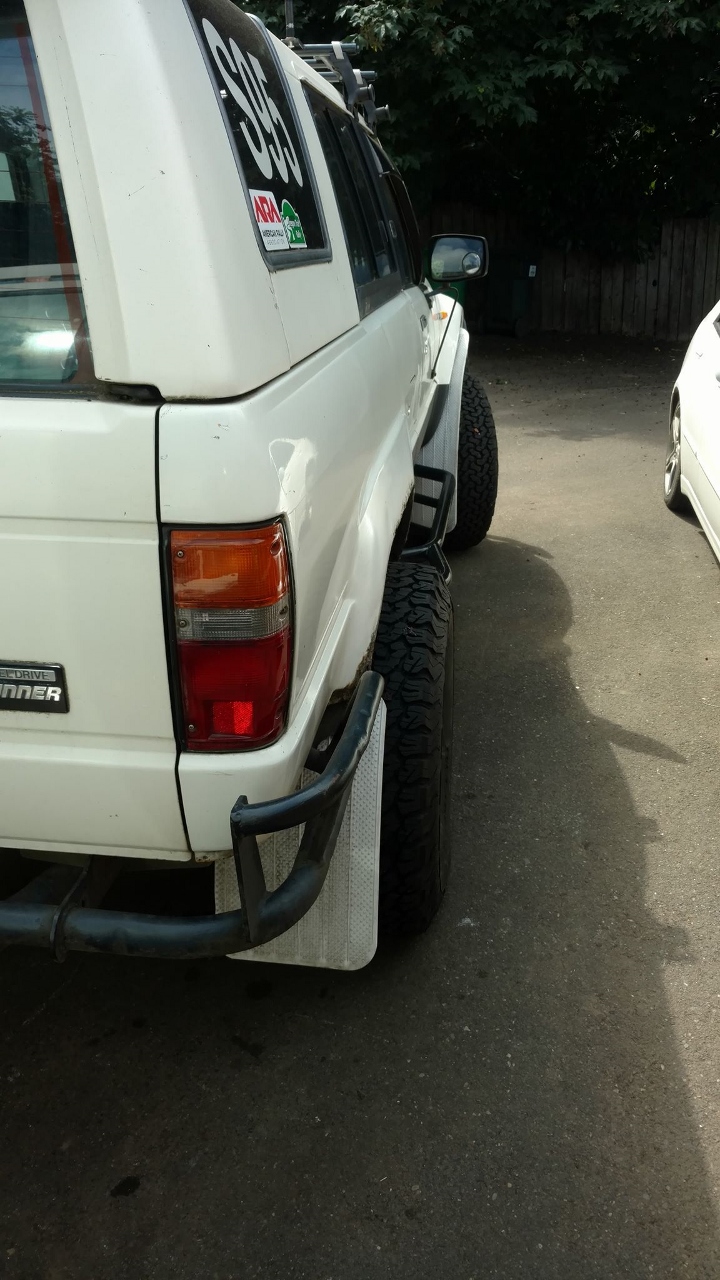
just a a couple inches of poke on the rear axle, but track width now matches the front
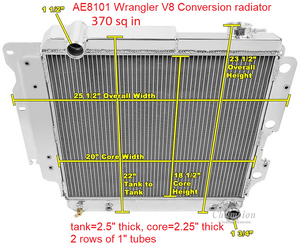
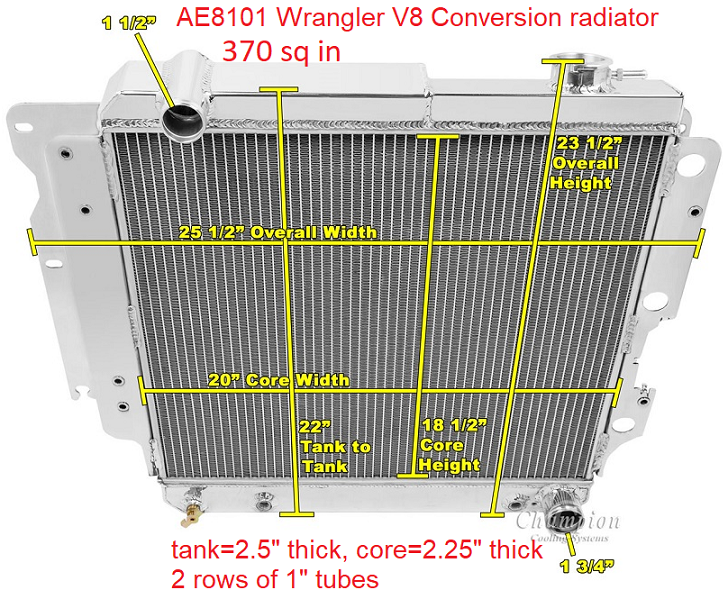
Installed a new radiator this weekend. The 19"x 15" universal Griffin was fine for the truck by itself, but it lacked a bit while towing in hot weather or low speed high load scenarios. Also, at 3" thick, it reduced the space available for a good fan. After A LOT of searching online for radiator dimensions, I settled on Champion AE8101 Wrangler V8 conversion radiator. The Griffin radiator had a core surface area of 294 sq in and left a big gap between the radiator and the front cross member. The new Champion radiator is 370 sq in and covers the entire area between the radiator support and the cross member. Note that the regular Champion 8101 radiator is 3 rows of 0.63" tubes while the AE8101 is 2 rows of 1" tubes, I went with 2 rows of 1" tubes which gives more volume inside the radiator + more tube surface area all in the same radiator size.
with the 1" body lift on my 'runner, the top of the bottom tank is even with the top of the front cross member and the bottom of the tank is even with the bottom of the cross member
the top of the radiator support was trimmed back several years ago which helped me push the radiator about an inch forward than normal - hood still closes fine and doesn't touch the radiator
this is looking down the passenger side mount. Years ago, I trimmed the radiator opening wider to fit some other radiator that I had at the time. I kinda feel like if I hadn't trimmed the metal away, this radiator may have bolted to the stock sheet metal just fine I had to make filler plates to close the gap, can't remember how big the original opening was). The large side mounts on the radiator were trimmed a bit with a jigsaw and metal cutting blade to clear the steering gear and winch wiring.
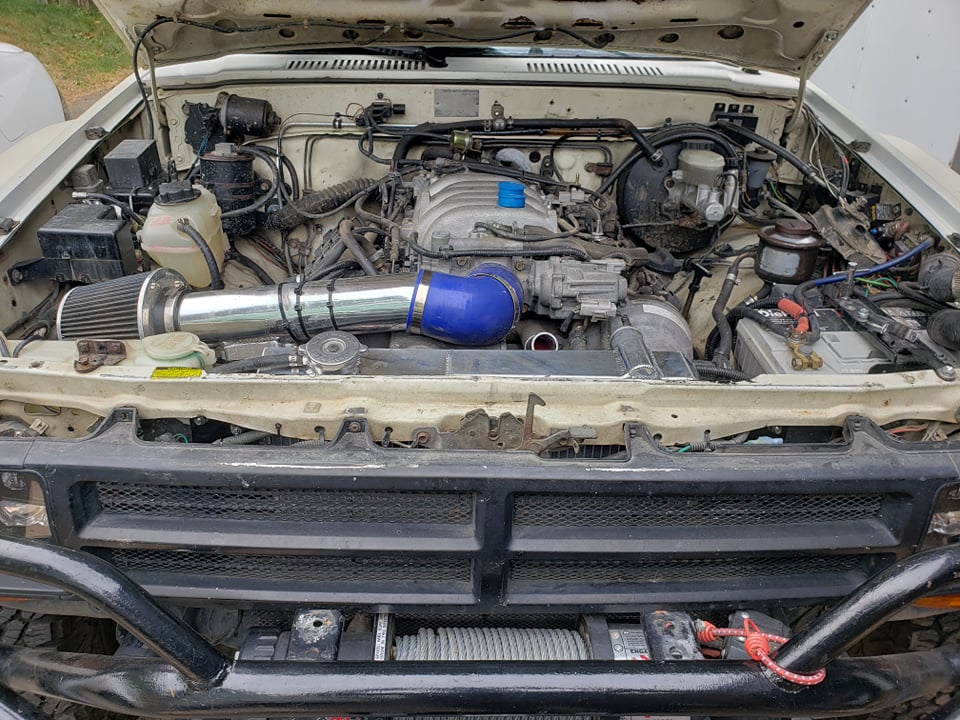
For now, I remounted the 14" fan I was using before, but I plan to go with a 16" fan in the very near future. I really wanted to use the Derale 2 speed H.O. fan which is a very thin 2 5/8" all the way across with 2400 CFM on high speed, but I'm about 1/4" shy of it fitting no matter what I do - a reminder that every fraction of an inch counts and keep that engine back as far as possible when making mounts. So instead I'm looking at the Maradyne M162k if the motor is narrow enough to fit in the space between pulleys on the engine.
4 1/2 years ago, I used 22RE rubber mounts (since they're very common and were in use for decades) on my own brackets. After about 6 months, they relaxed enough to let the oil pan contact the steering relay rod (center link), so I built a new oil pan to clear that (it was already close when I made the brackets originally). Over time, they relaxed a bit more to where other clearances are getting tight.
So, this was the problem. After 4.5 years, the rubber mount sagged and the engine dropped ~3/4 inch.
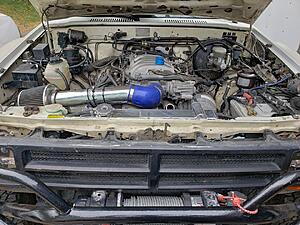
With a 2x4 laid across the top of the fenders and over the front of the engine (tightest point between engine and hood), I have ~ 7/8" - 1" of space between the board and the engine cover with the sagging rubber mounts.
So I made new mounts to lift the engine back up to slightly higher than where it was when I originally swapped it. After I paint and install the new mounts, the engine cover should touch and just barely lift the board. Because the hood arches up in the middle, I'll still have enough room to close the hood with no problem (already verified). Barnes 4WD DOM Sleeve & Poly Bushing 2 5/8 Inch Mounting Width 9/16 Inch Bolt Hole and Barnes 4WD Full Circle Bushing Mount Pair with some 1/4" plate make up the frame side mount, the rest was just making a 1/4" thick plate for the engine side and 1/8" to take up the space between. (Pic is before it was fully welded and braces were added to the vertical pieces)
Final product all painted and installed. That's 1/4" plate against the engine to reduce warp from welding and stay flat & 1/4" plate where it bolts to the stock mount on the frame for the same reason. All the rest of the plate is 1/8" and gusseted. Note the slight notch I had to make to clear the coolant block-off plate (only necessary on the passenger side).
Driving around, there is a very slight amount of vibration, but it's barely noticeable and easy to ignore.
I do get some vibration above idle in neutral - - at ~2,000 rpm or above, it's enough to make something rattle in the dash, but it's fine at high idle on a cold start
 09-29-2019, 10:08 AM


