When you click on links to various merchants on this site and make a purchase, this can result in this site earning a commission. Affiliate programs and affiliations include, but are not limited to, the eBay Partner Network.
Well I am testing out my SAS on my 01 Tacoma and what a heck of a way to test it out by taking it all the way to Hilton New York from Arizona and now I am on my way back ....
I am in a small town 30 miles to the east of Terre Haute, Indiana called Cloverdale .... truck is performing very good...... no problem with temperatures..... on the highway
running very cool, the automatic transmission running very cool at about 144 to about 166
Picture taken from the outdoor patio of the great Mexican restaurant that I ate at(El Cantarito). I highly recommend the spinach and cheese quesadilla.
Just decided to upload what I found on Google.....
below you can see the Motel 6 on the left.....El Cantarito restaurant in the middle ....
and where my truck was parked at the Chicago's Pizza.
Freaking SWEET! Which I could find a set of shackles like that for mine
Yeah, I didn't need to buy those shackles but it looks a little nicer looks a little more professional with those long zinc anodized shackles :-)
So tonight I made it halfway through Oklahoma so I found a Motel 6 just east of Oklahoma City, hope no tornadoes go through here while I'm sleeping, nothing fancy ....
Observations on my trip on the highways....both going and coming back......4400 miles of highway....Not a single SAS Taco seen or no other SAS truck for that matter. Saw about 3 stock tacomas and not sure if they were even 4x4....might have been prerunners. Saw maybe 5 Jeeps total....mostly 4 door version with stock suspensions.....mostly driven by teenage girls.
And even while driving around the streets of Hilton and surrounding areas I did not see a single awesome 4x4.....1 stock Tacoma 4x4 I think.
I had some serious pizza in Hilton though!
They know how to do that for sure.
So I just ordered a V6 488 G2 Gears for my rear 8" e-locker....and a 488 Nitro Gear for my 9.5" FJ60 front end. That should give me back all my zip and then some.
I'd like to point out that factory 410 gears are doable with 35" tires on a Tacoma with the 3.4L engine and auto.....takeoff from lights seemed good. But on the highway with the cruise on all the time the auto-tranny was constantly downshifting into 3rd on any slight incline. That probably won't happen with the 488 gears.
The trucks with the manual trannies would be more concerned about burning up their clutch and pressure plate with a 4:10/35" combo.
So that's what I figure it actually ran me to do this SAS. Hey the radiator was kinda optional but heck....
the stock one really hangs down too far. Yaaaa, I got lucky in that Craig had some left-over stuff from his
SAS project....about $1000 worth of lucky. And that FJ60 front assembly would run about 300 if you had
to go to the junkyard to get one......
So it could be called a 3000 SAS build also depending on circumstances....mine just happened to be
better than most.
Here's my recommendation to anybody that has a Tacoma and wants to do a similar build........
1----Remove the clam diff assembly...and get the radiator and T100 oil pan in ahead of time and out
of the way. It can still be driven even with the clamshell removed while gathering parts.
2----absolutely wait til it's on wheels and all clearances checked/suspension cycled a little BEFORE
doing the full welds on everything. axle perches and fixed leafpack mounts come to mind. Ford
shock towers also come to mind.....axle knuckles also come to mind as the castor may need to
be tweaked or the pumpkin angle might need adjusting.
I have that plasma. I love it. I(as in me and the crew) have done MULTIPLE projects(countless 3.4 swaps and elocker conversions, 70's hilux 2rz swap, my SAS...ect) with this little guy. It's perfect. I would get the next size bigger(500ci...?) if you are planning on doing 1/4" stuff a lot. Meaning, it'll blast thru 1/8", work thru 3/16" and with patience 1/4". It's super small and portable and the cables and such are super long. Makes doing projects a breeze. Plus, my Hobart handler welder isn't so lonely any more
I have that plasma. I love it. I(as in me and the crew) have done MULTIPLE projects(countless 3.4 swaps and elocker conversions, 70's hilux 2rz swap, my SAS...ect) with this little guy. It's perfect. I would get the next size bigger(500ci...?) if you are planning on doing 1/4" stuff a lot. Meaning, it'll blast thru 1/8", work thru 3/16" and with patience 1/4". It's super small and portable and the cables and such are super long. Makes doing projects a breeze. Plus, my Hobart handler welder isn't so lonely any more
ya BigBluePile..... So what you're telling me is the little plasma cutter is just fine for SAS projects and such. And that is good to hear from someone with actual experience with it.
I was looking at my $1414 costs for my SAS list and I might have forgot a few of the items...like the trailgear PS hose kit for 90.
But, all in all, I have kept the cost down quite a bit.
Had a 1985 FJ60 front end that I picked up in Grand Junction, CO. as part of a basketcase deal....(Thank you Lee). It's wider that the 79~85 mini-truck front(55" vs 58") and has the massive 9.5" ring gear and stock 410 gears(later discovered gears were actually 3.70). It also appears to have a thicker, and physically heavier housing. Although on the 4400 mile highway trip with the cruise control on ALL the time, I saw the auto-tranny down-shifting alot from OD to DRIVE....pretty much on any slight incline.....and I was totally surprised in how many ups and downs there were from Arizona to New York on the highway system. It seemed like rolling hills the entire way. Well, all except for Texas. That place was boringly flat(except for the 10 buried cadillacs on the south side of the highway) and the cruise worked great there.
I am still going to bite the bullet and put 488 Nitro front and G2 rear gears to complement the 35" tires.
Add another $1000 to the SAS costs(gas and Motel rooms) because I had to test out and ring out the bugs by doing this trip to and from new york.
I did a few things purposely to keep things simple and costs down....like using the shackle to the front. No brake dive and no need for a $350 long spline DS. The axle housing is travelling in pretty much the same arc as the driveshaft so only needs about 1" of spline travel and certainly the stock DS can do that. And no worries about the wheelwell making that terrible noise when the mudders contact them....and mutilate the sheet metal in the process. I don't even have to trim the pinch lip. This is because the frontal shackle has the tire moving up and slightly FORWARD on compression. And no requirement to push the PS box as far forward as possible and violate, in a most serious fashion, the thin front body mount.
I flipped the axle housing and that means the drain plug is now on top. That way, this becomes a driverside 3rd member axle housing and I get to keep and re-use the factory chain driven 2.62 low range transfercase which is also driverside output. And now the drain plug will never catch rocks and loosen up on the trail spilling all my Coastal gear oil. That flip saved me about 2000 dollars and a lot of work based on adapters and gear-driven transfer-cases to convert my existing transfercase to passenger-side output..
I made my own Y-arm for the passenger side knuckle. That means I don't need the 300 dollar hi-steer arms. That means I don't have to worry about the possibility of the draglink contacting the cross-rod(tie-rod).....one rod under the leafpack and one over.
By using the 4" x 5/16" mild steel flat stock from the frame horn to the main body mount(45" long total) under the cab body means I get rid of one of the weak links in the Tacoma and that is a wimpy frontal frame. Now It can take a halfway decent hit(and drive away afterwards) from someone jibber jabbing on their phone. And the 5/16" plate means I can drill and tap the the holes for the box directly into the frame....using American 1/2" x 20 x 1" long grade 5 or grade 8 bolts.
My experience with the after-market PS box mounting kits that use the 3 sleeves thru the thin frame is they crack at the inside weld rings. They cost about $40 and there are better ways than the 3 sleeves system......a relatively short 12 inch x 4" wide 5/16" thick plate welded to the existing frame and tapped for the 3 holes is a lot better than the 3 sleeve method.
410 gears and 35" tire are ok around town but on the highway there is just too much hunting between 3rd and overdrive when the cruise control is on. 488 gears are the answer.
Below is the installation of the front Nitro brand 9.5" gears for the front.....Not in great detail ....just a few pics.
Below shows the factory 370 gears that the FJ60's commonly get (FJ62s get 410 gears).
The Nitro box.
These Nitros have a nice finish.....it's obvious that they have been lapped in by the face to flank finish.
Tender Loving Care
I wonder where "J10" is....it's code for some designated location.
81 ft/lb x 12 per the FSM
removing the 370 pinion...the nut was on pretty tight but I convinced it.
The 370 pinion on the left verse the 488 on the right. Swap the used pinion bearing over with a .060" shim.
Re-assemble the pinion end and dial in about 5 in/lb for the PPL.
Today's task is to install new G2 488 in the rear e-locker. Last night I drained the gear oil out
while it was still warm.(drains a bit more thoroughly). In the pic below, the center was jacked up
and jack stands to support it on each end. Wheels were removed. Then the drums easily slid off
at least for me.
Gear oil puddle on passenger side....bearing or seal getting loosey goosey.....
Need to get the axles out. remove the 4 nuts. remove the brake line and preferably cap it off
with some sort of rubber plug.
Optional but I removed all 6 bolts that secure the rear hard line...moves around freely and
easier to deal with it that way for this operation.
Will re-install them later.
this end clean....
and this end also clean
e-locker harness to be dis-connected...and the driveshaft also.
The DS will be bungied up high out of the way.
I removed the "dust cover" but it's not needed. For me, the 2 electrical harnesses easily
dis-connected themselves.
The "vac line" on the e-harness really does come off pretty easy. Only pushed in there about 1/2"
The 2 electrical harness plugs unplugged very nicely for me
9 short studs and 2 long studs secure the e-locker in place.
I used the floor jack to break loose the diff seal and out popped the 3rd.
A little clean-up and it's on my bench. Now to put that G2 488 in as seen in the pic......
First tried .082" for a pinion shim and as you can see, it's pretty darn good...this is the drive side of
these 8" G2 488s and the pattern is centered but favoring the heel somewhat. Depth is exact.
I might point out that during the teardown of the original 410 gears with original bearings
that I was really impressed the the "old" original 2001 bearings were all in very good shape.
Not only that but back in 2007 I did a refresh of all 4 bearings where I added some preload
where there was none before. That preload was all there STILL and it's 8 years and 100,000
miles later!
Here's the link to that 2007 refresh. I was shocked how loose the factory left these gears/bearings. http://gearinstalls.com/refresh.htm
Coast. proper depth and slight toe.
drive of the pinion tooth.
Looks like the comet tail is tucked in to the root too far meaning I could go a touch deeper and I will.
For my install, I will opt for the HD Marlin seal on the left. It's massive compared to the
genuine OEM seal on the right.
Slams down nicely.
Not shown but I did increase the pinion shim value to .085"..... 3 thou deeper is what I will want
for my usage offroad.
PPL pinion pre-load was measuring a nice mild 5 inch/pounds of drag. With used bearings,
5 is a good number....new bearings 10~15 is aok.
70 ft/lb on the 4 bearing cap bolts.
I checked the BL on 10 spots around the ring gear and it varied from .0055" up to .0075 worse
case. The spec etched on the ring gear said .006" so all is happy now.
The carrier bearing are original still with 180,000 miles on them and I just now cranked
on them for a good preload value of 10 in/lb. Deflections will be minimized and strength maximized.
Final pattern chech....DRIVE.....Centered and a slight deep condition....my personal preference.
Coast.....nice.
pinion tooth....DRIVE.....nice
The comet is not hard in to the root....the way I like it.
Although I did not take any notes, I can still engrave the ring to do the same effectively.
G2 Gears do set up nicely.
Hi Stace-
Yes. Feels like it has its ZIP back. I have lots of power now off the line. These G2 488 gears are very quiet too. Feels like the auto is no longer being loaded down even around town. And, on the highway, from what little bit I have done, no more issues with jumping out of OD.
It was a much needed gear change really. 35's and 488's is the right combo for my situation....37" and 529 is for the guys that go BIG.
I went from being ~11% undergeared due to tires 4" bigger to being 8~9% over-geared due to the 20% change to 488 gears. Works out real nice.
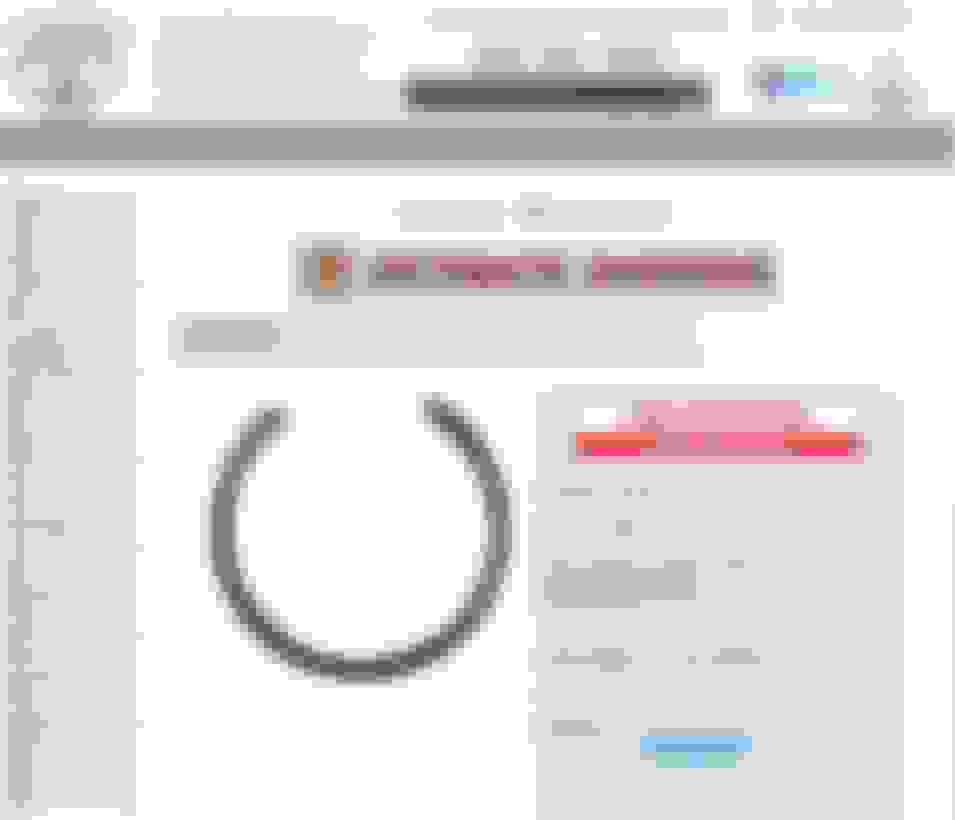
Anyways, I had to get some thick snap rings from Toyota....part number 90520-31007. Used in 2 places....on the outside of the "star" to keep the axle from sliding too far inside the bell and the other snap-ring is at the very tip of the outer axle stub to keep the stub from receding too far back into the knuckle cavity. These are very thick snap rings measuring .093" thick.
This should be the correct Toyota part number for the "internal birf clip"....the one that is inside the bell.
90520-27091
I am completely blown away by your fabrication skills and quality craftsmanship. I wish I had even a tenth of the skill you have. Very nice build. I read the whole thread in one sitting. Fantastic work!

 08-12-2015, 04:54 PM


 Plus, my Hobart handler welder isn't so lonely any more