When you click on links to various merchants on this site and make a purchase, this can result in this site earning a commission. Affiliate programs and affiliations include, but are not limited to, the eBay Partner Network.
One thing I found was that my pedals were a little slick, kind of would like an automatic transmission some day.
so I found some scrap diamond plate, in about 30 minutes:
I had these made:
I reinforced and stiffened up my gas tank skid plate with some #3 rebar ...
then I made some some L brackets and mounted it to the frame ... (truck is heavily modified so skid plate no longer lined up with old mounting hardware)
...about $14 in rebar , $6 in primer, and I feel much more confident that my skid plate can take a good hit.
Jolene, you might look into a 90 degree connector so the aux stays connected, but that's a fantastic setup.
My ultra-cheap mod is a light reminder (I kept draining my battery ). Get any cheap, loud 12v noise maker and wire it between the TAIL and IGN fuses (if your noise maker is dioded, wiring it one way will remind you to turn them on, the other, to turn them off; if it's not dioded, it will remind you to do both).
3pk fuse taps - US$9
2pk beeper/flasher - US$8
25' black/red wire - US$5
Counting the cost of the parts I used, not the parts I bought:
My cheapo modo: found a piece of 2 gauge wire by the dumpster about 2 feet long, crimpped up between the battery "-" and engine block. that smoothed out the idle right there.
Some people may not like carpet in their rig but this is a flip for me so I decided to do Home Depot carpet like I have in the past. 18 bucks and some 3M spray adhesive, little bit of measuring and some patience and it will look pretty damn good.
Had to cut out a section to go around the center bottom dash support, should have left a flap of carpet to go completely around it. Planning and measuring and really thinking about how you want to lay the carpet down makes life a lot easier
All in all I'm happy with the result and if you guys need any more info on the carpet I have the part number and exact prices and can show you the 3M spray. Let me know what y'all think.
Floor pan is in great shape, truck has zero rust on it, no dents and had the original paint on the floor pan that I just washed and dried before laying everything down.
I barely fit into my recently acquired '83 standard cab so I decided to remove the bench slider in an attempt to move the seat down and back.
First I pulled the seat (four bolts). The slider is held in place by four bolts (12mm I believe). I grabbed some cheap steel from the hardware store to make new brackets with. Here is the back bracket utilizing the stock bolt that held the slider on:
Here is how I did the front:
Pound the front one down and attach with the stock bolt/nut to the floor pan:
I just zipped a sheet metal screw in for the back one:
Repeat on the other side.
The seat sits awesome now and I have tons of room. I gained a ton of headroom, I have a nice reach to the wheel and it feels way more solid than before.
Not worried about what happens to those thin sheet metal brackets if you get in an accident?
Not really. The seatbelts are still bolted to the floorpan. Not to mention the seat is in stronger than the old rattly slider mechanism was holding it so if anything this is an improvement.
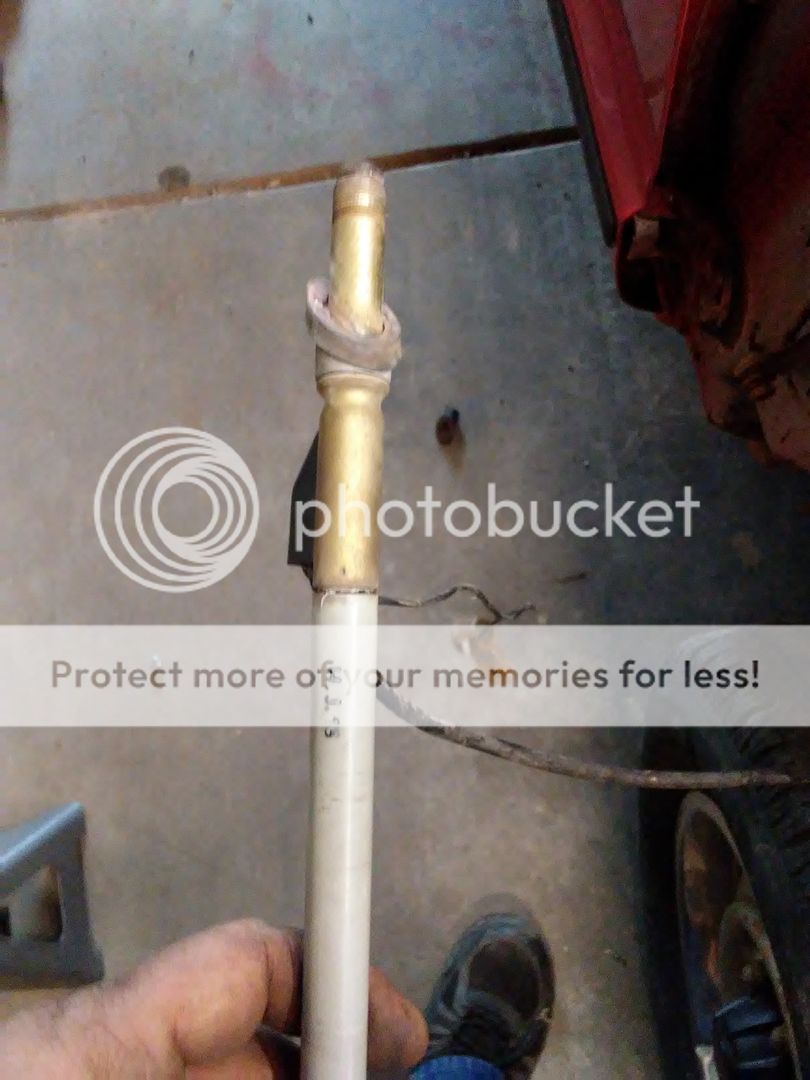
For a broken antenna here is how I go about fixing mine.
Originally Posted by Terrys87
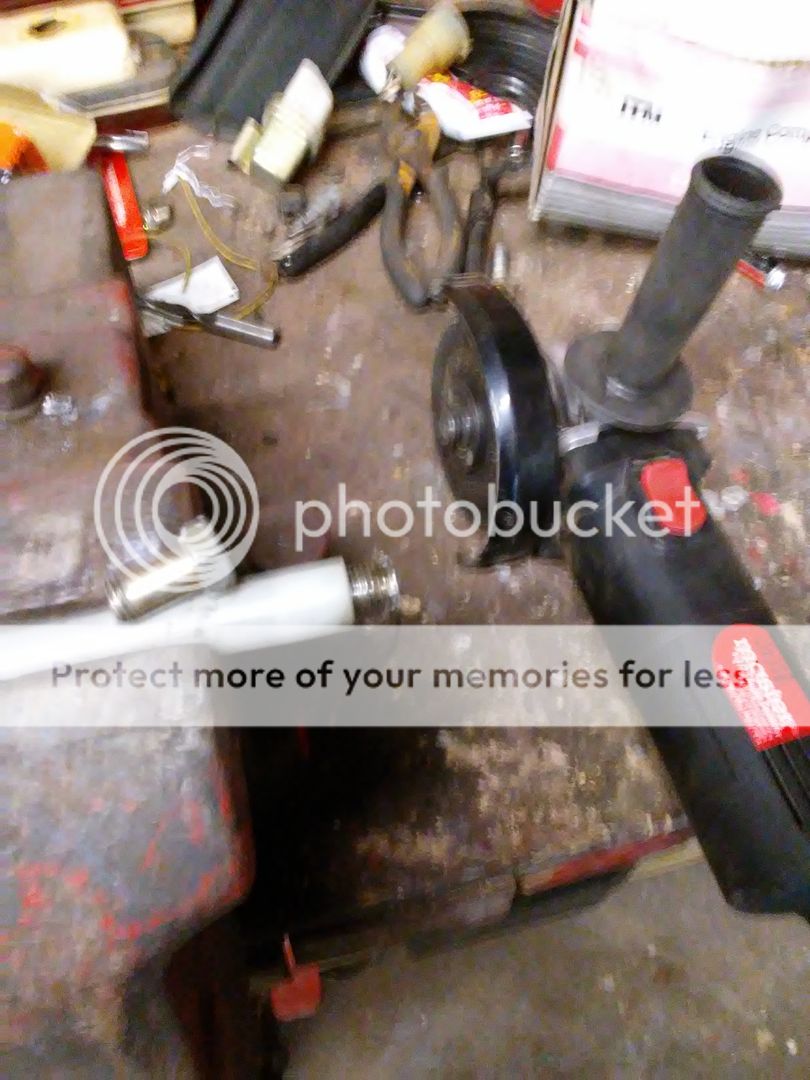
Another common problem with these trucks is the broken antenna.
Originally Posted by Terrys87
How I fix the broken antenna. I use a 14mm bolt or similar size and thread it into the broken pvc tube.
Then I cut the head off.
Then thread the other piece back into the threaded piece. I have never had one to fail after I have done this repair. I see numerous trucks with antennas tilted back and it is from the pvc being broke.


 03-23-2016, 02:55 PM


 ). Get any cheap, loud 12v noise maker and wire it between the TAIL and IGN fuses (if your noise maker is dioded, wiring it one way will remind you to turn them on, the other, to turn them off; if it's not dioded, it will remind you to do both).