*4th GEN OLD MAN EMU SUSPENSION LIFT*
#141
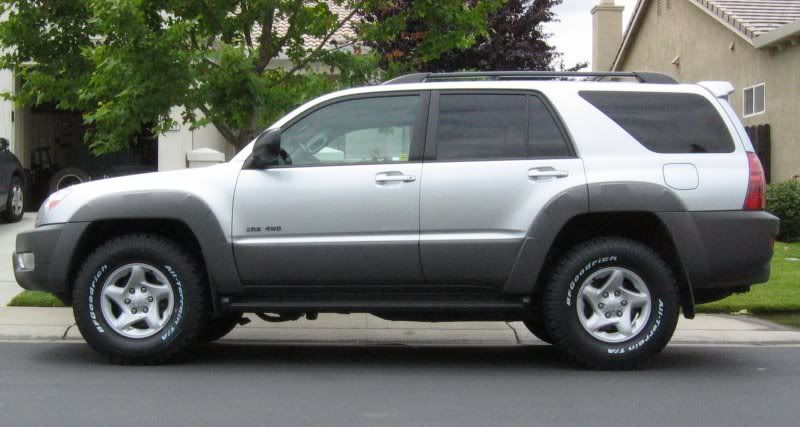
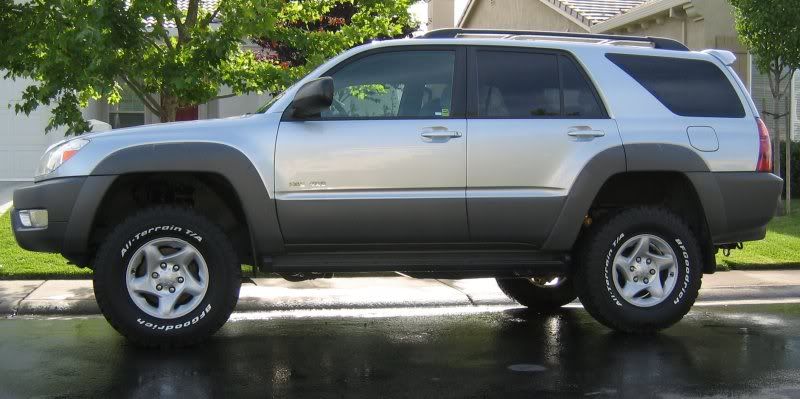
4x4rnr before & after
Ok, so it took me a while to get some pics. Sorry these aren't the best (lighting & angle). I'll try to get a better angle on the after shot whenever the car across the street moves! Hmm... I suppose I could make use of my recovery strap and drag it out of the way  hehe
hehe
Before:

After:

 hehe
hehe Before:

After:

#143
Originally Posted by FirstToy
Looks great! Nice work man

James, how long did it take for your springs to settle? And IIRC, you're sitting at +3" front and +2.75" rear. Was your front ever at 3.5", 'cause that's where mine is still sitting? Or do you have extra weight up front... mine is all stock except suspension and wheels?
#145
Originally Posted by bulldog-yota
Time to ditch those running boards now.

#147
Originally Posted by Vegas Runner
Did you take any pictures during the installation?
BTW Vegas, when is your kit getting installed? It's in the mail now, right?
#148
I am hoping to install this weekend. It sounds like it is a pretty easy install. The delivery is scheduled for today. Hopefully It will come as scheduled.
Regarding the pictures. Nothing in particular, just interested in pictures in general, to see how it went.
Regarding the pictures. Nothing in particular, just interested in pictures in general, to see how it went.
#149
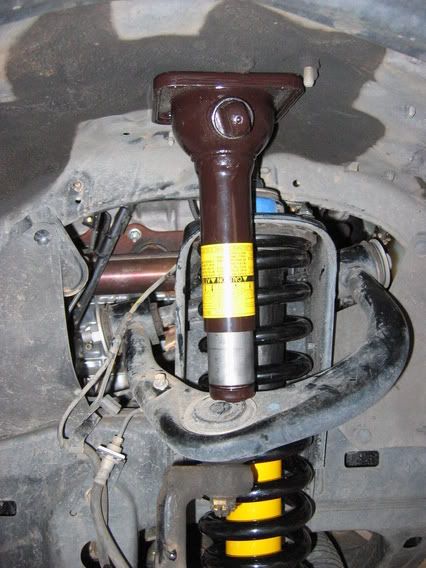
Here's one that might be of interest. This is how I used the spare-tire bottle jack to push the UCA down far enough to stuff the lower end of the new strut into it's saddle. Look closely and you can also see how I removed the brackets for the speed sensor (ABS) wires and pushed the wires out of the way to get the struts in and out.


#151
Originally Posted by Vegas Runner
Excellent. Good Tip. Did you re-route the brake line at all?

I know FirstToy mentioned that he had intentions of making a new bracket to create some slack or something. Did that ever happen James???
#156
Hey guys, I just purchased my OME lift from slee with 884/895 for a 04' V8. Previously I had my Revtek lift installed by a professional and I noticed in the front my rubber bushings and retainer missing where my spacer is located. My question is do I need my stock bushing to install OME?
Also I am thinking about returning my 884 back and getting the preinstall spacer for the 885, consider my rig is a V8 and the 885 are a bit higher.
Also I am thinking about returning my 884 back and getting the preinstall spacer for the 885, consider my rig is a V8 and the 885 are a bit higher.
#158
Yeah you need the top plate, coil spring isolater and the bushings and washers on the top. This is the stock stuff that comes with the 4Runner. OME only supplies the strut, coils and bottom coil bucket. Like Vegas Runner, you can ask Slee to pre-install the whole front assembly for you so you can just drop it in (more $). Or just get those parts from the dealer, this normally wil take a few days to get.
Get Vegas Runner's feedback on the 885's on the V8, but I think 884s might be a little low with the V8. I fitted an OME trimpacker and Toytec topspacer on my 884s for the V8. The 885s should make it without all the goodies, but Vegas should be the first to get it in and report back.
Get Vegas Runner's feedback on the 885's on the V8, but I think 884s might be a little low with the V8. I fitted an OME trimpacker and Toytec topspacer on my 884s for the V8. The 885s should make it without all the goodies, but Vegas should be the first to get it in and report back.
#160
See the start of the thread for all details.
But I used the OME front trimpacker (they are a few $ each) on each side. I then ordered the Tacoma top spacer from Toytec for each side (They are approx a 1/4", you have to phone them to order). You might want to use just the OME trimpacker on each side though, should give you like 3" and a bit lift. Or you can use 2 trimpackers on a side and it will be basically the same height as the 885. 2 is the max trimpackers you can use on a side I believe.
I got the Toytec spacers to add more droop, but currently with the front swaybar in place it will not make a difference from an extra trimpacker in reality.


 you've got a slam dunk there with the struts pre-sprung. That would have saved me some time.


