
Philbert's 87 4Runner Head Gasket & head replacement - take II

 03-07-2013, 10:20 AM
#103
Registered User
Thread Starter
iTrader: (2)
Join Date: Dec 2009
Location: Pleasanton, CA - SF Bay Area
Posts: 2,159
Likes: 0
Received 7 Likes
on
5 Posts
Thanks guys, I'll give it another go this afternoon.
I remember your carnage photos from reading that thread so many times...I'd give a finger right now just to get this thing on!
Stay tuned
Dario, haven't forgotten about the bolts....
I remember your carnage photos from reading that thread so many times...I'd give a finger right now just to get this thing on!
Stay tuned
Dario, haven't forgotten about the bolts....
03-07-2013, 10:22 AM
#104
YotaTech Milestone-Two Millionth Post
 03-07-2013, 10:30 AM
#105
Hey Phil.... sorry for the problems...
I couldnt get the sprocket back on the cam, and then for some reason, I rolled the crank back a tiny bit, to provide the slack I needed.... that did it! I also had a helper with a long driver through the sprocket holes onto the rocker tower. .... and I also had a long HD driver down in the cover pushing back the tensioner, using a bolt/IIRC/as a leverage point, then rolled back the crank just a tidbit until it just seemed to slide right on the cam. IIRC, this head is slightly taller? (Engnbldr?) ....
I couldnt get the sprocket back on the cam, and then for some reason, I rolled the crank back a tiny bit, to provide the slack I needed.... that did it! I also had a helper with a long driver through the sprocket holes onto the rocker tower. .... and I also had a long HD driver down in the cover pushing back the tensioner, using a bolt/IIRC/as a leverage point, then rolled back the crank just a tidbit until it just seemed to slide right on the cam. IIRC, this head is slightly taller? (Engnbldr?) ....
03-07-2013, 10:37 AM
#106
Oh, on the alt, the number came right up for the autozone ppl when testing[120A GM Caddy/and others(then me on a suppliers site).... and it was out of a 89-90 CADDY V8, .... I removed it myself cuz it appeared new//then tested high on all 3. The guy, 83toy or something, has the 140a version.....
Urs......(on bottom of page shows years).....
http://frugalmechanic.com/auto-part/...FcZFMgodUBsAdg
Urs......(on bottom of page shows years).....
http://frugalmechanic.com/auto-part/...FcZFMgodUBsAdg
Last edited by ChefYota4x4; 03-07-2013 at 10:51 AM.
03-07-2013, 12:03 PM
#107
Registered User
Thread Starter
iTrader: (2)
Join Date: Dec 2009
Location: Pleasanton, CA - SF Bay Area
Posts: 2,159
Likes: 0
Received 7 Likes
on
5 Posts
Guess who just removed their timing cover?
I spent another 45 minutes on this thing, with more leverage, coat hanger wire, etc - gave up. I'm not too worried about the cover - I still have more FIPG black and will just clean surfaces and use that, but without the gasket material - FIPG is pretty stout stuff and it works on my oil pan just fine.
Stay tuned - have to jump on a conference call right now so need to break.
03-07-2013, 12:35 PM
#110
YotaTech Milestone-Two Millionth Post
I remember something about using a cut soda can to shoehorn the timing cover in under the gasket. not sure how you can do the little dabs of FIPG when you do it that way though.
03-07-2013, 01:59 PM
#111
Registered User
Thread Starter
iTrader: (2)
Join Date: Dec 2009
Location: Pleasanton, CA - SF Bay Area
Posts: 2,159
Likes: 0
Received 7 Likes
on
5 Posts
Back in business!!
Getting the sprocket on with the cover off was cake!
I attached the water pump to the cover while it was off, cleaned up the block and cover (gasket came off easy since it was so new!), and re applied black FIPG on all the mating surfaces. When I put it on, I put the top in first, to slide under the HG - 92 TOY, you're right it was a sticky situation because the HG drooped a little, and I had to make sure the timing cover was not buckling it. It was a harried job, since FIPG dries so fast and is messy, but I think I nailed it (fingers crossed!).
I'm taking a short break but will go back and swap out the alternator bracket, maybe pull the old studs from the old head and transfer over, etc.
Lots still to do.
03-07-2013, 03:17 PM
#114
Registered User
Thread Starter
iTrader: (2)
Join Date: Dec 2009
Location: Pleasanton, CA - SF Bay Area
Posts: 2,159
Likes: 0
Received 7 Likes
on
5 Posts
Hi guys - I wrote a thread asking for advice on wiring up my GM alternator:
https://www.yotatech.com/forums/f131.../#post52051128
I'm going to install the brackets while I wait for responses (fingers crossed!)
https://www.yotatech.com/forums/f131.../#post52051128
I'm going to install the brackets while I wait for responses (fingers crossed!)
03-07-2013, 06:33 PM
#115
Registered User
Thread Starter
iTrader: (2)
Join Date: Dec 2009
Location: Pleasanton, CA - SF Bay Area
Posts: 2,159
Likes: 0
Received 7 Likes
on
5 Posts
OK, so I installed the alternator bracket and the alternator (I left the pulley on because I couldn't get it loose).
It's a SNUG fit. The coolant hose that comes off the timing cover on the drivers side is really close to the top of the alt - like 1/4" close!
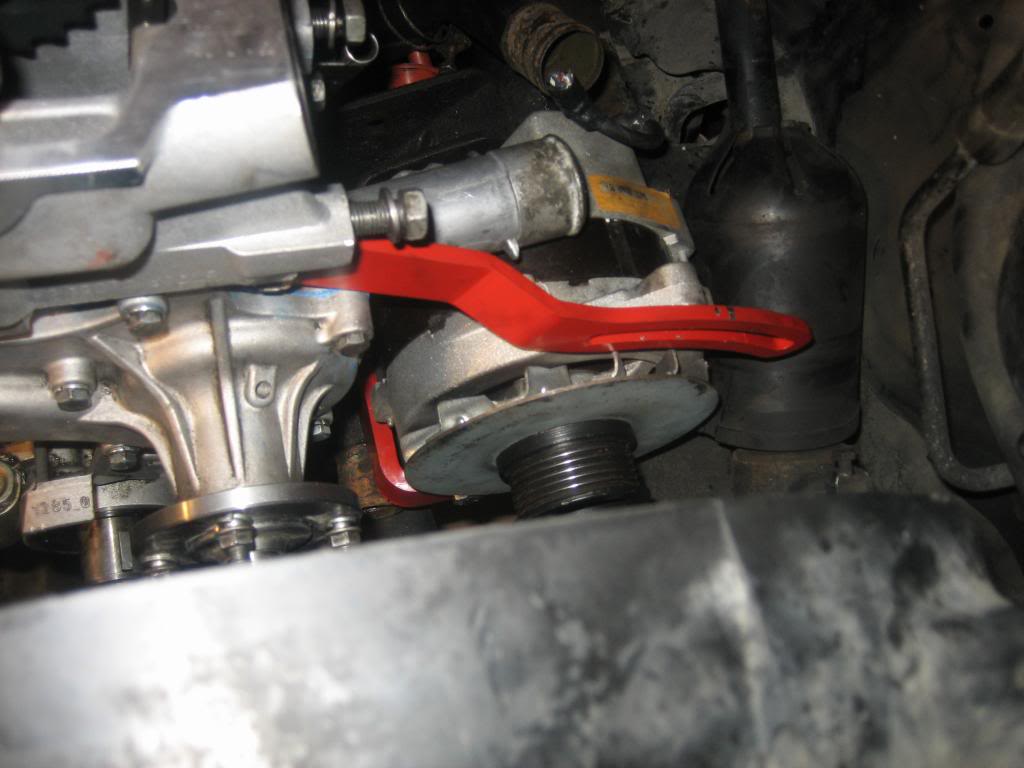
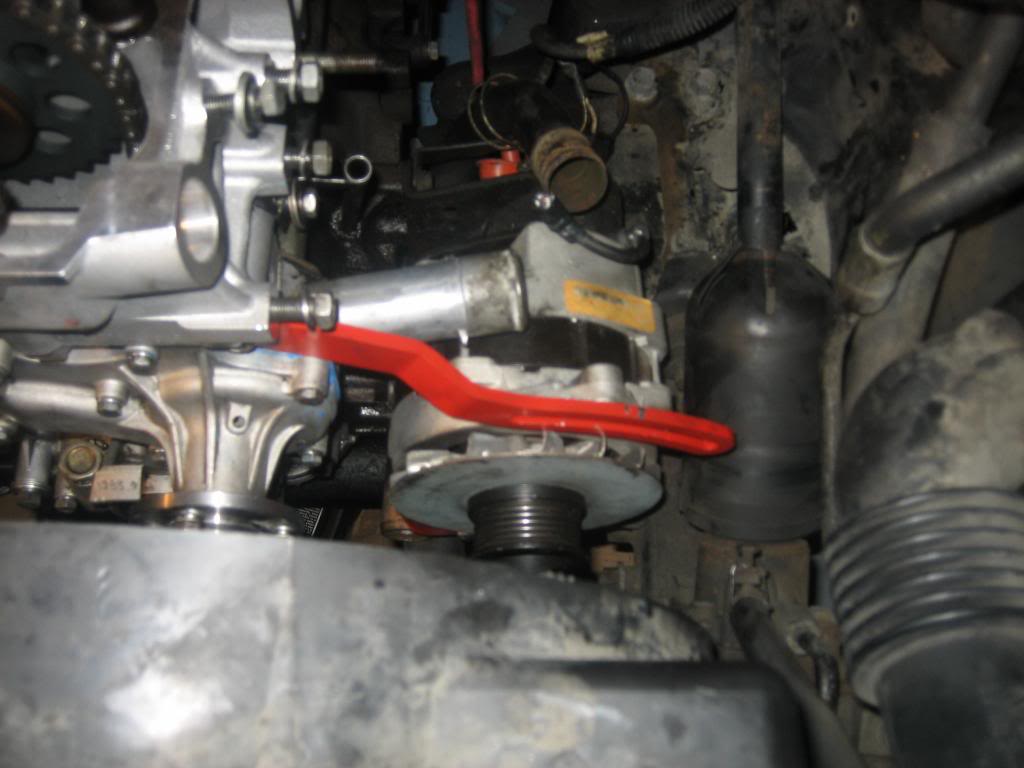
Also, I need to get the bolt for the adjustment rail - anyone know if it's a generic size for GM alternators?
Here it is now:
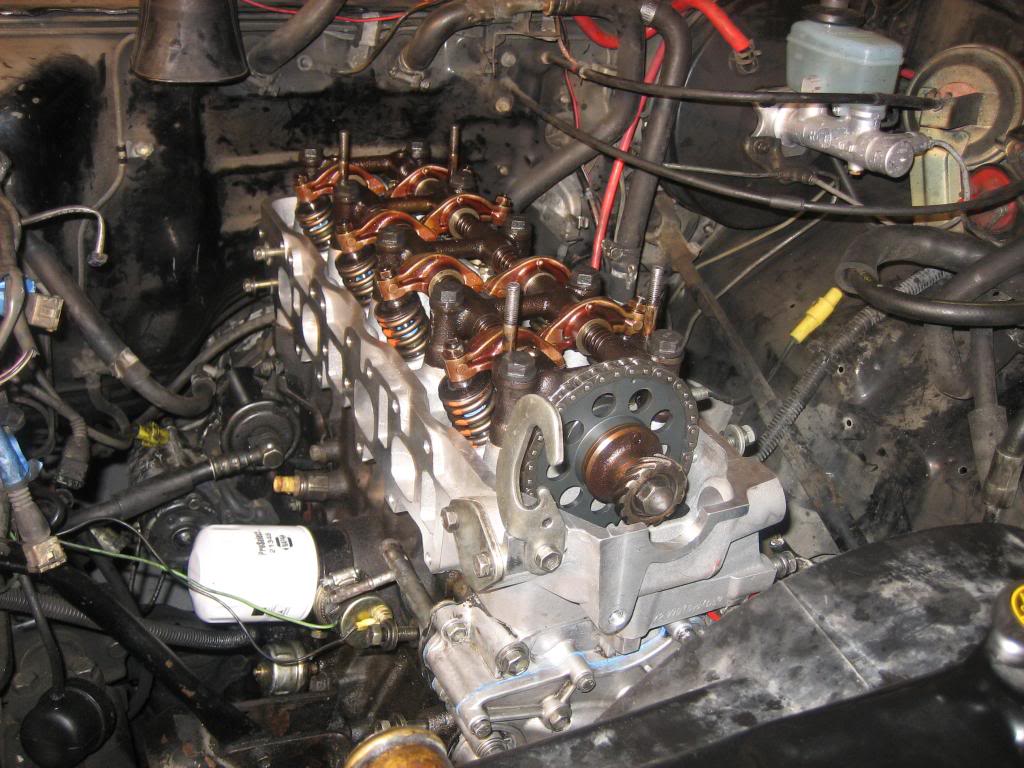
I also moved all the studs from the old head to the new one - PITA. One stud for the EGR won't budge...may need to get at HW store.
I get my lower manifold back tomorrow so hopefully I can get that side of the engine buttoned up. I mailed my injectors to witchunter Monday so hope they are at work tomorrow.
In all this I'm also trying to do the battery swap and Supra AFM installation....sigh.
It's a SNUG fit. The coolant hose that comes off the timing cover on the drivers side is really close to the top of the alt - like 1/4" close!
Also, I need to get the bolt for the adjustment rail - anyone know if it's a generic size for GM alternators?
Here it is now:
I also moved all the studs from the old head to the new one - PITA. One stud for the EGR won't budge...may need to get at HW store.
I get my lower manifold back tomorrow so hopefully I can get that side of the engine buttoned up. I mailed my injectors to witchunter Monday so hope they are at work tomorrow.
In all this I'm also trying to do the battery swap and Supra AFM installation....sigh.
03-07-2013, 06:39 PM
#116
Wow, u gotta haul ahead of ya...... but u always fi g ure it out and with great write ups to boot!
I PM'd a byddy who did a 140a alt. swap..... came here to get rhe link to the new thread ao I can shoot him that as well. He had a belt issue as well..... went from 14" to 15.5 or somthing like that. I will be back here with his thread link shortly
I PM'd a byddy who did a 140a alt. swap..... came here to get rhe link to the new thread ao I can shoot him that as well. He had a belt issue as well..... went from 14" to 15.5 or somthing like that. I will be back here with his thread link shortly
03-07-2013, 07:12 PM
#117
https://www.yotatech.com/forums/show...=251620&page=6
Starts on page 5 but doesn't pick up til this one.... should be something useful on it...
Also, that is what was on the connector, nothing more or less. His 140a connector he bought has 4 wires, from eBay. Not sure what it had on the car he got his from, cuz he forgot it, IIRC.....
Starts on page 5 but doesn't pick up til this one.... should be something useful on it...
Also, that is what was on the connector, nothing more or less. His 140a connector he bought has 4 wires, from eBay. Not sure what it had on the car he got his from, cuz he forgot it, IIRC.....
Last edited by ChefYota4x4; 03-07-2013 at 07:15 PM.
03-07-2013, 07:38 PM
#118
Registered User
Thread Starter
iTrader: (2)
Join Date: Dec 2009
Location: Pleasanton, CA - SF Bay Area
Posts: 2,159
Likes: 0
Received 7 Likes
on
5 Posts
Thanks Chef - read the whole thing. Sounds a little different from the one BLKNBLU posted but the first gens may be different (your guy said he found stuff only for second gen trucks/1st gen 4runners and it wasn't matching up with what he had so....
You paid $12 for the alt you sold me - you dog!!
You paid $12 for the alt you sold me - you dog!!
03-07-2013, 08:44 PM
#119
Nahhhhh, woof! Haha. .. Not sure that was 50% off stuff. Was a bit more PITA to remove than wut he dealt with, lol.
So blknblu did this? Looks like it fit well, no? I know they're tight fits from wut I've read. But ur worried???
So blknblu did this? Looks like it fit well, no? I know they're tight fits from wut I've read. But ur worried???
Last edited by ChefYota4x4; 03-07-2013 at 08:45 PM.
03-07-2013, 09:09 PM
#120
Registered User
Thread Starter
iTrader: (2)
Join Date: Dec 2009
Location: Pleasanton, CA - SF Bay Area
Posts: 2,159
Likes: 0
Received 7 Likes
on
5 Posts
Oh, no I got my threads crossed - he referenced a thread that covered this - in my new GM alternator thread I started today:
https://www.yotatech.com/forums/f131.../#post52051209
DARIO - almost forgot...the bolts that hold the AC bracket to the block are 10x1.25mm and 1.5 inched long including the hex head. I couldn't get a read on the bolts for the AC to the bracket, as my tap/die set didn't have a size that fit. I think 9x1.25 came closest but I wouldn't trust that!
I just got done for the night - cut my battery + to fuse box wire and snaked the battery wire to the other side of the bay (adjusted the 4 gauge hookup to the starter and wrapped it over the bellhousing). I also disconnected the - battery cable from the body ground mount and will move it over (I need to ground the 4 gauge cable to the block on the other side, and the smaller wire to the body as it was on the passenger side).
If I have time tomorrow (wife is flying back in town from biz trip) I will start on the intake manifold installation, and maybe remove the air box to see how the battery mounts up over on the drivers side. I may also tackle soldering the AFM wires to an extender cable (I have what I think is a really awesome solution for this but I don't want to share it unless I know it works first!).
And of course the alternator wiring I need to tackle....
I also need to create a third photobucket account, as I'm over 99% on this latest one LOL.
good night guys!


