
Philbert's 87 4Runner Head Gasket & head replacement - take II
 04-16-2013, 09:25 PM
#221
 04-17-2013, 12:16 PM
#222
Registered User
Thread Starter
iTrader: (2)
Join Date: Dec 2009
Location: Pleasanton, CA - SF Bay Area
Posts: 2,159
Likes: 0
Received 7 Likes
on
5 Posts
I bit the bullet and called the dealer (whom I now loathe for gouging me on parts last week) about the o ring for the water pipe that wraps around the head and mates to the bottom of the intake. $4.00 rubber o ring. I figure why not. Parts guy seemed familiar with it and told me I don't need to add any FIPG - just the o ring.
Coming together....
Coming together....
04-17-2013, 12:31 PM
#223
YES, one step of security that u WILL NOT regret! I did regret not just biting that proverbial bullet! AND the overcleaning of that part if the flange by the pipe/flange meeting surface! Lol. I even have video showing it leaking right through the pipe.... and trust me, the junk yard gougingnsux too! Hahaha.
04-17-2013, 12:55 PM
#225
Hahahahaha, no no no... Please don't be worried Phil! Let me explain what happened. If you look at my motor or followed any of that at all on the initial build and clean up, I went absolutely nuts cleaning everything. That pipe looked brand new when I was done... What I didn't realize is that the mounting flange the pipe goes through is crimp fastened inside using copper and brass or something... I could start to see it, the gold colors, shining through around the area where the pipe comes through the other side of that flange. So what literally happened was this... I clean the part as I mentioned, and then as I put it all back together, on the very first restart of a fully screwed up an overpriced piece of crap rebuild, haha, it was leaking from that area. I did some research and through Jerry, 92toy, I realized that the O ring can become totally compromised by simply removing it. It will never leak up to 400,000 miles I'm sure if it's never exposed to air or removed causing cracking that creates failure... But once it's exposed to the air it begins to dry out immediately. So I went through the nightmare of pulling it all back off( this is why I explain my message of using studs and nuts when I finally re did it)...
And I install the new O ring, started up, and drip drip drip drip drip. I just about broke something, trust me! Lol. Just by chance I took a video and pictures showing where the leak was coming from just too stave off comments that were suggesting it was leaking somewhere else... I could see it leaking from right there. well, lo and behold, Jerry made a comment asking, " is it just me, or does it look like it is leaking right through the pipe? "... Sure enough he was right!
Sorry for being so lengthy in my explanation, but I just wanted to make very clear that all I was saying was to avoid the very rare Murphy's Law type crap that happened to me there, just leave any elektrolisis that's on that pipe alone. Even just a moderate cleaning of that three-way pipe that feeds the IACV caused that to leak as well. I actually picked up that pipe, covered in crap, at the same time I picked up my new wrap-around pipe.
Its not that I want people to worry when I mention that pipe or the head block plate gasket, or the sealer that goes on the oil pump bolt, or to cut and remove the portions of the hard pipes gasket the go into the back of the timing cover and slather them with sealant before installing again... I simply want to save someone the terrible waste of time and stress of having to go through what I did! Hahahahaha. Now kill it homie! Hehe
Last edited by ChefYota4x4; 04-17-2013 at 12:59 PM.
04-17-2013, 01:06 PM
#226
Registered User
Thread Starter
iTrader: (2)
Join Date: Dec 2009
Location: Pleasanton, CA - SF Bay Area
Posts: 2,159
Likes: 0
Received 7 Likes
on
5 Posts
Thanks Mark, that makes me feel a lot better 
That's a great idea on the studs to replace the bolts - I had a bugger of a time lining up the pipe! Do you recall the bolt - was it M8x1.0 or M8x1.25? I'm going to the HW store today anyway, so if I can pick up a couple studs/nuts for this that would be great.
Actually, do you mind just reaching in there, undoing one, and checking for me? JUST KIDDING
I feel like the head bolts/studs were all the same thread but I can't remember now
04-18-2013, 07:48 AM
#227
Registered User
Thread Starter
iTrader: (2)
Join Date: Dec 2009
Location: Pleasanton, CA - SF Bay Area
Posts: 2,159
Likes: 0
Received 7 Likes
on
5 Posts
I'm getting the o ring today after work. I just realized that i filled the motor with oil last weekend so I was worried about pulling the new oil filter on there...but then I realized it should all be in the pan and not in the filter/block, since I haven't turned the motor over at all, since...right? RIGHT?
04-19-2013, 07:53 AM
#228
Registered User
Thread Starter
iTrader: (2)
Join Date: Dec 2009
Location: Pleasanton, CA - SF Bay Area
Posts: 2,159
Likes: 0
Received 7 Likes
on
5 Posts
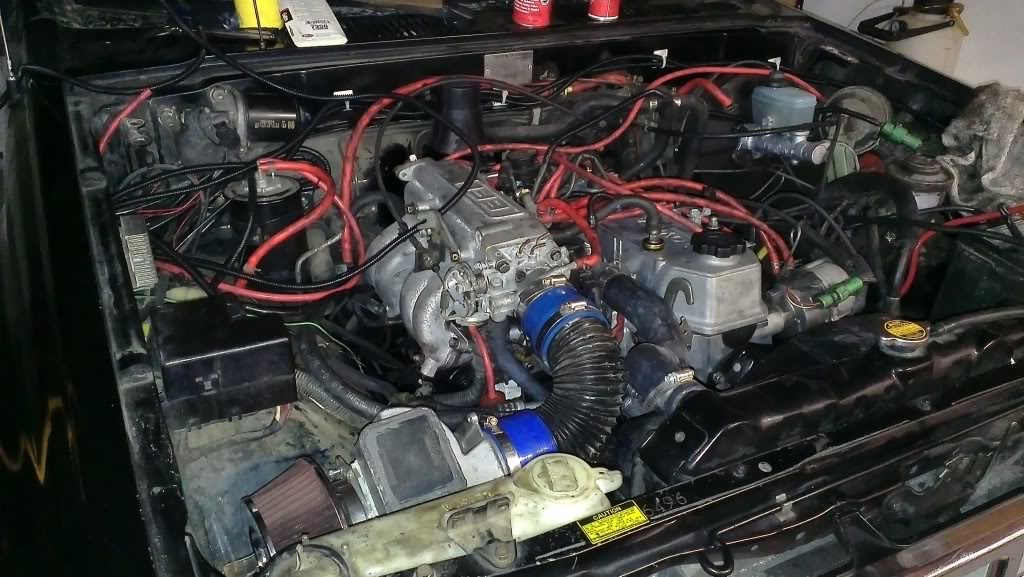
Made a ton of progress last night � was in the garage till midnight!
I tackled the lower intake manifold water pipe o ring issue, and ended up using studs, per Chef�s recommendation. This made it MUCH easier. I backed one bolt out, replaced with a stud, then did the other, keeping it aligned. Then I gently pried it away from the manifold and got enough slack in it to fit the o ring in, and then slip it over the studs and tighten with some nuts and lock washers. Took me 30 minutes, which is less than I thought going into it. The size of the studs there is M6x1.0 and I used 1� long studs. And yes, removing the oil filter was fine since there was no oil yet in the block
Bad shot with the oil pressure sender wire dangling in the way but there it is:
Oh, and you know that cold start injector banjo bolt I couldn�t find and had to buy from the dealer for like $20? I found it yesterday when I went to the auto store to return the 2 non-fitting alternator belts�.it was still wrapped in painters tape with �CSI� scrawled on it in sharpie�.and the tape was sticking to the outside of the auto parts shopping bag that had been sitting on my workbench the whole time�.DOH! If anyone wants to buy one cheap let me know
I then:
- Tightened all belts
- Installed TB
- Hooked up hoses to TB and intake (since I adjusted the TPS earlier)
- Adjusted distributor drive gear properly (Thanks Mark and Jerry)
- Routed and wire loomed power wire and AFM extension; routed along back of engine bay
- Tightened misc remaining coolant and air hoses
- Installed battery temporarily and hooked up
- Installed 82 Supra AFM (need to look at Kiyobrown�s build to figure out how he mounted it)
- Filled radiator with distilled water
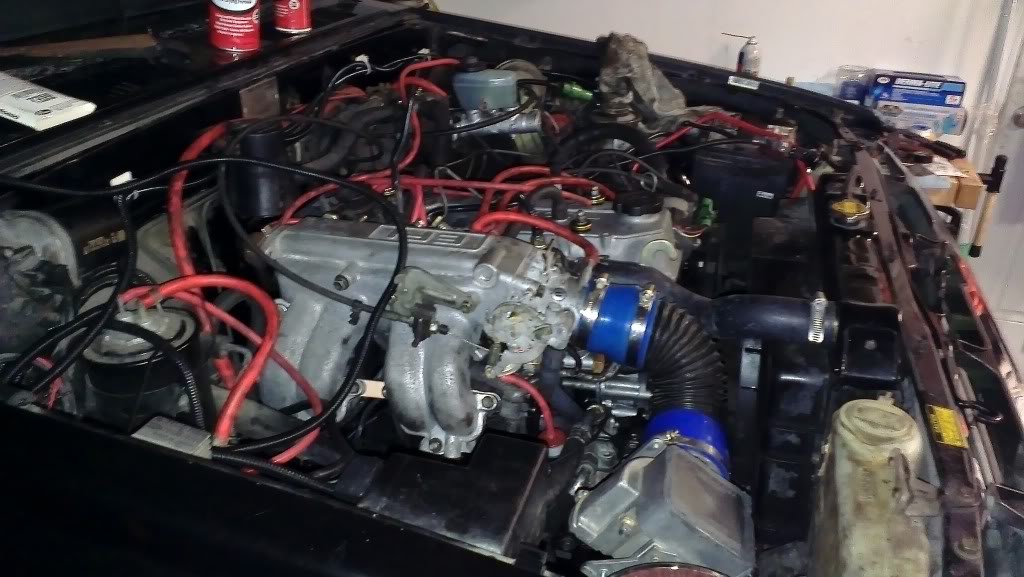
I have a check engine light on (!) Once I had the battery hooked up, I turned the key to ACC just to see if anything bad would happen. No fuel smell or visible leaks from the pump so that�s good. The CEL is on but I think that may be due to the AFM not yet being plugged in? We�ll see when it is LOL.
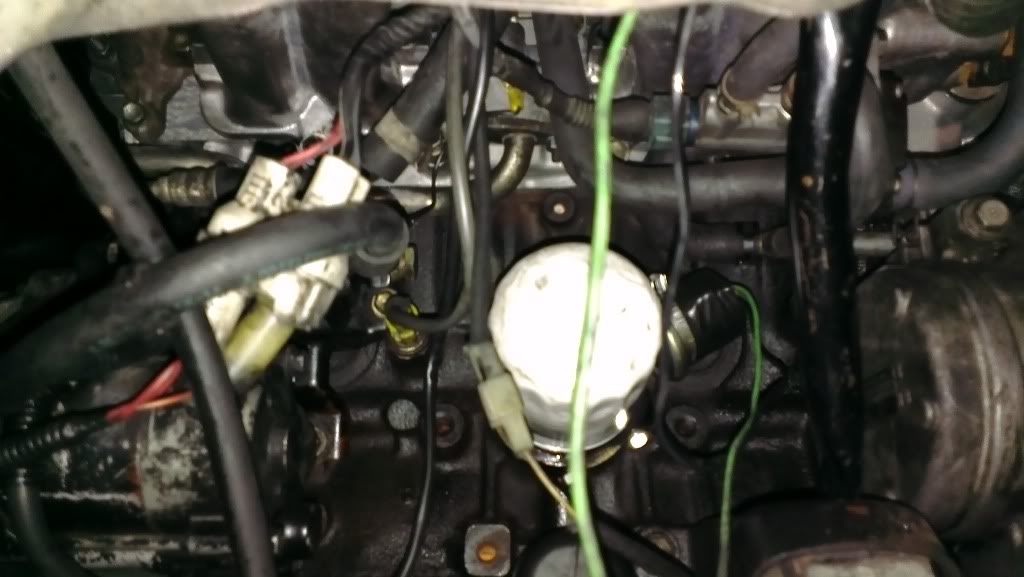
I have a coolant leak (!) After I topped off everything with water (to look for leaks of course), I noticed a very small trickle coming off the back of the motor, down the drivers side bellhousing. I got under the truck, on top of the engine bay, etc to get a better look, and reached my hands back there to see if I could isolate it�seems to be coming from just below that EGR heat exchanger, where the wrap around coolant pipe bracket mounts. Could this be the pipe itself leaking?! There was some play in it as I jockeyed it into position to mount up to the intake, but I never felt it �Give� as if it were breaking/bending too abruptly. Anyone come across this before? Don�t think it�s the head � there is no pressure in the system at this point. To note: it seems the stuff leaking is brownish, like old sediment/dirty water - and I drained everything prior (even the block) and put in brand new distilled water...does that help??
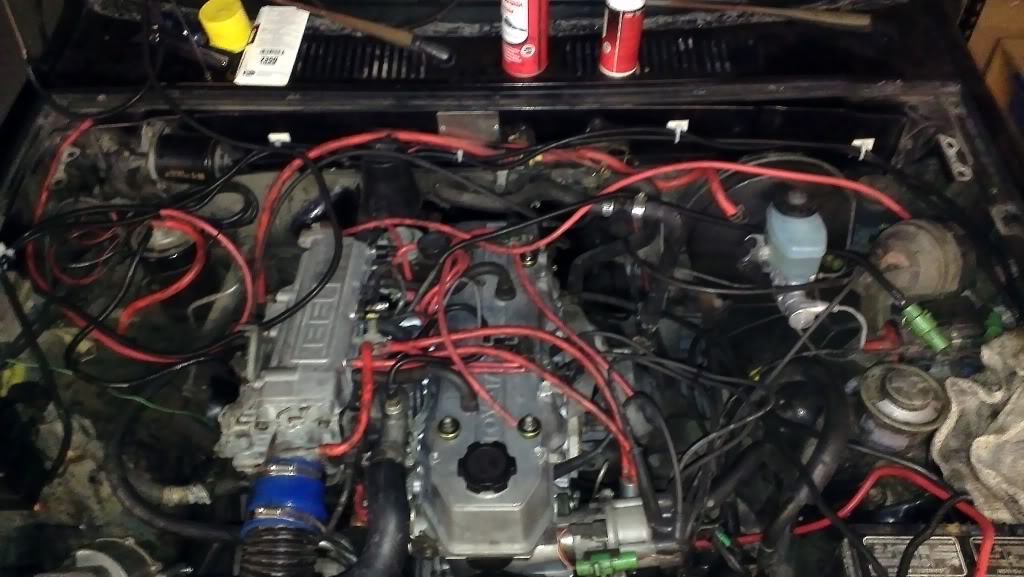
Here is where it leaks from:
Here�s where it sits:

I need to next:
- Route vacuum hoses (and hopefully clean them up with dish soap LOL)
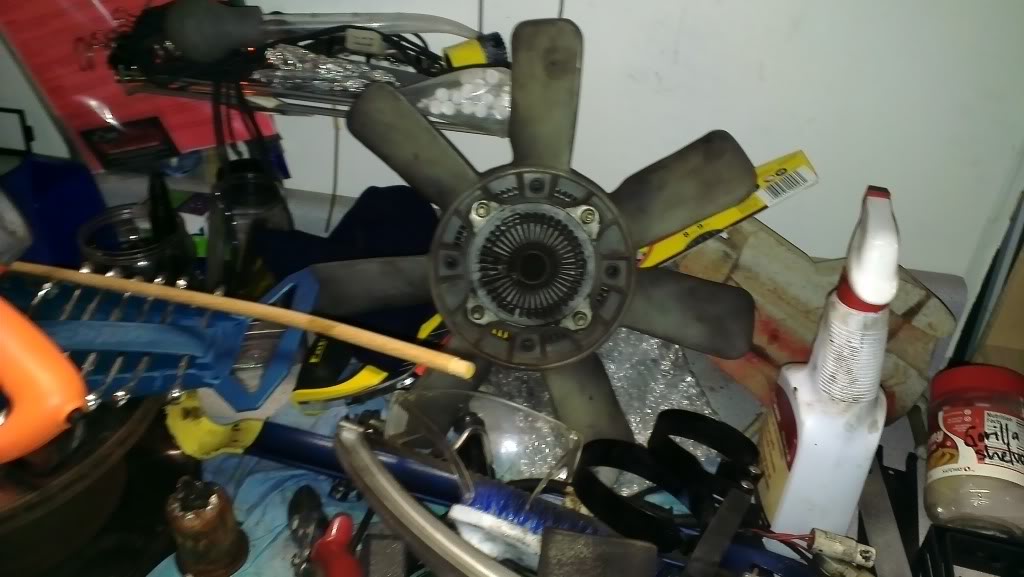
- Install fan (and maybe clean it as well first)
- Plug in AFM, and mount it properly (isolating box will come later)
- Address leak?? Not sure if I should deal with this now or later�I don�t know what it is
- Prime with oil by bumping starter
- Start and do cam break it/oil change
Any ideas on the damn leak? I can�t believe it�s coming from there � the one place I can�t really see or get to!
Bad shot with the oil pressure sender wire dangling in the way but there it is:

Oh, and you know that cold start injector banjo bolt I couldn�t find and had to buy from the dealer for like $20? I found it yesterday when I went to the auto store to return the 2 non-fitting alternator belts�.it was still wrapped in painters tape with �CSI� scrawled on it in sharpie�.and the tape was sticking to the outside of the auto parts shopping bag that had been sitting on my workbench the whole time�.DOH! If anyone wants to buy one cheap let me know
I then:
- Tightened all belts
- Installed TB
- Hooked up hoses to TB and intake (since I adjusted the TPS earlier)
- Adjusted distributor drive gear properly (Thanks Mark and Jerry)
- Routed and wire loomed power wire and AFM extension; routed along back of engine bay
- Tightened misc remaining coolant and air hoses
- Installed battery temporarily and hooked up
- Installed 82 Supra AFM (need to look at Kiyobrown�s build to figure out how he mounted it)
- Filled radiator with distilled water
I have a check engine light on (!) Once I had the battery hooked up, I turned the key to ACC just to see if anything bad would happen. No fuel smell or visible leaks from the pump so that�s good. The CEL is on but I think that may be due to the AFM not yet being plugged in? We�ll see when it is LOL.
I have a coolant leak (!) After I topped off everything with water (to look for leaks of course), I noticed a very small trickle coming off the back of the motor, down the drivers side bellhousing. I got under the truck, on top of the engine bay, etc to get a better look, and reached my hands back there to see if I could isolate it�seems to be coming from just below that EGR heat exchanger, where the wrap around coolant pipe bracket mounts. Could this be the pipe itself leaking?! There was some play in it as I jockeyed it into position to mount up to the intake, but I never felt it �Give� as if it were breaking/bending too abruptly. Anyone come across this before? Don�t think it�s the head � there is no pressure in the system at this point. To note: it seems the stuff leaking is brownish, like old sediment/dirty water - and I drained everything prior (even the block) and put in brand new distilled water...does that help??
Here is where it leaks from:

Here�s where it sits:


I need to next:
- Route vacuum hoses (and hopefully clean them up with dish soap LOL)
- Install fan (and maybe clean it as well first)
- Plug in AFM, and mount it properly (isolating box will come later)
- Address leak?? Not sure if I should deal with this now or later�I don�t know what it is
- Prime with oil by bumping starter
- Start and do cam break it/oil change
Any ideas on the damn leak? I can�t believe it�s coming from there � the one place I can�t really see or get to!
04-19-2013, 03:22 PM
#230
Registered User
Thread Starter
iTrader: (2)
Join Date: Dec 2009
Location: Pleasanton, CA - SF Bay Area
Posts: 2,159
Likes: 0
Received 7 Likes
on
5 Posts
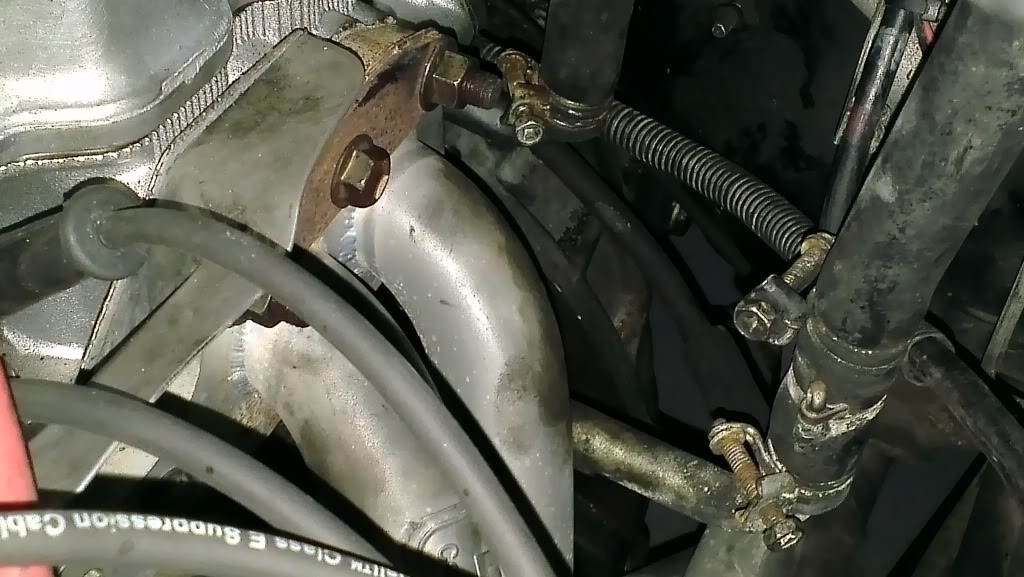
I think Chef nailed it, in his build thread (thanks Mark!).....the EGR cooler on the back of the head.
(stole this photo)
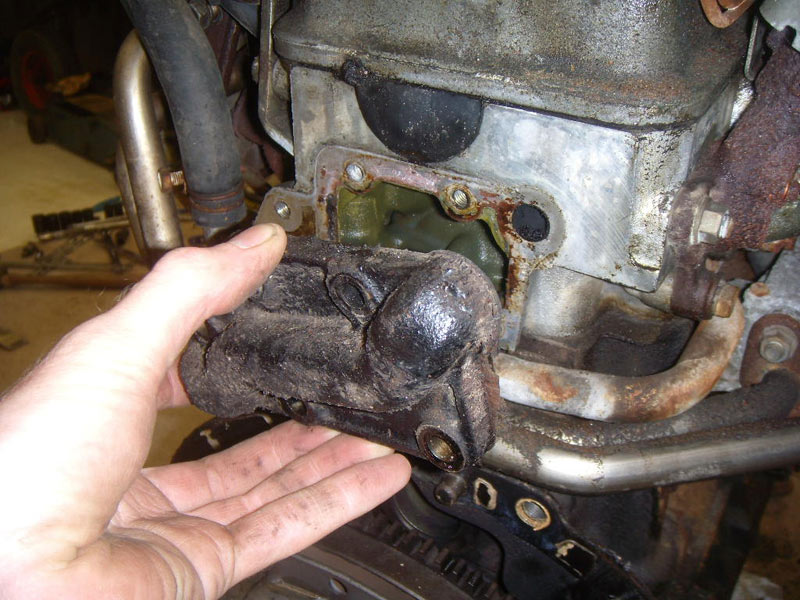
1) I did loosen the bolt to wiggle the pipe last night - must not have tightened it fully after
2) I broke one of the 5 bolts (barely torqued it) when putting this thing on when I first put the pipe on
I think I'll take it off, and see if I can work the broken bolt out - and replace with studs (my favorite bolt replacement)
Not sure how I can get the bolt out if it's flush -damn head is ON....ugh. I have the OEM gasket on there - maybe I can just smear FIPG everywhere and tighten the other 4 bolts....will update on my thread later - thanks for the tip, Mark!!
(stole this photo)
1) I did loosen the bolt to wiggle the pipe last night - must not have tightened it fully after
2) I broke one of the 5 bolts (barely torqued it) when putting this thing on when I first put the pipe on
I think I'll take it off, and see if I can work the broken bolt out - and replace with studs (my favorite bolt replacement)
Not sure how I can get the bolt out if it's flush -damn head is ON....ugh. I have the OEM gasket on there - maybe I can just smear FIPG everywhere and tighten the other 4 bolts....will update on my thread later - thanks for the tip, Mark!!
04-19-2013, 07:39 PM
#231
Gotta get if out, new stud/bolt (just use studs on bottom 2 if at all, cuz once it's right, it should never leak again...)....BUT, I would not try to ditch that bolt and rtv.... Toyota, while some locations and set ups seem to torture and some even , in fact, being poor choices......most all they did was with lots of planning and attention to torque patterns and values, ya know? Head bolts went from 58 to 64#, oil pump has 3 different torque values between 5 bolts.....
I think the risk if leaking would be high. Hate always being a debbie downer latelyn ...but in this realm I guess I'm a bit heavy on the "do it right the first time".
I think the risk if leaking would be high. Hate always being a debbie downer latelyn ...but in this realm I guess I'm a bit heavy on the "do it right the first time".
04-19-2013, 09:52 PM
#232
How about the 82 Supra AFM swap?
Phil, IIRC Kiyobrown also built a compartment to air into AFM cooler than the rest of the engine compartment. PLs let us know how much improvement you get with that swap.
04-20-2013, 08:13 PM
#233
Registered User
Thread Starter
iTrader: (2)
Join Date: Dec 2009
Location: Pleasanton, CA - SF Bay Area
Posts: 2,159
Likes: 0
Received 7 Likes
on
5 Posts
Will do Ray.
I took off the egr cooler today and was able to remove the snapped bolt by hand
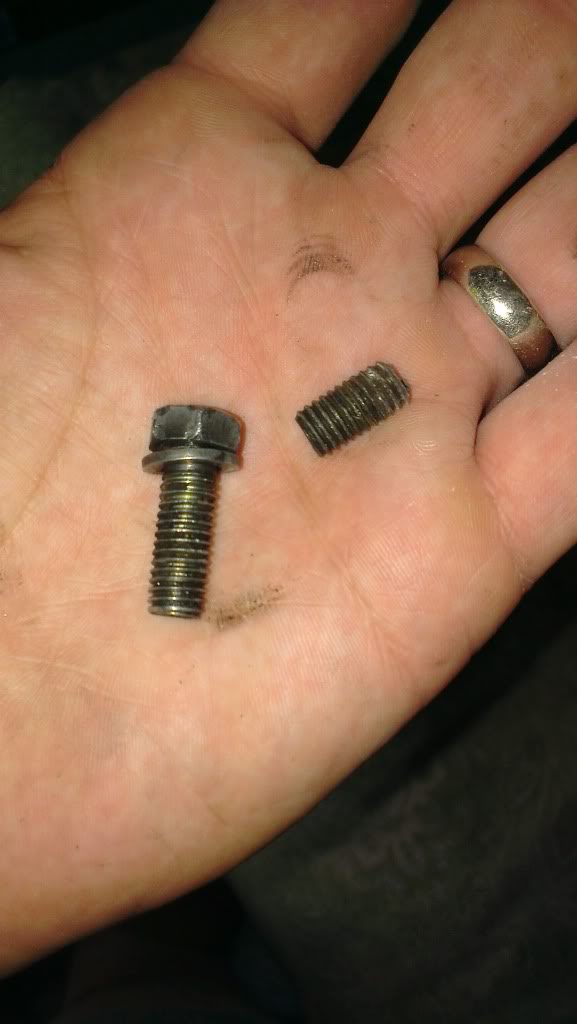
Tomorrow I will get all new bolts or studs for mounting it back on to the new head. Any reason NOT to use all studs here? Chef mentioned using studs for the lower of the five bolts, but I don't see a reason not to just use studs..I would feel better torquing down studs rather than bolts back there...thoughts??
I took off the egr cooler today and was able to remove the snapped bolt by hand
Tomorrow I will get all new bolts or studs for mounting it back on to the new head. Any reason NOT to use all studs here? Chef mentioned using studs for the lower of the five bolts, but I don't see a reason not to just use studs..I would feel better torquing down studs rather than bolts back there...thoughts??
04-24-2013, 09:28 AM
#234
Registered User
Thread Starter
iTrader: (2)
Join Date: Dec 2009
Location: Pleasanton, CA - SF Bay Area
Posts: 2,159
Likes: 0
Received 7 Likes
on
5 Posts
Soooo close!
In typical slow fashion, I made a little progress last night - I went at that EGR cooling plate again last night and had to do the bolts/studs twice more before I got it to NOT LEAK water. I ended up using all new bolts and no studs, as the studs never seemed to really "take" and snug up - the bolts did and the leaks stopped (hopefully that trend will continue when the engine is warm - that area is hard to get to!
I spilled a ton of water on the garage floor during all this....sigh.
So, got that guy on, topped off with more water and installed the valve cover.
Also installed the fan (had to take the shroud off - poor planning again).
Hooked up the AFM (but still need to mount it properly - it's just laying there on the passenger side plugged into the air filter for now - I want to get it running before I do that or the battery mount.
Bumped the starter several times with the coil disconnected to get the oil flowing.
The check engine light still comes on - I need to do the diag port short and read the codes - never had a CEL on this truck in 11 years, so this is my first time doing a non OBD-II CEL....Found a GREAT guide from Roger at 3Crawler, linked below and pasted for reference for later. My guess is it's either a bad sender (the two under the t stat's plugs got a little bent so maybe they don't work anymore), or the AFM is bad. Or the TPS, since I removed and adjusted it...we'll see soon!
So, just need to hook up vacuum hoses, diagnose CEL, and start her up!
Anything I'm not thinking of guys?
Here is the CEL process article and the chart I copied from his site:
http://www.4crawler.com/4x4/CheapTri...es/index.shtml
CODE DESCRIPTION / PROBABLE CAUSE(S)
1 Normal operation (no code stored)
2 Open or shorted Air Flow Meter (AFM) circuit
- Defective AFM
- Defective Electronic Control Unit (ECU)
3 No signal from igniter 4 times in succession
- Defective Igniter
- Defective Main Relay circuit
- Defective ECU
4 Open or shorted Water Thermo Sensor (THW) circuit
- Defective THW
- Defective ECU
5 Open or shorted Oxygen Sensor (O2) circuit
- Lean or rich indication (with injectors full rich or full lean)
- Defective O2 sensor
- Defective ECU
6 No engine revolution sensor (Ne) signal to ECU
- Ne being over 1000 RPM in spite of no Ne signal to ECU
- Defective Igniter circuit
- Defective Igniter
- Defective distributor
- Defective ECU
7 Open or shorted Throttle Position Sensor (TPS) circuit
- Defective TPS
- Defective ECU
8 Open or shorter Air Thermo Sensor citcuit
- Defective intake air thermo sensor circuit (see AFM)
- Defective ECU
9 not used?
10 No starter switch signal for ECU w/ vehicle speed = 0 and engine RPM > 800
- Defective Vehicle Speed Sensor (VSS)
- Defecticve main relay circuit
- Defecticve igniter switch to starter circuit
- Defective ECU
11 Short circuit in Check Connector T with A/C switch ON or TPS - IDL point OFF
- Defective A/C switch
- Defective TPS circuit
- Defective TPS
- Defective ECU
12 Knock control Sensor (KS) signal has not reached judgement level in succession
- Defective KS circuit
- Defective KS
- Defective ECU
13 Knock CPU (Sensor?) faulty
04-24-2013, 12:13 PM
#235

Sorry missed the last update. would have said.. My concern with using studs on the EGR cooling passage cover would be can you get the cover between the studs and firewall. Seems like you managed so that's a non issue?
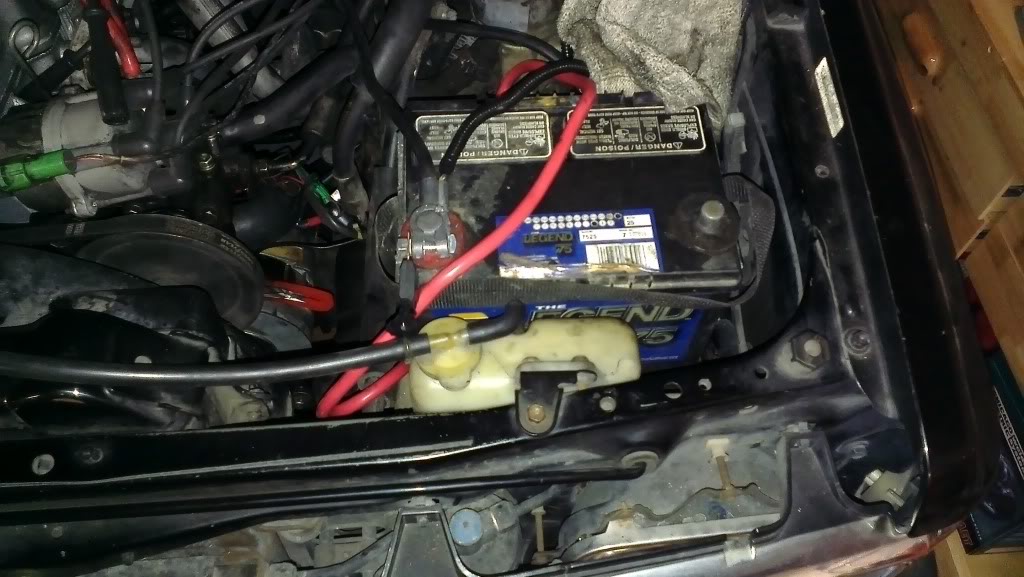
You'll want to consider rotating your battery so the positive side is away from the fender. This prevents it from shifting and shorting out and makes jump starting less apt to ground out also.
You can gently tweak the copper bits of the coolant switch and sensor so they line back up with the female plug ends. no worries there unless you bashed them really well, in which case they break loose internally and don't show conductivity. I didn't check if the cold start switch is open or closed at low temp, but I expect it's closed (read: has low or no resistance) when cold.
Your diagnostic code list looks like the turbo list, aka wrong one.
04-24-2013, 12:21 PM
#236
Registered User
Thread Starter
iTrader: (2)
Join Date: Dec 2009
Location: Pleasanton, CA - SF Bay Area
Posts: 2,159
Likes: 0
Received 7 Likes
on
5 Posts
Thanks Co_94.
I was able to wedge the cooler in there, and between the water pipe mounting tab (I had put one stud in at the top, which allowed me to slide the bottom in first, then put it over the stud. I ended up swapping for bolts anyway afterall.
I have the battery positioned that way and was doing so for the very reason you mentioned
For the senders, if that's the issue, the plastic male plugs are just loose to the touch - you can manually rotate and push them "in" to make them more snug but it's not very tight....I'll see what the code says.
Speaking of codes, I got that list of codes from 4crawler's site, linked above in the post....do you have another more accurate list if this is for a 22RET and not 22RE? He had 2 different lists, one for 86-87 trucks, and one for "later" years (88 and up).
04-24-2013, 12:48 PM
#237
Plug gender is determined metal bits not the shrouds. Pretty sure you got it right there but thought I'd throw that out there... You maybe lost the O-rings which you can source from HF in an assortment or estimate em with singles from the hardware store. Can usually tighten the female spade with a screw driver or pick if that is the issue, or worst case give the male spade a bit of a twist so it connects well at the corners.
As for what the code is I'm going to guess maybe the loose plugs or you swapped the cold start timing switch with the engine coolant temp plugs. .. Lemme go checks those... Meh book fail, doesn't show the cold start plug pretty sure it's the same square plug. ECT is G(green) and Br-B(Brown-Black), switch is G-W(Green-white) and B(Black).
04-25-2013, 07:01 PM
#238
Registered User
Thread Starter
iTrader: (2)
Join Date: Dec 2009
Location: Pleasanton, CA - SF Bay Area
Posts: 2,159
Likes: 0
Received 7 Likes
on
5 Posts
I ran the diagnosis and got a"4"...bad thermo sensor from the chart above. Guessing it is one or both of these guys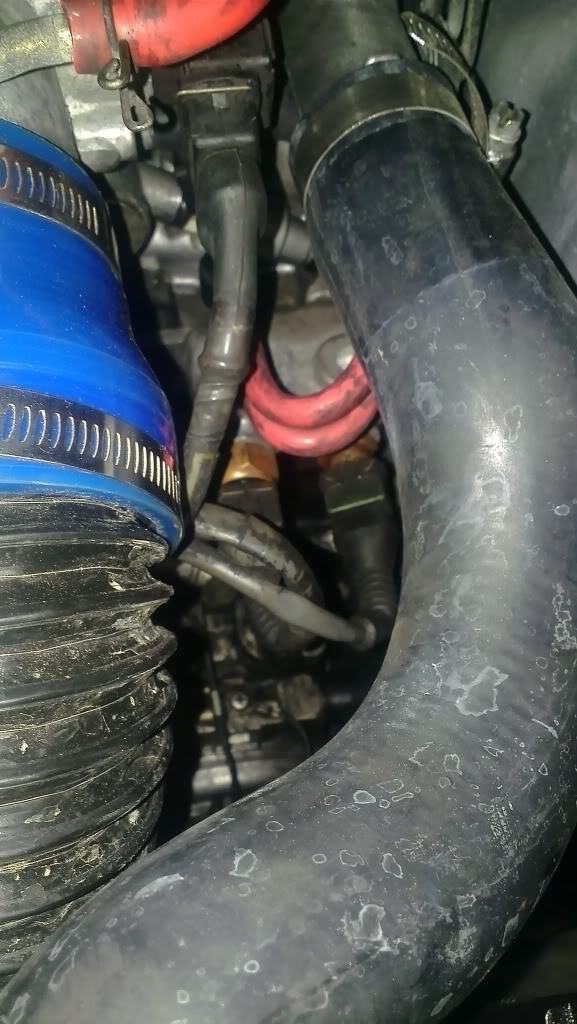
I plan to get it running, then drain coolant, pull these guys and diagnose if they are salvageable....
I plan to get it running, then drain coolant, pull these guys and diagnose if they are salvageable....
04-25-2013, 11:52 PM
#239
Do u, like me, have a thermo temp time switch/sensor just behind the thermostat? Mine had a bad pin so I fixed that and it stopped a code.... Cant remember which code it was. Got new OEM as mine was a bit fuggled.... Not all year 22re's have em.
04-26-2013, 03:44 AM
#240
Super Moderator
Staff
iTrader: (1)
Join Date: Aug 2008
Location: Anderson Missouri
Posts: 11,788
Likes: 0
Received 25 Likes
on
22 Posts
You have made some great progress. I havent been able to get on here as much as I would like lately. The sensor on the right is the Water Thermo Sensor. Never had one of them to go bad myself. The one on the left is the Cold Start Timing Switch, those do go bad and is something that disappears from the salvages quick.
Since you never had a code before you started, I am thinking you have a bad connection or even possibly forgot to hook one up.
Yours will be the top picture. Use a paper clip instead of a wire. When I took the picture, I couldnt find a paperclip. You have the correct codes listed above for yours.
How to get Check Engine Codes. I just put this up for others. Applies to 87 and up. 86 and older is the bottom picture.
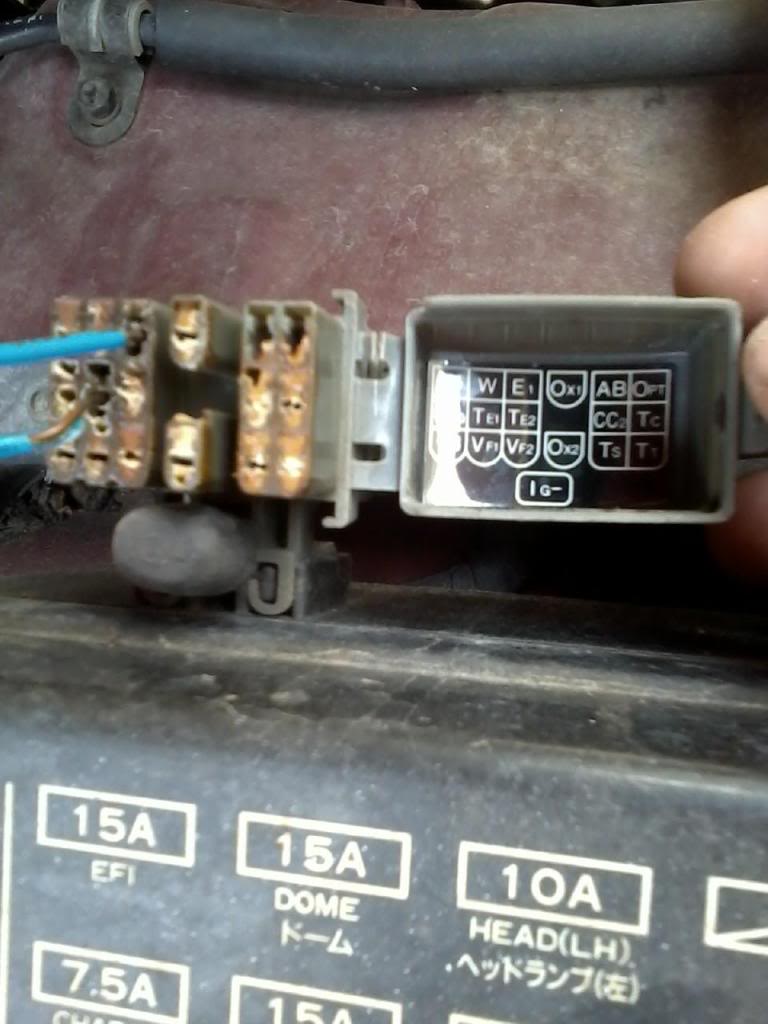
The Diagnostic port for the 85-86 is on the Drivers side inner fender and is nothing the same as the 87 and up. Here is T1 and E1 jumped. The codes and engine flashes are the same as the rest of the trucks on the dash.

Since you never had a code before you started, I am thinking you have a bad connection or even possibly forgot to hook one up.
Yours will be the top picture. Use a paper clip instead of a wire. When I took the picture, I couldnt find a paperclip. You have the correct codes listed above for yours.
How to get Check Engine Codes. I just put this up for others. Applies to 87 and up. 86 and older is the bottom picture.
The Diagnostic port for the 85-86 is on the Drivers side inner fender and is nothing the same as the 87 and up. Here is T1 and E1 jumped. The codes and engine flashes are the same as the rest of the trucks on the dash.


