
Marlin Rear Bumper for 4Runner
 04-11-2007, 03:47 PM
#81
Contributing Member
Join Date: Oct 2002
Location: Santee, CA
Posts: 2,724
Likes: 0
Received 0 Likes
on
0 Posts
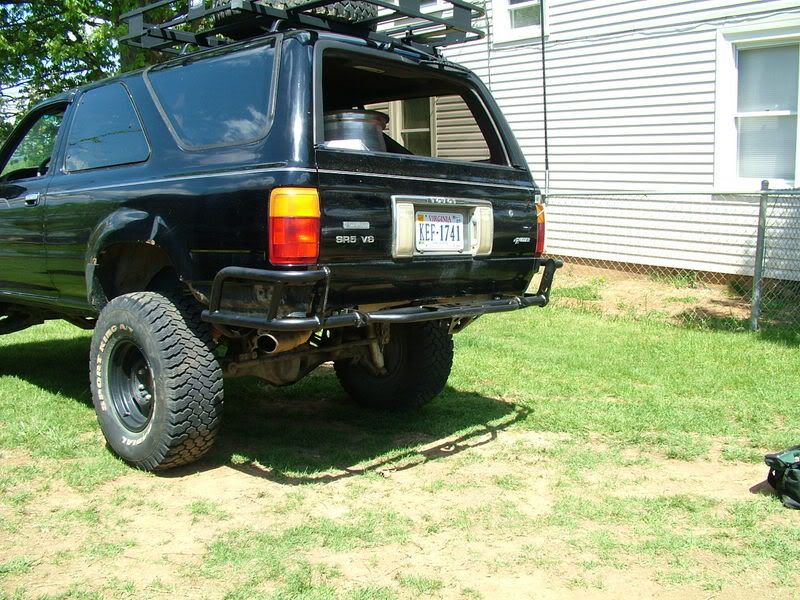
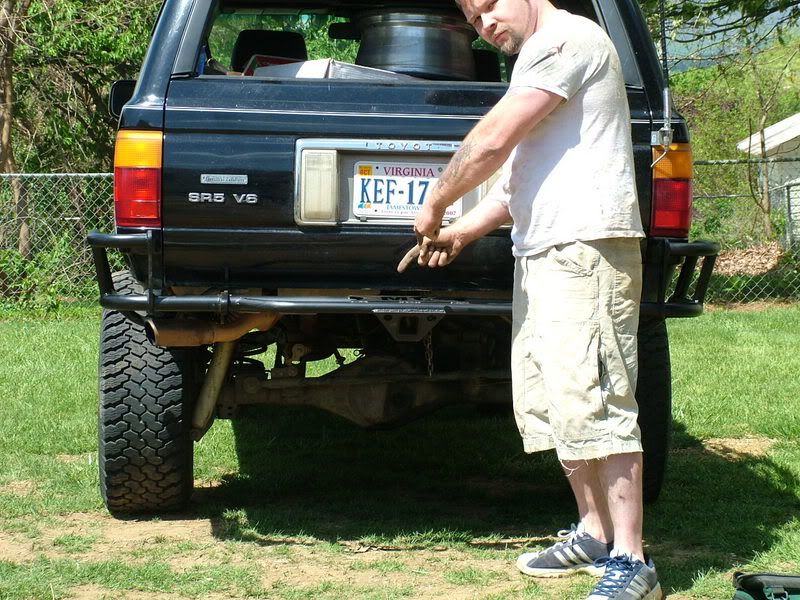
Not a Marlin bumper, but same idea...I had my exhaust re-routed and tucked right below the bumper. I have hit it a couple times, but for the most part it is out of the way...


Going through the body is another alternative, but it looks bad once it has been rubbed on rocks..Phalanx's rig.....

Going through the body is another alternative, but it looks bad once it has been rubbed on rocks..Phalanx's rig.....
 04-11-2007, 06:15 PM
#82
Registered User
Join Date: Mar 2007
Location: spfld, MA
Posts: 385
Likes: 0
Received 0 Likes
on
0 Posts
just got an e-mail from marlin...they shipped my bumper this morning...i guess they had one after all.
also just went to a buddies house and he put on my passenger side slider...it looks BA can't wait to get the other one on and then the bumper
also just went to a buddies house and he put on my passenger side slider...it looks BA
can't wait to get the other one on and then the bumper
04-11-2007, 06:27 PM
#83
Contributing Member
Cootees - Can you give me Larry's number so I could call and talk with him please? I wouldn'tcut a hole in the body for the exhaust unles you are going to put some kind of heat sheild around it to keep from heating up and bubbling your paint. Why not just cut it off a little and leave it? Maybe throw a turndown or something if necessary. You've seen mine right?
Looking at the Marlin compared to the CBI I'm goiing CBI all the way. They look sturdier and more form fitted to each vehicle. Plus, they have some really nice sliders that are coming my way as well.
Looking at the Marlin compared to the CBI I'm goiing CBI all the way. They look sturdier and more form fitted to each vehicle. Plus, they have some really nice sliders that are coming my way as well.

I have seen yours and I would love to dump it over the axle but I have to exit it on the side somewhere or I will get fumes inside when I run with my rear window down.
04-11-2007, 10:18 PM
#84
Registered User
Join Date: Dec 2005
Location: Roanoke, VA
Posts: 571
Likes: 0
Received 0 Likes
on
0 Posts
That's a bummer for his garage.
I guess that's a good point about the fumes. I don't really think about that because I don't drive an suv. Can you come up and over like that and maybe come out back at an angle or straight back in general. Maybe just bring it right to the edge of the bumper instead of coming all the way out.
I guess that's a good point about the fumes. I don't really think about that because I don't drive an suv. Can you come up and over like that and maybe come out back at an angle or straight back in general. Maybe just bring it right to the edge of the bumper instead of coming all the way out.

 04-15-2007, 07:22 AM
#86
Registered User
Join Date: Mar 2007
Location: spfld, MA
Posts: 385
Likes: 0
Received 0 Likes
on
0 Posts

just checked up on the tracking info...my bumper is said to be at my door on 4/20..next friday....hopefully it won't be pouring rain like it is now so i can get that on and the driverside slider on too...

 04-19-2007, 10:40 AM
#90
Contributing Member
Join Date: Feb 2006
Location: Loveland, Colorado
Posts: 458
Likes: 0
Received 0 Likes
on
0 Posts
Pics
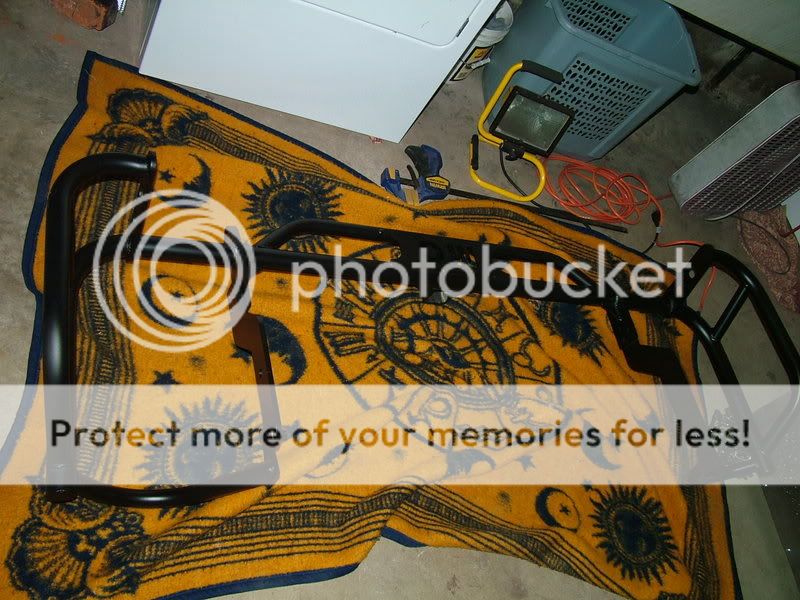
Wife has the DCam in her car right now, so you have to make due with crappy phone images. These are just general images. I painted the plates that go into the frame, but am going to let the rest of it "season" in Moab, and then the POR-15 will stick to it better when I get back.
04-19-2007, 10:46 AM
#91
Contributing Member
Join Date: Feb 2006
Location: Loveland, Colorado
Posts: 458
Likes: 0
Received 0 Likes
on
0 Posts
Pics of the welding
Looks like all of the flat steel is laser-cut. The welding job is very good. Every mount point fit very snug. I'm amazed that it could be built to such a close fit. Getting the front outside hoops into where they bolt is kinda tricky with the springs and shackles in the way. You have to drop the back end of the bumper down half way and insert the side hoops up into their position. but they have to come in from the front of the vehicle, which means you must have the rear of the bumper at just the right angle. Once you have the bolts in on the outside (front) hoops, you just swing it up and put the six bolts in to bolt it to the main (3/8" flat steel) mounting plates.
Last edited by 86Original; 04-19-2007 at 10:48 AM.
04-23-2007, 12:12 PM
#93
Contributing Member
Join Date: Feb 2006
Location: Loveland, Colorado
Posts: 458
Likes: 0
Received 0 Likes
on
0 Posts
Here's a shot from yesterday on Moab Rim, overlooking the Colorado River.

Note the power lines below. They're hanging from 40-60ft tall poles above the pavement of Kane Creek Road. I believe that the obstacle is called Devil's Crack. Moments earlier the passenger rear was fairly high in the air
Note the power lines below. They're hanging from 40-60ft tall poles above the pavement of Kane Creek Road. I believe that the obstacle is called Devil's Crack. Moments earlier the passenger rear was fairly high in the air
Last edited by 86Original; 04-23-2007 at 12:19 PM.


 04-24-2007, 05:06 AM
#95
Registered User
Join Date: Mar 2007
Location: spfld, MA
Posts: 385
Likes: 0
Received 0 Likes
on
0 Posts
here are some shots from last saturday...the best i can do for now
http://www.leded.com/GutterMaBell_Ap...07/image6.html
http://www.leded.com/GutterMaBell_Ap...7/image72.html
http://www.leded.com/GutterMaBell_Ap...07/image6.html
http://www.leded.com/GutterMaBell_Ap...7/image72.html

 04-30-2007, 03:13 AM
#99
Registered User
Join Date: Mar 2007
Location: spfld, MA
Posts: 385
Likes: 0
Received 0 Likes
on
0 Posts
looks good, love the 2door 2nd gens.
looks better then mine does, i got to modify it so it's up higher for the BL
looks better then mine does, i got to modify it so it's up higher for the BL
Last edited by LTrunner; 04-30-2007 at 05:04 PM.


