
Downey intake failed. Installing LC dual row chain and Engnblr Street/RV head
 05-21-2008, 09:36 AM
#1
Registered User
Thread Starter
Downey intake failed. Installing LC dual row chain and Engnblr Street/RV head
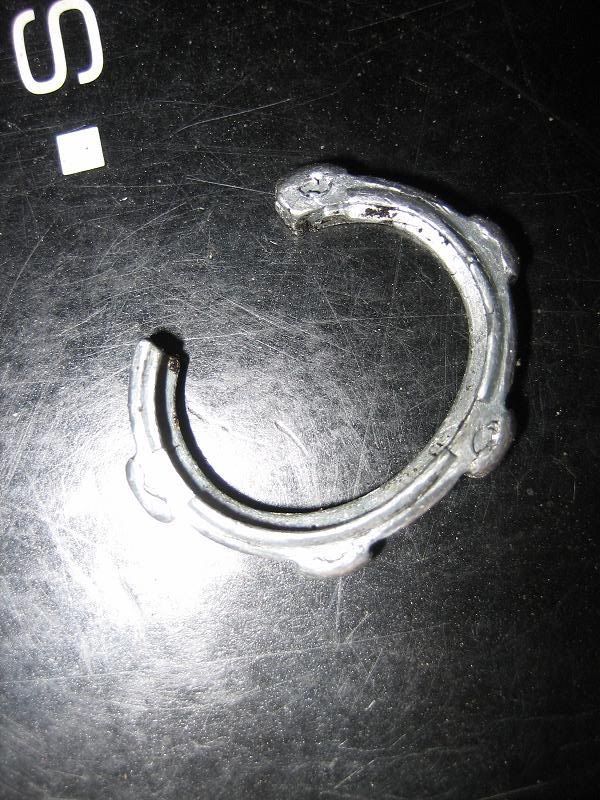
Over spring break i was driving my truck in the desert and the motor started making a loud banging noise(like a pot and pan smacking together). I thought damn, that must be a rod. i was idling, so i quickly popped the hood and ran around to listen. The sound was comming from the top of the motor. I shut it off and then i noticed this....
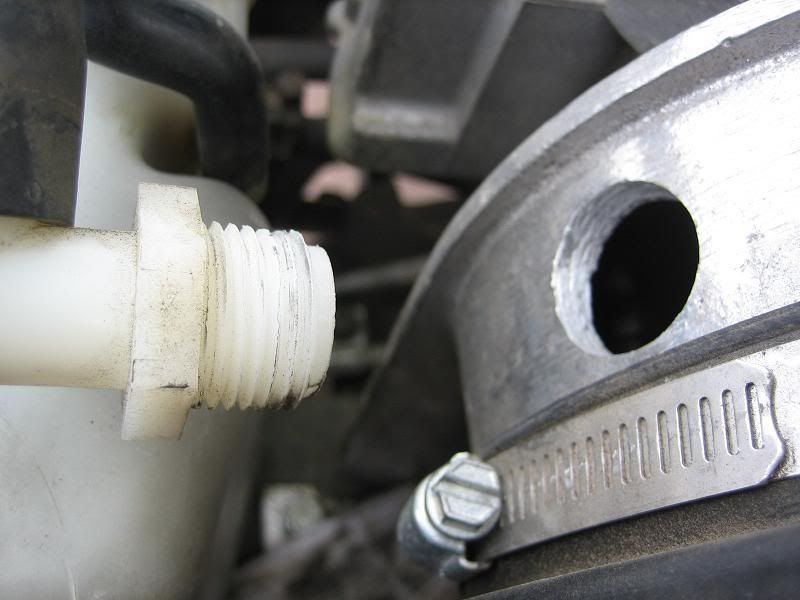
It's a Downey intake and there "was" a nut on the inside keeping the plastic elbow secured to the housing. My friend proceeded to tow me the 15-20 miles to the highway so i could get towed 100+ miles home, luckily i have AAA.
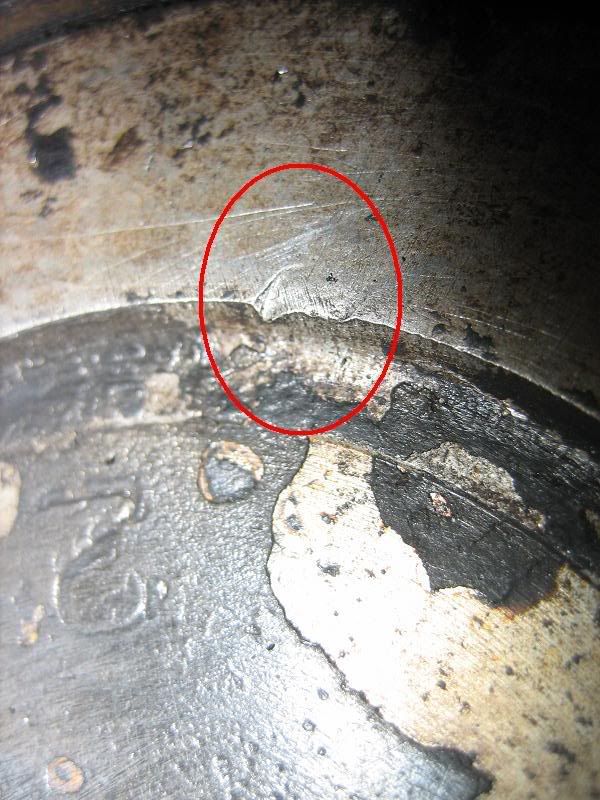
I ripped the top end apart and found the culprit sitting in the #1 cylinder intake port.
I was lucky that i was idling when the nut got sucked in because the damage was minimal. The valve had just started chpping away at the nut. Here is the top of piston #1:
I called Downey and they acted like this has never happened before. I told them that they need to change this design asap before it happens to more people. Three alteratives would be: tack weld the aluminum nut to the aluminum housing, thread the whole, or weld an elbow to the housing. They seriously thought that a flat nut mated up to a curved suface was gonna survive in an offroad vehicle. I had to leave my truck sitting in the driveway for 5 weeks while i focused on the rest of my school semester. Now that school is out i finally began the repair and while i am at it, i decided to upgrade some stuff:
-Engnbldr Street/RV head, gasket set, grade 10 head bolts, LC exhaust studs
-LC Engineering dual row timing chain conversion kit(dual row chain, steel guides, new timing cover, new japanese oil & water pump).
-LC heat isolator intake gaskets
-Injectors cleaned and balanced at Whitch Hunter Performance
-All aluminum radiator
-100 amp alternator conversion by Broadway Auto electric
Here is a list of bolt on parts that were already on the truck:
-LC header, 2.25" flowmaster
-Downey intake
-LC Pro EFI cam
-LC throttle body
-Black magic electric fan
-LC flywheel
-Denso Irridium plugs, NGK wires
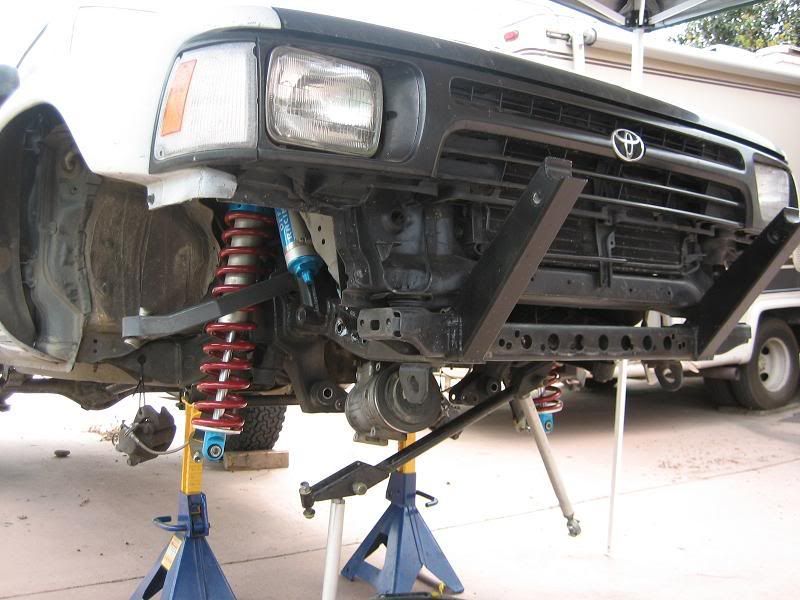
I spent all day tearing the rest of the accesories off the motor so i could get at the timing cover. The biggest set back was in order to get the oil pan off i needed to take off the lower A-arms and strut frame. While i had it apart, i replaced my 500lb springs with new Eibach 450lb springs.
This is where i was at yesterday:
It's a Downey intake and there "was" a nut on the inside keeping the plastic elbow secured to the housing. My friend proceeded to tow me the 15-20 miles to the highway so i could get towed 100+ miles home, luckily i have AAA.
I ripped the top end apart and found the culprit sitting in the #1 cylinder intake port.
I was lucky that i was idling when the nut got sucked in because the damage was minimal. The valve had just started chpping away at the nut. Here is the top of piston #1:
I called Downey and they acted like this has never happened before. I told them that they need to change this design asap before it happens to more people. Three alteratives would be: tack weld the aluminum nut to the aluminum housing, thread the whole, or weld an elbow to the housing. They seriously thought that a flat nut mated up to a curved suface was gonna survive in an offroad vehicle. I had to leave my truck sitting in the driveway for 5 weeks while i focused on the rest of my school semester. Now that school is out i finally began the repair and while i am at it, i decided to upgrade some stuff:
-Engnbldr Street/RV head, gasket set, grade 10 head bolts, LC exhaust studs
-LC Engineering dual row timing chain conversion kit(dual row chain, steel guides, new timing cover, new japanese oil & water pump).
-LC heat isolator intake gaskets
-Injectors cleaned and balanced at Whitch Hunter Performance
-All aluminum radiator
-100 amp alternator conversion by Broadway Auto electric
Here is a list of bolt on parts that were already on the truck:
-LC header, 2.25" flowmaster
-Downey intake
-LC Pro EFI cam
-LC throttle body
-Black magic electric fan
-LC flywheel
-Denso Irridium plugs, NGK wires
I spent all day tearing the rest of the accesories off the motor so i could get at the timing cover. The biggest set back was in order to get the oil pan off i needed to take off the lower A-arms and strut frame. While i had it apart, i replaced my 500lb springs with new Eibach 450lb springs.
This is where i was at yesterday:
 05-21-2008, 02:52 PM
#5
Registered User
Join Date: Mar 2008
Location: Temecula Valley, CA
Posts: 12,723
Likes: 0
Received 5 Likes
on
5 Posts
that aluminum 'nut' you're talking about looks like a typical lock nut used for electrical conduit junction box fittings. but yeah, you're right about it not tighening up flat against a curved surface.
You could ever-so-gently crimp the new nut with a pair of pliers or maybe put a second nut behind it and jam them together.
You could ever-so-gently crimp the new nut with a pair of pliers or maybe put a second nut behind it and jam them together.
05-21-2008, 03:06 PM
#6
Ouch, that sucks about the intake.
Nice truck, I was looking at the pics thinking "I've seen that truck before." If I remember right I bought a 31" spare AT tire from you a few months ago.
Nice truck, I was looking at the pics thinking "I've seen that truck before." If I remember right I bought a 31" spare AT tire from you a few months ago.

Trending Topics
05-21-2008, 03:29 PM
#8
Registered User
Join Date: Nov 2007
Location: Dillsburg, PA
Posts: 954
Likes: 0
Received 0 Likes
on
0 Posts
Looks like the nut portion should be welded to the outside of the intake. It would certainly stop that problem from happening again. Where is that hose coming from anyway? Is it a breather hose?
05-21-2008, 03:39 PM
#9
Registered User
Join Date: Mar 2008
Location: Temecula Valley, CA
Posts: 12,723
Likes: 0
Received 5 Likes
on
5 Posts
If I'm correct about that part being a lock nut for electrical connectors, you'll have a heckuva time welding it- it's cast / pot metal.
Better to tap the hole and thread the fitting in.
Better to tap the hole and thread the fitting in.
05-21-2008, 04:03 PM
#12
Registered User
Join Date: Nov 2007
Location: Dillsburg, PA
Posts: 954
Likes: 0
Received 0 Likes
on
0 Posts
05-21-2008, 09:09 PM
#13
Registered User
Thread Starter
It goes to the smog air pump
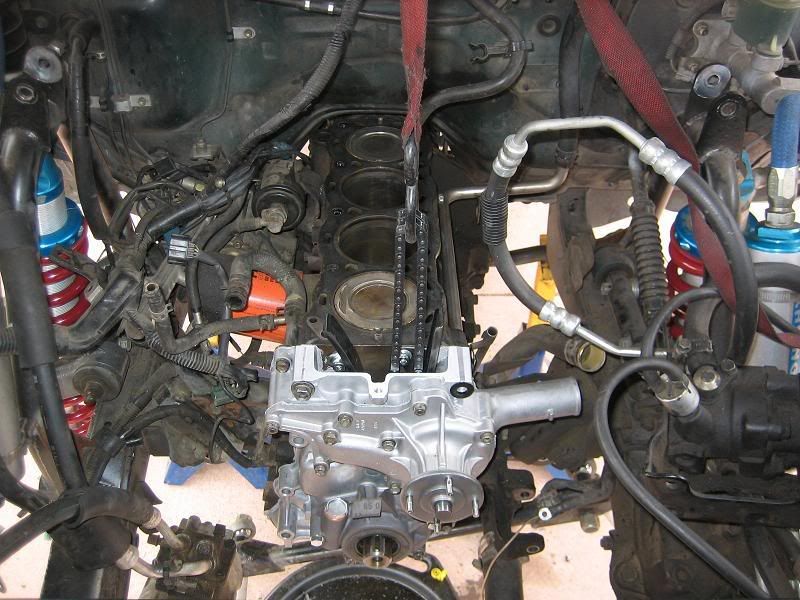
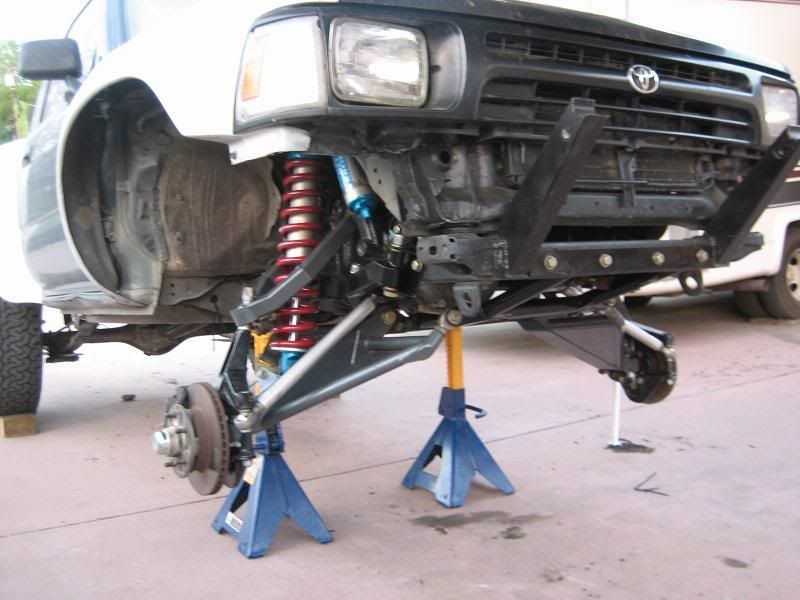
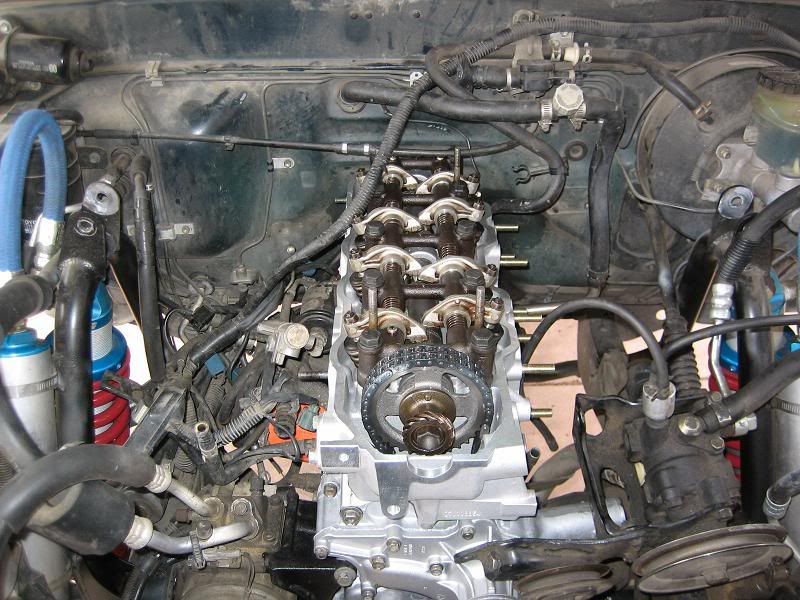
Here is what i accomplished today:
intalled the dual row kit, oil pan and put the front suspension back on
 05-26-2008, 02:42 PM
#15
Registered User
Thread Starter
I had to work all weekend so the progress isnt where i would like it to be. The cam sprocket was extremely difficult to get on the cam. Im worried now that it is too tight. I have no spark plugs in the head and it felt like 20ft-lbs of pressure to turn the motor over, but when i used my torque wrench to measure, it read between 35 and 40ft-lbs. I know the spread between the crank center and the cam center was different on the older and newer 22r blocks. Im wondering if LCE sent me the kit for the older block. Does anyone have any ideas?
05-26-2008, 03:17 PM
#16
Registered User
I don't have an answer on the cam, but have somebody weld an elbow to that intake. I wouldn't use any nuts after that happened. Doesn't LCE have any kind of warranty? Is it not covered because it's "off-road"?
05-26-2008, 04:18 PM
#17
Registered User

Join Date: Jan 2005
Posts: 552
Likes: 0
Received 0 Likes
on
0 Posts
I bought one of these when I still had a 3.0 in my truck and when I saw the plastic elbow and electrical conduit nut I knew this wasn't good. I found a rubber grommet that fit the hole perfectly, then turned, drill and tapped some Delrin rod to replace the part of the elbow that goes into the air cleaner. I milled some wrench flats on the part outside of the air cleaner and screwed in a brass barbed elbow fitting for the hose. Inside, a clevis pin and washer is safety wired to keep the new elbow fitting from coming out. I also used nut retainers and safety wire to bolt on the VAFM. The fitting I made for it also seals that area, unlike the elbow supplied by Downey.
I would forget about welding this thing. I did some machining to it to make it fit and it had lots of small voids in it. The casting is a little on the mediocre side.
I would forget about welding this thing. I did some machining to it to make it fit and it had lots of small voids in it. The casting is a little on the mediocre side.
Last edited by cadman; 11-10-2015 at 06:40 PM.
05-26-2008, 06:43 PM
#18
Registered User
Join Date: Jan 2007
Location: milwaukee, WI baby muddin in the streets!!
Posts: 2,801
Likes: 0
Received 1 Like
on
1 Post
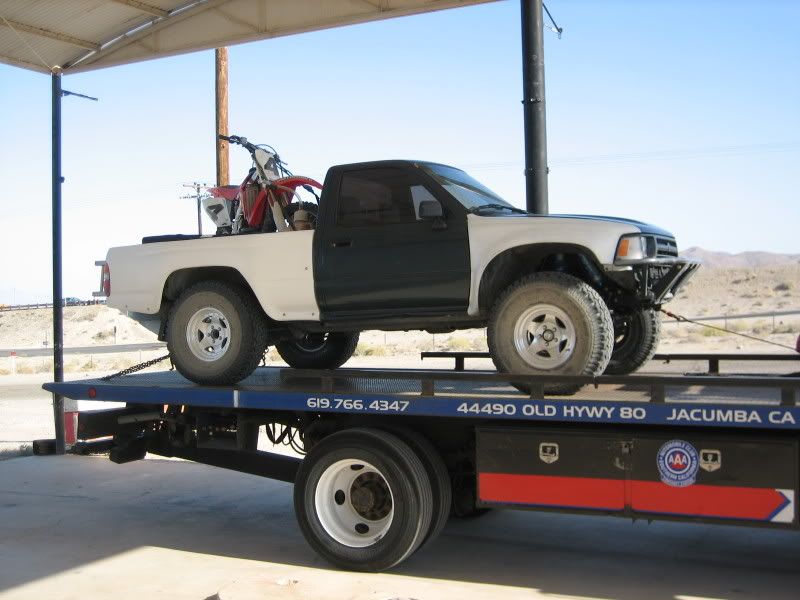
all i can say is what the heck do you do to just say well im going to do this so ill just replace this wile im at it?????????? i mean my god kid well nice truck i mean very nice i really like you front end what is it? long travel? looks good on that man
05-26-2008, 09:03 PM
#19
Contributing Member
05-26-2008, 09:24 PM
#20
Registered User
Join Date: Feb 2008
Location: Salem, OR
Posts: 2,805
Likes: 0
Received 0 Likes
on
0 Posts
I had to work all weekend so the progress isnt where i would like it to be. The cam sprocket was extremely difficult to get on the cam. Im worried now that it is too tight. I have no spark plugs in the head and it felt like 20ft-lbs of pressure to turn the motor over, but when i used my torque wrench to measure, it read between 35 and 40ft-lbs. I know the spread between the crank center and the cam center was different on the older and newer 22r blocks. Im wondering if LCE sent me the kit for the older block. Does anyone have any ideas?


