
DIY headlight wiring harness upgrade for low $$
 01-24-2010, 02:00 PM
#41
Registered User
Dang it, hwhy didn't i see this yesterday, gonna go try that out. I thought mine wasn't working bacause of a switched power vrs switched ground.
EDIT: I just switched thsose grounds and boom, but bleeder did you notice that high lows stay on with the highs? no diode needed!!!!!!!!
EDIT: I just switched thsose grounds and boom, but bleeder did you notice that high lows stay on with the highs? no diode needed!!!!!!!!
 aka the John madden of YT!
 01-24-2010, 02:04 PM
#42
Contributing Member
Thread Starter
lmao
that's strange about the wiring though; I know that's not the case with the bulbs plugged in though
maybe the low amp draw of your test light, or the low amperage it takes to trip a relay isn't enough to kill the low beams in the OEM switching mechanism? I dunno...
either way, I have a diode wired into mine, and when the high beams are triggered, both the lows and the highs are one, and it puts out a good bit of light, and a hell of a lot of heat radaiating in front of the bulbs, lol. seriously, I melted shrink wrap in front of my headlight with the high beams on not even kidding! that makes me glad I used bulb sockets that say they are for "high heat applications"
  but everything's fused like it should be, so if we have a melt down, which we shouldn't, it'll be an isolated melt down
that's strange about the wiring though; I know that's not the case with the bulbs plugged in though
maybe the low amp draw of your test light, or the low amperage it takes to trip a relay isn't enough to kill the low beams in the OEM switching mechanism?
I dunno...either way, I have a diode wired into mine, and when the high beams are triggered, both the lows and the highs are one, and it puts out a good bit of light, and a hell of a lot of heat radaiating in front of the bulbs, lol. seriously, I melted shrink wrap in front of my headlight with the high beams on
not even kidding! that makes me glad I used bulb sockets that say they are for "high heat applications" but everything's fused like it should be, so if we have a melt down, which we shouldn't, it'll be an isolated melt down
Last edited by iamsuperbleeder; 01-24-2010 at 02:07 PM.
01-24-2010, 03:11 PM
#43
Registered User
I still think the high/low on at same time has something to do with the switched ground. I'd like to try this harness on something that had DRL on and see what happens. I think those have switched power. At least according to 4Crawler.
http://www.4crawler.com/4x4/CheapTri...s.shtml#SGtoSP
I did notice with high beams on my indicator light seems to be dimmer though. But, Icould be seeing things and it could have been dim before the switch over.
http://www.4crawler.com/4x4/CheapTri...s.shtml#SGtoSP
I did notice with high beams on my indicator light seems to be dimmer though. But, Icould be seeing things and it could have been dim before the switch over.
Last edited by xxxtreme22r; 01-24-2010 at 03:13 PM.
01-24-2010, 04:13 PM
#44
Registered User
 01-24-2010, 04:31 PM
#45
Contributing Member
Thread Starter
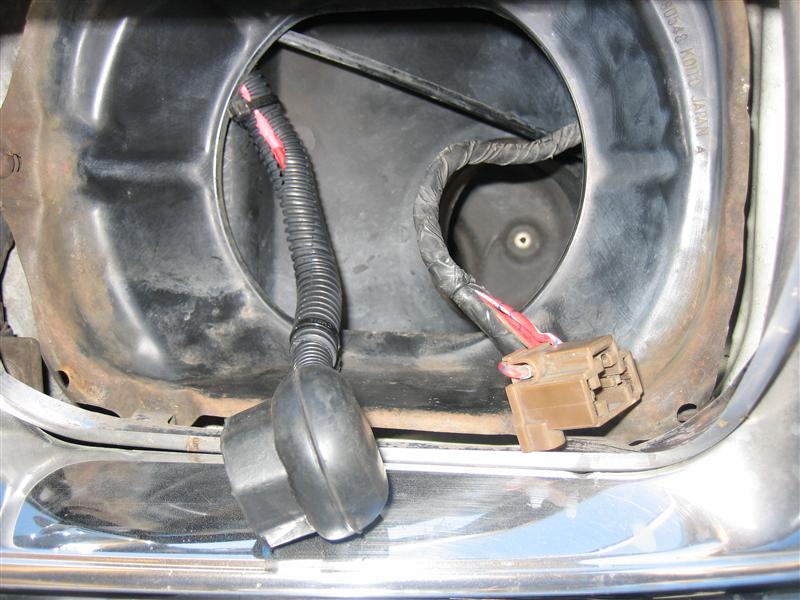
lol, yes, that's what I getting at by "high heat". The plastic they were wrapped in just said "For High Heat Applications"; I snagged them from work
they're ceramic, and they have a rubber boot-like thing over them to help keep the moister out
don't have any pics, but they look exactly like this:

they're ceramic, and they have a rubber boot-like thing over them to help keep the moister out
don't have any pics, but they look exactly like this:
Last edited by iamsuperbleeder; 01-24-2010 at 04:35 PM.
01-25-2010, 02:17 PM
#46
Contributing Member
Thread Starter
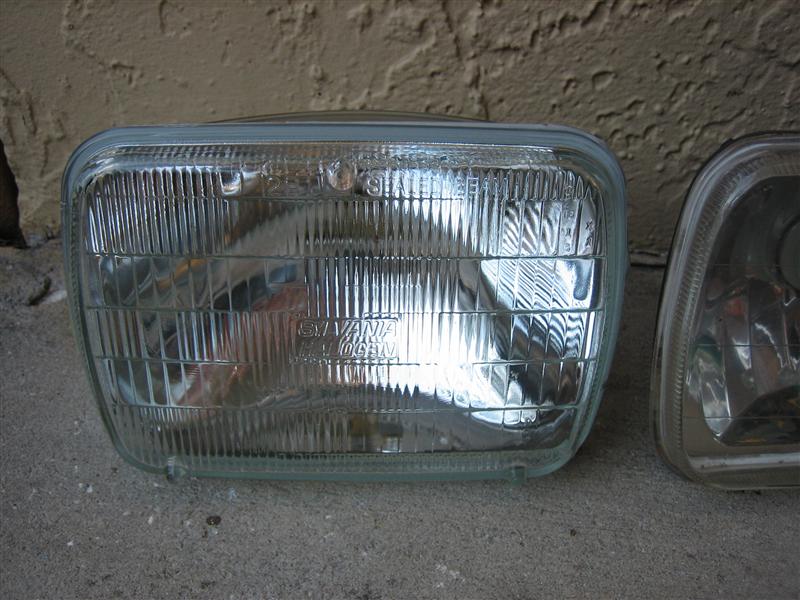
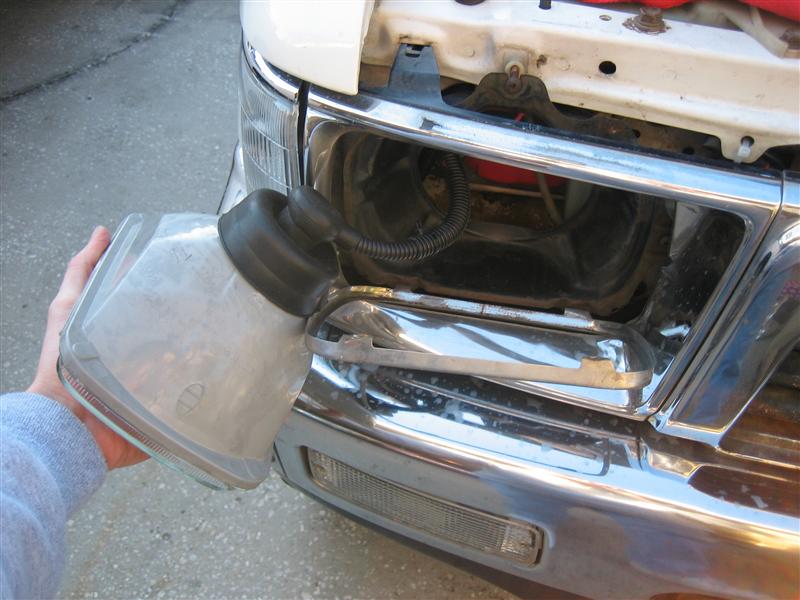
Well I installed the new lights today, and pulled out an OEM style sealed beam to put in one to compare
Brightness isn't much to speak of becuase I'm only running one light at a time on either circuit, and there's a reason for that. The OEM socket on the passenger side is being used as the tap-in for the relays, so it's sealed and wrapped up weather-tight, and I REALLY don't want to go digging into the new wiring harness just to undo the wires so that I can plug a headlight back into the OEM socket And by leaving it connected, I also couldn't plug the OEM sealed beam into the other side and run the high beams, because it would burn up the diode that I installed... so, I have a high beam and low beam pic of the new headlight, but just a low beam pic of the OEM style bulb in the OEM socket
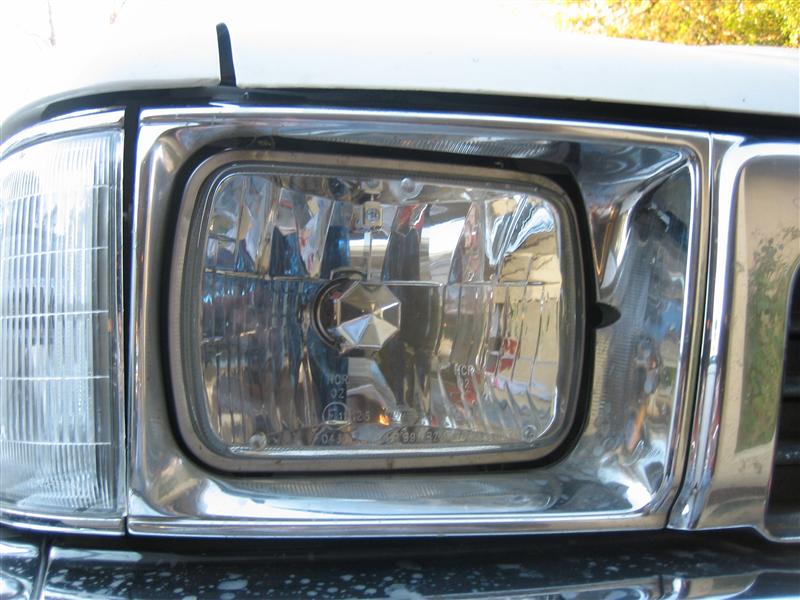
First off, the el-cheapo conversion lights that I've had in there for about 9 or 10 months obviously hazed up, and leaking a little too because of the rusting on the inside... word of advice, DO NOT buy the conversion lights that have those little accent lights, or "city lights" I think they usually call them, cause those are some cheap stuff!
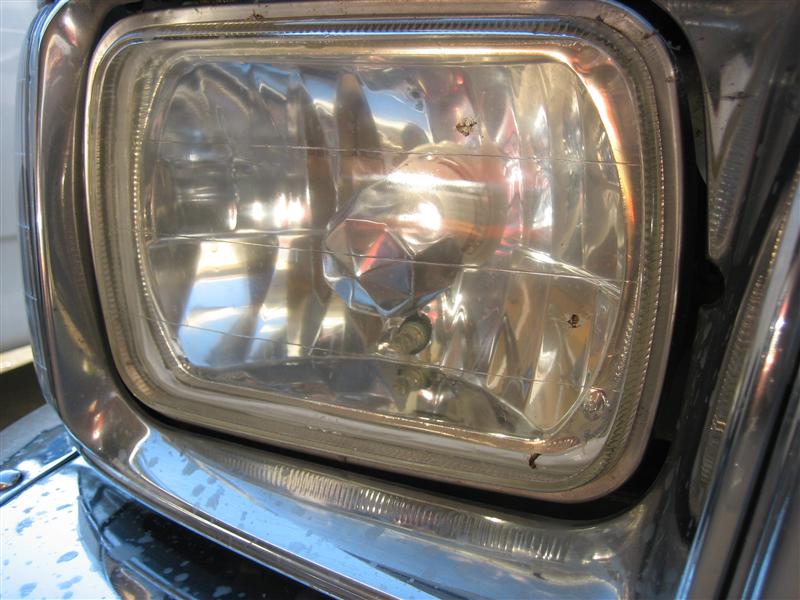
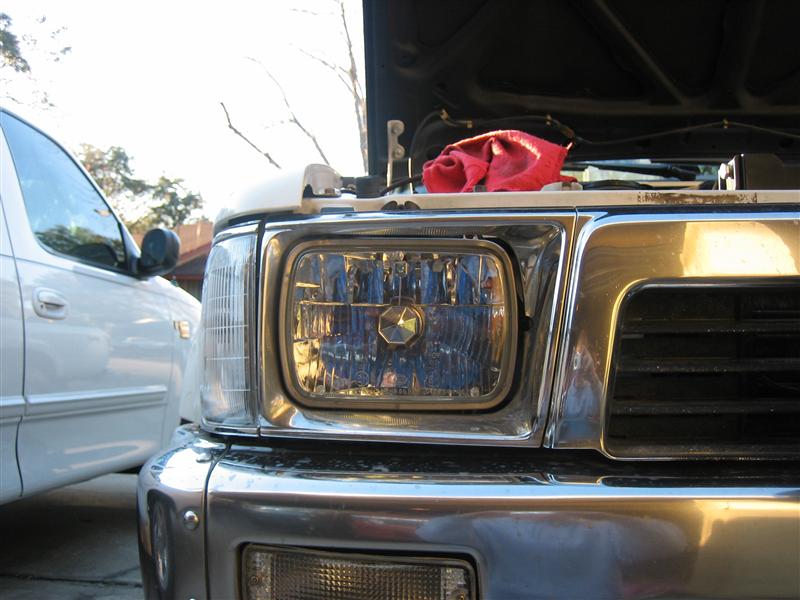
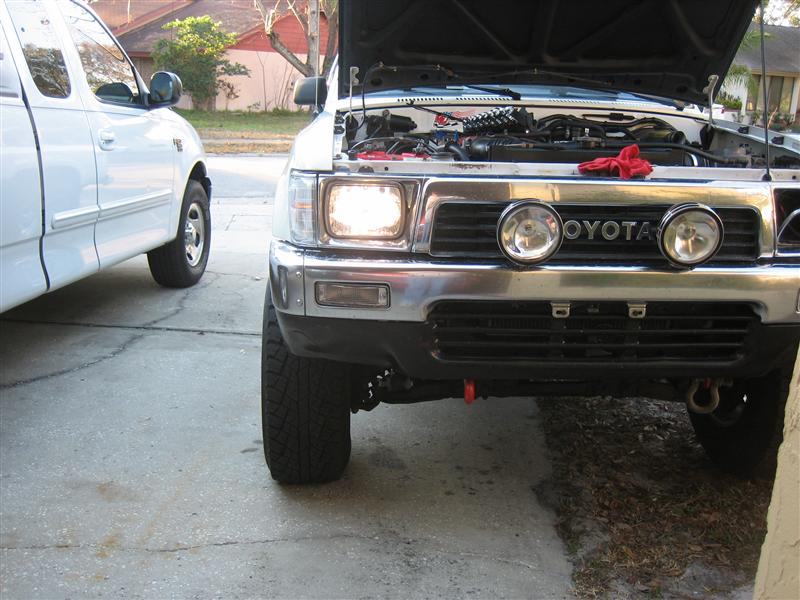
So, I put an OEM style sealed beam in the driver's side, plugged into the OEM socket
New plug on the left, OEM plug on the right
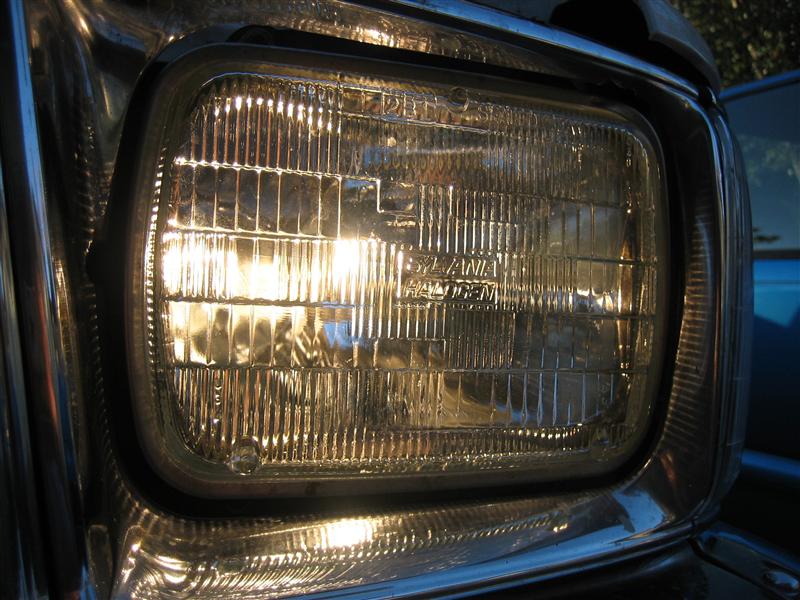
Notice the distint yellow tint
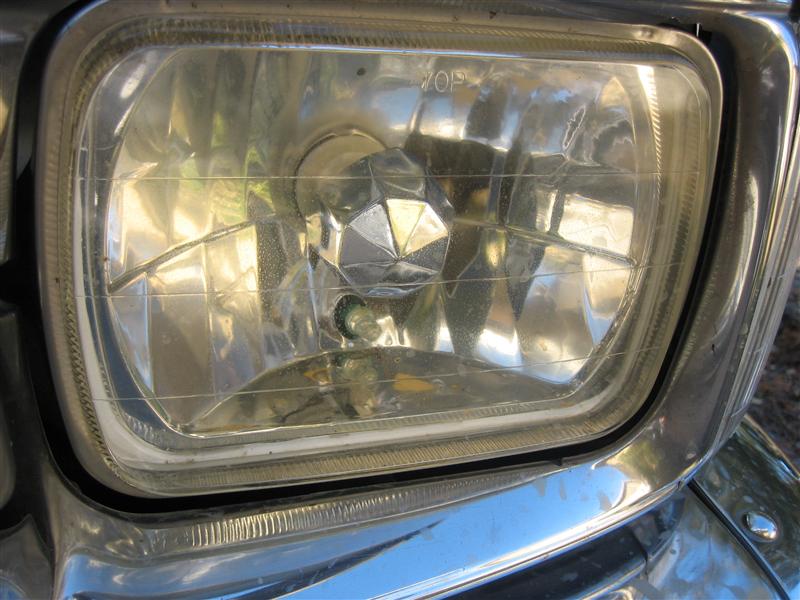
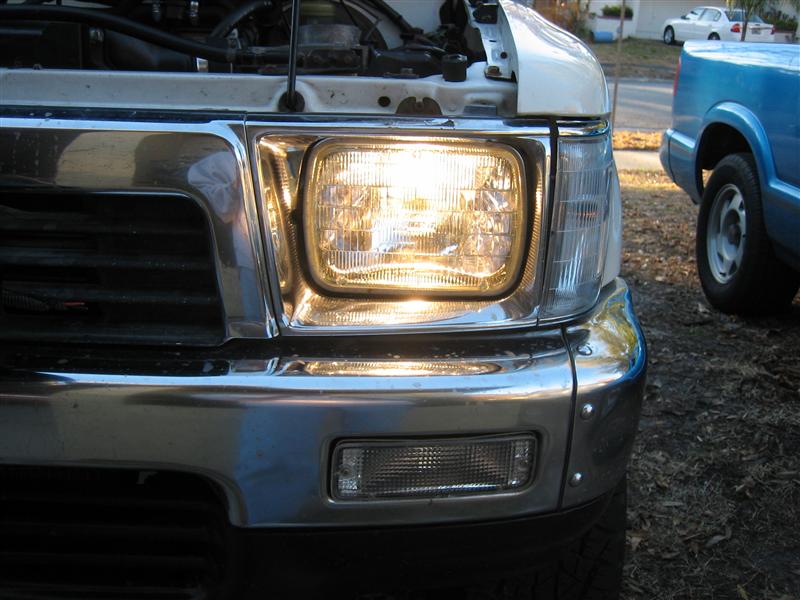
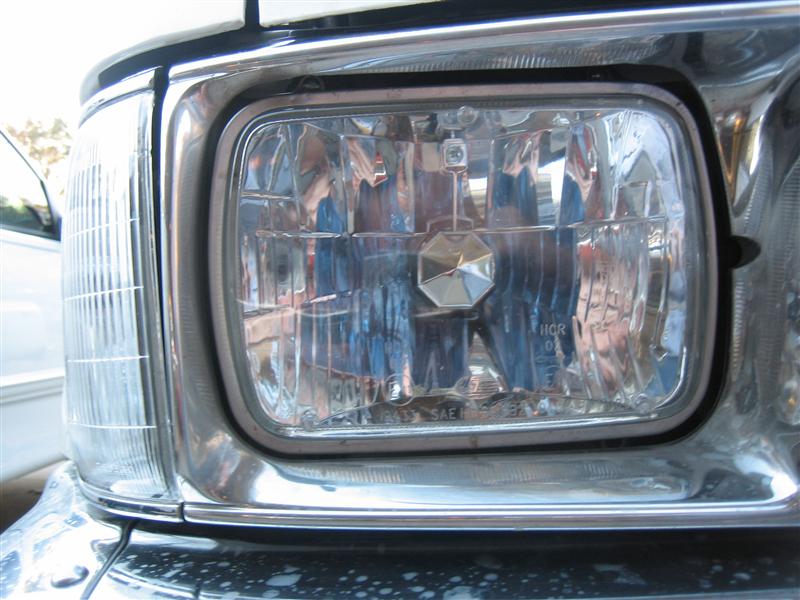
So, then I put one of the NEW conversion lights in the passenger side, plugged into the NEW harness
One thing nice about making your own wiring harness is that you can give yourself all the slack in the wires you want
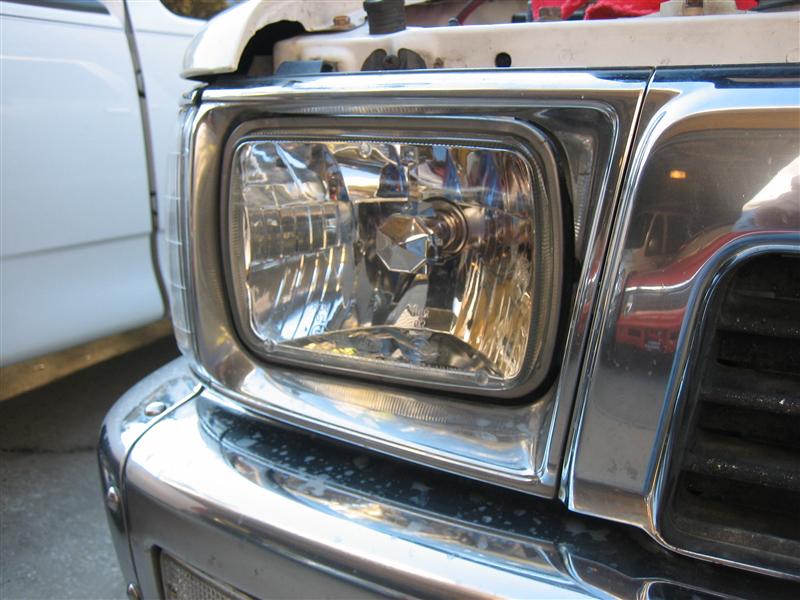
Nice and white light
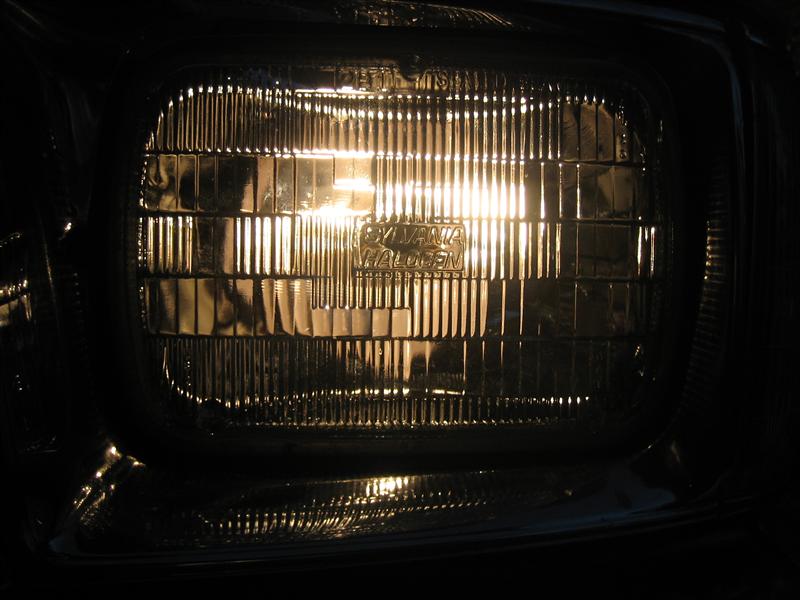
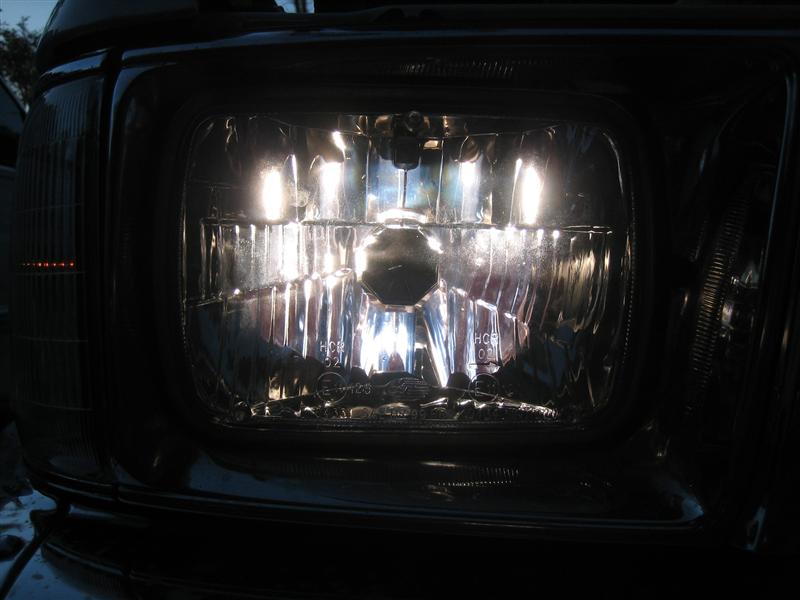
Low beam
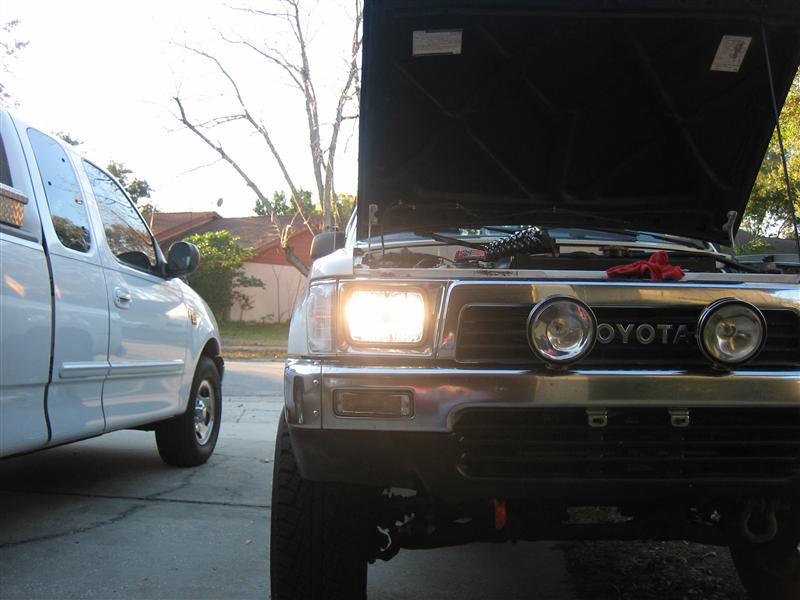
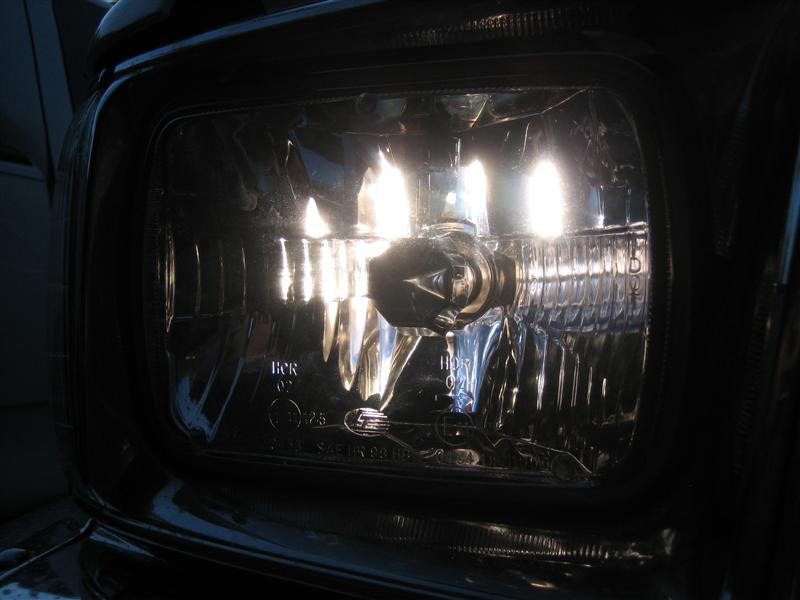
High beam
Again, low beam
and high beam
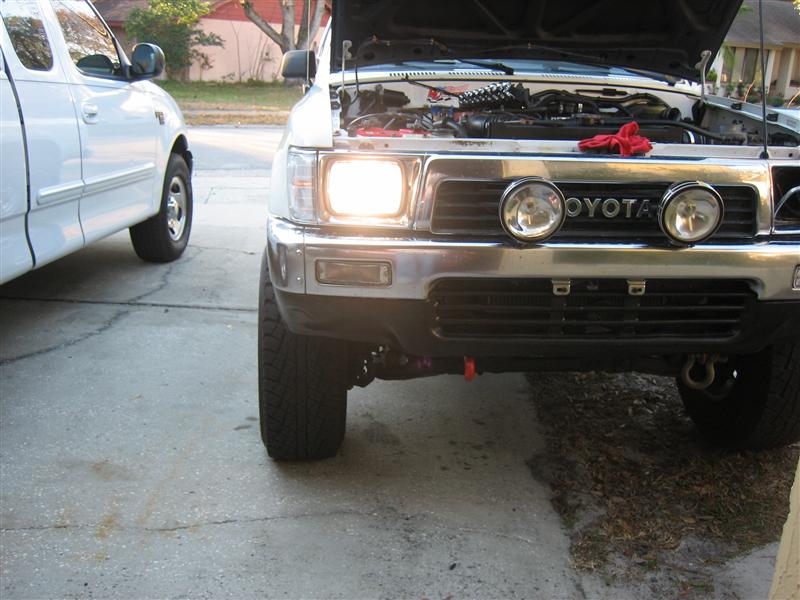
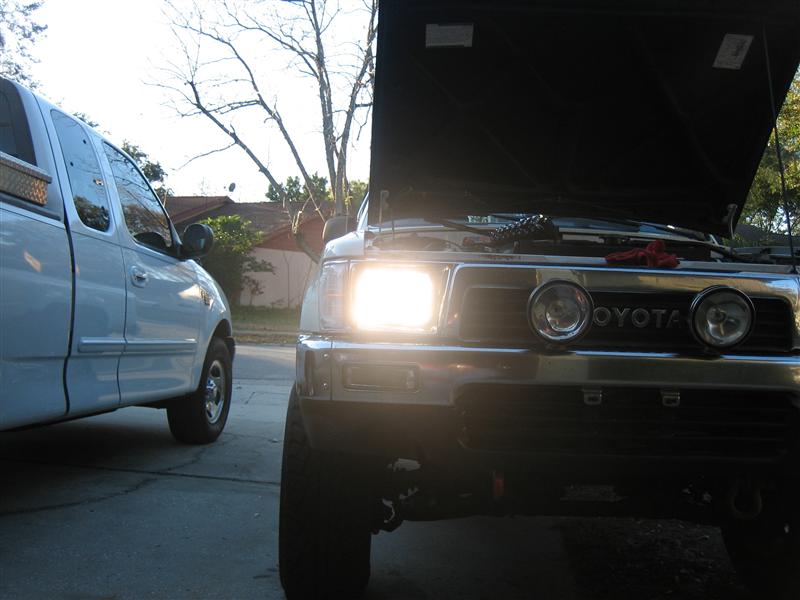
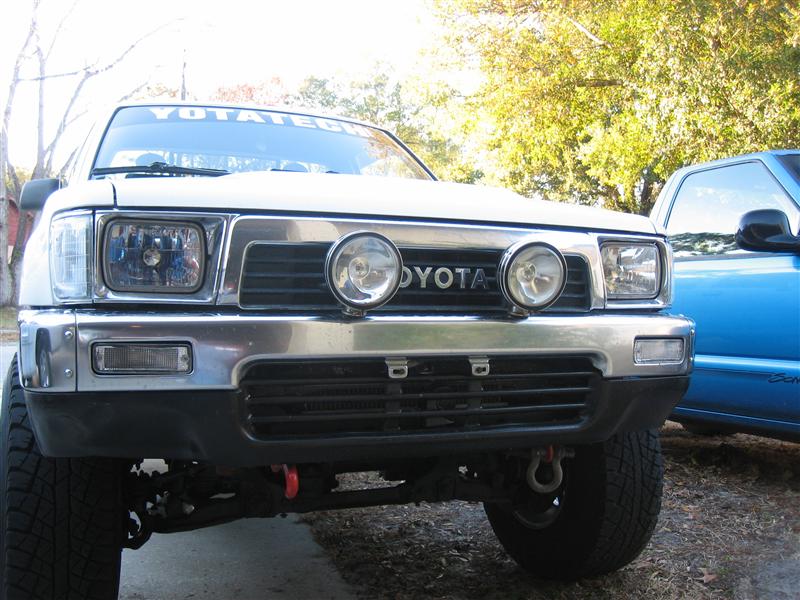
And the low beams together, new conversion headlight plugged into the new wiring harness on the passenger side (left), and an OEM style sealed beam on the OEM socket on the driver's side (right)
As for now, the only thing I can speak of is the color of the light, and the freek'n heat this H4's put off compared to the sealed beam! Once the alternator comes in and the truck get's back on the road, I'll be able to tell how good the light pattern really is, and just how bright they're going to be
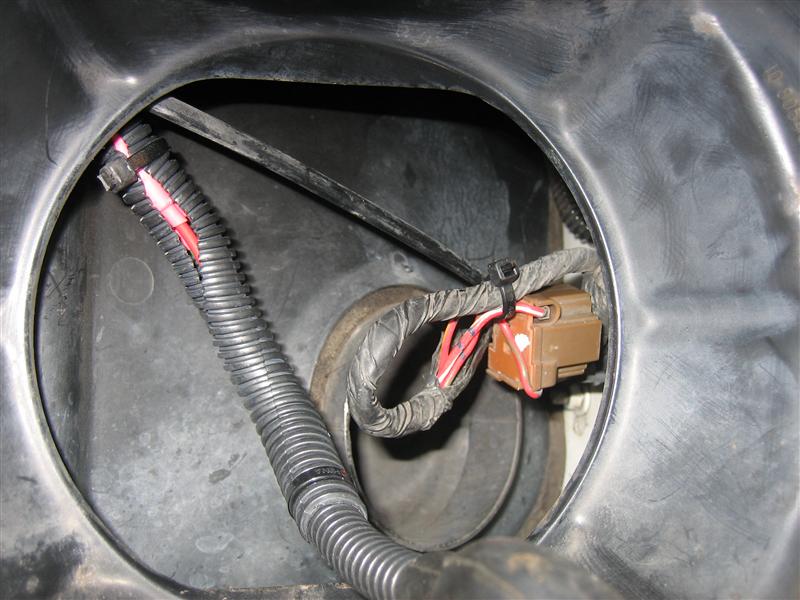
But for now, I've tucked the OEM plug up and out of the way
And I installed the other new light into the new harness.
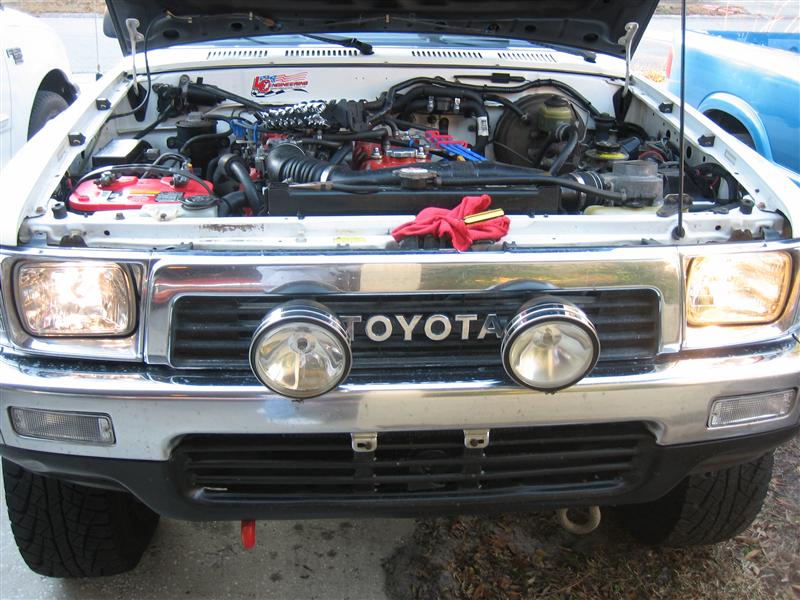
So how about some sexy headlight pics


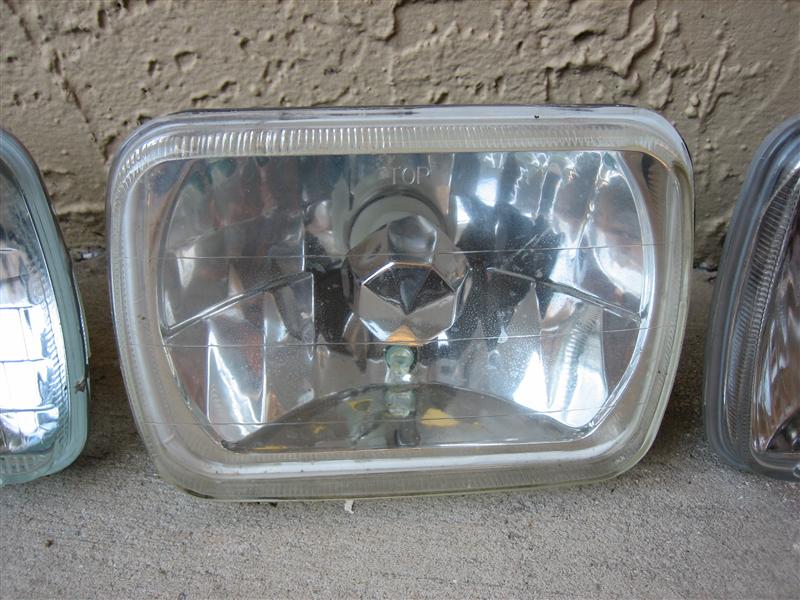
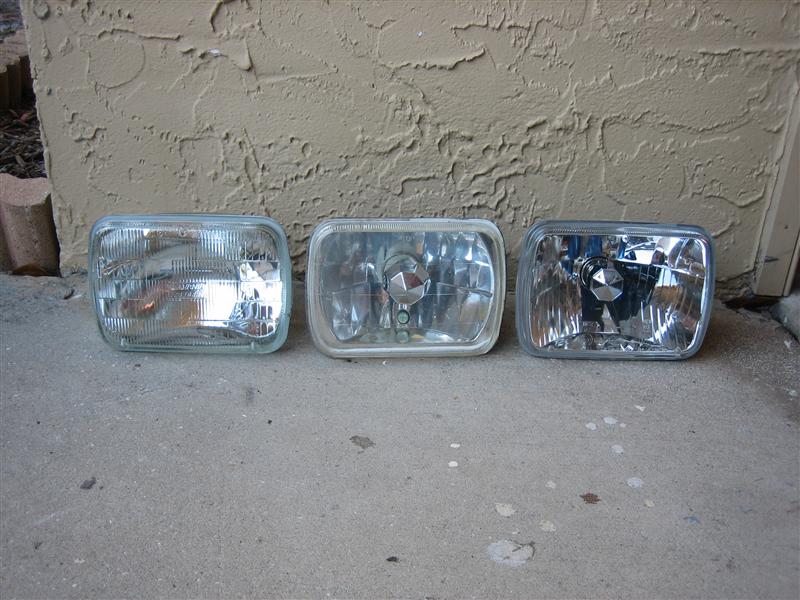
One last pic, just headlight side-by-side comparison, lol

Brightness isn't much to speak of becuase I'm only running one light at a time on either circuit, and there's a reason for that. The OEM socket on the passenger side is being used as the tap-in for the relays, so it's sealed and wrapped up weather-tight, and I REALLY don't want to go digging into the new wiring harness just to undo the wires so that I can plug a headlight back into the OEM socket
And by leaving it connected, I also couldn't plug the OEM sealed beam into the other side and run the high beams, because it would burn up the diode that I installed... so, I have a high beam and low beam pic of the new headlight, but just a low beam pic of the OEM style bulb in the OEM socketFirst off, the el-cheapo conversion lights that I've had in there for about 9 or 10 months
obviously hazed up, and leaking a little too because of the rusting on the inside... word of advice, DO NOT buy the conversion lights that have those little accent lights, or "city lights" I think they usually call them, cause those are some cheap stuff!So, I put an OEM style sealed beam in the driver's side, plugged into the OEM socket
New plug on the left, OEM plug on the right
Notice the distint yellow tint
So, then I put one of the NEW conversion lights in the passenger side, plugged into the NEW harness
One thing nice about making your own wiring harness is that you can give yourself all the slack in the wires you want
Nice and white light
Low beam
High beam
Again, low beam
and high beam
And the low beams together, new conversion headlight plugged into the new wiring harness on the passenger side (left), and an OEM style sealed beam on the OEM socket on the driver's side (right)
As for now, the only thing I can speak of is the color of the light, and the freek'n heat this H4's put off compared to the sealed beam! Once the alternator comes in and the truck get's back on the road, I'll be able to tell how good the light pattern really is, and just how bright they're going to be
But for now, I've tucked the OEM plug up and out of the way
And I installed the other new light into the new harness.
So how about some sexy headlight pics
One last pic, just headlight side-by-side comparison, lol
Last edited by iamsuperbleeder; 01-25-2010 at 02:19 PM.
11-17-2010, 10:39 PM
#48
Registered User
Bump...
anyone else have this problem? with my test light im getting power on low beams from (looking at the oem connector on the truck) the right side plug..
edit** on my relay it says 87 and 87a.. from what ive read most people leave 87a alone? but why couldnt you run 87 to one head light then 87a to the other? Also, when i wire up my relay for my high beams(only low relay wired up) should that change anything on the oem h4 plug?
Last edited by 874runnersr5; 11-17-2010 at 11:03 PM.
11-18-2010, 04:33 AM
#49
Registered User
Me and iamsuperbleader leave 87a alone because we are using 4 pin relays not the 5 pin that have the 87a pin.
if you follow iamsuperbleeder's diagram or mine on here you will not have a problem. Note: I did not use the diode in my diagram as my low beams stay on with high beams without it. Not sure why, cannot explain it but they do.
not sure what your problems is to help you, why do you think getting power to that plug is not right?
11-18-2010, 05:39 AM
#50
www.delcity.net is a good place to buy relays, relay sockets, fuseblocks, etc. Beware of minimum order.
Also check out http://shop.genuinedealz.com/ for good prices on tinned wire, adhesive lined heat shrink tubing and expanding loom. All shipping is free though USPS with this site.
Just though I would share these links as they are perfect for this project.
Also check out http://shop.genuinedealz.com/ for good prices on tinned wire, adhesive lined heat shrink tubing and expanding loom. All shipping is free though USPS with this site.
Just though I would share these links as they are perfect for this project.
11-18-2010, 08:01 AM
#51
Registered User
Me and iamsuperbleader leave 87a alone because we are using 4 pin relays not the 5 pin that have the 87a pin.
if you follow iamsuperbleeder's diagram or mine on here you will not have a problem. Note: I did not use the diode in my diagram as my low beams stay on with high beams without it. Not sure why, cannot explain it but they do.
not sure what your problems is to help you, why do you think getting power to that plug is not right?
if you follow iamsuperbleeder's diagram or mine on here you will not have a problem. Note: I did not use the diode in my diagram as my low beams stay on with high beams without it. Not sure why, cannot explain it but they do.
not sure what your problems is to help you, why do you think getting power to that plug is not right?
Because accoridng to 4crawlers site looking at the h4 bulb pinout
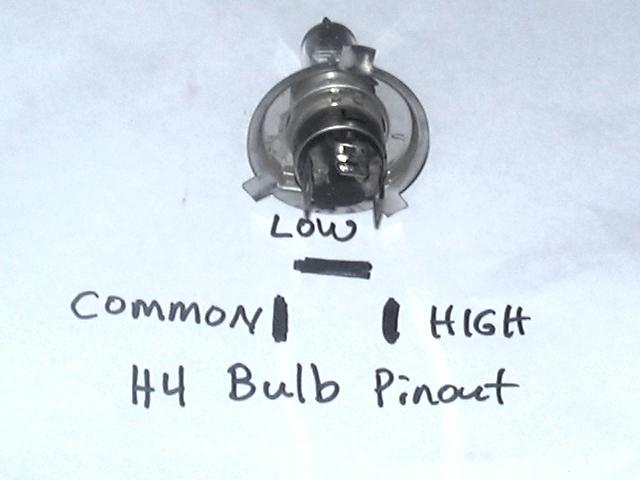
where common is, im getting my low beam switched power from.. then same with high beam.. doesnt make sense
 11-18-2010, 08:47 AM
#52
Registered User
it doesn't make sense because the original harness is switched ground and not switched power. you have to think in reverse.
when you convert to the type of harness we have done you are converting to switched power.
87 and 87a are the two contacts to which 30 will connect. If the coil is not activated, 30 will always be connected to 87a. Think of that pin as "87, always connected". When current is applied to the coil, 30 is connected to 87. 87 and 87a are never connected to each other. Here, polarity does not ever matter. You can connect 30 up to positive or negative, and that is what you will get out of 87 or 87a.
Therefore you have to splice the two power wires into 87a on a 5 pin relay. and leave 87 alone since it has constant power till it is activated by the original headlight socket.
Last edited by xxxtreme22r; 11-18-2010 at 08:54 AM.
11-18-2010, 09:13 AM
#54
Registered User
I didn't use one by going with my diagram (even though it's listed there) and my lows stay on with my highs. we just don't know why. lol. My guess is it has something to do with the whole switched power verses switched ground.
11-18-2010, 12:13 PM
#55
Registered User
it doesn't make sense because the original harness is switched ground and not switched power. you have to think in reverse.
when you convert to the type of harness we have done you are converting to switched power.
87 and 87a are the two contacts to which 30 will connect. If the coil is not activated, 30 will always be connected to 87a. Think of that pin as "87, always connected". When current is applied to the coil, 30 is connected to 87. 87 and 87a are never connected to each other. Here, polarity does not ever matter. You can connect 30 up to positive or negative, and that is what you will get out of 87 or 87a.
Therefore you have to splice the two power wires into 87a on a 5 pin relay. and leave 87 alone since it has constant power till it is activated by the original headlight socket.
k perfect, i went out and got some new relays(higher end water proof ones) back to work i go..
11-18-2010, 12:58 PM
#56
Registered User
Okay this is the part that doesn't make sense, looking at the plug... Terminal left should high top term low right term ground, on my truck I'm getting left nothing even on high, top I think is ground I used my multimeter for contiunity and it beeped and I'm getting power from the right term to send the switch to relay...any else got this problem? Idealy shouldn't left term be high power, but it's not giving my test light any power while I have the high beams on....
11-18-2010, 01:42 PM
#60
Registered User


